1
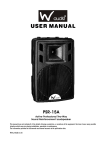
Instruction Manual
19 " / 22 " LCD TV
Model 19WLM550DHID/ 22WLM550DHID
English Version
Safety Instructions
IMPORTANT SAFETY INSTRUCTIONS
WARNING
To r e d u c e t h e r i s k o f f i r e o r e l e c t r i c s h o c k , d o n o t e x p o s e t h i s
equipment to rain or moisture.
CAUTION
RISK OF ELECTRIC SHOCK
DO NOT OPEN
CAUTION: TO AVOID THE RISK OF ELECTRIC SHOCK,
DO NOT REMOVE COVER (OR BACK).
NO USER-SERVICEABLE PARTS INSIDE.
REFER SERVICING TO QUALIFIED SERVICE PERSONNEL.
This symbol is intended to alert the user to avoid the risk of
electric shock, do not disassemble this equipment by anyone
except a qualified service personnel.
This symbol is intended to alert the user to the presence
of important operating and maintenance instructions
in the literature accompanying the appliance.
CAUTION
Use of controls or adjustments or performance of procedures other than those
specified herein may result in hazardous radiation exposure
1
TV User Guide
To prevent any injuries, the following safety precautions should be observed
in the installation, use, servicing and maintenance of this equipment.
Before operating this equipment, please read this manual completely,
and keep it nearby for future reference.
Safety Instructions
IMPORTANT SAFETY INSTRUCTIONS
Do not place the equipment on any uneven or unstable carts,
stands, tables, shelves etc..
The equipment may fall, causing serious injuries to children or adults
and serious damage to the equipment itself.
Use only a cart or stand recommended by the manufacturer.
This equipment and recommended cart or stand should be handled
with care. Quick stops, excessive force, and uneven surfaces may
cause the equipment and recommended cart or stand to overturn.
Do not disable the 3-wire grounding type plug. The grounding pin
on the 3-prong plug is an important feature. Removing the grounding
pin will increase the risk of damaging the equipment.
If you can not fit the plug into the electrical outlet, contact an
electrician to install a grounding outlet.
Always operate this equipment from the type of power source
indicated on the rear of the serial/model plate.
Never overload wall outlets and extensions.
Use and handle the power cord with care.
Do not place any heavy objects on the AC power cord.
Do not pull the AC power cord. Do not handle the AC power cord
with a wet hand.
Do not touch the power cord and antenna cable during lightning.
When the equipment has not been used for a long period of time,
unplug it from the wall outlet.
Do not place, use or handle this equipment near water.
Never expose the equipment to liquid, rain, or moisture.
Seek for service if any of the above is spilled into the equipment.
Do not expose the equipment to extreme temperatures or
to direct sunlight, the equipment may overheat and can be damaged.
Do not install the equipment near any heat sources such as
radiators, heat registers, stoves, or any other apparatus
that might produce heat.
TV User Guide
2
Safety Instructions
IMPORTANT SAFETY INSTRUCTIONS
Do not attempt to service the equipment yourself.
Opening and removing the covers may expose you to dangerous
voltage or any other hazards and may void your warranty.
Refer service from qualified personnel.
Do not place or drop any other objects on top.
Do not insert anything into the ventilation holes of your equipment.Inserting any
metal or flammable objects may result to fire or electric shock.
Do not place the equipment on uneven or unstable carts, stands,
tables, shelves etc..
The equipment may fall, causing serious injuries to children or adults
and serious damages to the equipment itself.
Always place the equipment on the floor or on a surface that
is sturdy, level, stable and strong enough to support
the weight of the equipment.
Do not block any ventilating openings, leave an open space around the equipment.
Never place the equipment :
on a bed, sofa, rug, or any other similar surfaces;
too close to drapes/curtains/walls, in a bookcase,
built-in cabinet, or any other similar places that may cause
poor ventilation.
Always remove the cord from the outlet before cleaning the equipment.
Never use cleaners, harsh or abrasive chemicals or solvents on the
equipment. Clean only with a dry, soft, lint-free cloth.
3
TV User Guide
CONTENT
CONTENT
PREPARATION .........................................................................................................................5
Features ............................................................................................................................................................5
Package Contents ..............................................................................................................................................6
TV ......................................................................................................................................................................7
Front View .........................................................................................................................................................7
Rear View .........................................................................................................................................................10
Remote Control ................................................................................................................................................11
USING THE FEATURES ...........................................................................................................13
Watching your TV .............................................................................................................................................13
Wide-Screen Mode ...........................................................................................................................................14
First Time Installation ........................................................................................................................................15
Picture ..............................................................................................................................................................16
Sound ...............................................................................................................................................................17
Setup ................................................................................................................................................................18
Timer ................................................................................................................................................................22
Function ........................................................................................................................................................... 22
DTV Channel List Options ................................................................................................................................24
DTV Setup ....................................................................................................................................................... 25
EPG ..................................................................................................................................................................27
DVD SETUP Menu......................................... .................................................................................................28
SPECIFICATION .......................................................................................................................30
GUARANTEE ...........................................................................................................................31
TV User Guide
4
PREPARATION
Congratulations on the purchase of your new High Definition Compatible
Te l e v i s i o n . I n o r d e r t o m a x i m i z e t h e p o t e n t i a l o f t h i s t e l e v i s i o n , y o u m u s t u s e
it in conjunction with a High Definition Signal Source, utilizing a proper High
Definition receiving unit (of ten referred to as a "set-top" box).Only "true"
H i g h D e f i n i t i o n t r a n s m i t t e d v i d e o w i l l y i e l d o p t i m u m p i c t u r e q u a l i t y.
Please contact your cable or satellite provider for more information on
how to receive High Definition programming.
Features
PREPARATION
Various Audio/Video terminals for external equipment connection
1 set of Composite video input terminal
1 set of S-VIDEO input terminal
1 set of HDMI input terminal
1 set of VGA input terminal
1 set of SCART terminal
Component Video Inputs
O ff e r t h e b e s t v i d e o q u a l i t y f o r DV D ( 4 8 0 i / 4 8 0 p ) , a n d d i g i t a l s e t - t o p - b o x
(HD1080i,720p) connections.
High-Definition Multimedia Interface (HDMI)
This interface can accommodate a copy-protected digital connection (HDCP) to other digital set-top
boxes that have compatible interface.
5
PREPARATION
Package Contents
Once you open the box, make sure all of the following contents are included.
If missing any items, please return this product to the original place
of purchase.
PREPARATION
TV
A
SP
EC
T
D U
LC EN
M
V
FA
V
FA
E
V
FA
X
+
IT
LA
E
P
G
G
SU
O
G
R
N
P
B
TI
E
TR
TL
IN
O
R
E
P
E
AT
A
-B
Power Cord
Remote control/
AAA batteries
Instru ction
Manu al
Instruction Manual
These items are all you need to set up and operate the TV
in its basic configuration.
*Most devices (VCRs, DVD player, etc.) come with the necessary
cable for connection. If you want to set up a complex system, you may need to buy
extra cable, connector, etc.
PREPARATION
9
6
TV
Front View
DESCRIPTION
PREPARATION
8
9
7
ITEM
DESCRIPTION
1 VOL+
Volume up/right orientation
2 VOL -
Volume down/left orientation
3 CH+
TV channel up/up orientation
4 CH -
TV channel down/down orientation
5 MENU
MENU/ENTER
6 AV/TV
Select the input signals
7 POWER
Power On/Off (Standby)
8 LED
The LED light indicates when the TV is activated
9 IR
Infrared Receiver
PREPARATION
DVD
LCD
TV
Front View
PREPARATION
ITEM
1
DVD Pause
2
DVD Play
3
DVD Stop
4
DVD Open/Close
5
DVD
Next
6
DVD
Previous
PREPARATION
8
TV
Rear View
PREPARATION
ITEM
9
DESCRIPTION
1 DC 12V IN
Power input interface ( 12V DC ) .
2 HDMI
Connects to a digital set-top box or other deceives with a HDMI
interface.
3 VGA
Used to connect a video signal from a personal computer .
4 SCART
Connects to the SCART input jacks of the audio or video equipment.
5 S-VIDEO
Connects to the S-VIDEO intput jacks and Audio intput jacks on
your video equipment.
6 CVBS
Connects to the composite A/V input outputs jacks on your video
equipment.
7 PC Audio
Connects to the sound-output port of a personal computer.
8 Earphone out
Earphone out interface.
9 CI
CI slot
10 RF ( 75Ω)
The RF input that connects to your VHF/UHF antenna or cable.
PREPARATION
Remote LCD
Control
TV
1
POWER
20
Turns the TV on and into standby mode .
2
1
MUTE
2
Mutes and restores your TV sound.
3
0-9, -/-0- 9: TV channel number select or Teletext page number
select.
-/--: One bit, two bit or three bit TV channel select.
4
3
4
6
5
ASPECT
Return your latest program.
5
7
NICAM
8
NICAM/GERMAN Stereo server select.
9
ASPECT
Selects from the following modes settings:
Auto,4:3, 14:9,16:9,Subtitle,FullScreen,Zoom1,Zoom2.
(See Page14 for details)
7
VOL+/-
12
13
Volume up/down.
8
10
LCD
MENU
CH+/ -
EXIT
14
15
FAV
FAV-
FAV+
EPG
Channel up/down.
9
LANG SUBTITLE
AUDIO
Displays the source and channel' s information .
18
ANGLE
10
16
19
17
DISPLAY
11
PREPARATION
6
ZOOM
ENTER
Allows you to move,select and setup the OSD options.
11
EXIT/DVD SETUP
20
PROG
INTRO REPEAT
A- B
Exit from the current menu./Brings up DVD SETUP menu to
the screen( DVD Mode).
12 LCD MENU
Displays the OSD menu (on screen display).
13
PMODE
Select picture mode.
14
SMODE
Select sound mode.
15
INPUT
Source select.
16
SLEEP
Sets the TV sleep time.
17
: DVD
: DVD
: DVD
: DVD
: DVD
: DVD
: DVD
Play/Pause.
Stop.
Open.
Previous.
Next.
Forward.
Backward.
PREPARATION
10
Remote LCD
Control
TV
18 TEXT, HOLD, LANG/ AUDIO, SUBTITLE, INDEX, SIZE,
20
REVEAL/ANGLE, SUBPAGE/ ZOOM
TEXT: Switch to Teletex with text mode.
1
HOLD: Toggle hold on or off for current display page.
LANG/AUDIO: To show the list of audio languages available for the
current channel.Just in DVB mode/ Select AUDIO mode( in DVD
mode) .
SUBTITLE: To switch the dialogue at the bottom of the screen.
3
INDEX: Refer to index page.
SIZE: Change display size.
REVEAL/ANGLE: Reveal/hidden the hidden words. /No use.
SUBPAGE/ZOOM: Sub coded page access. /Enlarg or
6
reduces the main picture size( in DVD mode).
PREPARATION
19
FAV,FAV-/FAV+,EPG
2
4
5
ASPECT
7
8
FAV:Press to display FAV menu.
FAV-/ FAV+:Source decrease fav channel.
EPG:Press to show the Electronic Program Guide menu.
20
D. MENU,TITLE, D. DISP, GOTO, PROG, INTRO,
REPEAT, A- B
9
10
12
D. MENU: Bring up the DVD menu to the screen.
13
TITLE: Brings up the DVD menu to the screen.
D. DISP: Display the DVD’s information.
GOTO: Goto the files/time preriod that you want to play. 15
PROG: Change the display effect/ edit the playing order.
INTRO: No use.
17
REPEAT: Select repeat mode.
A- B: Repeat from A to B.
21
LCD
MENU
EXIT
14
FAV
FAV-
FAV+
EPG
19
AUDIO
18
ANGLE
ZOOM
Auto adjust (PC mode)./DVD open.
11
PREPARATION
16
LANG SUBTITLE
AUTO/EJECT
20
11
PROG
INTRO REPEAT
A- B
Remote Control
Installing the batteries in your remote control
2
Insert two AAA size batteries.
Make sure to match the (+) and (-) ends of
the batteries with the (+) and (-) ends indicated
in the battery compartment.
3
Align the lower tabs of the back cover to the
remote control and snap the cover into place.
PREPARATION
1
Pull the tab of the back cover and pull up on
the cover to open the battery compartment
of the remote control.
Note :
Do not use caustic cleaners( porcelain, stainless steel, toilet, or oven cleaner, etc...).
You may cause damage to your remote control.
Effective range
Your remote control can be activated from up to the TV 5m away, if pointed directly
in front of the device.
30 O
30 O
5M
PREPARATION
12
Using the Features
Watching your TV
If the TV does not display any picture,please check all the connections.
5
1
3
1
Press the POWER button to turn your TV on.
2
Press the INPUT button to enter TV mode.
3
Press the CH +/- button to change channel number,
4
ASPECT
5
3
or use the 0-9 & -/-- buttons to select a channel.
The one/two digit numbers can be set by pressing -/-button.
6
LCD
MENU
EXIT
2
FAV
FAV-
FAV+
4
Press the
button to alternate back and forth
5
Press the VOL +/- button to adjust the volume.
between the current and previous channel.
EPG
LANG SUBTITLE
AUDIO
ANGLE
ZOOM
Press the MUTE button to turn the sound off.
Press again to turn the sound on.
PROG
INTRO REPEAT
A- B
U S I N G T THE
H E F E FEATURES
ATURES
USING
6
13
Press the DISPLAY button th display the information such
as the channel and channel label.
Note: Select the menu language before operating the TV
(see page 15, LANGUAGE ).
USING THE FEATURES
Wide-Screen Mode
Wide-Screen mode allows you watch the broadcasts with various picture format in wide
screen mode. Press the ASPECT button repeatedly to toggle through the following wide
mode settings.
16 : 9
When watching 4:3 image, the original
image will stretch horizontally to a 16:9
image to fill the screen.
14 : 9
You can enjoy the picture format of 14:9 or
general TV program with the 14:9 mode.
Zoom1
The original image will extend the
1.25:1 image to fill the screen.
4: 3
When watching 4:3 image, the original
image will be unchanged and there will
be vertical bars on the side of the screen.
Auto
4:3
14:9
16:9
Zoom2
Zoom1
FullScreem
Subtitle
Note: You can only select 4:3 and 16:9 (Wide) in RGB[PC], HDMI mode only.
USING THE FEATURES
Press the ASPECT button to select repeatedly modes settings as follows:
You can only select 4:3, 16:9 (Wide) and Zoom in RGB[DTV], HDMI[DTV],
Component [DTV] mode only.
13
USING THE FEATURES
14
12
First Time Installation
If this is the first time you open the TV and there is no
programs in the TV memory,the first time installation
menu will appear in the picture.
First Time Installation
Country
Other
Language
English
Delete Analog Program
Analog Program Search
Delete Digital Program
Digital Program Search
Cancel
OK
Select
Press OK
to select the
Language
Press
button and then use
OSD language.
to select the
:
You can press LCD-MENU button to stop auto
tuning and close the OSD menu.
Auto Tuning
ATV
button and then use
After setting the items,select OK to finish the first
timeinstallation,or select Cancel to exit this menu.
Adjust
Searching
MENU
Country
Press
country.
422.00MHz
1
Exit
You can press LCD-MENU button to stop auto tuning and close the OSD menu.
Begin auto tuning in DTV channel.
Auto Tuning
Auto Tuning
Searching
ATV
Searching
422.00MHz
1
Please wait ....
DTV
1
474.00MHz
TV saving channels do not power off or press any butons
If there is no program after auto tuning,the suggestion will appearon the screen.
USING THE FEATURES
First Time Installation
Unfortunately the TV did not find any channels.
Please check your aerial connetion
and refer to the user manual.
Do you wish to re-tune you TV.
YES
NO
If you cancelled the first time installation,it will remind you whether to set the first time
installation next time
Press Cancel :
First Time Installation
First time installation is not finished!
Are you sure to exit?
YES
15
Do It next time
Do It next time
USING THE FEATURES
NO
14
ATV Menu
PICTURE menu options
Press MENU button on the front panel or LCD-MENU on the remote control to display
the main menu.
1. Press
button to select PICTURE in the main menu
2. Press
button to select the option that you
want to adjust in the PICTURE menu.
3. Press
button to adjust.
4. When you are satisfied with your adjustment,press
the LCD-MENU button to retun the previous menu
or press the EXIT button to exit the main menu.
Picture Mode
Select picture mode in PICTURE menu.(Available picture mode:Standard,Movie,Sport,Mild,Game.)
If you change the value of Contrast,Brightness,Colour,Tint,Sharpness or Colour
temperature on the picture menu,the picture mode will be changed to “Personal” automatically.
You may select the picture mode directly by pressing PMOD button.
TIPS : You can press PMOD button on the remote control to select the Picture Mode directly.
Contrast
Press
button and then use
Contrast
to adjust the contrast of the picture.
28
After adjusting the value you want,press LCD-MENU button to return to the preview MENU.
Brightness
Press
button and then use
to adjust the brightness of the picture.
Colour
Press
button and then use
to adjust the colour saturation.
NOTE: this option is invalid in PC mode,and it will be shown ingray
button and then use
to adjust the tone of colour when your system is in NTSC.
Sharpness
Press
to select the sharpness mode of your
TV.(Available Sharpend Mode:Normal,Sharp,
Sharpest,Softest,Soft.)
Colour temperature
Select an optimum colour temperature mode to suit
your eyes for viewing among Normal,Warm and Cold.
NOTE:This option is available only in PC mode.
DNR(Digital Noise Reduction)
If thebroadcast signal received is weak,you can select
the DNR option to reduce the video noise level
between Off,Low,Mid and High.
15
USING THE FEATURES
USING THE FEATURES
Tint
Press
12
16
SETUP
ATV Menu
SOUND menu options
Press MENU button on the front panel or LCD-MENU on the remote control to display
the main menu.
1. Press
button to select SOUND in the main menu
2. Press
button to select the option that you
want to adjust in the SOUND menu.
3. Press
button to adjust.
4. When you are satisfied with your adjustment,press
the LCD-MENU button to return the previous menu
or press the EXIT button to exit the main menu.
Volume
Press
button and then use
Volume
to adjust the sound level.
28
After adjusting the value you want,press LCD-MENU button to return to the preview MENU.
U S I N G T THE
H E F E FEATURES
ATURES
USING
Sound Mode
Select Sound Mode in SOUND menu.(Available sound mode:Personal,Voice,Music,Theatre.)
If you change the value of Bass and Treble on the Sound menu,the sound mode will be changed to
“Personal” automatically.
You may select the sound mode directly by pressing SMODE button.
TIPS: You can press SMODE button on the remote control to select the Sound Mode directly.
17
Bass
Press
button and then use
to increase or decrease the level of the lower-pitched sounds.
Treble
Press
sounds.
button and then use
to increase or decrease the level of the higher-pitched
Treble
Press
button and then use
left and right speakers.
USING THE FEATURES
to increase or decrease the level of the audio output between
SETUP
ATV Menu
SETUP menu options
Press MENU button on the front panel or LCD-MENU on the remote control to display
the main menu.
NOTE:SETUP menus are different for different input sources,if the input source is selected HDMI/
VGA and there are no relative input signal, SETUP menu will be unavailable.
SETPUT menu of TV input:
1. Press
button to select SETUP in the main menu
2. Press
button to select the option that you
want to adjust in the SETUP menu.
3. Press
button to adjust.
4. When you are satisfied with your adjustment,press
the LCD-MENU button to retun the previous menu
or press the EXIT button to exit the main menu.
Country
This option allows you to select the country.
Auto Tuning
This option allows you to tune the channels that can be received automatically.
Note:Before you perform Auto Tuning,you must choose the country where you are by
selecting Country option.
Press OK key to start.
ATV
MENU
1
422.00MHz
Exit
You can press LCD-MENU button to stop auto tuning and close the OSD menu.
17
USING THE FEATURES
USING THE FEATURES
Auto Tuning
Searching
18
ATV Menu
Manual Tuning
This option allows you to perform Manual Tuning.
NOTE:Before you perform Manual Tuning,you must choose the country where you are by
selecting Country optiom.
1. Press
button to select Manual Tuning in the
setup menu
2. Press
button to perform yor selection,the menu of
Manual Tuning will display on the screen.
Program
The current program number.press
upper or lower program.
Sound System
Press
to select a corresponding sound system,such as I,DK,BG.
Colour System
Press
to select a corresponding colour system,such as Auto,PAL,SECAM.
Program Label
This option allows you to label a channel,you can also relabel the programs have been labeled.
1. Select a channel you want to labeled.
2. Press
3. Press
to select Program Labeled in the SETUP menu.
to perform yor selection,the menu of Program Label will display as below.
Program Label
USING THE FEATURES
4. Press the numeric buttons to input the numbers directly or press
to select the letters.
5. Press
to move the cursor.
6. Press ENTER,LCD-MENU or EXIT button to confirm and return to previous menu.
19
12
AFT(Auto Fine Tune)
Due to weak signals or a wrong antenna configuration,some of the channels may not be tuned
to the best reception condition.AFT function allows you to fine tune channel selected(the
frequency of channel is around the value in Manual Search option).
Manual Search
Manual Search
.
MHz
This option has two functions:
1. Set the puency of channel for AFT option.
2. Press button for 3+ seconds and it will start auto tuning from this frepuency.
USING THE FEATURES
18
SETUP
ATV Menu
Program Edit
This function allows ypu to sort the TV programs according to ypur preferences,as following:
1. Press
menu.
to select Program Edit in the SETUP
2. Press
to enter into the sub menu,a channel list
will display.
3. Press
to select the channel in the list which you
would like to sort.
4. Press
to perform your selection.
5. Press
to select the location you would like to
place the channel.
6. Press
to perform your selection.
7. Press LCD-MENU to return to the previous menu or
press EXIT to exit.
Favorite:Press green button on remote control to select the favourite programs.
Press FAV button to open the Favorite List,you can open your favourite programs then Press
select the channel you want to watch.
to
USING THE FEATURES
Skip:Press yellow button on remote control to select which programs you want to skip.
Press yellow button again thes program will unlock.
Favorite:Press blue button on remote control to lock the programs.
Press blue button again this program will not be skipped.
19
USING THE FEATURES
12
20
SETUP
ATV Menu
SETUP menu of VGA input(for setting the PC picture position):
USING THE FEATURES
SETUP menu of HDMI input(for setting the HDMI picture position):
12
21
USING THE FEATURES
SETUP
ATV Menu
Timer menu options
Press MENU button on the front panel or LCD-MENU on the remote control to display
the main menu.
1. Press
button to select TIMER in the main menu
2. Press
button to select the option that you
want to adjust in the TIMER menu.
3. Press
button to adjust.
4. When you are satisfied with your adjustment,press
the LCD-MENU button to retun the previous menu
or press the EXIT button to exit the main menu.
Sleep Timer
Select the sleep time to put automatically the TV in standby mode.Timer can be selected as 0min,
15min,30min,45min,60min,75min,90min,105min,120min.Also you can select the sleep time by
pressing SLEEP button repeatedly.
OSD Timer
You can select the time when the OSD display on the screen such as:5sec,10sec,15sec,20sec,
25sec,30sec.
Function menu options
Press MENU button on the front panel or LCD-MENU on the remote control to display
the main menu.
1. Press
button to select FUNCTION in the main
menu
2. Press
button to select the option that you
want to adjust in the FUNTION menu.
3. Press
button to adjust.
Language
Press
to select the OSD language.
Video Size
This option allows you to select the screen display mode which best corresponds to your
viewing requirements.
NOTE:The available aspect mode may be different in different input signal.
USING THE FEATURES
4. When you are satisfied with your adjustment,press
the LCD-MENU button to retun the previous menu
or press the EXIT button to exit the main menu.
Blue Screen
This option allows you to select the blue background on or off.If on,the screen background
will turn blue very weak or no signal condition.
21
USING THE FEATURES
12
22
SETUP
ATV Menu
Child Lock
Press ENTER or
button to set the child lock.
You need to enter the PIN code if the Child Lock is set “on”,and the default PIN code is
empty,you can press ENTER button directly to enter.
TIPS:The superuser’s(administrator’s)password is 4711.
Child Lock
Press ENTER or
btton to set the child lock.
Key Lock
Press ENTER or
btton to set the key lock.
USING THE FEATURES
Change PIN Code
Press ENTER or
btton to set the Change PIN Code.
Old PIN Code
Press 0~9 buttons to enter the correct old PIN code,you can not change the PIN
code if you entered a wrong PIN code.
New PIN Code
Press 0~9 buttons to enter the new PIN code you want.
Enter Again
Press 0~9 buttons to enter the PIN code you entered in the New PIN Code menu
again to confirm the new PIN code.
First Time Installation
Press button to open the First Time Installation menu,and the operation of this menu is in page 13.
Reset
Press ENTER or
23
12
btton to reset the TV to the factory default.
USING THE FEATURES
22
SETUP
DTV Menu
Channel List options
Press ENTER button to open the Channel List,then press
want to watch.
to select the channel you
Favorite List options
Press FAV button open the Favorite List,then press
to select the channel you want to watch.
USING THE FEATURES
23
USING THE FEATURES
24
12
SETUP
DTV Menu
Channel Search options
1. Press
button to select SETUP in the main menu
2. Press
button to select your option what you want to adjust in the SETUP menu.
3. Press
button to adjust.
4. When you are satisfied with your adjustment,press the LCD-MENU button to retun the previous
menu or press the EXIT button to exit the main menu.
USING THE FEATURES
Press
25
button to select Manual Search,Press ENTER or
Channel
The current channel number.Press
select the channel directly.
button to set the Manual Tuning.
to select the upper or lower channel,Press 0~9 to
Start Search
To select whether to start seaching in begin/searching/finished.
Sercice Found
The services be found.
Signal Quality
The signal quality of current channel.
Signal Strength
The signal strength of current channel.
Frequency
The frequency of current channel.
USING THE FEATURES
24
SETUP
DTV Menu
Program Edit
This function allows you to edit the DTV programs according to your preferences,as following:
Common Interface
If you have inserted the CI card to the TV,you can see the information of the it.
USING THE FEATURES
USING THE FEATURES
26
12
SETUP
EPG Menu
EPG(Electronic Programme Guide) options
Use EPG button on the remote control to display the EPG menu directly as below:
USING THE FEATURES
Press
to navigate the menu.
Press EPG button again to exit EPG.
Press yellow/blue button to select advance day.
Press OK button to set the reminder function.
Press
to select the program you want to teleview.Press OK button.When this program
begin to play,you will be reminded.
27
12
USING THE FEATURES
26
SETUP
DVD SETUP Menu
1.Input mode: DVD.
2.Press DVD-SETUP key,show the main menu.
3.Press
to chose items that are going to be set up.Then pres
to enter the setup menu.
4.Press
to move the highlight to the items that is to be setup.Press ENTER for confirmation or
press
to the setup menu.
5.Press
to adjust items.
6.Press
to EXIT SETUP,then press ENTER or press DVD-SETUP key to exit setup menu.
Notice : The system automatically change to the pause mode after enter the setup menu .
General
TV Display:Set TV Display mode.
Angle Mark:Set Angle Mark.
OSD Languge:Set OSD Languge.
Captions:Captions.
Screen Saver:Screen Saver.
Last Memory:Set Last Memory.
Audio
USING THE FEATURES
Downmix:Set Downmix mode.
27
USING THE FEATURES
12
28
SETUP
DVD SETUP Menu
DOLBY
:
DYNAMIC:Screen display as following.
Video
USING THE FEATURES
Sharpness:Adjust the sharpness of the picture.
Brightness:Adjust the Brightness of the picture.
Contrast:Adjust the Contrast of the picture.
29
12
Preference
Audio:Set Audio language.
Subtitle:Set Subtitle language.
Disc:Set Disc language.
Parental:Set Parental control.
Password:Change Password.
Default:Load factory setting.
USING THE FEATURES
26
SPECIFICATIONS
Panel System
19 inch LCD panel
22 inch LCD panel
Display Resolution
1440 ( H )×900( V )
1680 ( H )×1050 ( V )
Television System
PAL I,D/K,B/G SECAM D/K,B/G
Inputs/Output
HDMI input
1
1
VGA input
1
1
SCART input
1
1
S-VIDEO input
1
1
CVBS input/AUDIO(L/R)
1
1
PC AUDIO
1
1
Earphone out
1
1
CI slot
1
1
OSD language
English,French,Spanish,German,
Italian, Portuguese
Speaker Out
Power supply
DC 12V
<48W
<60W
SPECIFICATION
Power Waste
2×3W
29
USING THE FEATURES
30
GUARANTEE
SPECIFICATION
GUARANTEE
31
12
GUARANTEE
26
GUARANTEE
GUARANTEE
GUARANTEE
32