1
Historic Wyre Website User Guide
Website Purpose
There are two main purposes for this site:
1. Interpreting LIDAR images to reveal archaeological features.
2. Advice and information on archaeological features.
Interpreting LIDAR images
The 2007 LIDAR survey images can be browsed by using either the vertical slider to zoom
in and out or by using the mouse, which also allows the user to pan sideways across the
map. Surface features of archaeological potential were traced from the LIDAR images.
When the 'Choose your Layers' window is opened the user will see separate data layers for
points, lines and polygon features.
Advice and Information
On the main map, if you click on an archaeological feature (line, point or polygon) with the
left mouse button you can find out more about the feature. If you, as a landowner or land
manager with archaeological features under your care, click on a link it will open a
document specific to that selected feature, providing additional guidance and advice.
Using the Map View Window
The map view window opens with the Historic Wyre Project Area in the centre. The large
greyscale shape is the LIDAR imagery. At the top of the map there are four menus: Choose
your Layers, Background Maps, Navigate to a location and Tools.
Page 1 of 6
The following sections explain each of those menus.
Choose your Layers
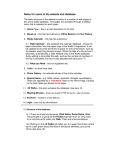
Move your mouse pointer over the double
chevron button on the top right of the menu
and use the left mouse button to expand the
menu.
To the left of each heading is a cross. Select
this to expand the sub-list and select, or
deselect each layer to turn it on or off in the
display. This is useful if, for example, you
would like to view the LIDAR imagery without
the archaeological interpretation. Deselect
the three layers under the Archaeological
Features to remove them from the display.
Other headings in this menu allow you to
display various map boundaries and, if you
wish, to deselect the LIDAR imagery so that
archaeological features can be viewed
against the backdrop of Ordnance Survey
mapping.
At the bottom of the menu is a slider control labelled opacity. This control allows you to fade
the LIDAR imagery to make the background map more visible. This is particularly useful if
you would like to compare the LIDAR and archaeological features with Ordnance Survey
map detail. As a guide, set opacity to 50% then adjust to suit the level of detail you want.
Background Maps
To move the background map in any direction place
your mouse pointer near the centre of the screen and
hold down the select button (usually left mouse button)
while moving the mouse to alter the relative position of
the map.
Place your mouse pointer over the double chevron
button on the top right of the menu labelled Background
Maps to expand the menu. To the left of each heading is a radio button. Hover over the
radio button that corresponds to the type of map you want to view and then apply a left click
to switch on the map. The vector map has been switched on in the example above.
Page 2 of 6
Navigate to a location
The 'Navigate to a location' menu allows the user to enter a map reference, for example
SO7877. This type of search will take the viewer to the centre point of a 1 kilometre square
area. Alternatively, if you know the Ordnance Survey grid reference for an exact location
you are interested in then enter the full x and y coordinates (e.g. 378000 277000) to zoom
to that location. You can also search by postcode to view an area around a certain property
or street. Enter the full postcode then click go and zoom the map to the location.
Tools
The tools menu allows the user to carry out the following functions:
Zoom to a previous extent in the map view.
Page 3 of 6
Zoom out to see the full extent of the LIDAR survey area.
Go forward in your series of map views. This will only work if you have returned to map
view areas using either
or
Use this tool to clear any selected features.
Select this to measure distances across the map. Use your left mouse button to select
start and finish points.
This tool will allow you to search for an address.
The contacts tool will help you to retrieve contact details for organisations involved in
curating the archaeology of Wyre Forest and also organisation that own and manage some
of the land and nature reserves in Wyre.
Select this help button to access this help document at any time.
To find out more about an archaeological feature
Move your mouse pointer over any feature visible in the map view then select the feature by
pressing the left mouse button. A window titled Visible Results should open (see below).
Page 4 of 6
Select the tab that relates to the type of feature selected either: historic points, historic lines
or historic polygons (please refer to glossary for information). The example above is a
historic polygon. The window will display the Unique ID of the feature. This is the number
allocated to the feature in the LIDAR survey. You should always quote Unique ID numbers if
you wish to contact the Historic Environment Record for further information about a feature
or features. Select show to highlight the feature in the map view. Under the Feature Type
heading is a short description of the feature. The Monument Type heading shows which
general class the feature belongs to. Under Document, select the more info link to open a
PDF document that contains a generic description and interpretation of features related to
the class type. Each document also contains information about opportunities for
conservation and management of the feature type. This will be of particular use to
landowners who have features under their care. Please contact the relevant county Historic
Environment Record for more specific advice. Follow the link: You may also see the
contacts PDF or select
to open the contacts document from the map view.
Glossary
Feature or features:
The general term used to describe archaeological remains that are visible and have been
recorded by LIDAR. The mapping of features has been done in three groups: Historic
Points, Historic Lines and Historic Polygons
Historic Lines
Historic Points
Historic Polygons
Historic Points: small features, such as charcoal burning hearths or a single pit
Historic Lines: long narrow features, such as tracks or ditches
Historic Polygons: large area features, such as settlement earthworks, or groups of
features, such as interlaced tracks.
Historic Environment Record:
Worcestershire and Shropshire Councils maintain a comprehensive database of
archaeological information called the Historic Environment Record. Please refer to the
contacts section of this website for details.
Page 5 of 6
GIS:
A Geographical Information System is a computer system that can capture, store,
manipulate, edit, analyse, manage, and present all types of geographical data, usually
against the background of a digital map.
Layer:
A particular set of data that can be viewed in a GIS website or software. In the context of
the Historic Wyre website, all the archaeological features are stored in three separate
layers.
LIDAR:
Light Detection and Ranging is a type of (usually) aerial survey that uses high density, low
power lasers to record the topography of the ground surface in very high detail. LIDAR does
not record archaeology that is below the surface, but there may be below ground
archaeology associated with surface features, such as settlement and industrial remains.
Topography:
The study of the Earth's surface; the natural terrain and also variations created as a result
of human activity and vegetation. Topography is represented on Ordnance Survey maps as
contour lines and variations in colour as well as text descriptions, for example, descriptive
words such as, hill, valley or vale.
Page 6 of 6