1
Owners Manual
© WOODWAY USA
PHONE # 262 548 6235
FAX# 262 548 6239
FORM: OWNERS MNUL
REV: 11-29-07
APPR BY: EW
1
WOODWAY SERVICE PROVIDER INFORMATION SHEET
NAME OF COMPANY _________________________________________________
CONTACT PERSON _________________________________________________
ADDRESS __________________________________________________________
__________________________________________________________
PHONE NUMBER ____________________________________________________
FAX NUMBER _______________________________________________________
MAJOR CITIES AND AREAS YOUR COMPANY SERVICES ___________________
___________________________________________________________________
___________________________________________________________________
FORM: OWNERS MNUL
REV: 11-29-07
APPR BY: EW
2
TABLE OF CONTENTS
CHAPTER 1: INTRODUCTION ...................................................................................... 5
IMPORTANT SAFETY INSTRUCTIONS ..................................................................... 6
ITEMS & SERVICES AVAILABLE FROM WOODWAY ............................................... 8
THINGS TO CONSIDER BEFORE STARTING EXERCISE PROGRAM..................... 9
THEORY OF WOODWAY’S FITNESS PROGRAMS................................................. 11
ELECTRICAL SPECIFICATIONS .............................................................................. 13
RUNNING BELT SPECIFICATIONS .......................................................................... 14
ENVIRONMENTAL SPECIFICATIONS...................................................................... 14
CHAPTER 2: TREADMILL INSTALLATION ................................................................ 15
GROUNDING REQUIREMENTS ............................................................................... 16
LOCATION REQUIREMENTS ................................................................................... 16
TRANSPORTING YOUR TREADMILL ...................................................................... 16
ELECTRICAL REQUIREMENTS ............................................................................... 16
OUTLET COMPATIBILITY ......................................................................................... 17
CHAPTER 3: TREADMILL FUNDAMENTALS ............................................................ 18
BELT SURFACE ........................................................................................................ 19
TRANSPORTATION SYSTEM .................................................................................. 19
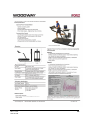
SERIAL NUMBER PLACEMENT ............................................................................... 20
POLAR ® HEART RATE MONITOR ........................................................................... 20
CHAPTER 4: PERSONAL TRAINER DISPLAY .......................................................... 22
DISPLAY OVERVIEW ................................................................................................ 23
DESCRIPTION OF STATISTICS ............................................................................... 24
QUICK START (USER DEFINED OPERATION) ....................................................... 25
QUICK START DISPLAY PARAMETERS ................................................................. 26
STARTING A PROGRAMMED WORKOUT ............................................................... 27
RUNNING A HEART RATE CONTROL PROGRAM.................................................. 28
CHANGING A PROGRAM DURING A WORKOUT ................................................... 29
PROGRAMMING USER PROGRAMS....................................................................... 30
CHAPTER 5: TREADMILL OPTIONS .......................................................................... 31
CHAPTER 6: TREADMILL MAINTENANCE ................................................................ 33
CLEANING AND INSPECTION.................................................................................. 34
LUBRICATION ........................................................................................................... 35
ADJUSTMENTS AND CALIBRATION ....................................................................... 35
CHAPTER 7: WARRANTY INFO ................................................................................. 36
CHAPTER 8: WRAP UP ............................................................................................... 38
TROUBLESHOOTING ............................................................................................... 39
PREVENTATIVE MAINTENANCE LOG .................................................................... 41
NUMBERS TO KNOW ............................................................................................... 42
FORM: OWNERS MNUL
REV: 11-29-07
APPR BY: EW
3
MY WOODWAY ________________________ ARRIVED _______________________
Model Name
Date
WOODWAY History
WOODWAY’s history began in Germany in 1974. Willi Schoenberger, a technical
director in charge of planning a fitness center, noticed that the most important piece of
equipment, the treadmill, did not meet the most important requirements: a mechanically
sound machine that is designed to meet human needs.
He envisioned a comfortable surface that did not interfere with the natural biomechanics
of running or walking. Also, he wanted to design a transportation system which
eliminated the friction associated with the conventional (conveyor belt) treadmills. After
intensive research, and trial and error (and in cooperation with the Deutsche
Sporthochschule in Koln, Germany), Willi developed and patented a very unique and
revolutionary treadmill design.
In 1975, WOODWAY GMBH was founded in Weil am Rhein, Germany. The name
“WOODWAY” is derived from the German “wald weg” or “way of the woods” – the feel
of running on a soft pine needle covered path in the forest.
In 1983, a manufacturing license was awarded to Sakai Medical, for the use of
WOODWAY technology in the Japanese marketplace.
In 1988, a U.S. license was granted to a small, but well-established manufacturing
company in Waukesha, Wisconsin. WOODWAY USA was formed when the U.S.
incarnation of the WOODWAY was developed and completed in 1990. WOODWAY
USA is very proud to be the primary manufacturer of WOODWAY Treadmills worldwide,
exporting treadmills each month to Germany and Japan for international distribution, in
addition to serving our domestic customers and clients.
Today, WOODWAY’s design and manufacturing facilities in the United States, Germany
and Japan make WOODWAY the largest specialized treadmill manufacturer in the
world. Constant enhancements in quality, design and function are shared and
implemented by all three WOODWAY manufacturers.
FORM: OWNERS MNUL
REV: 11-29-07
APPR BY: EW
4
Chapter
1
GETTING STARTED
IMPORTANT SAFETY INSTRUCTIONS
ITEMS AND SERVICES AVAILABLE FROM WOODWAY
THINGS TO CONSIDER
THEORY OF WOODWAY FITNESS
SPECIFICATIONS
FORM: OWNERS MNUL
REV: 11-29-07
APPR BY: EW
5
Important Safety Instructions
All basic pertinent precautionary measures must always be taken into account when
using a treadmill. Please therefore read this manual carefully and familiarize yourself
with the operation of the unit and with all warning signs fitted to the machine.
DANGER: The treadmill must be disconnected before cleaning to protect from electric
shocks.
The surfaces of the treadmill should not be soaked with liquid; the best way to clean the
running mat is with a spray or a damp cloth.
CAUTION: Fuses may only be replaced by fuses of the same time and rated output to
provide permanent protection from fire.
WARNING: The following points must always be observed to protect from burns,
electric shocks and injuries:
1. Never leave the treadmill connected and running without supervision. Before
leaving the machine, stop it and disconnect it from the mains. To do so, switch all
control elements to STOP or OFF and then pull the plug out of the socket. This
procedure is always necessary when the treadmill is at a standstill and before
dismantling any parts.
2. The treadmill must be continuously monitored when used in the vicinity of
children or physically and mentally disabled persons.
3. The treadmill may only be used for the purposes described in this manual.
4. Never operate a treadmill with defective plug or cable or a running mat which is
damaged or not functioning correctly.
5. The cable should not come in contact with heating surfaces or sharp edges.
6. No objects of any kind may fall through the openings or onto moving machine
components. Also keep hands, hair, loose clothing, towels etc. away from the
moving treadmill.
7. Only qualified maintenance staff can carry out electrical and mechanical repair
work. Please contact your dealer, the Service Center, or the WOODWAY factory
directly. Only original spares may be used.
FORM: OWNERS MNUL
REV: 11-29-07
APPR BY: EW
6
Important Directions
The following instructions are to be observed when operating the treadmill:
1. Loose clothing and towels may not be placed on the running mat of the treadmill.
2. The area behind the treadmill must be clear and at least 200 cm away from walls
or furniture.
3. Always keep hands well away from moving parts.
4. Never allow children near the treadmill without supervision. The Force treadmill is
designed for up to 500 pounds running, 800 pounds walking. If any objects
should become lodged in the belt or rollers, there is no guarantee that the
treadmill will stop immediately.
5. Never get on or off the treadmill while the running mat is moving. Always use
handles or a railing whenever possible.
6. Always wear suitable shoes, e.g. shoes with a rubber sole or other non-slip
shoes. High-heeled shoes or shoes with leather soles are not suitable. Also
check that there are no stones lodged in the soles.
7. Training sessions must be interrupted immediately in the case of abnormal stress
symptoms or pain. If there is any doubt, please consult your doctor.
8. Containers with liquids may never be placed on the treadmill.
9. To rule out the risk of electric shocks, avoid all contact between water and the
electric components (i.e. motor, mains cable and mains plug). Never service your
treadmill yourself. Please always contact your WOODWAY dealer or the
authorized Service Center.
10. For safety reasons, the treadmill must always be switched off when adjusting the
settings or when any other work is being carried out in the vicinity of the treadmill.
FORM: OWNERS MNUL
REV: 11-29-07
APPR BY: EW
7
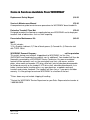
Items & Services Available From WOODWAY
Replacement Safety Magnet
$16.50
Service & Maintenance Manual
$74.90
A comprehensive guide to maintenance procedures for WOODWAY brand treadmills.
Protective Treadmill Floor Mat
$79.00
Designed to protect the flooring or carpeting below your WOODWAY and to keep your
treadmill clear of obstructions such as thick carpeting.
Preventative Maintenance Kit:
$40.00
MKIT
This kit includes:
1) Dry Graphite Lubricant; 2) Tube of black grease; 3) Canned Air; 4) Extension tool
with TORX -20 bit
WOODWAY Renewal Program:
call for quotation
This entails having your treadmill shipped back to WOODWAY via Van Line
(WOODWAY can coordinate these details; cost is additional). Your treadmill will then be
thoroughly renovated by a WOODWAY Service Technician. Any worn or outdated
features will be replaced, such as: the running belt and slats, side covers and trim
plates, drive motor and encoder, IPC drive, drive belt, latest display board comparable
to the board currently on the treadmill, HTD drive shaft, elevation potentiometer, fuse
holder, interface board, tracking rollers, any worn bearings, re-powder coating of
handrails and exterior hardware. The treadmill will then carry a 1 year parts and labor
warranty. It is like getting a brand new WOODWAY at a fraction of the cost.
*Prices above may not include shipping & handling.
*Contact the WOODWAY Service Department or your Sales Representative to order at
1-800-966-3929.
FORM: OWNERS MNUL
REV: 11-29-07
APPR BY: EW
8
Things to Consider Before Starting Exercise
Program
CONSULT A PROFESSIONAL FITNESS TRAINER
It is advisable for all exercise beginners to consult a professional fitness instructor or
personal trainer to develop an overall fitness evaluation/wellness program before
starting an exercise routine.
CONSULT A PHYSICIAN
If you are over 40, have a history of heart disease, are overweight, or have not been
involved in any kind of exercise program for several years, it is recommended that you
see your physician as a precaution before engaging in a vigorous exercise program.
UNDERSTAND THE IMPORTANCE OF WARMING UP AND COOLING DOWN
It is important to warm up and cool down prior to and at the end of each work out,
respectively. Always try to incorporate a series of basic leg stretches before and after
each workout. Stretching provides the necessary flexibility to prevent sore muscles and
injury during daily activities.
LEARN HOW TO TAKE YOUR PULSE PROPERLY
To select the Fitness Level that is most suitable to exercise, it is important to correctly
determine your heart rate or pulse. To do this, it is recommended that you use a good
quality heart rate monitor. If you do not have a heart rate monitor, you can find your
pulse by placing your fingers on the underside of your wrist or either side of your throat.
While looking at the second hand on your watch, count how many heartbeats you feel
within fifteen (15) seconds. Multiply this number by four to get your Beats Per Minute
(BPM). Your heart rate will be needed when you take the Self-Fitness Test.
KNOW YOUR MAXIMUM HEART RATE
To determine your maximum heart rate, subtract your age from 220 (general formula).
The difference is the approximation of your maximum heart rate, as used by the
American Heart Association and The American College of Sports Medicine. The only
way to determine your true maximum heart rate is to have a stress test administered by
your physician. The American Heart Association recommends that you have a stress
test done if you have any history of heart disease or if you are over the age of 40 and
beginning an exercise program.
During exercise, it is recommended that you not exceed 85% of your maximum heart
rate. Our programs are designed to keep your heart rate within your Target Zone. Your
Target Zone is an area between 60 and 75% of your maximum heart rate. Should you
find your heart rate above the 75% level, you have probably selected a Fitness Level
that is too high in that particular Fitness Program. You should either drop to a lower
intensity level in the same Fitness Program, or use a less stressful Fitness Program.
FORM: OWNERS MNUL
REV: 11-29-07
APPR BY: EW
9
Heart Rate Chart
AGE
MAXIMUM
HEARTRATE
60% OF
MAXIMUM
HEART RATE
20
25
30
35
40
45
50
55
60
65
70
75
200 BPM
195
190
185
180
175
170
165
160
155
150
145
120 BPM
120
110
110
100
100
100
90
90
90
90
80
75% OF
MAXIMUM
HEART RATE
85% OF
MAXIMUM
HEART RATE
150 BPM
150
140
130
130
130
120
120
120
110
110
100
170 BPM
160
160
150
150
140
140
130
130
130
120
120
HOW OFTEN SHOULD YOU EXERCISE?
The biggest mistake made by people when starting an exercise program is that they try
to do too much too fast. Give yourself time to get into shape. Becoming reconditioned
also takes time. Either way, it will not happen overnight. Remember: the key is
consistency and duration of exercise, not intensity. Fitness experts recommend that you
start by exercising three to four days a week within your target heart rate for at least 20
minutes per session. Your ultimate goal should be to get yourself gradually to a level of
fitness where you can comfortably keep your heart rate in the Target Zone for 50 to 60
minutes four to five times a week.
WEAR PROPER WALKING/JOGGING SHOES
To help avoid getting sore feet and muscles, it is suggested that you invest in a good
pair of walking/jogging shoes. It is important to purchase a comfortable pair of shoes
with good heel and arch support. Also, remember to regularly replace old or worn out
shoes with new shoes.
STAY ACTIVE
Between workouts it is suggested that you simply stay active, eat well-balanced meals,
and drink plenty of water. The combination of these activities should enhance your
chances for a future of good health.
FORM: OWNERS MNUL
REV: 11-29-07
APPR BY: EW
10
Theory of WOODWAY’s Fitness Programs
Today's research shows that we have underestimated the value of walking as an
effective method of achieving good cardiovascular and aerobic conditioning.
Jogging was thought to be the best way to achieve these goals. Research now tells us
that brisk walking actually can burn more calories than jogging and provide the fitness
level needed to live a healthy life. Even well known authorities in the field of aerobics
are reversing their ideas on the benefits of running over walking. In the January 1990
issue of Prevention magazine, Charlotte A. Tate, a board of trustee member of the
American College of Sports Medicine stated, "The fact is, running a marathon does not
make you any healthier than walking three miles three times a week at a fairly fast
pace".
The key to a successful exercise program is consistency. It is the small advances over a
long period of time that will give you the big benefits of fitness. Just as you can not wake
up one morning and be a professional baseball player, you can not achieve fitness
overnight. Any professional must learn his/her trade to become successful; so you must
give yourself time to achieve fitness.
WOODWAY has looked hard at today's research to form the philosophy behind our
Fitness Programs. Consistency is the key. It is the time you dedicate to your exercise
program, not the intensity level that is important.
Because walking is something that can easily be done by the unconditioned person as
well as by the highly conditioned person, WOODWAY has dedicated many of our
programs to walking and slow jogging. These programs are designed to gradually take
you to a well-conditioned state and keep you there. Achieving fitness can be fun and not
nearly as strenuous as you thought.
Most of our programs are dedicated to the general public, although we do meet the
need of the fitness enthusiasts by including high intensity workouts for joggers and
runners and elite athletes alike.
Technically, our programs spread a workload over as many muscle groups as possible
at a low intensity (i.e. walking or jogging) for long periods of time. These programs
gradually increase the workloads by using speed and incline to keep the activity as
aerobic (vs. anaerobic) as possible. This will enable you to achieve the best kind of
cardiovascular conditioning exercise. Because our programs are designed to do all of
this for you, you do not need to worry about how to get into shape. Simply use your
WOODWAY treadmill on a regular basis and let us worry about the technicalities. Just
have fun!
FORM: OWNERS MNUL
REV: 11-29-07
APPR BY: EW
11
FORM: OWNERS MNUL
REV: 11-29-07
APPR BY: EW
12
Electrical Specifications
Electrical Requirements – Below are the standard electrical requirements, if you have
a different electrical configuration please contact your sales representative.
Power Requirements:
120 V ac: 20 Amp, 60 Hertz
208/220 V ac: 10 Amp, 60 Hertz
*20 Amp Dedicated line required (cannot share neutral line)
Reason: if you have 120 volts out of the wall outlet and more than one major appliance
on the hot or neutral line, the voltage will drop below 10% minimum of 120 volts and the
treadmill will shut off and reset.
Break Specifications:
175 lbs, Magnetic Particle Break
Power Cord and Type:
10 feet, 3 prong. 120: 5-20P, 208/220: 6-20P
Wall Outlet Requirements:
120 V ac:
NEMA 5-20 R Receptacle (Dedicated circuit required)
208/220:
NEMA 6-20 R Receptacle (Dedicated circuit required)
Main Fuse:
120 V ac:
208/220:
15 A slo-blo, 3AG
10 A slo-blo, 3AG
Heart Rate Pickup Assembly:
Pickup Range: Up to 30 inches
Heart Rate Range: Up to 200 beats per minute, uni-directional
Outlet Compatibility:
The 120 V ac input WOODWAY treadmill comes standard with a 3-prong plug (NEMA
520 P). The only outlet that the plug can be installed is a NEMA 5-20 R – which does
not share the neutral.
The 208 V or 220 V ac input WOODWAY treadmill has a 3-prong plug (NEMA 6-20 P).
It will only fit in a NEMA 6-20 outlet. DO NOT BEND OR REMOVE PRONGS. If other
power cord plugs are required, please consult the factory.
FORM: OWNERS MNUL
REV: 11-29-07
APPR BY: EW
13
Running Belt Specifications
General
Slats, overlapping, replaceable
Slat type
Rubber over aluminum support
Running Belt Hardness
Approximately 40 Shore D
Running Area
See detailed specifications/model (Ch.1)
Standard Color
Black
Support
102 roller bearings, 10 roller guides
standard; The Path = 64 roller bearings,
8 roller guides.
Lateral movement
+/- 8 mm
Environmental Specifications
Degree of Protection
IP42
Operating Conditions
Ambient Temperature
Relative Humidity
+10°C to +40°C (0°F to +104°F)
20 to 95%
Transportation & Storage Conditions
Temperature Range
Relative Humidity
-18°C to +49°C (0°F to +120°F)
20 to 95%
Atmospheric Pressure Range
FORM: OWNERS MNUL
REV: 11-29-07
APPR BY: EW
700hPa to 1060 hPa (20.67 to 31.3
inches of Mercury)
14
Chapter
2
TREADMILL INSTALLATION
GROUNDING INSTRUCTIONS
LOCATION REQUIREMENTS
TRANSPORTING YOUR TREADMILL
ELECTRICAL REQUIREMENTS
OUTLET COMPATIBILITY
FORM: OWNERS MNUL
REV: 11-29-07
APPR BY: EW
15
Grounding Requirements
This treadmill must be grounded. If it should malfunction or break down, grounding
provides a path of least resistance for electric current to reduce the risk of electric
shock. This product is equipped with a power cord with a grounding plug. The plug must
be plugged into an appropriate outlet that is properly installed and grounded in
accordance with all local codes and ordinances.
Location Requirements
Install your treadmill on a structurally sound surface. If it is to be used above ground
level set it up near the corner of the room to ensure maximum support during highspeed use. The surface should be reasonably level to ensure minimum frame flexing.
Do not place the treadmill directly on shag or plush carpeting because of the moving
parts underneath. If the operating area is thickly carpeted, set the unit on a mat
(WOODWAY has a selection of mats available for purchase if needed; call 1-800WOODWAY for details). This will reduce the lint that can get into the treadmill and also
reduce carpet wear.
Transporting Your Treadmill
CAUTION: THIS TREADMILL IS HEAVY AND COULD CAUSE INJURY IF PROPER
LIFTING TECHNIQUES ARE NOT UTILIZED. LIFTING BARS ARE SUPPLIED WITH
THE TREADMILL TO MOVE THE TREADMILL.
Lifting bars are inserted into each bottom corner of the treadmill. Do not pull or lift on the
cosmetic covers. If a flat dolly is available, place the dolly underneath the treadmill and
push it to the desired location. If the treadmill must be disassembled, the cosmetic
covers and the handrail assembly could be removed for easier transportation. Always
unplug your treadmill before disassembly.
Electrical Requirements
The maximum electrical power requirements of your treadmill at top operating speed is
20 A at 120 V ac. Therefore, the operating area must be equipped with an approved,
dedicated 120 V ac, 60 Hz NEMA 5-20R grounded outlet and properly fused –
CANNOT SHARE THE NEUTRAL! If an extension cable is needed, it must be at least
12 AWG with ground and no more than 10 feet long. For the 208 or 220 V ac input
power options, the outlet must provide the appropriate ac voltage, 60 Hz at 15 A.
FORM: OWNERS MNUL
REV: 11-29-07
APPR BY: EW
16
Outlet Compatibility
The 120 V ac input WOODWAY treadmill comes standard with a 3-prong plug (NEMA
5-20P). The only outlet that the plug can be installed is a NEMA 5-20R – which does not
share the neutral.
The 208 V or 220 V ac input WOODWAY treadmill has a 3-prong plug (NEMA 6-20P). It
will only fit in a NEMA 6-20R outlet. DO NOT BEND OR REMOVE PRONGS. If other
power cord plugs are required, please consult factory.
CAUTION - Any alterations to the plug configuration could void your warranty.
FORM: OWNERS MNUL
REV: 11-29-07
APPR BY: EW
17
Chapter
3
TREADMILL FUNDAMENTALS
BELT SURFACE
TRANSPORTATION SYSTEM
SERIAL NUMBER PLACEMENT
POLAR HEART RATE
FORM: OWNERS MNUL
REV: 11-29-07
APPR BY: EW
18
Belt Surface
The patented running belt is made of individual slats mounted on a continuous set of
tooth belts. The tooth belts mesh with the front pulley assembly, which meshes with the
drive motor. This results in no belt slippage. The individual slats are comprised of two
materials: a rubber based surface and an aluminum T-shaped frame. The rubber
material, approximately 3/8 inch thick, and the aluminum T-slat makes a WOODWAY
the "softest treadmill running surface in the world". The rubber running surface greatly
reduces shock of impact and helps reduce the local extremity pain associated with longterm running. The positive belt engagement eliminates friction and heat, and therefore
increases the longevity of the running surface and treadmill itself.
The WOODWAY rubber belt surface is unlike other treadmills (which normally utilize a
cotton and nylon belt) and takes some getting used to. You may find, at first, that the
surface has a "grip" to it you have not experienced before. The more often you utilize
your treadmill the more you will become accustomed to the feel of it. With continuous
prolonged usage, the running surface will eventually "smooth" itself in the areas that
receive the most wear.
Transportation System
The transportation system is comprised of two bearing rail assemblies, an endless steel
wire reinforced lateral belt, and 7-inch diameter toothed roller drums. The bearing rails
support the running surface and are integral to reducing belt wear and friction.
The two endless lateral belts have many key functions: they hold the individual slats
together, transfer power to and from the motor and runner, and help keep the running
belt from tracking to the left or right. The two bearing rails consist of three main parts:
the bearing rail, individual bearings, and the bearing-supported roller guides. A smooth
section of the lateral belts roll over the bearings and roller guides.
The bearing rail supports all the bearings and roller guides and helps to distribute the
local loads throughout the treadmill. The roller guides on each side assist to reduce
tracking error and help support the running belt. The individual bearings on each side
also evenly distribute the load across the treadmill.
The toothed drums are used to transfer the load to and from the motor and to eliminate
any slippage. The front drum assembly has an extra tooth pulley that is used by the
motor. The drum assemblies have heavy-duty pillow blocks (bearings) which also
reduce friction.
This unique transportation system results in very little friction and can even be used
without power - you can simply push the running belt under your own power!
FORM: OWNERS MNUL
REV: 11-29-07
APPR BY: EW
19
Serial Number Placement
Each WOODWAY treadmill is assigned a serial number when built. The 7 or 8 alphanumeric code can be found in two different locations on the treadmill. The serial number
is on the main label located on the back of the display board housing. It is also on the
front left section of the treadmill frame.
Sequential Number
Assigned at Assembly
{XXXXX}{XY}
Date Code of
Manufacture
The main label also includes information about your particular treadmill. It lists input
voltage and current, and the options and/or features of your treadmill. Please refer to
your packing slip or invoice or contact WOODWAY USA (1
1-800-WOODWAY) to
determine the features you may have ordered, if you are in doubt, with your treadmill.
Polar ® Heart Rate Monitor
Both display boards are also equipped to project a user’s heart rate in conjunction with
®
the use of a Polar Monitor. In order for the board to correctly display a user’s heart
rate, the receiver within the display board must obtain a stable heart rate signal from the
®
Polar transmitter.
®
The Polar Heart Rate System consists of three main elements: 1) the
Sensor/Transmitter, 2) the Chest Band/Strap and 3) the Monitor/Console. The receiver
of the wireless ECG system is built into the monitor/console unit of the board. While
operating under heart rate control modes, the computer monitors the exact
measurement of and control over the activity of the heart.
How to Wear the Chest Strap
The Sensor/Transmitter is worn just below the chest and at the top of the abdomen,
preferably directly on bare skin (not over clothing). The transmitter should be centered
below the pectoral muscles (breasts). Once the strap is secured, pull it away from the
chest by stretching the band, and moisten the conductive electrode strips located
underneath the snaps. If you wish to wear the band over a shirt, moisten the shirt under
the area of the electrode strip. The transmitter operates automatically while you are
wearing it. It does not operate while it is disconnected from your body. However, as
moisture may activate the transmitter, please wipe it dry after use. The chest band is
washable. After you have detached the transmitter, wash the band in warm water, using
mild soap, and rinse thoroughly in clean water. Never scrub the transmitter surfaces.
FORM: OWNERS MNUL
REV: 11-29-07
APPR BY: EW
20
The Transmitter
You must be within three and a half feet of the receiver in order for the signal to
transmit. Please take note that your transmitter may fluctuate erratically if you are too
®
close to other Polar equipment. Maintain at least a three-foot distance between other
®
Polar units.
®
Note: Erratic heart rate reception may occur if the Polar Monitor is too close in
proximity to strong sources of electromagnetic radiation, such as television sets,
personal computers, electric motors and some other types of fitness equipment. Only
one transmitter should be used inside the range of any one receiver as the receiver may
pick up several signals simultaneously causing an inaccurate readout.
FORM: OWNERS MNUL
REV: 11-29-07
APPR BY: EW
21
Chapter
4
PERSONAL TRAINER DISPLAY
DISPLAY OVERVIEW
DESCRIPTION OF STATISTICS
QUICK START
QUICK START DISPLAY PARAMETERS
STARTING A PROGRAMMED WORKOUT
RUNNING A HEART RATE CONTROL PROGRAM
CHANGING A PROGRAM DURING A WORKOUT
PROGRAMMING USER PROGRAMS
FORM: OWNERS MNUL
REV: 11-29-07
APPR BY: EW
22
Display Overview
There are twenty-eight buttons on this display panel, which allow the user to input
program parameters to control treadmill operation and allows the user to monitor the
progress of their workout. The five seven-segment displays show program statistics.
The four-digit displays are programmed to display time in an 88:88 format. The 128 X
256 pixel LCD display shows the user’s choice of program profiles and also shows the
user’s progress during their workout. The program profiles indicate the Load contours in
printed graphics.
Heart rate is monitored by a Polar receiver for pickup RF from Polar chest belt heart
rate units.
The control panel allows the user to control or view:
• Manual Control of load
• Statistics display of Speed, Load, Time, Watts, METs, Accumulated Watts,
Distance & Heart Rate
• 8 user-modifiable programs
• Automatic load adjustment during programs
• User prompts and warnings
• 1 time based program/ 1 distance based program
In order for the user to monitor the progress of their workout, the personal trainer board
displays:
• Load Profile
• Time
• Watts/Distance
• Speed
• Accumulated Watts
• Heart Rate
FORM: OWNERS MNUL
REV: 11-29-07
APPR BY: EW
23
Description of Statistics
TIME:
Time is displayed in the format 00:00. Time counts up from zero in the user-defined mode.
The time counts down in Programmed Run mode.
SPEED:
Speed is displayed in the format 00.0. Speed represents the user’s current speed in miles per
hour (or kilometers per hour) or can be used to set the desired user speed. Valid speed
values are: 0.0 – top speed (which varies depending on model and options ordered).
DISTANCE:
Distance is displayed in the format 00.00. Distance represents the accumulated user distance
in miles. Distance continues to accumulate until the program ends or until the user presses
the PAUSE button.
WATTS:
Watts are displayed in the format 0000. Watts represent the watts generated and are
calculated using the user’s weight (entered at the start up of a program), or if not entered by
the user, a default weight of 155 Ibs.
ACCUMULATED WATTS:
Accumulated watts are displayed in the format 00:00. Accumulated watts represent total
watts accumulated during the entire workout.
METs (metabolic equivalency):
METs is displayed in the format 00.0 and represents the equivalent amount of work in
lifestyle or formal exercise activities as defined by a MET equivalence chart. The method for
calculating MET’s is 3.5 milliliters of oxygen per kilogram of body weight per minute.
HEART RATE:
Heart Rate is displayed in the format 000 and represents the user’s actual heart rate (pulse).
LOAD:
The load display is used to display the current user load to set the user load. Valid load
values are 0 – 150 Ibs.
FORM: FORCE
REV: 10-23-07
APPR BY: EW
24
Quick Start (User Defined Operation)
1. First, make sure to check that the treadmill is plugged in and that the power switch (within
lower right-hand cut-out) has been turned on.
2. To power-up the display, press the “ON” Button.
3. To “power-up” the display, press the “ON” Button until the LED and LCD displays are
illuminated – this process can take up to 3 seconds! The LCD display in the center of the
panel will read “Press INCREASE for Quick Start or select a program”.
The user can choose to follow the directions or simply enter the load value desired. If the
INCREASE button is pressed, the display will be in a User-directed Mode. The text “Press
START TIME & PAUSE to begin workout” will then appear in the LCD display. Once the user
presses the START TIME & PAUSE button, the workout will begin.
FORM: FORCE
REV: 10-23-07
APPR BY: EW
25
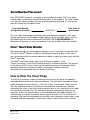
Quick Start Display Parameters
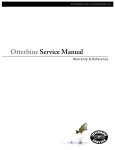
Time will begin counting up from zero, speed will be set to 0.1 mph and the distance and
calories will begin accumulating. The LCD display will illustrate a 100 yard oval track. A
flashing dot will move around the track (in a counter clock-wise direction) representing the
user’s distance. The center of the track will read “Laps = 0.” Each lap around the track
represents 100 yards. The lap counter will increase by one with every completed lap.
The user may Pause the program at any time by pressing the PAUSE button.
The user-defined track is laid out as shown in the figure below:
LAP = 0
1 lap = 100 Yards
•
Pausing Workout
If the user presses the PAUSE button, the LCD display will read “Treadmill Paused. Press
PAUSE to resume.” Statistics will freeze with the current session values at the time the
PAUSE button was pressed. Once the user presses the PAUSE button again, the workout
will resume. While paused, the CLEAR button will be enabled. Pressing the CLEAR button
will reset all of the treadmill statistics.
FORM: FORCE
REV: 10-23-07
APPR BY: EW
26
Starting a Programmed Workout
Starting a Workout
Time will begin counting down; load will be set to the first segment load. Distance and watts
will begin accumulating. The LCD display will show the program profile. The numeric keys,
the CLEAR button and the ENTER button will not be displayed.
Workout Variables
While running the program, the user may change load using the INCREASE and DECREASE
load buttons. The user may pause the program at any time by pressing the START TIME &
PAUSE button. The state of the program you are in will be flashing to show your progress.
The beeper will sound 3 seconds prior to load changes.
Pausing a Workout
If the START TIME & PAUSE button is pressed the LCD display will read “Treadmill Paused”.
Press START TIME & PAUSE to resume. Statistics will freeze with the current session values
at the time the PAUSE button was pressed. Once the user presses the PAUSE button again,
the workout will resume. While paused, the CLEAR button will be enabled.
At the end of a Program
When the program time expires, the LCD will read “Program Complete” for 3 seconds. The
load will then return to zero.
FORM: FORCE
REV: 10-23-07
APPR BY: EW
27
Running a Heart Rate Control Program
Note: These programs will only operate effectively if you are wearing a heart monitor chest
strap.
1. If the Heart Rate Control Program was chosen, the user will be prompted to enter their
age and target heart rate. The display will read “Enter Age” and a default age of 40 will
be displayed. The user may use the numeric keys to enter their age. (Valid age values
are 15 – 100). The CLEAR button may be used to erase the currently displayed age.
When the user finishes entering his age, he may press the ENTER button to accept it.
2. Once the user’s age has been entered, they will be prompted to enter their target heart
rate. The LCD display will read “Enter Target Heart Rate” and a target heart rate
based on the user’s age will be displayed. (The formula 220 – age will be used to
compute the user’s max hear rate. The user’s target heart rate will be equal to sixtyfive percent of his/her max heart rate). The user may use the numeric keys to modify
the estimated target heart rate value. (Valid target heart rate values are 70 – 200). The
CLEAR button may be used to erase the currently displayed target heart rate. When
the user finishes entering target heart rate, they may press the ENTER button to
accept it.
3. Once the user has chosen their desired control type, they may press the ENTER
button to accept it.
4. Once the user has chosen their desired target HR, they will enter weight, max load,
and workout time. Next, the user will be prompted to press the START TIME button to
begin their workout. The text “Press START TIME to begin workout” will appear on the
LCD display. Once the user presses the START TIME button, their workout will begin.
5. Once the workout begins, the Heart Rate Control profile will appear on the LCD
display. While running the program, the user may override load setting. Target heart
rate may be modified at any time while running the Heart Rate Control program. The
user may enter a new target heart rate using the numeric keys. Press the CLEAR
button to erase the newly entered target heart rate. Press the ENTER button to accept
it.
FORM: FORCE
REV: 10-23-07
APPR BY: EW
28
Changing a Program During a Workout
If a user is running any program (user-defined, predefined, heart rate control or
programmable) and wishes to choose a different program, they have several options:
•
Do not wish to retain current program statistics? Simply press the Off button followed
by the On button to reset the treadmill. Choose another workout.
•
Enter Pause Mode and then press a program button (example: Interval). The profile
associated with that program button will appear on the LCD display. The user may
then setup the program and begin his workout. Because statistics were not cleared,
the statistics from the previous workout will be retained. Upon completion of this
workout, the final program statistics will include statistics from this workout and the
previous workout.
FORM: FORCE
REV: 10-23-07
APPR BY: EW
29
Programming User Programs
There are 8 user program profiles. Each profile consists of 40 segments, each with a
programmable time, speed and incline setting. If a program key is pressed on power-up while
the user is prompted to “Press ‘FAST’ for Quick Start or select a program”, program setup will
begin. The user program associated with that numeric key will appear on the LCD display.
The user may then setup the program and begin their workout. The user will not enter a
workout duration for user programs. Workout durations are calculated by adding each of the
segment time values (for that profile) stored.
Editing User Programs
To edit one of the 8 user programs, press “Enter” after selecting a user program. The Edit
User Program screen will appear.
The user program number will appear next to the “Edit User Program:” heading. Segment
number one will be displayed and highlighted. The INCREASE and DECREASE load buttons
may be used to increment or decrement the segment number. Press ENTER to begin editing
that segment. The load value for segment one will be highlighted. The numeric keys or the
speed arrow keys may be used to enter a load value. Press ENTER to store that value and
highlight the time value. The numeric keys may be sued to enter a segment time length.
Press ENTER to store that value and advance to the data for the next segment. Repeat this
process for all segments desired. When programming is complete, press the off button to exit
the Edit User Programs screen.
FORM: FORCE
REV: 10-23-07
APPR BY: EW
30
Chapter
5
TREADMILL OPTIONS
FORM: FORCE
REV: 10-23-07
APPR BY: EW
31
208 or 220 V Input Power
The 208 or 220 V ac input voltage requirements are options for all WOODWAY treadmills. A
power transformer is installed and wired for either 208 V ac or 220 V ac. The remaining parts
of the treadmill are unaffected.
Single Handrail
The single side handrail can be ordered to ease getting on and off the treadmill.
Handrail Controls
One of the many unique features of the Desmo series treadmills is the option of side handrail
controls. The handrail controls allow the user to adjust the speed and/or incline without
needing to lean over the display to do so. This means the user does not have to "break
stride," therefore reducing the possibility of losing balance and/or falling.
The handrail controls consist of 5 push buttons. These are: STOP, SPEED INC., SPEED
DEC., ELEV. UP and ELEV. DOWN buttons.
FORM: FORCE
REV: 10-23-07
APPR BY: EW
32
Chapter
6
TREADMILL MAINTENANCE
CLEANING AND INSPECTION
LUBRICATION
ADJUSTMENTS AND CALIBRATION
FORM: FORCE
REV: 10-23-07
APPR BY: EW
33
Cleaning and Inspection
Periodic cleaning and inspection of your WOODWAY treadmill will help to lengthen the life
while helping keep it looking like new. With this preventative maintenance it will be easier to
spot problems that might not otherwise be found.
Below is a guideline of our recommended cleaning and maintenance intervals. If your
treadmill is located in a dirty environment or under heavy-duty use, cleaning and inspection
should be implemented more often.
Do not use abrasive brushes or cleaners, as they may scratch the paint and plastic surfaces.
Do not soak any surface; the sensitive electronics may be harmed.
CAUTION: Turn off treadmill and disconnect power cord before cleaning.
Weekly:
• Clean handrail, front display panel & cosmetic covers.
• Inspect power cord.
• Check overall condition of the treadmill.
• Move, and vacuum underneath the treadmill.
Every Six (6) Months:
• Vacuum inside the treadmill (unplug and remove cosmetic covers.)
• Inspect all nuts and bolts. Tighten any that are loose.
• Clean running surface.
• Spray running surface with anti-static spray. ( grey belts only )
• Check drive belt – replace if shredding or teeth are missing.
Yearly:
• Grease front and rear roller bearings.
FORM: FORCE
REV: 10-23-07
APPR BY: EW
34
Lubrication
Bearings
Almost all of the bearings used in the treadmill are pre-lubricated and do not need to be
greased initially. On a yearly basis, the four (4) bearings located at the front and rear shaft
will need to be lubricated.
Running Belt
The teeth on the bottom of the running belt are pre-lubricated to aid in reducing noise. There
is no need to lubricate the teeth. If running belt is rubbing against the side of the drive pulleys,
then a small amount of grease (i.e. Molykote or equal) on the edges of the belt slats will help
reduce noise.
Drive Belt
As in the case of the running belt, the application of grease on the edge of the drive belt is
only needed to reduce belt squeak and should be used sparingly.
Note: Use a minimal amount of lubrication to prevent excess dirt and debris from sticking to
the machine after cleaning.
Adjustments and Calibration
Running Belt
The running belt should not require adjustment. However, if the running belt or associated
parts have been changed, then belt tension should be checked and set at 8 ½”.
Treadmill Mounting Feet – TOOLS NEEDED: 2 FT LEVEL, ¾ INCH WRENCH
If treadmill wobbles or seems unstable, mounting feet must be checked. Using the level,
check both ends of the treadmill. Loosen the tensioning nut and turn the foot until it is at the
correct level. Tighten the tensioning nut.
Note: When moving the treadmill the frame may flex. If treadmill seems wobbly, push handrail
to one side or the other, this may straighten frame without mounting feet adjustment needed.
FORM: FORCE
REV: 10-23-07
APPR BY: EW
35
Chapter
7
WARRANTY INFORMATION
FORM: FORCE
REV: 10-23-07
APPR BY: EW
36
Warranty Information
Frame
Home Use
Medical Use
Commercial Fitness Use
15 years
10 years
10 years
Track/Belt and
Motor
10 years
5 years
5 years
Parts
Labor
5 years
4 years
3 years
3 years
1 year
1 year
WOODWAY warrants that all products and accessories will be free from manufacturing
defects according to the applications/terms listed above. The warranty period commences on
the original date of purchase (with the exception of the running belt component, which is
warranted for a period of four years from the original date of purchase). This warranty is given
only to the original purchaser. This warranty does not cover damage or equipment failure
resulting from misuse, abuse, or failure to comply with electrical codes. Further, this warranty
shall not apply if there is any modification to the products or accessories or if there is a failure
to provide maintenance as outlined in the Owner's Manual.
WOODWAY GIVES NO OTHER WARRANTIES, EITHER EXPRESSED OR IMPLIED. THE
WARRANTY OF FITNESS FOR A PARTICULAR USE IS HEREBY DISCLAIMED.
The buyer's remedy for breach of the expressed warranties contained herein shall be limited
to the return of the product and accessories and repayment of the original purchase price.
Provided, however, at WOODWAY selection, it may repair and replace the non-conforming
goods or parts. WOODWAY shall not be liable for any incidental or consequential damages.
Our Guarantee
WOODWAY guarantees the repurchase of WOODWAY treadmill products for a period of up
to four (4) years after original installation. A direct payment, or credit toward the purchase of a
new WOODWAY, of 20% of the purchase price of the treadmill will be made to the owner of a
WOODWAY treadmill. This guarantee is limited to the original owner. Contact WOODWAY
for further details.
FORM: FORCE
REV: 10-23-07
APPR BY: EW
37
Chapter
8
WRAP UP
TROUBLESHOOTING
PREVENTATIVE MAINTENANCE LOG
NUMBERS TO KNOW
FORM: FORCE
REV: 10-23-07
APPR BY: EW
38
Troubleshooting
If you are having problems with your treadmill, please be prepared with answers to the
following questions before calling our service center.
QUESTIONS:
• What is the make, model and serial number of your treadmill?
• What happened prior to the problem?
• Did the problem happen unexpectedly or did it progressively worsen over time?
• Was someone using the treadmill at the time the problem occurred?
• Explain any other symptoms that you feel are relevant.
PROBLEMS:
1. No Display: If the treadmill’s display does not light up when powered up, check the
following items:
• Input power fuse – replace if blown
• Power coming out of wall outlet
• Check power with another piece of equipment (radio, fan, etc.). Check main fuse or
circuit breaker, move to another outlet.
• Is the treadmill plugged in?
• Is the safety magnet installed or positioned correctly? Try to reposition. Check all
connectors at circuit boards.
2. Belt Movement
• Is the display working properly?
• If the display works, and/or the incline works, unplug the treadmill and wait at least 60
seconds before plugging it back in.
BELT TIGHT/HARD TO PUSH
• First, determine if display board is illuminated and/or if the incline system is working.
This information will help our service technician in advising you where the source of
the problem may be.
BELT BINDING
• Check for obstructions and remove if possible.
3. Erratic or Blinking Display
• Probable causes: Low line voltage; too much load on the same line.
• Make sure treadmill is on a dedicated electrical circuit.
• Possible static problem / spray with staticide.
• Display power supply on Interface board is defective.
FORM: FORCE
REV: 10-23-07
APPR BY: EW
39
4. Squeaking Sounds: Possible causes:
• Noisy bearing(s). Try greasing or replacing the bearing.
• Drive belt rubbing against the drive pulley, try greasing the edge of the drive belt with a
little all purpose grease.
• Running belt rubbing against drive pulleys, try lightly greasing the teeth on the drive
shaft, and let the treadmill run at a slow speed for a couple of minutes to spread
grease evenly. (NOTE: Too much grease will make a mess and will accumulate dust.)
• Check for a defective guide roller or Z roller bearing on the bearing rail, replace if
defective
FORM: FORCE
REV: 10-23-07
APPR BY: EW
40
Preventative Maintenance Log
DATE
FORM: FORCE
REV: 10-23-07
APPR BY: EW
MAINTENANCE PERFORMED?
BY
RESULT
41
Numbers to Know
_________________________________________________
Your Treadmill Serial #(s): Model/#_
_________________________________________________
Model/#_
___________________________________________________
Model/#_
___________________________________________________
Model/#_
___________________________________________________
Model/#_
___________________________________________________
Model/#_
___________________________________________________
Model/#_
___________________________________________________
Model/#_
___________________________________________________
Model/#_
___________________________________________________
Model/#_
(The serial number can be found on the back of the treadmill’s display board housing & also
on the front/left section of treadmill frame – side cover must be removed to locate on the
frame).
FORM: FORCE
REV: 10-23-07
APPR BY: EW
42
Speed (MPH)
12.0
10.0
800-WOODWAY (966-3929)
FORM: FORCE
REV: 10-23-07
APPR BY: EW
43