1
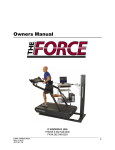
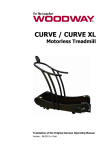
Owner’s Manual Curve Non-Motorized © WOODWAY USA W229 N591 FOSTER COURT WAUKESHA WI 53209 PHONE # 262 548 6235 FAX# 262 548 6239 FORM: CV OWNERS MNUL REV: 2/12/10 APPR BY: MF 1 WOODWAY SERVICE PROVIDER INFORMATION SHEET NAME OF COMPANY _________________________________________________ CONTACT PERSON _________________________________________________ ADDRESS __________________________________________________________ __________________________________________________________ PHONE NUMBER ____________________________________________________ FAX NUMBER _______________________________________________________ MAJOR CITIES AND AREAS YOUR COMPANY SERVICES ___________________ ___________________________________________________________________ ___________________________________________________________________ MY WOODWAY ________________________ ARRIVED _______________________ Model Name FORM: CV OWNERS MNUL REV: 2/12/10 APPR BY: MF Date 2 TABLE OF CONTENTS Chapter 1 Getting Started ............................................................................................. 5 IMPORTANT SAFETY INSTRUCTIONS ..................................................................... 6 THINGS TO CONSIDER BEFORE STARTING EXERCISE PROGRAM..................... 9 Chapter 2 Specifications ............................................................................................ 12 RUNNING BELT SPECIFICATIONS .......................................................................... 13 ENVIRONMENTAL SPECIFICATIONS...................................................................... 13 Chapter 3 Treadmill Installation ................................................................................. 14 LOCATION REQUIREMENTS ................................................................................... 15 TRANSPORTING YOUR TREADMILL ...................................................................... 15 Chapter 4 Treadmill Fundamentals............................................................................ 19 BELT SURFACE ........................................................................................................ 20 TRANSPORTATION SYSTEM .................................................................................. 20 SERIAL NUMBER PLACEMENT ............................................................................... 21 INCLINE SYSTEM .......................................... ERROR! BOOKMARK NOT DEFINED. POLAR ® HEART RATE MONITOR ........................................................................... 21 Chapter 5 Safety Features .......................................................................................... 23 Chapter 6 Curve LED Display ..................................................................................... 26 DISPLAY OVERVIEW ................................................................................................ 27 DISPLAY PARAMETERS .......................................................................................... 27 FUNCTIONAL BUTTONS – PRE-SET PARAMETERS ............................................ 28 DESCRIPTION OF STATISTICS ............................................................................... 28 WORKOUT PARAMETERS ....................................................................................... 29 Chapter 7 Treadmill Maintenance .............................................................................. 30 CLEANING AND INSPECTION ................................................................................. 31 LUBRICATION ........................................................................................................... 32 Chapter 8 Warranty Information................................................................................. 33 Chapter 9 Wrap-up ...................................................................................................... 35 TROUBLESHOOTING ............................................................................................... 36 PREVENTATIVE MAINTENANCE LOG .................................................................... 37 NUMBERS TO KNOW ............................................................................................... 38 FORM: CV OWNERS MNUL REV: 2/12/10 APPR BY: MF 3 WOODWAY History WOODWAY’s history begins in Germany in 1974. Willi Schoenberger, a technical director in charge of planning a fitness center, noticed that the most important piece of equipment, the treadmill, didn’t meet the most important requirements: a mechanically sound machine that is designed to meet human needs. He envisioned a comfortable surface that didn’t interfere with the natural biomechanics of running or walking. Also, he wanted a transportation system which eliminated the friction associated with conventional (conveyor belt) treadmills. After intensive research, and trial and error (and in cooperation with the Deutsche Sporthochschule in Cologne, Germany), Willi developed and patented a very unique and revolutionary treadmill design. In 1975, WOODWAY GmbH was founded in Weil am Rhein, Germany. The name "WOODWAY" is derived from the German "Waldweg" (Wald = Wood and Weg = Way) – the feel of running on a soft pine needle covered path in the forest. In 1983, a manufacturing license was awarded to Sakai Medical, for the use of WOODWAY technology in the Japanese marketplace. In 1988, a U.S. license was granted to a small, well-established manufacturing company in Waukesha, Wisconsin. WOODWAY USA was formed when the U.S. incarnation of the WOODWAY was developed and completed in 1990. WOODWAY USA is proud to be the primary manufacturer of WOODWAY Treadmills worldwide, exporting treadmills for international distribution, in addition to serving our domestic customers and clients. Today, WOODWAY’s design and manufacturing facilities in the United States, Germany and Japan make WOODWAY the largest specialized treadmill manufacturer in the world. Constant enhancements in quality, design and function are shared and implemented by all three WOODWAY manufacturers. As WOODWAY moves forward, attention to product quality, innovation, and customer service are at the forefront of our efforts. Along with our treadmills, other products, services and strategic relationships are being developed so as to keep WOODWAY on the leading edge as we meet fitness training, testing and rehabilitation needs. FORM: CV OWNERS MNUL REV: 2/12/10 APPR BY: MF 4 1 Chapter GETTING STARTED SAFETY THINGS TO CONSIDER ITEMS AND SERVICES AVAILABLE FORM: CV OWNERS MNUL REV: 2/12/10 APPR BY: MF 5 Important Safety Instructions A safety sign has been included with your treadmill. It is the responsibility of the owner to post this sign in a visible area near the machine. WOODWAY Training Technique Advisory: To maximize the benefit and safety of your treadmill training WOODWAY recommends all users maintain proper running form and not shuffle their feet. When servicing any piece of fitness equipment, basic precautions must be followed. Familiarize yourself with all warnings, instructions and procedures concerning proper care and maintenance of a WOODWAY treadmill. Instructions are found in this service training manual and some also appear on labels and instructions on the treadmill itself. DANGER – To Reduce the Risk of Electrical Shock • Do not operate the heart rate monitor transmitter in conjunction with an electrical heart pacemaker. The transmitter may cause electrical disturbances. • Do not soak the treadmill surfaces with any liquid; use a sprayer or damp cloth. • Do not place any open liquid containers on any part of the treadmill. The use of sport bottles with closeable tops is acceptable to be used. FORM: CV OWNERS MNUL REV: 2/12/10 APPR BY: MF 6 • Do not attempt to service your treadmill yourself if you feel at risk. • Always keep the running surface clean. CAUTION: • Consult with your physician before beginning any exercise program, especially if any of the following pertain to you: history of heart disease, high blood pressure, diabetes, chronic respiratory disease, elevated cholesterol, smoke cigarettes, or experience any other chronic disease or physical impairments. • Pregnant women should consult their physician before beginning an exercise program. • If you experience dizziness, chest pains, nausea or any other abnormal symptoms while utilizing the treadmill, stop immediately. Consult a physician before continuing. • A qualified mechanic should perform service or repair work. It is preferable that mechanics have successfully completed our factory-authorized service school or equivalent. WARNING – To reduce the risk of injury to you and to others: • THE CURVE IS NON-MOTORIZED – The user controls the rate of speed including the rate at which the treadmill slows or comes to a stop. There is no motor on the Curve, therefore there is not an emergency stop lanyard. The treadmill will come to a stop on its own, it is imperative that all users familiarize themselves with the treadmill and its features. • THE CURVE IS NON-MOTORIZED – The belt moves freely, always mount and dismount the Curve from the rear of the treadmill. Use the handrails at all times when mounting and dismounting from the rear. Set up and operate treadmills on a solid, level surface. • Keep all loose clothing and towels away from the treadmill running surface. It is also important that shoe laces do not extend past the bottom of the sole of the shoe. • Keep the area behind the treadmill clear and at least FOUR FEET from walls or furniture. FORM: CV OWNERS MNUL REV: 2/12/10 APPR BY: MF 7 • Keep hands away from all moving parts. • Never leave children unsupervised around a treadmill. • Inspect the treadmill for worn or loose components prior to use. Tighten/replace any worn or loose components prior to use. • WOODWAY treadmills are built to handle runners weighing up to 800 pounds at speeds between 0-4 MPH and 550 pounds at speeds up to 18 MPH. A treadmill running belt might not stop immediately if any object becomes caught in the belt or rollers. • Care should be taken when entering and exiting the treadmill. Never enter or exit the treadmill while the running belt is moving. Use the handlebar or handrails whenever practical. • Wear proper athletic shoes, such as those with rubber or high-traction soles. Do not use shoes with heels or leather soles. Make sure no stones are embedded in the soles. • Allow several minutes to bring your heart rate into the training zone shown elsewhere in this manual. Walk slowly after your workout to allow your body time to cool down and your pulse rate to decrease. • The safety and integrity designed into the machine can only be maintained when the treadmill is regularly examined for damage and repaired. It is the sole responsibility of the user/owner or facility operator to ensure that regular maintenance is performed. Worn or damaged components should be replaced immediately or the treadmill removed from service until the repair is made. Only manufacturer supplied or approved components should be used to maintain and repair the treadmill. FORM: CV OWNERS MNUL REV: 2/12/10 APPR BY: MF 8 Things to Consider Before Starting Exercise Program CONSULT A PROFESSIONAL FITNESS TRAINER It is advisable for all exercise beginners to consult a professional fitness instructor or personal trainer to develop an overall fitness evaluation/wellness program before starting an exercise routine. CONSULT A PHYSICIAN If you are over 40, have a history of heart disease, are overweight, or have not been involved in any kind of exercise program for several years, it is recommended that you see your physician as a precaution before engaging in a vigorous exercise program. UNDERSTAND THE IMPORTANCE OF WARMING UP AND COOLING DOWN It is important to warm up and cool down prior to and at the end of each work out, respectively. Always try to incorporate a series of basic leg stretches before and after each workout. Stretching provides the necessary flexibility to prevent sore muscles and injury during daily activities. LEARN HOW TO TAKE YOUR PULSE PROPERLY To select the fitness level that is most suitable to exercise, it is important to correctly determine your heart rate or pulse. To do this, it is recommended that you use a good quality heart rate monitor. If you do not have a heart rate monitor, you can find your pulse by placing your fingers on the underside of your wrist or either side of your throat. While looking at the second hand on your watch, count how many heartbeats you feel within fifteen (15) seconds. Multiply this number by four to get your Beats Per Minute (BPM). Your heart rate will be needed when you take the Self-Fitness Test. KNOW YOUR MAXIMUM HEART RATE To determine your maximum heart rate, subtract your age from 220 (general formula). The difference is the approximation of your maximum heart rate, as used by the American Heart Association and The American College of Sports Medicine. The only way to determine your true maximum heart rate is to have a stress test administered by your physician. The American Heart Association recommends that you have a stress test done if you have any history of heart disease or if you are over the age of 40 and beginning an exercise program. During exercise, it is recommended that you not exceed 85% of your maximum heart rate. Our programs are designed to keep your heart rate within your target zone. Your target zone is an area between 60 and 75% of your maximum heart rate. Should you find your heart rate above the 75% level, you have probably selected a fitness level that is too high in that particular fitness program. You should either drop to a lower intensity level in the same fitness program, or use a less stressful fitness program. FORM: CV OWNERS MNUL REV: 2/12/10 APPR BY: MF 9 Heart Rate Chart AGE MAXIMUM HEARTRATE 60% OF MAXIMUM HEART RATE 20 25 30 35 40 45 50 55 60 65 70 75 200 BPM 195 190 185 180 175 170 165 160 155 150 145 120 BPM 120 110 110 100 100 100 90 90 90 90 80 75% OF MAXIMUM HEART RATE 85% OF MAXIMUM HEART RATE 150 BPM 150 140 130 130 130 120 120 120 110 110 100 170 BPM 160 160 150 150 140 140 130 130 130 120 120 Source: American College of Sports Medicine. HOW OFTEN SHOULD YOU EXERCISE? The biggest mistake made by people when starting an exercise program is that they try to do too much too fast. Give yourself time to get into shape. Becoming re-conditioned also takes time. Either way, it will not happen overnight. Remember: the key is consistency and duration of exercise, not intensity. Fitness experts recommend that you start by exercising three to four days a week within your target heart rate for at least 20 minutes per session. Your ultimate goal should be to get yourself gradually to a level of fitness where you can comfortably keep your heart rate in the target zone for 50 to 60 minutes four to five times a week. WEAR PROPER WALKING/JOGGING SHOES To help avoid getting sore feet and muscles, it is suggested that you invest in a good pair of walking/jogging shoes. It is important to purchase a comfortable pair of shoes with good heel and arch support. Also, remember to regularly replace old or worn out shoes with new shoes. STAY ACTIVE Between workouts it is suggested that you simply stay active, eat well-balanced meals, and drink plenty of water. The combination of these activities should enhance your chances for a future of good health. FORM: CV OWNERS MNUL REV: 2/12/10 APPR BY: MF 10 ITEMS & SERVICES AVAILABLE FROM WOODWAY Protective Treadmill Floor Mat $79.00 Designed to protect the flooring or carpeting below your WOODWAY and to keep your treadmill clear of obstructions such as thick carpeting. WOODWAY Renewal Program: call for quotation This entails having your treadmill shipped back to WOODWAY via Van Line (WOODWAY can coordinate these details; cost is additional). Your treadmill will then be thoroughly renovated by a WOODWAY Service Technician. Any worn or outdated features will be replaced, such as: the running belt and slats, side covers and trim plates, timing belt, display board comparable to the board currently on the treadmill, HTD drive shaft, tracking rollers, any worn bearings, re-powder coating of handrails and exterior hardware. The treadmill will then carry a 1 year parts and labor warranty. It is like getting a brand new WOODWAY at a fraction of the cost. *Prices above may not include shipping & handling. *Contact the WOODWAY Service Department or your Sales Representative to order at 1-800-966-3929. FORM: CV OWNERS MNUL REV: 2/12/10 APPR BY: MF 11 2 Chapter SPECIFICATIONS POWER REQUIREMENTS RUNNING BELT SPECIFICATIONS ENVIRONMENTAL SPECIFICATIONS FORM: CV OWNERS MNUL REV: 2/12/10 APPR BY: MF 12 Power Requirements The Curve is non-motorized and therefore does not require electricity from a wall outlet. The Curve display utilizes 2 AA batteries to power the LED windows. Batteries are included. To replace the AA batteries: On the back of the display there is a small plastic door with a tab, push the tab in to open the door. Replace AA batteries with proper positive and negative alignment. The display has (+) and (-) indicating which end of the battery should be placed in that location. Running Belt Specifications General Slats, overlapping, replaceable Slat type Rubber over aluminum support Running Belt Hardness Approximately 40 Shore A Running Area See detailed specifications/model (Ch.1) Standard Color Black Support 114 roller bearings, 12 roller guides Lateral movement +/- 8 mm Environmental Specifications Degree of Protection IP2x Operating Conditions Ambient Temperature Relative Humidity +10°C to +40°C (0°F to +104°F) 20 to 95% Transportation & Storage Conditions Temperature Range Relative Humidity -18°C to +49°C (0°F to +120°F) 20 to 95% Atmospheric Pressure Range FORM: CV OWNERS MNUL REV: 2/12/10 APPR BY: MF 700hPa to 1060 hPa (20.67 to 31.3 inches of Mercury) 13 3 Chapter TREADMILL INSTALLATION LOCATION REQUIREMENTS TRANSPORTING YOUR TREADMILL CURVE SET-UP FORM: CV OWNERS MNUL REV: 2/12/10 APPR BY: MF 14 Location Requirements Install your treadmill on a structurally sound surface. If it is to be used above ground level set it up near the corner of the room to ensure maximum support during highspeed use. The surface should be reasonably level to ensure minimum frame flexing. Do not place the treadmill directly on shag or plush carpeting because of the moving parts underneath. If the operating area is thickly carpeted, set the unit on a mat (WOODWAY has a selection of mats available for purchase if needed; call 1-800WOODWAY for details). This will reduce the lint that can get into the treadmill and also reduce carpet wear. Transporting Your Treadmill CAUTION: THIS TREADMILL IS HEAVY AND COULD CAUSE INJURY IF PROPER LIFTING TECHNIQUES ARE NOT UTILIZED. LIFTING BARS ARE SUPPLIED WITH THE TREADMILL TO MOVE THE TREADMILL. Lifting bars are inserted into each bottom corner of the treadmill. Do not pull or lift on the cosmetic covers. If a flat dolly is available, place the dolly underneath the treadmill and push it to the desired location. If the treadmill must be disassembled, the cosmetic covers and the handrail assembly could be removed for easier transportation. Curve Set-Up The Curve is designed to be disassembled for easier transportation , the treadmill base portion and handrail assembly can be separated to reduce weight and make a move more manageable. Step 1 FORM: CV OWNERS MNUL REV: 2/12/10 APPR BY: MF 15 • Place the handrail assembly in the desired location • Insert lifting bars into treadmill base, the black steel bars fit into two square holders on • the front of the treadmill (side opposite decal) • The treadmill base has wheels on the back portion, lifting with the black bars will allow the treadmill to move on the wheels NEVER USE THE CURVE TREADMILL WITHOUT THE HANDRAILS PROPERLY IN PLACE Step 2 FORM: CV OWNERS MNUL REV: 2/12/10 APPR BY: MF 16 Lift the front of the treadmill and slowly wheel it onto the handrail base placing the front feet of the treadmill base into the 2 circle cups on the handrail assembly. The treadmill must be directly in line with the rail of the handrails assembly to assure proper installation. Step 3 Connect the two ends of the display cable. (One end comes out of the handrail and the other end comes from underneath the treadmill) FORM: CV OWNERS MNUL REV: 2/12/10 APPR BY: MF 17 Curve Display Installation 1. Open the cardboard box that houses the display, un wrap the display and take the 4 allen head bolt and 5/32 allen wrench (provided) 2. First attached the two plug ends (one from the handrail and the other from the display) plug securely and make sure it clicks 3. Feed the extra cable back into the handrail 4. Line up the display on the handrail so that the 4 holes match up and the words are right side up for the user to read. Put the 4 allen head bolts into the four holes, be sure to put all four in loosely before tightening with the wrench. 5. Tighten securely with Allen wrench FORM: CV OWNERS MNUL REV: 2/12/10 APPR BY: MF 18 4 Chapter TREADMILL FUNDAMENTALS BELT SURFACE TRANSPORTATION SYSTEM SERIAL NUMBER PLACEMENT INCLINE SYSTEM POLAR HEART RATE FORM: CV OWNERS MNUL REV: 2/12/10 APPR BY: MF 19 Belt Surface The patented running belt is made of individual slats mounted on a continuous set of tooth belts. The tooth belts mesh with the front pulley assembly, which meshes with the drive motor. This results in no belt slippage. The individual slats are comprised of two materials: a rubber based surface and an aluminum T-shaped frame. The rubber material, approximately 3/8 inch thick, and the aluminum T-slat makes a WOODWAY the "softest treadmill running surface in the world". The rubber running surface greatly reduces shock of impact and helps reduce the local extremity pain associated with longterm running. The positive belt engagement eliminates friction and heat, and therefore increases the longevity of the running surface and treadmill itself. The WOODWAY rubber belt surface is unlike other treadmills (which normally utilize a cotton and nylon belt). All treadmills take time getting us to operating and using them. With your WOODWAY, you may find, at first, that the surface has a "grip" to it you have not experienced before. The more often you utilize your treadmill the more you will become accustomed to the feel of it. Like all treadmills, it is important not to drag your feet on a WOODWAY treadmill. Transportation System The transportation system is comprised of two bearing rail assemblies, an endless steel wire reinforced lateral belt, and 7-inch diameter toothed roller drums. The bearing rails support the running surface and are integral to reducing belt wear and friction. The two endless lateral belts have many key functions: they hold the individual slats together, transfer power to and from the motor and runner, and help keep the running belt from tracking to the left or right. The two bearing rails consist of three main parts: the bearing rail, individual bearings, and the bearing-supported roller guides. A smooth section of the lateral belts roll over the bearings and roller guides. The bearing rail supports all the bearings and roller guides and helps to distribute the local loads throughout the treadmill. The roller guides on each side assist to reduce tracking error and help support the running belt. The individual bearings on each side also evenly distribute the load across the treadmill. The toothed drums are used to eliminate any slippage. The drum assemblies have heavy-duty pillow blocks (bearings) which also reduce friction. This unique transportation system results in very little friction so you can simply push the running belt under your own power! FORM: CV OWNERS MNUL REV: 2/12/10 APPR BY: MF 20 Serial Number Placement Each WOODWAY treadmill is assigned a serial number when built. Depending on the year your model was built, it will have either a 7 – 8 digit alpha-numeric code, or a 9 digit numeric code. The serial number can be found on the front left section of the treadmill frame. The label also includes information about your particular treadmill. It lists input voltage and current, and the options and/or features of your treadmill. Please refer to your packing slip or invoice or contact WOODWAY USA (1 1-800-WOODWAY) to determine the features you may have ordered, if you are in doubt, with your treadmill. Polar ® Heart Rate Monitor The display board is equipped to project a user’s heart rate in conjunction with the use ® of a Polar Monitor. In order for the board to correctly display a user’s heart rate, the ® receiver within the display board must obtain a stable heart rate signal from the Polar transmitter. ® The Polar Heart Rate System consists of three main elements: 1) the Sensor/Transmitter, 2) the Chest Band/Strap and 3) the Monitor/Console. The receiver of the wireless ECG system is built into the monitor/console unit of the board. While operating under heart rate control modes, the computer monitors the exact measurement of and control over the activity of the heart. How to Wear the Chest Strap The Sensor/Transmitter is worn just below the chest and at the top of the abdomen, preferably directly on bare skin (not over clothing). The transmitter should be centered below the pectoral muscles (breasts). Once the strap is secured, pull it away from the chest by stretching the band, and moisten the conductive electrode strips located underneath the snaps. If you wish to wear the band over a shirt, moisten the shirt under the area of the electrode strip. The transmitter operates automatically while you are wearing it. It does not operate while it is disconnected from your body. However, as moisture may activate the transmitter, please wipe it dry after use. The chest band is washable. After you have detached the transmitter, wash the band in warm water, using mild soap, and rinse thoroughly in clean water. Never scrub the transmitter surfaces. FORM: CV OWNERS MNUL REV: 2/12/10 APPR BY: MF 21 The Transmitter You must be within three and a half feet of the receiver in order for the signal to transmit. Please take note that your transmitter may fluctuate erratically if you are too ® close to other Polar equipment. Maintain at least a three-foot distance between other ® Polar units. ® Note: Erratic heart rate reception may occur if the Polar Monitor is too close in proximity to strong sources of electromagnetic radiation, such as television sets, personal computers, electric motors and some other types of fitness equipment. Only one transmitter should be used inside the range of any one receiver as the receiver may pick up several signals simultaneously causing an inaccurate readout. FORM: CV OWNERS MNUL REV: 2/12/10 APPR BY: MF 22 5 Chapter SAFETY FEATURES FORM: CV OWNERS MNUL REV: 2/12/10 APPR BY: MF 23 One Way Drive Mechanism The Curve’s non-motorized running surface is designed for the user to control and actually drive or turn the belt. The innovative curved design coupled with gravity makes this possible. For the safety of the user, the running surface only rotates in a motion that allows for forward running use of the machine (as opposed to reverse). This provides a stable and nearly locked running surface for mounting and dismounting of the treadmill from the rear or back of the unit. THE CURVE SHOULD ONLY BE ENTERTED FROM THE BACK OF THE UNIT – NEVER STEP ON THE FRONT OF THE CURVE UNIT STEPPING ON THE FRONT OF THE UNIT WILL CAUSE THE BELT TO SPIN RAPIDLY Curved Parallel Handrails The Curve has curved parallel handrails which allow the user to maintain direct contact for safety and stability throughout the curve of the running surface. Users should maintain constant contact with the handrails for safety at all times. ALWAYS USER THE HANDRAILS WHEN ENTERING OR EXITING THE CURVE FORM: CV OWNERS MNUL REV: 2/12/10 APPR BY: MF 24 CAUTION LABELS The Curve has two caution labels expressing the fact that the treadmill is non-motorized and the belt spins freely and it must be entered from the back and health risks associated with overexertion. FORM: CV OWNERS MNUL REV: 2/12/10 APPR BY: MF 25 6 Chapter Curve LED DISPLAY BOARD DISPLAY OVERVIEW DISPLAY PARAMETERS FUNCTIONAL BUTTONS – PRE-SET PARAMETERS DESCRIPTION OF STATISTICS WORKOUT PARAMETERS FORM: CV OWNERS MNUL REV: 2/12/10 APPR BY: MF 26 Display Overview There are 5 seven-segment displays that show program statistics. The four-digit displays are programmed to display time in an 88:88 format. There are three functional buttons that are used to set, toggle and display data. Display Parameters Manual User control of SPEED Statistics display of TIME, CALORIES, DISTANCE & PULSE (HEART RATE) Display of treadmill SPEED FORM: CV OWNERS MNUL REV: 2/12/10 APPR BY: MF 27 Functional Buttons – Pre-Set Parameters MODE – Push to scroll through and select the display window which you would like to set (time, distance, calories and time). A small diamond will be shown in the upper left hand corner indicating the window is ready to be set. Pushing the MODE button will move the diamond to the next window. SET – Set the value of the window indicated by the MODE diamond by pressing the SET button, each time the button is pressed the value setting goes up in even increments appropriate for that statistical display. RESET – Resets the time value during normal operations. Also, during set-up resets the window indicated by the MODE diamond to zero. Description of Statistics SPEED - Displays the current speed in MPH TIME – Displays the workout/exercise time accumulated • Counts the total time from start of workout/exercise to finish, TIME display stops automatically if no exercise detected for 3 seconds • Workout/exercise time can be set in advance (see above instructions in Functional Buttons), when the time approaches the preset an alarm will beep DISTANCE – Displays the workout/exercise distance accumulated • Workout/exercise distance can be set in advance (see above instructions), when it approaches the preset distance the alarm will beep CALORIES – Displays the workout/exercise calories burned or accumulated • The calories value can be set in advance (see instructions above), when the calorie value approaches the pre-set value the alarm will beep ALARM – The display will “Beep” when the MODE, SET or RESET buttons are pressed AUTO ON/OFF & AUTO START/STOP – The display automatically detects use and the LED windows display data upon the belt moving. To reset the values follow the instructions provided above. The display will automatically shut off upon the treadmill remaining unused and the belt stationary for 8 minutes. FORM: CV OWNERS MNUL REV: 2/12/10 APPR BY: MF 28 Workout Parameters To Begin Workout Start walking while holding onto the handrails. This will trigger the display board. ALWAYS ENTER THE TREADMILL FROM THE BACK Active Controls During a workout, the user may reset any of the data display windows by scrolling to the window using MODE button and then pressing RESET. Ending a Workout To end a workout, gradually reduce walking speed while holding onto handrails. The display can be reset by scrolling to the windows using MODE and pressing RESET. The display will automatically turn off if the treadmill is stationary for 8 minutes. ALWAYS EXIT THE TREADMILL FROM THE BACK FORM: CV OWNERS MNUL REV: 2/12/10 APPR BY: MF 29 7 Chapter TREADMILL MAINTENANCE CLEANING AND INSPECTION LUBRICATION FORM: CV OWNERS MNUL REV: 2/12/10 APPR BY: MF 30 Cleaning and Inspection Periodic cleaning and inspection of your WOODWAY treadmill will help to lengthen the life while helping keep it looking like new. With this preventative maintenance it will be easier to spot problems that might not otherwise be found. Below is a guideline of our recommended cleaning and maintenance intervals. If your treadmill is located in a dirty environment or under heavy-duty use, cleaning and inspection should be implemented more often. Do not use abrasive brushes or cleaners, as they may scratch the paint and plastic surfaces. Do not soak any surface; the sensitive electronics may be harmed. CAUTION: Turn off treadmill and disconnect power cord before cleaning. Weekly: • Clean handrail, front display panel & cosmetic covers. • Check overall condition of the treadmill. • Move, and vacuum underneath the treadmill. Every Six (6) Months: • Vacuum inside the treadmill (remove cosmetic covers.) • Inspect all nuts and bolts. Tighten any that are loose. • Clean running surface. • Check drive belt – replace if shredding or teeth are missing. Yearly: • Grease front and rear roller bearings. Seasonally: • In autumn & winter remember that the dry climate in many regions of the country will cause a greater static discharge to occur when the treadmill is used. Be sure to spray the running surface with a staticide spray regularly to prevent static shock to the treadmill user. FORM: CV OWNERS MNUL REV: 2/12/10 APPR BY: MF 31 Lubrication Bearings Almost all of the bearings used in the treadmill are pre-lubricated and do not need to be greased. On a yearly basis, the four (4) bearings located at the front and rear shaft will need to be lubricated. Running Belt The teeth on the bottom of the running belt are pre-lubricated to aid in reducing noise. There is no need to lubricate the teeth. If running belt is rubbing against the side of the drive pulleys, then a small amount of grease (i.e. Molykote or equal) on the edges of the belt slats will help reduce noise. Apply grease to the teeth on the back drive shaft to help the belt stay aligned properly. FORM: CV OWNERS MNUL REV: 2/12/10 APPR BY: MF 32 8 Chapter WARRANTY INFORMATION FORM: CV OWNERS MNUL REV: 2/12/10 APPR BY: MF 33 Warranty Information Commercial Fitness Use Frame All Components 10 years 5 years Battery Operated Display 2 years Labor 1 year WOODWAY warrants that all products and accessories will be free from manufacturing defects according to the applications/terms listed above. The warranty period commences on the original date of purchase. This warranty is given only to the original purchaser. This warranty does not cover damage or equipment failure resulting from misuse, abuse, or failure to comply with electrical codes. Further, this warranty shall not apply if there is any modification to the products or accessories or if there is a failure to provide maintenance as outlined in the Owner's Manual. WOODWAY GIVES NO OTHER WARRANTIES, EITHER EXPRESSED OR IMPLIED. THE WARRANTY OF FITNESS FOR A PARTICULAR USE IS HEREBY DISCLAIMED. The buyer's remedy for breach of the expressed warranties contained herein shall be limited to the return of the product and accessories and repayment of the original purchase price. Provided, however, at WOODWAY selection, it may repair and replace the non-conforming goods or parts. WOODWAY shall not be liable for any incidental or consequential damages. Our Guarantee WOODWAY guarantees the repurchase of WOODWAY treadmill products for a period of up to five (5) years after original installation. A direct payment, or credit toward the purchase of a new WOODWAY, of 20% of the purchase price of the treadmill will be made to the original owner of a WOODWAY treadmill. This guarantee is limited to the original owner. Contact WOODWAY for further details. FORM: CV OWNERS MNUL REV: 2/12/10 APPR BY: MF 34 9 Chapter WRAP UP TROUBLESHOOTING PREVENTATIVE MAINTENANCE LOG NUMBERS TO KNOW FORM: CV OWNERS MNUL REV: 2/12/10 APPR BY: MF 35 Troubleshooting If you are having problems with your treadmill, please be prepared with answers to the following questions before calling our service center. QUESTIONS: • What is the make, model and serial number? • What happened prior to the problem? • Did the problem happen unexpectedly or did it progressively worsen over time? • Was someone using the treadmill at the time the problem occurred? • Was the treadmill in LOCKED or FREEWHEEL mode? • Explain any other symptoms that you feel are relevant. FORM: CV OWNERS MNUL REV: 2/12/10 APPR BY: MF 36 Preventative Maintenance Log DATE MAINTENANCE PERFORMED FORM: CV OWNERS MNUL REV: 2/12/10 APPR BY: MF BY RESULT 37 Numbers to Know Your Treadmill Serial #(s): _ ________________________________________________ Model/#_ _ ________________________________________________ Model/#_ _ ________________________________________________ Model/#_ _ ________________________________________________ Model/#_ _ ________________________________________________ Model/#_ _ ________________________________________________ Model/#_ _ ________________________________________________ Model/#_ _ ________________________________________________ Model/#_ (The serial number can be found on the back of the treadmill’s display board housing & also on the front/left section of treadmill frame – side cover must be removed to locate on the frame). FORM: CV OWNERS MNUL REV: 2/12/10 APPR BY: MF 38 800-WOODWAY ( 9 6 6 - 3 9 2 9 ) FORM: CV OWNERS MNUL REV: 2/12/10 APPR BY: MF 39