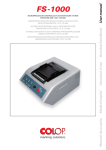
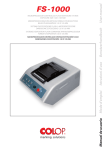
1
COMPUTER CONTROLLED
FLASH EXPOSURE SYSTEMS
UM-1200
OWNERS MANUAL
Version 1.04
2
Congratulations and thank you for your purchase of an Ultimark computer controlled flash exposure system. This
system represents the state-of-the-art in flash exposure stamp technology with microprocessor-controlled
electronics and semi-automatic operation. Before you begin using your machine please read this manual to insure
safe and proper operation.
PRODUCT DESCRIPTION
1. Scope of use
The Ultimark computer controlled exposure system has been designed to quickly and easily expose flash foam text plates in a
production environment. After loading the desired artwork, clear protective film, and text plate foam the clamping mechanism
of the UM-1200 will apply the even and precise pressure required for proper exposure to the text plate. Pressing a single
button will charge the system to the desired energy level and properly expose the text plate foam in one operation. The
exposed stamp text plates are now ready for immediate use in the assembly in the Ultimark Pre-Inked stamps.
IMPORTANT PRODUCT SAFETY INSTRUCTIONS
This product has been engineered and manufacured to insure your personal safety. To insure the proper installation and safe
operation please observe the following basic rules and keep this manual for future reference.
1. Power Conditions
Operate your product only from the type of power source indicated on the label located at the rear of the machine. All
machines are supplied with grounded power plugs. This plug will only fit into a grounded power outlet. Do not use with non
grounded power sources. It is highly recommended that a surge protector be used to help protect the machine from sudden
transient increases and decreases in electrical power.
Do not overload wall outlets, extension cords or surge protectors with other devices as this can result in a risk of fire or
electrical shock. Power supply cords should be routed so that they are not likely to be walked on or pinched by items placed
against them.
CAUTION: Before opening the case for any type of service procedure, unplug the machine for at minimum 15 minutes to
allow for any remaining charge in the capacitors to be fully dissipated. Electrical repairs should be made only by a licensed
electrician familiar with these types of electronics and capacitors.
2. Safety Features
The Ultimark exposure system is equipped with safety features that will protect the user (anti-shock protection, unintentional
exposure) under normal operating conditions.
To prevent the possibility of stray voltages in the machine, all case covers have been grounded, plus a thermal protection
(fuse) in the power supply area has been incorporated.
Triggering the exposure with the clamp in the open position is not possible due to a sensor placed within the clamping device.
Operation of the exposure mechanism is also blocked if the sensor is defective, removed or disconnected.
3. Machine Placement
Do not place equipment on any surface that is not properly supported for safe operation. The UM-1200 is approximately 29
pounds (14 kg). This machine should be placed on a sturdy, level, and clean work surface. Serious injury to the operator and
damage to the equipment can result from poor machine placement. This equipment has been designed to be operated from
a flat, level surface. Do not attempt to place the equipment on any non-level surface.
4. Ventilation
There are vent openings at the underside and cooling vents at the rear of the Ultimark exposure system that provide the
proper air circulation to the electronics for operation. Do not block any of these openings or restrict airflow around the
machine by placing this product in close proximity to other equipment or into confined spaces. Please allow for at least 10
inches (25 cm) of unobstructed area around the machine. Periodically check the intake fan filters to insure that they are
clean.
5. Heat and Cold
This product should be situated away from heat sources and other equipment that may generate excessive vibration, dust or
moisture. Avoid exposing unit to sudden temperature changes to prevent condensation inside this unit.
6. Attachments
Do not use any attachments not specifically recommended or supplied by Trodat with the Ultimark exposure system as this
may cause hazards.
3
CONTROLS AND FUNCTIONS
Front Panel
UM-1200
(1) POWER SWITCH - Press this switch to turn the power on/off to this unit. The switch will be lighted when the unit is
turned on and operating normally. The light within the switch will go off when the unit is turned off.
(2) POWER DIAL - The power dial will show the current energy level setting that each lamp will discharge when the
exposure is activated. The energy level is measured in Volts and has a 300-volt minimum to 700-volt maximum range.
The suggested default energy level is 600 volts. This setting is typically a good all purpose setting for most situations
from exposing a single stamp die to multiple stamp dies.
(3) STATUS LEDs - These two light emitting diodes (LED’s) provide information on the status of the top clamp and the
status of the exposure. The green Clamp Closed LED will light when the clamp is in the closed position and the LED will
go off when the clamp the top of the clamp is opened. The red System Status LED will light when an exposure is initiated
and remained lighted during the exposure process. The System Status Led will blink after the exposure cycle is
completed while the system prepares for the next exposure. Both the Status LED’s will blink if an exposure is attempted
with the clamp in the open position.
(4) FLASH RELEASE BUTTON - Press this button to execute an exposure. This button is only active with the clamping
mechanism in the fully closed and locked position.
(5) CLAMPING MECHANISM - This is for the compression of the foam text plates. The top of the clamp evenly applies
pressure and compresses the text plate before exposure. The top of the clamp moves away from the exposure area
during loading and unloading of the clamp. The exposure area of the UM-1200 machine is A6 sized or approximately
5.0” x 4.5”.
4
Rear Panel
UM-1200
(1) COOLING VENTS
These three cooling fans allow warm air to escape from the electronics of the unit in order to cool the internal components.
Do not block airflow around these cooling vents at the rear panel or to the airflow vents at the underside of the unit.
(2) FUSE HOLDER
This contains the fuse that provides overload protection for the unit. The fuse is a 250 volt 16 amperes fuse in 110 volt
specified machines and it is a 250 volt 10 amperes fuse in 220 volt specified machines.
(3) POWER PLUG
Insert power cord here to supply power to the unit. Use the grounded power cord provided.
(4) SERIAL NUMBER TAG
The model and serial number information for the unit is provided here for warranty and repair reference.
5
OPERATION
BASIC OPERATION
There are three components required in the flash exposure in the Ultimark system. They are (1) the printed artwork, (2) clear
protective film and (3) Ultimark text plate.
PRINTED ARTWORK REQUIREMENTS
The artwork for the exposure process should be printed using 600 dots per inch (DPI) laser printer on vellum (Trodat product:
VELLUM). The print should be right-reading (positive) and toner side up for use in the Ultimark exposure system. The
density of the toner is important to block the light of the print areas. You may need to adjust your print density setting of your
printer for optimal performance. See your printer’s owner manual.
The text or copy for the stamp should be surrounded by a black printable border that is the same overall size as the text plate
that will be exposed. Doing this will allow for easy placement of the text plate during the loading process. A second inner
boarder should be used representing the typesetting limits and centered within the black rectangle. This inner boarder should
be made yellow in color and very thin in line thickness so that it will not print on the vellum.
Templates are available for all Ultimark mount sizes for use in your typesetting software.
**IMPORTANT** - When typesetting copy for a layout of stamps for printing on vellum, leave at least a ½” (1.27mm) gap (¾”
or 2cm where possible) between stamps in your layout. This is to allow for quick easy placement of text plates and proper
exposure. Slightly smaller gaps may be used however having small gaps between stamps will increase the chance of
disturbing text plates that have been already placed in the layout.
CLEAR PROTECTIVE FILM
The clear protective film is placed on top of the printed vellum to separate the artwork from the text plate. (Trodat product
UMCP1000 CLEAR PROTECTIVE FILM) The clear protective film is necessary to prevent the toner from the printed vellum
from being deposited on the text plate due to the pressure and heat generated during the exposure process. It is not
recommended that printed vellum or clear protective film be reused for this reason.
ULTIMARK TEXT PLATES
Ultimark text plates have a carefully sealed lip around its perimeter that is captured perfectly within the patented retaining ring
of Ultimark Pre-Inked Mounts. One side of the text plate will be sealed with the stamp artwork and the other side will be
exposed to the ink cartridge in the assembly of the mount.
6
LOADING STAMPS FOR EXPOSURE IN UM-1200
STEP 1 – Place the printed artwork on vellum onto the glass in the exposure area. The vellum should be placed with the toner
side facing up and the copy should be right reading (not reversed or mirrored).
STEP 2 – Place a sheet of clear protective film (UM-CP1000) on top of the vellum in the exposure area.
**TIP** - Use a piece of removable transparent tape or a 3M Post-It book marking flags to secure the clear protective film to
the glass. This will prevent the vellum and clear protective film from sliding when you proceed to the next step. Stapling the
clear protective film to the vellum before placement onto the glass is also acceptable. **Important** When typesetting copy
for a layout of stamps for printing on vellum, leave a ½” (1.27mm) gap between stamps (¾” or 2cm where possible) in your
layout. This is to allow for quick easy placement of text plates and proper exposure.
STEP 3 – Gather the appropriately sized text plate(s) for your artwork. Using the black border that you made around your
text as a guide, place the text plate with the sealed side down on top of the clear protective film so that the text plate is in the
border of your artwork.
STEP 4 – Grasp the side of the clamp top and pivot the top towards the front of the unit to close.
STEP 5 – Grasp the handle of the clamp top and squeeze the locking bar.
STEP 6 - Swing the handle downwards and stop when the handle meets with resistance. Release the locking bar to lock the
clamp top in place.
You are now ready to expose the stamp dies.
7
OPERATION
Perform the following procedure to expose stamp text plates that have been loaded into the exposure unit.
STEP 1 – The green Clamp Closed LED will light and remain on while the top clamp secured in the locked position. Press
the red colored Flash Release button.
The red System Status LED will light and remain on while each of the three lamps are sequentially charged and flashed as a
part of the exposure procedure. The red System Status LED will blink at the completion of the exposure process as the
system prepares for the next exposure
STEP 2 – Open the clamp cover and remove the exposed stamp components.
NOTE: Both the Clamp Closed and System Status LED will blink in tandem if an exposure is initiated while the top clamp is in
the open position.
MAINTENANCE
Your new Ultimark exposure system has been designed for low maintenance operation as well as ease of use. There are
regularly scheduled maintenance requirements consisting of cleaning the glass and clamp compression plate as needed.
Please observe the following cleaning tips.
Cleaning the Exposure Glass
Unplug the unit for 10 minutes before performing any operations below. It is very important to keep the glass in the exposure
area clean and dust free. This will prevent any possibility of foreign objects interfering with producing a properly exposed
stamp die. Clean the glass with any household glass cleaner. Apply glass cleaner to a soft paper towel and then use the
towel to clean the glass. Do not spray any cleaners directly on the glass or any other part of the machine.
NOTE: The glass used in your Ultimark exposure system is specially formulated for strength and optimum transition of light
energy from the exposure to pass through it. Replace glass only with Trodat supplied exposure glass should it ever require
replacement. Do not clean this glass with any abrasive agents that can cause scratching in the surface.
Cleaning the Machine Body
Unplug the unit for 10 minutes before performing any operations below. Apply water or any mild household cleaner if needed
to a soft towel and wipe the surface of the machine (including display) clean. The towel should be damp not wet. Do not use
any solvent based cleaners to clean the unit; this may cause damage to the paint or display.
8
TECHNICAL SPECIFICATIONS
1. Power Supply (110V)
AC power supply ...................................................................................... 110V ± 10%
Frequency ............................................................................................... 60 Hz ± 5 %
Maximum Power consumption (when capacitors are charging) ............................. 7 A
Current (idle conditions) .................................................................................... 50 mA
Power supply protection ............................................................................1 fuse 10A
Grounding ...........................................................through third wire of the power cable
2. Power supply (220V)
AC power supply ..................................................................................... 220 V ± 10%
Frequency ............................................................................................... 50 Hz ± 5 %
Maximum Power consumption (when capacitors are charging) .......................... 3.5 A
Current (idle conditions) .................................................................................... 25 mA
Power supply protection .........................................................................1 fuse 6.3 A
Grounding ...........................................................through third wire of the power cable
3. Electrical parameters of device
Single charging cycle average time (Ucharge = 600 V)............................................. 20 s
Discharge cycle max. time .................................................................................... 30 s
Max. allowable number of cycles ........................................................60 cycles / hour
Single lamp life time ............................................................................. 40 000 flashes
Discharge power (Ucharge = 600 V)............................................................... total 1800J
9