1
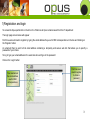
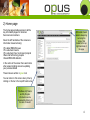
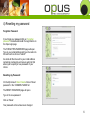
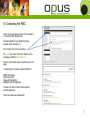
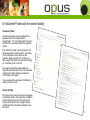
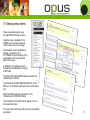
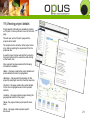
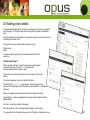
RBC-EM Volunteer Services Opus User Guide Version 1.0 1 Welcome to Opus Dear Volunteer Services team member, Welcome to Opus, a web portal designed to be used by all RBC volunteers. Opus is a members only portal that allows Volunteer Services to access and update the latest information regarding current and forthcoming projects including editing congregation, team and volunteer records. It also provides access to RBC-EM news and allows the team member to manage their personal details. This guide will introduce you to the key features of the portal and contains the following information: Section 1) Registration and login 2) Home page 3) Managing my account 4) Resetting my password 5) Contacting the RBC 6) Volunteer Finder and the search facility 7) Viewing news items 8) Updating general news items 9) Viewing volunteer details 10) Adding & deleting volunteer details 11) Editing volunteer details 12) Viewing team details 13) Adding team details 14) Editing & deleting team details 15) Adding congregation details 16) Editing & deleting congregation details 17) Adding congregation contact details 18) Editing & deleting congregation contact details 19) Viewing project details 20) Adding project details 21) Editing & deleting project details 22) Viewing and updating project documents 23) Adding site details 24) Editing & deleting site details 25) Editing details on the ‘Misc’ page 26) Opus help Page 3 4 5 6 7 8 9 10 11 12 13 14 15 16 17 18 19 20 21 22 23 24 25 26 27 28 2 1) Registration and login To access the Opus portal click on the link in the ‘Welcome to Opus’ email received from the IT department The login page screen below will appear First time users will need to register by typing the email address they use for RBC correspondence in the box and clicking on the ‘Register’ button An email will then be sent to that email address containing a temporary and secure web link that allows you to specify a password of your choice To log in type your email address in the username box and type in the password Click on the ‘Login’ button Your username is the email address used for RBC correspondence First time users need to register to obtain a password 3 2) Home page The home page provides access to all the key information pages for Volunteer Services team members Down the left hand side of the screen are information boxes itemising: The latest RBC-EM news The volunteer’s teams The volunteer’s four most recent projects Recent & forthcoming projects Overall RBC-EM statistics At the end of each session always log out using the ‘Logout’ link located in the top right hand side of the page In the centre of the screen there are links to other areas including access to updating your personal details These links are written in green text You can return to this screen at any time by clicking on ‘Home’ in the top left hand corner The News, My Teams and My Projects information can be accessed by clicking on the item of interest 4 3) Managing my account To access the page to manage your account click on personal details on the home page under ‘Common Tasks’ or click on [My Account] in the top right hand corner of the screen The My Account: Basic Details screen will open This page provides an overview of your personal details A list of available options to update your personal information will appear under COMMON TASKS To update your personal information select the required item from the list For example click on ‘Change user name’ and follow the on screen instructions To update your contact details click on contact underneath My Account: Basic Details The My Account: Contact Details page will open Type in the new information and click on the appropriate ‘update’ button To update your emergency contact details click on emergency underneath My Account: Basic Details Click on basic to return to the My Account: Basic Details screen 5 4) Resetting my password Forgotten Password If you forget your password click on Forgotten password? located underneath the login button on the Opus login page The FORGOTTEN PASSWORD page will open. Type in your email address and type the code into the text box then click on ‘Submit’ An email will then be sent to your email address containing a temporary and secure web link that allows you to specify a new password of your choice Resetting my Password On the My Account: Basic Details click on ‘Reset password’ in the ‘COMMON TASKS’ list The RESET PASSWORD page will open. Type in the new password Click on ‘Reset’ Your password will now have been changed 6 5) Contacting the RBC There may be occasions when it is necessary to contact a RBC department Contact details for key departments are located under ‘Contact Us’ The ‘Contact Us’ links are located: In green text under ‘Common Tasks’ on the homepage entitled Contacting Us On the main black menu bar at the top of the page ‘Contacting Us’ includes contact details for: RBC Information Volunteer Data Opus Administration Badges and Photographs ‘Contact Us’ also contains team specific contact details for: Team overseers and assistants 7 6) Volunteer Finder and the search facility Volunteer Finder At times a volunteer may be needed with a particular skill or that meets specific requirements. The ‘Volunteer Finder’ function will find all the volunteers that fit the required criteria The 'Volunteer Finder’ can be located on the home page under ‘common tasks’, by clicking on the ‘Volunteer Finder’ button on the members page of a team or by clicking on ‘Misc’ page in the black menu bar and clicking on ‘Volunteer Finder’ in the list By using the drop down boxes select the required criteria then click ‘Find’. All volunteers matching the criteria will appear below the ‘Find’ button on the page You can access the volunteers’ full details by clicking on their names Search Facility By typing in a key word such as a congregation or volunteer name in the search box located in the top right hand corner of the screen and clicking on the search icon a page will open containing all the information available on the key word 8 7) Viewing news items There are several ways to view the latest RBC-EM news in Opus Headline news is available in the ‘NEWS’ box on the left hand side of the screen on the home page Team specific news is available by clicking on the team in the ‘MY TEAMS’ box and clicking on the news button in the top right hand side of the screen In addition it is possible to receive the latest news updates by receiving a RSS feed To receive RSS feeds a RSS reader will need to be installed via the Internet To subscribe to the RBC-EM RSS feed click on the RSS icon in the bottom right hand corner of the News box When the RSS feed page opens click on the ‘Subscribe to the RSS feed’ button The ‘Subscribe to this feed’ box will appear, click on the ‘Subscribe’ button The next screen will tell you that you have successfully subscribed 9 8) Updating general news items Volunteer Services are able to add general news items that the RBC-EM volunteers can access by the methods explained in section 7 of this guide To add a general news item click on ‘Adding a general news item’ on the Welcome page under Common Tasks The Insert: General News page will open Type the news item title in the box and click on the ‘Add and Edit’ button The ‘NEWS ITEM’ page will open. Type in the news item in the box containing the instruction ‘Awaiting content’. This instruction will need to be deleted before starting to type in the news item. Format the text as required using the buttons in the tool bar Once the news item has been checked click on the ‘Save’ button The news item will then appear under ‘RECENT NEWS’ with the date and [edit] and [delete] options If a news item is no longer required then it can be deleted. A box will appear asking you to confirm the deletion. Click ‘OK’ 10 9) Viewing volunteer details To access volunteers’ details click on ‘Volunteers’ in the top left hand corner on the black menu bar that runs along the top of the page. The Volunteers: RBC page will then open. This page opens on the regular RBC volunteers details listed in alphabetical order Underneath the Volunteers: RBC page title are links to the different classifications of RBC volunteers. These are: RBC – regular RBC volunteers Co-opted – RBC volunteers from another RBC region assigned to work on a particular project Local – volunteers from the local congregation who are not RBC volunteers Committee – RBC-EM committee members Open the page of the volunteers’ class that is to be edited and the page will open listing all the volunteers This list can be sorted using the drop down box by: Forename Surname Team A specific volunteer can be searched for by entering the volunteer’s name in the search box and clicking on the search icon The volunteers’ list can be refined by using the tick boxes on the left of the page selecting or de-selecting ‘Overseers only’ To scroll through the volunteers’ list use the buttons located next to the search box These buttons navigate to the next or previous page These buttons navigate to the first and last page 11 10) Adding & deleting volunteer details To Add a Volunteer To ‘Add a volunteer’, ‘Edit a volunteer’ and ‘Delete a volunteer’ click on the appropriate icon Click on the class of volunteer where the new volunteer’s details are to be added under Volunteer: RBC. For example ‘local’ or ‘co-opted’. The page opens on regular RBC volunteers so if you are adding a regular volunteer stay on the first page Click on the ‘Add a Volunteer’ icon with the green plus symbol located in the top left hand corner of the page Add Edit Delete The Add: RBC Volunteer page will open. Complete the form with the volunteer’s details. The process can be discontinued at any time by clicking on the ‘Cancel’ button To continue the process click on the ‘Add & Edit’ button at the bottom of the page This will then allow you to enter the volunteer’s other details by clicking on each page where you have information such as emergency contacts and skills After inputting each item click on the appropriate ‘Update’ or ‘Save’ button To Delete Volunteer details Click on the volunteer’s name in the list on the RBC: Volunteers page to open their ‘PERSONAL DETAILS’ page and click on the ‘Delete Volunteer’ icon with the red bar symbol in the top left hand corner A Delete: RBC Volunteer page opens with the buttons: ‘Delete’ and ‘Cancel’. Click on the appropriate button as follows: Delete: To remove the record completely Cancel: To discontinue the deletion process To navigate back to the Volunteers main page click on ‘Volunteers’ in the top left hand side of the page in the black menu bar 12 11) Editing volunteer details To Edit A Volunteer To edit the details of an existing volunteer click on their name in the list on the RBC: Volunteers page and their ‘PERSONAL DETAILS’ page will open Click on the ‘Edit Volunteer’ icon with the blue pen symbol. This allows you to edit their details as follows: Personal details – including contact details and congregation Emergency contacts- including emergency medical notes Teams – this allows you to add or delete a volunteer from a team Skills – including qualifications Notes – including interview details After editing each item click on the appropriate ‘Update’ or ‘Save’ button To navigate back to the Volunteers main page click on ‘Volunteers’ in the top left hand side of the page in the black menu bar 13 12) Viewing team details To view information about your teams click on the required team in the ‘MY TEAMS’ box on the left hand side of the screen The team’s page will open showing the contact details of the overseer and assistant Under Team: Team Name in the top right hand corner there are other pages that contain additional team specific information Team specific information is available by clicking on the relevant page name These include: Members- this page provides information on all the team members including contact details Bookings – this page lists all team members’ bookings on recent projects Statistics – this page shows the team’s statistics on recent projects News – this page contains all the latest team news updated and managed by the overseer Docs – this page contains useful documents specific to your team updated and managed by the overseer 14 13) Adding team details To access team details click on ‘Teams’ on the black menu bar that runs along the top of the page. The ‘Teams’ page will open listing all the teams in alphabetical order. A specific team can be searched for by entering the team’s name in the search box and clicking on the search icon To scroll through the team list use the buttons located next to the search box To Add a New Team Click on the ‘Add a Team’ icon with the green plus symbol located on the left of the page. The Add: Team page will open. Complete the form with the team’s name and other requested information The process can be discontinued at any time by clicking on the ‘Cancel’ button To continue the process click on the ‘Add & Edit’ button at the bottom of the page The Edit Team: Team Name will open. Under the team name are links to the other pages where information can be inputted if it is available. These are: Basic – including the overseers’ and assistants’ details Members – including the facility to add or remove team members The ‘news’ and ‘docs’ pages are managed by the overseers After editing each item click on the appropriate ‘Update’ or ‘Save’ button To navigate back to the Teams main page click on ‘Teams’ on the black menu bar 15 14) Editing & deleting team details To Edit a Team Select a team from the list on the ‘Teams’ page. The Team: Team Name page will then open. Click on the ‘Edit Team’ icon with the blue pen symbol in the top left hand corner of the page The Edit Team: Team Name will open. Under the team name are links to the other pages where information can be inputted if it is available. These are: Basic – including the overseers’ and assistants’ details Members – including the facility to add or remove members and to move team members between primary and secondary team membership The members’ list can be sorted by forename or surname by using the drop down box The ‘news’ and ‘docs’ pages are managed by the overseers After editing each item click on the appropriate ‘Update’ or ‘Save’ button To Delete Team Details Click on the team’s name to open the ‘Teams’ page and click on the ‘Delete Team’ icon with the red bar symbol in the top left hand corner A Delete: Team page opens with the buttons: ‘Delete’ and ‘Cancel’. Click on the appropriate button as follows: Delete: To remove the record completely Cancel: To discontinue the deletion process To navigate back to the Teams main page click on ‘Teams’ on the black menu bar 16 15) Adding congregation details To access congregation details click on ‘Congregations’ on the black menu bar that runs along the top of the page. The ‘Congregations’ page will open listing all the congregations in alphabetical order A specific congregation can be searched for by entering the congregation’s name in the search box and clicking on the search icon To scroll through the congregation list use the buttons located next to the search box To Add a New Congregation Click on the ‘Add a Congregation’ icon with the green plus symbol located on the left of the page. The Add: Congregation page will open. Complete the form with the congregation’s name and select a Kingdom Hall from the drop down box. The process can be discontinued at any time by clicking on the ‘Cancel’ button To continue the process click on the ‘Add & Edit’ button at the bottom of the page The Edit Congregation: Congregation Name page will open. Under the congregation name are links to the other pages where information can be inputted if it is available. These are: Basic – to update the congregation name Sites – select the location of the Kingdom Hall from a drop down box Contacts – to add key contacts for the congregation After editing each item click on the appropriate ‘Update’ or ‘Save’ button To navigate back to the Congregations main page click on ‘Congregations’ on the black menu bar 17 16) Editing & deleting congregation details To Edit a Congregation Select a congregation from the list on the ‘Congregation’ page. The Congregation: Congregation Name page will then open. Click on the ‘Edit Congregation’ icon with the blue pen symbol in the top left hand corner of the page The Edit Congregation: Congregation Name page will open. Under the congregation name are links to the other pages where information can be inputted if it is available. These are: Basic – to update the congregation name Sites – select the location of the Kingdom Hall from a drop down box Contacts – to add key contacts for the congregation After editing each item click on the appropriate ‘Update’ or ‘Save’ button To Delete Congregation Details Click on the congregation’s name to open the ‘Congregations’ page and click on the ‘Delete Congregation’ icon with the red bar symbol in the top left hand corner A Delete: Congregation page opens with the buttons: ‘Delete’ and ‘Cancel’. Click on the appropriate button as follows: Delete: To remove the record completely Cancel: To discontinue the deletion process To navigate back to the Congregations main page click on ‘Congregations’ on the black menu bar 18 17) Adding congregation contact details To access congregation contact details click on ‘Contacts’ on the black menu bar that runs along the top of the page. The ‘Congregation Contacts’ page will open listing all the congregation contacts in alphabetical order This list can be sorted using the drop down box by: Forename Surname Congregation A specific congregation contact can be searched for by entering the congregation contact’s name in the search box and clicking on the search icon To scroll through the congregation contact list use the buttons located next to the search box To Add a New Congregation Contact Click on the ‘Add a Contact’ icon with the green plus symbol located on the left of the page. The Add: Contact page will open. Complete the form with the contact’s details including their appointment in their congregation under ‘Category’ and then select the congregation from the drop down box. The process can be discontinued at any time by clicking on the ‘Cancel’ button To continue the process click on the ‘Add & Edit’ button The Edit Contact: Contact Name page will open. Complete the form clicking on each appropriate ‘update’ button once completed To navigate back to the Congregation Contacts main page click on ‘Contacts’ on the black menu bar 19 18) Editing & deleting congregation contact details To Edit a Congregation Contact Select a contact from the list on the ‘Congregation’ contacts’ page. The Name Contact Name page will then open. Click on the ‘Edit Congregation Contact’ icon with the blue pen symbol in the top left hand corner of the page The Edit Contact: Contact Name page will open. Update the form as required After editing each item click on the appropriate ‘Update’ or ‘Save’ button To Delete Contact Congregation Details Click on the congregation contact’s name to open the ‘Contact: Name’ page and click on the ‘Delete Congregation Contact’ icon with the red bar symbol in the top left hand corner A Delete: Contact page will open with the buttons: ‘Delete’ and ‘Cancel’. Click on the appropriate button as follows: Delete: To remove the record completely Cancel: To discontinue the deletion process To navigate back to the Congregation Contacts main page click on ‘Contacts’ on the black menu bar 20 19) Viewing project details Project specific information is available by clicking on ‘Projects’ in the top left hand corner of the home page This will open up the ‘Projects’ page and the projects will be listed The projects can be sorted by either project name or by date by selecting the required sort from the drop down box A specific project can be searched for by entering the project name into the search box and clicking on the search icon Once a project has been selected the following information is available: Basic – this page contains the project details such as site address and client congregations Bookings – this page lists the bookings for this project by selecting a team from the drop down box Contacts - this page contains the contact details for the client congregations and other important contacts Location – this page contains a map showing the geographical location of the project News- this page contains project specific news items Docs – this page contains project specific documents 21 20) Adding project details To access project details click on ‘Projects’ on the black menu bar that runs along the top of the page. The ‘Projects’ page will open listing all the projects in alphabetical order A specific project can be searched for by entering the project’s name in the search box and clicking on the search icon The projects list can be sorted using the drop down box by: Project name Date To scroll through the project list use the buttons located next to the search box To Add a New Project Click on the ‘Add a Project’ icon with the green plus symbol located on the left of the page. The Add: Project page will open. Complete the form with the project’s name. The process can be discontinued at any time by clicking on the ‘Cancel’ button To continue the process click on the ‘Add & Edit’ button The Edit Project: Project Name page will open. Under the project name are links to the other pages where information can be inputted if it is available. These are: Basic – to update the project name and to add work days for the project Congregations – assign congregations to the project and the Kingdom Hall site address details Contacts – to add key contacts for the project After editing each item click on the appropriate ‘Update’ or ‘Save’ button To navigate back to the Projects main page click on ‘Projects’ on the black menu bar 22 21) Editing & deleting project details To Edit a Project Select a project from the list on the ‘Projects page. The Project: Project Name page will then open. Click on the ‘Edit Project’ icon with the blue pen symbol in the top left hand corner of the page The Edit Project: Project Name page will open. Under the project name are links to the other pages where information can be inputted if it is available. These are: Basic – to update the project name and to add work days for the project Congregations – assign congregations to the project and the Kingdom Hall site address details Contacts – to add key contacts for the project News – to add or update specific news items for the project Docs – to add or update specific documents for the project After editing each item click on the appropriate ‘Update’ or ‘Save’ button To Delete Project Details Click on the project’s name to open the ‘Projects’ page and click on the ‘Delete project’ icon with the red bar symbol in the top left hand corner A Delete: Project page will open with the buttons: ‘Delete’ and ‘Cancel’. Click on the appropriate button as follows: Delete: To remove the record completely Cancel: To discontinue the deletion process To navigate back to the Projects main page click on ‘Projects’ on the black menu bar 23 22) Viewing and updating project documents Viewing project documents Project documents can be viewed by clicking on ‘docs’ in the top right hand corner under Project: Project Name The documents will be listed under ‘PROJECT DOCUMENTS’. Click on the title of the document of interest to open it Updating project documents Documents can be uploaded to be viewed by RBC volunteers by: •Preparing the document and saving it in a PDF format in an easily accessible location •Open the ‘docs’ page in Opus under ‘Projects’ and click on ‘Browse’ •A window will open where you will need to navigate to where the document has been saved •Click on the document to be uploaded and click on the ‘Open’ button •The path to the document will then appear in the ‘Browse’ box •Click ‘Upload Document’ •The document will then appear under ‘PROJECTS DOCUMENTS’ with the date and [edit] and [delete] options If a document is no longer required then it can be deleted. A box will appear asking you to confirm the deletion. Click ‘OK’ 24 23) Adding site details To access site details click on ‘Sites’ on the black menu bar that runs along the top of the page. The ‘Kingdom Hall & Other Properties’ page will open listing all the properties in alphabetical order A specific property can be searched for by entering the property’s name in the search box and clicking on the search icon To scroll through the property list use the buttons located next to the search box To Add a New Site Click on the ‘Add a Site’ icon with the green plus symbol located on the left of the page. The Add: Site page will open. Complete the form with the site’s name and other details The process can be discontinued at any time by clicking on the ‘Cancel’ button To continue the process click on the ‘Add & Edit’ button The Edit Site: Site Name page will open. Under the property name are links to the other pages where information can be inputted if it is available. These are: Basic – to update the site name and address details Congregation- to select the congregations for the Kingdom Hall site from the drop down box. Click ‘Add’ to assign the congregation. If there is more than one congregation at the Kingdom Hall site then one of the congregations will need to designated as ‘owner’ by clicking the ‘Add as Owner’ button After editing each item click on the appropriate ‘Update’ or ‘Save’ button To navigate back to the Sites main page click on ‘Sites’ on the black menu bar 25 24) Editing & deleting site details To Edit a Site Select a site from the list on the ‘Sites’ page. The Site: Site Name page will then open. Click on the ‘Edit document’ icon with the blue pen symbol in the top left hand corner of the page The Edit Site: Site Name page will open. Under the site name are links to the other pages where information can be inputted if it is available. These are: Basic – opens the DETAILS page to update the site name and address details. There is also an option to upload a photograph of the site by: •Preparing the photograph and saving it in a jpeg format in an easily accessible location •Click on the ‘Browse’ button •A window will open where you will need to navigate to where the photograph has been saved •Click on the photograph to be uploaded and click on the ‘Open’ button •The path to the photograph will then appear in the ‘Browse’ box •Click ‘Upload Photo’ •The photograph will then appear under ‘PHOTO’ Congregation- to select the congregations for the Kingdom Hall site from the drop down box. Click ‘Add’ to assign the congregation. If there is more than one congregation at the Kingdom Hall site then one of the congregations will need to designated as ‘owner’ by clicking the ‘Add as Owner’ button After editing each item click on the appropriate ‘Update’ or ‘Save’ button To Delete Site Details Click on the site’s name to open the ‘Sites’ page and click on the ‘Delete site’ icon with the red bar symbol in the top left hand corner A Delete: Site page will open with the buttons: ‘Delete’ and ‘Cancel’. Click on the appropriate button as follows: Delete: To remove the record completely Cancel: To discontinue the deletion process To navigate back to the Sites main page click on ‘Sites’ on the black menu bar 26 25) Editing details on the ‘Misc’ page The ‘Misc’ page contains links to update other important information relating to difference aspects of the RBC. Access this page by clicking on ‘Misc’ on the black bar The Miscellaneous page will open. This page contains links to other pages that can be updated and edited as required. These include: Meetings – Add or amend RBC meeting details General News – upload general news items to be read by RBC volunteers Dietary – update the dietary requirements of RBC volunteers. For example vegetarian Skills & Qualifications – update skills and qualifications of RBC volunteers. Contact us – to edit the ‘Contact Us’ page that is used by RBC volunteers to contact certain RBC teams such as RBC Volunteers or Opus administration Volunteer Finder – to find volunteers with specific skills After making the necessary amendments always click on the appropriate ‘save’ or ‘update’ button 27 26) Opus Help There is an additional help feature if more detailed information on the functionality of Opus is required The ‘Help’ document link is located in the top right To access this document click on ‘Help’ in the top right hand corner The ‘Help’ document will then open Down the left hand side is a contents list showing a comprehensive guide to all the features of Opus There is also a ‘Keyword Index’ and a ‘Search’ tab where required information can be searched for The ‘Help’ document opens in a new window The Opus website remains open in the original window To access the ‘Keyword Index’ and the ‘Search’ function click on the appropriate tab To navigate back to the Opus website click on the ‘Opus’ tab at the top of the browser 28


![Village Hall User Guide [prototype: 6th March, 2008] Welcome to](http://vs1.manualzilla.com/store/data/006893154_1-ed1bdbd64c2d646fd5348e7f1385fe89-150x150.png)