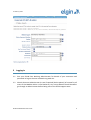
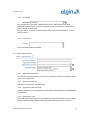
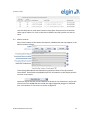
1
Ref EEMUG_120320
ELGIN is a trading style of
Roadworks Information Limited
Company Number: 07589848
ELGIN EToN Module
User Guide
ELGIN
John Carpenter House, John Carpenter Street
London EC4Y 0AN
Ref EEMUG_120320
ELGIN EToN Module User Guide
2
Ref EEMUG_120320
1
Introduction
1.1
The Elgin EToN Module, is an extension to the web based Elgin service
(eton.roadworks.org formerly www.elgin.gov.uk ). The module will either be set
up to run for notices or for permitting. This enables Highways Authorities to create
and submit EToN notices or to apply for permits for road works and other
noticeable activities as required by the Traffic Management Act. This document
provides details on how to generate a notice or permit application, but does not
provide guidelines for the implementation of the TMA. Please see your local
Traffic Manager or your Elgin Eton Module Administrator for these guidelines. For
further technical information please refer to the details provided in Section 10.
1.2
Each section will show part of the web page, interspersed with explanations.
Much of the information will be hidden from initial view like the notice search or
the agreements. By pressing on the down arrow or the cross you can expand these
sections. To close, press the up arrow or minus sign. They can be closed and
expanded as necessary. Hovering over the question mark will display help. Some
drop down boxes will supply multiple options. These can be selected by holding
down the CTRL key whilst selecting. Similarly by holding the down the CRTL key,
selected values can be unselected by clicking on again.
1.3
This user guide is applicable to both noticing and permitting, the difference being
the notice types available.
1.4
The figure below shows the opening screen for the Eton Module for Notices which
is the notice generation page. The opening screen is similar for permits.
ELGIN EToN Module User Guide
3
Ref EEMUG_120320
2
Logging In
2.1
See your ELGIN Eton Noticing Administrator for details of your username and
password to log on the eton.rodworks.org web site.
2.2
We ask that one Administrator (or two if required) be the point(s) of contact for all
users of the Module within a Local Authority. Any user problems should therefore
go through an Administrator before being sent to the ELGIN support team
ELGIN EToN Module User Guide
4
Ref EEMUG_120320
3
3.1
Recent Changes
Notice Search
•
3.2
The notice search has been updated to allow multiple criteria in the search
Multiple USRNs (CC Mode)
•
Deselecting of USRN is now on the notice page as well as the CC grid.
•
If sending more than one CC notice then these will form a Notice Group,
allowing you to send further notices together. This replaces the Project Group.
ELGIN EToN Module User Guide
5
Ref EEMUG_120320
4
Sample Initial Notice
The default notice when entering the system is an initial notice. This is not the only
notice that is available, but is used as an example within this document.
This section goes through the process of populating each of the elements for this
notice type, this would apply to a greater or lesser extent to all notices/permits.
All mandatory fields are in bold. Sections that are closed up (showing the Plus sign)
are optional. If populating one of these sections all mandatory fields are required
in that section.
4.1
Notice Type
A new notice can be changed to Forward Planning if required. The drop down
below is from the permit option.
4.1.1 Sender Details
Select the Operational District that you are sending notices for. Do not leave this
on the default unless you are working for them.
The first time a user generates a notice they may need to fill in their name and
email address in the following boxes. If your name does not appear in the drop
down list then add it using the middle box. The e-mail address is used to send
alerts giving you reminders of when follow up notices are required.
ELGIN EToN Module User Guide
6
Ref EEMUG_120320
The senders information is used to identify the individual that sends in the notices.
It is recorded as part of the xml but not part of the Eton data that gets added into
the register.
When you first enter yourself on the system, the system will ask whether your
name should be associated with just the current Operational District (OD) or all
ODs. Unless you really carry out work for a wide range of ODs, you should select
just the current district. Otherwise the lists will become tiresomely long for all
users. If you need to be added to the list for other districts later, contact your
ELGIN Eton Module Administrator who can do this for you.
Once you have submitted your notice, you will then be able to select yourself from
the drop down list in the future.
4.1.2 Works Location
In a change to previous versions the location has now moved up the order of
notice elements for the initial notices. Here the emphasis is on using the map to
pick up the position. The default state of the map shows no other information, but
additional layers can be viewed by switching the layers on, such as planned works,
restrictions and the street gazetteer.
Please note that not all map layers are available at all scales. You may need to be
zoomed in for some to become active.
If you check for conflict first and plan your works around this you are more likely
to have your notice accepted.
On first entering a notice, the location map will default to your local authority.
Once a position has been located for a works, subsequent notices for that works
will default to that location.
Use the zoom and pan tools on the map to home in on the area and then the road
or alternatively use the Zoom to drop down box to find the USRN by entering the
street name and doing a search.
ELGIN EToN Module User Guide
7
Ref EEMUG_120320
Get Point Coordinates
Pan/Zoom into selected area
Map Layer control
Get Line Coordinates
Get Polygon Coordinates
Double Click to finish both line and polygon on the map
Search facility.
Select type from
List then enter
details
It is here at the works location stage that it is determined whether multiple
notices are to be created. If a polygon or line is entered covering a number of
USRNs then you can enter CC mode.
A popup will be displayed listing the USRN(s) you have currently selected. Select
Yes, to return to the main page, No, to return to the map. USRNs that are not
required can be deselected when you return to the main page.
Both single and multiple notice/permit modes continue in the same way until the
submit button is pressed. All values will be replicated for CC mode apart from the
ELGIN EToN Module User Guide
8
Ref EEMUG_120320
works reference. See section 6 on CC mode to see how to edit or delete any of the
CC mode created notices.
4.1.3 Provisional Street
If no USRN can be located then a provisional street can be used. Tick the Use
Provisional Street? Box. You will then need to enter the details into the following
fields.
Provisional street details should only be used if there is no street information
available. Some authorities like to be contacted in advance to confirm that a
provisional street is required. Please check with your ELGIN Eton Module
Administrator to confirm arrangements.
4.1.4 Section 58 required
If your Administrator has activated this option, you will see a check box. You
should tick this box if a section 58 restriction is required after the works are
completed. By ticking this box the operator of the Register will be alerted that a
proposed restriction/restriction notice needs to be sent out when this notice is
received.
4.1.5 Recipient
The recipient is the operational district that you are sending the information to.
This should be the operational district of your Street works register and will be
automatically populated depending on the USRN(s) selected. This should not need
to change. The ASD which determines this will also determine whether or not to
send a Permit notice rather than a normal notice if the LA has instigated permits.
ELGIN EToN Module User Guide
9
Ref EEMUG_120320
4.1.6 Restricted
Only change this if you have a good reason for the works details not to be
published outside the internal works register. There are two main reasons why
notices would be restricted.
They are either in a security-sensitive location or they are submitted as a test or
practice notice.
4.1.7 Comments
Enter comments about the works.
4.2
Notice Agreements
4.2.1 Agreement Reference
This will be a code provided to you by the co-ordinator of the Streetworks register
if there is an agreement.
4.2.2 Agreement Contact
The name of the person you dealt with.
4.2.3 Agreement Date and Time
The date and time of your telephone conversation with them can be selected from
the calendar.
4.2.4 Agreement Type
The same agreement may cover more than one type of permission. You can select
several types by holding down the Ctrl key while clicking on items in the list.
ELGIN EToN Module User Guide
10
Ref EEMUG_120320
4.3
Project Details
Project information is optional, unless in CCmode, allowing you to cross-reference
all the notices that you consider part of the same project. The project reference
follows the same naming convention as the works reference below.
4.4
Works Details
4.4.1 Works Reference
Each works must have a unique reference. The first 5 characters of the reference
are determined by the Operational District and must not be changed. You can add
up to 19 further characters. Valid characters are uppercase alphabetic A-Z,
numeric characters 0-9 and the separators “/” and “-“. Spaces should not be used.
4.4.2 Works Category
Select the appropriate category from the drop down list. There are 5 categories,
Major, Standard, Minor, Immediate-Urgent and Immediate-Emergency. The
category will affect the notice sequence required and the notice periods.
ELGIN EToN Module User Guide
11
Ref EEMUG_120320
If major is selected for works that are identified in an undertaker’s annual
operating programme or are normally planned or known about at least six months
in advance of the proposed start date and the works are less than 11 days then
tick the box to remove the duration validation for this notice. The box does not
need to be ticked if a road closure.
4.4.3 Charge Category
Use the drop down menu to select the appropriate option.
4.4.4 Works Description
Should be a succinct description of the nature of the works that enables a
coordinator to understand what is involved.
4.4.5 Phase Type
Use the drop down menu to select the appropriate option.
4.4.6 Start Date
Use the calendar at the right hand side to select the dates or enter as a date in the
format of dd/mm/yyyy.
ELGIN EToN Module User Guide
12
Ref EEMUG_120320
Populating the Actual Start Date and Time will depend on the works category.
4.4.7 End Date
Use the calendar at the right hand side to select the dates or enter as a date in the
format of dd/mm/yyyy.
4.4.8 Outside Working Hours
Use the drop down menu to select the appropriate option.
4.5
Additional Works Location Details
By pressing the plus sign at this stage you can view the coordinates you digitized
earlier.
Pressing the minus sign will hide the details
This should contain a succinct description of where on the road your works are. It
may also be helpful if you include indications of where (carriageway / verge
ELGIN EToN Module User Guide
13
Ref EEMUG_120320
footway / cycleway) you will be working, as this is no longer catered for separately
on the notice.
If in CC mode you will see the above rather than the text box. The location
description for each road can be set after the submit button has been pressed.
In the 3 fields above select the appropriate response from the drop down lists.
4.6
Conditions (Permits Only)
If a condition type or condition types are selected then explanatory text should be
added in the text field.
4.7
Inspection Units
Enter the estimated number of inspection units.
ELGIN EToN Module User Guide
14
Ref EEMUG_120320
4.8
Works Contacts
The works contact information is optional in Eton however this can be made
mandatory by your Administrator if your register requires the information. A
record is kept of previous details to allow for easy population of the fields by using
the drop down lists.
That is the end of filling in the details. To send the form press the Submit button
see the Sending the Notice section below.
ELGIN EToN Module User Guide
15
Ref EEMUG_120320
5
5.1
Follow Up Notices
Notice Search
To access previous notices use the search notice facility at the top of the page.
Press the down arrow to open.
If recalling previous notices please be aware that once a notice has been
submitted in a particular Eton version subsequent notices for that reference will
also be submitted in that version.
Recent Notices will hold a list of the last few entered on the system. Unless you
have very recently entered a notice, you will probably need to use the search
options. By default all notices for your Local Authority will be displayed.
Populate the relevant field(s) to find the works you are looking for.
Press the search button to perform the search.
The search results will appear below the search criteria.
ELGIN EToN Module User Guide
16
Ref EEMUG_120320
Click on the Select a notice… to reveal the results.
Select the works reference from the list and click on Load notice for the notice
history and for the next notice or Copy notice if you wish to use the previous
notice as a template for another works. See CC Notices for creating multiple
notices in the same area.
5.2
Notice History
The previous notice history for the works is then displayed at the top of the page.
Click on the +/- toggle switch to display/ not display details. Hover over the Notice
comments to display the comment. Notices successfully sent are indicated by a
green tick. If you hover over the tick it will tell you when the notice was received
by the Register. If the notice failed there will be a resend button instead of a tick.
There is now an additional radio Resend button to resend notices that have
already been sent. This has been included for the eventuality that there may be a
problem with the receiving system.
ELGIN EToN Module User Guide
17
Ref EEMUG_120320
5.3
Next Notice Type
The Notice Type box will display the most likely next type of notice. This can be
changed by using the drop down list. All valid types of notice based on what has
been previously sent are displayed.
The Notice sequence number will have been incremented by 1 from the last notice
sent for that works. Please note that received notices will have a different
sequencing order.
The notice type determines what information is required. All notices require the
Works Reference as well the Sender and Recipient information.
When entering the next notice for a works you will see that some fields will
already be populated with information from the previous notice. All additional
information will be in a similar format to that displayed in the Initial Notice.
5.4
Notice Group
A notice group is created for every set of CC notices created at the same time. If
the works that you have loaded is part of a notice group, you are asked if you wish
to send similar notices for other works in the group
By selecting yes the other works will be displayed in a grid as below. The option to
send the notice to other works is dependent on whether the notice is of an
appropriate type for the other works, and if it is not the send checkbox will be
disabled.
ELGIN EToN Module User Guide
18
Ref EEMUG_120320
Use the check box to mark those works in the project that you want to send the
same type of notice for. Click on the box to deselect any that you do not wish to
send.
5.5
Works Location
After initial creation of the works the location, USRN details and map appear in the
Works Location section.
The existing USRN details are displayed in greyed out boxes of the provisional
street fields. These fields are populated just for information on the display and are
not sent in the notice.
Open the map to see the current location of the works. For CCnotices it will be the
centre line of the USRN that was inside the original digitised polygon or buffered
line. If the location is not correct it can be re-digitised.
ELGIN EToN Module User Guide
19
Ref EEMUG_120320
6
6.1
CC Notices
Creating CC Notices
Works can only be noticed on one street, so separate notices are required for each
street if the works are on multiple streets. These can be created in CC mode if they
are the same works category. CC Mode aims to make the process easier since the
data only needs to be entered once, but multiple notices are created.
To enter this mode, simply digitise a line or polygon that covers more than one
USRN. This is done on the location map when entering a Forward Planning or
Initial notice. All USRNs within the polygon or within a 10 meter buffer of the line
are identified. Up to 99 CC Notices can be sent in one go.
ELGIN EToN Module User Guide
20
Ref EEMUG_120320
If you wish to continue with multiple notices and the selection includes the USRNs
you wish to notice select Yes. Any USRNs not required can be removed by unticking the check boxes below.
Other details about the works can be entered in the normal way.
Please note that the actual coordinates sent through on the notice will be the
centre lines of the USRNs within the polygon or buffer. If you wish to send through
polygons you will need to create each notice individually. Use the copy notice
button in the search facility to help with this.
6.2
Works Reference
The Works Reference for each notice is based on the works reference supplied in
the notice form. The works reference is truncated to 21 characters if necessary,
and a /01, /02 etc. is appended to each CC notice being sent. These values do not
appear in the grid.
6.3
Project Reference
If sending more than one CC notice then a Project Reference and Description
must be supplied. By default the project reference is the first 21 characters of the
supplied Works Reference, unless a Project Reference has been supplied in the
previous page.
ELGIN EToN Module User Guide
21
Ref EEMUG_120320
6.4
Editing the Grid
Editing of the CC notices takes place after the submit button has been pressed at
the Notice confirmation stage.
An editable grid containing all the USRNs is displayed including the location
description , which is mandatory. Most of the other notice elements in the grid
may be edited, so each CC notice may be customized. You can also deselect a
USRN if not required. This may happen when footpaths or roads are close
together.
Pan along the grid for the field(s) to edit.
Even though the digitised coordinates are now showing on the page, if more than
one CC notice/permit is sent then the coordinates sent will be those of the centre
line of the relevant USRNs.
ELGIN EToN Module User Guide
22
Ref EEMUG_120320
7
Sending the Notice
When all the details have been populated you can send the notice by pressing the
Submit Eton notice button. This is just the checking stage of a two stage process. It
is this stage that the grid will appear for CC notices.
If everything is successful then a copy of what is ready to send is displayed on the
screen. You will then need to confirm that you wish to send this notice using the
Submit button again or if you wish to change anything press the Edit notice
button. If you press the edit notice button, you will need to go through the two
stage submission process if you wish to send the amended notice.
There are two types of results from the checking, warnings and errors.
7.1
Warnings
A warning does not stop you sending the information as is, but informs you that
there may be a problem.
For example a Restriction warning is given below.
If the local authority you are sending to is also sending planned and inforce
restrictions to Elgin then a check is made to see if you are planning on working in
the road during a restriction. If so, a warning message will come up.
7.2
Errors
If there any errors in the notice you will see them listed at the top of the screen in
red. The relevant fields are also hi-lighted in red. Some possible errors are shown
below.
ELGIN EToN Module User Guide
23
Ref EEMUG_120320
You will not be able to submit the notice until all the errors are resolved.
7.3
Submission
When you submit a TMA notice through ELGIN, the notice is queued, then sent to
the receiving system. It is usually sent out within 2-5 minutes after submission. If
the notice submission fails, 5 attempts to resend the notice will be made at 10
minute intervals. If after 5 attempts the notice still has not been submitted an
email will be sent to the notice sender alerting them of the fact. ELGIN is designed
to trap most of these conditions and give you either an error message or a
warning before you get to the final stage of submission. If there is a genuine
problem please contact your Administrator.
If you do receive an email reporting that the receiving system is not responding,
this may be because the receiving service is temporarily unavailable. If you bring
up the notice history and there is not a green tick by the notice there will be a
function to resend. After this, if it is still failing to send, contact your ELGIN EToN
Module Administrator.
ELGIN EToN Module User Guide
24
Ref EEMUG_120320
8
Incoming Notices
This is particularly relevant to permitting, but will apply to the standard noticing as
well.
8.1
Two-way communication
If your ELGIN Eton Module Administrator has set up your Operational District to
receive replies from your Streetworks register, these will be displayed in sequence
with your notices when viewing the notice history.
8.2
Permit Status (Permits Only)
At the top of a permit page the permit status is shown.
When sending in a forward planning notification this will be ‘None’. This will
change to Application once you apply for a permit.
It is expected that you should receive a response from your Streetworks register in
reply to your permit application. This response should arrive within a specified
time period. If a response is not received then your PAA/Permit/Variation will be
marked as deemed.
An example for Permits is shown above.
ELGIN EToN Module User Guide
25
Ref EEMUG_120320
8.3
9
Inspections
Inspection details can be displayed if sent through from your register.
ELGIN supply an Anonymous FTP site. Address 80.168.56.106, no directory.
Admin intervention will be needed to implement this functionality.
Conditions of Use
The ELGIN EToN Notice Module is subject to ELGIN Terms of Business - October
2011 which are available upon request. The ELGIN service is hosted and
maintained by ELGIN under the terms of the ELGIN Terms of Service.
The ELGIN EToN Module is available to staff and authorised subcontractors and
agents of the Highway Authority. There is no restriction on the number of users.
The system allows concurrent use of the Module.
10 Further Information
All enquiries:
James Harris
[email protected]
www.elgin.org.uk
ELGIN
John Carpenter House
John Carpenter Street
London
EC4Y 0AN
ELGIN EToN Module User Guide
26