1
7.
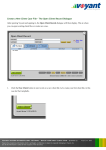
Time: Check the Time panel located on the right side of the screen.
Selections on this panel are used to set the time span over which the
income will be earned.
The start event (green dot) and
end event (red dot) are selected by
default, indicating that this salary
will be earned from the beginning
of the plan (the Start event) until
John's planned retirement (the
Retirement (John) event) at age 60.
Leave these default selections in
place for now.
8.
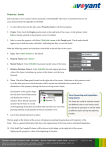
The Time Panel: Selecting
Alternative Start / End Events
Different start or end events could
be selected to begin or end the
income later or earlier in the
planning timeline. To select an
alternative time span for the income,
deselect the default events by
clicking the red dot (end event)
and/or green dot (start event). Then
reset the time span of the income by
selecting different start or end
events.
To view the year and age at which the income
will end, move your cursor over the end event,
Retirement (John).
The line graph at the bottom of the screen will
present a general illustration of how the income will
grow and when it will end.
9.
Click the Add button.
John’s income now appears in the ledger, located on the right side of the screen. Later, whenever you
need to edit an item in the plan, you will select it first in the ledger,
The Ledger
The ledger always shows
initial annual values.
Whenever an item needs
editing, always select it first in
the ledger. Details will be
displayed in the fields left,
ready for updates.
VOYANT ADVISER: INTRO TUTORIAL 1 - BUILD YOUR FIRST CLIENT CASE
Edition. 2, 09-07-2012 • Voyant, Inc. 2012
Voyant, Inc. proprietary information which is privileged, confidential, or subject to copyright belonging to Voyant, Inc.
Use of this information is solely for the recipient of this document.
18