1
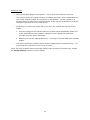
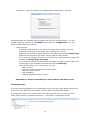
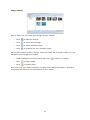
Support/ User guide HMA Content Management System 1 Contents: Access Page 3 Editing Pages Page 4 Adding/Editing Text Page 7 Adding/Editing Images Page 9 Adding/Editing Files Page 11 Adding a Page Page 12 Homepage News Page 14 Image Library Page 15 File Library Page 16 2 Access To log in to the Content Management System, visit: http://www.yourURL.co.uk/manage/Login.aspx The content management system is a Javascript based application. In this respect, some proxy servers may block access initially. In this situation, please contact your IT department and ask them to ensure the domain name of the website is added to your ‘safe list’ to ensure access. A sample of the log in screen is below for reference. You should have been supplied with a Username and Password to access the site. If you do not have these or would like the details to be reset at any point, or have any questions about the CMS in general please contact HMA on 01226 209450 or email [email protected] 3 Editing Pages Once logged in, the page structure on the left hand side represents the navigation on the website. Where sub pages are present, the + sign to the left of each folder can be clicked on to reveal these. To edit a page: • Left click on the page you wish to edit This will then reveal current and previous versions of the page • Left click on the version you wish to edit More often than not, this will be the top, live version • Click the ‘Edit Page Version’ button 4 As there is no hierarchy of access to this CMS, the Approved Future Versions functionality is not in use. • • Page information will be displayed on the screen in a tabbed format ready for editing. Please note that multiple pages can be edited at the same time. Generic Page Information will generally remain the same throughout the update process – below are details of the relevant fields in this area: -‐ Template - The page style that is used – this should be selected carefully when adding a page, however, mistakes can be rectified by using this facility. -‐ HTML Title – the title that appears at the top of your browser (above the address bar) -‐ Nav. Title – the text that appears in menu on the website. Because the top level of navigation is graphical, only the sub navigation items can be edited in this respect. -‐ Page Title – the text that appears on the page. If there is a ‘Title’ field within the Main Content area, this will take precedence over the Generic Page Information. -‐ Meta Content – used by Search Engines. Should contain comma separated key phrases relating to that page. -‐ Meta Description – used by Search Engines. Should contain a short description of the content on that page. -‐ Publishing information Start date/time – set a page to go live in the future End date/time – set a page to be removed in the future -‐ Is Hidden – should be ticked if the page should not be displayed on the website -‐ Is Approved – should be ticked if the page should be displayed on the website. 5 • Left click Save Changes (bottom right hand corner) for changes to take effect. The Save Changes will take you to one last box: -‐ -‐ -‐ View Page – Shows a preview of the page you have edited within the CMS (You will still need to close this page if you choose this option) View Page and Close – Shows you a preview of the page you have edited within the CMS (When you close this, it won’t need closing elsewhere) Close – Just closes the page with no preview option Always remember to check the front end of the website once changes have been made to ensure the formatting and content is correct. News & Events is the only content manageable page, therefore you will only be able to edit content in the News Article tab of the News Detail template. 6 Adding/Editing Text Where a template provides the ability to add/edit text, this will be done in one of two ways: • PLAIN TEXT FIELD There are no formatting tools available on these areas for one of two reasons: -‐ The text automatically generates a graphic on the front end for which formatting will become redundant -‐ The style set on the front end is conducive to search engines crawling the site and as such, formatting tools would overwrite this style. • CONTENT BLOCK Microsoft based formatting tools available To add or edit content this way, click on the Add New Content Block or to edit, click on the content block you wish to edit and click the Edit Content Block button. 7 Where you can change the format of your text, whether it be to a title etc… Change the colour of the text Bold/Italics/Underline/Strikethrough Add a link to highlighted text within the content box Bullets / Numbering Back/Forward If you are copying text from other places, say a word document or email or another site, then you will need to strip it of its current formatting. To do this, paste the text into this HTML box and then click update. Your content will be added and you will need to add your format to it. This ensures it looks correctly on the front end. These buttons are for use whilst adding or editing tables. If you hover over the buttons, they will inform you of what they do, they are standard table buttons. • Hints and Tips -‐ -‐ -‐ -‐ -‐ When using the CMS in Internet Explorer, links to website and email addresses are automatically formatted as in Microsoft Word. If inserting a link manually, ensure you select the text, click on the link tool and insert the relevant information. Pages within the website should open in the same window; Links to 3rd party sites should open in a new window. If inserting an email address manually, select the address, click on the link tool and insert the mailto:[email protected] – the mailto: element is essential to ensure the system knows it’s an email address and not a website link. When entering content into the content box, if you return after the last line and then delete that return, this will ensure that the formatting is changed from format to paragraph and so will render correctly on the front end. If the formatting of an update looks strange, visit the HTML button in the relevant text area to check that no untoward formatting has been copied over. If in doubt, copy the text and paste it into the HTML area to re-format. <p> and </p> tags are relevant and are ok to be in the HTML area. 8 Adding/Editing Images When a template provides the ability to add/edit an image, a separate tab will appear when editing the page. To add an image to a page: • • • • Edit the page as instructed in section 1 Within the ‘Images’ section of the page (this can sometimes be within another tab, say main content for example), left click ‘Add New Image’ – this will bring up the image library. See Image Library for more information. If the image has already been uploaded, it can be used in multiple places – search and select the image you want, click ok and insert an appropriate ‘Picture Label’ (this is inserted for accessibility reasons. It should contain alphanumeric characters only and describe the content of the image). If the image needs to be uploaded (please see image below) -‐ -‐ -‐ -‐ -‐ -‐ -‐ -‐ Left click Left click Add File Select file from your computer Assign the image to a category (please see Image Library for more details) and insert a short description (if applicable). This can be repeated as many times as necessary to create a list of images to upload. Left click Upload and wait for confirmation that this process is complete. Close the Upload dialog box which will return you to the image library. Select the image you wish to use (either by browsing, searching by category or filtering by the first few letters of the file name) Left click Use Selected and insert an appropriate Picture Label. 9 Hints and Tips • Only upload RGB jpegs to the system – this is the best format for web use. • The system stores all original versions of images and then resizes and scales to a web-ready format suitable for anywhere on the website. In this respect, it is advised that you upload low resolution shots to the system to effectively manage the space you take up on our web server. • Depending on where the image sits on the site, the system will do one of two things: 1. Crop the image to the relevant size (the system will automatically retain one of the proportions of the image in relation to the original size and then centrally crop the other dimension) 2. Resize to fit into the appropriate area – normally to a fixed width with variable height. • File names and Picture Labels should contain alphanumeric characters only – do not include any characters such as ‘&’ in these. There are more buttons within the Image Library that we haven’t covered here. Please see Image Library section for more details. 10 Adding/Editing Files To create a link to a file from text you need to: 1. Add the file to the File Library. 2. Find the file within the library and select the file (highlighting it). 3. Click to reveal the window below: 4. Highlight the files address and copy (ctrl + C). 5. Open the Content Block for the text you want to edit (See page 7). 6. Highlight the text you want to be a link within the Content Block and select the button to reveal: 7. Paste the link into the Link URL field and enter a suitable title in the Title field. 8. Select Open link in a new window or Open link in the same window (See hints & Tips on page 8). 9. Click Update, save changes and check. 11 Adding a Page To add a page to the site • • Right click on the relevant folder on the right hand side to add it to Left click to select Add Page Enter the following information as requested: • Page Details -‐ Page Name Should contain alphanumeric characters only – do not include any characters such as &/.’ etc… -‐ Make Page a Folder? (this should be selected if the menu item should automatically take the user to the first sub page in the folder i.e. About Us may be a folder which goes automatically to an Introduction page) -‐ Show in menu? Select ‘Yes’ if it should appear in the navigation Select ‘No’ if the item appears within the page -‐ Hide Child Pages? (select this if you automatically want to hide any sub navigation items at once). 12 • Redirect -‐ Enter a destination URL with the http:// prefix if the menu item should redirect to another page within the website or even a 3rd party site. -‐ Open in a New Window? (if the redirect is to a third party website). • Template – will depend on what type of page you are adding (News detail) 13 • Summary - review the page you’ve added before confirming to proceed. All pages added will automatically be hidden from the site until populated. You can unhide a page by unticking the Is Hidden and ticking the Is Approved box on the Generic Page Information section. • Hints and Tips -‐ If adding a page similar to one that has already been created, copy the Template and format of that page when creating the new one -‐ Pages can be deleted by right clicking on the page and selecting Delete Page -‐ Pages can be moved up and down using a drag and drop facility -‐ If you need to change the file name of a page then right click on the page and left click on Change Page File Name -‐ If you need to change the Page details of a page you have created, right click on the page in the navigation and then left click on Edit Page. -‐ This will then take you to a box where you can: o Add a redirect o Choose to open the redirect in a new window o Make the page a folder o Hide Subpages o Change the page to show in menu Remember to always ‘Save Changes’ in the bottom right hand corner Homepage News The news item that appears on the homepage is the news story that appears at the top of the list in the ‘News & Events’ folder (in the content management system). To change this select the relevant news story and drag and drop it to the top of the folder (See position of ‘Sheffield welcomes…’ news story in screenshot below). 14 Image Library Here is where you can store and manage all your images. • Click to add new images • Click to edit selected image • Click to delete selected image • Click to create a link for a selected image Use the filter option to search for the image you need, but to make it easier you can categorise your images into folders: • Under Categories on the left hand side click • Click to edit a folder • Click to delete folder to add a new folder Once you have your folder/categories created, when adding an image or editing an image you can add them to the category of your choice. 15 File Library Here is where you can store and manage all your files. • Click to add new files • Click to edit selected file • Click to delete selected file • Click to create a link for a selected file (you can use this link within content – add it to text etc...) Use the filter option to search for the file you need, but to make it easier you can categorise your files into folders: • Under Categories on the left hand side click • Click to edit a folder • Click to delete folder to add a new folder Once you have your folder/categories created, when adding a file or editing a file you can add them to the category of your choice. 16