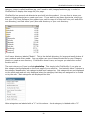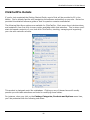
1
ClickCartPro (CCP)
User’s Guide
© 1999-Present Kryptronic, Inc. All rights reserved worldwide. Kryptronic, the Kryptronic logo and all Kryptronic
software names and logos are trademarks of Kryptronic, Inc. All Kryptronic software is copyrighted and the intellectual
property of Kryptronic, Inc. All Kryptronic software is developed and distributed under license by Kryptronic, Inc.
Application Information is available online at http://www.kryptronic.com/.
ClickCartPro Version 6.0.6 User Manual
Table of Contents
Welcome To ClickCartPro .................................................................................................................................................... 6
Advanced Features.......................................................................................................................................................... 6
This Is A Big Install… ........................................................................................................................................................... 6
Preparing To Install ............................................................................................................................................................. 7
The Zip File You Received ........................................................................................................................................... 8
Creating Program Directories on Your Webserver .......................................................................................................... 8
Installing The Software ...................................................................................................................................................... 11
Setup Step One- Server Paths and Script Names ........................................................................................................ 12
Setup Step Two- cURL Configuration............................................................................................................................ 14
Setup Step Three- URL Info .......................................................................................................................................... 14
Setup Step Four- Cookie Info ........................................................................................................................................ 16
Setup Step Five- Registration Info & Encryption Key .................................................................................................... 17
Setup Step Six- PEAR Installation................................................................................................................................. 18
Setup Step Seven- Hybrid X Core Installation............................................................................................................... 19
Setup Step Eight- Mail Configuration............................................................................................................................. 20
Setup Step Nine- Mail Configuration Part Deux ............................................................................................................ 20
Setup Step Ten- Database Selection ............................................................................................................................ 21
Setup Step Eleven- Database Configuration ................................................................................................................. 22
Setup Step Twelve- Application Installation................................................................................................................... 23
Setup Step Thirteen- KHXC Database Initialization ...................................................................................................... 24
Running The Management Interface For The First Time .................................................................................................. 24
The Introductory Navigation Menu .................................................................................................................................... 25
The Expanded Navigation Menu ....................................................................................................................................... 26
Application Selector ....................................................................................................................................................... 26
Account Menu ................................................................................................................................................................ 26
Account Overview .......................................................................................................................................................... 26
Documentation............................................................................................................................................................... 27
Support........................................................................................................................................................................... 27
Community Support Forum............................................................................................................................................ 27
Kryptronic Software Wiki................................................................................................................................................ 27
Kryptronic Corporate...................................................................................................................................................... 27
Popular Actions.............................................................................................................................................................. 27
Recent Actions............................................................................................................................................................... 28
Current Date & Time ...................................................................................................................................................... 28
Software License Key .................................................................................................................................................... 28
How Do I Audition My Web Page? ................................................................................................................................ 28
The Quick Start Guide- Let’s Do It! ................................................................................................................................... 28
Quick Start- Setting Up Your Categories........................................................................................................................... 30
Quick Start- How Do I Remove The Example Categories?........................................................................................... 37
Quick Start- Setting Up Your Product Options .................................................................................................................. 39
Quick Start- Adding Products ............................................................................................................................................ 42
Quick Start- Concerning Product Photos....................................................................................................................... 44
Quick Start- Changing Default Picture Sizes ................................................................................................................. 46
Quick Start- Any Spotlight Categories For This Product? ............................................................................................. 46
Quick Start- Declining Balance Inventory ...................................................................................................................... 47
Quick Start- Delivery Of Products To Your Customers ................................................................................................. 48
Quick Start- Bring On The Categories and Product Options! ........................................................................................ 50
Quick Start- Who Can View Your Products? ................................................................................................................. 51
Quick Start- Reinserting Your Spreadsheets Into The Core.......................................................................................... 51
Quick Start- Adding Additional Columns To Your Spreadsheet .................................................................................... 53
Quick Start- Setting Up Your Shipping Companies ....................................................................................................... 55
Quick Start- Setting Up Customer Payment Options..................................................................................................... 55
Quick Start- Setting Up Your State/Province/Country ................................................................................................... 57
Quick Start- A Quick Fix For The Splash (Front) Page ................................................................................................. 58
ClickCartPro Details............................................................................................................................................................ 60
2
ClickCartPro Version 6.0.6 User Manual
Application: Profile and Namespaces................................................................................................................................ 61
Application Profile .......................................................................................................................................................... 61
Application Name And Description ................................................................................................................................ 62
Front End Display Name ............................................................................................................................................ 62
Application Defaults/Application Interface.................................................................................................................. 62
Manage Program Namespaces ..................................................................................................................................... 62
Catalog: Categories, Products and Options ...................................................................................................................... 64
Manage Online Store Categories .................................................................................................................................. 65
Working With HTML Code................................................................................................................................................. 67
Manage Online Store Products...................................................................................................................................... 72
Manage Product Option Selection Items ....................................................................................................................... 85
Manage Product Options ............................................................................................................................................... 87
Commerce: Orders and Checkout..................................................................................................................................... 91
Decrypt Offline Order Data ............................................................................................................................................ 92
Manage Checkout Form Fields...................................................................................................................................... 92
Manage Custom Sale Methods ..................................................................................................................................... 94
Manage Discount Codes................................................................................................................................................ 95
Manage Online Orders (Completed and Processing).................................................................................................... 96
Manage Online Orders (Pending and Cancelled).......................................................................................................... 97
Manage Processing Gateways ...................................................................................................................................... 97
ClickCartPro Supported Payment Methods and Instructions For Installation.............................................................. 100
PayPal Website Payments Pro Management .......................................................................................................... 100
Online Processing Setup.......................................................................................................................................... 101
Setting Up Specific Online Processors .................................................................................................................... 103
Authorize.Net AIM & Wells Fargo (Authnet Interface) ............................................................................................. 104
Authorize.Net SIM .................................................................................................................................................... 104
2CheckOut ............................................................................................................................................................... 105
WorldPay .................................................................................................................................................................. 105
Cardservice Linkpoint (API Only) ............................................................................................................................. 106
Cardservice Linkpoint HTML .................................................................................................................................... 106
Bank Of America & Wells Fargo (BoA Interface) ..................................................................................................... 107
Verisign Payflow Link ............................................................................................................................................... 107
ECHOnline Credit Card ............................................................................................................................................ 108
Planet Payment & RTware ....................................................................................................................................... 108
SkipJack ................................................................................................................................................................... 109
PSiGate .................................................................................................................................................................... 110
NetBilling .................................................................................................................................................................. 110
CyberSource ............................................................................................................................................................ 111
Recurring Billing ....................................................................................................................................................... 113
Displays: Skins, Menus, XHTML Includes and Messages .............................................................................................. 114
Manage Catalog Category Displays: Online Store View ............................................................................................. 114
Manage Catalog Product Displays: Category View..................................................................................................... 114
Manage Catalog Product Displays: Detail View .......................................................................................................... 115
Manage Custom Menu................................................................................................................................................. 116
Manage Display Skins ................................................................................................................................................. 117
Manage FrontEnd Menus ............................................................................................................................................ 118
Manage Online Store Menu ......................................................................................................................................... 119
Manage System Messages.......................................................................................................................................... 120
Manage XHTML Includes ............................................................................................................................................ 121
Upload and Install A New Skin .................................................................................................................................... 122
Skin Installation ........................................................................................................................................................ 122
Exports: Data Export Modules......................................................................................................................................... 122
Peachtree Accounting Export ...................................................................................................................................... 123
Export File Names/Export File Name: Customers File ............................................................................................ 123
Quickbooks Accounting Export.................................................................................................................................... 123
Export File Name...................................................................................................................................................... 123
Forms: Application Forms and Form Fields .................................................................................................................... 123
3
ClickCartPro Version 6.0.6 User Manual
Manage Advanced Software Form Fields.................................................................................................................... 124
Manage Advanced Software Forms ............................................................................................................................ 125
Manage Advanced Software Selection Items .............................................................................................................. 125
Forms: Dynamic Forms and Form Fields ........................................................................................................................ 126
Manage Dynamic Form Fields ..................................................................................................................................... 126
Manage Dynamic Forms.............................................................................................................................................. 128
Locations: States, Provinces and Countries.................................................................................................................... 129
Manage Countries........................................................................................................................................................ 129
Manage States and Provinces ..................................................................................................................................... 130
Mail: Messages, Mail and Subscriptions ......................................................................................................................... 131
Manage Mail Messages ............................................................................................................................................... 131
Manage and Send Subscriptions................................................................................................................................. 132
Send Mail Message ..................................................................................................................................................... 134
General Message Settings/From Email Address......................................................................................................... 134
Recipients/To Email Addresses ............................................................................................................................... 134
XHTML Message Information/Send XHTML Message (In addition to text) ............................................................. 134
Reports: Statistics and Access Logs ............................................................................................................................... 135
View Activity Reports: Daily ......................................................................................................................................... 135
View Activity Reports Monthly...................................................................................................................................... 135
View Activity Reports Yearly ........................................................................................................................................ 135
View Admin Access Reports........................................................................................................................................ 136
View Page Access Reports.......................................................................................................................................... 136
Settings: Application Settings Menu................................................................................................................................ 136
Application Settings/Settings ....................................................................................................................................... 136
Catalog Global Displays/Settings ................................................................................................................................ 138
Cron Settings/Settings ................................................................................................................................................. 140
Currency Weight and Dimensional Settings ................................................................................................................ 140
Frontend Meta Information........................................................................................................................................... 141
Settings/Meta Description ........................................................................................................................................ 141
General Store Settings................................................................................................................................................. 142
Settings/Allow Guest Checkout................................................................................................................................ 142
Image Specifications.................................................................................................................................................... 143
Settings/Image Width: Cart Product Images ............................................................................................................ 143
Intershipper Settings .................................................................................................................................................... 144
Settings/Active Carriers............................................................................................................................................ 144
Language Strings......................................................................................................................................................... 144
Linkpoint API Settings .............................................................................................................................................. 144
Mail Settings ................................................................................................................................................................ 145
Settings/Default Contact Email Address .................................................................................................................. 145
PayPal Website Payments Pro Settings...................................................................................................................... 145
Settings/API Login: User Name ............................................................................................................................... 145
Peachtree Export Settings ........................................................................................................................................... 146
Settings/Account Number: Accounts Receivable..................................................................................................... 146
Quickbooks Export Settings......................................................................................................................................... 147
Settings/Account Name: Accounts Receivable (A/R) .............................................................................................. 147
Remote E-Commerce Settings .................................................................................................................................... 148
Settings/Allow Remote Product Page POSTs.......................................................................................................... 148
Shipping Settings ......................................................................................................................................................... 149
Settings/Add Handling Charge To Free Shipping Methods ..................................................................................... 149
Shipping: Realtime Shippers and Custom Shipping Methods......................................................................................... 150
Configure FedEx DirectConnect Connection............................................................................................................... 150
Configure Intershipper Connection .............................................................................................................................. 151
Configure UPS Online Tools Connection .................................................................................................................... 151
Connecting to USPS WebTools................................................................................................................................... 152
Manage Custom Shipping Methods............................................................................................................................. 152
Web Pages: Web Page Management ............................................................................................................................. 153
Manage Web Pages .................................................................................................................................................... 153
4
ClickCartPro Version 6.0.6 User Manual
Kryptronic Software End User License Agreement (EULA) ......................................................................................... 156
Program Credits ................................................................................................................................................................ 161
5
ClickCartPro Version 6.0.6 User Manual
Welcome To ClickCartPro
You have purchased an incredibly powerful tool. You will have infinite power to control virtually
every aspect of your customer’s online experience. This User’s Guide will provide you with the
comprehensive detail you need to get this store up and running from the bottom up. We’ve split
it into 3 sections.
•
•
•
Installation: Getting ClickCartPro and the Core up and running on your server
Quick Getting Started Guide: Easy to use first steps…create a fully working store
quickly and painlessly. We’ll walk you through the setup of your software as well as help
you create your first categories, products, etc. The guide will help you get a working
store up and running as quickly as possible. We won’t spend a great deal of time on the
look and feel of your site, rather, we’ll help you get your products loaded in, set up your
shipping, billing and other customer interaction and have a fully working backbone that
you could put online.
The Details: The “meat” of the manual. After you’ve learned the basics, learn the details
behind them.
Advanced Features
ClickCartPro is an advanced Shopping Cart product. It is designed to create a fully working
store…whether you’re an 80 Billion dollar nationwide chain or a one-man band. Because of this
power, there are certain features in the interface that are designed for a developer with an
advanced knowledge of web site programming. We will mark these sections in both the install
and Getting Start Guide with the following logo:
When you see this logo, you know that you probably shouldn’t fiddle with this tool unless you’re
an advanced user. Also, this probably isn’t necessary for 95% of the people who purchase the
product. This should save you confusion and time.
This Is A Big Install…
The installation of ClickCartPro is a little trickier than your average software installation.
Why?
Well, think about it. We have to set up a store from scratch…with all of the bells and whistles
necessary to make your customers feel safe and secure when they visit your site. In order to be
6
ClickCartPro Version 6.0.6 User Manual
safe and secure, we’ve set everything up for you, but it does take a bit of work in the first go
round. Of course the payoff for this “bit of work” is that you never need pay a monthly fee for a
shopping cart that offers half of the features and none of the control provided by ClickCartPro.
Most folks find this to be a pretty nice trade off.
You are essentially setting up 2 products in one: The Kryptronic Hybrid X Core, a fast database
online core which handles all of the database processing of your store requests, and
ClickCartPro, the front end creation product which sets up your store and your customer user
interface.
You’ll find as you go that we’ve done everything we can to make this as painless as possible.
Our software is pretty smart, knows what it’s looking for and makes lots of educated guesses
which usually are right on the mark.
Preparing To Install
Your webserver (the place you plan on setting up your site) must meet a list of requirements that are met by
almost every webserver on the planet. When you first try to install the product, it will check out your server to
make sure that all of the requirements are met. If not, it will tell you what is missing. From this point, you
can either contact your webserver provider and ask that these specifications be met or move to a server that
does. The important point here is that ClickCartPro will tell you if there’s a problem. Most likely, your
webserver will automatically provide these elements, but if you aren’t satisfied with their support, you may
want to contact [email protected] for suggested alternatives. Here is the list of requirements: PHP
Version: PHP 4.3.0 or newer.
1. The PHP INI value for 'safe_mode' must be 'Off'. The KHXC attempts to set this value to
'Off' if 'safe_mode' is set to 'On' when the script executes. An error will be presented if the
KHXC is unable to dynamically change this value.
2. The PHP INI value for 'magic_quotes_runtime' must be 'Off'. The KHXC attempts to set
this value to 'Off' if 'magic_quotes_runtime' is set to 'On' when the script executes. An
error will be presented if the KHXC is unable to dynamically change this value.
3. The PHP INI value for 'file_uploads' must be 'On'. The KHXC attempts to set this value to
'On' if 'file_uploads' is set to 'Off' when the script executes. An error will be presented if
the KHXC is unable to dynamically change this value.
4. The PHP INI value for 'upload_tmp_dir' must be set to a directory that exists on the
webserver and is writable by the webserver process, or the PHP INI value for
'upload_tmp_dir' must not be set and the operating system's default temp directory must
be writable by the webserver process.
5. The PHP cURL extension must be loaded. The KHXC attempts to dynamically load the
cURL extension if it is not loaded when the script executes. An error will be presented if
the KHXC is unable to dynamically load the cURL extension.
6. A relational database management system (RDBMS) account. The KHXC stores
information in an RDBMS to allow quick and secure access to data. This account must be
set up with the following permissions: CREATE, DROP, ALTER, INSERT, UPDATE, DELETE
and SELECT. The following relational database systems are supported by the KHXC:
MySQL, PostgreSQL, SQLite and Microsoft SQL Server.
7. The ability to send Internet email via SMTP or the sendmail executable. The KHXC
requires SMTP server access in order to send Internet email via SMTP. The KHXC requires
7
ClickCartPro Version 6.0.6 User Manual
sendmail to be located on the webserver and accessible by your webserver account to
send Internet email via sendmail.
Note for Unix/Linux webserver administrators: In several paragraphs, we’ll cover how you
will change PHP INI values using a .htaccess file under Apache webserver. Just look for the
underlined Linux/Unix Info on page 11.
The Zip File You Received
You were provided access to a zip file with the entire installation when you received your
software license key for the KHXC. You will need to download that installation archive file and
extract it to your computer. The installation archive file will be named:
khxc-{version}.zip
When you extract this file on your local machine using a utility like WinZip (Windows) or unzip
(Linux), it will create a directory named:
c:/unzipped/khxc-{version}
This directory will include five files:
admin.php- This will be your administration page. Following installation, this is where you’ll
live when you’re working on your site.
index.php- Want to see what your creation looks like? This is where you’ll tune in during your
work to see the results.
installer.php- This will be the file we run first. It is the installation file and will set up
ClickCartPro and the Hybrid X Core for all of the other work you’ll do.
license.pdf- Your license agreement. Read this so you know what you’re agreeing to. It’s
pretty standard stuff, but you should peruse it anyway.
readme.pdf- This is the file you’re looking at right now.
Creating Program Directories on Your Webserver
ClickCartPro can be installed directly into the root directory of your web site.
8
ClickCartPro Version 6.0.6 User Manual
You can make the choice if you want to separate your ClickCartPro from your existing content or
if you want ClickCartPro to occupy your root directory. For the purpose of this demonstration,
let’s assume that you want to keep ClickCartPro separate from the rest of your site’s content and
want all of your ClickCartPro work to be within it’s own folder.
If you did decide to install directly into your root directory, just follow the steps below minus
creating a /khxc sub directory. You will still need a secure sub directory and those steps are also
listed below.
Once you have extracted the installation archive file locally on your computer, you will need to
turn around and upload the installation files to your webserver via FTP. Use your FTP client
software to do this. (WS FTP, Cute FTP Pro)
First, browse to your root web directory via your FTP client. The root web directory on your
server is the directory where your web pages are served. Common names for this directory are:
www, web, httpdocs, htdocs, html. You will need to know which directory your root web
directory is to complete this installation. The instructions presented below assume the name
'www' for this directory.
Next, create a directory in your root web directory named 'khxc'. This will be your Public
Directory. You can name this directory anything you like, but for illustrative purposes here we
will assume your directory was named 'khxc'. Example:
/home/account/www/khxc
The next step is to create a Private Directory to store sensitive information and the software
codebase. This directory must either be in a non-web-accessible location (not within your root
web directory path), or in a password protected web-accessible location (in your root web
directory path, but password protected). For security purposes, please ensure this directory is
either non-web-accessible or password protected.
If you choose to create the Private Directory in a non-web-accessible location (not within your
root web directory path), browse to that location via FTP and create the directory. This will be
your Private Directory. You can name this directory anything you like, but for illustrative
purposes here we will assume your directory was named 'khxc-private'. Example:
/home/account/khxc-private
If you choose to create the Private Directory in a web-accessible location (within your root web
directory path), browse to that location via FTP and create the directory. After creating the
directory, for security purposes, you must password protect this directory with whatever
password protection method your host has available (.htaccess, Windows Explorer, etc.). Failure
to password protect this directory could result in compromising your Internet site and possibly
your webserver - depending on the data you store there.
For illustrative purposes, and because it is the preferred method, we will assume you chose to
create the Private Directory in a non-web-accessible location.
Uploading Files to Your Webserver
9
ClickCartPro Version 6.0.6 User Manual
After both the Public Directory and the Private Directory have been created, you will need to
upload the five installation files you extracted from the installation archive file. Upload these five
files to the Public Directory you created. Example:
/home/account/www/khxc/admin.php
/home/account/www/khxc/index.php
/home/account/www/khxc/installer.php
/home/account/www/khxc/license.pdf
/home/account/www/khxc/readme.pdf
Setting Permissions
After you've uploaded all five installation files from the installation archive file to the Public
Directory on your webserver, you will need to ensure permissions are set correctly on those
directories and files. The installer script will present an error if both the directories and the files
do not have the correct permissions level.
The Public Directory and the Private Directory as well as all the files in the Public Directory will
need to have writable permissions. Read below to find out how to set permissions on these
directories and the files in the Public Directory for your particular operating system:
For Unix/Linux webservers: Setting permissions on these two directories and the files in the
Public Directory is done using your FTP client software. Simply highlight the directory or file and
choose to change it's 'Permissions', 'Properties' or 'CHMOD'. If your webserver runs under an
anonymous account (like 'nobody' or 'apache') to execute your Internet scripts, you will have to
set a permission level of '777' on the directories and files. If your webserver runs under your
user account to execute your Internet scripts, you may be able to set a permission level of '755'
on the directories and files. When in doubt, set the directories and files to permission level '777'.
For Windows webservers: Setting permissions on these two directories and the files in the
Public Directory is done using Windows Explorer. Permissions on Windows webservers are set on
directories only, with any file in a given directory taking on the same permission level as it's
parent directory. If you do not own and operate your own Windows webserver you will most
likely have to request that permissions be set on the Public and Private directories by your
server administrator. Ask the server administrator to set permissions on the two directories to
'Full Control' for the process that PHP runs under. Typically permissions must be set to 'Full
Control' for the groups 'Web Applications', 'Web Anonymous Users' and 'Everyone'. These
permission changes need to be done via Windows Explorer, not the IIS Control Panel.
Unix/Linux Info
Change PHP INI values using .htaccess file under Apache webserver:
The KHXC does a very good job of trying to set all PHP INI values on it's own, but some are
directory controlled. Some server administrators allow for you to change directory controlled PHP
INI values by using a .htaccess file in the root web directory. Because specific .htaccess file
contents vary in different Apache versions, we recommend you use whatever .htaccess format
your server administrator recommends to set the required PHP INI values.
10
ClickCartPro Version 6.0.6 User Manual
Change the KHXC's default permissions level (777) for script created files and directories:
The files and directories created by the KHXC and KHXC installer are set to permissions level
'777' when they are created to allow for easy FTP access to the files. If you would like to change
this default permissions level to a more restrictive level, edit the values for the
'perms_level_files', 'perms_level_dirs' and 'perms_level_config' variables in the files:
/home/account/www/khxc/admin.php
/home/account/www/khxc/index.php
/home/account/www/khxc/installer.php
Be sure to test your installation after making such a change to ensure the permissions level
entered is appropriate.
Installing The Software
After you've set permissions on those files and directories, access the installer script to continue
through the installation process. To access the installer script, simply open your web browser
and browse to the location of the 'installer.php' script you uploaded earlier. Example:
http://www.yourdomain.com/khxc/installer.php
The installer script is an intelligent application that will handle installing, registering and
configuring the KHXC for you. Let’s go through the lucky 13 steps and explain them to you.
Upon running Installer.php for the first time, you’ll be presented with the first access screen.
You’ll simply plug in the unlock code that you received with the download. This is a pretty large
code, you’ll probably save yourself some aggravation if you simply copy and paste the code from
your registration email to the program. You’ll then repeat this process in the second box.
Important Note:
It would probably be quite handy if you had a pen, pencil or crayon on hand to jot down the
various names and passwords that you’ll select during the installation and configuration of
11
ClickCartPro Version 6.0.6 User Manual
ClickCartPro. You’ll want to keep this information handy when you need to access it in the
future.
Next you’ll see a link to our license agreement. It looks like this:
This is a standard licensing agreement and normally, you’d just click on it and hit the Continue
button. But before we do that, let’s try a little experiment. Let’s not verify and not check the
box. Now click on “Continue”.
See…no harm, no foul. With all screens in the ClickCartPro setup, if you make a mistake, you
just get a repeat of the screen you just filled out with a red message explaining your error as
best as the software can tell. In this case, you’ll receive a message that looks like this:
The world won’t end, the sky won’t fall, and you’ll simply head to the place the software found
the error and continue on your merry way.
Throughout this installation and future work with ClickCartPro, you’ll find this crucial
communications to be imperative to your work. Make a mistake, and ClickCartPro will highlight
the mistake in a zesty pink to catch your eye and help you get back on the right path.
This time, let’s click on the License agreement authentication and press “Continue”.
Now it’s time to start setting things up.
Setup Step One- Server Paths and Script Names
Installation of this software on your webserver requires that two directory paths be used: one
public path and one private path. You’ve already set these up prior to installing the product.
(Remember /khxc and /khxc-private?) You know where these directories exist, but now we
want to show the software. This can be a little tricky, as your web addresses are probably a
little more complex than you think. If your main web site is www.goatcheeseeaters.com/khxc, 2
things are probably likely:
12
ClickCartPro Version 6.0.6 User Manual
1. You have a strange need to advertise your love of goat cheese and
2. The detailed web address is probably double that size on the server. It probably looks
more like this:
/data/12/1/2/89/1182578/user/1237645/htdocs/khxc
(In your server’s eyes, this is still www.goatcheeseaters.com/khxc)
This larger address is required for both your Public and Private directories. Because ClickCartPro
is sitting on your server looking around, it will make educated guesses for these addresses. For
the Public directory, this is almost always right. For the Private (-private) directory, it may not
guess correctly. If you tell the software to proceed and it signals an error in this field, you may
have to access this information in your provider’s Control Panel (under the File Manager) or by
using your FTP Client software. Normally, the first portion of this information is correct, but the
last bit may be different.
Script Names
In addition to choosing the directories where this application is installed, you also have the
ability to change the names of the scripts, which control the public (index.php/frontend) and
private (admin.php/backend) functions of the application. To change the name, simply access
these files online via your FTP Client server, make the changes and the report the exact new
names in the spaces you see. If you choose to rename the index.php and/or admin.php scripts,
update the script name fields that you’ll see. This may come in handy to avoid a naming conflict
if you want the store in the root directory but called from an existing site (ie: you might change
index.php to store.php)
Important
If you are new to this and running it for the first time, you’ll likely not want to make any
changes at this point.
13
ClickCartPro Version 6.0.6 User Manual
Click “Continue” to move on.
Setup Step Two- cURL Configuration
First, what is cURL?
cURL is a command line tool for transferring files with URL syntax, supporting FTP, FTPS, HTTP,
HTTPS, SCP, SFTP, TFTP, TELNET, DICT, LDAP, LDAPS and FILE. curl supports SSL certificates,
HTTP POST, HTTP PUT, FTP uploading, HTTP form based upload, proxies, cookies,
user+password authentication (Basic, Digest, NTLM, Negotiate, kerberos...), file transfer
resume, proxy tunneling and a bunch of other things.
It can be initiated on your site by use of a cURLing iron or cURLers. (just kidding)
This setup deals with a very small number of you who may require a Proxy server for the proper
use of cURL. Most of you will not require this. It’s easy to see if you do. Just click on
“Continue”. If you move to Step Three, then you were in the large club of users who didn’t
require a Proxy Server. If you do require the use of Proxy servers, then continue on to finish
Step Two. You’ll have 5 different potential fields here where you may have to enter information.
cURL Proxy URL- If your server requires the use of a Proxy server for connections to other
Internet sites via cURL, your server administrator should have provided you with a proxy URL.
This URL needs to be entered with a leading 'http://' or 'https://'. If your host provided you with
a full URL including a port designation, leave the port designation in the URL. Only enter a cURL
Proxy URL if you are sure your host requires the use of a proxy server with cURL. Again, it’s
best to try clicking on “Continue” first before trying any of these Proxy entries.
If your server does require such things, you may also be required to fill out the next two fields
that deal with cURL Proxy usernames and cURL Proxy passwords. If you are required to fill in
these fields, your host should be able to provide you with the correct user name and password.
cURL Proxy Over HTTP or HTTPS Checkboxes- If your server requires the use of a proxy
server for connections to other Internet sites via cURL, your server may only require the use of
the proxy server for HTTP connections or HTTPS connections. Just check the appropriate boxes
if such a Proxy server is required.
After you’ve made your selections, just click on “Continue” to proceed to Step Three or receive
further instructions.
Setup Step Three- URL Info
Installation of this software on your webserver requires that URLs be designated for both secure
(SSL) and non-secure (non-SSL) requests. This software supports running under both shared
and dedicated SSL certificates. If you do not wish to set up a secure URL at this time, or do not
plan on using SSL services, simply enter the same URL (a non-SSL URL) in both the URL fields
provided.
14
ClickCartPro Version 6.0.6 User Manual
The software must have a valid domain name to install.
In addition to designating the URLs this application runs under, you must also designate the SSL
port.
Non-Secure (Non-SSL) Server- This non-secure URL entered below will be the main URL used
by this application for all requests not requiring SSL encryption for transmission of sensitive
data.
This URL should be prefixed with 'http://' and should be entered without a trailing slash. This
URL should point to the same 'Public Directory Path' you set up previously during this
installation.
Example: http://www.yourdomain.com/khxc or http://www.yourdomain.com
Again, ClickCartPro should be able to find this directory without your help and will fill it in for you
in most cases.
Secure (SSL) URL-The secure URL entered here will be the main URL used by this application
for all requests requiring SSL encryption for transmission of sensitive data.
This URL should be prefixed with 'https://' and should be entered without a trailing slash. This
URL should point to the same 'Public Directory Path' you set up previously during this installation
or a secure directory that is symbolically linked to the 'Public Directory Path' you entered.
If you purchase a certificate through your provider, they will usually take care of the installation
of the certificate and provide you with the secure URL. If you purchase a certificate someplace
else you will still have to have your hosting provider install the certificate for you (the only
exception to this would be someone with a dedicated server that they are managing
themselves).
Example: https://secure.yourdomain.com/khxc
Important Note:
As noted above, if you do not wish to set up a secure URL at this time, or do not plan on using
SSL services, simply enter the same URL here that you designated for the 'Non-Secure (NonSSL) URL' above. Otherwise, you may even have trouble signing on to begin work with
ClickCartPro because the opening screens will be searching for information in an https directory
that doesn’t exist. If you can’t sign on once you’ve completed the installation, this is likely the
culprit.
Remember, you have purchased this product because you desire a serious presence on the web
and plan to sell your products to the vast sea of customers who reside there. Securing your web
site can cost you a bit of extra money, but this is not the place to skimp on your business.
Providing a store that is deemed “secure” is worth the price of admission. It is the difference
for many customers between shopping and leaving.
15
ClickCartPro Version 6.0.6 User Manual
This little lock makes customers feel safe and secure and helps hold back the flood of
paranoia over feeding one’s credit card into the void. Without that little lock in the browser,
many customers simply say “Thanks, but no thanks.”
Secure (SSL) Port
The secure port entered in this field will control how media is linked to from the external display
files used by this application. The default port for nearly all servers is 443. Use port 443 unless
your webserver serves SSL content using a different port.
Once you have either filled out or ignored the appropriate fields, click on “Continue to move on
to Setup Step Four.
Setup Step Four- Cookie Info
Get yourself a cold glass of milk because we’ve reached the cookie phase of the setup.
What is a cookie? A cookie is simply a small piece of information that a web site leaves on a
visitor's computer when the visitor visits a site. Cookies are used to remember information about
a visitor to be used at a later time.
Installation of this software on your webserver requires that cookie domains and paths be
designated for both secure (SSL) and non-secure (non-SSL) requests. While this software does
not require the use of cookies for its main functions, some core auxiliary functions or other
applications and/or modules may require cookies to function properly.
Non-Secure (Non-SSL) Cookie Domain
The cookie domain entered in this field should correspond to the non-secure URL on which this
installation will run. If you are installing this application on a webserver account for which a
domain name has not yet been assigned or propagated, you should still enter the final domain
below.
ClickCartPro will normally fill this in for you. If your non-secure directory is
www.beachballtwirlers.com/khxc you should see an entry that looks like this:
.beachballtwirlers.com
The www has been removed and any backslashes as well.
Non-Secure (Non-SSL) Cookie Path
The cookie path entered in this field should correspond to the non-secure URL on which this
installation will run. This path is preceded by a slash, but should not include a trailing slash.
Again, if your web site non-secure directory is www.beachballtwirlers.com/khxc, this field should
look like this:
16
ClickCartPro Version 6.0.6 User Manual
/khxc
It is likely that ClickCartPro will also sense this and fill it in for you.
Secure (SSL) Cookie Domain
The cookie domain entered in this field should correspond to the non-secure URL on which this
installation will run. If you are installing this application on a webserver account for which a
domain name has not yet been assigned or propagated, you should still enter the final domain
below.
ClickCartPro will normally fill this in for you. If your non-secure khxc directory is
www.beachballtwirlers.com/khxc you should see an entry that looks like this:
.beachballtwirlers.com
The www has been removed and any backslashes as well.
Secure (SSL) Cookie Path
The cookie path entered below should correspond to the secure URL on which this installation
will run. This path is preceded by a slash, but should not include a trailing slash.
Again, if your web site non-secure directory is www.beachballtwirlers.com/khxc, this field should
look like this:
/khxc
It is likely that ClickCartPro will also sense this and fill it in for you.
Once you’ve filled out these fields, sadly, you will hit “Continue” without so much as an Oreo or
Fig Newton to show for it.
Setup Step Five- Registration Info & Encryption Key
In order to install the Kryptronic Hybrid X Core (KHXC) application on your webserver, you need
to register the program and select an encryption key. During the registration phase of the
installation, contact will be made with the Kryptronic Central Server to verify the information you
submit. In order to successfully register the program, be sure to enter the information
requested exactly as it appears on the order confirmation message you received from
Kryptronic.
Kryptronic Hybrid X Core (KHXC) License Key
17
ClickCartPro Version 6.0.6 User Manual
You’ll simply paste in the license key you received when you purchased the product. Because
this is a long code, it’s probably best if you simply copy and paste it directly from your
confirmation email. This is valid for only a single license of ClickCartPro.
Encryption Key
Here, you will enter an encryption key that ClickCartPro will use to encrypt sensitive data such
as passwords in the database. This encryption key should be a unique password to this
installation and should not be shared with anyone.
Registrant First Name, Last Name, Email Address Fields
Simply fill out the pertinent information on the person you wish to be listed as the registrant of
ClickCartPro. This email address will be used as the main contact for support messages and
announcements.
Click on “Continue” to move on to Step SIX.
Setup Step Six- PEAR Installation
Goody…more food! Never let it be said that installing ClickCartPro leaves you hungry.
Actually, PEAR stands for PHP Extension and Application Repository.
This software requires these PEAR modules to provide core functionality. These modules are
freely available from pear.php.net and each is distributed under license by their authors. Module
license information is available on pear.php.net.
Please note: PEAR module installation is a multi-task interactive process that requires you to
click 'Continue' after each task is completed.
Pear Module Installation
Simply check the box to install the PEAR modules.
Auto Submit Installation Steps
This process is a multi-step installation process. Rather than having to click “Continue” after
each step of this installation, the default is to have the installer simply auto submit the steps.
Once you click on “Continue”, the software will begin installing the modules it needs. You’ll see
this screen that will update your progress.
18
ClickCartPro Version 6.0.6 User Manual
The software will also list the current module it’s installing and the modules still pending. It
looks like this:
Once all of your PEAR modules are installed, you’ll be one step closer to a successful
ClickCartPro installation, but still be quite hungry. We’ll now proceed to the Baked Turkey with
Mashed Potatoes and Gravy modules…just kidding.
Setup Step Seven- Hybrid X Core Installation
Now we’re going to install the heart of the system. The Hybrid X Core (KHXC) codebase is
required to run the KHXC. The core codebase is installed by contacting the Kryptronic Central
Server. After verifying your registration information, the core codebase is downloaded and
installed.
Again, this is a multi-step process, so you’ll want to check the “Install the KHXC codebase” check
box and tell it to Auto-Submit the installation steps.
Once again, you’ll be greeted by your progress bar and a pending tasks indicator.
19
ClickCartPro Version 6.0.6 User Manual
Setup Step Eight- Mail Configuration
Installation of this software on your webserver requires the ability to connect to a Simple Mail
Transfer Protocol (SMTP) server, or the ability to connect to the sendmail executable (Unix/Linux
servers only) to send mail using the application.
Wherever possible, a connection to an SMTP server is optimal. For Unix/Linux servers where
security protocols prohibit internal connections to an SMTP server, select the sendmail option.
After selecting the type of mail connection to configure, you will be presented with connectionspecific information to complete.
Click on “Continue”
Setup Step Nine- Mail Configuration Part Deux
Let’s assume that you selected SMTP as your server method. This is the most common and thus
the most likely choice you would have made. This step now helps you further configure your
mail support.
SMTP Server Hostname
20
ClickCartPro Version 6.0.6 User Manual
Every SMTP server can be connected to using either a common hostname (Example: localhost or
mail.host.com) or an IP address (Example: 127.0.0.1). Most SMTP servers will respond to the
name 'localhost'. Enter your SMTP server's hostname or IP address in this field.
If your server requires the SMTP server be connected to over SSL, prefix the hostname with
'ssl://' to ensure an SSL connection is established with the server.
ClickCartPro has already filled out ‘localhost’ so you needn’t fill out anything in the event you’re
going with the defaults.
SMTP Server Port
Every SMTP server operates on a dedicated port on the server. The standard port for SMTP is
port '25'. Your server may require the use of a non-standard port. Enter your SMTP server's port
in this field.
ClickCartPro has already filled out ‘25’ so you needn’t fill out anything in the event you’re going
with the defaults.
SMTP Server Username and Password Fields
Some server administrators require authentication to connect to their SMTP server. If your
server requires SMTP transactions to be authenticated, enter the username and password for the
server in the fields below.
In most cases, you will leave these fields blank. Only enter a SMTP Server Username if you are
sure your host requires SMTP authentication.
Click on “Continue” to proceed.
Setup Step Ten- Database Selection
Installation of this software on your webserver requires that a connection with a relational
database management system (RDBMS) be present. In the last step of the installation process
the KHXC_DB module was installed to allow connection to a variety of different relational
database systems.
A Relational Database uses tables to store information. The standard fields and records are
represented as columns (fields) and rows (records) in a table. A Relational Database groups
fields of like information in related columns and then takes advantage of this uniformity to build
completely new tables out of required information from existing tables. In other words, it uses
the relationship of similar data to increase the speed and versatility of the database.
The "relational" part has to do with mathematical relations. A typical relational database has
anywhere from ten to thousands of tables. Each table contains a column or columns that other
tables can key on to gather information from that table. By storing this information in another
table, the database can create a single small table with the locations that can then be used for a
21
ClickCartPro Version 6.0.6 User Manual
variety of purposes by other tables in the database. Relational databases are created using a
special computer language, structured query language (SQL) that is the standard for database
interoperability. SQL is the foundation for all of the popular database applications available
today.
If you have not configured a relational database account to use, now is the time to do so. This
software takes care of creating all the database tables it uses, however the database itself needs
to exist.
If you are unsure of the version or type of relational database you have configured on this
webserver, contact your server administrator. You can also simply try the process of
elimination, as ClickCartPro will not let you select the wrong database product.
The database used by this software must be configured with the following permissions: CREATE,
DROP, ALTER, INSERT, UPDATE, DELETE and SELECT.
After selecting the type of relational database you have configured, you will be presented with
database-specific connection information to complete.
We’ll assume you selected MYSQL (All Types) as your database.
Click On “Continue”
Setup Step Eleven- Database Configuration
Once you’ve had success and moved to this step, we’ll simply take a few moments to configure
your database.
Database Host Name
Enter the hostname of the server where the database resides. Typically this is set to 'localhost' if
the database resides on the same server as this software installation. In some cases, you may
be required to enter the IP address of your host. You can usually find this by either checking the
SQL section of your web provider’s control panel or in their online support help system.
22
ClickCartPro Version 6.0.6 User Manual
Database Name
Enter the name of the database that was configured for use with this software. This name is
whatever you want it to be. Just select something you’ll remember and then write it down.
Database User Name
Just like above, this is whatever username you choose. Just make sure to log it with all of your
other ClickCartPro names and passwords.
Database Password
Just like above and above. This can be a password of your choice. But to repeat it thrice…make
sure you log this information in a handy spot so that if you forget, you can retrieve.
Once you’ve set everything up and jotted it down, click on “Continue”.
Setup Step Twelve- Application Installation
You’ve now reached the point where you’ve told the installer everything it needs in order to work
and play with your server. You’ve selected the database, installed the PEAR and KHXC
codebase…now it’s time to install the application itself and the modules that will perform all of
the various tasks your web site will require.
Like several of the installation functions, this is a multi-step process and you’re best off just
telling it to Auto Submit the steps. The software will default to the following values:
23
ClickCartPro Version 6.0.6 User Manual
If you like clicking and nursing an installation, then by all means click on the “No, do not auto
submit button”, but if you want to get started setting up your site, then go with the defaults
and move on.
Setup Step Thirteen- KHXC Database Initialization
You’ve done it! You’ve reached the finish line. We now have to simply initialize the database
and finalize our installation. Again, this is basically a straightforward process. Simply make
sure that the Initialize Database checkbox is clicked and tell it to auto-submit the steps. After
the installation process is complete, you’ll be given the option to launch the management
interface. Let’s do it. It looks like this:
Now let’s have some fun…
Running The Management Interface For The First Time
Accessing the Admin.php
24
ClickCartPro Version 6.0.6 User Manual
You’ve now finished running the installer script and you have accessed the ClickCartPro
Management Interface to configure your administrator account and work with ClickCartPro. The
install automatically launches this interface. In the future, when you want to access the
Management Interface, simply open your web browser and browse to the location of the
'admin.php' script you uploaded earlier. Example:
http://www.yourdomain.com/khxc/admin.php
The Admin.php controls the “Back-end” administrative tasks for your site. Here you will create
the backbone of the system as well as the look and feel that your users will see when they
access your site.
The Introductory Navigation Menu
When launching Admin.php, you will be presented with the Navigation Menu on your left and
simple login information center screen. The Navigation Menu will grow once you’ve logged into
the system, but for now, it provides PDF document information for both the KHX Core and
ClickCartPro as well as support information. To proceed, simply type in the email address and
password you set up during installation.
Important Note:
If you’ve forgotten the password you assigned to this account, simply click on the blue link to
receive that password via your registered email address.
Again, if you are unable to log into the system, you can probably run install.php again
and revisit Step Three. This time, make sure that you fill in a non secure address and
not an https address.
Once you’ve logged in, you’ll see the full ClickCartPro Menu system on the left and Kryptronic’s
Central News Server center screen.
25
ClickCartPro Version 6.0.6 User Manual
•
Kryptronic Central Server News: News articles delivered to you by Kryptronic. These
news articles provide tips and tricks on running the software as well as important update
and upgrade information.
•
ClickCartPro Menu: This Menu/Sub Menu system will aid you in the complete setup of
your site’s background and foreground information.
The Expanded Navigation Menu
Once you’ve entered ClickCartPro, the Navigation tool will expand and appear below the main
ClickCartPro menu. Also, several new menu items will appear to help track your movements
within the program.
Application Selector
This menu simply allows you to quickly jump back and forth between ClickCartPro and the
Kryptronic Hybrid X Core.
Account Menu
This menu deals with the nuts and bolts of your site. It rehashes details of your original
installation that dealt with contacts, passwords, etc. You probably should revisit this menu on
occasion to make sure important information is up to date…change passwords, etc. But unless
you change your web site administrator, you needn’t visit here often.
Account Overview
26
ClickCartPro Version 6.0.6 User Manual
This menu simply presents a summary page for all of the items included in the sub menus of the
Account Menu. In fact, clicking on Account Overview and Update Account Profile presents the
same series of items and again, includes the ability to change the administrative email address,
contact info, password, etc. From here or the separate sub-menu, you can also log off of the
system. It is important to log off each day in order to maintain the best security for your web
site.
Documentation
Identical to the Documentation heading in the Introductory Navigation Menu, you can simply
launch PDF manuals of both ClickCartPro and Kryptronic Hybrid X Core. From here you can also
launch an identical online version of the Software License that also resides at the end of this
manual. It’s an exciting read…don’t miss it!
Support
This menu item launches the various online support options presented for ClickCartPro. They
include a Community Support Forum, a software Wiki, and of course, the Kryptronic website
itself. A product with the power and magnitude of ClickCartPro simply cannot be supported with
one singular method. It takes a thorough user manual, thoughtful programming, and a
community of users with practical experience to make ClickCartPro the best it can be for you.
Community Support Forum
This robust bulletin board is a great place to land if you have questions about your ClickCartPro
and you need more than the manual can give. This bustling forum is hosted and attended by
experts who use this product daily and are usually very willing to offer answers to your
questions. You’ll also find additional information from the programmers and special
announcements regarding your product.
Kryptronic Software Wiki
This is a great way to learn about different methods for using your software. Again, like the
Forum, various experts have tackled certain processes and provided the code you need to make
them happen. Even if you don’t have a wealth of knowledge about HTML and PHP coding, there
are still helpful hints that can help you get the most out of your ClickCartPro experience.
Kryptronic Corporate
The main Kryptronic Web site is an excellent source for news, downloads and other current
information that may not make your manual. Clicking here will whisk you to the site and you
can browse from there.
Popular Actions
27
ClickCartPro Version 6.0.6 User Manual
Over time, ClickCartPro will learn the pages where you spend the most time and log them in this
directory so that you can quickly return to those pages. Using this menu item when you first log
in may save you time and clicks.
Recent Actions
This menu saves the last 5 places you visited in ClickCartPro, so if you want to quickly return to
work you were doing previously, you simply choose a location and you’re there. (Sort of like a
digital time machine)
Current Date & Time
This displays the date and time that this page was displayed…according to the clock on the
server. It is not an actual clock as it merely displays the time when the page was generated.
Software License Key
This displays your current software license key so that you can never misplace it.
How Do I Audition My Web Page?
Once you have configured your administrator account and started setting up ClickCartPro, you
will want to view the content as visitors to your site will view it. To audition the “Front-end” of
your site, simply open your web browser and browse to the location of the 'index.php' script you
uploaded earlier. Example:
http://www.yourdomain.com/khxc/index.php
Important Note:
It might make your life easier if you create shortcuts to both the Admin.php and Index.php
locations in your Internet browser so you can quickly and easily navigate to them throughout the
process of setting up your site. Most Internet browsers have a Favorites section where you can
assign frequently used web pages to a link or button for faster access. Both your Admin.php
and Index.php locations will be frequented often while you setup your new site, so quick access
will be important.
The next chapter will define each and every menu item in the massive ClickCartPro program and
you should read the whole thing at your leisure, but we’re going to show you how to get the
jump and get right down to business.
The Quick Start Guide- Let’s Do It!
Normally, we’ll spend most of our time working with ClickCartPro, but let’s enter the Core first.
Why? Because it sounds really cool and also because it will let us start to organize our site using
simple spreadsheets to get the job done.
To access the Kryptronic Hybrid X Core, simply scroll down to the expanded Navigation menu,
select the Application Selector and click on the Kryptronic Hybrid X Core.
28
ClickCartPro Version 6.0.6 User Manual
Now that you’ve arrived in the core, simply find the “Database: Connections, Backups and
Raw Admin” entry and click on it.
This is the main repository of all of the various databases used within ClickCartPro to display
your product information. We’re going to download a few of these spreadsheets and explain a
quick way to get your site up and running. Scroll down and click on the “Raw Database
Admin” button.
You’ll now be greeted by the various tables used by ClickCartPro. We’re going to pull four of
these files and have a look at them. First up will be ccp0_cat; this is our Category file. Just
find this file and click on the Export button.
29
ClickCartPro Version 6.0.6 User Manual
Clicking on this button will bring up a screen that controls this particular file. Scroll to the
bottom of this page and click on “Submit”. This will compile and load this file to make it ready
for export. You’ll then see this screen:
Just click on “Download: Click here to access the Downloads page”.
You’ll then see the following:
Now just right click on this file use the Save Target As…menu item and save it to your desktop.
We’ll also want to gather ccp0_prod, ccp0_prodoptionsel as well as ccp0_prodoptions.
These four files control your Product Categories, your Product Options and of course, your
Products. Just repeat the steps you just used to fish out your Categories and secure the other
three.
Once you have these four files located on your Desktop, we’ll start setting things up.
Important Note:
You’ll notice that the files have also had a _dataexport added to their name. This extra text is
added so that you don’t mistakenly download a file overtop of something you care about. You
can rename this file by simply right clicking on it and getting rid of the extra characters in the
name once you’ve finished working with it.
Quick Start- Setting Up Your Categories
Once you’ve downloaded the four files to your desktop, simply double click on the ccp0_cat file
to launch it in your favorite spreadsheet software. Because you are going to Import these
corrected CSV (comma separated values) files back into ClickCartPro, it is best that you don’t
make any structural changes to the format. Most popular spreadsheets will easily display and
save these files, so just go with the flow.
It should look something like this:
30
ClickCartPro Version 6.0.6 User Manual
When you finally do input your products into ClickCartPro, you’re going to have to list both the
categories for that product and the product options. Because of this, we’ve found it best to set
up both the Categories and the Product Options prior to setting up the Products.
Now that you can see the various columns and the example files that are contained in
ClickCartPro, it should be a little easier for you to figure out how to fill in the various columns.
Remember, when you begin this process and start importing your own information into the web
site, you can always refer to the http://www.yourdomain.com/khxc/index.php link that
you made in your Internet Browser to compare what you’re seeing in the spreadsheet to how it
translates to the screen.
All of the items in your Categories spreadsheet are explained in great detail in the Details
section, but let’s look at our spreadsheet. Again, for clarification, this spread sheet matches the
Category editor in ClickCartPro. You may want to have this part of ClickCartPro open in your
browser while you mess around with your spreadsheet.
Just return to the ClickCartPro Management Interface by going to the Navigation Menu,
Application Selector and then clicking on ClickCartPro.
You’ll then go to the ClickCartPro Main Menu, select Catalog: Categories, Products and
Options and select Manage Online Store Categories.
31
ClickCartPro Version 6.0.6 User Manual
Let’s look at the columns of the Category Spreadsheet:
The first column you’ll see is id. This is simply an abbreviated ID name for your category. This
should typically be a one-word lower cased id tag.
The next column you’ll arrive at is the name heading. For this, you’ll want to fill out the entire
name of a particular category exactly as you want your customers to see the name.
Next up will be the keywords column…simply fill out any words that you feel best describe the
category you’ve listed. This should be somewhere between 5 and 10 keywords that can help
search engines categorize your web site and better place you where you belong. These
keywords will be the start of ClickCartPro’s mission to get you the best possible Internet
exposure.
Now you’ll enter a description of your web site. You can either enter straight text into this
space or if you have XHTML abilities, you can enter XHTML code here. If you do plan on using
XHTML, once you’ve filled out this space, the next column; deschastags is simply techno-speak
for “Description has tags”…if you are using XHTML coding in your description, simply put a “1”
here, if not…a “0”.
The next column says skinoverride. This deals with the overall skin you plan on using for this
category. If you’re new to skins and the underlying code you need to make them work, it’s best
to just leave this column blank and go with the defaults. With ClickCartPro, you have power to
control every aspect of the look and feel of your web site, but in this case, in the interest of
quick gratification, let’s just leave this space blank and see what the defaults do.
The next column deals with your category image. It is called catimg. This column is looking for
the location of your image file. If you plan on setting up a sub directory to store your web
images called /images, you will need to account for that in this column. For instance, if your
32
ClickCartPro Version 6.0.6 User Manual
category image is called lambfries.jpg, you’ll need to add /images/lambfries.jpg in order for
ClickCartPro to display this image on your page.
ClickCartPro has several sub-directories pre-built into the product. You are free to store your
photos in these directories or create your own. If you want to see these directories, simply go
into your FTP Client Software (the product you used to copy all of this stuff into your web site’s
root directory) and find either your /khxc sub directory or your root directory.
You’ll see a directory labeled “Media”. This is the default directory for large and small photos of
your products and other media. You can either use one of these directories for your Category
photos or create a new directory. ClickCartPro doesn’t care, as long as you share the correct
location with it.
The next column you’ll see is called splashdisp. This simply tells ClickCartPro if you plan on
this category being displayed on the front page of your web site. You basically have 2 choices in
the category department; sub categories and main categories. Sub categories are not displayed
on the main page and are only displayed when the category that they are assigned to is clicked
on by the user. Main categories are displayed like this:
Main categories are labeled with a “1” in this column. A sub category is labeled with a “0”.
33
ClickCartPro Version 6.0.6 User Manual
The next column you’ll see is subdispnum. This tells ClickCartPro how many sub categories
you would like to see displayed per row on a category page. You have the choice of 1-4
subcategories per page. Sub categories appear like this on your Main category page (this
example category is set to display 3 sub categories per row):
Now you’ll tell ClickCartPro how you’d like your sub categories displayed by using the
subdistype column. You’ll have several choices. These are listed with the abbreviation you’ll
need for the spreadsheet.
•
•
•
Default (default) – Image and title displayed
Image And Description (imgdesc)- Title, image and description displayed
No Image (noimg)- Title and description displayed
To audition these spreadsheet changes, you have to re-import this spreadsheet into
ClickCartPro. Generally, for quick checks, the Category editor within ClickCartPro is the fastest
way to poke around and try things. The spreadsheet method is best for importing large
amounts of stuff.
The next column is titled proddispnum. This simply covers how many products you want per
row in a particular category. Like the sub categories, you have the choice of 1-4 products per
row.
Also, like the sub categories, you’ll have a choice of how to display your products in the next
column called proddistype. Again, to best see how these fit in your world, try each of the 5
choices and see which one you like best. Just select a choice, then go to the bottom of the
Category page and submit. Then open your Audition page and see how it looks. If you want to
use your spreadsheet to try all of these options, here are the abbreviations you’ll need:
•
default: Image And Title
34
ClickCartPro Version 6.0.6 User Manual
•
•
•
•
dsadd: Description And Add Button
dsimg: Image And Description
noimg: No Image
wadd: With Add Button
The next column; catmulti basically gives your customers the option to add multiple products
from within the category page. For some shopping carts, this is a perfect option…for others it
doesn’t work. In these early trial runs for setting up your shopping cart, try it and see if you like
it. A “0” in this column turns it off and a “1”, turns it on. You should be seeing a pattern here
and also seeing that many of the controls for ClickCartPro are consistent throughout the product.
Next you’ll see the xcat column. This is where you’ll add all of the ID abbreviations from the
sub categories you created for a main category. It should look like this when you’re through
entering your sub categories.
In the sortorder column, you can assign a specific order for your categories and sub categories
to be displayed in. You simply number your categories from lowest number (most important) to
highest (least important).
The next column deals with who gets to see a particular category. It is called catview and you
can assign a category to be viewed by Everyone (A), Selected groups of people (L) or No one at
all (N). Both “Everyone” and “No one” are pretty self explanatory, but if you do choose
“Selected”, then you must also define exactly who you want to see the page in the next column
called catviewg. You have the choice of “admin” which means backend administrators,
“affiliate” which means a page designed for your affiliate clients only, “reports” which means
administrative backend reports, “superuser” which means a category designed for backend
superusers of ClickCartPro, “users” which means basic front end users, and “wholesale”, which
means a category designed for your wholesale clients. Just use a comma-separated list for
special cases or in most cases…the “A” for everyone.
You have now finished entering in your Categories. Now let’s see what we’ve done. First we’re
going to have to import this altered spreadsheet back into ClickCartPro. Save the file and make
sure you maintain the CSV format. Now go back into the Core by clicking on the Navigation
Menu, Application Selector, and finally Kryptronic Hybrid X Core. It should look like this:
35
ClickCartPro Version 6.0.6 User Manual
Once we’ve arrived in the Core, we’ll once again select Database: Connections, Backups and
Raw Admin.
Once again, we’ll click on Raw Database Admin.
But this time, we’ll find the ccp0_cat line and click on Import.
Scan down on this page until you see the CSV File Entry, browse your hard disk to find the one
you’ve just edited, enter it and then hit the Submit button.
36
ClickCartPro Version 6.0.6 User Manual
If you’ve done your job well and maintained the correct format, you’ll see this pleasing green
message to let you know that you’ve accomplished your task.
Now you can audition your changes live by going to your live audition at
http://www.yourdomain.com/khxc/index.php or
http://www.yourdomain.com/index.php
How does it look?
Probably looks fine, but it is mixed with all of the example Categories and Products that were
there when you started. No problem…read on…
Quick Start- How Do I Remove The Example Categories?
Because ClickCartPro is very database-like, it will take a spreadsheet like the one you just
completed and add those contents to the ones that were already in the database. Even if you
erased the examples in your spreadsheet, they haven’t disappeared from view.
The examples are excellent examples of the correct way to do things. They’re sort of like
training wheels until you get up to speed. Once you know what you’re doing, you can get rid of
them.
Let’s take care of that now.
37
ClickCartPro Version 6.0.6 User Manual
From the Core Main Menu, click once again on Database: Connections, Backups and Raw
Admin.
Once again, we’ll click on Raw Database Admin.
This time, we’re going to click on SQL Statement: Submit A Raw SQL Statement
Now scroll down to the SQL Statement heading and click in the text box that is provided. Here
we will enter an XHTML command that tells the Core to erase the file that exists for Categories
and allow you to reenter your new Category file as the reference.
38
ClickCartPro Version 6.0.6 User Manual
Simply type in “delete from ccp0_cat” and hit the Submit button.
Now you have erased the Category table of ClickCartPro and you can re-input your altered table.
Now you’ll only see the categories you created. From where you are now, just click on the
“Overview: Raw Database Admin” link.
Return to the ccp0_cat line, click on Import and re-import the altered ccp0_cat table.
Your web site should now reflect only your new categories.
Important Note: This same procedure will be used to remove all of the examples from the
Options, Products and other categories.
Quick Start- Setting Up Your Product Options
As we said earlier, before we can start adding products to our store, it is best to take care of
Categories, which we just finished and Product Options. Only you will know if you need to cover
Product Options for your store. Product options are additional or complimentary items that
present themselves when a customer is scanning a product. Let’s say you sell computers and
when a customer selects your Miswap 3000 computer, you want to offer additional items to
upgrade the Miswap. You may want to offer 3 choices of DVD ROM Drivers or several flavors of
video cards. When a customer upgrades the standard computer, you want ClickCartPro to
compensate with additional pricing and shipping weights, etc., to accommodate the new items.
This is where we set all of that up prior to actually adding products to the store.
This is also an ideal area to suggest additional products to the customer. Let’s say that a
customer buys your high quality Cow Evaluation software. You might also sell cow makeup and
cow clothing…this is a great time to offer those as additions to the software. Again, only you will
know if Product Options apply to your particular store.
39
ClickCartPro Version 6.0.6 User Manual
Now we’ll need to begin work on 2 of the 4 spreadsheets that we downloaded earlier. We’ll need
ccp0_prodoptionsel and ccp0_prodoptions. Let’s explain what each of these spreadsheets
will cover:
ccp0_prodoptionsel- These are actual individual products and the price and weight that they
will add to the customer’s order. This will be the first spreadsheet we work on in relation to
Product Options.
ccp0_prodoptions- This sheet deals with the more broad categories of the products in the
ccp0_prodoptionsel sheet. For example, you may have a Product Option called Video Cards that
contains 5 different video cards. The Heading “Video Cards” is created here, while the actual
cards themselves and their prices, weights, etc., are listed in the ccp0_prodoptionsel
spreadsheet.
Let’s open ccp0_prodoptionsel to clarify:
This spreadsheet is mercifully small and easy to understand. First you’ll see id, which again, is a
one word abbreviated lowercased name for a certain product.
Next you’ll see the name column, where you’ll input the actual display name you want to
identify the product with.
The pricechangreg column basically is asking you how much additional money should be added
to a customer’s bill when a customer chooses to add this product. Keep in mind that this can be
a positive or negative number. In some cases, your customer may select a less powerful option
than the standard model supplies. In this case, you may be substituting a less expensive option
and saving the customer a few bucks. For cases like this, you would put a (-) in front of the
price (-8.00). Otherwise, a positive number like 84.00 would be used.
The pricechangrec, pricechangwhl, and afflcommchang headings all deal with various
wholesale, affiliate and recurring pricing options that are provided in ClickCartPro, but beyond
the scope of this getting started guide. Just leave them at “0” for the purpose of this
demonstration.
Important Note About Affiliate And Wholesale Pricing:
See page 79 for more details on setting up your Affiliate and Wholesale accounts.
The weightchng heading allows you to compensate for the additional weight this option will add
to the overall weight of the order so accurate shipping charges can be applied at checkout. Like
40
ClickCartPro Version 6.0.6 User Manual
the pricechangreg heading, this can also be a negative number or “0” if the option adds no
additional weight.
If you want ClickCartPro to track your stock of Option items, fill out your current stock number
for this particular item in the inventory column. Just remember, if you fill in anything but “0”
here, ClickCartPro will not offer this option to the customer when supply reaches “0”. If you do
want this option to be active, you also need to make sure that the product you attach it to is set
to track the stock. We’ll revisit this topic when we begin to set up your products.
The downloadfile column is used when you’re allowing a Product Option that requires a
software download. We’ll leave it blank for the purpose of this particular demonstration.
The final column is called fieldorder and deals with the particular order you want to display
these options in. If you are presenting 3 different DVD ROM drive upgrades, you’ll want to
present these in order of importance with #1 being the most important and so on.
Once we’ve created all of the various product option products, we’ll now create categories and
descriptions of these product option groupings by opening the ccp0_prodoptions spreadsheet.
Again, this is a very small and easy to understand spreadsheet.
As with most of the spreadsheets within ClickCartPro, you’ll first encounter the id column. You’ll
want to name the category of options. If we stick to our prior example, we may want to create
an id called dvdrom_add and vga_add. These two categories represent our selection of DVD
ROM options or VGA card options.
The name column represents the display name for this particular group of options.
The description column gives a chance to jot down a few lines to describe the group of
products you’ve chosen to present as a possible product option for your customer. This
description can also contain XHTML tags. If you plan on using XHTML in the description, make
sure you put a “1” in the next column called deshastags. If you don’t want XHTML in the
description, just leave this at the default “0” setting.
The fieldtype column allows you to choose how your Product Options will be displayed. You
have various display types to choose from, but three in particular deal with lists of products.
(These are displayed on page 95) You have:
•
•
•
Selection Box (SELECT-CUSTOM)
Check box (CHECKBOX-CUSTOM)
Radio Button (RADIO-CUSTOM)
Is this option required in order for your customer to order the product it’s associated with?
You’ll make that decision in the required column. If your customer must choose one of these
41
ClickCartPro Version 6.0.6 User Manual
options to continue, set this column to “1”.
the default “0”.
If the product is truly optional, simply leave it at
The cssclass column just tells the file that controls the look and feel of your site, that this is
using the khxc_formfield format. If you’re not familiar with css/xhtml programming, just leave
this at the default value.
The xprodoptionsel column is where you’ll list the products that are within this particular
option. If the option is VGA cards, this is where you’ll list the various choices. You’ll simply use
the ID numbers that you created in the ccp0_prodoptionsel spreadsheet.
The next column for the ccp0_prodoptions spreadsheet is the useinventory column. Like the
previous spreadsheet we worked on, ClickCartPro is happy to track the stock of your options, but
you must make sure that the product they’re associated with is set to track the stock.
The final column is called fieldorder and allows you to choose the order with which your
product options are presented within a product. Like all ranking items within ClickCartPro, the
lower the number, the earlier it’s presented in the order.
Quick Start- Adding Products
So now we’ve prepared our Categories and our Product Options. We’re finally ready to put a few
new products into our store. Now when our Product spreadsheet asks us about which category
we want the product in or the options it needs, we’ll already have those IDs handy.
Let’s open the ccp0_prod spreadsheet.
Of course, our product entries will be more complex than the Categories and Product options,
but most of these are pretty simple once you get rolling.
Here is what the first columns of the Product spreadsheet look like:
You may notice a slightly different order than what we’re presenting here, but just follow the ids
and you won’t get lost. We’ll explain why the order is presented differently at the end of the
Adding Products section.
By now, the id column should be child’s play. You simply select an abbreviated representation
of the product your working on.
The name column, much like its predecessors is the full name of the product. This will be
displayed so it should be the full name and full capitalization.
42
ClickCartPro Version 6.0.6 User Manual
The prodnum column allows you to assign a number to a product. This may or may not work
with your common standard practice…it can be left blank if you choose not to use it.
The pricestatus column allows you to choose from:
•
•
•
•
•
•
R for regular pricing
S for sale pricing
N for option based pricing
V for volume based pricing
C for recurring pricing
D for not for sale
Most folks will just use regular pricing…especially when setting up the store, so just make sure
you have an “R” in this field.
Your regprice column is where you plug in the customer price for the product.
The saleprice, volprice (volume pricing), voltext (text for volume pricing explanation),
recurprice (recurring price) and affilcomm (affiliate commission) columns are designed for
different types of pricing and are explained in explicit detail in the full manual.
The keywords column is where you’ll list the various keywords you want associated with this
product. What words would a potential customer think of when in search of this product? Just
think of 5 or 10 words and separate them with a comma.
The descshort column is the short description of this product that will show up on category
pages and other places where the product is listed along with other products. It should be 3
sentences that provide basic details on the product.
As the ccp0_prod spreadsheet is a long one, we’ll now refresh the artwork to deal with the next
subjects.
The desclong column contains the nitty gritty details on your product. This can be input as
standard text or by using HTML tags. As always, if you have HTML chops and choose to use
HTML, make sure that you put a “1” in the next column, deschastags (description has tags). If
you are only using standard text for this column, then the deschastags column will have a “0”.
The skinoverride column allows you to substitute a different skin for a particular product. This
deals more with look and feel and is beyond the scope of this demonstration. We’ll just be using
the default skins for this demo.
The lgdisp column deals with how you want your product details displayed. You have 3 choices
to choose from. (Examples of these options are pictured on page 82) Here they are with their
spreadsheet codes:
43
ClickCartPro Version 6.0.6 User Manual
•
•
•
Centered Image Display (center)
Default Format (default)
No Image Displayed (noimg)
There are pictures of each of these selections in the full manual, but for the purpose of this
demonstration, simply go with the default.
The reldisptype column deals with the related products that you will assign to this product, if
any. If you sell shoes and want to offer shoestrings or shoe polish, these will be related
products and you should include them. This column lets you specify how you want to display
them. (They are all shown on page 73) You have 5 choices:
•
•
•
•
•
Default (default)
Description and Add Button (dsadd)
Image and Description (dsimg)
No Image Displayed (noimg)
W/add Button (wadd)
For this demonstration, let’s just use defaults again. Like the lgdisp column, there are pictures
of most of these options on page 73.
The reldisplaynum column allows you to assign between 1 and 4 related products per row on a
product page. You can simply fill in any number you choose.
The next column we’ll deal with is called prodmulti. Would you like your customers to have the
option of purchasing related products directly from this product page? If this feature works with
your store’s format, just set this box to “1”. If you don’t want to activate this feature, just put a
“0” in this box.
Quick Start- Concerning Product Photos
Now we’ll talk pictures. ClickCartPro provides 3 spaces for pictures of various flavors on your
product page. You have small thumbnail photos that will go into the imgsm column; large
product photos that will reside in the imglg column and then detailed extra large photos will
reside in the imgxl column.
Use a single small photo for your thumbnail photo. You do have the option of using more than
one photo for your large display column. To use more than one picture, simply type in a
comma-delimited list of pictures. Keep in mind that these large photos are all displayed on your
product’s main page. You may want to see the affects of using multiple photos and whether you
like that or not. Your extra large photos can also be stored in a comma-delimited list. These
extra large photos can be accessed by a button on your product page and are displayed in a nice
light box effect.
Once you’ve decided which pictures to use on your product, let’s take a quick break from these
spreadsheets to import your pictures into ClickCartPro.
Just go to your FTP editor and access your site.
44
ClickCartPro Version 6.0.6 User Manual
It should look something like this:
Now access the /media subdirectory and then click on /ccp0.
Your FTP editor should now reflect something that looks like this:
Once glance clears everything up. You have folders called prodlg, prodsm, and prodxl. All
you need to do is import your thumbnail small photos into the prodsm folder, your large
product photos into the prodlg folder and of course, your extra large detailed photos into the
prodxl folder.
This will be a much quicker process than importing these pictures one at a time in ClickCartPro.
Also, when you are planning on using the comma-delimited method of displaying more than one
picture in the prodlg and prodxl categories, this method makes it much easier. ClickCartPro’s
interface is really more suited to adding or replacing one photo at a time.
45
ClickCartPro Version 6.0.6 User Manual
Quick Start- Changing Default Picture Sizes
One last thought on pictures. Say you already have thumbnails designed for your web site and
ClickCartPro’s default settings put the squeeze on your thumbnails or stretch them like a
Hollywood actress with too much plastic surgery…No problem just go to Settings: Application
Settings Menu and click on Image Specifications.
Here, you’ll be able to adjust the width of several categories of photos on your site and better
“dial in” the look of your images.
Quick Start- Any Spotlight Categories For This Product?
The next several columns deal with placing your product on the various promotional categories
that are provided in ClickCartPro. The splashdisp, newdisp, specialdisp, bestselldisp and
featuredisp columns correspond to the various spotlight menus that are optional within
ClickCartPro. These normally display in the Online Store menu and appear like this:
The splashdisp column lets you determine if this product is crucial enough that you want it
displayed on the front page of your web site. This is the ideal place to push the products that
mean the most to your store. A “0” means “don’t list it there”. A “1” means “list it there”.
If a product is new to your site, you may want to list it in the newdisp column. Repeat
customers to your site may only peruse this link because they only want to know about the new
stuff that you have to offer. It’s always wise to keep this section as up to date as possible.
Another favorite of many customers is the sale area. You can mark “1” on all of the products
where you have a special limited price in the specialdisp column. Folks love to get a bargain
and the Internet is no exception. It is also important to keep this area current.
46
ClickCartPro Version 6.0.6 User Manual
The bestselldisp column is next and deals with products you view as best sellers. The “best
seller” moniker may convince a customer who is choosing between 2 different versions of a
product on your site. Best sellers mean that you have tacit “lemming” approval.
The featuredisp column allows you to focus on only 5 products that you wish to feature on the
front page of your site. These are your core products and the ones you wish to push the hardest
when a customer arrives at your store.
What is the difference between Home and Store Home?
As you begin working and auditioning your changes, you may notice that you’ll see references to
Home, Splash and Store Home in both headings and background. Basically, there are 2 "landing
pages" within ClickCartPro. The first is the page that, by default, one sees when they hit a site
that hasn't been changed from the initial installation. That is the HTML page you see in Web
Page Management with the identifier of Splash. The second page is the Store Home (landing)
page, which is what you normally get when you click on the Store Home link in the default skin.
Let’s continue in our spreadsheet. We’re now configuring the stock and tax options for your
specific products. If your specific state, province or country require you to apply sales tax to
this item, you would set it to “1”. If you plan on just setting standard tax ratios to both states,
provinces and various countries, then leave taxstateprov and taxcountry at the default “0”.
When would I care about this?
This might come into play if you have state tax enabled but are selling an item that is tax
exempt. In that case, you would disable the state tax. The taxcountry is used for international
stores. Tax rules vary from country to country, so if you are not in the United States, check with
your local tax authorities to set up your tax fields correctly.
Quick Start- Declining Balance Inventory
The useinv and invlevel columns represent inventory tracking and levels for your products. If
you want ClickCartPro to track your inventory you would simply set the useinv column to “1” and
then fill in the current inventory for that particular product in the invlevel column. Some people
love the declining balance inventory because it always gives their customers up to date
information about product availability. Others don’t like it because once ClickCartPro thinks
you’re out of stock it no longer lists the product available for shipment. This can cause pain if
you also have a telephone sales staff and they ship things without reporting them to ClickCartPro
or customers leave your store to purchase similar products from a different store. You have to
decide whether this feature benefits you or causes confusion. Once you’ve decided this, you can
either implement or not implement.
47
ClickCartPro Version 6.0.6 User Manual
The addemtext column refers to text you’d like to add in addition to the thank you email that is
generated when a customer purchases anything from you. If this product has special
instructions or you’d like a special message to be conveyed alongside your standard “Thank you”
email, then this is the place to type it in. This is standard text only…no html.
Quick Start- Delivery Of Products To Your Customers
When most of us think of shipping, we think of the UPS driver, the postal carrier or other big
trucks filled with packages. In fact, most products are probably delivered in this exact manner.
But if you’re a software company or provide some sort of service, you may deliver nothing at all
to a customer via shipping. Other businesses present various unusual shipping demands and
ClickCartPro is set to support them all.
The delmethod column deals with your specific plans for delivery of this particular product. You
have several choices: (just put the letter in parenthesis in your spreadsheet)
•
Not Shipped (N)- This would be used for a specific service or software download where
no actual product will be shipped.
•
Realtime Carrier (R)- If you plan on using the Post Office, UPS, Fedex or Intershipper to
ship this product, ClickCartPro has these companies integrated into the checkout so
realtime quotes can be generated. We’ll set these carriers up later in the tutorial.
•
Product-Based Shipping (P)- You can simply assign a total shipping amount for a
specific product and bypass the realtime quotes.
•
Custom Shipping Method (C)- You can base your shipping charges on a number of
factors that you set up in the next column.
The customship column provides you with a list of custom shipping methods that you can apply
to a particular product at customer checkout. Simply plug in the abbreviation that shows in the
parenthesis:
•
•
•
•
•
Calculation On Total Item Cost (cst)
Calculation On Total Item Quantity (quan)
Calculation On Total Item Weight (wgt)
Percentage Of Total Item Cost (pct)
User Defined Calculation (user)
The dlfile column contains the name of a download file in the case of a software product. If you
use the ClickCartPro interface to upload a downloadable file, you simply browse your drive, show
it the file you want and it uploads it automatically to your secure directory in a special /download
subdirectory. (i.e. /htdocs/khxc-private/downloads/yourfile.exe) To use the spreadsheet
method, you simply put the name of the file in this box and then upload your software file to
that directory using your ftp editor. Now your files are secure in a password-protected
environment, but your customers can purchase them quite easily.
48
ClickCartPro Version 6.0.6 User Manual
The shiponename, shiponeprice, shiptwoname, shiptwoprice, shipthreename and
shipthreeprice columns all deal with Product based shipping. If you want to skip realtime
quotes from shipping companies and simply include a blanket price for your own chosen shipping
methods for each product, you would fill out the name and price in these columns. For example,
you may just want to offer:
•
•
•
Overnight Shipping:
$12.00
Second Day Shipping: $9.00
Ground Shipping:
$6.00
This spreadsheet continues…Let’s refresh the look again:
The shiplocal and shipint columns deal with both domestic and international carriers that you
prefer if you’ve chosen Realtime Shipping as your shipping method for this particular product.
You can choose one or all of these methods on a product-by-product basis: (just use the content
in the parenthesis to add this method to your shipping choices)
•
•
•
•
Federal Express (FEDEX)
Intershipper (INTERSHIPPER)
United Parcel Service (UPSTOOLS)
United States Postal Service (USPS)
You’ll fill these out for both domestic (shiplocal) and international (shipint) shipping if you intend
to provide both. We’ll explain later how to set up these realtime shippers.
Product dimensions occupy the next 4 columns and include shiplength, shipwidth, shipheight
and shipweight. You will simply type in length, width and height in inches and weight in lbs.
The system defaults to US standards, but if you need centimeters and kilograms for a non-US
company, you can simply go to the Application Settings menu and change to the non-US
standards.
Important Note:
It is very important to fill out all shipping dimensions, especially when using Realtime and
Custom carriers because this additional information helps guarantee that both you and your
customers get the most accurate shipping quotes possible. Saving you from overpaying or
explaining over billing.
The shipnumbox column let’s you state the number of boxes a particular product requires. You
can select “0” boxes to have this product packed in a box with other products in the order or
select from “1” to “6” if this product requires it’s own box or boxes.
49
ClickCartPro Version 6.0.6 User Manual
The next three fields: shipstateprov, shipcountry and shipzip all deal with the location you
plan on shipping the products from and is imperative for most background shipping operations.
If you ship everything from one business location, you can leave these fields blank and
ClickCartPro will default to the business state, country and zip code you list for the business. If
you have various products shipping from various warehouses in several states, then you’ll need
to fill in these fields with the correct state, country and zip code for the products this affects.
The shipemail column deals with any products that you may have drop-shipped by another
company. Every time an order is confirmed that is drop shipped, your drop-shipper receives an
email with simple customer shipping instructions. No price or other account information is
provided.
Quick Start- Bring On The Categories and Product Options!
We finally can see the light at the end of the tunnel on this very lengthy spreadsheet. Finally we
get to use the Category and Product Option information that we started early in this tutorial.
This would probably be a good time to print both the ccp0_cat and ccp0_prodoptionsel
spreadsheets, as you will be referring to them to fill out your next columns.
The xcat column contains the category id name for the categories that you want this product to
be listed in. If you have more than one category for this product, simply separate the various
names by a comma. The ID names for this column will come directly from the ccp0_cat
spreadsheet that you just printed out.
The xprod column is where you’ll list any products that you feel are related to this product.
Again, a pair of shoes might have related products like shoe strings, shoe polish, etc. You will
have to wait to fill out this particular column until you have a full list of products and product IDs
finished.
The xprodoptions column will contain the various product options that you created. The id
names for this column will come right from the ccp0_prodoptionsel spreadsheet that you just
printed out.
We’re in the homestretch! This will be the last update screenshot of the spreadsheet and then
we’re finished with the meat of our web site.
Quick Start- Sorting Out The Details
ClickCartPro allows customers to search for products in various ways. This makes it more
convenient for your customers to find the way that best suits their needs. The following 3
columns, sortorder, sortprice and prodidx help ClickCartPro sort according to those needs.
50
ClickCartPro Version 6.0.6 User Manual
The sortorder column deals with sorting in order of importance according to you. Like all
sorting capabilities in ClickCartPro, a low number means a higher rating. “0” is the most
important, and so on. Here you set the order that products are displayed within their
categories.
The sortprice column let’s you assign a price that is only pertinent when a customer tells
ClickCartPro to sort according to price. This price is not part of any calculations, but lets you
place products in a certain order in that search.
The prodidx column allows you to assign a letter to a product so that when a customer searches
alphabetically, this product comes up at the letter assigned.
Quick Start- Who Can View Your Products?
The next column, prodview allows you to say exactly who can view this particular product. You
may have products that are viewed by:
•
•
•
Everyone (A)
Specific User Groups (L)
No One (N)
Normally, you want your products to carry the “A” moniker so that everyone can view them, but
if you do decide you only want certain groups to see this product, then you have the following
choices:
•
•
•
•
•
•
admin- Backend Administration
affiliate- Affiliate Accounts
reports- Backend Reports
superuser-Backend Superuser
users-Basic Account
wholesale- Wholesale Account
The minquan and maxquan columns deal with minimum and maximum quantities of products
allowed in a customer shopping cart. Just use a “0” here to turn off this function. These items
may have seemed out of place on your spreadsheet, but as we promised at the beginning of the
Product tutorial, an explanation is forthcoming.
Quick Start- Reinserting Your Spreadsheets Into The Core
So, we’ve finished our introductory work on the Categories, Products and Product Options
spreadsheets, so now it’s time to reinsert the 4 sheets we’ve worked on back into ClickCartPro.
First, we’ll want to remove the example files that are there. Simply refer back to the tutorial on
accomplishing this by going to page 40 and applying the same steps for the product, product
option select and options lists.
51
ClickCartPro Version 6.0.6 User Manual
Now we’ll reinsert all 4 spreadsheets.
To do that we’ll stay in the CORE!
Just go to the Application Selector and Select “The Core”
Then select Database: Connections, Backups and Raw Admin
Now select Raw Database Admin
Now we’ll see the four spreadsheets we’ve worked on one at a time from this list:
This time around, after saving our spreadsheets, we’ll simply choose the spreadsheet we’ve
altered from the list and click on Import.
52
ClickCartPro Version 6.0.6 User Manual
Midway on the next page, we’ll see a box which lets us browse our local hard drive to find the
file in question and then import it back into ClickCartPro.
Lather, rinse and repeat with all four files. Now you can go to your link to audition the site (it
has index.php in the title) and see what you’ve added. It’s starting to look like your own web
site now. Again, we’re not too worried about look and feel…more about accurate products,
pictures, descriptions and the business backend starting to take shape.
Quick Start- Adding Additional Columns To Your Spreadsheet
ClickCartPro is pretty darn comprehensive. We’ve tried our best to offer you just about every
conceivable option when setting up your store. But what if you want to add a column of
information to your spreadsheet that we didn’t think of? Perhaps you sell trucks and want to
add some field test columns that will appear on your product page? Perhaps you want your
product page to offer demos of your latest software product? Could be anything, but what do
you do when you want to include additional information in your spreadsheet. If you notice, the
spreadsheet we’ve been using as an example includes 4 extra columns that didn’t show up in
your spreadsheet. These were columns added after the fact to include additional information not
normally included in ClickCartPro. This is why your spreadsheet may not have been displayed
with exactly the same order as ours. But now, for fun, let’s add a column to the Product
spreadsheet:
Important Note: This is marked advanced because without the knowledge of how to display
these additional columns, they will do you little good.
Now that we’ve fixed all of the spreadsheets in the core, let’s go back to that original list of all of
the various databases (spreadsheets) in the core and go to the ccp0_prod listing. This time
we’ll want to click on the Maintain button.
53
ClickCartPro Version 6.0.6 User Manual
Let’s click on Add A New Column To This Database Table
First we’ll enter the Column Name (this should be lower-cased letters a-z and the _ sign only).
Next we’ll enter the Display Name of the column…as usual, this should be the full wording that
you want to see.
In the Column Section Name enter the following phrase “Keywords and Descriptions”.
In the Column Description enter the instructions for the column so you remember why you
created it.
Then set the Guided Overview Display Indicator to “False” and click on Submit.
This will change the ccp0_prod spreadsheet, but only after you do one more thing.
Go back to the Raw Database Admin.
This time click on Submit A Raw SQL Statement
Go to the ccp0_prod entry again and this time, click on the Guided Select button.
You’ll then see a long listing called Select Clause. This has nothing to do with Santa, but if you
scroll down to the bottom, you’ll see the entry or entries that you just created. Simply check
them and these columns will now be active and updateable via your spreadsheet. Simply go
through the process of downloading the product spreadsheet again to begin adding the new info.
You may also notice that this has changed the order of your spreadsheet. That is why. We
promised we’d tell you why and now you know.
You’ve now added an additional row to your Product Spreadsheet and you can add the additional
information that was missing. This won’t show up on your store audition yet, but it will now be
available when the person who creates the look and feel of your web site needs it.
54
ClickCartPro Version 6.0.6 User Manual
Even if you don’t understand one fact about skins, CSS, and XHTML, the preparation you do for
your web site can save you thousands of dollars and lots of time setting up your site.
Quick Start- Setting Up Your Shipping Companies
As we said earlier, you have the choice of using UPS, FedEx, Intershipper and the United States
Postal Service to not only deliver your packages, but also to quote your customers online with
free realtime shipping rates that coincide with the weight and dimensions of their order.
All of these free services require you to have an account setup with the organization in question.
To set these up, just return to ClickCartPro, go to the Shipping: Realtime Shippers and
Custom Shipping Methods menu and select the carrier you wish to set up.
Most of these require you to sign up on the web site of the shipper in question, get some sort of
account number, register your company and then plug the numbers into ClickCartPro. It’s a
fairly simple process and should take more than a few minutes per shipper to complete.
Quick Start- Setting Up Customer Payment Options
Like shipping companies, setting up your credit card processing and customer checkout is a
fairly straightforward process. There are numerous payment gateways supported right out of
the gate, you simply have to plug in the information provided by those gateways to begin
shipping your customer information to them and processing their payments.
We’ll assume that if you already have access to a gateway, that you’ll be able to read your way
through the basic instructions included in ClickCartPro and get things setup.
Just go to your Commerce: Orders and Checkout menu and select Manage Processing
Gateways.
55
ClickCartPro Version 6.0.6 User Manual
You’ll now see a list of options displayed. You’ll notice the Active Status column here. This just
tells you what payment options are currently active for your customers.
To make any option available to your customers at checkout, simply click on Update and once
you begin working with any option, you have to set the Active Status flag to “True” as you see
below.
Here are some of highlights of the list you see above:
•
Contact Customer- This approach is ideal for those customers who are a bit squeamish
about plugging their credit card numbers into the Internet. It simply provides them an
option to have someone from your company call them for their credit card information.
56
ClickCartPro Version 6.0.6 User Manual
•
•
•
•
You just have to judge whether or not you have the resources to follow up each customer
who chooses this option.
Offline (Credit Card)- This is a great option to use if you can’t always ship your
customers’ products on the day that they order them. If you have to order in products
and have a few days down before shipping, this is great because the system verifies that
you have a good credit card, but you can then run it at your leisure when you’re ready to
ship.
Check Payment- If you have customers who prefer paying by Check, this will allow them
to print their invoice and send a check for payment in advance.
Purchase Order Payment- Does your business accept purchase orders? If so, activate
this field and you’re up and running.
Paypal Payment Options- ClickCartPro supports 3 different flavors of PayPal. Simply
activate the one that you have set up in advance. If you don’t currently accept PayPal,
here are the current options:
o Standard- Pass items in a shopping cart to PayPal where customers complete their
payment. PayPal authorizes payments and returns customers to your website.
o Pro Express- Provide a seamless checkout for PayPal account holders via an APIbased integration. Customers select payment method and shipping address on
PayPal, then return to your website to finalize their purchase. (Recommended by
Paypal.com)
o Pro Direct- Accept payments via phone, fax, mail and in-person payments. Add
this optional service for a low monthly fee.
After these options, you’ll have 22 different payment gateway companies to choose from.
Quick Start- Setting Up Your State/Province/Country
ClickCartPro allows you to set up the system to automatically charge taxes when necessary. If
you are in the United States, normally, you only charge taxes to customers who live in your
particular state. To set this up, just go to Locations: States, Provinces and Countries.
Select Manage States and Provinces…
You’ll then see a list of all of the states in the United States on page one and provinces of
Canada and various Armed Forces locations all over the world.
Select “Update” on your particular state.
taxes.
You’ll then see a block which asks about charging
57
ClickCartPro Version 6.0.6 User Manual
Just select “Yes” and ClickCartPro will take care of the rest.
Quick Start- A Quick Fix For The Splash (Front) Page
If you’ve done everything correctly, you’ll still see some things that need to be replaced before
you can get your store running online. Let’s do a temporary patch to your front-page artwork.
The first logo is the company logo in the upper left of the web site.
It is called logo.png and looks like this:
Simply right click on this and copy it into your favorite graphic editor. Make a new logo that
matches this size and call it “logo.png”.
Just use your ftp editor to copy it to this location:
/khxc/skins/ClickCartPro/media/logo.png
If you want to get rid of this handsome fellow, the file is called
http://www.yourwebsite.com/khxc/media/ccp0/html/splash_contact1.png
You can find it, make a file that is similar in size and replace it.
This may not be the optimal HTML and design protocol, but right now, we’re just trying to get
your store up and running.
58
ClickCartPro Version 6.0.6 User Manual
Also, the text on the front page may be too generic to suit your tastes; you can find this by
going to your Web Pages: Web Page Management page and selecting Splash Page.
You simply click on the Update link to start your work.
You’ll find a box called HTML content.
It looks a little scary, but if you scroll down through the Martian language that you see here,
you’ll eventually see the wording from the web site. It will be preceded by a <p> and then have
a </p> at the end of it. You don’t have to get too tricky here. Just replaced the text that is
contained within these html symbols which mean “Start Paragraph” <p> and “End Paragraph”
</p> and you’ll now be writing your first html code. You can simply be careful and replace the
boilerplate text with your own wording.
What starts as this…
…can now reflect your web site’s most important message.
Just experiment with this a little. It’s not rocket science and as long as you’re careful not to
erase anything in the <brackets>, you can quickly create your first html message knowing
absolutely nothing about html.
Again, you’ll want to eventually have a pro from either a local html company or the experts at
[email protected] help you really design the look and feel that perfectly fits your
business personality, but for all intent purposes, we’re now done with all of the content and
backbone information. We just need to add the “purdy” stuff as well as the background info
needed to make your site “pop” in all of the search engines.
That’s the end of our Getting Started Guide. The next chapter delves a little deeper into
ClickCartPro.
59
ClickCartPro Version 6.0.6 User Manual
ClickCartPro Details
If you’ve just completed the Getting Started Guide, most of this will be provided to fill in the
blanks. You’re already familiar with navigating the software and setting up your site. But we’ve
provided this detailed reference guide so that no question remains unanswered.
The following Main Menu options are available for ClickCartPro. Each menu item is broken down
and explained…from first click to every option available within that selection. This is where you’ll
start and spend a majority of your time with ClickCartPro, stocking, managing and organizing
your site and customer services.
This product is designed much like a database. Clicking on any of theses items will usually
present you with table selections and tools for modifying those tables.
For instance, when you click on the Catalog: Categories, Products and Options menu item,
you’ll be presented with the following sub menu:
60
ClickCartPro Version 6.0.6 User Manual
From this selector, you’ll be able to launch the specific table that you wish to modify. In most
cases, you’ll have the following menus to choose from:
1. Functions Menu- From here, you can either add new items to the table, like products,
categories or whatever that particular table controls or you can search the table for a
specific item. In the case of a large store with many products, you’ll simply type in a few
letters of the product you’re interested in just like a standard search engine.
2. Navigation Menu- This will simply tell you how many items are in a particular table and
also the number of pages necessary to display those items.
3. Data Overview Menu- This is the actual list of items in a particular table. In most cases
you’ll have several choices for accessing the data listed.
a. Clone - This makes an exact copy of the item you’re looking at and launches it in
the editor. This is ideal when you have several versions of the same product so you
can quickly duplicate a majority of the information and then just change certain
details.
b. Update- This simply allows you to access the detailed information of a particular
table item so that you can modify it.
c. Delete- Just like the sign says…this allows you to delete an item from the table.
There is a confirmation window that pops up during Delete, so if you make a
mistake, you have a chance to reverse it.
4. Database Information- This displays the database SQL coding that tells the database
what you’re requesting in this table.
Application: Profile and Namespaces
Use this option to manage defaults and namespaces. This refers to the ClickCartPro application
itself and how it names the categories and functions it uses internally.
Application Profile
61
ClickCartPro Version 6.0.6 User Manual
Application Name And Description
Common Application Name
Enter the common name of the application. This name is used in all Backend interface displays
and menus to reference the application. The default name is ClickCartPro. This is only useful if
you want to personalize the Admin section of the product…otherwise, there’s really no reason to
change it.
Front End Display Name
Enter the Frontend display name of the application. This name is used in all FrontEnd interface
displays and menus to reference the application. This is your name for the ClickCartPro
application within your site. If you refer to your site as the Wizbang Hammer Store, then this is
what you would type in here to refer to.
Description
Enter a description for this application. This description shows up on the landing page in the
Admin section that is just above the Application menu link.
Application Defaults/Application Interface
This is the interface this application is associated with. To make this the default application for
this interface, update the 'Default Application for Interface' field. This defaults to “Front End”
when you’re working with ClickCartPro and will say “Back End” should you be making changes to
the Kryptronic Hybrid X Core.
Default Application For Interface
Choose whether this application should be the default application for the interface it's associated
with. Setting a default here will cause the default status for other applications running under the
same interface to be unset. This option would apply if you had multiple instances of CCP
installed on the same core (which some people do) or another application installed on the core
along with CCP.
Default Namespace For Application
Choose the namespace that should be displayed for this application as the default in the event
that a request is received for the application without a namespace referenced. In the event you
have someone trying to hack your site, they will only be shown the default “Splash” page rather
than accessing information they should not be able to get.
Default Display Skin
Choose the skin that should be displayed for this application. This skin can be overridden by
namespaces and various functions within the software. There are two different default choices
here, the ClickCarPro E-commerce skin and the standard E-commerce skin.
Manage Program Namespaces
62
ClickCartPro Version 6.0.6 User Manual
This menu item is for advanced users only. If you are not a ClickCartPro “Superuser”, you really
have no reason to access this listing of the program namespaces. There are basically 145
different functions that the backbone of this program handles right out of the box. Every time a
customer uses your site or clicks on a service within your web site, the software dutifully
completes the task. Each of these prearranged tasks has a name that describes it. A
“namespace” is a one-word abbreviation of that task. It’s a way for the software to apply its
powerful engine specifically to complete a job. It’s no different than walking into a large
company and entering the door of the department that can best solve your problem. The
namespace simply points the software to the right door.
You use this interface to manage these tasks. Every request made executes a namespace whether the namespace is included in the request URL, or the default namespace for a particular
application is executed. Namespaces allow for different modules and functions to take control of
various tasks performed by the software. Namespaces use permissions to control security for
those tasks. Some of the tasks are not for the eyes of your customers; some are not for the
eyes of lower level employees. In this area, you can determine which users can access which
tools.
This interface is used to manage the items stored in the database table associated with this
function. Depending on the permissions associated with this table, you may have options to
insert data (add a new item), update data (change the values for an item), delete data (remove
an item), clone data (make a copy of an item) and to search for items matching particular
criteria.
For example: When a customer wants to subscribe to your newsletter list, they type their
email into the appropriate box on your site and hit Submit. Pressing the Submit button tells the
backbone of the system to copy this email to the newsletter list using a routine that has been
predetermined by the backbone. The process is basically called Email Subscriptions and the
namespace is a one-word abbreviation called “gsubscript”. This routine is a namespace.
Update Namespace Information/Namespace Region
This is the namespace region to which this namespace belongs. Multiple namespaces can belong
to the same region, however only one namespace can be active per region.
Display Name
This is the display name for this namespace. This display name is used for page titles and
statistical logging.
63
ClickCartPro Version 6.0.6 User Manual
Active Status
This is the active status for this namespace. If you select to make this namespace active, all
other namespaces that belong to the same namespace region will become inactive.
User Group Permissions
This is the area of setup that determines “who” has access to certain tasks. In most cases, you
will keep the defaults, but it is good to understand how to access and augment this information.
Allowed Groups
This is a comma-delimited list of user groups that are allowed access to this namespace. If all
groups are allowed access to this namespace by default, enter an asterisk here. Edit this field in
conjunction with the Denied Groups field. If you choose to allow access to this namespace for all
user groups (enter an asterisk here), the Denied Groups field must be completed with a commadelimited list of denied user groups (allow all but those denied) or must be left empty (everyone
is allowed access to this namespace).
Denied Groups
This is a comma-delimited list of user groups that are denied access to this namespace. If all
groups are denied access to this namespace by default, enter an asterisk here. Edit this field in
conjunction with the Allowed Groups field. If you choose to allow deny to this namespace for all
user groups (enter an asterisk here), the Allowed Groups field must be completed with a
comma-delimited list of allowed user groups (deny all but those allowed) or must be left empty
(everyone is denied access to this namespace).
Display Skin Selection
Choose the skin that should be displayed for this namespace. If no entry is made here the
application default will be used. This skin can be overridden by other namespaces and various
functions within the software. In most cases, the default values are your best bet.
URL Link Type
Select the type of link to use for this namespace. A selection of SSL here will force all links
printed by the software to point to https URLs (the secure section of your store). A selection of
Non-SSL here will force all links printed by the software to point to http URLs (the non-secure
section of your store.
Catalog: Categories, Products and Options
The Getting Started Guide covered the best way to add Categories, Products and Options en
masse to your web site. Once you’ve set up your initial store using the Getting Started Guide,
the ClickCartPro interface will be the place where you add these items one at a time.
As you begin to add new products and categories to your site, you’ll notice that you will need to
enter unique identifiers for each individual product and category. These identifiers reside in the
background and are never seen by your customers. Product identifiers are used in conjunction
with related products and categories when the web site identifies a certain product. Because
there is a set length of 250 characters for each product entry, it is best to abbreviate your
64
ClickCartPro Version 6.0.6 User Manual
product names and keep this system as simple as possible. This can be especially useful if you
plan on having many sub-categories to reference.
Manage Online Store Categories
This is where you will setup and maintain the main categories of your web site. These
categories will be displayed in the Categories portion of your web site’s main menu and will lead
your customers through the main highlights of your site. You will augment this section to reflect
your web site’s personality and theme.
To begin adding categories, simply click on the Insert link under the Functions Menu.
The page that comes up contains the following fields, which will help you create a new category:
Category Identifier
This identifier is used within the backend of the software to specify this category. Your
customers do not see it, so it can be abbreviated for your convenience.
65
ClickCartPro Version 6.0.6 User Manual
Display Name
This is the display name for this category. This display name is used in meta tags generated by
the software. This is also the name that will appear on the menu in your web site. It should
identify your category clearly so that your customers know what is there.
Category Keywords and Description/Search and Meta Tag Keywords
Enter a comma-delimited list of keywords below. These keywords are used in both software
searches and meta tags generated by this software. This is one of the major keys to
establishing your site on search engines, so be thorough, specific and choose your words wisely.
Important Note:
When jotting down your keywords, make sure you really focus on different ways to describe
your product. For example, if you sell records, you may also want to use words like LP, 45, 33,
discs, wax pressings, etc. Sometimes, a thesaurus can show you alternative words to describe
your product. Different countries, and even different parts of the same country refer to things
differently. Denoting all of these in your keywords can help you be more easily found when
customers come calling.
Description
This description is used in meta tags generated by the software. This is a description for this
category. It can be the text that shows up when a person searches and finds you in a search
engine. Be sure to take the time to best describe and sell your product here. The work you do
here can be cumbersome, but usually yields dividends by increasing traffic to your site. Choose
your words and your descriptions carefully. This helps interested customers locate and learn
about your products before they arrive at your web site. Think of them as “smart” road signs.
If they’re misleading, customers may never find your store. This description will also be used in
the event that you select this category as a sub-category of a larger main category to briefly
summarize the contents.
This description can contain XHTML tags. XHTML is a stricter version of HTML, the code that
most web pages are made from.
If you go to a web page and in your web browser, tell it to View Source, you will see HTML or
XHTML. XHTML tags tell the browser that you might want a word to be bold. In order for the
word “bold” to show up “bold”, the XHTML code would look like this (<b>bold</b>)) If the
description contains XHTML tags, be sure to set the Description Contains XHTML Tags field to
true.
66
ClickCartPro Version 6.0.6 User Manual
Description Contains XHTML Tags
Indicates if the description for this category has XHTML tags. This lets the software know that
you will be including these tags in your description and to look for and apply them.
Working With HTML Code
You’ll notice many references throughout the program to working with HTML or XHTML code.
Though many of you may work with web pages, you may have no experience with the
programming format that they use. There are excellent tutorials for such things on the Internet,
but when in doubt, simply use the program you use to work on your site. Programs like
Microsoft Front Page™ and others allow you to simply type the text you want and it will format it
into HTML code that you can simply copy and paste into your ClickCartPro interface.
Many experts recommend purchasing introductory books on HTML programming and using a
simple text editor like Notepad to program your site’s HTML.
If you are unfamiliar with the HTML or XHTML programming languages, you may want to hire a
local expert to consult with you on your web site. Kryptronic also provides experts for hire that
can help you shape your web site’s message and presentation. Simply contact
[email protected].
Display Options/Display Skin
Choose the skin that should be displayed for this category. If you do not select a skin to display,
the application or namespace default skin will be used.
Like HTML programming, creating your own skin can be pretty tricky business. You may save
yourself a great deal of heartache by hiring an expert either locally or at
[email protected].
Category Image
This image is used in category displays. It is normally situated to the left of the Category title
and description.
67
ClickCartPro Version 6.0.6 User Manual
To add a new image, you can either enter the name or browse your hard disk and upload a
specific file.
Main Category Indicator
This indicator when set to true treats this category as a main category to be displayed on the
online store splash (intro) page. If it is set to false, this category is to be considered a subcategory of another category. This can be assigned via the Related Categories menu that is
covered on the bottom of this page. Related Categories appear within the main page of any
Main Category.
Sub-Category Display Controls/Sub-Categories To Display per Row
If you’ve created sub-categories to be placed within your main categories, you will choose here
how many to display horizontally per row. You have choices ranging from one sub-category per
horizontal row to four sub-categories.
Sub Category Display Type
This entry allows you to select how your sub-categories are displayed. The default display
method shows a thumbnail (small) image and a title. You can also choose both a thumbnail
image and description or simply a title and description with no image.
Product Display Controls/Products to Display Per Row
If there are products within this category, the Products to Display per Row designation below
controls how many products are displayed horizontally when viewing this category. Like the
Category indicator, you can choose between one and four products per horizontal line.
Product Display Type
68
ClickCartPro Version 6.0.6 User Manual
If there are products within this category, the Product Display Type designation controls which
product category view display to use when presenting those products. Also like the category
display, you can choose from the following:
Default
Displays Title and Image
Description and Add Button
Displays Title, Image, Description, Quantity and an Add Button.
Image And Description
Displays Title, Image and Description
No Image
Displays Title and Description
69
ClickCartPro Version 6.0.6 User Manual
With Add Button
Displays Title, Image and Add Button
Product Multi-Add Indicator
This field allows you to control whether this category uses a product multi-add display. If this
field is set to true, the product display type and number of products to display per row values for
this category are ignored. Instead of using those values to display products for this category,
this category will present a display list that allows a user to add multiple products to their
shopping cart or wish list from the category page.
70
ClickCartPro Version 6.0.6 User Manual
Related Categories
Related categories are displayed as sub-categories of this category in the main page of each
category. Enter a single ID or a comma-separated list as seen below. If you need a list of all of
your categories, simply click on the blue link and that will launch a complete list of your
categories and their specific IDs.
Category Sort Order
This window allows you to determine the order in which your categories will display on your web
page. “0” would be first, followed by “1” in ascending order.
Category Visibility/Category Visibility Selection
This field allows you to control the users who can view this category. You can set this category
up to be viewed by everyone, only users belonging to the groups you specify using the Category
Visibility Groups field, or to be hidden from everyone.
Category Visibility Groups
This checkbox allows you to specify certain groups for which this category should be made
visible. It will only be active if you select “Specific User Groups Only” in the Category Visibility
Selection above. Here are your visibility choices:
admin - Backend Administration
affiliate – Access For Your Affiliates
reports - Backend Reports (Administration)
superuser - Backend Superuser (Your Web Designer, Corporate Officers)
users - Basic Account (Your customers)
wholesale - Wholesale Access for your dealers
71
ClickCartPro Version 6.0.6 User Manual
Manage Online Store Products
Here is where you will control the content and visual presentation of your actual products. You
will enter images, descriptions, category listings, prices, costs, related products and virtually any
important product-specific information. When you click on this item in your ClickCartPro menu,
you will be presented with the ability to add new products or edit your existing product list.
General Information/Product Identifier
This identifier is used within the backend of the software to specify this product. Your customers
do not see it, so it can be abbreviated for your convenience.
Display Name
This display name is used in Meta tags generated by the software. It can be the text that shows
up when a person searches and finds you in a search engine. Be sure to be careful when adding
the name of the product here. Always be cognizant of the fact that search engines are the judge
of how well you get inside your customer’s head. This extra thought usually yields dividends by
increasing traffic to your site. Choose your words carefully. Even something as simple as a
product name can be thought of as a lighted sign pointing to your store.
Product Number
This is the product number. This number is used in some displays to identify the product. This
product number is also available for searches. It is an easy way to track products with similar or
identical names, much like bar codes do in a retail store.
Pricing Type Selection
This is the pricing type for the product. This product can be priced regularly, on sale, option
based (all prices come from options only), volume based, use only a recurring charge or not be
priced at all (not for sale - display only). After choosing the most appropriate option for this
product, you can then configure the details in the fields that follow.
Price Specific Fields/Regular Price
72
ClickCartPro Version 6.0.6 User Manual
This is the regular base price for the product. This price is used for the 'Regular Price' and 'Sale
Price' pricing types. Enter as '0.00' if you are not using this paradigm.
Sale Price
This is the sale price for the product. This price is used for the 'Sale Price' pricing type. Enter as
'0.00' if not used.
Volume Price Schema
If you have selected Volume Pricing for your Pricing Type above, then this is the formula you will
display to determine volume pricing. Here is an example of how to enter this schema:
1:14.00; 2-5:12.00; 6-9999:10.00
(This basically means “1 unit is $14.00, 2-5 units are $12.00 each and 6-9999 units are $10
each.)
Important Note: Make sure you have Volume Pricing selected above. Remember, you also
need to fill in the next space, which is an html description of the pricing you’ve displayed. This
doesn’t have to be anything fancy. We’ll show you how in the example.
Volume Price XHTML Description
This is the volume pricing XHTML description for the volume pricing schema above. This XHTML
description is used for the 'Volume Based' pricing type. This description should be written in
standards compliant XHTML. This is what is shown to the customer to explain the schema above.
You can enter either literal prices here, or enter prices wrapped in 'price' XML tags to use the
currency conversion system. Example: <price>100.00</price>. Follow these exact guidelines
or your pricing will only show as 0.00.
Your HTML code would look like this:
<p>For one unit, the price would be <price>14.00</price>, 2-5 units would be
<price>12.00</price> and 6-9999 units would be <price>10.00</price></p>
We use the <price> identifier in the HTML code so that if something other than US dollars are
used, it is automatically converted.
Recurring Price
If you have a monthly service or subscription, this needs a recurring price for the product. This
price is used for the 'Regular Price', 'Sale Price' and 'Recurring Based (Only)' pricing types. Enter
as '0.00' if not used.
Wholesale and Affiliate Settings/Wholesale Price
This is the wholesale price for the product. This price is used for the 'Regular Price' and 'Sale
Price' pricing types for wholesale account holders. Typically this price is less than the regular and
sale prices.
Important Note About Affiliate and Wholesale Pricing:
73
ClickCartPro Version 6.0.6 User Manual
If you plan on offering Affiliate and Wholesale pricing in your store, you’ll also need to activate
these systems in the Core.
Just go to the Application Selector and select Kryptronic Hybrid X Core.
Then select Application Settings Menu.
Then select the Wholesale and Affiliate Account Settings.
You’ll now be able to activate the various programs you with to offer and also be able to set
limits for commissions. You should also remember that in order to offer both Affiliate and
Wholesale pricing, you’ll need to fill in Affiliate and Wholesale pricing on your spreadsheet for
both the products and product options.
It looks like this:
74
ClickCartPro Version 6.0.6 User Manual
Affiliate Commission Amount
If you have an affiliate dealer who is given a certain amount per product to sell your products,
this is where you would enter that pricing for each product. Enter an amount to pay as
commission to affiliates that generate orders for this product. Enter '0.00' to suppress payment
of affiliate commissions for this product.
Keywords and Descriptions/Search and Meta Tag Keywords
Enter a comma-delimited list of keywords below. These keywords are used in both software
searches and meta tags generated by this software. As always, these keywords can be
signposts in search engines to point customers to your site. Be smart and thorough when
making these decisions.
Short Product Description
Enter a short product description below. This short description must not contain XHTML tags.
This description is used in category displays and to generate Meta tags. This description should
sum up your product in a few sentences. It is used in the category lists of products.
75
ClickCartPro Version 6.0.6 User Manual
Long Product Description
This is the long detailed product description. It will be inserted in the product page. This
description can contain XHTML tags. If the description contains XHTML tags, be sure to set the
Description Contains XHTML Tags field to true.
Description Contains XHTML Tags
Indicate if the long description for this product has XHTML tags.
Display Options/Display Skin
Choose the skin that should be displayed for this product. If you do not select a skin to display,
the application or namespace default skin will be used.
Product Display Type
The Product Detail Display Type designation controls which product detail view display to use
when presenting this product.
76
ClickCartPro Version 6.0.6 User Manual
Default Format places your image to the left and description and price on the right, like this:
Centered Image Display looks like this:
No Image Displayed looks like this:
77
ClickCartPro Version 6.0.6 User Manual
Related Product Display Information/Related Products Display Type
Much like your category pages, if there are products to display that are related to this product,
this designation controls which display type is used for related products when viewing this
product.
Related Products Per Row
If there are products to display as related to this product, this designation controls how many
related products are displayed horizontally when viewing this product. You can choose between
one and four products depending on the visual style you prefer.
Related Product Multi-Add Indicator
This field allows you to control whether this product uses a product multi-add display for related
products. If this field is set to true, the related product display type and number of related
products to display per row values for this product are ignored. Instead of using those values to
display related products for this product, this product will present a display that allows a user to
add multiple related products to their shopping cart or wish list from the product page. An
example of the Multi-Add indicator was covered during the Category tutorial on page 75 of this
manual.
Product Display Images/Small Product Image
This image is used in category displays for this product as a thumbnail image.
If there is a file shown in this box, it is currently the thumbnail image associated with this item.
If you wish to use a different file, you can either enter a new file name for files that are already
installed on your web site, or use the browse button to find and upload a file from your hard
disk. Unlike many shopping carts that force you to create your own thumbnail, ClickCartPro
automatically sizes your images to the perfect size.
Large Product Image
This image is used in detail displays for this product as a large detail image. You can upload and
use a single image or enter a comma-delimited list of multiple images. If there is a file shown in
this box, it is currently the large product image associated with this item. If you wish to use a
different file, you can either enter a new file name for files that are already installed on your web
site, or use the browse button to find and upload a file from your hard disk.
Extra Large Product Image
This image is used in detail displays for this product as an extra large detail image accessed via
a lightbox effect by default. You can upload and use a single image or enter a comma-delimited
list of multiple images. If there is a file shown in this box, it is currently the extra large product
image associated with this item. If you wish to use a different file, you can either enter a new
file name for files that are already installed on your web site, or use the browse button to find
and upload a file from your hard disk.
Product Display Areas
This heading will allow you to choose the various pages this product may be displayed on. The
ClickCartPro store allows many different categories that you can use to differentiate your
products and better promote them within your site. Simply set these various drop down menus
to “true” to include the product you’re working on within that page. Most of these headings are
78
ClickCartPro Version 6.0.6 User Manual
stored in the Online Store Menu and allow your customers to quickly navigate your web site for
the information they seek.
Display on Store Splash Page
What are the first products you want a customer to see? Setting this dropdown menu to “true”
will display the product you’re working on right on your web site’s front page.
Display on New Products Page
Set the dropdown menu to “true” if you want to display the product you’re working on within the
online store New products page. This is a great category for repeat customers so that they can
quickly peruse only those items new to your store that they may not be familiar with.
Display On Specials Page
There is no better promotion on this planet than the special. Set this dropdown menu to “true”
so the product you’re working on is displayed on your Specials page. Customers are much more
likely to return to a site where they think they have received special pricing and superior service.
Display On Best Sellers Page
Set the dropdown menu to “true” to add this product to your Best Sellers page. This page is
good for customers who are having difficulty making a decision about a certain product. The
“Best Seller” distinction lets them feel like they are making a popular decision. This is based on
the all-important “Lemming Theory”.
Display in Featured Products Function
Indicate whether to display this product in the featured products function. Up to five products
can be displayed in this function.
Tax Information
Apply State and Province Tax
Indicate if state and province taxes are applicable to this product. Normally in the United
States, state tax is applicable on products you sell to customers within your state. In most
cases, if you live in Pennsylvania and sell a product to a customer in California, state taxes are
waived. It is always a good idea to check with your local state tax authority if you have a
question.
Apply Country Tax
Indicates if country taxes are applicable to this product. In most cases, country taxes are added
to products when they arrive in the destination country and are included in the Customs process.
If you have a question about such taxes, it is always good to consult with a tax authority for
your country or state.
Inventory and Quantity Controls
If you would like ClickCartPro to track the inventory for this particular product, just complete the
information in this field. ClickCartPro will keep track of important stock information and aid you
in keeping your inventory up to date.
Use Declining Balance Inventory
Indicate whether to use declining balance inventory for this product. If you choose to use
declining balance inventory, be sure to enter an Inventory Level. Items that use inventory and
79
ClickCartPro Version 6.0.6 User Manual
have a zero inventory level will be unavailable for purchases. This feature will keep customers
from purchasing products that you don’t currently have in stock. It will also keep you from
charging customers for a product you can’t ship to them and then having to reverse charges at a
later time. Of course, this must be monitored closely, as you also want your customers to be
able to order your products at any time.
Inventory Level
This is the inventory level for the product. This inventory level is declined for each item ordered
until it reaches zero if this product is set up to Use Declining Balance Inventory. Enter as '0' if
not used. This is how ClickCartPro knows what you have and don’t have. It will simply remove
items as customers order until “O” is reached. ClickCartPro only knows when products are
purchased via the store. If you also have telephone ordering available, this quantity must be
updated to keep it useful.
Minimum Quantity Allowed
This is the minimum quantity allowed in customer shopping carts for this product. Customers will
be unable to add item quantities less than this level. Set this value to zero to disable this
feature.
Maximum Quantity Allowed
This is the maximum quantity allowed in customer shopping carts for this product. Customers
will be unable to add item quantities more than this level. Set this value to zero to disable this
feature.
Confirmation Email Text
You can enter text below to be included in order confirmation messages for orders containing
this product. Do not enter XHTML tags in this confirmation email text. You’ll normally have a
standard email address that ships to your customers for every order you ship out of the store.
This message is for products that may require special attention or instructions to deliver your
customers the most useful and up to date information available.
Delivery Method Selection
This is the delivery method for the product. This product can be a service(not be delivered by a
physical carrier), it can be delivered via realtime shipping carriers, a product specified method, a
custom shipping method or it can be a digital download item.
Delivery Specific Fields
80
ClickCartPro Version 6.0.6 User Manual
Once you’ve chosen a specific shipping method for your product, you can customize that method
even further with the fields that follow.
Custom Shipping: Method
If you’ve chosen a “Custom” shipping method, this field will help you decide which custom
shipping method best suits your product. You can base your shipping charge on your Total Item
Cost, your Total Item Quantity, Your Total Item Weight, a percentage of the total Item Cost, or
define your own calculation.
Download: File
If you sell downloadable software products, you can select the file name here and upload to a
secure directory on your server. There is a single user name and password for download
products. When a customer buys a downloadable product they get a link to a specific file in the
public download directory and the user name and password (which are the same for everyone).
The user name and password as set in admin under Home > Hybrid X Core > Settings:
Application Settings Menu > Download Directory Settings
Important Note:
For security reasons, you should probably change this name and password weekly.
Product Based: Method Screens
These fields are used for the 'Product Based Shipping' delivery type. Enter a name below for the
various product based shipping methods. You may want to bypass the realtime shippers and
just offer blanket pricing on a product. This is where you would offer such a thing.
Example:
Ground Shipping2nd Day ShippingOvernight Shipping-
$10.00
$18.00
$1000.00
Product Based: Method Price Screens
These fields are used for the 'Product Based Shipping' delivery types. Enter a price, which
corresponds to the various shipping methods you choose.
Realtime Local Delivery Carrier
81
ClickCartPro Version 6.0.6 User Manual
Here you can choose the standard realtime local (domestic) deliveries that you use. Just check
all of the delivery services you are connected to and your customers will then receive realtime
quotes for shipping on all of their orders. The following shippers are currently supported in
ClickCartPro:
•
•
•
•
FedEx DirectConnect
InterShipper
UPS Online Tools
USPS WebTools
Realtime International Delivery Carrier
This field is used for the 'Realtime Carrier' delivery type for international orders. Select one or
all of the carriers that you will use. Their rates and options will be displayed to your customers
after you configure the rest of your site. The following list is currently supported in ClickCartPro.
•
•
•
•
FedEx DirectConnect
InterShipper
UPS Online Tools
USPS WebTools
Realtime and Custom: Item Length
This field is used for the 'Realtime Carrier' delivery type. Enter a length for this item. This
dimension should be entered in inches (IN) or centimeters (CM) depending on the global
dimension setting selected in Shipping Settings.
Important Note:
If you plan on using realtime shipping quotes, it is important that you take the time to
accurately reflect the measurements of your products. This information insures that your
customers receive accurate shipping quotes and that you are not over-billed and underpaid by
the customers for their shipments.
Realtime and Custom: Item Width
This field is used for the 'Realtime Carrier' delivery type. Enter a width for this item. This
dimension should be entered in inches (IN) or centimeters (CM) depending on the global
dimension setting selected in Shipping Settings.
Realtime and Custom: Item Height
This field is used for the 'Realtime Carrier' delivery type. Enter a height for this item. This
dimension should be entered in inches (IN) or centimeters (CM) depending on the global
dimension setting selected in Shipping Settings.
Realtime and Custom: Item Weight
This field is used for the 'Realtime Carrier' and 'Custom Shipping' delivery types. Enter a weight
for this item. This weight should be entered in pounds (LB) or kilograms (KG) depending on the
global weight setting selected in Shipping Settings.
Realtime and Custom: Number of Boxes
This field is used for the 'Realtime Carrier' delivery type. Select how many boxes this item is
shipped in. You can choose from one to six boxes.
82
ClickCartPro Version 6.0.6 User Manual
•
•
Group With Other Items
Multiple Box Selector
Realtime and Custom: Origin State
This field is used for the 'Realtime Carrier' delivery type. Select which state or province this item
is shipped from. If there is nothing special about how you deliver this product, the default values
will be filled in for you with your default address. This simply lets your shipping services know
where the product will ship from to determine the rates.
Realtime and Custom: Origin Country
This field is used for the 'Realtime Carrier' delivery type. Select below which country this item is
shipped from. If there is nothing special about how you deliver this product, the default values
will be filled in for you with your default address. This simply lets your shipping services know
where the product will ship from to determine the rates.
Realtime and Custom: Origin Zip/Postal Code
This field is used for the 'Realtime Carrier' delivery type. Enter below the zip/postal code this
item is shipped from. If there is nothing special about how you deliver this product, the default
values will be filled in for you with your default address. This simply lets your shipping services
know where the product will ship from to determine the rates. You would only need to change
this if you ship from a different location that your business office.
Dropshipper Information
Enter a single or comma-delimited list of email addresses to which order email messages should
be sent for orders containing this item. Recipients of dropshipper messages will receive product
and delivery information only - not customer account information.
Relationships/Related Categories
Enter a single ID or a comma-separated list of multiple IDs for categories that this product
should be displayed in. There is a link called Related IDs that you simply click on to see all of the
categories you can choose from. It is shown below:
Related IDs (New Window): Related Categories
Related Products
Enter a single ID or a comma-separated list of multiple IDs for products that are related to this
product. There is a link called Related IDs that you simply click on to see all of the categories
you can choose from. It is shown below:
Related IDs (New Window): Related Products
Related Product Options
If you selected the 'Option Based' pricing type, you must relate this product with at least one
product option. For all other types you can relate this product to zero or more product options.
Enter a single ID or a comma-separated list of multiple IDs for product options that are related
to this product. There is a link called Related IDs that you simply click on to see all of the
categories you can choose from. It is shown below:
Related IDs (New Window): Related Product Options
83
ClickCartPro Version 6.0.6 User Manual
Product Sort/Search Options/Product Sort Order
This sort order numeric allows display of products in a particular order. Products are sorted
within category and related product displays in ascending order based on this numeric indicator.
Products are listed from 0 and up to determine their placement in a particular category. (what
do you do if you have a product that you want #1 in one category, but #6 in another?…two
products made?)
Product Sort/Search Price
The product sort/search price controls how this product is displayed in FrontEnd result sets when
sorted by price. It also controls the price used in store searches when a minimum or maximum
price is entered by the user. Enter a price here to use for this sort. This price is not used by
the software for any calculations.
A good price to use here would be the actual price for a quantity of one of this product. This field
is stored as an integer in the database without a decimal to ensure accurate sorting.
Example:
$999.85 would be stored as $999 or $1000
Product Index Group
This product index selection controls under which letter in the index this product is displayed in.
Simply match the first letter of the product. This is not done automatically, so make sure you
don’t skip this step when setting up your product. (Apples go under “A”)
Product Visibility/Product Visibility Selection
This field allows you to control which users can view this product. You can set this product up to
be viewed by anyone (for all of your standard customers), only users belonging to the
groups you specify using the Product Visibility Groups field (see the groups listed below),
or to be hidden from everyone (perfect when you’re working on products for a future release
that you aren’t quite ready for everyone to know about just yet)
Product Visibility Groups
If you selected to allow only certain user groups to access this product under the Product
Visibility Selection field, select the groups for which this product should be made visible.
•
•
•
admin - Backend Administration
affiliate – Access For Your Affiliates
reports - Backend Reports (Administration)
84
ClickCartPro Version 6.0.6 User Manual
•
•
•
superuser - Backend Superuser (Your Web Designer, Corporate Officers)
users - Basic Account (Your customers)
wholesale - Wholesale Access for your dealers
Manage Product Option Selection Items
This heading allows you to manage all of the options you may present for particular products. If
you sell computers and each computer allows you to pick certain mice, video cards, DVD ROMS,
and other options, you would list those items here. They would then show up as options after
your customer selects the base item. This section also allows you to assign a positive or
negative adjustment to the overall package so that the price to the customer changes “on the
fly”.
These are the actual Product Option items themselves. This is where you spell out the product;
it’s details and additional cost. Once you have determined the individual items, you will then use
the next field, “Manage Product Options” to categorize the products into groups like “CD ROM
upgrades”, “Hard Disk Upgrades”, etc.
It looks like this:
To add a new product option, simply click on the Insert link under your Functions menu. You
can also edit your existing Options by clicking on the “Update” link beside the chosen product.
85
ClickCartPro Version 6.0.6 User Manual
These options can then be added to the Related Product Options field of any included product.
Identifier and Name/Identifier
This identifier is used within the backend of the software to specify this product option. Your
customers do not see it, so it can be abbreviated for your convenience.
Display Name
This is the display name for this product option selection item. It is used in displays to identify
the selection item. Make sure you name this option concisely so customers easily understand
the various options they can add.
Price Change Information/Base Price Change
As customers add and delete options, the overall price of the product can flow with their changes
automatically. Enter a base price change for this product option selection item. This base price
change will affect the one-time base price for items added to customer shopping carts with this
product option selection item. You can enter a positive number (Example: Enter '+1.00' or '1.00'
to increase the base price) or a negative number (Example: Enter '-1.00' to decrease the base
price). If you enter '0.00' or a zero-equivalent, this product option selection item will have no
effect on pricing of options or items.
Recurring Price Change
Enter a recurring price change for this product option selection item. This recurring price change
will affect the recurring price for items added to customer shopping carts with this product
option selection item. You can enter a positive number (Example: Enter '+1.00' or '1.00' to
increase the recurring price) or a negative number (Example: Enter '-1.00' to decrease the
recurring price) or nothing at all. If you enter '0.00' or a zero-equivalent, this product option
selection item will have no effect on pricing of options or items.
Wholesale Price Change
Enter a wholesale price change for this product option selection item. This wholesale price
change will affect the wholesale price for items added to customer shopping carts with this
product option selection item. You can enter a positive number (Example: Enter '+1.00' or '1.00'
to increase the wholesale price) or a negative number (Example: Enter '-1.00' to decrease the
wholesale price). If you enter '0.00' or a zero-equivalent, this product option selection item will
have no effect on pricing of options or items.
Affiliate Commission Change
Enter an affiliate commission change for this product option selection item. This affiliate
commission change will affect the affiliate commission for items added to customer shopping
carts with this product option selection item. You can enter a positive number (Example: Enter
'+1.00' or '1.00' to increase the affiliate commission) or a negative number (Example: Enter '1.00' to decrease the affiliate commission). If you enter '0.00' or a zero-equivalent, this product
option selection item will have no effect on affiliate commissions of options or items.
Weight Change Information
Obviously, as you add options to a base product, you also affect the overall weight of your
shipment. This field allows you to adjust the shipping weight of the product as options are
added. Enter a weight change for this product option selection item. This weight change will
86
ClickCartPro Version 6.0.6 User Manual
affect the overall weight for items added to customer shopping carts with this product option
selection item. You can enter a positive number (Example: Enter '+1.000' or '1.000' to increase
the weight) or a negative number (Example: Enter '-1.000' to decrease the weight). If you enter
'0.000' or a zero-equivalent, this product option selection item will have no effect on overall
weight of options or items.
Declining Balance Inventory Level
You may also want to track the stock of your product option items. This is similar to the
declining balance of your product inventory. If you want this to track, simply add the number of
products currently in stock. Inventory will be adjusted according to your customer orders. Also
remember to manually adjust the quantity for phone or manual orders. Otherwise, this product
option will not be available for purchase from your customers if it shows a “0” balance. Enter
the inventory level for this product option selection item below. Declining Balance Inventory
must be activated for product options this product option selection item is associated with in
order to ensure inventory is declined when this product option selection item is ordered. The
default is zero ('0').
Download File Information
A download file can be associated with this product option selection item. If you choose to
associate a file with this item, the file will be made available for download by customers who
place an order for this product option selection item.
To associate a file with this item, either enter a file name or use the file upload field to download
a file from your hard disk.
Item Sort Order
The item sort order numeric allows display of all the product option selection items associated
with a product option in a particular order. The product option selection items are sorted in
ascending order based on this numeric indicator. The first product you want will be assigned “0”
and on up throughout your list.
Manage Product Options
Now that you’ve set up your individual product option items in the proceeding fields, it’s time to
group these items into categories and assign them a certain look and feel for their display. As
always, you can choose an existing Product Option Category to edit or add a new category by
clicking on the “Insert: Add a new row to this database link” in your Functions Menu.
Identifier and Name/Identifier
This identifier is used within the backend of the software to specify this product option category.
Your customers do not see it, so it can be abbreviated for your convenience. It is entered under
87
ClickCartPro Version 6.0.6 User Manual
the Online Store Products function to associate this option with a product. Because this identifier
is used in XHTML form fields, do not use spaces, periods or special characters.
Display Name
This is the display name for this product option. It is used in displays to identify the option to the
customer.
Description/Description
Enter a description for this product option to be displayed to customers. This description can
give them instructions. This description can contain XHTML tags. If the description contains
XHTML tags, be sure to set the Description Contains XHTML Tags field to true. This is where you
simply describe the option and instruct the customer the various choices available.
Description Contains XHTML Tags
Indicates if the description for this product option has XHTML tags.
Field Type and Required Status/Form Field Type
This is the XHTML form field type used to display this product option.
If you select a field type of “Selection”, “Checkboxes” or “Radio Buttons”, be sure to enter the
ID for at least one product option in the “Related Product Option Selection Items” field
that follows.
88
ClickCartPro Version 6.0.6 User Manual
You can choose a Text Box:
A Text Area: Regular
A Text Area: Small
A Selection Area:
Note: You must list these items in the Related Product Option Selection Items field that follows.
89
ClickCartPro Version 6.0.6 User Manual
Checkboxes:
Note: You must list these items in the Related Product Option Selection Items field that follows.
Radio Buttons:
Note: You must list these items in the Related Product Option Selection Items field that follows.
Hidden Field:
This simply removes the selection from this page.
Required Indicator
Must these options be addressed in order for the customer to order the associated product? If
yes, set this indicator to “True”, if no, set this indicator to “False”
CSS Class
90
ClickCartPro Version 6.0.6 User Manual
This area is marked Advanced because you’ll need a good understanding of CSS to make it
work. This marks an area so that your master CSS file (controls the look of the site) can label it
and apply the correct look to it. The CSS class to be used when displaying the form field. The
default is 'khxc_formfield'. You can change the look of the field by creating a custom css class.
You should apply this class to your all.css file. The default is khxc_formfield.
Related Product Option Selection Items
Enter a single ID or a comma-separated list of multiple IDs for product option selection items
that are related to this product option. You must enter at least one product option selection item
ID if the Form Field Type above is set to Selection, Checkboxes or Radio Buttons. For a list of all
of the Related IDs, just click on the blue link and copy and paste the IDs you want into the box.
It looks like this:
Related IDs (New Window): Related Product Option Selection Items
Declining Balance Inventory
For field types of Selection, Checkboxes or Radio Buttons you can specify inventory on the
product option selection item level. If you would like to activate a declining balance inventory for
those selection items, set this value to true. To turn off declining balance inventory, set this
value to false. If you use Declining Balance Inventory and the system thinks a product is not in
stock, it will no present it to the customers. This can be a two-edged sword. It is very nice to
present an accurate message about stock to your customers, but in many cases, customers will
look elsewhere if they can’t find what they’re looking for. After they’ve placed an order, most
customers will accept a message telling them their order will ship in a few days.
Option Sort Order
This allows you to display all of the product options associated with a product in a particular
order. The product options are sorted in ascending order based on this numeric indicator. Your
first option would be labeled “0” and on up through all of the options.
Commerce: Orders and Checkout
91
ClickCartPro Version 6.0.6 User Manual
Decrypt Offline Order Data
This form is used to decrypt information sent to you via email for offline orders. Typically credit
card numbers, switch/solo card numbers and CVV2 data is sent in encrypted format for offline
orders.
Encrypted Data
Enter the encrypted data below. This is given when an offline order is emailed to you. You then
need to copy the data from this email into this field for it to be decrypted. Kryptronic now also
has an offline decryptor available, just contact [email protected] for more information
on purchasing.
Manage Checkout Form Fields
This field controls the various alternative checkout options that a customer may present. This
will help you set up special forms for Gift Certificates, Discounts, Tax Exempt customers, etc.
This is an example of how this form looks on your checkout:
Form Field Information/Display Name
The display name for the field used in XHTML output during checkout and in mail messages. See
the example below:
92
ClickCartPro Version 6.0.6 User Manual
Form Section
The name of the section of the checkout form this field should be printed in. To create a new
section, simply enter in a section that has not yet been used. See above for an example of
where you text goes in the Form Section.
Required Indicator
Must your customer select something in this field in order to complete the order? If the answer
is yes, set this indicator to “True”. If not, set this indicator to “False”
Display Indicator
Indicator used to determine whether this field is displayed on the checkout form. Set this field to
“True” to display it and “False” to hide it.
Form Field Type
This is the XHTML form field type used to display the checkout field. Just like other option fields
in ClickCartPro, if you select a field type of Selection, Checkboxes or Radio Buttons, make sure
you enter at least one item in the Selection Items field that follows.
CSS Class
The CSS class to be used when displaying the form field. The default is 'khxc_formfield'.
Form Field Description
Display Description
This simply gives more detail to the customer to aid them in filling out this particular section of
the form. It can be displayed for the form field in XHTML output. See example below:
93
ClickCartPro Version 6.0.6 User Manual
Description Contains XHTML Tags
Indicates if the description for this form has XHTML tags.
Form Field Sort Order
This field allows you to place the checkout form elements of your shopping cart in the order you
choose. Start with “0” and work on up. The fields are sorted in ascending order based on this
numeric indicator.
Selection Items 1-20
If you’ve chosen a list of items to choose from during checkout, this is where you would display
them. You have 20 different fields that you can enter data into that will be displayed in the
format you’ve chosen above. In this case, the items are displayed in the Radio Buttons (List).
See example below:
Manage Custom Sale Methods
From here you can create custom sale methods that you can offer your customers. Some of the
built in templates include: Buy X Items Save Y Amount, Buy X Items Save X Percent, Total Of X,
Save Y Amount, Total Of X, Save Y Percent. These are just creative templates to help you
encourage your customers to purchase more items on your store.
Identifier Name/Identifier
94
ClickCartPro Version 6.0.6 User Manual
This identifier is used within the software to specify this custom sale method. This is only for the
backend identity of this method, so you can abbreviate it if you choose.
Display Name
This is the name for this custom sale method.
Sale Method PHP Content
Enter the content for this custom sale method below. This content should be written in standards
compliant XHTML and should contain PHP code. The PHP code in this custom sale method should
be based on the XHTML Includes used by this software.
Manage Discount Codes
This field will allow you to manage any discounts you may offer your customers throughout the
year. You can offer percentage-based pricing, flat discounts on all or selected products, or free
shipping for all or selected products.
General Information/Discount Code
This is the background identity information that ClickCartPro uses to identify this discount code.
It is never displayed, so feel free to abbreviate it.
Discount Code Type
Select Expiring to disable this discount code when empty. Select a Non-expiring type to keep
the code intact for multiple uses.
Discount Code Value
This is the discount code value. Enter a currency amount using the base currency for this
application or enter a percentage amount. If you enter a percentage, be sure to include the
percent sign (%) after your entry (example: 10.000%). If you enter a currency amount, do not
95
ClickCartPro Version 6.0.6 User Manual
include a currency symbol - enter only an amount (example: 10.00). To make this code good for
free shipping, enter 'FREESHIPPING' for the value instead of a currency amount or percentage
amount.
Product Limitation Information/Product Limitation Type
Select the product limitation type (if any) for this discount code. You can limit this code to only
related products that you’ll select, to all products or to everything but the products you’ve
excluded in the Related Products Field. This “Apply To All Except Related Products” entry can be
handy if your discount applies to just about everything in your store but a few items.
Related Products
This is where you select items that are included or excluded in your discounted pricing
(depending on which item you choose under “Product Limitation Type” above. Enter a single ID
or a comma-separated list of multiple IDs for products that are related to this discount code.
Click the blue link for an external window that lists all of the available IDs for products. Just cut
and paste the IDs you want to include. It looks like this:
Related IDs (New Window): Related Products
Active Status
Set this field to “True” if you are currently offering this discount. Set it to “False” if this discount
is currently not being offered.
Manage Online Orders (Completed and Processing)
96
ClickCartPro Version 6.0.6 User Manual
This is where you will access and work with your Completed and Processing orders. You will find
all of your customer information, order information and payment information. You can also find
Tracking information and update the status of an order from this field.
Manage Online Orders (Pending and Cancelled)
This is a listing of your pending and cancelled orders.
Manage Processing Gateways
This field controls the processing gateways that you use to process credit cards on your web
site. You have many different options to choose from here. If you already have a web store set
up, you probably already have a gateway that is likely supported here. If you are new to setting
up your store, then you have many “canned” options that you can choose from and you can add
as your store grows and more support is required.
Many small businesses do not carry stock of every single product that they advertise on their
web stores. In this case, you probably don’t want your store to process the cards of your
customers automatically. Perhaps you would prefer to process cards manually and only charge
your customers at the time of shipment. ClickCartPro offers you enough flexibility that you can
configure it to match the exact methods that fit your working style.
If you have experience adding gateways and do not see your particular gateway support, simply
click on the Add button and follow the following steps.
97
ClickCartPro Version 6.0.6 User Manual
If you do see the various gateways you use all listed, simply scan to the end of this chapter and
each individual gateway is addressed with specific instructions provided so that you can hook
that gateway into your checkout system.
Much of this information is obtained when you sign up for a particular gateway.
Identifier and Name/Gateway Identifier
This unique gateway identifier is used to identify this gateway within the software. This identifier
must be unique, but can be abbreviated, as your customers will not see it.
Gateway Name
This name is used within the software to reference this gateway. It is referred to by
administrators on the backend and not displayed for the customers.
Gateway Active Status and Type/Active Status
This field shows the current status of this gateway. If you set it to “True”, this gateway will be
made available for checkout processing.
Gateway URL Type
This is the type of URL used by this software. An internal URL uses this software and embedded
online processing classes for processing. It is capable of approving a credit charge without any
manual intervention. It simply means that ClickCartPro contacts the payment processing
gateway directly under the covers and requests authorization for the credit charge the customer
entered then presents the results to the customer (approved or not) and does the appropriate
post processing if applicable. An external URL uses an external URL with a relay and response
transaction much like old style manual credit card machines that dialed up a secondary company
to obtain an approval.
Checkout Display/Field Display Text
This display text is used to present an option for this gateway to the customer during checkout.
It better describes this method so your customers understand which choices they want to make.
Field Display Order
The field order numeric allows display of the gateways in the checkout form in a particular order.
The fields are sorted in ascending order based on this numeric indicator. Start with “0” for the
first option you want to present on up.
Field Names/Response Field Name: Response Code
This field is marked Advanced because it should never need to be changed by the storeowner.
Every processor integration uses a response code field to transmit a transaction authorization or
failure code back to this software.
98
ClickCartPro Version 6.0.6 User Manual
Response Field Name: Order Number
Every processor integration uses an order number field to transmit the transaction order number
back to this software with a response code. Enter the order number field used by this gateway
below. Again, this should never be changed by the store owner, as the information should
always be correct.
Request Field Name: Order Total
For processor integrations that use internal URLs for processing, this field is used to ensure the
order total has not been tampered with by the customer. The value of field you specify here is
matched against the order total to verify the order total is accurate.
Valid Response Codes
Enter a single or comma delimited list of response codes issued by this gateway. All codes
entered here should be valid codes that represent an accepted transaction. Do not include failed
transaction response codes here. Again, this should never be changed by the store owner, as
the information should always be correct.
Security/Referring URL String
The referring URL string contains text that must be contained in the referring URL for orders to
be accepted using this gateway. Typically this string is set to an application script name or
processor domain name.
Transaction Key/Password
Some gateways require the use of a transaction key, hash or password to process transactions.
If this gateway requires such a key, hash or password, enter it here. Gateways that require a
transaction key include: Authorize.net/Wells Fargo AIM and SIM, ECHOnline, EFSNET, NetBilling
and FirstPay.
Gateway User/Store ID
For gateways that require the use of a user id or store number, enter that here. Any additional
information to be entered for your account (example: Verisign Partner ID) is entered directly in
the Form Display Code field in a few steps.
Checkout Processing Information/Perform Post-Order Updates
Indicate whether orders processed using this gateway should perform post-order updates
automatically. Post-order updates include updating inventory and discount codes as well as
affiliate commissions. Post-order updates should only be performed for gateways that process
transactions in real time.
Supports Recurring Billing
Indicate whether this gateway supports recurring billing.
Form Display Code
The PHP code entered here is used to set up the XHTML form used to process an order for this
gateway. The PHP code in this display should be based on the XHTML Includes used by this
software. Any XHTML content included in this display should be written as standards compliant
XHTML.
99
ClickCartPro Version 6.0.6 User Manual
ClickCartPro Supported Payment Methods and Instructions For Installation
The following customer payment methods are supported within the ClickCartPro infrastructure.
Just locate the methods that you prefer to use and follow the instructions for their use within
your store.
PayPal Website Payments Pro Management
Configuring the PayPal Website Payments Pro payment method is quite easy. All of the controls
are in the Orders and Payment menu. This is how you can quickly set up PayPal Website
Payments Pro:
STEP 1: Getting Your Webserver Ready
1. The PayPal Website Payments Pro payment methods require you to use a secure server
for processing credit cards transparently using the 'PayPal (Pro Direct Method) - Secure
Server' method. Make sure your host has set up a secure (SSL) webserver account for
you. If you did not originally configure SSL URLs when you installed the program, access
the installer to do so.
STEP 2: Getting Your PayPal Account Ready
1. Login to your PayPal account at www.paypal.com.
2. Click the 'Profile' tab, then select the 'API Access' link.
3. Click the 'API Certificate Request' link, complete the form on the following page. Make
note of the account name and password you select and then click 'Continue'. On the
following page, review the information submitted, and if it's correct, click the 'Generate
Certificate' link. On the next page, click the 'Download' link and save the file
'cert_key_pem.txt' to your computer.
4. Click the 'Merchant Tools' tab and select the 'Virtual Terminal' link next to the PayPal
Website Payments Pro section.
5. Complete the Virtual Terminal application and wait approximately two days to receive
your approval email.
6. Once you receive your approval email, login to PayPal, select the 'Virtual Terminal' link
again and choose to Accept the Monthly Billing Agreement.
STEP 3: Setting Up ClickCartPro
1. Access the management interface function ClickCartPro | Settings: Application Settings
Menu | PayPal Website Payments Pro Settings.
1. Save your key file. Simply paste the contents of your key file into the Keyfile Contents
field.
100
ClickCartPro Version 6.0.6 User Manual
2. Set 'Enable PayPal Website Payments Pro Express Checkout Link' to true.
3. In the field 'API Login: User Name', enter in the account name you selected when setting
up your certificate key file on PayPal's site.
4. In the field 'API Login: User Password', enter in the password you selected when setting
up your certificate key file on PayPal's site.
5. None of the other fields on that page need to be modified.
6. In the management interface, select the ClickCartPro | Commerce: Orders and Checkout |
Manage Processing Gateways function.
7. If you previously accepted payments using PayPal's Standard method, and the payment
method 'PayPal (Standard Method) - Payment Form' is 'Active', choose to 'Update' that
method and set it to 'Inactive'.
8. Choose to 'Update' the 'PayPal (Pro Express Method) - Payment Form' payment method.
Set that method to 'Active'. You only need to update that single field on this page.
9. Choose to 'Update' the 'PayPal (Pro Direct Method) - Secure Server' payment method. Set
that method to 'Active'. You only need to update that single field on this page.
10.After you have completed these steps, your online store will be ready to accept payments
via PayPal Website Payments Pro.
Recurring Billing
Please note: The PayPal Website Payments Pro API (Application Programming Interface)
available from PayPal does not support recurring billing transactions. If you need to support
recurring billing transactions in real time through your online store, and you would like to use
PayPal, choose to use the 'PayPal (Standard Method) - Payment Form' payment method.
Online Processing Setup
Configuring available payment methods is quite simple. All of the controls are in the ClickCartPro
| Commerce: Orders and Checkout | Manage Processing Gateways function.
If you plan on using the recurring billing function of the software, please refer to the Recurring
Billing section.
First, you have to decide which type of order process best suits your site. You can choose more
than one of the following methods:
Contact Customer
No payments accepted online. The customer is notified that you will contact them via telephone
to discuss payment options. Though this saves you any online processing and security issues, it
also means that you have to manually call each customer to obtain the correct payment method.
101
ClickCartPro Version 6.0.6 User Manual
This is the default method used while you are setting up your store before other customer
payment options are added.
Offline Processing (Credit Card & Switch/Solo Cards)
Collect credit card and/or Switch/Solo card information on your own secure server, encrypt the
numbers and then email the primary order email address an encrypted decrypt key. Credit card
numbers can then be decrypted using the Manage Online Orders function. This would be used
for stores that want to run credit cards manually. This can be handy if you have products that
you must order in or ship later than same day…it keeps customers happy when there card isn’t
charged before the product is shipped.
Accept Checks or Purchase Orders
You can allow your users to pay by check or purchase order by presenting them with a
printable/faxable version of their order that can be sent in to you for payment. This method can
be particularly appealing to customers who fear identity theft via Internet credit card
transactions.
Process Payments Through PayPal
You can accept payments with your PayPal account. If users don't have their own account, they
will be prompted by PayPal to create one.
Process With A Payment Gateway
This is the application id that is being used in most cases it is ccp0 or gbu0 (British version)
Be sure to remove the {} when making the changes in the processor site and only use ccp0.
Collect credit card information on your own secure server and have an online processing partner
validate and process the order or use an online processing partner's secure order form for credit
card number entry. Both methods are supported and are easily configurable. If you have a large
supply of products that are always in stock, this is the quickest method for processing payment
and shipping orders.
Currently a large listing of payment processors are supported:
1.
2.
3.
4.
5.
6.
7.
8.
9.
10.
11.
12.
Authorize.Net (SIM & AIM)
Cardservice Linkpoint (HTML & API)
Verisign (Payflow Link)
iTransact
WorldPay (WorldDirect)
Bank Of America
Planet Payment
RTware
2CheckOut (Authnet)
Wells Fargo (Secure Source & BOA)
PaySystems
ViaKlix
102
ClickCartPro Version 6.0.6 User Manual
13.
14.
15.
16.
17.
18.
19.
20.
21.
22.
23.
GoRealtime.Com
ECHOnline
EFSNET
InternetSecure
PlugNPay
SurePay
SkipJack
PSiGate
Netbilling
BluePay (API)
FirstPay
To configure this software package to work properly with your online processing partner's
methods, every bit of information that is transmitted can be configured. In some cases, namely
the interfaces that do not use a third party payment gateway, it is not necessary to make any
modifications.
If you are using a third party payment gateway, you will need to enter your username /
storename / storeid in the Gateway User/Store ID field. You will need to replace the string
'your_username' with the username your processor assigned to you.
Since all pieces of transmitted information are configurable and this package is an open source
the opportunity is here to configure this package for processors other than those that are
provided in the package. There is an insert function available in the management interface to
allow you to configure a processor that is not currently supported. Just follow a similar
processor's entry as an example if you choose to create a new one.
In addition, it is possible to post information from this program to another secure script, even an
ASP script on an NT web server. The information collected there can be sent, for validation, off
to your online processing partner's site before returning to your non-secure site for order
fulfillment. The possibilities are endless. This program is capable, however, of running securely
on it's own.
If your selection was to use a Secure Server method, edit the list of credit cards in the Form
Display Code field. If you selected to use an online processing partner's payment form this
information will be collected on their site.
Setting Up Specific Online Processors
Several online processors are listed below because their setup requires additional configuration
using the admin functions on their site or require the entry of a key or password in addition to
the username entry required by all. Review the instructions below.
If your processor is not listed below with specific instructions, no configuration on their site using
their admin utility is necessary. The following processors do not require additional setup but do
require that your password be entered in addition to your username. Passwords are entered in
the 'Transaction Key/Password' field and are encrypted for your security.
1. EFSNET
103
ClickCartPro Version 6.0.6 User Manual
2. FirstPay
3. SurePay
The remaining processors below require additional configuration using the processor's site admin
utility.
Authorize.Net AIM & Wells Fargo (Authnet Interface)
1.
Login to your account at the processor's site and choose the Settings function.
2.
Under the Settings | Test Mode function, set the system to 'LIVE MODE'.
3.
Under the Settings | Transaction Version function, set the Transaction Version to '3.1'.
4.
Under the Settings | Password-Required Mode function, check the box next to 'Require
Password for ALL Transactions'.
5.
Under the Settings | Obtain Transaction Key function, provide your 'Secret Answer' and
check the box labeled 'Disable Old Transaction key'. After clicking the submit button, you
will be presented with your Transaction Key, which you will need to copy.
6.
Under the Settings | Form Fields function, uncheck every checkbox, then check these
two: Invoice # - Required and Customer ID - Required.
7.
Logout of your account at the processor's site and login to the management interface.
8.
For the Payment Method select the appropriate payment method.
9.
In the Update Payment Method function set the Active Status to Active.
10. Now enter your id in the Gateway User/Store ID field. Replace the string
'your_username' with your processor login.
11. In the 'Transaction Key/Password' field, enter the Transaction Key you created and
copied while using the processor interface.
12. Click 'Submit' and log out of the management interface. You are done.
Authorize.Net SIM
1.
Login to your account at the processor's site and choose the Settings function.
2.
Under the Settings | Test Mode function, set the system to 'LIVE MODE'.
3.
Under the Settings | Transaction Version function, set the Transaction Version to '3.1'.
104
ClickCartPro Version 6.0.6 User Manual
4.
Under the Settings | Password-Required Mode function, check the box next to 'Require
Password for ALL Transactions'.
5.
Under the Settings | Obtain Transaction Key function, provide your 'Secret Answer' and
check the box labeled 'Disable Old Transaction key'. After clicking the submit button, you
will be presented with your Transaction Key, which you will need to copy.
6.
Under the Settings | Form Fields function, uncheck every checkbox, then check these
two: Invoice # - Required and Customer ID - Required.
7.
Logout of your account at the processor's site and login to the management interface.
8.
For the Payment Method select the appropriate payment method.
9.
In the Update Payment Method function set the Active Status to Active.
10. Now enter your id in the Gateway User/Store ID field. Replace the string
'your_username' with your processor login.
11. In the 'Transaction Key/Password' field, enter the Transaction Key you created and
copied while using the processor interface.
12. Click 'Submit' and log out of the management interface. You are done.
2CheckOut
1. For the Payment Method select the appropriate payment method.
2. In the Update Payment Method function set the Active Status to Active.
3. Now enter your id in the Gateway User/Store ID field. Replace the string 'your_username'
with your processor login.
4. Logout of the management interface and open a browser session with your online
processor. Login to your account and select the Shopping Cart | Cart Details function. Set
the value for the field named "Return to a routine on your site after caredit card
processed" to "Yes". For the "Return URL" field, enter in the full path to your script.
Example: http://www.yourdomain.com/khxc/relay/{APP}.php
5. Log out of processor's admin utility. You are done.
WorldPay
1. For the Payment Method select the appropriate payment method.
2. In the Update Payment Method function set the Active Status to Active.
105
ClickCartPro Version 6.0.6 User Manual
3. Now enter your id in the Gateway User/Store ID field. Replace the string 'your_username'
with your processor login.
4. Logout of the management interface and open a browser session with your online
processor. Login to your account and select the Settings function.
5. In the Installations section, click the button under Configuration Options for the
Installation ID you want to manage.
6. On the Configuration Options page, enter the full http path to your script (Example:
http://www.yourdomain.com/khxc/relay/{APP}.php) in the 'Merchant's Shop URL' and
"Callback URL" fields. Then check the boxes next to "Callback enabled?" and "Use callback
response?". Click the "Save Changes" button.
7. Log out of processor's admin utility. You are done.
Cardservice Linkpoint (API Only)
1. When you signed up for your API processing account at linkpoint, you were provided with
a key file. The contents of this key file need to be copied into the Linkpoint API Keyfile
Contents field in the ClickCartPro | Settings: Application Settings Menu | Linkpoint API
Settings function.
2. No other configuration is necessary for this method (other than entering your id in the
Gateway User/Store ID field by replacing the string 'your_username' with your processor
login).
Cardservice Linkpoint HTML
1. Using the administrator, click on Orders & Payment then select the Manage Payment
Methods function.
2. For the Payment Method, select the appropriate payment method.
3. In the Update Payment Method function, set the Active Status to Active.
4. Now enter your id in the Gateway User/Store ID field. Replace the string 'your_username'
with your processor login.
5. Logout of the management interface and open a browser session with your online
processor. Login to your account.
6. Go to Customization then Payment Form Settings and make the following changes:
Delete any text in the "Recipient's Top" and "Recipient's Bottom" textboxes. For the
"Order Submission Form URL", enter in the full path to your script. Example:
http://www.yourdomain.com/khxc/relay/{APP}.php For the "Thank You Page URL", enter
in the same URL as above and check the boxes for "Check here if this url is a CGI script."
106
ClickCartPro Version 6.0.6 User Manual
and "Check if you wish to automatically display specified URL after the LinkPoint HTML
receipt page." Make sure both are checked. For the "Sorry Page URL", enter in the same
URL as above and check the boxes for "Check here if this url is a CGI script." and "Check
if you wish to automatically display specified URL after the LinkPoint HTML receipt page.".
Make sure both are checked. In the "Custom Fields" section, enter in under the column
"Name" for #1: "usrnum" and for #2: "tracknum". There is no need to check the boxes
for "Make Viewable" or enter anything in the field "Caption" for either of these "Name"
entries. In the "Customer's Receipt" section, uncheck the box "Check here if you would
like to receive a copy of each receipt". You don't want CardService sending anything to
your customer as the software does it for you. Click "Submit" at the bottom of the page.
7. Log out of processor's admin utility. You are done.
Bank Of America & Wells Fargo (BoA Interface)
1. Using the administrator, click on Orders & Payment then select the Manage Payment
Methods function.
2. For the Payment Method, select the appropriate payment method.
3. In the Update Payment Method function, set the Active Status to Active.
4. Now enter your id in the Gateway User/Store ID field. Replace the string 'your_username'
with your processor login.
5. Logout of the management interface and open a browser session with your online
processor. Login to your account.
6. Using the processor's admin interface, turn off all notification by email, both to you and
the customer.
7. Change your confirmation pages to custom instead of the default page and make the
address for both pages 'http://www.yourdomain.com/khxc/relay/{APP}.php' or whatever
location you have the program located. Regardless, make this the address for *BOTH*
your reject and accept confirmation pages in the custom confirmation pages.
8. Log out of processor's admin utility. You are done.
Verisign Payflow Link
1. Using the administrator, click on Orders & Payment then select the Manage Payment
Methods function.
2. For the Payment Method, select the appropriate payment method.
3. In the Update Payment Method function, set the Active Status to Active.
107
ClickCartPro Version 6.0.6 User Manual
4. Now enter your id in the Gateway User/Store ID field. Replace the string 'your_username'
with your processor login.
5. Logout of the management interface and open a browser session with your online
processor. Login to your account. Select the Account Info function.
6. Go to General - Edit Configuration and make the following changes: For Return URL
Method, choose POST. For Return URL, enter the full http path to your script. Example:
http://www.yourdomain.com/khxc/relay/{APP}.php For Required Fields, check the boxes
for Name, Address, City, State, Zip, Country and Email.
7. Go to Security Options and make the following changes: Add the full http path to your
script as an "Accepted URL". Example:
http://www.yourdomain.com/khxc/relay/{APP}.php
8. Click the submit button at the bottom of the page to update your settings.
9. Log out of processor's admin utility. You are done.
ECHOnline Credit Card
1. There is no configuration needed using the ECHO management interface - just be sure to
have your ECHO merchant id and password that were issued to you.
2. Login to the management interface.
3. For the Payment Method select the appropriate payment method.
4. In the Update Payment Method function set the Active Status to Active.
5. Now enter your id in the Gateway User/Store ID field. Replace the string 'your_username'
with your processor login.
6. In the 'Transaction Key/Password' field, enter the password you have been issued for your
merchant id.
7. Click 'Submit' and log out of the management interface. You are done.
Planet Payment & RTware
1.
Using the administrator click on Orders & Payment then select the Manage Payment
Methods function.
2.
For the Payment Method select the appropriate payment method.
3.
In the Update Payment Method function set the Active Status to Active.
108
ClickCartPro Version 6.0.6 User Manual
4.
Now enter your id in the Gateway User/Store ID field. Replace the string
'your_username' with your processor login.
5.
Logout of the management interface and open a browser session with your online
processor. Login to your account and select the Settings function.
6.
Select the General Connection Setup function, then Response String Version. Ensure
that the response string version is set to 3.1.
7.
Under the General Connection Setup function, select the Referrer URLs function. Choose
to add a URL and on the following page, enter the full http path to your script.
8.
Under the General Connection Setup function, select the Response/Reciept URLs
function. Choose to add a URL and on the following page, enter the full http path to your
script. You do not need to make this a default Recipient Link or Relay Response URL, but
it's acceptable if you choose to do so.
9.
Under the Payment And Receipt Forms function, select the Receipt Method function.
Select to use a POST receipt method. Enter the full http path to your script in the
Recipient Link URLs field.
10. Under the Payment And Receipt Forms function, select the Form Fields function. There
uncheck every checkbox, then check these two: Invoice # - Required and Customer ID Required.
11. Under the Automated Direct Connect function, select the ADC Relay Response function.
Enter the full http path to your script in the URL field.
12. Under the Security function, uncheck the Require Password For All Transactions box.
13. Under the Email Receipts function, uncheck the Email Transaction Receipt To Customer
box.
14. For the CVV2 Verification and Address Verification functions, select levels that you feel
comfortable with.
15. Log out of processor's admin utility. You are done.
SkipJack
1. Login to your account at the processor's site and choose the 'Preferences' function.
2. Select the 'Response Files' function.
3. Click the 'Send Customer to the following WebPages/URLs' radio button and in the four
text boxes provided under that button, enter in the full path to your script. Example:
http://www.yourdomain.com/khxc/relay/{APP}.php. The same entry goes in all four text
boxes.
109
ClickCartPro Version 6.0.6 User Manual
4. Logout of your account at the processor's site. You are done.
PSiGate
1. Enter your id in the Gateway User/Store ID field. Replace the string 'your_username' with
your processor login.
2. The default PSiGate response method is a GET response. If you have changed this to a
POST response at PSiGate, change back to GET.
3. PSiGate regulations specify that you must inform them whether you will be using their
payment form or your own secure server to collect credit card information. Inform them of
the method you're using and PSiGate will configure your account correctly.
NetBilling
1.
Under the Fraud Controls function, choose the Fraud Defense sub-function. Under the
Enable Fraud Defense heading, make sure that Fraud Defense is Enabled. Under the
Order integrity heading, make sure 'Enforce order integrity' is checked. Copy the Order
integrity key as you will need it later. Make any other changes to these settings you
wish. Click the Apply button.
2.
Under the Security function, choose the Access Security sub-function and for Payment
Form Interfaces, make sure that 'Enable Payment Form V2.x (Universal) interface' is
checked. Click the Apply button.
3.
Under the Setup function, choose the Website tools sub-function and click 'Browse
Sites'. Choose to add a new site at the bottom of the list. Enter a Site Tag, Site Name
and URL. Make note of the Site Name you choose. The URL used here is for reference
only, so you can enter your main site URL here (not the full http path to {APP}.php).
4.
On the same page, next to the site you've added, click the 'Config' link. On the following
page, enter your name, phone and email address in the Website Information section.
Then, in the Default payment form settings section, enter the full path to your script for
the Return URL and GiveUp URL fields. Example:
http://www.yourdomain.com/khxc/relay/{APP}.php. Also, set the Return Method to
POST and the Postback CGI URL to blank. For the Payment options field, make sure
'Accept Credit Card payments for this site' is checked and the Payment Form field is set
to the default for your Site Name. Click the Apply button.
5.
Return to the Setup function, then choose the Website tools sub-function and click
'Browse Sites'. Next to the site you added previously, click the 'Email' link. On the
following page, in the Email templates sent to merchant section, enter your email
address in the 'To' field, and select the any email templates for your site you wish to use
for the Standard receipt and Decline notice emails (if you don't want to use the default
templates). Click the Apply button.
110
ClickCartPro Version 6.0.6 User Manual
6.
Logout of your account at the processor's site and login to the management interface.
7.
For the Payment Method select the appropriate payment method.
8.
In the Update Payment Method function set the Active Status to Active.
9.
In the Processor Username field, replace the string 'your_accountnum:your_sitename'
with your account number, followed by a colon (:) followed by the Site Name you
created using the NetBilling administrator.
10. In the 'Transaction Key/Password' field, enter the Crypto Hash you copied while using
the processor interface.
11. Click 'Submit' and log out of the management interface. You are done.
CyberSource
1.
Login to your Cybersource account and select the Settings menu option.
2.
Access the Account Information function in the Settings menu.
3.
In the 'Process Payment Transactions' section, select 'Hosted Order Page (HOP)' from
the drop-down menu.
4.
In the 'Duplicate Order Check' section, select 'Decline duplicate orders' by checking the
box next to that option.
5.
In the 'Shopping Cart' section, select 'ClickCartPro' from the drop-down menu. If
'ClickCartPro' is not listed, select 'Other' then enter 'ClickCartPro' in the text box below
the drop-down menu.
6.
Click the 'Update' button at the bottom of the page.
7.
Access the Hosted Order Page Settings function in the Settings menu.
8.
In the 'Simple Order POST' section, select 'Do not show the Hosted Order Page to my
customers' by checking the box next to that option.
9.
In the 'Payment Details' section, de-select 'Display Tax Amount' by un-checking the box
next to that option.
10.
In the 'Payment Types | Credit Cards' section, select all credit cards you wish to accept
by checking the box next to each card name. In addition, check the 'Display' box for
each CVV/CID/CVN option and un-check the 'Require' box for each CVV/CID/CVN option.
11.
In the 'Billing Information' section, check the 'Display' box and un-check the 'Edit' box
for the Billing Fields.
111
ClickCartPro Version 6.0.6 User Manual
12.
In the 'Shipping Information' section, check the 'Display' box and un-check the 'Edit' box
for the Shipping Fields.
13.
In the 'Appearance | General' section, enter your company name in the 'Company
Display Name' field and select the color scheme you wish to use by choosing it from the
'Color Scheme' drop-down menu.
14.
In the 'Appearance | Order Page' section, enter any HTML you wish to use for the
'Header' and 'Footer'. Leave the 'Background Image URL' field blank.
15.
In the 'Appearance | Receipt Page' section, enter the full http path to your script
(Example: http://www.yourdomain.com/khxc/relay/{APP}.php) for the 'Receipt
Response URL' field.
16.
In the 'Appearance | Decline Page' section, enter the full http path to your script
(Example: http://www.yourdomain.com/khxc/relay/{APP}.php) for the 'Decline
Response URL' field.
17.
In the 'Email | Addresses and Options' section, check the box next to the 'Send
Merchant Receipt Email' field and enter your email address in the merchant's 'To
Address' field. Un-check the box next to 'Send Customer Receipt Email'. For the
customer email section, you can leave the 'From Address' and 'From Name' fields blank.
18.
In the 'Email | Appearance' section, you can leave the 'Header' and 'Footer' fields blank.
19.
Click the 'Update' button at the bottom of the page.
20.
Access the Security Keys function in the Settings menu.
21.
In the 'Generate HOP Script' section, select the PHP option, and save that script to your
computer's hard disk drive. Make a note of the location of that script. It's named
'HOP.php'.
22.
Access the Smart Authorization function in the Settings menu.
23.
In the 'Smart Authorization' function, there are quite a few options for fraud settings.
Set those authorization fields to whatever level you feel most comfortable with.
24.
Click the 'Update' button at the bottom of the page.
25.
Log out of processor's admin utility and login to the management interface.
26.
For the Payment Method select the appropriate payment method.
27.
In the Update Payment Method function set the Active Status to Active.
28.
In the Form Display Code section, follow the instructions regarding storing the HOP.php
file you created on your server.
112
ClickCartPro Version 6.0.6 User Manual
Recurring Billing
This software supports recurring billing transactions. For all payment methods that support
recurring billing, the order process is exactly the same for customers.
Manual recurring billing requires that the store owner process the recurring transactions
manually either by charging payment cards or sending invoices to customers on a recurring
basis. The following payment methods support manual recurring billing:
1.
2.
3.
4.
5.
Contact Customer
Offline (Credit Card)
Offline (Switch/Solo)
Check Payment
Purchase Order
Fully automatic recurring billing requires no action by the storeowner to process recurring
transactions. As part of the order process, the recurring transactions are set up with the
processor and automatically set to occur. The following payment methods support fully
automatic recurring billing:
1. Cardservice Linkpoint API - Secure Server
2. PayPal (Standard Method) - Payment Form
Semi automatic recurring billing requires initial action by the store owner to process recurring
transactions. As part of the order process, the recurring transactions are set up with the
processor, but need to be activated by the store owner. The following payment methods support
semi automatic recurring billing:
1. Authorize.Net AIM Credit Card - Secure Server
2. Wells Fargo (Authnet) Credit Card - Secure Server
For these semi automatic recurring billing payment methods, follow the instructions below to
activate the recurring billing:
1. Login to your account at the processor's site and choose the Settings function.
2. Once transactions have settled, access the 'Search and Download' function and search for
the transaction you would like to make recurring. All transactions initiated by the software
that should be made recurring have an order number ending with an 'R'.
3. When you choose to view the Transaction Detail page for the order, you will see a link
named 'Create ARB Subscription from Transaction'. Click this link and complete the
'Create New ARB Subscription' form to set the transaction up as recurring.
4. Please note: As part of the order process, the first month's payment is made to set the
order up on the Authorize.net system. You will need to start date to one month in the
future to avoid double billing for the first month.
113
ClickCartPro Version 6.0.6 User Manual
Displays: Skins, Menus, XHTML Includes and Messages
This category manages the overall look and feel of your complete web site. You will be
presented with all of the background code that is used to give the store its personality. In order
to make changes to virtually any of the information presented here, you’ll need a good
understanding of PHP and XHTML coding. But there are some things you can change in this
section without that coding background.
Manage Catalog Category Displays: Online Store View
This category requires an understanding of PHP and HTML coding. If you do not have this skill
set at your disposal, you may have to contract an outside source to make changes or additions
to the contents of this menu. You can also contact [email protected] to receive a quote
for designing a web site that reflects your business attitude.
Identifier and Name/Identifier
This identifier is used within the software to specify this display.
Display Name
This is the name for this display.
Display Content
Enter the content for this display below. This content should be written in standards compliant
XHTML and should contain PHP code. The PHP code in this display should be based on the XHTML
Includes used by this software.
Manage Catalog Product Displays: Category View
This category requires an understanding of PHP and HTML coding. If you do not have this skill
set at your disposal, you may have to contract an outside source to make changes or additions
114
ClickCartPro Version 6.0.6 User Manual
to this menu. You can also contact [email protected] to receive a quote for designing a
web site that reflects your business attitude.
Identifier and Name/Identifier
This identifier is used within the software to specify this display.
Display Name
This is the name for this display.
Display Content
Enter the content for this display below. This content should be written in standards compliant
XHTML and should contain PHP code. The PHP code in this display should be based on the XHTML
Includes used by this software.
Manage Catalog Product Displays: Detail View
This category requires an understanding of PHP and HTML coding. If you do not have this skill
set at your disposal, you may have to contract an outside source to make changes or additions
to this menu. You can also contact [email protected] to receive a quote for designing a
web site that reflects your business attitude.
Identifier and Name/Identifier
This identifier is used within the software to specify this display.
Display Name
This is the name for this display.
Display Content
Enter the content for this display below. This content should be written in standards compliant
XHTML and should contain PHP code. The PHP code in this display should be based on the XHTML
Includes used by this software.
115
ClickCartPro Version 6.0.6 User Manual
Manage Custom Menu
This information is for Advanced Users Only.
Menu Item Identifier and Name/Menu ID
This is the unique identifier for this menu.
Display Name
Display name for this menu item used in the menu.
Namespace and Reference String/Namespace
Select the namespace used to handle requests for this menu item. Example: Select 'Web Page display' to target user-created web pages.
Reference String
Enter a reference string to be passed to the namespace associated with this menu item.
Example: Enter 'splash' to target the splash page for the 'Web Page - display' namespace.
Menu Display Order and Status/Menu Display Order
The menu display order numeric allows display of menu items in the custom menu in a particular
order. The menu items are sorted in ascending order based on this numeric indicator.
Menu Display Status
This indicator controls whether this menu item is displayed in the custom menu. Select true to
display the menu or false not to display it.
116
ClickCartPro Version 6.0.6 User Manual
Manage Display Skins
This category requires an understanding of PHP and HTML coding. If you do not have this skill
set at your disposal, you may have to contract an outside source or contact
[email protected] to make changes or additions to this menu.
Install New Skin:
Use the Skin Installation form to install a new skin. Skins installed via this form should be stored
in a properly formatted skin TAR archive file. If you choose to install a skin that already exists,
the installed skin id will be appended with a numeric character in order to provide the newly
installed skin with a unique id.
Skin Installation
Browse your local hard drive and select the skin installation file for the skin you wish to install.
This file will be used to install a new skin.
Installed Skins
This is a list of the default skins that are currently installed for ClickCartPro. From this master
list of skins, you can either click on “Profile” to simply display name, version and a description of
the skin, “Clone”, to make and exact replica of the skin as a starting point for a new related skin,
or “Update” to make changes to an existing skin.
Profile/Skin Information/Skin Name
This is a descriptive name for this skin. This name is presented in backend interface displays.
Skin Version
This is the version number for this skin.
Skin Description
This is a text description for this skin.
Upload File: Skin File Upload
117
ClickCartPro Version 6.0.6 User Manual
This is where you can choose and upload a new skin to ClickCartPro.
Skin Controlled File
Browse your local hard drive and select the media file you wish to upload.
Skin Controlled Directory Selection
Select the skin-controlled directory to which you would like to upload a file. This directory is
controlled by the skin you selected to update.
Update Skin
From here you can update the various skins used by ClickCartPro. Again, if you don’t have a
working understanding of CSS code, you’ll need to hire an outside source or contract with
[email protected] to handle this background work. You’ll have access to the various
skin files that control the look of your ClickCartPro store. All of this is Advanced CSS
programming.
Manage FrontEnd Menus
This menu item manages all of the menus you use on your web site’s front page. Here you can
name, organize and group these menus to suit your personal taste and establish the flow of your
web site.
Menu Identifier and Name/Menu ID
This is the unique identifier for this menu. It is only used in the back end of the program and
never seen by customers, so you can abbreviate for convenience.
Display Name
118
ClickCartPro Version 6.0.6 User Manual
Display name for this menu used in the XHTML menu heading. This allows you to manipulate
the names of the menu item you are working on. It looks like this:
Menu Display Order, Group and Status/Menu Display Order
Which menu goes where on your web site? This is where you select the running order of menus
and whether a menu is situated on the right or left side of your site. The menu display order
numeric allows display of menus in FrontEnd skins in a particular order. The menus are sorted in
ascending order based on this numeric indicator.
Menu Display Group
The menu display group indicator is used in conjunction with the display skin to control where
this menu is presented. The default skin installed with this application uses two groups, LEFT
and RIGHT to indicate whether a menu is displayed in the left column or the right column in the
skin.
Menu Display Status
This indicator controls whether this menu is displayed in FrontEnd skins. Select true to display
the menu or false not to display it.
Manage Online Store Menu
This menu item allows you to manage the look and feel of your online store menu. You can set
up the running order and titles of categories that you choose to display to aid your customers in
buying and checking out. The Online store menu looks like this:
119
ClickCartPro Version 6.0.6 User Manual
Menu Identifier and Name/Menu ID
This is the unique identifier for this menu. As with all menu identifiers and IDs, this is never
shown to your customers and can be abbreviated for your convenience.
Display Name
Display name for this menu item used in the menu. As you can see in the above menu, this can
be whatever you choose.
Menu Display Order and Status/Menu Display Order
The menu display order numeric allows display of menu items in the store menu in a particular
order. The menu items are sorted in ascending order based on this numeric indicator. The
example above shows you how the running order can be set.
Menu Display Status
This indicator controls whether this menu item is displayed in the store menu. Select true to
display the menu or false not to display it.
Manage System Messages
Most actions within your web site will create a result and your customer will have to be
informed. If your customer updates his or her address, they will expect the web site to inform
them that it understood their request and carried out their actions. There are many such
activities that are monitored and accomplished during a web site’s active use. This menu item
allows you to customize the messages that your store passes along to customers or visitors
during normal usage. These messages range from a “Thank you” that confirms when a
120
ClickCartPro Version 6.0.6 User Manual
customer has successfully completed a task to error messages that confirm that a customer has
confused the web site in some way or triggered an unexpected result during usage.
Message Identifier and Type/Message Identifier
The message string is used to identify this message within the software. This is never shown to
your customers and can be abbreviated for your convenience.
Message Type
There are three choices here: (normal, error, confirmation). In most cases, only “error” and
“confirmation” messages have been used.
Message Display Text
The actual text displayed for this message. Because the identifier probably will not tell you
exactly why and when this message is generated, the display text will probably give you enough
to let you know.
Manage XHTML Includes
In some cases, more than a simple message will be required to help a customer complete a
task. This menu item manages the full display process that might be required.
Include Information/Display Name
Include display name as displayed in KHXC backend interfaces. This is never seen by your
customers and can be abbreviated for convenience.
Include File Contents
The include filename. This requires knowledge of HTML and PHP coding. If you need to make
changes to this material, you may need to contract outside help.
Description
This is the description of the XHTML include. This simply tells you the procedure that the XHTML
coding is accomplishing.
121
ClickCartPro Version 6.0.6 User Manual
Upload and Install A New Skin
Use the form below to install a new skin. Skins installed via this form should be stored in a
properly formatted skin TAR archive file. If you choose to install a skin that already exists, the
installed skin id will be appended with a numeric character in order to provide the newly installed
skin with a unique id.
Skin Installation
Browse your local hard drive and select the skin installation file for the skin you wish to install.
This file will be used to install a new skin.
If you are unfamiliar with skins and their underlying technology, you may want to contact
[email protected] to find out about purchasing and configuring pre-made skins.
Exports: Data Export Modules
For your convenience, ClickCartPro is equipped to export your customers, orders and items
directly into your accounting system in order to save time and duplicate entry.
122
ClickCartPro Version 6.0.6 User Manual
Peachtree Accounting Export
Use this interface to export your completed orders into Peachtree compatible CSV files. Before
running this data export, ensure that you have updated the account names you use in Peachtree
using the Peachtree Export Settings function under the Application Settings Menu for this
application. This function will only export orders with a 'Completed' status that have not been
previously exported. If you choose to export data to a file that already exists, that file will be
deleted prior to creating a new export file.
Export File Names/Export File Name: Customers File
Enter the name of the file you would like created for the customers export below.
Export File Name: Items File
Enter the name of the file you would like created for the items export below.
Export File Name: Orders File
Enter the name of the file you would like created for the orders export below.
Quickbooks Accounting Export
Use this interface to export your completed orders into a Quickbooks compatible IIF file. Before
running this data export, ensure that you have updated the account names you use in
Quickbooks using the Quickbooks Export Settings function under the Application Settings Menu
for this application. This function will only export orders with a 'Completed' status that have not
been previously exported. If you choose to export data to a file that already exists, that file will
be deleted prior to creating a new export file.
Export File Name
Enter the name of the file you would like created below.
Forms: Application Forms and Form Fields
Any situation where information is exchanged between a vendor and a consumer requires that a
form be submitted. This menu manages the forms themselves as well as each individual field,
so that you can receive information precisely as you require it.
123
ClickCartPro Version 6.0.6 User Manual
Manage Advanced Software Form Fields
First we’ll deal with the fields within the forms themselves.
Address”, the fields would be “Name”, “Address”, etc.
If the form is called “Billing
Form Information/Form
This is the form to which the fields are associated with.
Form Section
The name of the section of the form this field should be printed in. To create a new section,
simply enter in a section that has not yet been used.
Form Field Information/Display Name
The name to be displayed for the form field in XHTML and MAIL output. This is the name that
will be seen by your customers, so make all new entries clear and concise.
Display Description
This is the description that will be displayed to help customers understand the information you’re
seeking. Again, this is a good place to be clear and concise if you seek accurate information
from your customers. This can contain XHTML tags.
Description Contains XHTML Tags
Indicates if the description for this form has XHTML tags. If you are using these tags, set this to
“True”…if not, the default “False” can be maintained.
Form Field Specification/Required Indicator
Is this field required in order for the form to be valid? If yes, then set this drop down to “True”.
If set to true, the system will not allow a customer to proceed without filling in this field.
Default Value
A default value to be displayed for the form field if no value is present. If there is no value for
the field, what is entered here will be shown/used. This is useful for pre-filling a field when it is
shown the first time. It can aid your customers in filling out an unfamiliar field.
CSS Class
The CSS class to be used when displaying the form field. The default is 'khxc_formfield'.
Maximum Value Length
This is the maximum length of text in characters to allow in text form fields. A maximum length
of zero (0) will result in no maximum length parameter.
Form Field Sort Order
124
ClickCartPro Version 6.0.6 User Manual
The field order numeric allows display of the fields in the form in a particular order. The fields
are sorted in ascending order based on this numeric indicator.
Manage Advanced Software Forms
Now that we’ve worked on the individual fields that are contained within our forms, we’ll deal
with the forms themselves. This menu allows you to manipulate all of the provided forms on
both the front end and back end of ClickCartPro. These are Application type forms that provide
space to input necessary information into the system such as “name”, “address”, etc.
Form Information/Display name
This is the display name of this form. This is a front-end display, so it may be viewed by your
customers…make sure it is clear and concise.
Form Description
This is the form description that will be used during XHTML output. This explains why your
customer is filling out the form and provides instruction. It can contain XHTML tags.
Description Contains XHTML Tags
Indicates if the description for this form has XHTML tags. If your description contains XHTML
tags, this should be set to “True”.
Number Of Output Columns
The number of columns fields should be printed to in the XHTML output. You have a choice of
one or two columns. The default value is one.
Namespace Specification/Post Namespace
This is the namespace to which the results of this form should be posted via a Common Gateway
Interface or CGI.
Manage Advanced Software Selection Items
There are literally tons of features built into the ClickCartPro Backend. Each of these advanced
software selection items is listed here and available for review and/or alteration. These deal with
advanced features like currency adaptation, affiliate and wholesale discounts, various support for
weights and measurements, various checkbox types, etc.
125
ClickCartPro Version 6.0.6 User Manual
Custom Selection Item Information/Select Identifier
Identifier used to locate selection items. Multiple selection items belonging to the same selection
group should have the same identifier.
Selection Item Display Value
This is the display name of the selection option. In many cases, this will be viewable by your
customer and therefore should be clearly stated and not abbreviated.
Form Data Specification
Value stored in the database for the selection option. HTML fields that are a “collection” of things
(radio buttons, selection lists, checkboxes) have 2 components to them – the text that is shown
to the user to make a selection and a value that is associated with that selection – this field is
the latter of those … the actual value that will be stored.
Selection Item Sort Order
The selection order numeric allows display of the selection items in a particular order. The
selection items are sorted in ascending order based on this numeric indicator.
Forms: Dynamic Forms and Form Fields
While the menu above dealt with application type forms where certain information is required in
order to expedite a job, this menu deals with the dynamic forms that are supported by
ClickCartPro. These forms are more freeform in nature and are generally associated with
customer feedback.
Manage Dynamic Form Fields
This sub menu deals with the actual fields contained within a dynamic form, such as email
address, name, phone number, etc.
Dynamic Form Field Information/Unique Form Field ID
This is the unique id for this dynamic form field.
Controlling Dynamic Form
This is the form with which this field is associated.
Display Name
The display name for the field used in XHTML output and in mail messages. Simply describes
the information you wish the customer to input. “How did you hear about us?”
Form Section
The name of the section of the form this field should be printed in. To create a new section,
simply enter in a section that has not yet been used.
126
ClickCartPro Version 6.0.6 User Manual
Default Value
Enter the default value to be used to pre-populate this field. This just gives a customer an
example answer if they don’t understand the tone of the information you require. “Heard about
you from a radio advertisement”.
Email Field Indicator
Set this field to true if this field is an email address field and it should be used to populate the
from email address in the dynamic form mail message.
Required Indicator
Is the completion of this field necessary in order to move forward or complete the form? If so,
set this to “True”.
Form Field Type
This is the XHTML form field type used to display the dynamic form field. If you select a field
type of Selection, Checkboxes or Radio Buttons, be sure to enter at least one Selection Item in
the Selection Items (For List Types) boxes that are located at the bottom of this page. If your
form has the need for customer verification, you can also select the Captcha image verification
field. This common verification tool looks like this:
CSS Class
The CSS class to be used when displaying the form field. The default is 'khxc_formfield'.
Form Field Description/Display Description
This is the description to be displayed for the form field in XHTML output.
Description Contains XHTML Tags
Indicates if the description for this form has XHTML tags.
Dynamic Form Field Sort Order
The field order numeric allows display of the fields in the form in a particular order. The fields
are sorted in ascending order based on this numeric indicator.
Selection Items (For List Types)
Of course, if you’re going to let customers make selections, they must have something to select
in your fields. These boxes allow you to enter those choices. Up to 20 choices are provided for.
127
ClickCartPro Version 6.0.6 User Manual
Manage Dynamic Forms
From this menu, you can manage and augment the Dynamic Forms that you plan to present on
your website. There is already a Customer Feedback template in place, but you can add as
many forms as you wish from here. Once a customer fills out the form, the results will be
emailed to the main contact account for your site.
Dynamic Form Information/Identifier
This is the unique id for this dynamic form. It is used as a reference string in URLs to identify
this form.
Display Name
This is the display name of this dynamic form. It will be the heading of your Form, so make sure
it sums up the information you wish to receive in the various fields.
General Message Information/Default From Email Address
If your customer chooses not to enter an email address, this will be the default “From” address.
This defaults to the main contact email address for your web site in ClickCartPro.
Message Subject
In order to help you know when you’ve received response emails from your customers, you can
label these emails based on the Dynamic form your customer has filled out. If you are receiving
numerous responses from numerous forms, this is an easy way to organize them before you
have a chance to review them.
Message Header Text
Enter text to be presented at the top of the mail message sent for this dynamic form. Do not
include XHTML tags in this text. XHTML tags will be added automatically if an XHTML message is
to be sent.
XHTML Message Information/Send XHTML Message (In Addition To Text)
Indicator used to control whether an XHTML message will be sent in addition to a text message
for this mail message. If your mail service does not support HTML emails, then you should set
this to “False”, otherwise, your emails from customer feedback may be blocked or unreadable.
XHTML Message Skin
The skin used to use for the mail message XHTML display. This skin selection overrides the
default Mail skin (Mail) used for all messages by default.
Message Recipients/To Email Addresses
Enter the email addresses for the mail (To) recipients of the mail message. You can enter a
single address or a comma-delimited list of addresses. The default email address will be the
default main contact for your web site.
Cc Email Addresses
128
ClickCartPro Version 6.0.6 User Manual
Enter the email addresses for the carbon copied (Cc) recipients of the mail message. You can
enter a single address or a comma-delimited list of addresses.
Bcc Email Addresses
Enter the email addresses for the blind carbon copied (Bcc) recipients of the mail message. You
can enter a single address or a comma-delimited list of addresses.
Form Description Header
This is the description that appears on the top of your Customer Feedback form or other
Dynamic forms you create.
Description Header Contains XHTML Tags
Indicates if the description for this form has XHTML tags.
Display Options
Choose the skin that should be displayed for this dynamic form. If you do not select a skin to
display, the application or namespace default skin will be used.
Locations: States, Provinces and Countries
This menu allows you to manage all of the various places you may choose to ship products. It
also allows you to configure individual tax information and other categories related to each
individual country, state or province in relation to your own country, state or province.
Manage Countries
This menu presents a list of all countries, their ISO code (International Organization for
Standardization) and whether you need charge tax on orders placed from that country.
Currently, if you are based in the United States, you need not charge any taxes for specific
countries. Most of these taxes are added and charged directly to the customer when a product
hits that particular country’s borders.
Name and ISO Abbreviation/Full Country Name
This is the country’s full name.
Country ISO Code
This is the country's two letter ISO (International Organization for Standardization) code or
abbreviation.
Tax Information/Tax Rate (Percentage)
This is the country’s tax rate as a percentage. Enter 0.000 for no tax.
Charge Tax
129
ClickCartPro Version 6.0.6 User Manual
Indicates whether to charge taxes for order shipped to this country. This is set to “No” as a
default. (most countries outside add taxes during the customs process and do not demand that
merchants charge country taxes).
Shipping Taxable
Indicates whether delivery charges are taxable in this country. Again, this defaults to “No”.
Display Information/Display in Contact Forms
Will you sell to customers in this country? If so, this should be marked “Yes”. This field
indicates whether this country will be available in the contact information section of forms.
Display in Delivery Forms
Can you ship to this country? This field indicates whether this country will be available in the
delivery information section of forms.
Sort Order
This sort order numeric allows display of countries in a particular order. Countries are sorted in
displays in ascending order based on this numeric indicator. The US version of ClickCartPro has
the North American countries and the UK at the top of the list by default.
Manage States and Provinces
This menu manages individual states and provinces in Canada and the US, provides their 2
digital ISO(International Organization for Standardization) code and allows you to customize tax
information.
Name and ISO Abbreviation/Full State/Province Name
Enter the full name of the state or province.
State/Province ISO Code
The state or province's two letter ISO(International Organization for Standardization) code or
abbreviation.
Tax Information/Tax Rate (Percentage)
Enter the state or province tax rate as a percentage. Currently in the US, you need only charge
taxes to customers located in your business’s home state. Enter 0.000 for no tax.
Charge Tax
This field indicates whether to charge taxes for order shipped to this state or province.
Shipping Taxable
This field indicates whether delivery charges are taxable in this state or province.
Display Information/Display In Contact Forms
130
ClickCartPro Version 6.0.6 User Manual
Will you sell products to customers in this state? This field indicates whether this state or
province will be available in the contact information section of forms.
Display In Delivery Forms
Can you deliver your products in this state? This field indicates whether this state/province will
be available in the delivery information section of forms.
Country
This field covers the country in which this state or province is located. (Blank entries are
allowed).
Sort Order
This sort order numeric allows display of states/provinces in a particular order. States/Provinces
are sorted in displays in ascending order based on this numeric indicator.
Mail: Messages, Mail and Subscriptions
This is the email management field for your web site. From here, you manage all of the
“canned” emails that are forwarded to your customers as well as your newsletter subscriptions.
Manage Mail Messages
In many cases, when a customer completes a task on your web site, an automatic email is
generated and sent to them to thank them for participating or inform them that you have indeed
received their input. Here you can edit these messages and configure them to your personal
taste and business message.
Mail Message Information
This is the display name for this mail message.
Text Message Information
Enter the text content for this message below. This message content can contain PHP code. If
you choose to use PHP code in the message content, base your PHP code on the XHTML Includes
used by this software. This can be a simple message that doesn’t require PHP code, but if you
want to include information like order numbers or other site based info, you’ll need to include
the correct PHP code or use the “canned” messages provided.
XHTML Message Information/Send XHTML Message (In addition to text)
Indicator used to control whether an XHTML message will be sent in addition to a text message
for this mail message.
XHTML Message Skin
131
ClickCartPro Version 6.0.6 User Manual
The skin used to use for the mail message XHTML display. This skin selection overrides the
default Mail skin (Mail) used for all messages by default.
XHTML Message Include
Enter the XHTML content for this page below. This content should be written in standards
compliant XHTML and can contain PHP code. If you choose to use PHP code in the page content,
base your PHP code on the XHTML Includes used by this software.
Message Defaults/Default Message Sender (From)
If the person who sends you information does not provide an email address, this default address
will be included so that your mail system does not produce an error.
Default Message Recipient (To)
If a recipient is not specified by the calling application, this recipient is used as a default rather
than producing an error.
Default Subject
If a subject is not specified by the calling application, this subject is used as a default rather
than producing an error.
Subject Prepend String
This string is prepended to the mail message subject if specified. (Added to the beginning of the
subject). If you wanted the subject line of every note to say “Note from Joe’s Bait Shop - ” you
would enter it here. If the real subject of a note were “Order Update” the resulting subject
would be “Note from Joe’s Bait Shop – Order Update”
Subject Append String
This string is appended to the mail message subject if specified. (Added to the end of the
subject).
Additional Recipients/Additional Message Recipients (To)
Enter a comma-delimited list of recipients to be added to the TO message header.
Additional Message Recipients (Cc)
Enter a comma-delimited list of recipients to be added to the CC message header.
Additional Message Recipients (Bcc)
Enter a comma-delimited list of recipients to be added to the BCC message header.
Manage and Send Subscriptions
This is your newsletter management menu. From here you can assign customers to various
subscription lists or send blanket messages to all of your customers.
132
ClickCartPro Version 6.0.6 User Manual
New Subscription: Add a new subscription for account holders
This is where you define your various subscription lists according to your customers’ needs.
Subscription Information
Enter a display name for this subscription. Your customers will be able to subscribe to these
mailings using the Email Subscriptions heading of your web site. It looks like this:
Send User Account Broadcast Message/Message Information
This allows you to send a blanket message to all of the customers listed in ClickCartPro. As with
all messages, it is a good idea to include both text only messages and HTML messages. Some
mail servers do not support HTML messages, so if you don’t add a text only message, those
customers will receive nothing.
General Message Settings/From Email Address
Enter the email address which should be used as the from email address for the mail message.
Message Subject
Enter the message subject for the mail message.
Text Message
Enter the plain text message below. This text should be plain ASCII text.
XHTML Message Information/Send XHTML Message (In addition to text)
This field indicates whether an XHTML message will be sent in addition to a text message for this
mail message.
XHTML Message Skin
This field controls the skin used to use for the mail message XHTML display.
XHTML Message
This is where you enter the text for the XHTML message. This text should be properly formatted
XHTML. You must complete this field in order to send an XHTML message. If this field is not
completed, only a plain text message will be sent. As with all messages, it is a good idea to
include both text only messages and HTML messages. Some mail servers do not support HTML
messages, so if you don’t add a text only message, those customers will receive nothing.
Available User Account Subscriptions/Subscription Information
133
ClickCartPro Version 6.0.6 User Manual
Enter a display name for this subscription. Changing the name of this subscription does not
affect user subscription status.
Send Mail Message
If you want to send a message from within ClickCartPro, this menu will help you quickly
accomplish the task.
General Message Settings/From Email Address
Enter the email address which should be used as the from email address for the mail message.
Message Subject
Enter the message subject for the mail message.
Text Message
Enter the plain text message below. This text should be plain ASCII text. As with all messages,
it is a good idea to include both text only messages and HTML messages. Some mail servers do
not support HTML messages, so if you don’t add a text only message, those customers will
receive nothing.
Recipients/To Email Addresses
Enter the email addresses for the mail (To) recipients of the mail message. You can enter a
single address or a comma-delimited list of addresses.
Cc Email Addresses
Enter the email addresses for the carbon copied (Cc) recipients of the mail message. You can
enter a single address or a comma-delimited list of addresses.
Bcc Email Addresses
Enter the email addresses for the blind carbon copied (Bcc) recipients of the mail message. You
can enter a single address or a comma-delimited list of addresses.
XHTML Message Information/Send XHTML Message (In addition to text)
Indicates whether an XHTML message will be sent in addition to a text message for this mail
message. As with all messages, it is a good idea to include both text only messages and HTML
messages. Some mail servers do not support HTML messages, so if you don’t add a text only
message, those customers will receive nothing.
XHTML Message Skin
The skin used to use for the mail message XHTML display.
XHTML Message
134
ClickCartPro Version 6.0.6 User Manual
Enter the text for the XHTML message below. This text should be properly formatted XHTML. You
must complete this field in order to send an XHTML message. If this field is not completed, only
a plain text message will be sent.
Reports: Statistics and Access Logs
This set of reports measures the hits on ClickCartPro and presents them in various flavors
depending on the information you seek. The first three measure simple hits on the web site for
daily, monthly or yearly time frames. The other two reports offer more specific information.
View Activity Reports: Daily
How many hits on a particular day? This report keeps track.
View Activity Reports Monthly
How many hits in a particular month? This report tracks it for you.
View Activity Reports Yearly
You guessed it. This report tells you number of hits in a particular year.
135
ClickCartPro Version 6.0.6 User Manual
View Admin Access Reports
This report shows you administrative access to the various functions within your site. It tells
you the IP address of the individual and the function that was accessed.
View Page Access Reports
This report simply spells out your various pages and the number of hits per page. This is an
excellent marketing tool. What pages on your site interest your customers the most? More
importantly, which pages on your site are not drawing your customers’ interest? This
information can help you build up your weak pages and improve your inter-site traffic.
Settings: Application Settings Menu
This menu handles basic settings for your site. All of the little nuts and bolts that define your
site are handled by the various categories within this menu. Here you can define the web site
and make it your own.
Application Settings/Settings
Here is where you set defaults that determine important points about your business. This is
mostly basic logistical information about your business and should be a quick menu to navigate
for you.
Common Site Name
This is the common name to be used for your Internet site. This common name is used within
this application to display the name of your site. This is also used on invoices, receipts and the
Contact page.
Destination Namespace for Logins
This namespace is used as the default destination after successful logins. When a customer logs
into their account, this is a location they land in. It defaults to the Account Maintenance page.
136
ClickCartPro Version 6.0.6 User Manual
Show Delivery Address Book
Select true to display the delivery address book for users. Stores that do not ship any items
should not display the delivery address book. The delivery address displays the customer’s
chosen delivery address, allows the customer to augment or add a new address. It looks like
this:
Site Owner Address
Enter the address where the site owner resides. This goes in the copyright information at the
bottom of your web site. This is also used on invoices, receipts and the Contact page.
Site Owner City
Enter the city where the site owner resides below. This goes in the copyright information at the
bottom of your web site.
Site Owner Country
Select the country where the site owner resides below. This selection will be used as the default
for e-commerce realtime shipping quotes when an item does not have location information
present.
Site Owner Fax Number
Enter the fax number for the site owner below. This goes in the copyright information at the
bottom of your web site.
Site Owner State/Province
Select the state/province where the site owner resides below. This selection will be used as the
default for e-commerce realtime shipping quotes when an item does not have location
information present.
Site Owner Telephone Number
Enter the telephone number for the site owner below. This goes in the copyright information at
the bottom of your web site.
Site Owner Zip/Postal Code
Enter the zip/postal code where the site owner resides below. This entry will be used as the
default for e-commerce realtime shipping quotes when an item does not have location
information present.
137
ClickCartPro Version 6.0.6 User Manual
Catalog Global Displays/Settings
How do you choose to display the various lists of products your web site provides? This menu
controls how you display the products in categories like “Best Sellers”, “Featured Products”,
“New Items”, etc.
Your display options are identical to any product list display throughout ClickCartPro. You have
the following options:
Best Sellers: Product Display Type
If there are products to display on the best sellers page, the designation below controls which
display type is used for products when viewing the best sellers page.
Best Sellers: Products per Row
If there are products to display on the best sellers page, the designation below controls how
many products are displayed horizontally when viewing the best sellers page. You have the
choice of between 1 and 4 items per row.
Featured Products: Product Display Type
If there are products to display on the featured products function, the designation below controls
which display type is used for products when displaying that function.
Featured Products: Products per Row
If there are products to display in the featured products function, the designation below controls
how many products are displayed horizontally when viewing that function. You have the choice
of between 1 and 4 items per row.
New Items: Product Display Type
If there are products to display on the new items page, the designation below controls which
display type is used for products when viewing the new items page.
New items: Products per Row
If there are products to display on the new items page, the designation below controls how
many products are displayed horizontally when viewing the new items page. You have the
choice of between 1 and 4 items per row.
Product Index: Product Display Type
If there are products to display on in the product index, the designation below controls which
display type is used for products when viewing the product index.
Product Index: Products per Row
138
ClickCartPro Version 6.0.6 User Manual
If there are products to display in the product index, the designation below controls how many
products are displayed horizontally when viewing the product index. You have the choice of
between 1 and 4 items per row.
Search Results: Product Display Type
If there are products to display on the search results page, the designation below controls which
display type is used for products when viewing search results.
Search Results: Products per Row
If there are products to display on the search results page, the designation below controls how
many products are displayed horizontally when viewing search results. You have the choice of
between 1 and 4 items per row.
Specials: Product Display Type
If there are products to display on the store specials page, the designation below controls which
display type is used for products when viewing the specials page.
Specials: Products per Row
If there are products to display on the store specials page, the designation below controls how
many products are displayed horizontally when viewing the specials page. You have the choice
of between 1 and 4 items per row.
Splash Page: Categories per Row
If there are categories to display on the store splash page, the designation below controls how
many categories are displayed horizontally when viewing the splash page. You have the choice
of between 1 and 4 items per row.
Splash Page: Category Display Type
If there are categories to display on the store splash page, the designation below controls which
display type is used for categories when viewing the splash page.
Splash Page: Number of Featured Products to Display
Select the number of featured products to display in the featured products listing. You have the
choice of between 1 and 20 items to display.
Splash Page: Product Display Type
If there are products to display on the store splash page, the designation below controls which
display type is used for products when viewing the splash page.
Splash Page: Products per Row
If there are products to display on the store splash page, the designation below controls how
many products are displayed horizontally when viewing the splash page. You have the choice of
between 1 and 4 items per row.
View All: Product Display Type
If there are products to display on the store view all products page, the designation below
controls which display type is used for products when viewing all products.
View All: Products per Row
139
ClickCartPro Version 6.0.6 User Manual
If there are products to display on the store view all products page, the designation below
controls how many products are displayed horizontally when viewing all products. You have the
choice of between 1 and 4 items per row.
Cron Settings/Settings
“Cron”; from the Greek “chronos” meaning time, is a time-based scheduling device that specifies
shell commands to run periodically on a given schedule.
Last Daily Cron Run
This is the time daily cron tasks were last run for this application.
Last Weekly Cron Run
This is the time weekly cron tasks were last run for this application.
Online Order Storage Time
Select the number of years to store online orders. This defaults to 1 year, but is selectable
between 1 and 5 years.
Shopping Cart/Wish List Storage Time
Select the number of months to store unmodified store shopping carts and wish lists in the
database. Shopping carts and wish lists are modified each time a user adds, updates or removes
an item in their shopping cart and/or wish list. This defaults to 6 months but is selectable from
1 to 12 months.
Currency Weight and Dimensional Settings
Where in the world are you? This menu controls the currency, system of measurement and
system of weight you prefer your site to operate under.
Application Currency Specification
Select the currency to be used by this e-commerce application for amount entries. All amounts
entered within this application should be made in this base currency.
140
ClickCartPro Version 6.0.6 User Manual
Any active online processing gateways that have currency specifications should be modified to
match this setting. Online processing gateways that have currency settings are: PayPal Website
Payments Pro, PayPal Standard and WorldPay.
Important: If you have not activated the Currency Conversion System within the KHXC, make
sure this selection matches the System Base Currency entered on the KHXC level. (how?)
Application Dimensional Unit
Select the dimensional unit used by this e-commerce application. All dimensions (length, width
and height) entered within this application should be made in this dimensional unit. Dimensional
conversions are done based on this unit selection to accurately retrieve realtime shipping rate
quotes.
Application Weight Unit
Select the weight unit used by this e-commerce application. All weights entered within this
application should be made in this weight unit. Weight conversions are done based on this unit
selection to accurately retrieve realtime shipping rate quotes.
Frontend Meta Information
Settings/Meta Description
Enter a description to be used in the Meta description tag in XHTML displays for pages. This
meta tag specification will be overridden on the application level and may be overridden on the
page level.
Meta Keywords
Enter keywords to be used in the Meta keywords tag in XHTML displays for pages. This meta tag
specification will be overridden on the application level and may be overridden on the page level.
141
ClickCartPro Version 6.0.6 User Manual
Meta Title
Enter a page title to be used in the Meta title tag in XHTML displays for pages. This meta tag
specification will be overridden on the application level and may be overridden on the page level.
General Store Settings
This menu controls your customers’ checkout experience.
Settings/Allow Guest Checkout
Select true to allow checkout for guest users. If checkout for guest users is allowed, an account
will not be required to checkout.
Checkout: Custom Sale Method
If you have selected to activate the Custom Sale Method Status, select the custom sale method
to execute during checkout.
Checkout: Custom Sale Method Status
Select true to activate a custom sale method during checkout. If you select to activate a custom
sale method during checkout, the Custom Sale Method specified on this page will be executed.
Checkout: Display Progress Indicator
Select true to display a progress indicator in checkout.
Checkout: Minimum Order Amount
Enter a minimum order amount below. If you enter an amount greater than zero, users
attempting to checkout with a total of items in their shopping cart less than the amount specified
will be presented with a message indicating they need to add more items to their cart to
checkout. Set to '0.00' to turn off.
Checkout: Order Number Prefix
If you select a prefixed Order Number Type, enter an order number prefix here. This prefix will
be appended to all order numbers.
Checkout: Order Number Type
Select the type of order number generated by this software for online orders.
Continue Shopping: Target
Select the location to be targeted by the Continue Shopping button on the shopping cart page.
When history data is available this location will be targeted.
142
ClickCartPro Version 6.0.6 User Manual
Disable Online Store
Select true to disable the online store for maintenance, or false to open the store for business.
Disable Wish List
Select true to disable wish list displays and functions.
Display Product Numbers
Select true to display product numbers for items, or false to not display product numbers.
Display Product Options With Line Breaks
Select true to display product options with line breaks, or false to display without them.
Product Page: Display Email A Friend Link
Select true to display a link on the product detail page to email a friend about the item being
viewed, or false to not display the link.
Product Page: Display Related Products
Select true to display related products on the product detail page, or false to not display related
products.
Shopping Cart: Allow Fractional Quantities
Select true to allow for fractional quantities in the shopping cart.
Shopping Cart: Display Images
Select true to display images in the shopping cart. Images will be displayed if at least one item
has a valid image and this setting is true.
Store Pages: Products To Display per Page
Select how many products should be displayed per page by default.
Store Pages: Show Sort Options
Select true to display product sort options to users who are browsing the online store.
Image Specifications
This menu is the master control for all of the various images you display on your site. In most
cases, the defaults are best to use, but if you have images you want to keep as they are, simply
type a “0” in any of the values and the image will be sized exactly as you enter it.
Settings/Image Width: Cart Product Images
Enter a width in pixels to use to control the size of small product images displayed by this
software in the shopping cart. Enter '0' to show all images at their actual size.
Image Width: Category Images
Enter a width in pixels to use to control the size of category images displayed by this software.
Enter '0' to show all images at their actual size.
143
ClickCartPro Version 6.0.6 User Manual
Image Width: Large Product Images
Enter a width in pixels to use to control the size of large product images displayed by this
software. Enter '0' to show all images at their actual size.
Image Width: Shipping Carrier Images
Enter a width in pixels to use to control the size of shipping carrier images displayed by this
software. Enter '0' to show all images at their actual size.
Image Width: Small Product Images
Enter a width in pixels to use to control the size of small product images displayed by this
software. Enter '0' to show all images at their actual size.
Intershipper Settings
Intershipper is a shipping company which helps your customers find the best pricing for a
particular shipment. They claim to reduce the number of abandoned shopping carts that plague
most web stores by searching your particular shipping options and finding the best carrier for a
particular shipment. There is some sort of fee associated with the service. If you’re interested
in reading more, check out www.intershipper.com.
Settings/Active Carriers
Select which carriers should be used for Intershipper rate requests. All available carriers are
listed in this box. At least one must be active. Currently, you can make the choice of UPS, USPS
or FedEx.
Language Strings
This menu controls the various language strings as well as their text components used
throughout ClickCartPro. From here you can identify and augment the text components of any
string.
Linkpoint API Settings
144
ClickCartPro Version 6.0.6 User Manual
Linkpoint is the gateway between your system and the credit card processing gateways. The
contents of the API key file you downloaded from Linkpoint need to be entered into this field.
This key file should be associated with your Linkpoint API-enabled account.
Mail Settings
There are several cases during a normal business day where your web site will be generating
emails to inform you about orders. This menu manages those email addresses and allows you to
configure your internal email output.
Settings/Default Contact Email Address
This email address is used as a default to address for contact mail messages.
Order Email Address (Primary)
Enter a primary order email address here. This email address will be used as the sending
address for order email messages. If you choose to activate the Send Status for Order Email
Address (Primary), this address will receive an order email message for each order.
Order Email Address (Primary): Send Status
Select whether to send order email messages to the Order Email Address (Primary).
Order Email Addresses: BCC (Secondary)
Enter a single email address or a comma separated list of multiple email addresses which should
receive blind carbon copies of order email messages. If this field is empty, no email addresses
will be blind carbon copied.
PayPal Website Payments Pro Settings
Settings/API Login: User Name
Enter your PayPal Website Payments Pro API username that was provided to you by PayPal.
API Login: User Password
Enter your PayPal Website Payments Pro API password that you selected for your API username.
API URL
This is the API URL used by this software to connect to the PayPal Website Payments Pro SOAP
server.
Currency Code
Enter the three-letter currency code of the currency you wish to use for PayPal Website
Payments Pro payments. This currency code should be the same as the the currency you've used
to enter your products in the Catalog Manager. Examples: USD, GBP, CAD, JPY, etc.
145
ClickCartPro Version 6.0.6 User Manual
Enable PayPal Website Payments Pro Express Checkout Link
Select true to activate the PayPal Website Payments Pro Express Checkout Link. If you choose to
display this link, the 'PayPal (Pro Express Method) - Payment Form' payment method must also
be activated for the link to be shown. PayPal requires the use of the Express method if you also
choose to use the Direct method.
Keyfile Contents (API Keyfile)
The contents of the API key file you downloaded from PayPal (cert_key_pem.txt) need to be
entered into the field below. This key file should be associated with the API Password you enter
on this page.
Peachtree Export Settings
This menu manages all of your company’s account information so that you can accurately export
your files directly into your Peachtree accounting software.
Settings/Account Number: Accounts Receivable
Enter the account number for the accounts receivable account.
Account Number: Country Tax Amount (Income)
Enter the account number for the income account associated with the country tax total.
Account Number: Discount Amount (Expense)
Enter the account number for the expense account associated with the discount total.
Account Number: Item Subtotal (Income)
Enter the account number for the income account associated with the order subtotal.
Account Number: Payment (Bank or A/R)
Enter the account number for the bank or accounts receivable account.
Account Number: Sale Amount (Expense)
Enter the account number for the expense account associated with the sale total.
Account Number: Shipping Amount (Income)
Enter the account number for the income account associated with the shipping total.
Account Number: State/ Province Tax Amount (Income)
Enter the account number for the income account associated with the state/province tax total.
Invoice Display Name: Country Tax Amount
Enter the invoice display name for the country tax total.
Invoice Display Name: Discount Amount
Enter the invoice display name for the discount total.
Invoice Display Name: Payment
146
ClickCartPro Version 6.0.6 User Manual
Enter the invoice display name for the payment.
Invoice Display Name: Sale Amount
Enter the invoice display name for the sale total.
Invoice Display Name: Shipping Amount
Enter the invoice display name for the shipping total.
Invoice Display Name: State/Province Tax Amount
Enter the invoice display name for the state/province tax total.
Tax Type: Country Tax Amount
Enter the tax type for the country tax total.
Tax Type: Discount Amount
Enter the tax type for the discount total.
Tax Type: Item Subtotal
Enter the tax type for the item subtotal.
Tax Type: Payment
Enter the tax type for the payment.
Tax Type: Sale Amount
Enter the tax type for the sale total.
Tax Type: Shipping Amount
Enter the tax type for the shipping total.
Tax Type: State/Province Tax Amount
Enter the tax type for the state/province tax total.
Quickbooks Export Settings
This menu manages all of your company’s account information so that you can accurately export
your files directly into your Quickbooks accounting software.
Settings/Account Name: Accounts Receivable (A/R)
Enter the account name for the accounts receivable account.
Account Name: Bank Account (Bank)
Enter the account name for the bank account to which amounts should be posted.
Account Name: Country Tax Amount (Income)
Enter the account name for the income account associated with country tax charges.
Account Name: Discount Amount (Expense)
147
ClickCartPro Version 6.0.6 User Manual
Enter the account name for the expense account associated with the order discount amount.
Account Name: Item Subtotal (Income)
Enter the account name for the income account associated with the item subtotal.
Account Name: Sale Amount (Expense)
Enter the account name for the expense account associated with the order sale amount.
Account Name: Shipping Amount (Income)
Enter the account name for the income account associated with shipping charges.
Account Name: State/Province Tax Amount (Income)
Enter the account name for the income account associated with state/province tax charges.
Invoice Display Name: Country Tax Amount
Enter the invoice display name for the country tax amount.
Invoice Display Name: Discount Amount
Enter the invoice display name for the discount amount.
Invoice Display Name: Sale Amount
Enter the invoice display name for the sale amount.
Invoice Display Name: Shipping Amount
Enter the invoice display name for the shipping amount.
Invoice Display Name: State/Province Tax Amount
Enter the invoice display name for the state/province tax amount.
Remote E-Commerce Settings
Perhaps you have an existing site and don’t want to convert it all to a database format? You can
activate this feature and simply add “Add To Cart” buttons that link your shopping cart to your
current site. Here you would outline the additional sites that would be using your shopping cart.
Settings/Allow Remote Product Page POSTs
Select below to allow remote product page POSTs. When set to true, product pages from remote
URLs will be allowed to post product information into the e-commerce shopping cart. When set
to false, this functionality is disabled.
Allowed Remote Product Page URLs
Enter a single or comma separated list of URLs for remote product pages allowed to POST into
the e-commerce shopping cart. These URLs can be entered as partial URLs or fully qualified
URLs. Pattern matching is performed on referrer information based on the URLs entered here to
determine whether a remote product page is allowed to post into the e-commerce shopping cart.
If this field is empty and you have selected to Allow Remote Product Page POSTs, no remote
product pages will be allowed to POST into the e-commerce shopping cart.
148
ClickCartPro Version 6.0.6 User Manual
Shipping Settings
This menu handles all things shipping. Here you can customize your customer’s shopping and
shipping experience.
Settings/Add Handling Charge To Free Shipping Methods
Set this field to true to add handling charges to free shipping methods. Set this field to false to
prevent handling charges from being added to free shipping methods.
Allowed Shipping Addresses
This software can allow a customer to ship their order to multiple addresses, a single address or
to their billing address only. Select the appropriate option to control the type and number of
addresses allowed for shipping.
Free Shipping Threshold
Want to offer free shipping on all orders over $100? Enter a free shipping threshold below. If
you enter an amount greater than zero, the lowest value for all shipping methods will be free of
charge, and the amount for that lowest value will be subtracted from all other shipping options
presented. Set to '0.00' to turn off.
Handling Charge
Enter a handling charge below. If you enter an amount greater than zero, the handling charge
specified will be added to the cost for each shipment. Set to '0.00' to turn off.
Realtime: Minimum Box Height
Enter a minimum height for boxes to be shipped via realtime carriers. If a box is presented to
the shipping module with a height below this minimum, the minimum specified here will be
used.
Realtime: Minimum Box Length
Enter a minimum length for boxes to be shipped via realtime carriers. If a box is presented to
the shipping module with a length below this minimum, the minimum specified here will be
used.
Realtime: Minimum Box Weight
Enter a minimum weight for boxes to be shipped via realtime carriers. If a box is presented to
the shipping module with a weight below this minimum, the minimum specified here will be
used.
Realtime: Minimum Box Width
Enter a minimum width for boxes to be shipped via realtime carriers. If a box is presented to the
shipping module with a width below this minimum, the minimum specified here will be used.
Realtime: Present Dimensional Error Notices
If the dimensions of a shipment are above the maximum dimensions allowed by a realtime
carrier and an error is produced as a result, in addition to using the Shipping Error Carrier Name
149
ClickCartPro Version 6.0.6 User Manual
and Amount for the rate, a notice can be presented by this software. If you set this to “True”
this notice will be presented. “False” will suppress this notice.
Realtime: Present Weight Error Notices
If the weight of a shipment is above the maximum weight allowed by a realtime carrier and an
error is produced as a result, in addition to using the Shipping Error Carrier Name and Amount
for the rate, this software can present a notice. If you set this to “True” this notice will be
presented. “False” will suppress this notice.
Shipping Error: Amount
Enter a shipping error amount below. In the event of an error calculating shipping, this charge
will be displayed to the customer.
Shipping Error: Carrier Name
Enter a shipping error carrier name below. In the event of an error calculating shipping, this
carrier name will be displayed to the customer.
Shipping: Realtime Shippers and Custom Shipping Methods
This menu helps you set up all of the details for your shipping alternatives.
Configure FedEx DirectConnect Connection
Setting up your FedEx DirectConnect connection is a multi-step process. Follow the instructions
below to ensure your connection is set up properly.
•
•
If you do not have a FedEx account number, visit http://www.fedex.com/ to set up a
FedEx account online and obtain a FedEx account number.
Using the same information you provided while setting up your FedEx account, complete
the information below and click the 'Submit' button to retrieve a meter number from
FedEx, which will automatically activate your connection.
Contact Information
The online form contains basic contact information that you’ll need to fill out in order to begin
using FedEx DirectConnect.
150
ClickCartPro Version 6.0.6 User Manual
Configure Intershipper Connection
Setting up your InterShipper connection is a multi-step process. Follow the instructions below to
ensure your connection is set up properly.
• Visit the InterShipper web site at http://www.intershipper.com/ and click the login link
that's presented.
• Complete the information required to register.
• After submitting the form you will receive a username and password. Save the username
and password. Enter it in the provided spaces and press the “Submit” Button to activate
your connection.
• After activating your connection, access the Intershipper Settings function to turn on/off
shipping rates for various shippers.
Configure UPS Online Tools Connection
Setting up your UPS OnLine® Tools connection is a multi-step process. Follow the instructions to
ensure your connection is set up properly. This interface will provide a connection to UPS for
registration for UPS OnLine® Tools. Completion of the steps provided by this interface will
ensure correct registration and activation.
• Select your country from the listing below and click the 'Submit' button to continue. UPS
OnLine® Tools are only available in certain countries. A listing of available countries is
available at: http://www.ec.ups.com/ecommerce/solutions/global_redirect.html
• You will then be presented with a license agreement, which you must accept to continue.
Your registration information will also be collected and sent to UPS for validation.
• If your information is validated by UPS, your registration will be complete and your UPS
OnLine® Tools connection will be activated.
• After the selection of your country from the list of available countries below, you will be
presented with a form to complete in order to configure your UPS OnLine® Tools
connection.
151
ClickCartPro Version 6.0.6 User Manual
Connecting to USPS WebTools
Setting up your USPS WebTools connection is a multi-step process. Follow the instructions below
to ensure your connection is set up properly.
•
Visit the USPS web site at http://www.uspswebtools.com/ and click the registration
link that's presented.
•
Complete all of the information requested on the registration page, be sure to agree to
the USPS WebTools terms and conditions and submit the form.
•
After submitting the form you will receive a username along with a development URL
via email. Save the username and disregard the development URL.
•
Between 7:00 AM and 11:00 PM Eastern time, call the USPS Internet Customer Care
Center and speak to a representative. Provide the representative with your username,
inform them that you have completed testing your integration, and are ready to have
access to the production server. The representative will send you an email with the
production server URL.
•
Once you receive the production server URL via email from USPS, your account is
production-ready. Enter in your username below and click the 'Submit' button to
activate your connection.
Manage Custom Shipping Methods
Perhaps you want to offer shipping charges based on total item cost, quantity, weight or a
percentage of the item cost? Perhaps you have your own custom shipping method. This is
where you would configure and augment the various custom shipping methods. These items can
all be updated, but only if you understand PHP programming. When you click on Update, you
see the following self-explanatory information:
152
ClickCartPro Version 6.0.6 User Manual
Web Pages: Web Page Management
Manage Web Pages
This menu manages the various separate web pages that are added to your web site beside your
main resident pages. You have four standard web pages, but can add any number of additional
pages via this menu. Your standard web pages are Splash, your main front page, Store
Policies, Terms of Use and the Privacy Statement.
Page Identifier And Name/Identifier
This is the background identifier for a particular page. Your customers never see it, so it can be
abbreviated.
153
ClickCartPro Version 6.0.6 User Manual
Page Display Name
This is the front-end display name for a particular page. It is used in menus and in your Recent
Actions section to identify a page. It is a front-end page, so it will be seen by your customers
and should be clear and concise.
Page Content/HTML Content
This is the underlying XHTML coding for this page. If you do not have experience writing this
type of code, use a program like Front Page™ or other HTML editors to generate this code for
you.
Display Options/Menu Order
This menu allows you to determine in what order you will display the various headings.
Numbers ascend from zero; so choose the order by assigning the appropriate numbers to each
page you create.
Menu Display
Do you want this page to appear in your Front-End menus? If so, select “True”, if not, select
“False”.
Page Title Display
Do you want this page title to show in the show in the XHTML display? Select “True” for yes and
“False” for no. This shows your title information in the menu bar of an Internet Browser. It
looks like this:
This also comes into play when your customers bookmark a page.
Display Skin
Here is where you select the skin for a particular page. You have “canned” choices of either the
standard E-Commerce skin or the ClickCartPro E-Commerce Skin.
Meta Information/Meta Title
This is the name that will appear in both the upper menu of most Internet explorer type windows
as well as the title that the search engines will use to find you. Make sure you spend some time
thinking about its content.
Meta Keywords
154
ClickCartPro Version 6.0.6 User Manual
As with all “meta” words, the search engines and your customers will give you the final grade for
how you’ve done describing your site to others. These keywords are “key” to the search engines
marrying prospective clients with your site. Choose them wisely.
Meta Description
Providing an accurate description of your site helps the search engines find the right customers
for your site. Take your time and create meta descriptions that help a prospective client find
you among a sea of businesses.
155
ClickCartPro Version 6.0.6 User Manual
Kryptronic Software End User License Agreement (EULA)
END USER LICENSE AGREEMENT FOR THE KRYPTRONIC HYBRID X CORE (KHXC) AND KHXCBASED KRYPTRONIC SOFTWARE PRODUCTS
KRYPTRONIC, INC. LICENSES THE KRYPTRONIC HYBRID X CORE SOFTWARE PRODUCT AND
OTHER KHXC-BASED KRYPTRONIC SOFTWARE PRODUCTS TO YOU SUBJECT TO THE TERMS
CONTAINED IN THIS END USER LICENSE AGREEMENT ("EULA"). READ THE TERMS OF THIS
EULA CAREFULLY. BY INSTALLING, COPYING OR OTHERWISE USING THE SOFTWARE (AS
DEFINED BELOW), YOU AGREE TO BE BOUND BY THE TERMS OF THIS EULA. IF YOU DO NOT
AGREE TO THE TERMS OF THIS EULA, DO NOT INSTALL, COPY OR USE THE SOFTWARE.
NOTICE TO CUSTOMER
If you do not agree to the terms of this EULA, do not install, activate, or use this software. This
EULA is a contract between you (either an individual or an entity) and Kryptronic, Inc.
("Kryptronic"), which governs your use of this Kryptronic software product that accompanies this
EULA and related software components, which may include associated media, printed materials,
and online or electronic documentation.
DEFINITIONS
This Kryptronic Hybrix X Core software package includes the Kryptronic Hybrid X Core ("KHXC")
software product, related KHXC-Based Kryptronic software products designed for use with the
KHXC ("KHXC-Based Software") and Open Source Software components. The KHXC software
product is composed of a proprietary KHXC software and management interface component and
other KHXC-Based Software. KHXC and KHXC-Based Software are referred to collectively herin
as ("Software"). This software package may include sample programs or scripts ("Sample
Programs"). You may use and distribute Sample Programs under the terms set forth in the
applicable Sample Programs files. In this EULA, the KHXC, KHXC-Based Software products,
associated media, printed materials, and online or electronic documentation are collectively
referred to as the "Software."
"Open Source Software" means various open source software components, including, without
limitation, PEAR and the following PEAR packages: Auth_SASL, Archive_Tar, Console_Getopt,
File_Find, Mail, Mail_mime, Net_SMTP and Net_Socket, licensed under the terms of applicable
open source license agreements included in the materials relating to such software.
An "Installation" means a single physical installation of the Software.
A software license key ("Software License Key") issued to you by Kryptronic is required to use
the Software.
WARNING FOR EVALUATION LICENSEES
The Software can be activated with a no-cost evaluation Software License Key. Evaluation
Software License Keys have an expiration date ("Expiration Date"). If you activate the Software
156
ClickCartPro Version 6.0.6 User Manual
with an evaluation Software License Key: (i) you may use the Software until the Expiration Date
only to evaluate the suitability of the Software for licensing on a for-fee basis; and (ii) THE
SOFTWARE IS PROVIDED TO YOU "AS IS" WITHOUT WARRANTY OF ANY KIND, WHETHER
EXPRESS, IMPLIED, STATUTORY, OR OTHERWISE. KRYPTRONIC BEARS NO LIABILITY FOR ANY
DAMAGES RESULTING FROM USE (OR ATTEMPTED USE) OF THE SOFTWARE THROUGH AND
AFTER THE EXPIRATION DATE, AND HAS NO DUTY TO PROVIDE SUPPORT TO YOU.
OPEN SOURCE SOFTWARE
The Open Source Software is composed of individual software components, each of which has its
own copyright and its own applicable license conditions. You must review the licenses within the
individual packages to understand your rights under them. The licenses can be found online at
pear.php.net. Copyrights to the Open Source Software are held by the copyright holders
indicated in the copyright notices found online at pear.php.net.
LICENSE
The Software is licensed, not sold. Subject to the terms and limitations of this EULA, Kryptronic
hereby grants you a nonexclusive, nontransferable license, without rights to sublicense, to (i)
Use the Software License Key to activate the Software to the extent permitted by your payment
of applicable license fees (whether such fees are based on a single installation licensing model or
any other Kryptronic approved licensing model); (ii) Install or have installed a single instance of
the Software for each license fee paid; (iii) Use the Software in accordance with this EULA; (iV)
Use the Software in a legal manner; and (V) Use the documentation accompanying the Software
in connection with permitted uses of the Software.
LICENSE LIMITATIONS
You may not copy the Software except for a reasonable number of machine-readable copies of
the Software for backup or archival purposes and except as expressly permitted in the License
section above. You may not remove any titles, trademarks or trade names, copyright notices,
legends, or other proprietary markings on the Software. You are not granted any rights to any
trademarks or service marks of Kryptronic. Kryptronic retains all rights not expressly granted to
you.
LICENSES REQUIRED FOR THIRD-PARTY SOFTWARE
The Software enables you to install third-party modules and extensions that further enhance it's
functionality. You are responsible for obtaining any licenses necessary to operate any such thirdparty software, and must accept any EULAs required to use the software.
KRYPTRONIC'S RIGHT OF ENTRY
You hereby authorize Kryptronic to access your web server in order to inspect the Software in
any reasonable manner verify your compliance with the terms hereof.
PROPRIETARY RIGHTS RESERVED BY KRYPTRONIC
157
ClickCartPro Version 6.0.6 User Manual
Kryptronic retains all right, title, and interest in and to the Software and the Software License
Key and in all related copyrights, trade secrets, patents, trademarks, and any other intellectual
and industrial property and proprietary rights, including registrations, applications, renewals,
and extensions of such rights.
RESTRICTIONS
You may not (i) Sell, lease, license, sublicense, distribute or otherwise transfer in whole or in
part the Software or the Software License Key; (ii) Provide, disclose, divulge or make available
to, or permit use of the Software in whole or in part by, any third party without Kryptronic's
prior written consent; or (iii) Modify or create derivative works based upon the Software without
Kryptronic's prior written consent. Except to the extent expressly permitted by applicable law,
and to the extent that Kryptronic is not permitted by that applicable law to exclude or limit the
following rights, you may not decompile, disassemble, reverse engineer, or otherwise attempt to
derive source code from the Software, in whole or in part. You may not disclose the results of
any benchmark test of the Software to any third party without Kryptronic's prior written
approval.
SUPPORT AND SUBSCRIPTION SERVICES NOT INCLUDED
Kryptronic will not provide any support services under this EULA. This EULA does not give you
any rights to any updates or upgrades to the Software or to any extensions or enhancements to
the Software developed by Kryptronic at any time in the future. You may purchase support and
subscription services separately. If you have purchased Kryptronic support and subscription
services with the Software, these services are provided to you under the Support Contract Terms
and Conditions posted on Kryptronic's Web site, and by accepting the terms of this EULA you are
accepting these Support Contract Terms and Conditions. Any supplemental software code or
related materials that Kryptronic provides to you as part of any support and subscription
services are to be considered part of the Software and are subject to the terms and conditions of
this EULA. Kryptronic may use any technical information you provide to Kryptronic for any
Kryptronic business purposes without restriction, including for product support and development.
Kryptronic will not use information in a form that personally identifies you.
TERMINATION
Kryptronic may terminate this EULA if you fail to comply with any term of this EULA. In the
event of termination, you must destroy all copies of the Software and Software License Key. In
addition you must remove all copies of the Software from all computers and terminals on which
it is installed.
GOVERNMENT RESTRICTIONS
You may not export or re-export the Software except in compliance with the United States
Export Administration Act and the related rules and regulations and similar non-U.S. government
restrictions, if applicable. The Software and accompanying documentation are deemed to be
"commercial computer software" and "commercial computer software documentation,"
respectively, pursuant to DFAR Section 227.7202 and FAR Section 12.212(b), as applicable. Any
use, modification, reproduction, release, performing, displaying, or disclosing of the Software by
the U.S. Government shall be governed solely by the terms of this EULA.
158
ClickCartPro Version 6.0.6 User Manual
LIMITED WARRANTY
Kryptronic warrants, for your benefit alone, that the Software conforms in all material respects
to the specifications for the current version of the Software. This warranty is expressly
conditioned on your observance of the operating, security, and data-control procedures set forth
in the Software Documentation.
EXCEPT FOR THE PRECEDING EXPRESS LIMITED WARRANTY, TO THE MAXIMUM EXTENT
PERMITTED BY APPLICABLE LAW, KRYPTRONIC PROVIDES THE SOFTWARE WITHOUT ANY
WARRANTIES OF ANY KIND, EXPRESS, IMPLIED, STATUTORY, OR IN ANY OTHER PROVISION OF
THIS EULA OR COMMUNICATION WITH YOU, AND KRYPTRONIC SPECIFICALLY DISCLAIMS ANY
IMPLIED WARRANTIES OF MERCHANTABILITY, FITNESS FOR A PARTICULAR PURPOSE, AND
NON-INFRINGEMENT.
LIMITATION OF LIABILITY
TO THE MAXIMUM EXTENT PERMITTED BY APPLICABLE LAW, IN NO EVENT WILL KRYPTRONIC
BE LIABLE FOR ANY LOST PROFITS OR BUSINESS OPPORTUNITIES, LOSS OF USE, BUSINESS
INTERRUPTION, LOSS OF DATA, OR ANY OTHER INDIRECT, SPECIAL, INCIDENTAL, OR
CONSEQUENTIAL DAMAGES UNDER ANY THEORY OF LIABILITY, WHETHER BASED IN
CONTRACT, TORT, NEGLIGENCE, PRODUCT LIABILITY, OR OTHERWISE. BECAUSE SOME
JURISDICTIONS DO NOT ALLOW THE EXCLUSION OR LIMITATION OF LIABILITY FOR
CONSEQUENTIAL OR INCIDENTAL DAMAGES, THE PRECEDING LIMITATION MAY NOT APPLY TO
YOU.
KRYPTRONIC'S LIABILITY UNDER THIS EULA WILL NOT, IN ANY EVENT, EXCEED THE LICENSE
FEES, IF ANY, PAID BY YOU TO KRYPTRONIC FOR THE SOFTWARE LICENSED BY YOU UNDER
THIS EULA.
THE FOREGOING LIMITATIONS SHALL APPLY TO THE MAXIMUM EXTENT PERMITTED BY
APPLICABLE LAW, REGARDLESS OF WHETHER KRYPTRONIC HAS BEEN ADVISED OF THE
POSSIBILITY OF SUCH DAMAGES AND REGARDLESS OF WHETHER ANY REMEDY FAILS OF ITS
ESSENTIAL PURPOSE.
INJUNCTIVE RELIEF
You acknowledge that, in the event of your breach of any of the foregoing provisions, Kryptronic
will not have an adequate remedy in money or damages. Kryptronic shall therefore be entitled to
obtain an injunction against such breach from any court of competent jurisdiction immediately
upon request. Kryptronic's right to obtain injunctive relief shall not limit its right to seek further
remedies.
GENERAL
This EULA is governed by the laws of the State of Pennsylvania and the United States of
America, without regard to conflict of law principles. The United Nations Convention for the
International Sale of Goods shall not apply. This EULA is the entire agreement between us and
supersedes the terms of any purchase orders and any other communications or advertising with
respect to the Software. If any provision of this EULA is held invalid, the remainder of this EULA
159
ClickCartPro Version 6.0.6 User Manual
shall continue in full force and effect. This EULA may be modified only by written agreement
signed by authorized representatives of you and Kryptronic.
CONTACT INFORMATION
If you have any questions about this EULA, or if you want to contact Kryptronic for any reason,
please direct all correspondence to: Kryptronic, Inc., P.O. Box 865, York, PA 17403, United
States of America or email [email protected].
Kryptronic, the Kryptronic logo and all Kryptronic software names and logos are trademarks of
Kryptronic, Inc. in the United States and/or various jurisdictions.
160
ClickCartPro Version 6.0.6 User Manual
Program Credits
Codebase Development
Nick Hendler (Kryptronic, Inc.) has been the chief software developer for ClickCartPro since it's
inital version 1.0, which was developed in June 1999. Since then, the program has undergone
extensive changes, which have resulted in the current version available today.
The codebase, which includes the library, modules and data architecture, are developed by
solely by Kryptronic, Inc. and is distributed under license. ClickCartPro is not an open source
(GNU licensed) program, however the source code is delivered with the program and is editable.
Beta Test Team
Much credit is due to the beta test team for the time spent ensuring that ClickCartPro software is
both feature rich and fully tested before it is released to the user community. The beta test team
donate their time to both assist the community and have a hands on experience as the software
is created. Their efforts are appreciated and through their insight and diligence, a superior
product is possible.
Name
Support Forum ID
Email Address
Jeremy O'Connell
Todd Daubs
Dave Alders
Dave Martin
John Lester
Steven Dovey
Steven Dalton-Annett
Jim Bob Pipes
James Coyle
Howard Galpin
Vinh Chau
James Rath
Preston Elder
Dave Cole
Mike Simpson
Terry Ames
cyberws
Todd
dtwg
Dave
jpl
ZipSkins
steveblueradio
citywebsystems.com
jimmuk
GreenbarnWeb
superhero2000
redmanstudios
PreZ
Glark
Litemaster
TerryA
[email protected]
[email protected]
[email protected]
[email protected]
[email protected]
[email protected]
[email protected]
[email protected]
[email protected]
[email protected]
[email protected]
[email protected]
[email protected]
[email protected]
[email protected]
[email protected]
Some of the people making up the beta team own or work for companies providing directly
related services to the user community such as technical support, Internet site design, web
hosting or retail goods.
161