1
OPERATING
INSTRUCTIONS
TIMELAPSE inverted epi-fluorescence microscope Advanced
You must not operate this equipment without prior training from a
BALM facility staff member.
!
To arrange training and for help please contact:
Dr Ann Wheeler
ext: 2406
[email protected]
Dr Katy Cogger
ext: 2407
[email protected]
Isma Ali
ext: 2407
[email protected]
Standard Operating Procedure — Advanced user guide
How to turn the equipment on:
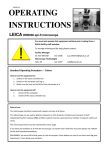
1. If you want to do fluorescence, switch on the metal halide lamp (a)
2. Switch on the extension plug (b)
3. NEW: Switch on the Camera – using the button on the camera (It looks like a computer on button)
4. Switch on the computer and log in
5. If you want to do bright field, switch on the bright field controller box (d)
How to turn the equipment off:
Switch off the bright field controller box, then the computer, then extension plug (b), and finally the
metal halide lamp (a)
Rules of use:
This microscope should be treated with respect and care at all times.
This Microscope can only be used by Masters by Research or PhD students, Postdocs and members of staff.
The microscope lenses must be cleaned after every usage and the equipment treated carefully at all times.
If you have any problems at all with the microscope, no matter how trivial they may seem please see a
technician immediately.
REMEMBER: You have 20GB of disk space on this microscope. Check before you start if you have room for
1
your experiment. If not, delete your old data. Make sure you empty the recycle bin afterwards
Z-stacks
1) In Multi Dimensional Acquisition select
Multiple Wavelengths and Z series
2) Save as normal
(files are saved as a single file for each
wavelength)
3) Set gain and exposure for each wavelength for
the brightest point in the Z axis (live)
4) Make sure Z series with the wavelength is
ticked for each channel
5) In the Z series tab (live)
Either – Acquire wavelength set at each Z
Or – Acquire Z series for one wavelength at a
time
6) Focus on top/bottom of image and click
Set top to current
7) Focus in opposite direction and click
Set bottom to current
8) Choose step size or number of steps
(see recommended step size for guidance)
9) Click Acquire
2
Processing Z-stack data
To create a multi-coloured stack, select Display,
and Colour Combine,
or use the Colour combine shortcut
Set the bit depth to 24-bit,
and select the stacks that correspond to each
colour component
Make sure All Planes of the stack are selected by
clicking on the stack icon
Click Colour Combine
Remember to save the colour combined stack
3
Multiple stage positions
1) In Multi Dimensional Acquisition select Multiple
Stage Positions and Multiple Wavelengths
2) Save as normal
(files are saved as a separate file for each
wavelength at each position)
3) Set gain and exposure for each wavelength at
one of the positions (live)
4) In the Stage tab (live),
Remove any stage positions already stored
from previous experiments by highlighting
them and selecting Delete
5) Using the joystick move the stage to a position
of interest, focus, type in a label for the
position, then click Add current position to list
6) Move to the next position of interest and add it
to the list, and so on
7) Click Acquire
4
Timelapse
1) In Multi Dimensional Acquisition select
Timelapse, and Multiple Wavelengths if you
are using more than one channel
2) Save as normal
(files are saved as a single file for each
wavelength at each time point)
3) Set gain and exposure of each wavelength (live)
4) Make sure Auto Focus is set for Every Nth
Acquisition and N is set to 6
5) In the Timelapse tab,
Set the Number of time points and Time
Interval
Duration tells you how long the experiment will
take
6) In the Summary tab, you can see how much
storage space is required to collect you data
set. Make sure you have enough space on the
E-Drive, and empty the recycle bin.
7) Click Acquire
5
Processing timelapse data
To make a metamorph timelapse movie, go to
Apps and Review Multi Dimensional Data
Or use the Review Multi Dimensional Data
shortcut
In the Review Multi Dimensional Data window
click Select Base File
In the Multi dimensional data set utilities
window click Select Directory and find where you
saved your data
Make sure you tick the dataset you want to use
Then click View
6
In the Review Multi dimensional Data window
tick the wavelengths you want to use
Right click in the top left corner to select all time
points
NB. If you do not want to include all time points
you can unselect them here by right clicking in
the box for each image
Click Load Images
A separate stack/movie is created for each
wavelength, use the bar at the top to navigate
through the different time points
You can change the colour of the stack by clicking
on the look up tables button,
and selecting a colour
7
To combine different coloured stacks, use the
Colour Combine tool (Display – Colour combine),
and make sure All Planes are selected
(See processing Z-stack data for more info)
Alternatively, you can make a multi-coloured
stack/movie using Review Multi Dimensional
Data.
Select the wavelengths you want to combine,
then in the Display tab,
tick the Colour composite box,
and select the correct sources for each
wavelength
Go back to the Selection tab
and click Load images as before
Remember to save your movie/stack (usually in Tif format)
8
To change your metamorph movie/stack into a
universally compatible format, open the Tif file in
Image J
Then go to File, Save As, AVI
Make sure you choose Uncompressed
And then decide the Quality and Frame Rate
9
Live cell imaging – switching on the system
1) Switch on the temperature controller
NB. System takes about 1hr to warm up
Please leave the controller set to 35°C, the
temperature at the sample will be 37°C
2) Put sample on stage
3) Position water chambers around sample
4) Position CO2 chamber over sample ensuring it
is sitting flat, and there are no gaps
10
5) Check tubing is connected to the ddH2O bottle
NB. Only one bottle should be connected
6) Turn on CO2 controller
7) Check there is no pressure left in the system
by turning the side valve on the gas cylinder in
the minus direction (ie. Anti-clockwise). The
pressure on the bottom gauge should read
zero.
If you do not check this, the tubing can
EXPLODE when you open the CO2 air valve
11
8) Open the CO2 air valve on the top of the gas
cylinder
9) Adjust the side valve (clockwise) to increase
the pressure in the system to 1 bar
(bottom gauge)
10) Check you can see bubbles in the water bottle
11) Set up Metamorph
12
Live cell imaging – switching off the system
1) Turn off the temperature controller
2) Close the top valve on the gas cylinder
3) Turn the side valve in the minus direction
(anti-clockwise) to release the pressure in the
system
4) Wait for the gauge to return to zero, and the
bubbles in the water bottle to stop
5) Turn off the CO2 controller
13