1
OPERATING
INSTRUCTIONS
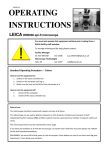
LEICA MM DM4000 epi-fl microscope
You must not operate this equipment without prior training from a
BALM facility staff member.
!
To arrange training and for help please contact:
Dr Ann Wheeler
ext: 2406
[email protected]
Dr Katy Cogger
ext: 2407
[email protected]
Isma Ali
ext: 2407
[email protected]
Standard Operating Procedure — Basic instructions
How to turn the equipment on:
1. Switch on the metal halide lamp
2. Switch on the microscope (the switch is on the back RHS of the microscope)
3. Switch on the computer and log in
How to turn the equipment off:
1.
Switch off computer
2.
Switch off Microscope
3.
Switch off metal halide lamp
Rules of use:
This microscope should be treated with respect and care at all times.
This Microscope can only be used by Masters by Research or PhD students, Postdocs and members of staff.
The microscope lenses must be cleaned after every usage and the equipment treated carefully at all times.
If you have any problems at all with the microscope, no matter how trivial they may seem please see a
technician immediately.
REMEMBER: You have 5GB of disk space on this microscope. Check before you start if you have room for your
experiment. If not, delete your old data.
1) Open Metamorph software
(basic or standard user)
NB: The software takes a while to load
Objectives available:
2) Place slide on microscope stage and choose objective lens
4x, 10x, 20x, 40x – air
40x, 63x – oil
Move by hand, not automated
NB: please LOWER THE STAGE before
changing between objectives (to
avoid crashing lens onto slide)
3) Check rod on LHS is pushed IN to direct the light to the eyepiece
4) Select a channel from the tool bar on
the RHS, and find your sample
Use these buttons to change between
the channels
5) Select Multi Dimensional Acquisition
(a new window will appear)
Open and close shutter using the
shutter state button
6) Set the parameters of your experiment using the
step by step tabs in the multi dimensional
acquisition window
7) Once you’ve set up your acquisition setting you
can save them using the Save State button and
reload them next session using the Load State
button
Save your data on the F-Drive
↘
In the Saving tab click Select Directory and
choose your folder on the F-Drive
Type in a Base Name for your experiment
Check the Incremental base name box is ticked
(this will automatically number your images under the base
name you selected)
Choose the number of wavelengths you need
8) Pull OUT rod on LHS to direct the light to the camera
9) Click Show Live icon
(live image will appear on screen,
you may need to adjust the focus)
10) Adjust Gain and Exposure for each wavelength
To change the assigned wavelengths select an illumination
from the dropdown menu
If you need to use Auto Scale, click on the icon on the LHS of
the Live Image Window, and select it from the dropdown
menu
Within the parameters of the gain and exposure that have
been set, you can alter the image displayed by sliding the
triangles on the side bar
NB. If the uppermost tail of the histogram is not viable then
some areas of your image will be overexposed
11) Click Acquire
(a separate picture will be
taken for each channel)
12) Creating a Merged Image
↘
↘
↘
↘
↘
click Colour Combine
in toolbar on RHS
select 24-bit
in Colour Combine window
assign the appropriate images
for each colour component
click Colour Combine
Save combined image to your
folder in tiff format
When you have finished, transfer all your data to the Z network drive
PLEASE TIDY UP!!
Clean lenses, throw away used tissue/lens tissue, dispose of old slides in the yellow sharps bin