Transcript
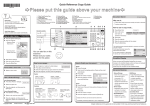
Quick Reference Copy Guide
cPlease
put this guide above your machineg
Document Server
Tips
Copy Paper Size
Copy Paper Size
You can check the copy paper
size using the scale on the exposure glass.
• Auto Paper Select
Selects a suitable size of paper automatically.
▼
(1. Placing Originals)
16. {New Job} key
17. {Registered Program} key/
{Other Function} key
18. Function status indicators
• Green: active.
• Red: interrupted.
19. Function keys
20. {Counter} key
21. {User Tools} key
22. {Tray Paper Settings} key
23. Display panel
A Press [Store File].
B Enter a user name, file name,
or password if necessary.
C Press [OK].
D Place Originals.
E Make scanning settings for the original.
F Press the {Start} key (11).
Originals are scanned and stored on
the hard disk. To find your document,
press the {Document Server} key (19).
The preview display denotes the screen
that allows confirming contents of the
scanned documents.
Standard available:
A Press the {Clear Modes} key (8).
Copier:
Document Server:
B Place Originals.
Why use it...
• To store often used documents centrally and print on demand.
• To reduce network load.
How to use in copy mode...
☺
You can also print and
scan on this machine!
Please ask your sales
person for these options.
• Auto Image Density
Adjusts the image density (darker/lighter)
automatically for copying.
How to make a copy...
10. {Stop} key
Press to stop a copy job in progress.
11. {Start} key
Press to start copying. Press to start
scanning and printing in Document
Server mode.
12. {Sample Copy} key
13. {Clear} key
Press to delete a number entered.
14. {#} key (Enter key)
15. Number keys
1. Status indicator
2. Operation switch
3. {Login/Logout} key
4. {Simplified Display} key
5. {Language Selection} key
6. {Interrupt} key
7. {Energy Saver} key
8. {Clear Modes} key
Press to clear the current settings.
9. {Program} key
Press to select the program mode.
(2. Copying)
Printer:
Scanner:
•
For more functions on Document Server, see “4. Document
Server”.
Exposure Glass
(Face down)
Simplified Display
•
How to save paper...
Auto Document
Feeder (Face up)
(2. Copying)
A See if original is 1-sided or 2-sided (duplex).
A Select one of the stapling positions (Pages will be sorted
automatically).
C Enter number of copies.
C Select original and copy type and / or
orientation.
D Press the {Start} key (11).
D Place original and press the {Start} key (11).
How to Reduce/Enlarge...
• Double-sided copies
1-Sided → 2-Sided
Copies two 1-sided pages
on one 2-sided page.
Auto Reduce/Enlarge
A Press [Auto Reduce /
Enlarge].
1
2
D Press the {Start} key (11).
→
2-Sided
2-Sided
Copies one 2-sided page
on one 2-sided page.
B Enter number of copies.
• Combining copies
Copies multiple 1-sided
originals on two sides of
copy paper.
C Place Original.
D Press the {Start} key (11).
Availability of finishing depends on your configuration.
C Place original and press the {Start} key (11).
(Paper tray is selected automatically).
Printed in the Netherlands
Copies multiple 2-sided
originals on two sides of
copy paper.
Staple and Punch can be done at the same time.
B Select a ratio, and then press [OK].
Copyright © 2006
If you want Punch
A Select one of the punch hole positions (Pages will be hole
punched).
B Select the paper tray.
Preset Reduce/Enlarge
A Press [Reduce/ Enlarge].
Advanced features
C Place Original.
1
Copies multiple 1-sided
originals on one side of copy
paper.
GCSHVY9E
For more combining, see “Copier Functions”.
GB GB
B2357630
You can view the simplified display from the Copier/Document
Server's initial screen by pressing the {Simplified Display} key.
The simplified display contains main functions only.
Characters and keys are enlarged on this screen, making for
easier operation.
B Enter number of copies.
2
C Place original and press the {Start} key (11).
(2. Copying)
If you want Staple
B Press [Dup./ Combine/ Series].
(2. Copying)
How to finish your document...
Reduce/Enlarge
• Zoom: you can change with
1% steps.
• Magnification: reduce/
enlarge horizontally and
vertically.
Series Copies
• Orientation: top-to-top or
top-to-bottom.
• Series: copies front and
back of a 2-sided original on
2 sheets.
• Booklet/Magazine: copies in
page order
Edit/Stamp
• Image Repeat/Double
copies
• Centring: move image to
centre
• Erase: centres and borders
are erased
• Stamps: background
numbering, etc.
Cover/Slip Sheet
• Front/Back covers – copied
or blank
• Designate: certain pages
copied on slip sheets.
Chapter references in this guide refer to the bundled OI CD; Copy/Document Server Reference.