1
Installation and Electrical Connection
WARNING—This product must be installed by a competent person or electrician in
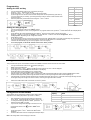
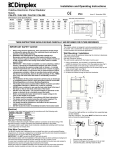
The RXMBS4 must be wall mounted as follows:
•
•
•
•
•
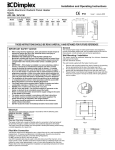
Remove single screw from underneath unit Fig.2 (1)
Separate base and install the base with the appropriate screws and fixings for the wall type (not supplied) Fig.2 (2)
Connect the two supply wires to the corresponding Neutral and Live terminals in the base Fig.3
Position the unit on the base, first hooking the two recesses in the inside top over the hooks on the base then gently swing the unit
down so that the pins engage in the connector Fig.2 (3)
Finally, secure with single fixing screw underneath Fig.2 (1)
Fig.2
Fig.3
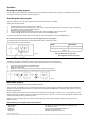
Controls
1 - Time (24hr)
2 - Day of the week
3 - Current mode: *
on or off
comfort or background
comfort or frost protection
4 - Mode display for each zone
5 - Modification / override buttons
6 - Validation button
7 - Timed absence mode (e.g.holidays)
8 - Selector switch index mark
9 - Mode selector switch (see Fig.6 and Table 2 below)
Table 1
Symbol
*Dependant on configuration (see ‘Configuration Heating Requirements’)
Function
Fig.4
Continuous comfort (all zones)
AUTO
Auto mode (heating runs to the preset program for each zone)
Continuous set back (all zones)
Continuous frost protection (all zones)
Set the time
PROG
Set the daily programs
Off (no heat output)
Fig.5
Configures communication and heater modes
Table 2