1
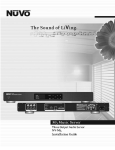
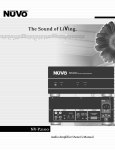
Hip Smarthome - Systems User Manual
For Support visit www.hipsmarthome.co.uk or call 01704-807114
Contents
1.
Hip SmartHub – Connection / Setup........................................................................................... 3
1.1.
2.
Hip SmartTV – Connection / Setup ............................................................................................. 5
2.1.
3.
Setup Guide ........................................................................................................................... 3
Setup Guide ........................................................................................................................... 5
Hip SmartMusic – Connection / Setup ....................................................................................... 6
3.1.
3.2.
3.3.
3.4.
3.5.
3.6.
Setup Guide ........................................................................................................................... 6
Using the App ........................................................................................................................ 9
Music Selection ................................................................................................................... 10
Direct Stream – Play from the content on your IOS or Android Device ............................. 10
Music Library – USB Hard Drive or Memory Stick ............................................................... 12
Line In / Out ......................................................................................................................... 12
3.7. Settings Menu ............................................................................................................................ 13
3.8. Zones ................................................................................................................................... 14
3.9. Gateways ............................................................................................................................. 14
3.10.
This App ........................................................................................................................... 14
3.11.
Add a NuVo Component .................................................................................................. 14
3.12.
Music Library – Share music form a PC, Mac or Nas Drive.............................................. 15
3.13.
Music Services.................................................................................................................. 18
3.14.
General ............................................................................................................................ 19
3.15.
International .................................................................................................................... 21
3.16.
Help .................................................................................................................................. 21
3.17.
Troubleshooting............................................................................................................... 22
3.18.
Music System Specification ............................................................................................. 29
For Support visit www.hipsmarthome.co.uk or call 01704-807114
1.
Hip SmartHub – Connection / Setup
The Hip SmartHub houses your Broadband Router
and distributes your internet connection to three
hardwired connection points (Ethernet sockets)
around your home.
To begin, you will need your Broadband Router
from your chosen Internet Service Provider.
1.1.
Setup Guide
1.1.1. Remove the cover from your SmartHub by inserting your fingers through the openings on
either side of the cabinet and gently pulling apart and towards you. The cover will come away
from the base.
1.1.2. Inside the SmartHub should be 3 x Ethernet Patch Cables. Remove these and pull apart the
Velcro Strap.
1.1.3. Take the 3 x Ethernet Patch Cables and Plug them into the 1st 3 sockets (left to right) on the
Patch Panel in the back of your SmartHub. Both ends of the Patch Cables are the same, so either
end can be plugged in to the Patch Panel. The Plugs go in from underneath by pushing back the
spring loaded tabs. The small clip on the plug should be facing towards you. Insert the plug
upwards into the socket until you hear it click.
1.1.4. Once you’ve inserted the 3 x Patch Cables into the Patch Panel, take your Broadband
Router and plug the other end of the Patch Cables into the sockets on your Router labeled
Ethernet (there will normally be 4 ethernet sockets on your Router, any three of the 4 will do).
1.1.5. Make the other connections for your Router as described in the instructions which came
with it. There should be a cable for the phone line / adsl connection and also for power. You
should find your Master BT point is located within 1 metre of your SmartHub.
1.1.6. Place your Router inside the SmartHub being careful not to bend the Patch Cables too
tightly. Secure the Router inside the SmartHub with the Velcro strip provided.
1.1.7. Refer to the setup instructions which came with your Broadband Router to establish that
your Router and Broadband Service are working Wirelessly before continuing.
For Support visit www.hipsmarthome.co.uk or call 01704-807114
1.1.8. Once you have established that your Router and Broadband Service are operating, you can
begin to connect your devices (Smart TVs, Computers, Games Consoles etc) to the Ethernet
Sockets provided in your home.
There should be 1 Socket in the Lounge, 1 in the Kitchen / Family
Area and 1 in the Master Bedroom.
1.1.9. To connect your device to the Ethernet Socket you will need a patch cable (otherwise
known as Ethernet Cable or RJ45 Cable). These are available at most PC / TV shops and many
devices are now supplied with one.
1.1.10. Plug one and into the wall socket and the other into the Ethernet Socket on your device.
Refer to your devices instructions to locate the socket.
1.1.11. Refer to the instructions for your device for setting up its network connection. With a
wired connection such as this, most devices won’t actually need any settings changing and should
work automatically.
1.1.12. Test the device either through the Test Network option within the devices settings menus
or simply by using a service on that device which requires the internet. So for example, if you are
plugging in your Smart TV, you can test it by trying to use the Catchup Services such as BBC IPlayer
etc.
1.1.13. Repeat steps 10-12 for each device you wish to connect.
1.1.14. Once you have established that each device is working, you can replace the SmartHub
cover by sliding it back into place.
For Support visit www.hipsmarthome.co.uk or call 01704-807114
2.
Hip SmartTV – Connection / Setup
The Hip SmartTV distributes your internet
connection to six hardwired connection points
(Ethernet sockets) around your home.
To begin, you will need to have installed your
Broadband Router and Hip SmartHub as described
above.
2.1.
Setup Guide
2.1.1. Remove the cover from your SmartTV by inserting your fingers through the openings on
either side of the cabinet and gently pulling apart and towards you. The cover will come away
from the base.
2.1.2. Inside the SmartTV should be 1 x Ethernet Patch Cable. Take the Patch Cable and insert one
end into one of the spare Ethernet Ports on the Network Switch inside the SmartTV cabinet. Plug
the other end into your Router. There is a knockout hole in the top and bottom of the cabinets
which can be used to feed the cables through.
2.1.3. Once connected, power up your Network Switch at the Mains socket and your Ethernet
Sockets will now be live.
2.1.4. Repeat Steps 9-13 above.
2.1.5. Once you have established that each device is working, you can replace the SmartTV cover
by sliding it back into place.
For Support visit www.hipsmarthome.co.uk or call 01704-807114
3.
Hip SmartMusic – Connection / Setup
3.1.
Setup Guide
3.1.1. Before you can operate your music system, the system electronics contained inside the Hip
SmartMusic cabinet must be connected to a working Broadband Router, or if you have opted for
Hip SmartTV, to the Network Switch inside the Hip SmartTV cabinet, which in turn is connected to
your Router as described above
3.1.2. Remove the cover from your SmartMusic cabinet by inserting your fingers through the
openings on either side of the cabinet and gently pulling apart and towards you. The cover will
come away from the base.
3.1.3. Inside you will see the Nuvo system electronics.
Fig.1
For Support visit www.hipsmarthome.co.uk or call 01704-807114
Front Panel :
(1)
(2)
(3)
(4)
Power Indicator
Zone 1 Status Light – Living Room (see troubleshooting)
Zone 2 Status Light – Kitchen (see troubleshooting)
Zone 3 Status Light – Master (see troubleshooting)
3.1.4. From the back of the Nuvo unit will come an Ethernet Cable. This can be plugged into
either one of the Ethernet Sockets on the back of the Nuvo device. The other end of this cable
needs to be plugged into your Router or if you have it, the Network Switch inside your Hip
SmartTV cabinet.
Fig.2
3.1.5. To begin setting up your Hip SmartMusic system, you will need one of the devices with
which you intend to operate the system. Any Apple IOS Device* (eg, IPhone, IPad, IPod Touch etc)
or Android Device can be used.
3.1.6. Make sure your device is connected via WiFi to your Broadband Router. Open up the App
Store for your device and search for the Nuvo Player app. Download and Install the App on your
device. *Please note that the IOS app will not run on older devices which do not support IOS5 or
later versions.
Fig.3
For Support visit www.hipsmarthome.co.uk or call 01704-807114
3.1.7. The system has been pre-configured for you, so simply select Control my system
Fig.4
3.1.8. After a few seconds your screen should look like this (if not see trouble shooting)
Fig.5
For Support visit www.hipsmarthome.co.uk or call 01704-807114
3.2.
Using the App
The iOS and Android apps offer complete system control wirelessly from any compatible Wi-Fi
enabled phone or tablet. The iOS version is available for free download from the iTunes App Store
and the Android version is available from Google Play. Both versions offer the same look and
control options. When used with tablets, the display is nicely optimized for a view of the complete
system operation on one screen.
3.2.1. System control begins with the Dashboard. Each of the zones are represented by an icon
on the left hand side. Your initial selection is done by dragging and dropping a zone into a new
zone group, as shown below. This can also be done by simply tapping an inactive zone. Once a
music selection is made, the related album art and now playing information will appear in the
zone group. Zones can play music individually or you can share music by dragging and dropping
multiple zones into a single group.
Fig.6
3.2.2. To deactivate a zone and stop the music playback on that zone, simply drag the icon back
into the open dashboard area below the zone groups.
For Support visit www.hipsmarthome.co.uk or call 01704-807114
3.3.
Music Selection
3.3.1. When a zone group is activated by moving a zone icon into the zone group field (see fig.
6),the app will go to the music navigation pane. From there, any streaming service, personal music
libraries, Direct Stream or local line in sources can be selected for playback. The available music
choices are visible in a music selection ribbon. As you scroll across the selections with your finger,
the active choice will be highlighted and the display will change accordingly.
Fig.7
3.4.
Direct Stream – Play from the content on your IOS or Android Device
3.4.1. If audio files such as MP3, AAC, FLA( or other audio files are resident on the smart device
they can be streamed directly to the system by selecting the "This Phone", "This iPad","This
Tablet" etc. When "This Phone" has been selected all music playable by the smart device will be
cataloged and listed in categories such as Artists, Albums, Tracks, Playlists etc.
3.4.2. Simply select the category you wish to list by and navigate to your chosen music.
3.4.3. Once you’ve found a track or album you want to play, simply click on it to begin listening in
your chosen Zone.
For Support visit www.hipsmarthome.co.uk or call 01704-807114
3.4.4. If you’re already listening to a track, you can select to play next (immediately following the
current track), or later (following any other tracks you’ve already queued up).
Fig.8
3.4.5. Once a device is direct streaming to a zone, other zones can join the zone and listen but
can't select content. Additional zones have transport control. Local joined zones have volume and
mute control as well as the ability to leave the group.
3.4.6. The number of smart devices used in a system can't exceed the number of Player zones
available. i.e. A three zone system can have a maximum of three smart devices connected and
streaming simultaneously.
3.4.7. Any file format the smart device can play, direct stream supports.
For Support visit www.hipsmarthome.co.uk or call 01704-807114
3.5.
Music Library – USB Hard Drive or Memory Stick
3.5.1. Existing personal music is easily shared with the entire system by plugging a USB storage
device into any of the three USB ports on the back of the Nuvo unit as shown in Fig.9.
Fig.9
3.5.2. The player will automatically scan the drives content and add it with its associated album
art to the system's music library. Not all USB drives are supported natively by the USB port as
current draw is limited. If a device that exceeds this is used, an external power supply must be
used.
3.6.
Line In / Out
3.6.1. Each zone (room) has a 3.5 mm stereo audio Line In and Out on the rear panel of the Nuvo
unit. This input allows any local zone analog music source to be plugged in and added to the
system as an additional source input or the output of the system to be connected to a subwoofer
for example.
Fig.10
3.6.2. Local Audio Input / Output Kit
Note : If you wish to connect a device which is in a room, rather than
near the cabinet, you will need a spare Ethernet Socket in that room,
as comes with Hip SmartHub and Hip SmartTV. You’ll also need a Local
Audio Input/Output Kit. Please contact us for more details.
For Support visit www.hipsmarthome.co.uk or call 01704-807114
3.7.
Settings Menu
The Settings menu has several selections important to the system's control and operation. Access
to Settings is made through the "Settings" button located at the bottom of the Dashboard. See
fig.11.
Fig.11
Fig.12
For Support visit www.hipsmarthome.co.uk or call 01704-807114
3.8.
Zones
Selecting "Zones" in the Settings menu, see fig.12, provides several controls for audio playback
and functionality. When the "Zones" button is touched , the app will display the choice of
zones within the system. When one of the zones is selected, its individual settings and controls
will be available, as shown in fig. 13.
Fig.13
3.9.
Gateways
3.9.1. This feature is not used in the standard setup. A wireless Gateway can be added to the
system to expand the system wirelessly into more rooms. Contact us for further information.
3.10. This App
3.10.1. Here there is a demonstration of how the App works. Also if you are experiencing
difficulties with the app, you can reset it here.
3.11. Add a NuVo Component
3.11.1. Please contact us for further information on expanding your system.
For Support visit www.hipsmarthome.co.uk or call 01704-807114
3.12. Music Library – Share music form a PC, Mac or Nas Drive
3.12.1. If you have music stored on a PC, Mac or NAS Drive, this can also be shared with your
system using the Music Share Software. The Music Share Software allows music content from
either shared network locations or libraries contained on personal computers to be streamed to
any zone in the system.
3.12.2. From your computer, go to www.nuvotechnologies .com/musicshare to download the
software from the NuVo website.
3.12.3. Follow the prompts for installing the software.
3.12.4. When the software is opened, it will connect to the network and display a blank music
share page, as shown in fig.14
Fig.14
3.12.5. Click on the "Add new" button at the top of the window. The music share choices will open
in the next window, as shown in fig.15. "My Music" folder is the default location for Windows
Media Player libraries.
Fig.15
For Support visit www.hipsmarthome.co.uk or call 01704-807114
3.12.6. If your music is stored on a Mac computer, or your preferred music library software is in
iTunes, then select "iTunes media folder". When a selection is made, you will see a progress
window, as shown in fig.16.
Fig.16
3.12.7. All shared folders and drives will be displayed in the software, as shown in fig. 14. The
software can be opened at any time and content can be added or removed. Note that if you are
sharing a personal library located on a personal computer hard drive, the software must actually
be downloaded to that computer before the share is created .Once the share directory is created,
it is not necessary to keep the Music Share Software open, although the computer hosting the
music content must be active on the same network as the system for that content to be available
for music playback.
Fig.14
For Support visit www.hipsmarthome.co.uk or call 01704-807114
3.12.8. Once music is added and you select "Music Library"in the Settings Menu on the, the Music
Library screen will display the shared locations and the number of songs and file size of the
accumulated library, as shown in fig. 15.
Fig.15
3.12.9. An additional selection "Add Share" will allow you to type in the network path to a
directory or shared drive with music content, as shown in fig.16. When a new library is added, it
may take time for the content to be refreshed. The length of time depends on the amount of
content.
Fig.16
For Support visit www.hipsmarthome.co.uk or call 01704-807114
3.13. Music Services
3.13.1. The system has the ability to stream music direct from on-line music services. The currently
supported services include, TuneIn (radio), Napster and Deezer. Spotify is set for release some
time in 2015 at which point it will be made available via an app update. TuneIn is free of charge
and can play all your usual Radio stations and thousands more besides. Napster and Deezer are
subscription services but allow you to listen to the vast majority of all music released and work
fantastically well with the system.
3.13.2. When "Music Services" is selected, the active streaming music services on the system will
be displayed, as shown in fig.17. The TuneIn Radio service doesn’t require a TuneIn account to
operate so will appear by default.
Fig.17
3.13.3. It also provides a button for adding new services. Most services require an online
subscription account. The associated user name and password for the account must be added in
this selection for the service to be active on the system.
For Support visit www.hipsmarthome.co.uk or call 01704-807114
3.14. General
3.14.1. When "General", the menu will display four important choices for information about the
components of the system, as shown in fig. 18. The first choice, "About", gives specific component
information for each zone, as shown in fig. 19.
Fig.18
Fig.19
For Support visit www.hipsmarthome.co.uk or call 01704-807114
3.14.2. "Software Update" will show any software updates that may be available, and allow for
easy updates, as shown in fig20. Typically any updates will pop up on the app. An important
advantage for the user is that the update is already downloaded in the background and once
"install" is selected all the zones in the system will automatically be updated.
Fig.20
3.14.3. "Registration" will open the product warranty registration page, as shown in fig.21. Please
register your system immediately for your two year system warranty.
Fig.21
For Support visit www.hipsmarthome.co.uk or call 01704-807114
3.14.4. Pressing “Advanced” gives you the option of re-booting the system.
Fig.22
3.15. International
3.15.1. “International” provides a location setting which allows the system to display the on-line
services available in your region.
3.16. Help
3.16.1. The "Help" button has links to contact NuVo directly or reference information on other
system components. If you have any issues, please contact ourselves via our website at
www.hipsmarthome.co.uk.
For Support visit www.hipsmarthome.co.uk or call 01704-807114
3.17. Troubleshooting
3.17.1. Front Panel LEDs
An important indicator of each zone's operation is the LED light on the front panel of the zone
players. The color and either solid or flashing state of the LED provides a visual reference for the
player's state of operation. Refer to the chart for an explanation of the functions and LED status.
For Support visit www.hipsmarthome.co.uk or call 01704-807114
3.17.2. Not Connected
A common indicator for lack of communication with the system is the app's "Not
Connected"screen,as shown in fig. 23. This screen appea rswhen the controller is unable to see the
zones in the system. There are several potential causes and remedies for this state that are
important for troubleshooting.
Fig.23
1.
Look in the network settings of your control device and verify that it is connected to
the same network as the NuVo System.
2.
This may sound relatively simple, but check the power status of the Zones on the
front panel of the NuVo unit. They should have a solid white (cyan if in Mute) LED
light on the front panel.
3.
Make sure that one or more of the zones are not offline. This state would be
indicated by a flashing red LED on the front panel. This can occur as a momentary
state, in which case the LED will return to a solid white when the network
connection is restored.
This is often corrected by simply turning off and restoring power to the player. Once
it is rebooted it should have a solid white LED on the front panel. If that does not
restore a connection, reset the player defaults by turning the power off and back
on.
For Support visit www.hipsmarthome.co.uk or call 01704-807114
When the front panel LED lights up, follow the steps outlined in section 3.17.3
Restoring Defaults. When that process is complete the player will have a solid green
LED. Repeat the zone player setup procedure from the control app, see section XXX
Adding Zones to an Existing System. When the zone is reconnected the front panel
LED should once again be solid white.
4.
Check the NuVo’s connection to the network's router. Reboot if necessary by
unplugging the power cable and plugging it back in.
5.
Occasionally home routers go offline. This is typically corrected by rebooting the
router.
3.17.3. Restoring Defaults
An important troubleshooting step is to restore defaults on the zones of the NuVo unit. If a
hard failure occurs, which results in a solid red LED, or the boot up process does not
complete correctly, which will result in a flashing white LED, you should follow these steps
to return the zone to its original factory state.
The following steps must be performed independently on each zone of the NuVo unit or on
any individual zone if only one zone is affected.
Fig.24
1.
Turn off the power using the power switch on the back panel above the AC plug.
2.
Turn the power back on and look for a white LED to light up. Note the Zone lights
are upside down compared to the buttons. See 3.1.3 to see which Zone relates to
which room.
3.
As soon as you see a white LED, touch the zone setup button, as shown in fig. 24.
There are three of these, one for each Zone. Your NuVo unit has been labelled with
the Zone Name above each zone setup button.
4.
When the LED appears green, release the button.
5.
The LED will flash green, then white.
For Support visit www.hipsmarthome.co.uk or call 01704-807114
6.
When the LED becomes solid green, the process is complete and the defaults have
been restored.
7.
Once a zone is reset, you will need to re-setup the zone as described in 3.17.4. If
you are resetting all zones, you will need to Setup a New System as described in
3.17.5.
3.17.4. Re-Setting up a Zone
The Zone must be reset as described above before setting up. This state is indicated by a
solid green light. Once you have a solid green light proceed as follows;
1.
From the Settings Menu, select Add a Nuvo Component.
Fig.25
For Support visit www.hipsmarthome.co.uk or call 01704-807114
2.
Once Add a Nuvo Component is selected the following screen will appear. Click
Next.
Fig.26
3.
The following screen will appear.
Fig.27
For Support visit www.hipsmarthome.co.uk or call 01704-807114
4.
On the back of the NuVo unit, press the Zone Setup button for the Zone you are
setting up. There are three of these, one for each Zone. Your NuVo unit has been
labelled with the Zone Name above each zone setup button.
Fig.28
5.
After approx 10-40 seconds (be patient) the following screen will appear. Click Next.
For Support visit www.hipsmarthome.co.uk or call 01704-807114
6.
The following screen will appear. Select what you wish to call the room and select
Next.
7.
The following Screen will appear. Select Done.
For Support visit www.hipsmarthome.co.uk or call 01704-807114
3.18. Music System Specification
For Support visit www.hipsmarthome.co.uk or call 01704-807114