1
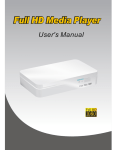
Scala HD Media Player USER MANUAL SCALA HD Media Player User Manual Table of Contents 1 2 3 4 Before you start ................................................................................................................................................................................................................................... 4 1.1 Safety notices ........................................................................................................................................................................................................................... 4 1.2 Warranty .................................................................................................................................................................................................................................. 4 1.3 Specification ............................................................................................................................................................................................................................ 5 1.4 Package contents...................................................................................................................................................................................................................... 7 HDD Installation.................................................................................................................................................................................................................................. 8 Setting the Scala HD Media Player ................................................................................................................................................................................................... 10 3.1 Front / Back Panel layout ...................................................................................................................................................................................................... 10 3.2 Remote control layout ........................................................................................................................................................................................................... 11 3.3 Connecting Scala HD Media Player to your TV ................................................................................................................................................................... 12 3.4 Initiating the Scala HD Media Player (optional) ................................................................................................................................................................... 12 System Menu ..................................................................................................................................................................................................................................... 13 4.1 Setup ...................................................................................................................................................................................................................................... 13 4.1.1 Audio setup ................................................................................................................................................................................................................ 14 4.1.2 Video setup ................................................................................................................................................................................................................ 15 4.1.3 Network setup ............................................................................................................................................................................................................ 16 4.1.4 System setup .............................................................................................................................................................................................................. 17 4.1.5 MISC setup ................................................................................................................................................................................................................ 18 4.2 Browser .................................................................................................................................................................................................................................. 19 4.2.1 Play Movies ............................................................................................................................................................................................................... 20 4.2.2 Play Music ................................................................................................................................................................................................................. 22 4.2.3 Show Photo ................................................................................................................................................................................................................ 23 4.2.4 Adding contents to PLAYLIST ................................................................................................................................................................................. 24 4.2.5 Adding contents to PLAYLIST ................................................................................................................................................................................. 25 2 SCALA HD Media Player User Manual 5 4.3 File Copy ............................................................................................................................................................................................................................... 26 Transcoding Software ........................................................................................................................................................................................................................ 27 5.1 Install and run under Transcode Server ................................................................................................................................................................................. 27 5.2 Adding Share Folders on PC ................................................................................................................................................................................................. 28 5.3 Connecting to File Sharing folders and BT download management ..................................................................................................................................... 29 5.3.1 Set up the Scala HD Media Player ............................................................................................................................................................................ 30 5.3.2 Connect to File Sharing Folder .................................................................................................................................................................................. 30 5.3.3 Connect to BT Download Management .................................................................................................................................................................... 31 5.3.4 Account Management ................................................................................................................................................................................................ 35 3 SCALA HD Media Player User Manual 1 Before you start 1.1 Safety notices 1. Caution during HDD installation: Always unplug the power cable before inserting Hard Drive. Electrostatic discharge (ESD) can damage system components. If an ESD-controlled workstation is not available, wear an antistatic wrist strap or touch an earthed surface before handling the HDD or SSD. 2. A power supply with a different voltage will damage the product and void its warranty. 3. Keep this equipment away from humidity or any type of moisture. 4. DO NOT drop /shake the device or put any weight on top of it. 1.2 Warranty Warranties extend only to defects that occur during normal use and do not extend to damage to products that results from incompatibility, abuse, misuse, negligence, unauthorized repair, modification, incorrect installation, incorrect voltage supply, air/water pollution, any accident or natural disasters. The warranty extends only on Akasa enclosure and does not cover a defective HDD, TV, router etc. as a result of a defective media player or the power adapter. Keep your original sales receipt in a safe place. Nothing herein should be construed as constituting an additional warranty. 4 SCALA HD Media Player User Manual 1.3 Specification ■ Connections Composite Out Video Output HDMI 1.3 Out Audio Out L/R Audio Output SPDIF(Optical) File transfer port 2 x USB 2.0 Host port Date transfer with PC USB 2.0 mini port Ethernet 10/100Mbps RJ-45 ■ Optional wireless dongle Wireless USB Dongle WI-FI 802.11g AK-NTWF01 Note: Please note that only certain USB dongle will work with this device. 5 SCALA HD Media Player User Manual ■ Media format support DivX 3/4/5/6,Xvid AVI / MKV H.264, AVC TS / AVI / MKV / MOV / M2TS MPEG-1 MPG / MPEG / DAT Video Decoding MPEG-2 MPG / MPEG / VOB / ISO / IFO / TS / TP / M2TS (Movie) MPEG-4 MP4 / AVI / MOV WMV9 WMV FLV FLV (Support up to 352x288) Real Video 8/9/10 RM/RMVB (Support up to 720p) Dolby Digital AC3/Plus/TrueHD 5.1ch, DTS/HD Master Audio 7.1ch Audio Decoding (Movie) MPEG-I Layer 1/2/3,MPEG-II Layer 1/2, MPEG4 HE AACv2, Real Audio, AAC, LPCM HDMI RAW/SPDIF RAW Audio Decoding WMA, MP3, Real Audio (RA), WAV, OGG, AAC, FLAC, ASF, M3U, MKA, MP4 (Music) Picture Format Subtitle JPG, JPEG, BMP, PNG, GIF, TIFF SRT, SUB, SMI, IDX/SUB, SSA, ASS Note: The specification and design is subject to change without any notice. 6 SCALA HD Media Player User Manual 1.4 Package contents Scala HD Media player DC Adaptor (12V 2A) Remote control 2 x AAA batteries HDMI cable Composite AV cable USB cable for connection with PC Quick guide HDD screws CD with Bit Torrent P2P software and installation manual 7 SCALA HD Media Player User Manual 2 HDD Installation NOTE: The SCALA Media Player can play media files from external storage via USB or Network without an internal drive. Installing the internal drive enables you to store files locally for easy access, backup or simply to free up space on your PC. Step 1 Open the box by undoing the two securing screws and sliding the system out of the aluminium housing Step 2 Place the HDD on the tray aligning the SATA connectors and gently insert the HDD until fully connected 8 SCALA HD Media Player User Manual Step 3 Secure the HDD with two screws provided Step 4 Slide the system back into the enclosure and secure with the screws on both corner. 9 SCALA HD Media Player User Manual 3 Setting the Scala HD Media Player 3.1 Front / Back Panel layout USB 1 Power/Standby Indicator HDD Indicator IrDA Receiver USB Device Indicator LAN/Data access Indicator Power Switch Composite Output Optical Output HDMI Connector 10 USB 2 Host Port Data Transfer with PC DC Connector LAN Connector SCALA HD Media Player User Manual 3.2 Remote control layout Please make sure that you’ve installed the AAA battery into the remote control. 1 18 4 1. POWER 16. EJECT 31. CM SKIP 2. Display 17. TITLE 32. SELECT 3. Audio 18. HOME 33. COPY 4 Number Buttons 19. TV SYSTEM 5. GOTO 20. SUBTITLE 6. Setup 21.MENU 7. Enter/ZOOM 22. VOL + / - 8. Browser 23. MUTE 9. STOP 24.REPLAY 10. PLAY 25. Navigation 11. PREV 26. RETURN 12. SLOW 27. PAUSE 13. Option 28. NEXT 14. REPEAT 29. FR/FF 15. ANGLE 30. CONFIRM 20 3 5 23 2 19 22 27 9 6 10 29 11 28 7 25 13 26 8 31 12 30 14 32 16 21 15 33 16 24 11 SCALA HD Media Player User Manual 3.3 Connecting Scala HD Media Player to your TV Connect either HDMI or Composite cable from the Scala HD Media Player to your TV. When connecting the HDMI cable to the TV, the device will detect the highest resolution suited for your TV. When connecting the Composite cable (CVBS) to TV, please make sure your TV is either PAL or NTSC system. 3.4 Initiating the Scala HD Media Player (optional) If you have installed factory new HDD inside and you are using the Scala HD Media Player for the first time, you will be asked to format the hard drive and you should follow the onscreen wizard otherwise go to next step. 12 SCALA HD Media Player User Manual 4 System Menu Switch on the system power and select appropriate HDMI or composite connection on TV menu. You should be able to see the main system menu screen with three options: File Copy – select to move files between internal / external storage and network Browser – select to search and play music, photo or video files Setup – select for system configuration 4.1 Setup Through main screen menu, you will be able to enter into the Setup page which contains five options: Audio, Video, Network, System and MISC. You can press ENTER (Key 7) to access each setting. 13 SCALA HD Media Player User Manual 4.1.1 Audio setup This setting is focusing on the outputs of Audio. There are 5 digital outputs, HDMI LPCM (2CH), HDMI LPCM Multi CH , HDMI RAW, SPDIF LPCM and SPDIF RAW. HDMI LPCM (2CH): When player audio output connects to TV via HDMI, the player will decode audio as STEREO. HDMI LPCM Multi CH: When player audio output connects to TV via HDMI, the player will decode audio as STEREO. HDMI RAW: When player audio output connects to amplifier via HDMI, the player will send the RAW data to amplifier. Amplifier will decode RAW data into multiple audio channels such as 5.1 or 7.1. SPDIF LPCM (2CH): When player audio output connects to amplifier via SPDIF, the player will decode audio as STEREO through amplifier. SPDIF RAW: When player audio output connects to amplifier via SPDIF, the player will send the RAW data to amplifier. Amplifier will decode RAW data into multiple audio channels such as 5.1 or 7.1. TIPS: If you only have HDMI TV, please choose HDMI LPCM(Stereo) If you have HDMI TV with HDMI amplifier, please choose HDMI RAW or HDMI LPCM(Stereo) If you have HDMI TV with SPDIF amplifier, please choose SPDIF RAW or SPDIF LPCM(Stereo) 14 SCALA HD Media Player User Manual 4.1.2 Video setup Aspect Ratio: Please choose one that is suitable for your TV system. Pan Scan 4:3, Letter Box 4:3, 16:09 and 16:10. Pan Scan 4:3 : Keep the height of wide screen, and cut off the right/left screen to fit the 4:3 TV system. Letter Box 4:3 : Keep wide screen, and black border will be covered on the top and bottom of screen to fit the 4:3 TV. 16:9 : Choose 16:9 to fit 16:9 TV system. 16:10 : Choose 16:10 to fit 16:10 TV system. TV System: Choose the right resolution of output to TV. TV System and Resolution Standard Resolution(SD) High Definition Resolution(HD) NTSC NTSC, 480p 720p@60Hz, 1080i@60Hz, 1080p@60Hz PAL PAL, 576p 720p@50Hz, 1080i@50Hz, 1080p@50Hz TIPS: Only HDMI supports High Definition Resolution Connect player to TV via HDMI, TV will notify player that what resolution it supported. If TV doesn’t support one of resolution, it will be un-selectable In case if you choose a wrong resolution and your TV screen go black, you always can connect CVBS to get your right resolution to TV 15 SCALA HD Media Player User Manual 4.1.3 Network setup Wired LAN Setup: Select to set the network settings between DHCP (AUTO) and DHCP (Manual). If you have a network device such as Router, it should assign IP by itself and you will be able to see it on the screen. Please select DHCP (Auto). Otherwise, please make sure your IP address, subnet mask and default gateway, then enter them manually. Wireless Setup (Optional): Select to set the wireless network setting. When plug-in a USB WI-FI dongle, the player will detect the dongle automatically. Note 1: Only certain USB dongle will work with this device therefore we recommend the Akasa AK- NTWF01 Note 2: The player with WIFI dongle will only be able to recognize the WEP with Open system, and only the Key 1 will be recognized. Also, only WPA-Personal, WPA2-Personal and WPA-AUTO Personal are recognizable for the player. 16 SCALA HD Media Player User Manual 4.1.4 System setup Menu Language: Select language. There are English, Traditional Chinese, Spanish, French, German, Italian, Dutch, Russian and Simplified Chinese available. Text Encoding: This setting is to display subtitle, file name and folder name in your language. Please select Unicode (UTF8), Simplified Chinese or Traditional Chinese. If select wrong setting, it might cause the unknown characters. Login Control: Select ON to enable File Sharing and BT web management access control. BT and SAMBA: To enable File Sharing and BT services. System Update: Select this setting to update the newest firmware. Please follow the steps below. 1. Prepare a USB flash drive or USB external hard disk and connect it to PC, then copy the firmware file to the root folder 2. Plug in USB flash drive or USB external hard disk into the USB 1 or USB 2 host port of player 3. Select System Upgrade, press OK to proceed 4. Please wait for about 5 minutes. During the upgrade procedure, the system may reboot repeatedly please DO NOT turn off the power or unplug the USB drive with new firmware. 5. . When finish, player will reboot automatically and return to the main menu. HDD Format: When you install a brand new 2.5” SATA HDD, you will possibly require HDD format. Press OK, the system will format the HDD. 17 SCALA HD Media Player User Manual Restore to Default: Once you press this function, all setting will be back to default. 4.1.5 MISC setup Resume Play: Select to turn ON/OFF to resume from video once you STOP the movie. Slide Show Timing: This function is to set the timing of picture showing on TV. There are options of OFF/2 Sec/5 Sec/10 Sec/30 Sec/1 Min/2 Min. Transition Effect: Select effect for slide show. Ken Burns: Default active play mode. Background Music: Play background music during slide show. Screen Saver: Screen saver will activate if there is no any action of browsing for 5 minutes. Movie Preview: Select On/Off for movie preview. Seamless Playback: Select On/Off to make the movie file (.ts) play smoothly. 18 SCALA HD Media Player User Manual 4.2 Browser You may use this player to play Music, Photo and Movie by plug-in USB Flash Drive, USB External Hard Disk and etc. When enter into the Browser icon you will be able to browse all media files where you stored in 2.5” Hard Disk, USB Flash Drive or USB External Hard Disk. When plug-in USB device into player, wait about a few seconds, the USB LED indicator will be lighted. And then you can browse the media files. Once you remove the USB device from player, the USB LED indicator will be off. By pressing Navigation Right/Left (Key 25) buttons on remote control to select whether you would like to browse Music only, Photo Only, Movie only or Browse All. You may press RETURN (Key 26) anytime when you want to return to last page. By pressing Navigation Up/Down (Key 25) buttons on remote control to select whether you would like to browse USB, HDD, NET, UPNP or Playlist. You may press RETURN (Key 26) at anytime when you want to return to previous page. 19 SCALA HD Media Player User Manual 4.2.1 Play Movies Select Movie or All tabs to browse movie files. In the browser, use Up/Down (Key 25) to select a file or a folder, and then press Enter (Key 7) to play the file or open the folder. You may press RETURN (Key 26) back to previous page. In the browser, moving the scroll bar to movie file, you will see the preview on the right side window. Press PLAY (Key 10) on remote control to play the movie. Press STOP (Key 9) on remote control to stop the movie. Press PAUSE (Key 27) on remote control to pause. Press FF/FR (Key 29) on remote control to Fast Forward or Backward. Press NEXT (Key 28) / PREV (key 11) on remote control to go next or previous chapter if applicable. Press SUBTITLE (Key 20) on remote control to enable or switch subtitles. This player supports srt, sub, smi, idx+sub, ssa, ass. Please rename the subtitle file name to be same as movie file name. Multi-Subtitle can be the same file name; the play will show the option for you to choose. 1. Text Encoding: This setting is to display subtitle, file name and folder name in your language. Please select Unicode (UTF8), Simplified Chinese, Traditional Chinese, Western, Turkish, Central European, Greek, Cyrillic, Hebrew, SE Europe. If wrong setting is selected, unrecognizable characters may be seen. 2. Time Sync: Adjust the time of subtitle. 20 SCALA HD Media Player User Manual 3. Color: Adjust the color of subtitle. 4. Size: Adjust the size of subtitle. 5. Off set: Adjust the position of subtitle. Adjust the navigation key in playing mode : Horizontal: Adjust the size of subtitle. Vertical: Adjust the position of subtitle. Press AUDIO (Key 3) on remote control to switch different audio outputs. Press VOL +/- (Key 22) on remote control to increase or decrease the volume. Press MUTE (Key 23) on remote control to mute the audio output; press again to resume. Press SELECT (Key 32) on remote control to add the movie into PLAYLIST. Press CONFIRM (Key 30) to confirm. 21 SCALA HD Media Player User Manual 4.2.2 Play Music Select Music or All tabs to browse music files. In the browser, use Up/Down (Key 25) to select a file or a folder, and then press Enter (Key 7) to play the file or open the folder. You may press RETURN (Key 26) back to previous page. In the browser, moving the scroll bar to music file, you will see the music information on the right side window. Press PLAY (Key 10) on remote control to play the music. Press STOP (Key 9) on remote control to stop the music. Press PAUSE (Key 27) on remote control to pause. Press FF/FR (Key 29) on remote control to Fast Forward or Backward. Press REPEAT (Key 14) on remote control to repeat the same music; press again to repeat all music. Press VOL +/- (Key 22) on remote control to increase or decrease the volume. Press MUTE (Key 23) on remote control to mute the audio output; press again to resume. Press SELECT (Key 32) on remote control to add the music into PLAYLIST. Press CONFIRM (Key 30) to confirm. 22 SCALA HD Media Player User Manual 4.2.3 Show Photo Select Photo or All tabs to browse photo files. In the browser, use Up/Down (Key 25) to select a file or a folder, and then press Enter (Key 7) to play the file or open the folder. You may press RETURN (Key 26) back to previous page. In the browser, moving the scroll bar to photo file, you will see the photo on the right side preview window. Press PLAY (Key 10) on remote control to play the photo. Press STOP (Key 9) on remote control to stop the photo. Press PAUSE (Key 27) on remote control to pause. Press VOL +/- (Key 22) on remote control to increase or decrease the volume. Press SELECT (Key 32) on remote control to add photo into PLAYLIST. Press CONFIRM (Key 30) to confirm. 23 SCALA HD Media Player User Manual 4.2.4 Adding contents to PLAYLIST Playlist creates a shortcut to allow quick access to the media files. You can play all selected files together regardless of different folders they are located in. Go to Browser and go to the media files that you’d like to put in the PLAYLIST Press SELECT (Key 32) to choose file(s) Press CONFIRM (Key 30) to add the file(s) into the PLAYLIST Then, you will see the file(s) that you selected in PLAYLIST TIPS: PLAYLIST function is only available if you installed 2.5” SATA HDD into the player; the function is not available for any USB device such as USB external HDD You can only select files; folder is not selectable 24 SCALA HD Media Player User Manual 4.2.5 Adding contents to PLAYLIST You may run the slide show to see your photos on TV while listening to selected music. Go to Setup → MISC →Slide Show Timing and set the timing for slide show. And then, go to Background Music and set the source of music files from Folder or PLAYLIST Go back to Browser and press Right/Left to choose the Music tab Add music files into PLAYLIST. Press SELECT (Key 32) to select and press Confirm (Key 30) to confirm Press Right/Left to choose the Photo tab and choose photos that you’d like to play slide show with Press PLAY (Key 10) or ENTER (Key 7) to play the slide show TIPS: If you set the Background Music source as Folder, you have to put photo files and music files in same folder, so that you can have slide show with background music when playing 25 SCALA HD Media Player User Manual 4.3 File Copy This function will allow you to copy file(s) between USB, HDD and NET. If you move file(s) to trash, the file will be deleted. You also can press COPY (Key 33) to go to File Copy menu at anytime. Use Up/Down (Key 25) to move the scroll bar and choose the source and destination. Press ENTER (Key 7) to proceed. Press ENTER (Key 7) to go into folders for both Source and Destination. Press SELECT (Key 32) to select the source file that you want to copy. Press again to cancel the selection. Press RIGHT (Key 25) to COPY file to the chosen destination. Then choose OK to copy, Move to move the chosen file(s) or Cancel the copy. If you choose Destination to TRASH CAN, the file(s) will be deleted. 26 SCALA HD Media Player User Manual 5 Transcoding Software After installing Transcode Server software on your PC, you will be able to run BT download and File Sharing function on Scala HD Media Player. 5.1 Install and run under Transcode Server to your PC. After installation run Transcode Server Please find the software of Transcode Server in CD disc, and install from Start/All Programs/Transcode Sever menu. You should see the screen as below: 27 SCALA HD Media Player User Manual 5.2 Adding Share Folders on PC Adding share folder(s) to Transcode Server on the PC will allow the Scala HD Media Player to quickly find the shared folders on the intranet. Go to NetShare Dialog tab and press Add button. Select the folder (or create new one by typing in a name) which will be visible as My_Neighbors by media center in the NET section of Browser and File Copy menu and press OK. TIPS: The shared folder will be visible by the Scala HD Media Player as long as the Transcode Sever is running on the PC. 28 SCALA HD Media Player User Manual 5.3 Connecting to File Sharing folders and BT download management Please make sure your Network Connection is plugged in and IP had been assigned to the Scala HD Media Player (either from DHCP server or fixed IP). If you have set up the Scala HD Media Player correctly, you will see the IP address in the Service tab. If not, please click on Scan button to obtain an IP address. Note: Before setting up File Sharing and BT download management, ensure the 2.5” SATA Hard Disk is installed into Scala HD Media Player. 29 SCALA HD Media Player User Manual 5.3.1 Set up the Scala HD Media Player Before you have access to File Sharing folder or BT download management, you will need to set up the player. Please go to the main menu of player, and then clicks as following: Setup System. Move the scroll bar down to BT and SAMBA, and then press OK on remote control. The system will show tow selections (On/Off). Move the scroll bar down to On and then press OK, it will enable the BT and SAMBA function. 5.3.2 Connect to File Sharing Folder Click on “Visit Neighbor” on Service tab of the Transcode Server software on the PC. You will be redirected to the File Sharing folders. Locate the 2.5” SATA HDD installed inside the Scala HD Media Player. You will be able to browse all its contents, copy, move and delete the files. 30 SCALA HD Media Player User Manual 5.3.3 Connect to BT Download Management Windows OS Click on “Neighbor Web” on Service tab of the Transcode Server, it will leaded to the P2P download web user interface. You will be able to add/delete BT seeds with user interface. If you set the Login Control as ON, login account and password are required. The default account name and password are same as 5.3.4. Mac OS Open url"http://xxx.xxx.xxx.xxx" in your browser where the xxx.xxx.xxx.xxx is IP address of your Scala HD Media Player. You can find the IP address in Scala HD Media Player setup page>Network menu. 31 SCALA HD Media Player User Manual 5.3.3.1 Setting You will need to set up the settings before you use P2P download. Please click on BitTorrent Download and then click on Setting tab: Max Download Rate: Set the maximum download speed. Set to “0” is no limit. 32 SCALA HD Media Player User Manual Max Upload Rate: Set the maximum upload speed. Set to “0” is no limit. Default setting is 20KB/s. Seeding time: Setting of how long you would like to keep sharing the seed once task finished. Default is 24 hours; set to “0” mean not sharing after finished. Delete the torrent file: When finish, the system will delete the torrent task automatically. Default setting is NO. Max simultaneous download task number: Setting of how many tasks you would like to run at the same time. Default setting is 4 tasks. Maximum is 10 tasks. When finish the setting, please click on the “Save Setting” to save all settings. NOTE: Please be aware that overloading BT tasks would impact the performance of the Scala HD Media Player. It is recommended to leave the device idle when performing BT download. 5.3.3.2 Adding seeds 1. Click on “+Add new torrent” to add a new download task. 33 SCALA HD Media Player User Manual 2. Click on “Browse” button to select where you stored the seed file. 3. Click on “Yes” button to confirm the task and back to download main page or click on “No” back to download page. 5.3.3.3 Delete Task 1. Click on “Check box” to select task in which you would like to delete 2. Click on “Delete” tab on the top to delete the task 34 SCALA HD Media Player User Manual 5.3.4 Account Management Please enable the “Login Control” under System of Scala HD Media Player before you click on Account Management. After the Login Control is set, the system will require you to login. Account name: admin Password: 123 Click on Account Management of Neighbor Web, you will be able to modify your password. Click on Enter to modify new password. 35 SCALA HD Media Player User Manual 36