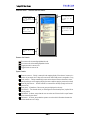
1
Traksys2000 Mapping Software User Manual Document Number 100-00292 Revision 2.02 Traksys2000 User Manual Copyright © 2003 by Thorcom Systems Limited. ALL RIGHTS RESERVED This document may not be copied in part or in whole, stored on magnetic tape or disc or in an information retrieval system, or used in any way without permission from the publisher. The information contained in this document has been carefully checked and is believed to be accurate and reliable, however, no responsibility is assumed for inaccuracies. Thorcom Systems Limited reserve the right to make changes to this document and the associated product in line with its policy of continued improvement. Thorcom Systems Limited does not assume any responsibility for direct or consequential damage to, or loss of, property or income through the use or inability to use this product. The equipment described in this document must be installed, operated and maintained in accordance with the written procedures described herein, and should not be used for any purpose that involves the safety of life or limb, and should not form any part of a life support system. Details and descriptions of the product, methodology and design supplied in this documentation are considered part of the product and are covered by the manufacturer's Intellectual Property Rights. Information provided in this documentation is to allow the customer to use, install and maintain the equipment described and does not transfer any rights to such Intellectual Property Rights, Patents or Copyrights to the customer or any third party. For further information on this product please contact Technical Support at: Thorcom Systems Limited Unit 4 96B Blackpole Trading Estate West Worcester WR3 8TJ England, U. K. Tel: 01 905 756700 (international: +44 1 905 756700) Fax: 01 905 755777 (international: +44 1 905 755777) Email: [email protected] Web Site: http://www.thorcom.co.uk Part Number: 100-00292 Revision: 2.02 Date: 14 June 2004 Reference: \\pendragon\documents\Manuals\Software\Traksys2000\T2kManual-100-00292.doc Page 3 Traksys2000 User Manual Page 4 Traksys2000 User Manual Document Revision History Date Rev Initials Changes/Amendments 21/01/2002 06/05/2004 01/06/2004 2.00 2.01 2.02 NSB/SC NSB NSB First draft release Updated with new functionality Updated with the new database options. Page 5 Traksys2000 User Manual Page 6 Traksys2000 User Manual Contents 1. Introduction ........................................................................................................................................... 11 1.1 Installation and Requirements ....................................................................................................... 11 1.2 Traksys Features............................................................................................................................ 12 1.3 How to Use This Manual................................................................................................................. 12 2. The Traksys2000 System ..................................................................................................................... 13 2.1 What is AVL?................................................................................................................................... 13 2.2 What else does Traksys offer?....................................................................................................... 13 2.3 System Setup ................................................................................................................................. 14 i. Fixed Mobile.................................................................................................................................. 14 ii. SVLP Server ................................................................................................................................. 15 2.4 AVL Concepts ................................................................................................................................. 15 2.5 AVL Reporting Rules ...................................................................................................................... 16 2.6 Traksys and the MCU500............................................................................................................... 16 2.7 AVL Formats................................................................................................................................... 17 3. Configuring Traksys2000...................................................................................................................... 18 3.1 Configuring Traksys2000 – Basic Concepts ................................................................................. 18 3.1.1 Vehicle Templates.................................................................................................................. 18 3.1.2 User Gazetteer ....................................................................................................................... 19 3.1.3 Getting Connected – Traksys Connections............................................................................ 20 3.1.4 Bearers................................................................................................................................... 21 3.1.5 Vehicles .................................................................................................................................. 21 3.1.6 Personnel............................................................................................................................... 22 3.2 Configuring Traksys2000 – Advanced Concepts .......................................................................... 23 3.2.1 Groups.................................................................................................................................... 23 3.2.2 Status Messaging................................................................................................................... 23 3.2.3 Events and Actions ................................................................................................................ 24 4. The Traksys2000 Display and Interface............................................................................................... 25 4.1 Using the Mapping Display Effectively ........................................................................................... 25 4.2 Traksys Resource View .................................................................................................................. 26 4.3 Traksys Admin View ....................................................................................................................... 26 Reference Sheet 1 – Resource View and Controls ......................................................................... 27 5.1 The View Page................................................................................................................................ 29 5.1.1 Activity Log............................................................................................................................. 29 5.1.2 Current Information Panel...................................................................................................... 30 5.1.3 Database Information Panel .................................................................................................. 30 5.1.4 Controls Panel........................................................................................................................ 30 Reference Sheet 2 – View Pane: Current Information and Database Panels ................................ 31 Reference Sheet 3 – View Pane: Controls Panel and Associated Dialogs ..................................... 32 5.2 The Noticeboard Page ................................................................................................................... 34 5.2.1 The Find Nearest Resource Dialog........................................................................................ 35 5.3 The Event Log Page....................................................................................................................... 36 5.3.1 Event Messages ..................................................................................................................... 36 5.3.2 Restoring Previous Event Logs ............................................................................................. 37 5.3.3 Features of Traksys Logging ................................................................................................. 37 Page 7 Traksys2000 User Manual 6. Configuration Reference........................................................................................................................ 39 6.1 Traksys Connections ...................................................................................................................... 39 6.1.1 The Connections Page ........................................................................................................... 39 6.1.2 Adding and Monitoring Connections...................................................................................... 39 6.1.3 The Configure New Connection Dialog................................................................................... 40 6.1.4 Available Connection Types ................................................................................................... 40 6.2 Admin Interface Reference............................................................................................................. 43 6.2.1 Vehicle Template Configuration ............................................................................................. 45 6.2.2 Personnel Template Configuration ........................................................................................ 48 6.2.3 Bearer Configuration.............................................................................................................. 48 6.2.4 Personnel Configuration ........................................................................................................ 51 6.2.5 Group Configuration............................................................................................................... 52 6.2.6 Status Configuration............................................................................................................... 53 6.2.7 Event Configuration................................................................................................................ 55 7. The Traksys 2000 Critical Event Framework ........................................................................................ 56 7.1 Currently Supported Events ........................................................................................................... 56 7.2 Currently Supported Actions .......................................................................................................... 56 7.3 Configuring Events and Actions ..................................................................................................... 57 7.4 Event Display.................................................................................................................................. 57 7.5 The Event List Filter ....................................................................................................................... 58 7.6 Adding an Event and Actions......................................................................................................... 58 7.6.1 Change State Action............................................................................................................... 59 7.6.2 Send Text Action .................................................................................................................... 60 7.7 Adding an Event Which Already Exists........................................................................................... 62 7.8 Event Collisions and Overlap.......................................................................................................... 62 7.9 Event Ordering ............................................................................................................................... 62 8. Analysing Your Fleet – Traksys Reports............................................................................................... 63 8.1 Using the Report Generator........................................................................................................... 63 8.2 The Journey Report ........................................................................................................................ 63 8.3 The Visit Report.............................................................................................................................. 65 9. Traksys Options..................................................................................................................................... 67 9.1 General Options.............................................................................................................................. 67 9.2 Database Options........................................................................................................................... 67 9.3 Auto Config Options ....................................................................................................................... 67 9.3 Logging Options............................................................................................................................. 68 9.4 Display Options .............................................................................................................................. 69 9.4.1 Vehicle Display Options.......................................................................................................... 69 9.4.2 Personnel Display Options..................................................................................................... 70 9.5 User Gazetteer Options.................................................................................................................. 70 9.6 SVLP Server ................................................................................................................................... 71 10. Troubleshooting and FAQ.................................................................................................................. 73 Q1: Why are none of the controls enabled for my vehicles?............................................................... 73 Q2: Why do I get an error when trying to use the report generator?................................................. 73 Q3: FleetTracker reports a problem with its ‘HASP’ key. What’s that? ............................................... 73 Q4: There are vehicles in Traksys, but none on the map. How is that possible?............................... 73 Q5: Why am I not getting any IO information with my AVL? ................................................................ 73 Q6: I’m requesting output information but nothing’s coming back. Why not?.................................... 73 Page 8 Traksys2000 User Manual Q7: Why are postcode lookups failing?................................................................................................ 73 Q8: AVL is being shown in the event log but none of my vehicles are moving on the map. How come? ................................................................................................................................................... 73 11. Glossary............................................................................................................................................... 74 Page 9 Traksys2000 User Manual Page 10 Traksys2000 User Manual 1. Introduction Traksys2000 is a combined mapping and control application for monitoring vehicles and personnel. Using suitable equipment, the program will deliver real-time position information to high-quality digital maps, offer the user the ability to communicate with resources on the fleet, and provide a selection of analysis and reporting tools which can be used off-line to measure the effectiveness of their day-to-day operation. Traksys will run on a wide variety of radio networks, and can support any number of simultaneous connections for receiving data, including Dolphin Tetra, Vodafone Paknet, and Thorcom’s own Simple Vehicle Location Protocol. Traksys runs as two applications – the mapping display, and the Traksys control panel. The control panel can be hidden in the system tray and shown only when necessary, or it can be reduced to ‘Resource View’, in which only the vehicles and personnel on the fleet are listed, and moved to one side. The mapping display shows several resolutions of map and has its own independent controls and utilities. 1.1 Installation and Requirements To install the program, insert your Traksys CD into the drive. The setup routines should start automatically – if they don’t, use Explorer to browse to your CD-ROM and double-click ‘Setup.exe’ There are two setup configurations available. • • ‘Programs Only’ – this will install only those files needed to run new functionality, fixes, or updates, on the assumption that the structure of the Traksys database remains unchanged between versions. ‘Typical/New Installation’ - this will install all-new files, including empty databases, and will overwrite your existing database if selected. Consult with your vendor if you are unsure which option to choose. ‘Programs Only’ will leave your existing database intact (including all configuration and historical data) but may not be a viable option if the update you are installing requires a new database layout. We will be providing a utility to convert between databases in a future release, but for now be sure to seek advice from your vendor if you are unsure. Once you have installed Traksys, you will then need to install the FleetTracker mapping application from its own install disks. Ensure that your activation dongle is in place in either your PC’s parallel or USB port before running Traksys. To run the program you will need at least the following: • • • 700 MHz Pentium (or equivalent PC) with at least 128 Mb of RAM (note that the more memory, the better) Windows 2000 running at 1024x768 resolution and 24-bit desktop colour depth, or greater For report generation, Microsoft Access® 2000 or better Run the program only by selecting ‘Traksys2000’ from your Thorcom programs menu. This will launch both programs with the correct options. You should never launch FleetTracker before Traksys, or use an improperly configured shortcut from your desktop which isn’t added as part of the installation. Page 11 Traksys2000 User Manual 1.2 Traksys Features Some of the key features on offer from the program include: Fully customisable AVL display using FleetTracker Full Access database integration for fleet and historical data, and report generation Country-wide location gazetteer for major features, as well as a fully customisable user gazetteer for depots, customer locations, etc. AVL, status, and text messaging integration AVL replay of specific vehicles (including vehicle status indication) Control and interrogation facilities for vehicles equipped with the Thorcom MCU500, including remote control of on-board IO Multi-connection capabilities for a variety of networks, including Tetra, Vodafone Paknet, GSM, and Thorcom’s own MDS700 networks Critical event framework for monitoring activity on your fleet and notifying personnel of specific events such as out-of-hours activity. Later sections of the manual deal with each of these features in more detail. 1.3 How to Use This Manual Operators will likely want to have the manual to hand during normal running of the system (although it is during system configuration where it is most likely to be needed). Several ‘Reference Sheets’ are included in later chapters which can be printed off and kept as convenient reference documents separate from the full manual. These should be used in conjunction with the laminated reference card supplied as part of the standard Traksys package. Administrators may also want to familiarise themselves with the Thorcom MCU500 units which run on most Traksys systems. Consult the MCU500 Software Reference Manual (Thorcom part number 10000204) for more detailed information on both the MCU500 and Thorcom’s unique approach to AVL systems in general. Page 12 Traksys2000 User Manual 2. The Traksys2000 System This chapter describes the operation of Traksys as part of a larger AVL and control environment, with a focus on its interaction with other Thorcom and third-party products. Users familiar with the components of an AVL system should feel free to skip this portion of the manual. 2.1 What is AVL? Automatic Vehicle Location, or AVL, is a combination of hardware and software which allows a control center to monitor the location of its vehicle fleet in real-time on graphical maps. Vehicles are represented by icons on the map which move to accurately represent the vehicle’s location. They transmit their locations over a radio bearer – for example Vodafone, or Thorcom’s own MDS700 system – which are received and decoded by Traksys, and converted to the correct position on-screen. Most AVL is achieved with the use of in-vehicle Global Positioning System – or GPS – equipment, which monitors the signals from the GPS satellite network and translates that information into a threedimensional position on the earth’s surface. Thorcom’s RLC and MCU500 series products are equipped with integrated on-board GPS receiver modules, and are the ideal complement to Traksys2000. By maintaining full histories of all AVL activity, Traksys also allows users to run queries on the previous location of vehicles, and to replay that data on screen or print it out as a report. In concert with Thorcom AVL’s reporting codes (which describe why an AVL report was sent – such as ‘Ignition On’, or ‘Input Activated’), the user is presented with a rich picture of where any vehicle was, and what it was doing, at any time. 2.2 What else does Traksys offer? In combination with other Thorcom products such as the MCU500, Traksys becomes much more than just an AVL system. You can use the software to monitor hardware ‘inputs’ in the vehicle – such as doors being opened, or motion detectors – which can be translated directly to the images and information on screen; or you can use it to engage hardware ‘outputs’ on the vehicle equipment, such as the vehicle horn, or immobiliser circuitry, all via Traksys2000’s user interface. Critical events – such as the movement of a vehicle out of hours – can result in alarms being sounded, or messages sent to supervisors’ mobile phones (you can also send text messages at any time). By using the full range of options available, the application becomes a fully-featured control and monitoring station for the vehicle fleet. Page 13 Traksys2000 User Manual 2.3 System Setup The nature of the hardware and software integration on any one system depends on how Traksys is receiving its data. There are currently two main ways to set up the system. i. Fixed Mobile GPS Antenna Radio Network Mobile (Radio) Fixed Mobile (Radio) MCU500 Traksys AVL Mobile Control Centre Text Commands Diagram 2-1 – Fixed Mobile System Diagram In this set-up, Traksys is connected to what is known as a ‘fixed mobile’, in essence the same radio equipment present in the vehicles. Messages from all the vehicles are funnelled into one receiving radio, which normally delivers data to Traksys through a PC COM port, using custom data protocols configured when you install the program. Outgoing commands are sent via the fixed mobile. This is a versatile configuration, although it is not appropriate for very large fleets, since the fixed mobile acts as a ‘bottle-neck’ for the system. This is not, in practice, a likely problem for the vast majority of Traksys systems. Page 14 Traksys2000 User Manual ii. SVLP Server GPS Antenna Radio Network Radio Antenna MSDS700 Gateway Router RLC Modem & Radio Traksys Base Station Hill Tops Diagram 2-2 – SVLP Server System Diagram The Simple Vehicle Location Protocol (SVLP) is a custom protocol designed by Thorcom Systems (though fully in the public domain), and is used by Thorcom MDS700 vehicle location and mobile data systems to deliver location data to system ‘clients’. Clients are workstations designed for fleet management and control (Traksys being one example of this). The client connects to the server using either a simple RS232 (COM port) cable, or more likely a Local or Wide Area Network (LAN/WAN) connection using internet protocols. Data is streamed directly to the client and displayed using the onscreen maps. SVLP systems are unsuitable for small commercial fleets due to the custom infrastructure required to deliver the data, however the benefits of having a dedicated radio network which is not shared with other users means that critical systems such as the emergency services can benefit greatly from highperformance AVL and mobile data. Traksys is usually employed as a secondary AVL workstation in such systems. Note also that Traksys itself has the ability to act as an SVLP server, converting incoming AVL to SVLP records which can be fed to other mapping and control clients on the network. 2.4 AVL Concepts How does AVL with Traksys2000 actually work? Many systems on the market are ‘polled’ systems, which means that the control centre has to manually request the location of a vehicle for the vehicle to report. Thorcom AVL turns this concept inside-out, with the vehicle constantly monitoring its own position using GPS, as well as the state of other on-board indicators such as digital inputs and output relays; it then uses this information to decide when to send an AVL report to the control centre. A userdefined configuration for the vehicle then allows this output to be filtered through a final set of reporting ‘rules’ giving more precise control over AVL delivery. Together, these features make it Page 15 Traksys2000 User Manual possible for the system to be run completely autonomously, with no intervention required from the command centre to keep the mapping display up-to-date. AVL reports are delivered with one of many ‘reason’ codes, telling the control centre why this update was generated; examples include timed reports, poll responses, and hardware input changes. Section 2.5 describes some of the rules available for the vehicle, and the MCU500 Software Reference Manual (Thorcom part number 100-00204) provides detailed descriptions of all aspects of the Thorcom AVL engine. If the control centre decides it wants an immediate update, it can still poll the vehicle, but this is the exception rather than the rule. In addition, other commands (such as turning on an output relay), may implicitly result in an AVL update from that vehicle. The benefits of this system quickly become apparent on pay-per-message networks such as Vodafone, Orange or Dolphin, where it’s vital that the amount of traffic is kept low to minimise costs. The Thorcom solution keeps wasteful reporting off the network, thereby reducing running costs. 2.5 AVL Reporting Rules AVL can be stimulated from the vehicle in a variety of ways, specified using the Thorcom Modem Personality Programmer (MPP), supplied with your system. Some of the most common rules available include: • • • • • • • Time elapsed since last report – for example, report at least once every 15 minutes Distance travelled since last report – for example, report every 2 kilometres When polled by the control centre (hence polling can be turned off in the vehicle) When stopped for more than a maximum time – for example, report if idling for more than 60 seconds When GPS coverage is lost, or when a GPS fault is detected – for example, the GPS antenna becomes loose or is removed When ignition is switched off - the MCU500 stays powered long enough to deliver a final AVL report (very useful in conjunction with Traksys Visit Reports – see section 8.3) When hardware inputs are changed – for example, when a refrigerator door is opened Full details on these and other reporting rules are contained in the MCU500 documentation. 2.6 Traksys and the MCU500 The MCU500 mobile locator unit is designed for use with Traksys2000, which provides the user with controls and interfaces designed specifically for use with that product. For fixed mobile systems, it’s likely that the vehicles in your fleet are fitted with the MCU500 ‘black box’. The MCU provides several crucial functions for Traksys: • • • Thorcom ‘rules-based’ AVL engine delivering autonomous AVL only when necessary. Connection to several commercial networks providing ‘off-the-shelf’ communications Digital connectivity, allowing Traksys to both monitor and control the state of other equipment fitted to the vehicle Page 16 Traksys2000 User Manual It is possible to use Traksys with equipment other than the MCU500, but its capabilities are somewhat reduced. 2.7 AVL Formats The MCU500 is capable of returning AVL in many levels of detail, called ‘reporting formats’. These are pre-programmed into the MCU500 using the Thorcom Modem Personality Programmer application, supplied with the MCU500. The most commonly-used AVL elements include: • • • • • Speed of vehicle in metres/second Bearing of vehicle in degrees Accuracy of position report State of MCU500 inputs/outputs Distance since last AVL report in kilometres (required for accurate Journey Reports – see section 8.2) You should consult your system supplier for advice on which elements to activate – the more information you send, the larger the message size, and therefore the cost of the message on commercial networks may increase, but Traksys will be able to make use of the extra information in its database archives and analysis reports. Page 17 Traksys2000 User Manual 3. Configuring Traksys2000 When you first install Traksys, it will contain none of the details of your fleet, so the first task of the administrator of the system is to configure the database. This means defining the various types of vehicle, personnel and network connections that exist on your own system. Traksys provides many building blocks for this purpose. This chapter describes the recommended sequence for configuring your fleet. Most of this configuration will be done via the Admin window. The general concepts, and how they apply in practice, are described here - for full instructions on how to configure each item, refer to the appropriate reference section as noted below. Basic Configuration • • • • • • Vehicle/Personnel Templates (section 6.2.1) User Gazetteer (section 9.5) Connections (section 6.1) Bearers (section 6.2.3) Vehicles (section 6.2.4) Personnel (section 6.2.5) Advanced Configuration • • • Groups (section 6.2.6) Status Messaging (section 6.2.7) Events and Actions (section 7) 3.1 Configuring Traksys2000 – Basic Concepts 3.1.1 Vehicle Templates On most fleets it’s easy to divide the vehicles and personnel into different roles. Templates provide a way to do this in the Traksys database. Once defined, you base the actual vehicles on the fleet on these templates, and the vehicles then ‘inherit’ the capabilities of their template. The more varied your fleet is, the more templates you should define, and in the process you start separating your fleet into more manageable groups. Many of the features of the Traksys software rely on the proper use of templates to function correctly, and you may find that you limit its capabilities if you decide not to use templates extensively in your system. Example: A delivery company ‘Traksys Trailers’ has two types of vehicle: vans and trucks. The latter are divided into two further categories: short haul and long haul. So, the administrator on this fleet may want to configure three vehicle templates: ‘Van’, ‘Short Haul Truck’, and ‘Long Haul Truck’. Templates can be configured with a variety of capabilities, including individual/unique attributes, input and output connections to external equipment, and other miscellaneous items. Template Attributes – Attributes are features of a template which are specific to your system, and will help Traksys operators make informed decisions on the state of their vehicles during day-to-day running of the fleet. You can add as many attributes to a vehicle as you like, and they will appear in the Page 18 Traksys2000 User Manual Traksys resource list as long as the display is configured to include them (see section 9.4 for more information on customising the display). Attributes differentiate one template from another in ways that may not be apparent solely through the template name. Example: Both types of truck in our imaginary delivery company may be fitted with tail-lifts, but vans are not, so ‘Tail Lift’ may be a useful attribute of both truck templates. Certain types of van may be required to return to the depot at the close of the working day, while others may be parked at the driver’s residence – this may be relevant enough information to split vans into two new templates, each with different attributes. Template IO – One of the most important aspects of any vehicle template, especially when your fleet employs the MCU500 AVL and telemetry unit, is the connectivity it carries to the rest of the vehicle. The MCU carries six digital inputs, and two relay outputs, which can be monitored or switched by the Traksys operator from their workstation. Inputs are typically connected to various indicators within the vehicle which may be relevant to the control centre, while outputs are used to manually switch critical devices on or off. When the MCU is programmed correctly, it can monitor the state of these connections and report changes to HQ. IO can be directly coupled with the Traksys Critical Event Subsystem (described fully in section 7) to change the visual appearance of vehicles on the map, or even send warning messages to supervisors’ mobile phones. Example: Traksys Trailers acquires a refrigerated van. The unloading doors on this van are wired to two of the six inputs on the MCU500. The ‘Refrigerated Van’ template in the Traksys database has been correctly configured with two inputs: ‘Side Loading Door’ and ‘Rear Loading Door’, each with the ‘Open’ and ‘Closed’ properties – so if a door is opened, Traksys receives this notification, and displays ‘Rear Loading Door Open’ on the resource list display. In addition, the administrator has programmed an ‘IO Connection ON’ event which puts the vehicle in the ‘Warning’ state – the vehicle appears green on the map and other displays while the door is open. A second ‘IO Connection OFF’ event is fired when the door is closed, and the vehicle reverts to the ‘Normal’ display. Miscellaneous Items – There are other aspects of a vehicle template which are vital to the operation of the system. First, you have to tell Traksys whether you are using MCU500’s in vehicles based on that template – if so, the many controls and options which depend on Thorcom equipment to function will be activated. Secondly, you can define the minimum period in which you expect to receive position (or any other) data from those vehicles; if vehicles based on the template do not report within that time, they are declared ‘Unheard’ by the system (one of several states in which a vehicle can be placed) and are greyed out on the map and other displays until their next AVL or data report. 3.1.2 User Gazetteer Traksys maintains a complete gazetteer of thousands of reference points across the UK against which it can match incoming vehicle position reports. This gives AVL positions a more meaningful label than raw latitudes and longitudes on the globe - for example ‘1.2m N of STOURPORT’ - and also allows users to add their own custom locations to the database. The next step in configuring Traksys is therefore to add your own points to the gazetteer. You do this via the Options dialog, and will normally enter a UK postcode from which Traksys will derive the actual geographical position – simply enter the postcode in the dialog provided (see section 9.5), name the Page 19 Traksys2000 User Manual location, and Traksys will automatically use that entry in the gazetteer for vehicles which approach the vicinity. Example: Traksys Trailers has three depots in Exeter, Plymouth, and Bristol. By entering the postcodes of those depots, the user gazetteer now contains three new locations – ‘Exeter Depot’, ‘Plymouth Depot’, and ‘Bristol Depot’. Any vehicle which enters that postcode will have its position updated to reflect the depot at which it has arrived. In addition, the administrator enters the positions of all of the firm’s customers, allowing at-a-glance tracking of the progress of vehicles along their routes. 3.1.3 Getting Connected – Traksys Connections Traksys connections are the physical interfaces into the workstation through which data is received from the fleet. Because Traksys supports a wide variety of hardware and networks, the administrator has to be specific about what type of hardware is connected to the workstation, allowing Traksys to implement the correct protocols on the network. The application supports the following connection types: • • • • • • • Tetra – The digital packet network such as that run by BT Airwave. Paknet – Vodafone’s own packet data service. SVLP – Thorcom’s own AVL delivery protocol. GSM – Standard mobile phone protocol implemented by Nokia, Motorola, and others. Map27 – For use on private MPT1327 networks. IP/Internet – For the direct receipt of AVL on a mobile IP network such as GPRS. Local MCU500 – An MCU500 itself can deliver AVL directly to Traksys over a hard-wired connection. This type is used mostly for testing purposes. You will normally have discussed on which network you are going to be running your system, and will have to create one or more relevant connections. If you intend to add multiple connections to the system (for example, one connection for AVL, another for outgoing event-driven messaging), then each bearer in the Traksys database (see section 3.1.4) will need to be associated with an individual connection. Example: Traksys Trailers has decided to run its vehicles on the Tetra network, so the administrator adds a Tetra connection on COM1 to Traksys – this will be the fixed mobile through which AVL is received and commands sent out. However, he also wants to be able to send messages to supervisors’ mobile phones when critical events occur, so he adds a second GSM connection on COM2, and configures his event framework to send text messages via the second connection. Page 20 Traksys2000 User Manual 3.1.4 Bearers Note: You won’t have to concern yourself with configuring bearers manually if you have Traksys automatically add vehicles as they are heard – see ‘Adding Vehicles Automatically’ below. Bearers represent radios or telephones on your fleet. They are the conduit from the vehicle to the radio network (such as Tetra, GSM, etc.) which is used to transmit the data to the control centre. There will be one bearer in your Traksys database for every radio, and therefore for every vehicle, in your fleet. Bearers are represented by their telephone (or radio ID) number, such as ‘4521917’. Examples of radios for which bearers should be created are: • • • • • Tetra D700 hand-held Siemens M20 GSM data unit Siemens MC35T GPRS data unit Nokia 8210 mobile phone Thorcom MDS700 mobile installation Once you have added a bearer to your database (see section 6.2.3), you will need to assign it to a vehicle (via the vehicle configuration screens), which will cause Traksys to associate the correct AVL with that vehicle. You’re free to swap bearers between vehicles in your configuration at any time – and in fact you have to ensure that, if radios are moved between vehicles, the database is kept up-to-date, else Traksys will not put vehicles in their correct positions on the map. Be aware though, that such changes will only affect subsequently received AVL – it will not retrospectively update the existing history logs to reflect the change. Note: Every bearer has a connection associated with it (see previous section). It is extremely important that bearers are kept up-to-date with changes to the configuration of Traksys connections; for example, if you delete an old connection and add a new one, you will have to manually re-associate all bearers which will use the new connection. 3.1.5 Vehicles The final step in configuring the basic operation of your system is to add the actual vehicle resources. There are two ways to do this: manually, by adding each bearer and vehicle in turn, or automatically, where you let Traksys add vehicles to the system as they are heard delivering AVL to the control centre. The latter method is recommended for most systems, however you might like to use a combination of the two for systems where AVL from your fleet is less frequent and vehicles may take some time to show up on the system. Adding Vehicles Manually – Adding a new vehicle is relatively straightforward (see section 6.2.4), but you must ensure that you have associated the correct bearer with your new vehicle, so that data heard via that bearer is applied to the correct vehicle resource. Vehicles added manually will be shown with ‘No Positions Received’ until a valid AVL report is received from them. Adding Vehicles Automatically – If you want Traksys to add vehicles automatically, you have to make sure that certain prerequisites are met. First, you must obviously have a valid connection through which the application can receive AVL from your fleet (see ‘Connections’ above); secondly, you have to configure Traksys’s user options correctly. This is done by clicking the administrator Options button, and checking the ‘Fully add the vehicle and its bearer to the database as soon as it is heard’ option. Page 21 Traksys2000 User Manual You may also want to specify the default vehicle template that should be applied to the vehicle as soon as it is entered. Adding Vehicles for Later Configuration – The third option open to you is to have Traksys add new vehicles as ‘Unconfigured’ on the system. They will temporarily be added to your Traksys session, but will not become a permanent feature of your setup until ‘imported’ into the database by the system administrator. Unconfigured vehicles appear on the map and in certain admin screens, but you are restricted as to what you can do with them, and they will be removed the next time Traksys is restarted (until they are heard again, of course). Once this setup is complete, you can leave Traksys running to receive AVL from your fleet. As soon as a vehicle is heard, it is added to the database and associated with the bearer from which the data was received, as well as set to the correct template if you have one selected. As they are added, vehicles will appear in the Traksys resource list with their current location, callsign (a simple default in this case) and whatever other items are selected for display in the Options dialog. It will probably be necessary for you to slightly reconfigure the vehicles with individual callsigns after they have been added, but this is a simple process (see section 6.2.4 for how to reconfigure vehicle resources). You will also need to associate the correct templates with each vehicle. 3.1.6 Personnel Some systems may also want to add personnel resources to their database. Personnel may or may not have bearers associated with them – though they never deliver AVL. If you mistakenly assign a vehicle bearer to a member of personnel, AVL from that bearer will be politely ignored. Traksys will never automatically create a personnel resource. If they do carry radios, it is possible for personnel to send both Status messages to the control centre and receive text messages from Traksys operators. In conjunction with being able to assign personnel to vehicles and define personnel templates with unique attributes, personnel can be a valuable resource in your database. Page 22 Traksys2000 User Manual 3.2 Configuring Traksys2000 – Advanced Concepts The requirements described in section 3.1 will bring your Traksys system on-line with AVL and mapping displays, but are certainly not the extent of the system’s capabilities. Experienced users will want to implement as many of these features as possible to get the best use of the system. 3.2.1 Groups Groups are an important way of dividing your fleet into more meaningful sub-parts, and are especially useful in large fleets where you want to examine or use specific vehicles quickly. Traksys provides the user with the ability to filter the major resource displays by group, showing only those members of the selected group. When your system is installed, it is auto-configured with a single group – ‘All Resources’ – to which both vehicles and personnel are automatically added when they are configured. You can create as many groups as you wish, each with as many or as few members as you like, drawn from the vehicles and personnel currently in the database Groups are used throughout the Traksys application and users are recommended to think about ways in which they can separate their fleet in this manner. Example: Traksys Trailers initially adds several groups. Staff are split into ‘Day Shift’ and ‘Night Shift’, while the vehicles on the fleet are split into the more obvious ‘Vans’, ‘Long Haul Trucks’ and ‘Short Haul Trucks’. In addition a final group of ‘Supervisors’ is added. 3.2.2 Status Messaging Many networks support the concept of status messaging. Statuses are very small messages which have several benefits: • • • They are normally very quick and easy to enter on a handheld or vehicle-fitted radio, providing remote users a convenient method of updating the control centre with their activity. They are relatively small and fast to send over the network. They are usually cheaper to send than larger data messages (such as AVL). Statuses normally consist only of a numeric value which is given a meaning on the specific system which is using them. Popular statuses include ‘En Route’, ‘Arrived’, ‘At Lunch’, and so on. They are a third Traksys message type along with AVL and text messaging. Status messages are used extensively by the Traksys displays to keep users apprised of what is happening on the fleet, especially in the Noticeboard display, which can colour-code individual resources to reflect their current status. In addition, receipt of status is a critical event in the Traksys Page 23 Traksys2000 User Manual Event Framework, which allows the application to execute certain predefined actions when the status arrives at the control centre. On those networks which support status messages (for example Tetra, or the Thorcom MDS700 network), this facility can be extremely useful in keeping the operator informed. Adding Statuses Manually – Statuses are represented in the system by a single number – for example ‘35536’. Administrators will need to add both the number used and a description of that status – for example ‘Not Available’. Whenever a resource (and both vehicles and personnel can deliver statuses to HQ) sends in a status, that resource’s display (including the icon on the map) is updated to reflect the status description. Adding Statuses Automatically – As with new vehicles and bearers, when Traksys receives a status which isn’t configured in its database, it can be programmed via the Options dialog to add that status to the database with a simple description – in the above case, ‘Status 35536’. This will bring the Traksys database up-to-date with the statuses available, but will require administrators to reconfigure those statuses at a later date with more useful descriptions. 3.2.3 Events and Actions Traksys includes a subsystem called the ‘Critical Event Framework’. This system continually monitors activities on the fleet – such as receipt of AVL, or status messaging, or changes in vehicle IO - and can be pre-programmed to execute predefined actions when certain conditions are met, such as changing the vehicle state, or sending a text message to a personnel group. Events can be permanently configured in the system but disabled while not needed. By carefully configuring the Event Framework, users can rely on the system, rather than the operator, to catch important activity on the fleet and draw the user’s attention to it. Events should always be added as the last step in configuring the fleet, so that all of the appropriate connections, resources, and other systems are in place and can be utilised. Section 7 contains full details on this configuration no events are included in a new installation of Traksys. Page 24 Traksys2000 User Manual 4. The Traksys2000 Display and Interface Traksys2000’s display and user interface are broadly split into two main parts: the mapping display, and the Traksys ‘control panel’. It is possible to relegate the control panel to the systray portion of your Windows display (the small tray in the bottom right of the screen), from which it will maintain the mapping displays while staying invisible itself, but most users prefer to shrink Traksys into ‘Resource View’ (a view in which only the fleet vehicles and personnel, and the most-used controls, are visible), and leave it floating in a corner of the mapping window without obscuring their maps (of course, the bigger the screen resolution, the better). From there, the most basic controls for both contacting your vehicles and manipulating the mapping display are available. Diagram 4-1 – Traksys Resource and Admin View Comparison The mapping display itself contains a variety of functions, options, and controls to help you move around the maps and find places quickly; these include post-code look-ups, route-calculations, zoomlevels, and so on. You should familiarise yourself with this software so you can exploit these capabilities to their fullest (the FleetTracker User Manual is provided as part of the Traksys2000 package). The Traksys control panel focuses less on displaying vehicle positions and more on monitoring and controlling your fleet; along with the historical information contained in your database, it provides you with a selection of commands and analysis tools which will both aid in the day-to-day running of your system and in making it more efficient as a whole. It also maintains a complete, up-to-date event log for all resources, providing at-a-glance activity information for the Traksys operator. 4.1 Using the Mapping Display Effectively Traksys incorporates many extra features into the FleetTracker mapping display which mimic the options available from the Traksys control panel. These are accessed by right-clicking on any of the vehicle icons. From the menu, you can select: • • • • • • Show only this vehicle – Removes all other icons from the map Show Details – Displays Traksys Admin View (including recovering the Traksys control panel from the systray if need be), with the current activity for the selected vehicle Poll Current/Defined/Custom – The poll commands as available from the control panel Set Profile – Set the current reporting rules for the selected vehicle Start Replay – Show historic positions for this vehicle Send Text – Send a text message to this vehicle Page 25 Traksys2000 User Manual In addition, several FleetTracker commands – such as Centre Map – are to be found on this menu. 4.2 Traksys Resource View Resource View is the ‘minimised’ version of the Traksys display, in which only the resource list and the most-used controls are available. No administration functions are provided in Resource View. Reference sheet 1 provides a complete run-down of the displays and controls available in this view. 4.3 Traksys Admin View By toggling Admin View on the operator is given access to the complete Traksys interface, including options for modifying the fleet setup, analysing the AVL history in the database, and sending advanced commands to both the mapping display and the vehicles and personnel on the fleet. Note: Traksys currently has the concept of two user ‘levels’ – Normal, and Administrator. Your privileges in Traksys (i.e. which functions you have access to) are determined by the privileges of the currently active user in Windows; normal users will not be able to reconfigure the fleet, for example. Admin View is in essence very simple – it is Resource View with a larger, more complex set of functions appended to the right; Resource View is in all other ways identical to its counterpart. The following additional pages are made available, accessible by clicking the ‘tabs’ at the top of the control panel. • • • • • • View – A detailed overview of the configuration and activity of the selected resource. Also gives access to the full suite of Traksys controls, including commands to send to the vehicles and personnel, as well as the AVL replay feature allowing vehicle histories to be played back on the map. Noticeboard – Designed as an at-a-glance overview of your fleet, showing the most useful resource information (such as current position and status) and offering several sorting and filtering options, including sorting by proximity to a specified location. Event Log – The complete history of all activity on the system. Shows messages as they arrive or are sent, configuration changes, warnings or errors on the fleet, and more. Complete records of the event log are archived for later retrieval, in both text and binary formats. Connect – Use this page to configure or modify connections to the hardware which delivers data from your fleet. Includes a comms-specific event log for tracking faults in the connections. Admin – The full suite of administration functions for configuring your system. Reports – Analysis tools for printing activity reports via Microsoft Access®. The View, Noticeboard, and Event Log pages are dealt with in Section 5 – Monitoring Your System; the Connect and Admin pages are dealt with in Section 6 – Configuration Reference; the Reports page is described in Section 8 – Analyzing Your Fleet. Page 26 Traksys2000 User Manual Reference Sheet 1 – Resource View and Controls Group Selector Filter the display based on the groups you have configured Resource List Controls Use these buttons to change the layout of the resource list Resource Card System Controls Configurable display shows details of all the vehicles (and personnel) in your fleet. Manipulate the mapping display and send commands to your fleet Window Controls Switch views, hide, or exit Traksys Resource List Controls Sort resource list in ascending alphabetical order Sort resource list in descending alphabetical order Toggle personnel in resource list Toggle vehicles in resource list System Controls Centre on resource – Vehicle is centered in the mapping display. If the selected resource is a member of personnel, then Traksys will centre on the vehicle that person is assigned to, if any Track resource – Traksys automatically centres on the selected resource whenever it moves, thereby tracking it on the mapping display (the same conditions apply to personnel as above) Show only this resource – All other vehicles are removed from the map (though not from the resource list) Show group – All members of the current group are displayed on the map Poll resource – The selected vehicle (or that assigned to the selected person) is polled for its current position Poll defined – As above, except that the user can select one of the ten built-in report formats to be returned by the vehicle Poll custom – As above, except that the operator can select which information elements the vehicle should return to Traksys Page 27 Traksys2000 User Manual Window Controls Toggle Admin View – Switch between Resource and Admin Views. Traksys will store the onscreen positions of both views and revert back to them where appropriate. Hide Traksys – Use this button to remove the Traksys control panel from the screen entirely. It will still be running in background and can be retrieved at any time from the System tray (just double-click on the icon): Exit Traksys – Click this button to close both Traksys and the mapping display. Vehicle Card The image below shows a typical vehicle card, though you can customise the display to show more or less detail. Vehicle Callsign Vehicle Icon Normally based on the current template and bearer Based on vehicle template and current state Vehicle Bearer Vehicle State Radio equipped in vehicle Based on last heard time and the Critical Event Framework Current Position Current Status Personnel Card The image below shows a typical personnel card. Staff Callsign Personnel Icon Normally the person’s name Personnel Bearer Personnel State Radio/telephone assigned to this person Based on the Critical Event Framework Current Assignment The vehicle this staff member is currently assigned to Current Status Page 28 Traksys2000 User Manual 5. Monitoring Your System Once your database is configured, the connections are up, and vehicles are delivering AVL, Traksys provides a selection of monitoring functions allowing you to observe and change the state of your fleet. Most operators will leave Traksys in Resource View the majority of the time, with the mapping displays taking up the bulk of desktop space, since the position of their vehicles is usually the most important piece of information they need. Less often used functions are accessed through Admin View, however, notably the View, Noticeboard, and Event Log pages. Diagram 5-1 – Traksys View, Noticeboard, and Event Log Pages These functions are available to Normal and Administrative users at any time. Simply open Admin View and select the page you need from the buttons across the top of the Traksys Control Panel. 5.1 The View Page Designed to be a one-stop information screen for individual resources on the fleet, the View page summarises database configuration information and event log activity, as well as providing access to the full range of controls for communicating with your vehicles and personnel. To display any one of the three information/control panels available on the View page – Current Information, Database Information, or Controls - simply click the appropriate header button. 5.1.1 Activity Log The Activity Log screen displays those events from the Traksys event log which correspond to the currently selected vehicle, including all incoming and outgoing data. Using this screen an operator, could, for example, review the most recent statuses of the vehicle, or the driver’s response to a text message. Events are colour-coded depending on the type of activity being reported, in the same way as in the main Traksys Event Log page; refer to section 5.3 for more information on this colour-coding and the type of activity which is reported in the logging screens. Auto-load of recent activity – Traksys provides an option to re-load the previous event log whenever the software is restarted, up to a maximum of a single day’s activity; you can activate this facility in the Logging page of the Options dialog. In this way, restarting Traksys will not cause recent activity to be lost – although operators should note that activity occurring before midnight on the current day will only be reloaded once before the current day’s logs take precedence. Page 29 Traksys2000 User Manual 5.1.2 Current Information Panel Along the lines of what is displayed in the cards on the resource list, this panel shows a selection of data which shows the operator the state of the selected vehicle or staff member. None of these parameters are changeable from this window – it is intended for information only. Reference Sheet 2 describes this panel in detail. 5.1.3 Database Information Panel Intended to give operators who don’t normally have access to the administration functions of Traksys information on the setup of the selected vehicle or staff member. Again, none of these details are editable. The complete panel is described on Reference Sheet 2. 5.1.4 Controls Panel This is the central location of all of the controls and commands open to the operator to manipulate their AVL system. Many of the controls in this panel rely on the use of MCU500’s on the fleet – if you select any vehicle which is not based on an MCU500-enabled template, they may be disabled. In addition, the presence of an active, valid connection is required to use many of the commands. When sending commands, the connection which is associated with the vehicle (via its bearer) will be used to transmit the data. This is a fixed assumption made by Traksys and cannot be modified (note that you can select specific connections to send data as part of the Event Framework). For a complete run-down of the controls available in this panel, refer to Reference Sheet 3. Page 30 Traksys2000 User Manual Reference Sheet 2 – View Pane: Current Information and Database Panels Current Location Shows the feature and raw latitude/longitude of the last valid report Current Status Current Datalog The vehicle must have delivered at least one datalog report IO State Connections and their last known states are displayed here Resource State Depends on the template and Critical Event Framework General Info Shows the configuration of this resource in the Traksys database Assignments Shows what bearers and personnel (if a vehicle) are assigned to this resource Template Shows the vehicle or personnel template on which this resource is based Attributes If the underlying template has any attributes, they will be shown here IO If the underlying vehicle template has any connections, they will be shown here. Page 31 Traksys2000 User Manual Reference Sheet 3 – View Pane: Controls Panel and Associated Dialogs Messaging Messaging functions – use this button to send a text message to any resource. AVL Controls Allows you to poll a vehicle, change its reporting profile, and run an AVL replay Datalogger Query a vehicle’s datalog, and/or recall its outstanding data Outputs If the underlying vehicle template has any outputs, query and control them from this panel Messaging Controls Send Text Message – Pops up a small dialog in which you can enter up to 120 characters of text to send to the selected vehicle or staff member. Uses the default connection (the first one in the connections list) to send the message. Location/AVL Controls Poll – Uses the default connection to send a MAMP message to the MCU500 in the currently selected vehicle, or to the vehicle to which the currently selected member of personnel is assigned. Poll Defined – Specify one of ten predefined AVL data formats (including more or less detailed information) for the MCU500 to return to Traksys. Poll Custom – Use the dialog displayed to select which AVL information the selected vehicle should return. Switch Profile – The MCU500 maintains ten ‘reporting profiles’, each of which can specify different conditions under which to send an AVL report to the control centre. Switch to different profiles via this control. Run Replay – Shows the AVL Replay Dialog, from which you can interrogate the AVL histories and replay previous AVL for the selected vehicle – see below for more details on this dialog. Datalogger Start Datalog Recovery – Choose whether Traksys should defer to the MCU500’s programming, or if you prefer, you can manually specify the maximum number of AVL logs the vehicle should return Stop Datalog Recovery – Stop a datalog recovery in progress (the current log will still be delivered) Page 32 Traksys2000 User Manual Datalog Query – Returns the number of AVL logs currently outstanding in the selected vehicle. This information is also sent by the MCU500 with every logged AVL update. Output Controls Query Outputs – Bring Traksys and the vehicle in-line by querying the MCU500’s current output state. Output Controls – For each output configured in the underlying vehicle template (up to a maximum of two), Traksys displays simple on/off switches, only one of which is enabled. Click either of these controls to remotely manipulate the outputs in the vehicle. AVL Replay Controls Relative Time Specify how far back from now to query the AVL histories. Absolute Time Specify an absolute time frame to query. Page 33 Traksys2000 User Manual 5.2 The Noticeboard Page This display is designed to give you an at-a-glance overview of all (or a select portion) of the resources on your fleet, as well as their positions and statuses. In addition it doubles up as a useful analysis tool allowing operators to make judgements on which resources to assign to the needs of their system, based on the proximity of vehicles to the incident in question. As in the screen-shot above, the noticeboard is a list of resources with information displayed in columns, as follows: • • • • Resource – The resource callsign, as configured in the Admin pages. Location – The last reported position of the vehicle, or ‘Location Unknown’ if no position reports have been received from the vehicle in question. An empty column will be shown if the resource is a person rather than a vehicle. Date/Time – The date and time of the last position report. Status – The last status report received from the resource, or ‘No Statuses Received’. Double-clicking on any of the resources will reduce Traksys to Resource View and centre the map on the relevant vehicle. Other features of this view include the following. Clickable Column Headers - All of the column headers are clickable, allowing the operator to sort the noticeboard according to preference – alphabetically, or chronologically, depending on the column clicked. Clicking the same column twice flips between sorting the items in ascending or descending order. Group Selector – This drop-down list allows you to filter the noticeboard according to the groups configured in your Traksys system. It has no impact on any other area of the program (so for example, changing the group in this screen does not affect the vehicles displayed on the map). Sort/Find By – Clicking this button displays a menu to the sort options open by clicking the column headers, as well as showing the user which option is currently in effect. In addition, the Find Nearest option is available through this menu (see below). Find Nearest – This useful feature allows the user to sort the noticeboard contents according to their proximity to a specific location. Click the menu to display the Find Nearest Resource dialog, which is described below. Once entered, the resources in your noticeboard are sorted in ascending order according to their absolute distance from this location (and the location column is updated to include the distance in miles from the reference point). Example: A Traksys Trailers operator receives an urgent request for frozen goods to be delivered to an out-of-the-way customer. By selecting the ‘Refrigerated Vans’ group, and inputting this customer’s postcode into the noticeboard, she finds that the nearest suitable vehicle is van 2013, only 0.8 miles from the customer, and dispatches it to that location. Status Colour-Coding – The final toggle switch to the right of the Noticeboard window will colour-code the entries in the noticeboard according to their current status, and the colours programmed to represent that status in the system. Section 6.2.7 deals with this aspect of Traksys administration. Page 34 Traksys2000 User Manual 5.2.1 The Find Nearest Resource Dialog Use this dialog to input the co-ordinates of any location in the UK against which to locate the entries in your noticeboard. Position Co-ordinates Usually filled in by your queries, but can be entered manually Postcode Lookup Enter any UK postcode and query the post-code database for its position Gazetteer Lookup Choose any location from your Traksys or user gazetteers, and its co-ordinates will appear above Position Co-ordinates – This is the raw latitude and longitude of the desired location, and is the ultimate position reference against which your resources are compared. If you happen to know the GPS co-ordinates of the reference point, you should feel free to enter them here, but you normally use the post-code or location look-up features to complete these fields. Postcode Look-up – This uses the mapping software’s built-in postcode database to derive a latitude/longitude from the supplied postcode. The co-ordinates derived from this function should be considered the 'centroid’ of the postcode area, given that the geographical area of postcodes tend to vary, but this should normally be more than adequate for directing resources to the scene. To use this feature, enter the postcode in the field provided, and click the ‘query’ button to the right. When a position is calculated, it will be noted in the dialog and entered into the co-ordinate fields at the top. In the case of an ‘ERROR – No response from gazetteer’ outcome, it is likely that FleetTracker – the mapping display application – is not running. Since Traksys relies on FleetTracker’s postcode database, you will need to make sure both programs are running before using the look-up facility. Gazetteer Look-up – Along the same lines, this feature uses both the standard Traksys gazetteer of UK locations, as well as the user gazetteer which can be updated to include customer-specific features (see section 9.5), to supply the reference co-ordinates based on your selection. The drop-down list shows all locations available, but will auto-complete as you type for ease of use (as illustrated above). Once you have found the correct position, simply click OK to sort the noticeboard according to your preferences. Remember that you can double-click on any resource to centre the relevant vehicle on the map. Page 35 Traksys2000 User Manual 5.3 The Event Log Page This page is constantly updated with information regarding the activity on your system, from AVL arriving, to configuration changes, to outgoing text messages, as well as warnings, alerts, and other indications that something critical has happened. Events are also sent to Traksys Admin View, appearing briefly at the bottom of the main Traksys control panel as they occur. The event log is capped at a maximum of 1000 messages, after which the oldest messages will be removed as new ones are added. The user is free to scroll up and down the list to view previous messages that haven’t yet been removed, but as long as the most recent message is visible, the list will auto-scroll as new events are added, keeping the most recent activity visible at the bottom of the page. Note that even though log messages are removed after a certain period, they are permanently accessible (assuming the correct options have been selected) as archives in your Traksys installation folder. An event log message has three components: the system time at which the event occurred, the resource to which the event is pertinent (for example, ‘Refrigerated Van 2314’), and the event text. 5.3.1 Event Messages Events are colour-coded according to their type, so that unusual activity is highlighted for the operator, and fall into one of several categories. The message category is included in the file archive with the abbreviation noted, but is otherwise colour-coded in the Traksys display: • Initialisation (Init, brown) – These events occur during system startup as Traksys reads its database and initialises the various software systems that comprise the program. Warnings or errors may appear during this period. Example: User JohnM logged in (Administrative privileges) • AVL and Status (AVL, blue) – These messages indicate the normal activity of Traksys when running with an active fleet. An AVL message can consist of several parts, as shown in the following example: M1 J47 @ 36.0 mph - Distance Travelled The message will always appear with its position – in this case ‘M1 J47’ - and may include information on the speed of the vehicle so long as that element is sent in the AVL report; in addition, the reason for this update is also noted – in this case, that the vehicle has exceeded the maximum distance specified before making a report. Status messages also fall into this message category, for example: En Route To Customer Assuming the status differs to the current status for the vehicle or personnel in question, the new status will be noted in the event log as its descriptive text configured in Traksys admin. • General notification (Notify, black) – Other information not directly related to AVL messages, such as changes to Traksys configuration, will appear as messages of this type. In this way, an Page 36 Traksys2000 User Manual audit trail is maintained of changes to the system which may cause problems down the line. For example: Removing bearer 0212 from session • Warning (Warning, green) – These events describe unexpected or unusual occurrences in the system which seem at odds with its configuration, such as the receipt of AVL from an unconfigured vehicle: Heard unconfigured vehicle on bearer 0212 Warning messages should be considered medium priority, and dealt with appropriately. • Error (Error, red) – These are high-priority messages that indicate something is seriously amiss in the system, such as the fact that one of the connections has failed: Tetra connection (ID 2) has failed Error messages should be considered high-priority. You would not normally expect to see any errors in a correctly configured and operating Traksys system. 5.3.2 Restoring Previous Event Logs Assuming that binary logging is enabled (see section 9.3), which causes Traksys to maintain a custom record of previous events as well as the human-readable text archives, it is possible to recover logs from recent Traksys sessions so that they are viewable in the View page activity log window. This means that on systems where Traksys is regularly restarted, that day’s activity will be accessible from the UI as well as from the file archives. When enabled, this feature will restore the entirety of the current day’s logs any time the program is restarted, from midnight onwards. The exception to this is in the first start of the day – in this case, Traksys will restore the previous day’s log. What this means is that on systems which are started only once per day, you have direct views on not only that day’s activity, but the previous day’s as well. This feature does not impact the use of AVL queries, which analyze the database message history and not the simpler event log history. You have complete access via an AVL replay to all of your data from the first day Traksys was installed (assuming your database hasn’t been manually archived in the meantime). 5.3.3 Features of Traksys Logging Traksys maintains a variety of file archives aside from its normal database history which can be used to trace previous activity on the system. The format of these archives is the ‘day-log’. In this regime, the most recently used log file is named ‘current.log’, and is archived at midnight by being renamed according to the time of the last entry in the file. Thus a series of files are created, representing a full 24 hours of activity. Note: Traksys does not ‘clean up’ old log files once they are archived – it simply moves on to a new current log. If you have set the logging preferences in your system to a high level, you may find, Page 37 Traksys2000 User Manual depending on the nature of your system, that the log directories grow to unmanageable sizes. In this case, you should feel free to delete old logs according to their date, or more preferably, archive existing day-files to a CD or other mass-storage medium in the event that they are needed later-on. You won’t create any errors in Traksys by deleting log files. Within the Traksys installation folder on your Windows PC, you will find several sub-folders containing your event archives: • • • • Event Log – Contains the archives of your Traksys event log, as displayed in the Event Log window, in text format. These can be opened at any time with a simple text editor such as Notepad. Sys Log – Your system log. This contains much more detailed diagnosis and debugging information on the activity within the Traksys application. While it is in text format, it is designed for use only by Thorcom engineers or customers under Thorcom direction, and must be activated in the Logging page of the Traksys options dialog. Binary Log – The binary archive of your event log. These files are not human-readable and are used by Traksys to restore previous events so that they are viewable in the Activity Log window of the View page. Never alter the content of these files. Connection Logs – These are in a similar format to the system log, and contain detailed archives of the comms activity in your Traksys connections. The sub-folders will be named according to the name of the connection they represent. Like the system log, this feature must be manually activated. Page 38 Traksys2000 User Manual 6. Configuration Reference Setting up your fleet is obviously the most challenging aspect of installing the system. Usually you will have taken advice from your system supplier on such things as AVL update rates, reporting formats, which network to use, and so on, but once you have decided on system-wide features, they must be implemented in detail in Traksys itself. This chapter of the manual is a detailed guide to the multitude of configuration options open to the system administrators. As a reference guide, this chapter is not designed as a tutorial on configuring your system – you’ll find such a tutorial in chapter 3. It should be used in tandem with that chapter after you’re familiar with the basic concepts of the Traksys database. 6.1 Traksys Connections Connections, configured via the Connections page of Traksys Admin View, represent physical links to radios or other devices, which in turn provide access to the network you are using to receive data from your fleet. You can add as many connections to Traksys as your PC will support (for example, through the number of COM ports available on your motherboard). 6.1.1 The Connections Page Connection List Shows all of the connections configured in your system. The first connection in the list is known as the ‘default’ connection Activity LEDs Show whether the selected connection is running Configuration Options Allow you to add or delete connections from your system (only available to administrators) Comms Log Like the event log, but shows activity related to the selected connection 6.1.2 Adding and Monitoring Connections To add a new connection, simply click the Add button and fill in the Configure New Connection dialog which will subsequently be displayed (detailed below). Once the connection is created, it will appear in the connection list along with its current state, and can be selected enabling you to view the comms log and other activity LEDs: • Tx – ‘Transmit’, flashes whenever a packet of data is sent out of that connection to your external equipment. Page 39 Traksys2000 User Manual • • Rx – ‘Receive’, flashes whenever a packet of data is received by the Traksys PC. CON – ‘Connected’, will appear blue when the connection is successful, but will turn red if the connection has failed (for example, the radio attached to the connection has been removed). Data cannot be sent or received through a connection which has failed – administrators should endeavour to fix the problem as soon as possible. Once a connection has been added and you are happy that it is working properly, you should click the Save button to make the changes permanent. If you don’t save your changes, new connections will be lost the next time you start Traksys. You’re also free to Edit and Remove any connections you need to – but again, you’ll need to save the changes. 6.1.3 The Configure New Connection Dialog This dialog gives the administrator options to setup or reconfigure Traksys connections. Connection Types Traksys supports many different networks – choose the interface here Connection Parameters Different types of connection require different parameters – configure the details of the connection here 6.1.4 Available Connection Types Traksys supports several different varieties of networks and hardware, including the recent Tetra network, Vodafone’s Paknet packet data service, Thorcom’s own SVLP data server, and the nationwide GSM (mobile phone) network. Selecting any of the network types displays the parameter window for that choice. Tetra – This digital network is available as a fixed mobile system using radios from such manufacturers as Motorola, Simoco, and Nokia (as well as others). Data over Tetra is carried in the ‘SDS’ – or Short Data Service – packet, which has a tariff associated with it on a per-message or bulk message basis. • • • COM port – Select which of your COM ports the radio is connected to (you will normally have received an interface cable with your radio which will plug straight into typical PC’s). AVL Protocol ID – Messages on the Tetra network are sent with a ‘protocol ID’ which identifies the type of message being sent. Thorcom AVL systems have reserved ID 192 for this purpose, so this value should not be changed unless under specific instructions from your supplier. Radio Type – Different radios in the Tetra network communicate to external equipment in different ways; you will need to select the type of radio you are using from the list provided – Page 40 Traksys2000 User Manual Motorola D700, Simoco D110 (not fully supported as yet), Motorola MTx300 series, or Cleartone CM9000. Other radio types will be supported in future revisions of Traksys. Paknet – Paknet ‘pads’ connect to PC and mobile equipment allowing data to be sent cost-effectively over the Vodafone network, using a fixed mobile arrangement. • COM port – Simply choose into which COM port you have plugged the Paknet pad. SVLP Listener – The Simple Vehicle Location Protocol is Thorcom’s own vehicle location protocol for sending data from AVL gateway PC’s out to individual ‘clients’ – of which Traksys is one example. SVLP in Traksys is provided only by way of a TCP/IP network connection to the server. • • Host Name or IP Address – SVLP listeners connect to the SVLP server, which exists on your network in the form of a host name (for example svlp.yourcompany.com) or an IP address (for example 192.168.1.1). Both types of entry are valid. IP Port to Connect To – SVLP is served off specific network ‘ports’ on the server machine (for example 4050). Your network administrator or supplier of the system will provide you with this information. SVLP connections continuously monitor the server to make sure that it hasn’t been removed, and will keep trying to re-establish in the case of a disconnection. GSM – GSM is the national network used by commercial mobile phone operators such as Vodafone, Orange, and One2One. Data is transmitted in the form of ‘SMS’ – or Short Message Service – packets, where each message has a tariff associated with it. The Traksys GSM driver is intelligent in that it will interrogate the attached telephone or fixed mobile device for its type and revision number, and automatically run whichever protocols are needed to send and receive data. In this way, only one parameter is required to open a GSM connection. • COM port – Simply choose into which COM port you have plugged your GSM radio or telephone. Map27 – Map27 is the data protocol used to communicate with radios operating on private trunked (MPT1327) networks. Messages on this network are transmitted in the form of ‘SDM’s, with a maximum packet size dependent on the capabilities of the network, and most networks also support status messaging which can be directly integrated into Traksys (see the earlier sections on Status Messaging). Systems using the Map27 protocol usually involve a fixed mobile radio connected to Traksys. • • COM port – Select which COM port the Map27 fixed mobile is connected to. Baud Rate – The speed of the data connection. Consult with your network supplier if you’re unsure about the speed of the data connection to your Map27 radio. IP/Internet – This option is available for Traksys2000 systems which receive AVL directly, in the form of UDP packets over an IP network. Remote vehicles, which will be operating on a system such as the General Packet Radio Service (GPRS), will be configured with the IP address of the Traksys PC and will deliver packets directly to this connection. Mobiles on this system will appear with bearers consisting of a fixed IP address (for example, ‘192.168.192.28’). Page 41 Traksys2000 User Manual • Service Port Number – The mobile equipment will be configured to deliver AVL on a specific IP port number, and Traksys must be configured to listen on the appropriate port. Set that number here. Local MCU500 – This connection type is included for testing purposes, allowing an MCU500 to be connected directly via a serial cable to the Traksys2000 PC’s COM port. • COM port – Select the COM port to which the MCU500 is connected. Page 42 Traksys2000 User Manual 6.2 Admin Interface Reference This section deals with the finer points of setting up your Traksys database, using the functions accessed in the Admin page of Admin View. It is highly recommended that you follow the procedures laid out in section 3, using this chapter as a reference for the subtler details. In many cases, configuration is intuitive enough that referring to your manual can be kept to a minimum, but the more advanced features of the program require detailed explanations. When editing a particular resource, you will see this kind of display in the Traksys admin window: Configuration Options Has two modes – view and edit. Will vary depending on the type of resource selected Database Tree Shows all of the resources in your database. Select any to view or configure them Option Buttons History Button Two or three buttons will be available depending on what is selected Use this to retrace your steps The Database Tree – This collapsable tree includes entries for all of the different resources in your database. Every time a resource is added or removed – either automatically or manually by the system administrator – that change will be reflected here. The various ‘headers’ also include an indication on the number of items in that category (there are 33 bearers configured in the above example, for instance). • • • • • • • • • Vehicle Templates – Contains one entry per vehicle template on your system. Personnel Templates – Contains one entry per personnel template on your system. Unconfigured Vehicles – Shows vehicles which have been added to your session but not yet imported into the database (see section 9.2) Bearers – One entry per bearer (telephone or radio) configured on your system. Vehicles – One entry per configured vehicle. Personnel – One entry per member of staff. Groups - One entry per group, including the automatic ‘All Resources’ group maintained for you by the system. Additionally, each group entry can be further expanded to show the current members of that group. Status – One entry per configured status. Events – One entry for each event configured in the Critical Event Framework (see section 7). History Button – As you navigate through the database tree, your actions are added to the history queue. Use this button to backtrack to previous selections (note that the history queue is cleared whenever you delete a resource from the system). Page 43 Traksys2000 User Manual Configuration Options – This area will show you either the current settings of the selected resource if in view mode, or the full suite of configuration options for that resource if in edit mode (you switch into edit mode by clicking the appropriate option button). The content of this window will vary dramatically as you select different resources – the example above is for a vehicle template. The following sections describe all of the configuration options for the various types of resources on your fleet. Option Buttons – Two or three buttons will appear here, allowing you to add, edit, or delete the resource, or cancel and apply changes to that resource. Use the edit button to switch between view and edit modes. Configuration changes (for the most part) will not be applied to your database until the Apply button is clicked, at which point the screen automatically reverts to view mode showing your newly updated resource. It is possible to select different resources at any time – and if you begin editing a second resource before applying changes to the first, those changes will be lost. Page 44 Traksys2000 User Manual 6.2.1 Vehicle Template Configuration Vehicle templates represent a selection of common features possessed by a selection of vehicles in your fleet. By basing vehicles on templates, you open up many other options within the program, such as certain events in the Critical Event Framework, but it is generally good practice to make as much use of templates as possible, since they lend structure to your Traksys setup and render future amendments to your fleet far easier to make. Template Name Identifies the template throughout the application. Descriptive names can often preclude the need for attributes later in the configuration Template Attributes Identify additional features of this template which may or may not exist in other vehicle templates Connections The MCU500 has six inputs and two output relays which can be connected to external equipment. Configure those here for use throughout Traksys Icon Choose the type of vehicle from the options provided Miscellaneous Details Other features of the template are specified here Template Name – Should describe the template so it can be recognised by the operator elsewhere in the program. Attributes – These are additional features of the template, specific to your system, which aren’t available in the other configuration options, and may be useful to operators trying to make best use of their resources (they can be displayed as part of the vehicle card in the resource list - though they aren’t by default). Attributes, once created, are shared between all vehicle templates, and you will need to check the appropriate box in the list to activate a specific attribute for this template (as above). A good example is shown above – ‘Parked at home depot’. To add an attribute, simply click the Add button, which will display a simple dialog in which you should enter the attribute’s description. It will be added to the list, but unselected, so be sure to check the option before applying your changes. To delete any attribute, select it, and click the Delete button. Note that this will delete the attribute entirely from the system, so any other templates which have that attribute selected will also be affected. Connections – Connections are a crucial aspect of Traksys systems, and are dealt with in the next section. Vehicle Image – The icon used by both Traksys and the mapping display to show vehicles based on this template is chosen here, rather than on a vehicle-by-vehicle basis, since the ‘type’ of the vehicle is the most fundamental aspect of any vehicle template. Choose from the following options: Page 45 Traksys2000 User Manual Car Truck Motorcycle Bus Van Unheard Time – Vehicles are declared ‘unheard’ when no data has been received from them within the specified time (above, 120 minutes/2 hours). If this happens, they are ‘greyed out’ on both the mapping and Traksys displays, indicating that no recent position information has been received, until a new position report is delivered. This is a useful way of staying apprised of any vehicles which may have equipment faults, as well as a convenient method of seeing which vehicles are actually operating at any given time. Use the arrows to alter the value, or enter it directly into the field provided. You should set this value as low as possible, based on the personality profile of your vehicles. For example, if you know that your vehicles are programmed to send timed updates every 15 minutes, then you know that, all else being equal, you will get at least one position report from them every quarter of an hour; taking into account stoppages, you may want to set the unheard time for 1 or 2 hours. MCU500 – This vital option should be checked if your vehicles are equipped with MCU500’s (most Traksys systems are supplied with this Thorcom product). Selecting any vehicle equipped with an MCU in Traksys opens up the controls and commands for that vehicle. Actions – Vehicle templates feature heavily in the Critical Event Framework, but those events are not configured here. Once the template is complete, visit the Events admin screen to specify how vehicles based on this template should be monitored. 6.2.1.1 Vehicle Template Connections When equipped with MCU500’s, vehicles on the Traksys fleet can return data on the state of those connections to the control centre, which, through the use of proper configuration by the system administrator, can have a direct impact on the presentation of the vehicles to the operator (for example, a vehicle can be programmed to enter the Warning state when a certain input is triggered). Key to this feature are IO connections in vehicle templates, which describe the various inputs and outputs wired to the MCU500, and allow the software to match incoming IO data with actual connections in the vehicle. Inputs and outputs are arranged in the list in a very specific order – and you can change that order by selecting any item and using the ‘up’ and ‘down’ arrows on the right to move it through the list. This order is important due to the way in which IO data is returned from the MCU500, which has six inputs arranged in a specific sequence on its connectors. The connections in the list must match the physical order of the connections on the MCU – so the first input in the list must represent the physical input 0 on the MCU, the second input 1, and so on. The same applies to output connections. If you don’t correctly match the vehicle template to the physical configuration of the MCU, then Traksys will apply the data to your vehicles incorrectly, and you will get a false impression of their IO state. To add a new connection, simply click the Add button, which displays the Add Vehicle Connection dialog, shown below. You can Edit or Delete an existing connection at any time, but you should note Page 46 Traksys2000 User Manual that such changes will ripple through the application and immediately affect any vehicles based on this template – including via the Event Framework, if any events are configured. Connection Type Is this connection an input or an output? Connection Name Should adequately describe this connection Connection States What descriptions best represent the two states of this connection? Actions – The Critical Event Framework can monitor the state of vehicle connections and take automatic actions based on the state of your vehicles – however, these actions are not configured here, but in the Events admin screen. See later sections for details. Type – A connection must be either an input, where signals are read from external equipment by the MCU500 (for example a car door or a panic switch), or an output, where the MCU sends signals to external equipment (for example a car horn or immobiliser). Name – A descriptive name for the connection. This will appear throughout the application. ‘On’ and ‘Off’ Text – Digital connections have only two states, but ‘on’ and ‘off’ are usually inadequate to convey the state of the actual equipment connected to them. For example, a door is not ‘on’ or ‘off’, it is ‘open’, or ‘closed’. By entering the appropriate text here, Traksys will match the digital IO data with your configuration and display the appropriate text. Page 47 Traksys2000 User Manual 6.2.2 Personnel Template Configuration Personnel templates are equivalent to vehicle templates, but apply to those staff members you feel you may want to include in your fleet. Only limited options are available in these templates. Template Name Describes this template Attibutes Which personnel attributes apply to this template? Template Name – A descriptive name for this template, shown throughout the application. Template Attributes – Akin to vehicle template attributes, this list shows the common personnel attributes configured in your database, allowing you to select which ones apply to this template. The controls here work in the same way as in the vehicle template configuration screen (see above). 6.2.3 Bearer Configuration These resources are very simple to configure, and you may never have to manually add one to the database at all, since Traksys’ auto-configuration options will add bearers as they are heard (if those options are activated). Note that bearers are actually assigned to vehicles or personnel in their configurations, not the bearer’s. Bearer Number Telephone or radio ID used by this bearer on the network Description What is this bearer? Connection Which connection is this bearer associated with? Number – This is the most crucial feature of any bearer, since it matches the bearer resource in your Traksys database to a telephone number (or radio ID, or IP address) on the network. All incoming data is delivered to Traksys with the number of the radio which originated it; by matching that number with a bearer, and then matching that bearer with the vehicle or staff member to which has been assigned, Traksys knows to which resource it should apply information such as AVL position reports. Page 48 Traksys2000 User Manual The exact number you should enter in this field depends on the type of hardware you are connected to. As a general rule, you should let Traksys automatically create bearers from your vehicles, since you can guarantee that the number generated by the system is appropriate. However, if you follow these rules when manually configuring bearers, you shouldn’t have any problems: • • • • • • Tetra networks – Enter the 7-digit ‘ITSI’ of the radio, without the prefix, for example ‘4521919’ GSM networks – Enter the full telephone number, including prefix, in local format, with no spaces; for example ‘07990534672’ Paknet networks – Enter the full subscriber ID of the pad, for example ‘23531200337506’. SVLP networks – Enter the four-digit radio ID, with leading zeroes, for example ‘0314’. Map27 networks – Enter (usually) the MPT1327 unit ID of the radio, for example ‘27’. IP/Internet – Enter the ‘dotted quad’ IP address of the vehicle, for example ’10.0.0.34’. Bearers are maintained as separate resources in this way (rather than just being a feature of individual vehicles or personnel) to make re-assigning radios and/or telephones in your fleet that much easier. You’re free to move bearers about your fleet as you see fit – wherever the bearer is assigned, that is where data delivered on that bearer will end up being applied. In addition, certain actions in the Critical Event Framework can deliver messages direct to individual bearers. Example: Traksys Trailers maintains a single telephone in the guard cabin at the gate. Any unauthorised activity on the fleet is transmitted via a text message to that bearer – and thus to whoever is on duty at the time. Description – Much of the time the description of the bearer is irrelevant, but if you need to specify exactly where the bearer is or what purpose it has in your fleet, do so here (note the example above). Connection – This crucial bearer attribute determines which connection is used to supply data to the bearer from the network, as well as which connection is used to send polling and other commands to the mobile. As such, it is crucial that changes to Traksys2000 connections are ‘rippled through’ to the bearers on the system manually. For example, a system administrator adds a GPRS connection and allows Traksys to auto-configure a dozen vehicles from their resulting AVL. However, he then accidentally deletes that connection, and adds a new one. At this point, it is likely that none of the data received through the new connection will be passed to its respective vehicles, because the bearers are still associated with a connection which isn’t there. To fix the problem, the administrator must manually re-select the new connection into all of the bearers on the system. By associating bearers and connections in this way, Traksys can receive AVL, status, text, and other data from a variety of different networks simultaneously, while still allowing operators to communicate effectively with all of the resources on the fleet. Page 49 Traksys2000 User Manual 6.2.4 Vehicle Configuration Vehicle configuration is complex given the fact that a vehicle is the central resource in the Traksys AVL system, although many of the more basic options are already taken care of in the vehicle template on which the vehicle resource is to be based. Vehicles are the ultimate destination of location data within a Traksys system. Hardware installed in the vehicle fleet generates location data over the radio network, and is then, via bearers configured in the database, associated with vehicle resources on the mapping display Template What type of vehicle is this? Bearer Which radio or telephone is assigned to this vehicle? Crew Assignment Assign members of staff to this vehicle Other Details Miscellaneous information on this vehicle Template – This drop-down list shows all of the vehicle templates currently configured in you database. Select the template which matches this vehicle – this will determine the availability of IO connections, attributes, and other features, as well as the icon to be used to represent this vehicle on the map. Note: It is possible to program Traksys to automatically apply one of your templates to new vehicles which are to be added to the database as they are heard (see section 9.2); if you select this option, you may find the template entry is already filled in for new vehicles. Bearer – This determines which radio or telephone ID represents this vehicle on the network – choose which of your bearers is installed in this vehicle, allowing Traksys to match incoming AVL and status data to the correct vehicle resource. The configured description of each bearer is included in its entry in the drop-down list. Note: You may also find this filled in for new vehicles if you are using the auto-configuration options. Crew – If you have configured any personnel in your fleet (though you don’t actually need to in order to run Traksys AVL successfully), it is possible to assign those personnel on a semi-permanent basis to any of your vehicles, thereby giving the vehicle a ‘crew’. The benefit of this is that the vehicle crew inherit the current state of the vehicle, rather than hold their own state, and are also strongly associated with the vehicle when double-clicked in the resource list or in another part of the Traksys UI, Page 50 Traksys2000 User Manual so that centering on the personnel results in centering on the vehicle, for example. These are useful features, but not strictly necessary to the normal running of the system. To assign a staff member to a vehicle, double-click or drag them from the right-hand ‘Personnel’ list into the vehicle list. Only personnel who are not already assigned to other vehicles will be shown in the personnel list. Callsign – This is the basic identifier for this vehicle throughout the application. Auto-configuration options will name a vehicle after its bearer, but you may like to amend the description to include the template name, as in the example above. Registration – Useful ancillary information for this vehicle. Description – Again, details which may aid the Traksys operator, but not strictly required for running the system. 6.2.4 Personnel Configuration Individual members of staff are configured on this screen. Although they can’t send AVL, staff can deliver statuses into the Traksys system, as well as receive text messages from the operator, and are a valuable resource in those systems where personnel are individually equipped with radios or telephones which can deliver this kind of data. Template What type of person is this? Bearer Which radio or telephone is assigned to this person? Other Details Name and callsign of this person (usually the same) Template – Identify into which category this person falls by basing them on one of your existing templates. Bearer – If this person is equipped with a radio or telephone capable of transmitting data to Traksys, create a bearer for them and assign it here. Note: If the auto-configuration options are switched on, it is possible that Traksys may hear a status or text message from a member of personnel and mistakenly create a vehicle from their data. If this has happened, delete the vehicle from your system, and simply re-assign that bearer to the correct member of staff. Other Details – Space is provided for both a name and callsign, but in most systems these will be the same. Callsign is used most frequently to identify personnel in other areas of the system. Page 51 Traksys2000 User Manual 6.2.5 Group Configuration Groups consist of any number of vehicles or personnel from your database, grouped together in any fashion which is appropriate to your system. In the examples throughout this manual, we have one group per vehicle template type, but you’re free to include any combination of resources into new groups at any time. There is no limit to either the number of groups you configure, or the number of members in each group (though they must have at least one member!). Group Members Choose any combination of vehicles or personnel from your database Group Identification Further configuration options for this group Members – To add or remove members of the group, double click on the resource in either list, or alternatively drag-and-drop it from one list into the other. The ‘Other resources’ list shows only those resources which aren’t already in the current group. Name – The group name, used throughout the application to refer to the group. Description – Provides details on this group should any be appropriate. Page 52 Traksys2000 User Manual 6.2.6 Status Configuration Status resources tell Traksys how to interpret the receipt of status codes from the mobiles (vehicles or personnel) on your fleet. Status codes are a standard feature of many networks – including the Tetra network – and are often relatively cheap or even free compared to text or other data messages, and by configuring a set of status codes which are unique to your system, a lot of information can be conveyed for little or no cost. Status codes are also an integral part of certain events in the Critical event Framework (see section 7), allowing the user to program Traksys to take certain actions when statuses are received. Number The network status code matching this status resource. Description What message does this status code represent? Colour Can be applied to the Noticeboard for vehicles which have delivered this status. Number – A status is fundamentally a single numeric value on the network. Typically, the network operator will reserve a block of status codes for implementation by user-configured systems, and it is then up to each individual system administrator to define what each status code means to their own fleet of vehicles and personnel. Enter the numeric value of this status in the field provided. Note: This value is so critical to a status resource that it is locked once you have added the status to your database – you can’t change this value later if you discover you have made a mistake or the system as a whole has been reconfigured. Instead, you will have to edit the meanings of individual statuses, or delete them and start afresh. Description – Once the statuses are defined by the system administrator, these definitions may be programmed into hand-held radios and selectable via a simple UI on the radio itself. By matching those descriptions with the entries here in your database, you will ensure that the numeric status code maintains the correct meaning across the system. It is the system administrator’s responsibility to ensure that this consistency is constantly maintained. The description, once configured, is changeable. It will appear throughout the application as status codes are received from the fleet, including within the vehicle label on the mapping display. Colour – Choose a colour which best represents this status (red for ‘Emergency’, perhaps). In the Traksys Noticeboard view, you can toggle these colours on or off for the resources in the noticeboard list, and they will be highlighted appropriately, giving a fast visual overview of the status of your entire Page 53 Traksys2000 User Manual fleet. Note that individual status resource colours do not feed through to the mapping display in this way, although the status descriptions do, as mentioned above. To change the colour, simply left-click on the colour indicator to display the colour palette of your PC. Choose any of the basic colours on offer, or if you prefer, click the Define Custom Colours button in that dialog to create a different shade. Actions – Because statuses can be used by the Critical Event Framework to affect the display of the vehicles throughout the system, as well as to perform other actions, they can have events associated with them for continuous monitoring by Traksys. These are not configured here, however – visit the Events page to add such features (see section 7 for more details). Page 54 Traksys2000 User Manual 6.2.7 Event Configuration The Traksys Critical Event Framework is configured via this section of the Admin tab. For full details on using this important feature of Traksys, refer to section 7 – the Traksys 2000 Critical Event Framework. Only the basics of the admin display are described here. Filter Used to show only those events relating to a particular resource Event List Those events corresponding to the current filter. Double click any event to edit it Event Filter – With large fleets, there can often be a lot of events that the system administrator is interested in tracking, so Traksys provides an event filter for displaying only those events of interest. Note that all relevant events for the selected resource are shown – displaying events for a particular vehicle, for instance, will show events based on its template, its IO, and all of the statuses on the system, since the vehicle could feasibly deliver any of them at any time. Event List – Here are displayed event ‘cards’, similar to resource cards in the resource list, with details of each event, including the stimulus which will set off the event, and the actions to take should it occur. Page 55 Traksys2000 User Manual 7. The Traksys 2000 Critical Event Framework The Traksys Critical Event Framework is a versatile method for users of the system to trap critical events from their fleet or personnel, and have Traksys automatically execute actions based on user configuration. Using this framework, administrators can create an autonomous system which, for example, notifies supervisors when vehicles move out of hours, or puts vehicles in an emergency state when certain critical statuses are delivered – or any combination of both. The framework will be constantly expanded and updated by Thorcom as new events and actions are identified by internal testing and customer feedback, or as Traksys expands with new features that can take advantage of it. 7.1 Currently Supported Events The framework currently contains support for the following events. • • • • Receipt of AVL (Applies to a vehicle template) – This event is fired whenever AVL is delivered to Traksys from a vehicle with the specified template. The event can be configured to trap AVL received at any time, during a specified period of any day (for example, 12pm – 1pm), or alternatively during a much more specific time frame (for example, any time between midnight Monday and midnight Wednesday). To trap any AVL received out-of hours, for example, a user will need to set up two events: one to trap messages between 5.30 and 11.59pm, and another to trap those between 12.00 and 8.30am (assuming a working day of 8am 5.30pm). He is then free to associate any actions he wishes with those events. Receipt of status (Applies to a status) – This event is fired when any vehicle or member of personnel delivers the specified status code. So, for example, an administrator may configure the system to send a notification message to a maintenance supervisor if staff in the field deliver a ‘Broken Down’ status. IO Connection ON (Applies to an IO connection in a vehicle template) – This event is fired when IO data is delivered by a vehicle carrying the specified connection, indicating that the connection has come ‘on’. For example, a refrigeration vehicle may be configured to enter the Warning state when it signals that its loading doors are open, and revert back to the Normal state when the doors are closed. IO Connection OFF (Applies to an IO connection in a vehicle template) – As ‘IO Connection ON’ but fired when the connection is in the ‘off’ state. Clearly the framework makes heavy use of vehicle templates, so it is recommended that users take full advantage of this feature of Traksys in order to get the most from these events. 7.2 Currently Supported Actions You can specify the following actions to be taken by Traksys when one of the above events is fired. Actions stack in the order in which they are assigned, although you can only have one instance of any one action in a single event (for example, it would be of little benefit requesting a vehicle to change into the Warning state twice). Other than this limitation there is no limit to the number of actions you can assign to a single event - Traksys will simply execute them all in the order they were created. You may, for example, want to send a text message to several people, or a group of personnel, as well as putting a vehicle into the Emergency state. Page 56 Traksys2000 User Manual • • Change State (Applies to the resource which caused the event to be fired) – Vehicles and personnel exist in one of four system states: Normal, Warning, Emergency, and Unheard. The Unheard state is currently monitored in background by Traksys and is not affected by the Event Framework; the other three states can be freely switched between using any events you think are appropriate for your system (see ‘IO Connection ON’ above for an example of stateswitching). Changing state has a direct impact on the visualisation of the resource both in Traksys and on the mapping display, giving users of the system at-a-glance information on the state of their fleet. Send Text Message – This useful tool allows you to deliver a text message containing custom information on the state of your resources, and is an excellent way of keeping people who don’t have direct access to the Traksys display apprised of events on the fleet. A common application is to trap AVL out-of-hours, and deliver warning messages to supervisors, security guards, or whoever else is appropriate, containing details of the vehicle which is on the move. Text messages can contain the name of the resource which fired the event (for example the callsign of the vehicle which is moving), the time of the event, the location of the vehicle at the time the event was fired (very useful when used in conjunction with the Traksys User Gazetteer – for example ‘Exeter Depot’), as well as a small custom message giving extra details (for example ‘Moving out of hours’ or ‘Unauthorised activity’). Messages can be delivered to a single bearer (whether it be assigned to a vehicle or to personnel - though of course you can stack actions to send to multiple people), or more likely to a Traksys group, containing all the relevant recipients, with the added advantage of being able to customise the group without having to change the parameters of the action. In conjunction with a GSM connection, Traksys can send text messages to any mobile phone on the GSM network, making this facility extremely powerful. 7.3 Configuring Events and Actions Events are configured from the Admin screen. Select the ‘Events’ branch of the admin tree to see a list of all events currently in the system, and the ability to Add, Edit, and Delete them as you see fit. You can also double-click an event to edit it. 7.4 Event Display Event Description Actions The event list displays events in the format above. The event description consists of two elements – the name of the event, giving you an indication of the kind of activity which will trigger the event’s actions, and any parameters which apply to the event (none in the case above). The event’s actions are displayed below the event description, in the order in which they will be executed by the system should this event be triggered. Any other items applying to this event will be shown below its actions, such as in the example below: Page 57 Traksys2000 User Manual In Figure 2, the event has been disabled by the administrator, and this is shown in the event list. Note that the event is also ‘greyed out’ to indicate its status. 7.5 The Event List Filter This combo box, situated above the event list, allows you to filter the entries in the event list to show only those events related to a particular resource, or group of resources. Simply select the appropriate entry and the event list will reset to show you those events applicable to your selection. For example, selecting the ‘Vehicle Template Events’ entry will display all events related to the templates in your database, such as all the Receipt of AVL events. Selecting a specific template will show only those events relevant to that template, and therefore to any vehicles based on it. Selecting a status will show the Receipt of Status event for that status if one has been configured. 7.6 Adding an Event and Actions You can only add an event to Traksys on the Events screen (though there are quick links to this screen from other places in the application). To do so, simple click the ‘Add New Event’ button, which will display the following dialog: Current Resource Current Event Event Parameters Action List Page 58 Traksys2000 User Manual If you have previously selected a specific resource in the event filter, then that resource will be displayed as the default in this dialog. Below the resource name is a list of the events available for that resource, selected by means of a drop-down combo-box – note that this box will be disabled if there is only one event type available. Once you have selected an event, that event’s parameter list will be shown in the space beneath. If the event you have chosen has no parameters, then this space will appear empty. Once you have decided on your parameters, you can add actions to the event simply by clicking the Add Action button alongside the action list. Select one of the actions available from that dialog, and configure the action, as follows. 7.6.1 Change State Action Current Action Available States By adding this action to your event, you will cause Traksys to change the state of whichever resource generated the event. For example, if a vehicle had delivered a status, and you had configured the receipt of that status event with this action, then the vehicle would be switched to the state you specify. The vehicle is left in this state indefinitely, or until a further event causes another state change. You cannot reset the state of the resource manually. Resources can exist in one of five states at any time: • • • • • Normal – The vehicle appears with its normal icon on the mapping display and Traksys control panel. Warning – The Warning version of the vehicle icon is displayed on the map, and the resource card in the resource list turns green to highlight the resource’s state. Emergency – The Emergency version of the vehicle icon is displayed on the map, and the resource card turns red. User-defined – Certain fleets may have special configurations which include user-states corresponding to statuses on the system. These are currently provided as special options at the time of sale. Unheard – This state is constantly monitored by Traksys in background. If a vehicle doesn’t send any data to the control centre in the specified minimum period, the vehicle is automatically declared ‘Unheard’, and its icon is greyed out on the map. Note: There will be no user-defined states on your system. This option is available only on selected systems, and will be incorporated into the general Traksys interface at a later date. Page 59 Traksys2000 User Manual 7.6.2 Send Text Action Current Action Connection to Use Message Content Destination If an event is triggered which incorporates this action, Traksys will use the connection specified (one of the connections in your connection list) to send a text message to the appropriate destination. Because you have to select the connection before the event is executed, it’s important that you have configured your connections correctly and in the manner in which you expect Traksys to run in the future, before adding any events; should you change your connections after configuring this action, Traksys may try to send the text message via the wrong bearer. The message is only tried once; if it fails (for example because the device normally attached to this connection has been removed or has a fault), it will not be retried. It is therefore very important that connections intended to be used for these messages are kept in good order, otherwise you may miss a critical notification which you would otherwise have received. The content of the text message consists of one or more of the options in the dialog, separated by asterisk pairs. • • • • User text – You can enter up to 50 characters of custom text which will be appended to the end of the message. You would normally relate this text to the event which has triggered the text message, as above. Name of resource – The callsign of the vehicle or member of personnel which triggered this event. Location of resource – If the resource in question is a vehicle, Traksys will include the current location of the vehicle as determined by its gazetteer; this includes user gazetteer locations if any have been configured – for example, ‘Exeter Depot’. Time of event – The time at which this event was triggered. This is especially useful on GSM networks where your text message may be stored until you are in a position to receive it. In the above example then, a typical text message may look something like this: Vehicle 4281675**Thu 20/12/01 11:07**Exeter Depot**Unauthorised Activity! The message will be cropped to the maximum number of characters available on the connection which sends it; for example, on a GSM connection, the maximum text message size is 160 characters; on Tetra, it is 120. Page 60 Traksys2000 User Manual The text message can be sent to any bearer currently configured in your database. To send to a specific bearer, select the To bearer option, and choose your destination from the drop-down list (this list will also show you the current assignment of each bearer, if it is assigned to a vehicle or personnel). Alternatively, you can choose a single group from your database, in which case Traksys will send the message to each member of the group in turn, assuming they have a bearer assigned to them at the time the message is sent. If you intend to send a message to multiple recipients, the recommended method is via a group, though you are free to add multiple Send Text actions to the same event, thereby achieving the same thing. The advantage of the group approach is that you can change the members of the group to reflect changes in your staff, without having to update the action as well – Traksys will simply send to whoever is in the group at the time of the event. Important Note: Because this action will cause Traksys to autonomously send messages over networks on which you are likely paying per-message, it is extremely important to exercise the proper caution when adding this action to your system. For example, if you were to inadvertently add a Receipt of AVL at any time event to an oft-used vehicle, Traksys will send a text message on every AVL it receives, which may cause tens or hundreds of messages to be delivered before you discover the mistake and are able to correct it. Even events which you don’t expect to be triggered very often – such as critical events indicating the theft of a vehicle, for example – may still deliver many notifications, and you should be aware of the ramifications. The ‘disable event’ function as shown in the figure above is a useful way to stop further executions of that event if you have subsequently been made aware of the activity which initially triggered it. Thorcom Systems Ltd. can accept no responsibility for a misconfigured system sending unintentional messages on a pay-per-message network. Page 61 Traksys2000 User Manual 7.7 Adding an Event Which Already Exists If you use the Add Event Dialog to add an event which already exists in your database (with the same parameters, should any apply), Traksys will add the actions configured in the new event to those already in place on the existing event, assuming equivalent actions aren’t already in place on it. The new actions will be appended to the existing action list, and will therefore be executed after those already configured. 7.8 Event Collisions and Overlap It is possible to configure events which overlap and will therefore both be executed by the same activity on the system. For example, consider two On Receive AVL events, one configured to fire between 5 and 10pm, and another configured to fire between 8pm and midnight. An AVL report which arrives at 9pm will trigger both of those events, which may result in duplicate actions. Traksys will alert you if you try to add an event which is already configured – however, for those events which have parameters, the parameters must exactly match for this alert to be triggered. In the case of the two events above, Traksys would consider the parameter differences to mean that the events were distinctly different, and would not warn you when adding them. 7.9 Event Ordering Normally, the issue of the order in which events occur should not be problematic, but occasionally you may configure different events to act on the same resources, and in those cases you should be aware of the priorities of the events and their actions. For example, consider a situation where you configure a Receipt of AVL at any time event to switch the vehicle state to Warning, as well as an IO Connection ON event for the same vehicle (or rather, its template) which switches the vehicle state to Emergency. On MCU500 systems, IO can be delivered inside an AVL report, so how does Traksys decide which event to trigger first? In practice, Traksys fires events in the following order: AVL IO Status This means that status events take precedence over IO events, which in turn take precedence over general AVL events. Page 62 Traksys2000 User Manual 8. Analysing Your Fleet – Traksys Reports Underlying the Traksys application is a full relational database with a host of archiving and analysis tools built in. Many of these are used exclusively by Traksys - for example to query an AVL replay - but some of the more advanced tools are available to the operator by way of the Reports page of the control panel. One of the main features of the database is to maintain a complete archive of all AVL, text, and status messages sent into or out of the system. In particular, the AVL archive is very detailed, including not only the position, speed, bearing, and so on of the vehicle, but whatever ancillary data was available in that report as well, such as the reason for the update, IO state, and so on. The reporting tools available in Traksys make heavy use of this information to provide useful trend and activity analyses from your database, allowing you to judge the efficiencies gained through the use of a vehicle location system, and where best to focus your efforts in the future. 8.1 Using the Report Generator The report generator requires a fully installed copy of Microsoft Access® to work, since it makes extensive use of the report and query-building tools of that product. You will receive an error if you attempt to run a report without first install that program. When printing, Access uses the current default printer, obviating the need for the user to complete any print setup options from Traksys. The default printer is selected from the Printers control panel, available via the Start menu on Windows2000. 8.2 The Journey Report This report delivers a thorough breakdown of the activity of a single vehicle in the time period specified. This includes all AVL received, all statuses received, all text messages received, and all text messages sent. A sample journey report is shown below. Resource Choose which resource to query in the Traksys history Time Frame Specify the same date in both to query a single day Run Query Execute the query on the database and wait for the results Print Report Send the finished report to the printer Page 63 Traksys2000 User Manual Page 64 Traksys2000 User Manual Resource – Lists all the vehicles in your fleet. Select the vehicle you are interested in before running the query. Time Frame – Click either drop-down list to display a date/time dialog from which you can specify the timeframe you’re interested in. You must specify a ‘To’ date which is the same as, or later than, the ‘From’ date; in the former case, specifying two identical dates will query the database for a single day’s traffic. Run Query – It may take a few seconds to complete the querty, especially on large histories where the system has been running for a significant amount of time. Once the query is complete, the results are displayed, or a warning pops-up informing you that no relevant data was found in the period specified. Print Report – Click this button to send the report to the printer. Check ‘Using the Report Generator’ above if you encounter any problems. 8.3 The Visit Report The Visit Report is designed to be much more focused than the Journey Report, and allows the operator to query the database for time spent ‘with customer’ in the case of vehicles which must make many different stops in their normal day-to-day running (for example in an electrical repair company). Traksys identifies specific AVL data within the history of a vehicle and extrapolates the different visits made during the time specified. To generate this report, Traksys makes two assumptions: first, that the start of a customer visit is flagged by an ‘Ignition Off’ AVL report, and second, that the end of the visit is similarly flagged by an ‘Ignition On’ AVL report. In order for the report generator to succeed it is imperative that your system has these reporting types activated in the ‘Power Management’ section of your MCU500 configuration. Where reports may be missing or incomplete, Traksys will assume that the last known position is the relevant location of the vehicle. Parameters for the Visit Report are identical to those for the Journey Report above – however, the number of records returned will always be much smaller for the same period. Page 65 Traksys2000 User Manual Traksys2000 Visit Report Vehicle ID: Unknown Reg. Date: Arrived Vehicle 337596 16 September 2003 Departed Dist Tot (miles) Location Trav Site 08:23 AM 0.8m NE of Thorcom Systems 0h 0m 13h 0h 0m 1.68 08:29 AM 12:37 PM Thorcom Systems 0h 5m 4h 8m 4h 14m 0.87 12:47 PM 01:35 PM 1.3m S of Thorcom Systems 0h 10m 0h 48m 0h 58m 1.68 01:40 PM 01:52 PM WORCESTER 0h 4m 0h 11m 0h 16m 1.43 02:00 PM 03:17 PM Thorcom Systems 0h 8m 1h 17m 1h 25m 3.79 03:21 PM 03:28 PM Mike's House 0h 3m 0h 7m 0h 10m 0.75 03:31 PM 04:52 PM Thorcom Systems 0h 3m 1h 21m 1h 24m 0.43 Mike's House 1h 11m 0h 0m 0h 0m 0.99 1h 47m 21h 8h 29m 11.62 06:04 PM Daily Totals Page 66 Traksys2000 User Manual 9. Traksys Options The Options dialog is available by clicking the button in the top-right of Traksys Admin View. It displays a straightforward multi-page dialog with a host of configuration settings for the application as a whole, rather than your fleet, which change the look and feel of the application, and the assumptions it makes while running. 9.1 General Options Startup - Send the last known position of all the vehicles in the database to the map – You will normally want to keep this option checked at all times. It causes Traksys to deliver the current positions of all resources to the map when the program starts up, bringing your mapping display in line with your database as quickly as possible. Miscellaneous – Auto-switch to Resource View when centering or tracking a vehicle – If selected, activating a control which manipulates the mapping in this way will cause the Traksys control panel to be reduced to Resource View, if it isn’t already. 9.2 Database Options The options on this page should not normally be changed unless under the supervision of Thorcom systems. These options control Traksys2000’s connection to the configuration and historical AVL database which underlies the program. Users have the option of running a local database, which is added to the Traksys installation directory automatically when the program is installed, or a remote database running on a more powerful platform such as Microsoft SQL Server 2000 or MySQL on Unix. Data Source – These buttons control whether Traksys connects to the local database or a remote database elsewhere on the network (though it may be running on the same machine as well). At install time, the local database is selected by default. Should you require the use of an external database server, select ‘Remote database’ and ensure that a valid ODBC DSN has been added to your system. Thorcom Systems will normally add this DSN before delivery of the Traksys PC. Database – Select either the ‘live’ Traksys database, or a previously archived database if you are using a remote connection. If you have archived a database snapshot and then restored it to your remote database server under a different name (for example ‘Traksys_Archive_280404’), you can select the archive from the ‘Archive’ combo-box. This combo will display all of the Traksys databases currently installed on your server; archives must, however, have a name of the form ‘Traksys_...’ where ‘…’ can be anything the administrator of the system feels is relevant. After a reboot, Traksys will connect to the selected archive from which you can then run any reports as normal; note that Traksys will not connect to any configured AVL sources if it is connected to an archive. 9.3 Auto Config Options Unconfigured Vehicles – These options control how Traksys should deal with AVL data which is received via a bearer which isn’t yet part of the database – i.e., the program’s auto-configuration. Turning these options on will reduce the amount of manual configuration required of the system administrator when the software is first installed (though some follow-up changes may be required once the vehicles have been added to the database). Page 67 Traksys2000 User Manual • Ignore unconfigured vehicles – Traksys will take no action when a new vehicle is heard – though a warning message will be displayed in the event log to indicate receipt of the data • Fully add the vehicle and its bearer to the database – Traksys takes full responsibility for adding both the new bearer, and a vehicle to which it can be assigned, to the database. It uses simple default values for elements such as the vehicle callsign (which will be based on the bearer number), but the administrator is free to change these at a later date For example, Traksys receives an AVL report on a new bearer, 0123. It adds a new bearer resource to the database with the number 0123, then adds a new vehicle with the callsign ‘Vehicle 0123’, assigns the new bearer to the vehicle, and finally applies the AVL data to it, causing the vehicle to appear on the map. A further option open to the system administrator here is to specify a template to use for the new vehicle: If this option is selected, choose one of your existing vehicle templates from the drop-down list, and Traksys will create new vehicles by automatically basing them on this template. If not, then vehicles are added to the database without a template, and will appear on the map as question-mark icons indicating that Traksys does not know which vehicle type to use as an icon (note that such vehicles can be reconfigured at any point). • Add an unconfigured vehicle to the session – Similar to the option above, but only temporarily adds the vehicles without user intervention. New vehicles appear both in the resource list and on the map, but ‘Unconfigured’, meaning that they are part of the system only until Traksys is next restarted – i.e. part of the current session only. Once added to the session, they can be Imported permanently into the system by visiting the Unconfigured Vehicles branch of the database tree, and clicking the Import button: This will add the vehicle permanently to your database exactly as if the ‘Fully add..’ option had been selected in this option dialog. Unconfigured Status – Similar in many respects to the options open to you with unconfigured vehicles, this option causes Traksys to automatically add any statuses that it hears which aren’t yet configured. Statuses are added with very simple descriptors – ‘Status 26’ for example - and should be reconfigured with their correct meaning at the earliest opportunity. This kind of auto-configuration option reduces the need for system administrators to have access to every detail of their fleet’s operation, since you will quickly see exactly which statuses are actually used by the system. 9.3 Logging Options Page 68 Traksys2000 User Manual Event Log – Enable Binary Event Log – The binary event log is maintained separately from the normal event archive, and records the same events in raw binary format, so that Traksys can spool previous events back into the system if configured to do so (see next option). Event Log – Load current log on start-up – Assuming that a binary event log is being maintained, Traksys can be programmed to reload this log whenever it is restarted. The advantage of this is that you can pick up your monitoring of the system where you left off, without losing the previous session’s activity. Restored logs are displayed in the Activity window in the View page, but not in the primary Event Log screen. Diagnostic Logging Levels – Using these sliders, you can set the logging levels of the system and comms logs, which maintain diagnostic records of the activity in the program. This information is maintained in human-readable format in the ‘Sys Log’ and comms log (named after the connection they represent) directories, and may be requested by Thorcom if you have a query on the operation of your system at a later date. The higher level you set, the more information is recorded, and with logging levels set to their highest rate on busy systems, you may quickly find that your logging directories exceed many megabytes in size. You should feel free to delete (or archive to other mass storage media such as CDR’s) any log files you want to, so long as you haven’t been specifically requested not to do so. Deleting the files will cause no damage to the system. 9.4 Display Options This page lets you customise the amount of information displayed by Traksys in the resource list, for both vehicles and personnel. 9.4.1 Vehicle Display Options Each of the options on the right corresponds to the equivalent display on the left. In this example, all of the display options are active – but on large systems with detailed configurations, this can quickly mean that the resource list becomes too large to manage. • State – The vehicle state, Operating Normally, Warning, Emergency, or Unheard. Page 69 Traksys2000 User Manual • • • • • • • Template Name – What template the vehicle is based on Assigned Bearer – Which bearer is assigned to this vehicle Current Status – The last status received by this vehicle and the time it arrived, or ‘No Statuses Received’ Current Crew – If any personnel are assigned to the vehicle, they will appear here Current Position – The last position report and the time it arrived, if any have been received Current IO – A list of all the inputs and outputs on the vehicle template this vehicle is based on, and their current states Attributes – A list of all the attributes currently selected for this vehicle. 9.4.2 Personnel Display Options • • • • • • State – The current state of the member of personnel, with the same potential states as a vehicle. The personnel may inherit their state from their assigned vehicle, depending on the configuration of the system Template Name – The personnel template this person is based on Assigned Bearer – Their assigned bearer, if any Current Status – The last status received for this person, and the time it arrived Vehicle Assignment – The vehicle this person is assigned to, if any Attributes – The attributes which have been applied to this person 9.5 User Gazetteer Options Traksys provides the administrator with the ability to add customised locations to the gazetteer which are specific to their own fleet – depots, HQ’s, noteworthy (or all) customers, and so on. In order to add a user feature all you will need is their postcode. Position Raw position co-ordinates for this location Feature Name A meaningful label for this deature Page 70 Traksys2000 User Manual The gazetteer list shows your existing user features. You can edit or delete these features at any time using the appropriate buttons. To add a new feature, click the Add button, which will display the Add/Edit Feature Dialog, shown below. New Location Name Will appear with vehicles that arrive at this location Co-ordinates You will rarely have access to these – use the postcode look-up instead Postcode Look-up Query the postcode database for the co-ordinates of your location Location Name – Describes the location – as in the example above, ‘Bristol Depot’. This name will appear in the Traksys resource cards and noticeboard as the location of any vehicle arriving at these co-ordinates. Co-ordinates – Raw latitude and longitude of the geographical position of your feature, the ultimate requirement of this dialog. While it’s feasible that you may have access to such information, administrators will usually take advantage of the supplied postcode lookup to provide the co-ordinates of any UK postcode. Postcode Look-up – Enter any normal UK postcode and click the Query button to interrogate the postcode database for that geographical location. The co-ordinates will be fed into the latitude and longitude fields once the look-up is complete. Note: Ensure that FleetTracker is running before using the postcode look-up feature. 9.6 SVLP Server Traksys2000 can be configured to act as an AVL gateway on installations which include several other GIS/mapping or control clients. For this purpose it emits data in the Simple Vehicle Location Protocol (SVLP), Thorcom’s own vehicle location protocol which is used by many large and high-profile AVL and mobile data systems in the UK. The definition of this protocol is contained in Thorcom document 10000286 (Simple Vehicle Location Protocol v4.04). Traksys2000 supports SVLP version 4.04 and contains the full range of authentication and command/response functions described in the v4.04 specification. Activate the SVLP server – If the server is not activated, no clients will be able to connect to Traksys2000. The server is activated by default. Page 71 Traksys2000 User Manual Port – The TCP port number from which the SVLP will be emitted. Clients will need to launch a TCP connection to this port in order to log in and receive SVLP data. User name – The username which must be offered by the client machines during the SVLP authentication/login phase. Password – The password which must be offered as part of the login phase (enter this password twice for verification). Multiple clients can connect to the SVLP server using the same credentials. Time-stamp – One of the configurable options available in SVLP v4.04, the time stamps contained in the SVLP records can be set to either ANSI time_t or SVLP time formats. Page 72 Traksys2000 User Manual 10. Troubleshooting and FAQ Q1: Why are none of the controls enabled for my vehicles? A: You have either not yet configured any connections (see section 6.1), or the connection(s) you have are not operating properly. Check your hardware and cables to make sure that your fixed mobile is switched on and correctly attached to your PC. In addition, the vehicles in question may be based on a template which does not have the MCU500 property – see section 6.2.1 for more details. Q2: Why do I get an error when trying to use the report generator? A: The report generator requires a full copy of Microsoft Access® to be installed on the same PC as Traksys, and uses the default printer to output the reports. Make sure you have the program, as well as a functional printer, installed on your Traksys PC. Q3: FleetTracker reports a problem with its ‘HASP’ key. What’s that? A: This is how FleetTracker refers to its hardware dongle, which must be attached to your PC’s parallel port before FleetTracker will run. You should have received this dongle with your Traksys installation package. Q4: There are vehicles in Traksys, but none on the map. How is that possible? A: If you have run FleetTracker without its dongle, the number of vehicles allowed on screen is reduced to zero. To fix this, open the Edit | Preferences | Symbols dialog and increase the number of vehicles to an appropriate figure. You must ensure that you close FleetTracker independently of Traksys (i.e. click File | Exit in FleetTracker) for this change to stick. Q5: Why am I not getting any IO information with my AVL? A: It’s likely not configured on your MCU500 – use MPP to check the configuration of your mobiles. Q6: I’m requesting output information but nothing’s coming back. Why not? A: You are probably receiving the correct IO data back from the MCU500, but if it is identical to Traksys’ existing IO record for that vehicle, no events will show up in your log. Q7: Why are postcode lookups failing? A: Make sure FleetTracker is running when you make the lookup. Q8: AVL is being shown in the event log but none of my vehicles are moving on the map. How come? A: The possible cause of this error is a change to Traksys2000’s connections which has not been fed back into the bearer configurations. See section 6.2.3 – Bearer Configuration. Page 73 Traksys2000 User Manual 11. Glossary Admin View – The Traksys display state in which all functions are available. Only administrators will have access to certain areas of Admin View. AVL – Automatic Vehicle Location, a combination of mobile equipment and control centre workstations which allow vehicles to be tracked in real time across a graphical mapping display. Bearer – A Traksys resource representing a single radio on your fleet. Uniquely identified by its radio ID – e.g. ‘4521917’. Control Panel – The Traksys control panel is the Traksys dialog that floats above the mapping display. Can be displayed in Resource or Admin views, or alternatively minimised to the systray. Critical Event Framework – Continuous event monitoring which causes Traksys to take actions based on activity on the fleet, with no intervention required from the user. For example, Traksys may be programmed to notify supervisors when a vehicle moves out of hours. Database – The configuration and historical data underlying the Traksys software. Datalog – A feature of the MCU500, which can store failed AVL updates for later retrieval, reducing the impact of poor network coverage or frequent removal of the radio from the vehicle. GSM – National data and voice network used by mobile phone operators such as Orange and Vodafone. MCU500 – Thorcom’s in-vehicle AVL and telemetry product to be used in conjunction with Traksys2000; the ‘mobile’ end of the AVL system. MDS700 – Thorcom’s own mobile data and vehicle location radio network for private systems. MPP – The Modem Personality Programmer software, used to configure the AVL ‘rules’ which govern the automatic generation of data from the MCU500, as well as other MCU configuration options. Paknet – National packet data service run by Vodafone. Personnel – Members of staff that form part of your fleet. May have bearers assigned to them and can receive text messages. Personnel never send AVL. Resource – An object in your database – for example, a vehicle, personnel, status, event, and so on. Resource View – Traksys display in which only the vehicle and personnel cards, and the most oftenused mapping and AVL controls, are visible. RLC – Thorcom radio modem product series, similar to the MCU500. SVLP – The Simple Vehicle Location Protocol, a publically available, Thorcom-designed text protocol for delivering AVL information to client workstations. Telemetry – Data sent from the MCU500 other than AVL, such as the state of its digital IO. Page 74 Traksys2000 User Manual Template – A selection of capabilities differentiating one resource from another. Vehicles and personnel can be based on templates – for example ‘Refrigeration Truck’ or ‘Supervisor’. Tetra – National UK data and voice network run by operators such as Dolphin and BT Airwave. UI – User interface, the controls and options available to the user to observe activity on - and control Traksys and the fleet. Vehicle – A Traksys resource representing a single mobile, which may actually be one of several types of vehicle, including motorcycles, vans, etc. Vehicles must always have bearers associated with them to use AVL. Page 75