1
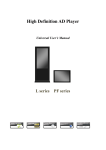
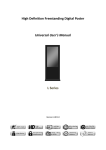
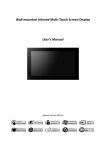
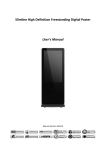
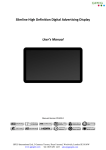
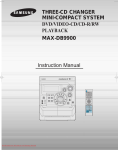
Standalone High Definition Media Player User’s Manual Manual Version PPHD1.0 Standalone High Definition Media Player Our Full Product Range Page 1 Standalone High Definition Media Player Safety Instructions Please keep the unit away from any heat sources. Place the unit in a stable and well‐ventilated place. The holes or openings on the unit are designed for ventilation. Do not cover or block the ventilation holes or openings Do not attempt to repair this product yourself! Improper disassembly of the product may invalidate the warranty and lead to possible danger If you have a problem that cannot be solved using the "Troubleshooting" guidelines, please contact your supplier. Page 2 Standalone High Definition Media Player Quick Start Guide This section of the guide is to allow quick set up and use of the unit. Please refer to the main part of the User Guide for full information on use of the unit. Please follow the steps detailed below: 1. Unpack unit and place in desired location, along with your display. 2. Take the power lead from the accessories bag, insert the lead into the unit and connect to mains outlet. The unit will power ON automatically. 3. Connect the unit to the display via the HDMI lead included and power ON the screen. 4. You may need to change the screen input source to HDMI – please refer to you screen user manual for details of how to do this. 5. Collect the files you wish to display and make sure they are supported by the unit (see Section 2.2) 6. On a PC copy the files you want to play onto an SD memory card. These should be in the root directory (without putting them into a folder). 7. Insert the SD card into the slot inside the lockable compartment. 8. Your files will now play using the default settings. Figure 1 Position SD Memory Card Slot Page 3 Standalone High Definition Media Player Contents: 1. 2. Introduction ................................................................................................................................ 6 1.1 Box Contents ................................................................................................................... 6 1.2 Product Overview ............................................................................................................ 6 1.3 Remote Control ............................................................................................................... 7 1.4 Replacing the Remote Control Battery ........................................................................... 8 1.5 Menu Operation .............................................................................................................. 9 System Operation ..................................................................................................................... 14 2.1 System Setup ................................................................................................................. 14 2.2 Supported Media Files .................................................................................................. 15 2.3 Steps to Load Media Files ............................................................................................. 16 2.3.1 Loading Media Directly to SD Memory Card .......................................................... 16 2.3.2 Loading Media via USB Drive ................................................................................. 16 2.3.3 Adding Scrolling Text .............................................................................................. 18 2.4 3. Advanced Guide ........................................................................................................................ 21 3.1 4. Connections .................................................................................................................. 20 Main Menu .................................................................................................................... 21 3.1.1 Add Media Files ...................................................................................................... 22 3.1.2 Editing Media Items ............................................................................................... 25 3.1.3 Deleting Items ........................................................................................................ 25 3.1.4 Saving ..................................................................................................................... 25 F.A.Qs and Troubleshooting Guide ........................................................................................... 27 4.1 How do I play PowerPoint presentations? .................................................................... 27 4.1.1 Option 1 (for plain slides with no animation): ....................................................... 27 4.1.2 Options 2 (for presentations with animation): ...................................................... 27 4.2 Video Conversion .......................................................................................................... 28 4.2.1 Format Factory ....................................................................................................... 28 4.2.2 HD Video Converter Deluxe ................................................................................... 30 4.3 My Remote Control does not appear to be working .................................................... 31 4.4 My media files will not update via USB ........................................................................ 31 Page 4 Standalone High Definition Media Player 4.5 My music isn’t playing over my image slide show. ....................................................... 35 4.6 My scrolling text is not being displayed ........................................................................ 35 Table of Figures Figure 1 Position SD Memory Card Slot ............................................................................................... 3 Figure 2 Product Overview ................................................................................................................... 6 Figure 3 Connection to Screen ........................................................................................................... 14 Figure 4 Screen Connections.............................................................................................................. 20 Page 5 Standalone High Definition Media Player 1. Introduction Congratulations on your purchase of our product. Please read carefully and follow all instructions in the manual before first use. The product should not be exposed to liquids dripping or splashing and no objects filled with liquids, such as vases, should be placed on the product. For user convenience, a number of operations can be performed through the remote control. Attention: 1. Do not change any default setting when it is unnecessary. 2. Keep the product far away from water during installation and use. 1.1 Box Contents 1xStandalone High Definition Media Player 1xPower Cable 1xHDMI Cable 1xSD Memory Card 1xCD (User Manual and Software) 1xRemote Control 2xKeys 1.2 Product Overview Figure 2 Product Overview Page 6 Standalone High Definition Media Player 1.3 Remote Control Button Function POWER Power ON or OFF MUTE Disable audio ⓿‐❾ Numbers for time input HOME Return to menu screen ← Left navigation button ↑ Up navigation button → Right navigation button ↓ Down navigation button OK Confirm selection RETURN Step back VOL‐ Decrease audio volume VOL+ Increase audio volume PLAY Start displaying content STOP Stop displaying content Page 7 Standalone High Definition Media Player 1.4 Replacing the Remote Control Battery 1. Slide off the battery cover 2. Remove the used batteries 3. Insert the new batteries with their terminals corresponding to the indicators 4. Slide the cover back on Page 8 Standalone High Definition Media Player 1.5 Menu Operation When first powering on your unit your opening On Screen Display should look like this: LOCAL HDD USB Device Smart Card Setup Using the remote control, scroll down to “Setup” and press OK. This will bring you to the main menu or “Setup Menu” which includes the following sub‐menus: Setup Menu System Video Audio Photo Subtitle Date/time Power On/Off1 Power On/Off2 Power On/Off3 Page 9 Standalone High Definition Media Player System: Basic system settings can be changed in this menu. Language Menu Rotate Video Rotate Display Time Playlog Restore Default System Info English 简体中文 繁體中文 Español Français Deutsch 日本語 韓國語 Normal Rotate 90 Rotate 270 Normal Rotate 90 Rotate 270 Rotate 180 On Off On Off Yes No V3.2_AdvPlayer Video: Resume Play Auto Detect Video Output On Off On Off HDMI_1080P_24HZ HDMI_1080P_50HZ HDMI_1080P_60HZ HDMI_1080I_50HZ HDMI_1080I_60HZ Audio: Audio Output Normal SPDIF Page 10 Standalone High Definition Media Player Photo: Alter properties such as how long images display for, transition effects and you can also activate background music to play over the photo slide show by selecting “Folder” or “Play List”. Slide Show Timing 3 Seconds 5 Seconds 10 Seconds 20 Seconds Transition Effect Default Setup Fade In Fade Out Persian Blinds H Persian Blinds V Slide Up Slide Down Slide Left Slide Right Stretch Up Stretch Down Background Music Close (Off) Folder (On) Play List Page 11 Standalone High Definition Media Player Subtitle: Here you can toggle On/Off and change the settings for the scrolling text such as text colour, background colour, speed and size. Subtitle On Off Foreground Red Green Blue White Grey Background Red Green Blue White Grey Alpha (Transparent) Subtitle Speed Fast Middle Slow Font Size Big Middle Small Date/time: To use any date/time related functions (clock, power timer etc.) you must set an accurate time and date in this sub menu. Time 00:00 Date 0000‐00‐00 Page 12 Standalone High Definition Media Player Power On/Off1 These sub menus are to control the power timer. If all are turned off (set as default) the unit will run continuously. You can set up to three On/Off times and choose what days you wish them to be active. Power On Switch On Off Power On Time 00:00 Power Off Time 00:00 Power On Repeat Sun Mon Tue Wed Thu Fri Sat Power On/Off2 Power On Switch On Off Power On Time 00:00 Power Off Time 00:00 Power On Repeat Sun Mon Tue Wed Thu Fri Sat Power On/Off3 Power On Switch On Off Power On Time 00:00 Power Off Time 00:00 Power On Repeat Sun Mon Tue Wed Thu Fri Sat Page 13 Standalone High Definition Media Player 2. System Operation 2.1 System Setup Once your unit has been plugged into the mains it should have power (there is no On/Off button or switch). Next you will need to connect it to a screen. To do this you can use the HDMI cable provided to connect the unit to your display like so: Figure 3 Connection to Screen Provided that your screen has been powered On, it should now display the unit’s on screen display. You may need to change the screen input source to HDMI – please refer to you screen user manual for details of how to do this. You are now ready to start loading and arranging your content. Page 14 Standalone High Definition Media Player 2.2 Supported Media Files Video Containers: MP4, AVI, VOB Codecs: DIVX, XVID, MPG, MPEG1, MPEG2, MPEG3, MPEG4 Image JPEG Audio MP3 1. Supported video files include: MP4, AVI, VOB, DIVX, XVID, MPG, MPEG1, MPEG2, MPEG3, MPEG4. This unit does NOT support MSVC/CRAM, MP42, GMC, IV32, RLE, cvid, VC1, RV20 and WMV. 2. Supported audio file: MP3. This unit does NOT support Sony ATRAC3, DTS, WMA, AAC, AC3, Dobly HD. 3. Supported image file format is JPEG. Video and image files should be a maximum 1920x1080 resolution (16:9 aspect ratio). Page 15 Standalone High Definition Media Player 2.3 Steps to Load Media Files 2.3.1 Loading Media Directly to SD Memory Card Note: If it is your first time using the unit you must use this method to test the system and ensure that everything is working properly. If you replace the SD card you must do this again. 1. Insert blank SD card into your computer. 2. Copy the files you want to play on to USB drive in the root directory (without putting them into a folder). 3. Take the SD card out from your computer and insert it into the unit (see figure 4). 4. Your files should now play alphabetically in a continuous slideshow. 2.3.2 Loading Media via USB Drive Note: If it is your first time using the unit you must first load some media files using the method of loading your files directly onto an SD memory card (section 2.3.1) to test the system and ensure that everything is working properly. 1. Insert blank USB drive into your computer. Page 16 Standalone High Definition Media Player 2. Create a new folder and name it “Copy” (this will contain the media files you wish to display). 3. Create a new blank text document (.txt file) and name it “copy” (the presence of this file commands the unit to copy the new files). 4. Within the “Copy” folder create a new blank text document (.txt file) and name it “1” (the presence of this file will delete the contents of the SD card). 5. Now copy the media files you want to play into the “Copy” folder of the USB drive. Page 17 Standalone High Definition Media Player 6. Take out the USB drive from your computer and insert it into the unit (see figure 4). 7. The existing files on the SD card will now be deleted before your new files are copied. 8. Your files should now play alphabetically in a continuous slideshow. 2.3.3 Adding Scrolling Text To add scrolling text you must create a text document (.txt file) containing your scrolling message. If you are loading the files directly to the SD card you must place this document in the root directory like so: If you are updating your unit via USB drive then the “scroll.txt” document must be placed in the “Copy” folder, like so: Page 18 Standalone High Definition Media Player When you update the unit, the text contained in the “scroll.txt” file will move from right to left along the bottom of the screen, over your media files. To toggle On/Off and change the settings of the scrolling message (such as size, speed and colour) you must access the “Subtitle” menu from the main “Setup” menu screen. Page 19 Standalone High Definition Media Player 2.4 Connections Video In (AV) – Composite Signal Connection HDMI – High Definition Multimedia Interface Signal Connection USB – Universal Serial Bus Port SD – Secure Digital Card Reader Figure 4 Screen Connections Page 20 Standalone High Definition Media Player 3. Advanced Guide Although this unit can operate without using any additional software, for more advanced functions and improved overall control you can use the Standalone Media Playlist Editor Software. Ensure that you copy the scheduling software (on the CD provided) to your computer’s hard drive. 3.1 Main Menu On opening the application you will be greeted by the software interface: Page 21 Standalone High Definition Media Player 3.1.1 Add Media Files Note: For compatible file formats please refer to 2.2 Supported Media Files. You must start by adding the files you wish to display to your playlist, the order can be changed afterwards. Video and audio cannot be added to the same schedule; you can either produce a playlist of photos with background music or a playlist of photos and videos. Adding Images Click “Add Picture” ( ) > Click “Browse” and locate and select files > Enter a duration time > Click “OK” > Image name appears in Schedule along with duration time. You can select multiple image files at once to add to a schedule by holding “Control” on your keyboard. You can move each item up or down in the playlist by using the arrow buttons on the right hand side once they have been added. Adding Audio Click “Add MP3” ( ) > Select Schedule > Click “Browse” and select MP3 file Page 22 Standalone High Definition Media Player > Click “OK” > MP3 Appears in Schedule. Note: You must add audio files after all image files. Adding Video Click “Add Video” ( ) > Select Schedule > Click “Browse” and locate and select Video files > Click “OK” > Video appears in playlist. Note: You cannot add Videos and MP3 audio files in the same schedule. Page 23 Standalone High Definition Media Player Adding Scrolling Text Click “Add Scroll Message” ( ) > Input the text that you wish to scroll OR > Import .txt file with scrolling text content by clicking “Browse” > Search for and select the .txt file containing the text that you wish to display. > Click “OK” > “Scroll Message” will now appear at the bottom of the interface. To toggle On/Off and make further changes to Scrolling text settings go to the main menu of the On Screen Display and select the “Subtitle” menu. Page 24 Standalone High Definition Media Player 3.1.2 Editing Media Items To edit the duration time of an image, highlight the file in the play list, then: Click “Edit” ( ) > Enter a duration time > Click “OK” > Image name appears in Schedule along with the updated duration time. To change the order of your media first highlight the file in the playlist and then using the Up and + Down buttons ( ) place the file where you want it to appear. 3.1.3 Deleting Items To delete items within a playlist, highlight the file in the play list and click “Delete” ( ) ‐ located on the right hand side of the application. The item will be removed from the playlist. 3.1.4 Saving Note: Before saving please ensure location drive is empty. Under “Save to Disk” there are 2 options, USB and SD. If you are updating your media files via Page 25 Standalone High Definition Media Player USB drive click on “USB” ( ). However, if you are saving directly to an SD card then click on ). “SD” ( > Click “Browse” and select the top level of the USB drive or SD card as the save location > Click “Save”. Page 26 Standalone High Definition Media Player 4. F.A.Qs and Troubleshooting Guide 4.1 How do I play PowerPoint presentations? 4.1.1 Option 1 (for plain slides with no animation): You can save the PowerPoint presentation as a JPEG File Interchange Format (.JPG). Microsoft PowerPoint software allows the user to do this 1) Create or open a PowerPoint presentation. 2) Click File >Save As 3) Enter a File name 4) Click on “Save as type” scroll down and find the file extension “JPEG file interchange format”, as shown in the image below. 5) Click Save. 6) A message will appear asking if you would like to save all slides as JPEG’s 7) Once you have selected your option, The JPEG images will be saved and are ready to use within a playlist or to upload to a storage device. Note: For the best portrait resolution, you can use this PowerPoint Page Setup: Width 38cm; Height 24cm (16:10 Ratio) 4.1.2 Options 2 (for presentations with animation): You can convert the PowerPoint presentation to a MPEG video clip. For the best display quality you should use the MPEG2 format which gives the best display quality. We suggest that you use the following software: Software Name: Wondershare PPT2DVD Web link: http://www.ppt‐to‐dvd.com/ppt2dvd/overview.html : Select Video Format: PowerPoint to MPEG2 Video Settings: • TV Standard: NTSC (29.97fbs); Page 27 Standalone High Definition Media Player • Standard: Standard DVD; • Aspect Ratio: 16:9 (widescreen); • Encode Size: Width 720, Height 480. 4.2 Video Conversion There are two possible tools for converting video 4.2.1 Format Factory This is a free multipurpose convertor that can be used for normal definition Normal Definition 1. Download a free convertor (Windows) called Format Factory which can be found at http://www.formatoz.com/ 2. Start the Software (picture 1). 3. On the left hand window pane select the ‘Video’ conversion options. 4. Select the ‘All to AVI’ conversion 5. Click the ‘Add File’ button and locate the file to be converted. Page 28 Standalone High Definition Media Player 6. Click the ‘Output Setting’ button and modify it to look like the image shown below. A number of important settings have been highlighted. 7. Select ‘OK’ to save these changes and then Press ‘OK’ button to goto main screen Page 29 Standalone High Definition Media Player 8. Press the ‘Start’ button along the top to start the conversion. Once completed, press the ‘Output Folder’ to see the converted video. 4.2.2 HD Video Converter Deluxe This is only really useful for High Definition videos. Download link: http://www.winxdvd.com/hd‐video‐converter‐deluxe/ This software does require to be bought. MP4 gives the best display quality. Please follow the following steps: 1. Select “to HD MP4” tab. 2. Change audio quality to 448 kbps, and change video quality to 12000, output image setting to custom size with custom aspect ratio, and video resolution to HD1080P(1920:1080), video codec to MPEG4. See the screen shot below for the recommend settings. Page 30 Standalone High Definition Media Player 4.3 My Remote Control does not appear to be working First try disconnecting the unit from its power source by unplugging the power lead and then plugging it back in. If the remote control still doesn’t operate correctly then replace the batteries in you Remote Control (see section 1.4). If this does not solve the problem then please contact your supplier. 4.4 My media files will not update via USB If you are have problems updating your display follow these steps to ensure it is not a technical issue. If it is your first time using the unit you must first load some media files using the method of loading your files directly onto an SD memory card to test the system and ensure that everything is working properly. To do this: 1. Insert blank SD card into your computer (take extra care to ensure that there is no additional files on the SD card or any self installation software, if there is please format the drive). Page 31 Standalone High Definition Media Player 2. Copy the files you want to play on to USB drive in the root directory (without putting them into a folder). 3. Take the SD card out from your computer and firmly insert it into the unit (see figure 4) taking extra care to make sure that it is fully inserted. 4. Your files should now play alphabetically in a continuous slideshow. Now that you have done this you should be able to update the units SD card using a USB drive. To do this: 1. Insert blank USB drive into your computer (take extra care to ensure that there is no additional files on the SD card or any self installation software, if there is please format the drive). 2. Create a new folder and name it “Copy” (this will contain the media files you wish to display). 3. Create a new blank text document and name it “copy” (the presence of this file commands the unit to copy the new files). Page 32 Standalone High Definition Media Player 4. Within the “Copy” folder create a new blank text document and name it “1” (the presence of this file will delete the contents of the SD card). 5. Now copy the media files you want to play into the “Copy” folder of the USB drive. Page 33 Standalone High Definition Media Player 6. Take out the USB drive from your computer and insert it firmly into the unit (see figure 4) making sure to take extra care that it is fully inserted. 7. The existing files on the SD card will now be deleted before your new files are copied. 8. Your files should now play alphabetically in a continuous slideshow. If you still cannot successfully update your media files using a USB drive please try repeating the steps with another USB drive before contacting your supplier. Page 34 Standalone High Definition Media Player 4.5 My music isn’t playing over my image slide show. If you have tried to load both image and audio files and you wish the audio files to be played as background music you must access the “Photo” submenu from the main “Setup” menu. Scroll down to “Background Music” and select “Folder”. 4.6 My scrolling text is not being displayed If you have created a playlist that includes scrolling text or have a “scroll.txt” document with your media files and its contents are not appearing, you must access the main “Setup” menu on the on screen display. Scroll down to the “Subtitle” menu, here you can toggle the scrolling text On/Off and change the settings of the scrolling message (such as size, speed and colour). Page 35