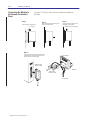
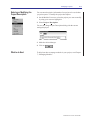
1
Allen-Bradley WeighScale Module (Cat. No. 1771-WS) User Manual Important User Information Because of the variety of uses for the products described in this publication, those responsible for the application and use of this control equipment must satisfy themselves that all necessary steps have been taken to assure that each application and use meets all performance and safety requirements, including any applicable laws, regulations, codes and standards. The illustrations, charts, sample programs and layout examples shown in this guide are intended solely for purposes of example. Since there are many variables and requirements associated with any particular installation, Allen-Bradley does not assume responsibility or liability (to include intellectual property liability) for actual use based upon the examples shown in this publication. Allen-Bradley publication SGI-1.1, Safety Guidelines for the Application, Installation, and Maintenance of Solid-State Control (available from your local Allen-Bradley office), describes some important differences between solid-state equipment and electromechanical devices that should be taken into consideration when applying products such as those described in this publication. Reproduction of the contents of this copyrighted publication, in whole or in part, without written permission of Allen-Bradley Company, Inc., is prohibited. Throughout this manual we use notes to make you aware of safety considerations: ! ATTENTION: Identifies information about practices or circumstances that can lead to personal injury or death, property damage or economic loss. Attention statements help you to: • identify a hazard • avoid the hazard • recognize the consequences Important: Identifies information that is critical for successful application and understanding of the product. The following are trademarks of Rockwell Automation: PLC, PLC-5, WeighScale, DH+, ControlView, PanelView, PLC-5/250, and INTERCHANGE. RSLinx and RSLogix are trademarks of Rockwell Software Inc. The following are registered trademarks of Microsoft Corporation: Microsoft and MS-DOS. The following are trademarks of Microsoft Corporation: Windows and NT. WAVERSAVER is a registered trademark of Hardy Instruments, Inc. C2 is a trademark of Hardy Instruments, Inc. Ethernet is a registered trademark of Digital Equipment Corporation, Intel, and Xerox Corporation. VGA is a trademark of International Business Machines Corporation. All other trademarks are property of their respective owners. The information below summarizes the changes to WeighScale Configuration software since the last release. Revision bars in the page margins indicate updated information. New Information The table below lists new features and shows where to find this new information. for this new information see chapter using the ladder logic utility and interface to the MMI 3 how the software is supplied 4 supervising security 5 managing projects 6 managing modules 7 configuring the module 8 calibrating the module with the calibration wizard 9 using the software to monitor module status 10 viewing or printing reports 11 writing custom ladder logic A editing the configuration/calibration block B monitoring module status without using WeighScale Configuration software C specifications D Publication 1771–6.5.117 – February 1998 soc–ii Summary of Changes Notes: Publication 1771–6.5.117 – February 1998 This preface describes how to properly and efficiently use this document. It tells you about: • purpose of this document • who should use this document • what this document contains • getting help • conventions • vocabulary • Rockwell Automation support Purpose of this Document This document shows you how to • use your Weigh Scale Module (cat. no. 1771-WS) in an Allen-Bradley PLC-5 programmable controller system • use WeighScale Configuration software (provided separately from the module) to configure, calibrate, monitor, and control your module Who Should Use this Document This document assumes that: • you can program and operate an Allen-Bradley PLC-5 programmable controller • you can program block transfer instructions • you are familiar with Microsoft Windows 3.1, 95 or NTt and are familiar with terms that describe what you should be doing when working in Windows, e.g., double-click, radio checkbox Publication 1771-6.5.117 – March 1998 P–2 Using this Document What this Document Contains Publication 1771-6.5.117 – March 1998 This document contains 11 chapters and 4 appendices: to see this chapter learn about process weighing and module features 1 Overview of the Weigh Scale Module install the module and learn about: •module power requirements •keying •chassis location •wiring of module and remote termination panel 2 Installing the Module •use the ladder logic utility to minimize programming •use the interface to the MMI 3 Using the Ladder Logic Utility •install WeighScale software •learn about hardware requirements for your computer •learn about software requirements for your computer •start the software •use online help 4 Getting Started with WeighScale Configuration Software •learn about control of security •select privilege categories •add and delete users •edit privileges •change passwords •enable security •login and logout 5 Supervising the Security System •create project files •work with project files 6 Managing Projects • add modules to a project • move a module from one project to another • modify the Module List screen 7 Managing Modules •use the Module Configuration screen •configure the module 8 Using WeighScale Configuration Software to Configure the Module •learn about which type of calibration is best for your application •access the Calibration wizard •calibrate the module •restore the calibration •read resistance to test the module 9 Using WeighScale Configuration Software to Calibrate the Module •access the Monitor screen •view or enter data 10 Using the Module Monitor Screen view or print descriptive reports 11 Documenting Projects learn procedures that you can use to isolate problems 12 Troubleshooting the Module Using this Document to see this appendix write custom ladder logic to: •address the module •select weight values •program your ladder logic A Writing Custom Ladder Logic calibrate the module by directly manipulating the configuration/calibration block B monitor status data by reading information directly from the data table: •read 6-digit integer values •read floating point values •learn about the implied decimal point •learn about the status block C Monitoring Status Data obtain information to install and use the WeighScale module D Specifications P–3 Editing the Configuration/Calibration Block In addition, we have included a Glossary that lists and defines terms you’ll need to understand to use the Weigh Scale Module and WeighScale software. Getting Help You can get online help on the Weigh Scale Module and WeighScale software. (See Chapter 4 of this manual for more on WeighScale online help.) In addition, you can refer to these documents for help on INTERCHANGEt and RSLinxt software and PLC processors: Rockwell Automation Allen-Bradley ALLEN-BRADLEY PUBLICATION INDEX October 1995 publication name publication number Enhanced and Ethernet PLC-5 Programmable Controllers User Manual 1785-6.5.12 PLC-5 Programmable Controllers Quick Reference 1785-7.1 INTERCHANGE Software for Windows User Manual 5850-6.5.2 INTERCHANGE Software for Windows Release Note 5850-6.5.2-RN1, -RN2 RSLinx OEM User’s Guide Doc ID 9399-WABOUG Device Configuration Utility User Manual 5850-6.5.7 PLC-5 Programming Software (Release 5.0) Instruction Set Reference Manual 1785-6.1 For a list of publications with information on Allen-Bradley programmable controller products, consult the Allen-Bradley Publication Index, publication SD499. Publication 1771-6.5.117 – March 1998 P–4 Using this Document Conventions We use these conventions in this document: this convention is used to " call attention to helpful information STOP alert you to information that you should read, or procedures that you should follow, before proceeding refer you to other Allen-Bradley documents that might be useful Also, we use these conventions to picture data entry and displays: this convention Enter c:\abic\run represents keystroke commands text that you need to type These instructions assume the 3½-inch disk is to be inserted into drive a of your computer. If drive a is not used, replace the a in these instructions with the appropriate drive designation. Vocabulary Publication 1771-6.5.117 – March 1998 In this document, we often refer to: • the Weigh Scale Module as the 1771-WS Module or as the module • the programmable controller processor, as the PLC processor or the processor • a transducer (sensing element) that measures an applied load by a change in its electrical output signal as a load cell. An exception is our reference to a C2 Second-Generation-Calibration load point to reflect the term used by the manufacturer of that specific device. Some manufacturers of load cells refer to them as load points or weigh modules. • Data Highway Plus network as the DH+ network Table of Contents Overview of the WeighScale Module Chapter 1 Installing the Module Chapter 2 What Is the Weigh Scale Module? . . . . . . . . . . . . . . . . . . . . . . . Compatibility Issues . . . . . . . . . . . . . . . . . . . . . . . . . . . . . . . . . Compatibility with Earlier Versions of the Module . . . . . . . . . . Data Table Use . . . . . . . . . . . . . . . . . . . . . . . . . . . . . . . . . . I/O Chassis . . . . . . . . . . . . . . . . . . . . . . . . . . . . . . . . . . . . . Remote Termination Panel . . . . . . . . . . . . . . . . . . . . . . . . . . Processor . . . . . . . . . . . . . . . . . . . . . . . . . . . . . . . . . . . . . . Features of the Weigh Scale Module . . . . . . . . . . . . . . . . . . . . . What to do Next . . . . . . . . . . . . . . . . . . . . . . . . . . . . . . . . . . . . Preventing Electrostatic Damage . . . . . . . . . . . . . . . . . . . . . . . Preparing to Install the Module . . . . . . . . . . . . . . . . . . . . . . . . . Set the Jumper for Single Density or Double Density Mode . . . Calculate Backplane Current Load for the I/O Chassis . . . . . . Determine I/O Chassis Addressing Mode . . . . . . . . . . . . . . . . Determine Module Location in the I/O Chassis . . . . . . . . . . . . Determine Remote Termination Panel Location . . . . . . . . . . . Plan for Sufficient Enclosure Depth . . . . . . . . . . . . . . . . . . . . Key the I/O Chassis for Your Module . . . . . . . . . . . . . . . . . . . Installing the Module . . . . . . . . . . . . . . . . . . . . . . . . . . . . . . . . European Union Directive Compliance . . . . . . . . . . . . . . . . . . . . EMC Directive . . . . . . . . . . . . . . . . . . . . . . . . . . . . . . . . . . . Low Voltage Directive . . . . . . . . . . . . . . . . . . . . . . . . . . . . . . Installing the Remote Termination Panel (RTP) . . . . . . . . . . . . . . Connecting the Module to the Remote Termination Panel . . . . . . Connecting the Junction Box to the Remote Termination Panel . . Grounding the Shield . . . . . . . . . . . . . . . . . . . . . . . . . . . . . . . . Interpreting the Indicator Lights . . . . . . . . . . . . . . . . . . . . . . . . . What to do Next . . . . . . . . . . . . . . . . . . . . . . . . . . . . . . . . . . . . Using the Ladder Logic Utility 1–1 1–2 1–2 1–3 1–3 1–3 1–3 1–4 1–4 2–1 2–1 2–2 2–3 2–3 2–4 2–4 2–4 2–5 2–6 2–6 2–6 2–6 2–7 2–8 2–9 2–12 2–12 2–13 Chapter 3 What’s in This Chapter? . . . . . . . . . . . . . . . . . . . . . . . . . . . . . . What is the Ladder Logic Utility? . . . . . . . . . . . . . . . . . . . . . . . . Using the Ladder Logic Utility . . . . . . . . . . . . . . . . . . . . . . . . . . Using the Interface to the MMI . . . . . . . . . . . . . . . . . . . . . . . . . Understanding the Data Table Layout . . . . . . . . . . . . . . . . . . . . Understanding Symbolic Names Used by the Utility . . . . . . . . . . What to do Next . . . . . . . . . . . . . . . . . . . . . . . . . . . . . . . . . . . . 3–1 3–1 3–2 3–4 3–5 3–6 3–8 Publication 1771–6.5.117 – March 1998 toc–ii Table of Contents Getting Started With WeighScale Configuration Software Chapter 4 Introducing WeighScale Configuration Software . . . . . . . . . . . . . Windows Compatibility . . . . . . . . . . . . . . . . . . . . . . . . . . . . . Communication Software Compatibility . . . . . . . . . . . . . . . . . Obtaining Weigh Scale Software . . . . . . . . . . . . . . . . . . . . . . . . Downloading Software from the Internet . . . . . . . . . . . . . . . . . Ordering Software by Mail or Telephone . . . . . . . . . . . . . . . . . Communicating with PLC-5 and ControlNet Processors over the DH+ and Ethernet Networks . . . . . . . . . . . . . . . . . . . . . . . . . . . . System Requirements . . . . . . . . . . . . . . . . . . . . . . . . . . . . . . . Installing the Software . . . . . . . . . . . . . . . . . . . . . . . . . . . . . . . Starting the Software . . . . . . . . . . . . . . . . . . . . . . . . . . . . . . . . Using Online Help . . . . . . . . . . . . . . . . . . . . . . . . . . . . . . . . . . What to do Next . . . . . . . . . . . . . . . . . . . . . . . . . . . . . . . . . . . . Supervising the Security System Chapter 5 Managing Projects Chapter 6 Controlling Security . . . . . . . . . . . . . . . . . . . . . . . . . . . . . . . . . Accessing the Security System . . . . . . . . . . . . . . . . . . . . . . . . . Adding a User . . . . . . . . . . . . . . . . . . . . . . . . . . . . . . . . . . . . . Listing Privileges . . . . . . . . . . . . . . . . . . . . . . . . . . . . . . . . . . . Deleting a User . . . . . . . . . . . . . . . . . . . . . . . . . . . . . . . . . . . . Editing Privileges . . . . . . . . . . . . . . . . . . . . . . . . . . . . . . . . . . . Changing a Password . . . . . . . . . . . . . . . . . . . . . . . . . . . . . . . Enabling Security . . . . . . . . . . . . . . . . . . . . . . . . . . . . . . . . . . . Logging in . . . . . . . . . . . . . . . . . . . . . . . . . . . . . . . . . . . . . . . . Logging out . . . . . . . . . . . . . . . . . . . . . . . . . . . . . . . . . . . . . . . What to do Next . . . . . . . . . . . . . . . . . . . . . . . . . . . . . . . . . . . . What is a Project File? . . . . . . . . . . . . . . . . . . . . . . . . . . . . . . . Creating a New Project File . . . . . . . . . . . . . . . . . . . . . . . . . . . Opening an Existing File . . . . . . . . . . . . . . . . . . . . . . . . . . . . . . Specifying Files to Be Displayed . . . . . . . . . . . . . . . . . . . . . . Specifying How Files are Sorted . . . . . . . . . . . . . . . . . . . . . . Renaming an Existing File . . . . . . . . . . . . . . . . . . . . . . . . . . . . Copying an Existing Project . . . . . . . . . . . . . . . . . . . . . . . . . . . Creating a New Directory . . . . . . . . . . . . . . . . . . . . . . . . . . . . . Entering or Modifying the Project Description . . . . . . . . . . . . . . . What to do Next . . . . . . . . . . . . . . . . . . . . . . . . . . . . . . . . . . . . Publication 1771–6.5.117 – March 1998 4–1 4–1 4–2 4–3 4–3 4–4 4–4 4–4 4–5 4–5 4–7 4–7 5–1 5–2 5–3 5–4 5–5 5–5 5–6 5–6 5–7 5–7 5–8 6–1 6–1 6–2 6–3 6–3 6–3 6–4 6–4 6–5 6–5 Table of Contents Managing Modules Chapter 7 Configuring a Workstation . . . . . . . . . . . . . . . . . . . . . . . . . . . . Adding a Module to a Project . . . . . . . . . . . . . . . . . . . . . . . . . . Adding a Module Using the Ladder Logic Utility . . . . . . . . . . . Adding a Module Without Using the Ladder Logic Utility . . . . . Moving a Module From One Project to Another . . . . . . . . . . . . . Modifying the Module List Screen . . . . . . . . . . . . . . . . . . . . . . . Modifying an Existing Module . . . . . . . . . . . . . . . . . . . . . . . . Entering or Modifying a Module Description . . . . . . . . . . . . . . Deleting a Module from the Module List Screen . . . . . . . . . . . Saving Your Changes . . . . . . . . . . . . . . . . . . . . . . . . . . . . . . . . What to do Next . . . . . . . . . . . . . . . . . . . . . . . . . . . . . . . . . . . . Using WeighScale Configuration Software to Configure the Module toc–iii 7–1 7–2 7–2 7–3 7–4 7–5 7–5 7–6 7–7 7–7 7–7 Chapter 8 Using the Module Configuration Screen . . . . . . . . . . . . . . . . . . . 8–2 8–3 Configuring the WeighScale Module . . . . . . . . . . . . . . . . . . . . . Selecting the Unit of Weight . . . . . . . . . . . . . . . . . . . . . . . . . 8–3 8–3 Selecting Auto-zero Tracking . . . . . . . . . . . . . . . . . . . . . . . . Selecting the Number of Load Cells . . . . . . . . . . . . . . . . . . . . 8–4 8–4 Selecting the Decimal Point Location . . . . . . . . . . . . . . . . . . . 8–5 Selecting the In-motion Tolerance Value . . . . . . . . . . . . . . . . . 8–6 Selecting the Zero-tolerance Value . . . . . . . . . . . . . . . . . . . . 8–7 Selecting the WAVERSAVER Setting . . . . . . . . . . . . . . . . . . . 8–7 Selecting Rate of Change Settings . . . . . . . . . . . . . . . . . . . . 8–8 Selecting the Moving Average Sample Size . . . . . . . . . . . . . . 8–9 Selecting the Real-time Sampling Period . . . . . . . . . . . . . . . . Viewing the Module’s Firmware Series and Revision . . . . . . . . 8–9 8–9 Viewing the Module Density . . . . . . . . . . . . . . . . . . . . . . . . . Viewing the Module Status . . . . . . . . . . . . . . . . . . . . . . . . . . 8–9 Downloading Configuration Values . . . . . . . . . . . . . . . . . . . . . . 8–12 Uploading Configuration Values . . . . . . . . . . . . . . . . . . . . . . . . 8–13 Copying Configuration Values Between Modules . . . . . . . . . . . . 8–14 Copying Configuration Values into a New Module When You Are Using the Ladder Logic Utility . . . . . . . . . . . . . . . . . . . . . . . . . . . . 8–14 Copying Configuration Values into a New Module When You Are Not Using the Ladder Logic Utility . . . . . . . . . . . . . . . . . . . . . . . 8–15 What to do Next . . . . . . . . . . . . . . . . . . . . . . . . . . . . . . . . . . . . 8–16 Publication 1771–6.5.117 – March 1998 toc–iv Table of Contents Using WeighScale Configuration Software to Calibrate the Module Chapter 9 Using the Module Monitor Screen Chapter 10 Documenting Projects Chapter 11 Before You Begin . . . . . . . . . . . . . . . . . . . . . . . . . . . . . . . . . . . Which Type of Calibration is Best for Your Application? . . . . . . . . C2 Calibration . . . . . . . . . . . . . . . . . . . . . . . . . . . . . . . . . . . Soft Calibration . . . . . . . . . . . . . . . . . . . . . . . . . . . . . . . . . . Hard Calibration . . . . . . . . . . . . . . . . . . . . . . . . . . . . . . . . . . Accessing the Calibration Wizard . . . . . . . . . . . . . . . . . . . . . . . Performing a Hard Calibration . . . . . . . . . . . . . . . . . . . . . . . . . . Performing a Soft Calibration . . . . . . . . . . . . . . . . . . . . . . . . . . Performing a C2 Calibration . . . . . . . . . . . . . . . . . . . . . . . . . . . Restoring a Calibration . . . . . . . . . . . . . . . . . . . . . . . . . . . . . . . Reading Resistance . . . . . . . . . . . . . . . . . . . . . . . . . . . . . . . . . What to do Next . . . . . . . . . . . . . . . . . . . . . . . . . . . . . . . . . . . . Accessing the Monitor Screen . . . . . . . . . . . . . . . . . . . . . . . . . . Viewing or Entering Data . . . . . . . . . . . . . . . . . . . . . . . . . . . . . What to do Next . . . . . . . . . . . . . . . . . . . . . . . . . . . . . . . . . . . . Viewing a Project . . . . . . . . . . . . . . . . . . . . . . . . . . . . . . . . . . . Printing a Project . . . . . . . . . . . . . . . . . . . . . . . . . . . . . . . . . . . What to do Next . . . . . . . . . . . . . . . . . . . . . . . . . . . . . . . . . . . . Troubleshooting the Module 10–1 10–2 10–3 11–1 11–2 11–2 Chapter 12 Diagnostics Reported by the Module . . . . . . . . . . . . . . . . . . . . . Troubleshooting with the Indicators . . . . . . . . . . . . . . . . . . . . . . Reading On-board Resistance . . . . . . . . . . . . . . . . . . . . . . . . . Checking Resistance with a Simulator Connected . . . . . . . . . . . Checking Block-transfer Communication . . . . . . . . . . . . . . . . . . Calibrating the Module to the Simulator . . . . . . . . . . . . . . . . . . . Checking Resistance of the Scale System . . . . . . . . . . . . . . . . . Checking Load-cell Mounting . . . . . . . . . . . . . . . . . . . . . . . . . . Calibrating with Piping Disconnected . . . . . . . . . . . . . . . . . . . . . Troubleshooting Load Cells . . . . . . . . . . . . . . . . . . . . . . . . . . . Zero Balance Test . . . . . . . . . . . . . . . . . . . . . . . . . . . . . . . . Bridge Resistance . . . . . . . . . . . . . . . . . . . . . . . . . . . . . . . . Resistance to Ground . . . . . . . . . . . . . . . . . . . . . . . . . . . . . Publication 1771–6.5.117 – March 1998 9–1 9–1 9–1 9–2 9–2 9–2 9–4 9–5 9–6 9–7 9–8 9–8 12–1 12–2 12–2 12–2 12–4 12–4 12–5 12–5 12–6 12–6 12–6 12–7 12–7 Table of Contents Writing Custom Ladder Logic Appendix A Editing the Configuration/Calibration Block Appendix B Monitoring Status Data Appendix C Addressing the WeighScale Module . . . . . . . . . . . . . . . . . . . . . Updating Weight Values . . . . . . . . . . . . . . . . . . . . . . . . . . . . . . Update Example . . . . . . . . . . . . . . . . . . . . . . . . . . . . . . . . . New Data . . . . . . . . . . . . . . . . . . . . . . . . . . . . . . . . . . . . . . Real-Time Sample Period BTR Time-out . . . . . . . . . . . . . . . . Calculating Flow . . . . . . . . . . . . . . . . . . . . . . . . . . . . . . . . . Setting up Communication . . . . . . . . . . . . . . . . . . . . . . . . . . . . Editing the Configuration/Calibration Block . . . . . . . . . . . . . . . . . Setting the Block-transfer Write Trigger Address . . . . . . . . . . . . . Programming the Module . . . . . . . . . . . . . . . . . . . . . . . . . . . . . Single Density (Series A) Programming Examples . . . . . . . . . Double Density Programming Examples . . . . . . . . . . . . . . . . Reading Floating-point Values . . . . . . . . . . . . . . . . . . . . . . . . . . Selecting the Frequency-rejection Value . . . . . . . . . . . . . . . . . . Setting the Tare Value . . . . . . . . . . . . . . . . . . . . . . . . . . . . . . . Zeroing the Gross Weight . . . . . . . . . . . . . . . . . . . . . . . . . . . . . Creating Setpoints . . . . . . . . . . . . . . . . . . . . . . . . . . . . . . . . . . Configuring Rate-of-change . . . . . . . . . . . . . . . . . . . . . . . . . . . Saving Configuration Changes . . . . . . . . . . . . . . . . . . . . . . . . . Verifying Configuration Data . . . . . . . . . . . . . . . . . . . . . . . . . . . Performing a Hard Calibration . . . . . . . . . . . . . . . . . . . . . . . . . . Enter Values in the Block . . . . . . . . . . . . . . . . . . . . . . . . . . . Perform the Hard Calibration . . . . . . . . . . . . . . . . . . . . . . . . . Performing a Soft Calibration . . . . . . . . . . . . . . . . . . . . . . . . . . Enter Values in the Block . . . . . . . . . . . . . . . . . . . . . . . . . . . Perform the Soft Calibration . . . . . . . . . . . . . . . . . . . . . . . . . Performing a C2 Calibration . . . . . . . . . . . . . . . . . . . . . . . . . . . Enter Values in the Block . . . . . . . . . . . . . . . . . . . . . . . . . . . Perform the C2 Calibration . . . . . . . . . . . . . . . . . . . . . . . . . . Restoring the Module . . . . . . . . . . . . . . . . . . . . . . . . . . . . . . . . Saving the Tare and Zero Values in Non-volatile Memory . . . . . . Configuration/Calibration Block . . . . . . . . . . . . . . . . . . . . . . . . . Reading Floating-Point Values . . . . . . . . . . . . . . . . . . . . . . . . . Reading 6-Digit Integer Values . . . . . . . . . . . . . . . . . . . . . . . . . Implied Decimal Point . . . . . . . . . . . . . . . . . . . . . . . . . . . . . . . Status Block . . . . . . . . . . . . . . . . . . . . . . . . . . . . . . . . . . . . . . toc–v A–1 A–2 A–4 A–5 A–6 A–6 A–7 A–7 A–7 A–9 A–9 A–17 A–26 A–27 A–27 A–28 A–29 A–35 A–36 A–36 B–1 B–2 B–3 B–4 B–4 B–5 B–6 B–6 B–7 B–8 B–9 B–10 C–1 C–1 C–1 C–2 Publication 1771–6.5.117 – March 1998 toc–vi Table of Contents Specifications Glossary Index Publication 1771–6.5.117 – March 1998 Appendix D Overview of the Weigh Scale Module This chapter provides an overview of the WeighScale module. What Is the Weigh Scale Module? Series B only The Weigh Scale module (1771-WS) is an intelligent I/O module that reads values from industry-standard strain-gage load cells. The module accepts analog weight values directly from a single load cell or the sum of the values from two, three, or four load cells connected through a junction box. WeighScale configuration software is NOT included with the module. You must obtain it separately. We tell you how in Chapter 4, “Getting Started with WeighScale Configuration Software”. You can use as many as eight load cells with the module. You will need an external power supply for five or more load cells. The module receives block-transferred configuration and calibration values from the PLC-5 data table. The module block-transfers the weight values and other status values to a PLC-5 processor. The WeighScale module can work without WeighScale Configuration software (interacting directly with the PLC processor). However, we recommend that you use the software to set up and maintain the module. You install WeighScale software on a personal computer in a DH+t network with the PLC-5 processor. If you are using RSLinx software as a man-machine-interface (MMI), you can connect the personal computer to the PLC processor with an Ethernet link. You can then enter configuration and calibration values on easy-to-use screens. Personal Computer with WeighScale Configuration Software PLC-5 Processor Data Table Junction Box I/O Image Table Configuration/Calibration Write Block Series A = 33 words Series B = 49 words Block-transfer Weigh Scale Module (1771-WS) Status Read Block Series A = 29 words Series B = 64 words Publication 1771–6.5.117 – March 1998 1–2 Overview of the Weigh Scale Module Compatibility Issues Compatibility involves previous releases of the module, data table use as well as compatibility with I/O chassis, remote termination panels, and processors. Compatibility with Earlier Versions of the Module A jumper setting (J1) you can change lets you configure the module for Series A (single density) or Series B (double density) operation. Functional modifications made to the Weigh Scale Module for Series B do not affect how the module operates in Series A mode. You can complete any tasks you performed using earlier versions of the module. To configure the jumper, see Chapter 2 of this manual. If you set the jumper for Series B (double density) operation: • you can now download setpoint, preact, and deadband values to the module • the module compares weight data to the setpoint and preact values. When the weight data reaches the preact value, the module sets a discrete bit in the PLC input image table without a block-transfer read • we now return rate-of-change data in the block-transfer-read data block • we also return all configuration data in the block-transfer-read data block A separate change to the real-time sampling period affects both new and old versions of the Weigh Scale Module: • When the PLC processor requests a block-transfer read, the Weigh Scale Module responds only if the real-time sampling period value has elapsed since the last block-transfer read • When the data transfer occurs, the data in the PLC data table is the most recent information processed by the module Publication 1771–6.5.117 – March 1998 Overview of the Weigh Scale Module 1–3 Data Table Use Communication between the module and the processor is bi-directional, using both block transfer reads (BTRs) and block transfer writes (BTWs). The module uses a byte in the output image table and a byte in the input image table. The module also requires an area in the data table to store the block-transfer read and write data. I/O image table use is an important factor in module placement and addressing selection. We show the module’s data table use in the following table. Use of Data Table Catalog Number Series Input Image Bits 1771- S 1771-WS A (single density) B (double density) 8 8 Compatibility Output Image Bits ReadBlock Words WriteBlock Words 8 8 29 64 33 49 Addressing Chassis 1/2-slot 1-slot 2-slot Yes1 Yes1 R12 R12 R23 No 1 Yes = Compatible without restriction. 2 R1 = Restricted compatibility; it cannot be in the same even/odd pair of slots with a 32-bit module. 3 R2 = Restricted compatibility; it cannot be in the same even/odd pair of slots (I/O group) with a 16-bit module. 4 B = Compatible with 1771-A1B, A2B, A3B, A3B1, A4B, 1771-AM1, -AM2 chassis. B4 B4 You can place your 1771-WS module into any I/O module slot of the I/O chassis. I/O Chassis This module can only be used in 1771-A1B, A2B, A3B, A3B1, A4B, -AM1, and -AM2 chassis. Remote Termination Panel The 1771-WS module is compatible with the 1771-RT44 remote termination panel, which you must purchase separately. Processor The 1771-WS module is compatible with 1785 PLC-5 processors. Publication 1771–6.5.117 – March 1998 1–4 Overview of the Weigh Scale Module Features of the Weigh Scale Module The 1771-WS module provides: • weight values in either pounds or kilograms • weight values in both 16-bit integer and 32-bit floating-point format • the ability to tare or zero the scale • compatibility with 3mV/V and 2mV/V industry-standard load cells and C2 Second-Generation-Calibration load points • 20-bit A/D conversion — providing 985,000 counts of displayed resolution over the 0-30mV range • 50ms A/D conversion period • a “weight-in-motion” status indication • Hardy Instruments WAVERSAVERt technology to filter out mechanical vibrations and noise from the weight values • 3 ways to calibrate the module: • hard calibration • soft calibration — to minimize the need for test weights when used with load cells of known sensitivity and range • C2 calibration — to minimize the need for test weights and eliminate the need for manual entry of values when used with C2 Second-Generation-Calibration load points • non-volatile on-board flash memory — to store calibration • • • • • • What to do Next Publication 1771–6.5.117 – March 1998 values restoration of calibration values from PLC data table to non-volatile on-board memory — lets you to quickly switch the calibration values to those of another scale, or to restore them after replacing a module stand-alone Windows-based (v3.1, v3.11, NT and 95) WeighScale Configuration software — to provide configuration and calibration without ladder logic programming software on-board diagnostics setpoints, deadbands, and preacts — let you download values to the module so that the module can compare the scale to the setpoints without waiting for the PLC processor to cycle through ladder logic that depends on block transfers rate-of-change in weight data — based on user-defined time units, evaluation period, and unit of measure configuration data — lets you view configuration data in the block-transfer read data block To help learn how to install the Weigh Scale Module, read Chapter 2, “Installing the Module.” This chapter tells you how to install the WeighScale module. Preventing Electrostatic Damage Electrostatic discharge can damage semiconductor devices inside this module if you touch backplane connector pins or jumper pins. Guard against electrostatic damage by observing the following warning: ! ATTENTION: Electrostatic discharge can degrade performance or cause permanent damage. Handle the module as stated below: • Wear an approved wrist-strap grounding device when handling the module • Touch a grounded object to rid yourself of electrostatic charge before handling the module • Handle the module from the front, away from the backplane connector. Do not touch backplane connector pins Preparing to Install the Module Before installing your module in the I/O chassis you must: to see page set the jumper for single- or double-density mode 2–2 calculate power requirements for the I/O chassis 2–3 determine module location in the I/O Chassis 2–3 determine remote termination panel location 2–4 plan for sufficient enclosure depth 2–4 key the I/O chassis for your module 2–5 Publication 1771–6.5.117 – March 1998 2–2 Installing the Module Set the Jumper for Single Density or Double Density Mode When you received the module, the J1 jumper was configured for Series B or double density mode. (The Series B module has a label on its side.) You can set the jumper for single (Series A) or double density (Series B) mode. if you select then single density (Series A) the module has Series A functionality double density (Series B) you can: • use setpoint parameters • retrieve rate-of-change values • verify configuration data Remove the module cover to access the J1 jumper. Top View Front Rear Double Density Rear Front Single Density Then set the jumper as shown in the following illustration. to set the module for this mode single density (Series A) double density (Series B) Publication 1771–6.5.117 – March 1998 set the J1 jumper to look like this Installing the Module 2–3 Calculate Backplane Current Load for the I/O Chassis Your module receives its power through the 1771 I/O chassis backplane from the chassis power supply. The maximum backplane current load of the module is 1.5A. Add this load to the loads of all other modules in the I/O chassis. This total must not exceed the chassis backplane or backplane power supply load specification. Determine I/O Chassis Addressing Mode Your J1 jumper selection determines the addressing mode of the Weigh Scale Module: If the jumper is set for this mo e:1 mode: The module is compatible with this addressing: 1/ -slot 2 1-slot 2-slot single density Yes rack 1 Yes double density Yes Yes No 1 If the jumper is not present, the module is compatible with 1/2-slot, 1-slot, and 2-slot addressing and defaults to Series A functionality. When the J1 jumper is set for double density (Series B) operation, the module is not compatible with two-slot addressing. Publication 1771–6.5.117 – March 1998 2–4 Installing the Module Determine Module Location in the I/O Chassis The extreme left slot is not an I/O module slot; it is reserved for processors or adapter modules: • If you are using ½-slot addressing, you can place your module into any I/O module slot of the I/O chassis • If you are using 1-slot addressing, do not place the 1771-WS module into the same even/odd module-slot pair with a 32-bit-density module. This module uses the input image table and the output image table • To minimize electrical noise interference, group analog and low-voltage dc digital modules away from ac modules or high voltage dc digital modules " Using earlier versions of the module If you are using a version of the module earlier than Series B (or a Series B module set for Series A mode) and are using 2-slot addressing, do not place the 1771-WS module into the same I/O group (even/odd module-slot pair) with a 16-bit-density module. This module uses a byte in the input image table and a byte in the output image table. Determine Remote Termination Panel Location Place your 1771-RT44 remote termination panel in close proximity to the module so that the distance is within the length of the interconnect cables you choose: • The length of the 1771-NC6 cable is 1.8m (6 feet) • The length of the 1771-NC15 cable is 4.6m (15 feet) Plan for Sufficient Enclosure Depth The cable connector sticks out from the front of the module. The enclosure must provide room for a total of 215 mm (8.5 inches) from the back-panel to the connector. Publication 1771–6.5.117 – March 1998 Installing the Module 2–5 Key the I/O Chassis for Your Module To key the I/O slot to accept only this type of module, use the plastic keying clips shipped with each I/O chassis. ! ATTENTION: Observe the following precautions when inserting or removing keying clips: • insert or remove keying clips with your fingers • make sure that keying placement is correct Incorrect keying or the use of a tool can result in damage to the backplane connector and possible system faults. I/O modules are slotted in two places on the rear edge of the circuit board. The position of the keys on the backplane connector must correspond to these slots to allow insertion of the module. You can key any I/O-module-slot connector in an I/O chassis to receive this module. Place keying clips between the following numbers labeled on the upper backplane connector: (See Figure 2.1.) • Between 24 and 26 • Between 32 and 34 You can change the position of these keys if subsequent system design and rewiring makes insertion of a different type of module necessary. Figure 2.1 Keying Positions ! ATTENTION: Insert or remove keying bands with your fingers. Keying Positions Between 24 and 26 Between 32 and 34 I/O chassis Keying Clips Upper Connector Publication 1771–6.5.117 – March 1998 2–6 Installing the Module Installing the Module When installing your module in an I/O chassis: 1. Turn off power to the I/O chassis. ! ATTENTION: Remove power from the 1771 I/O chassis backplane and disconnect the cable from the module before removing or installing an I/O module. Failure to remove power from the backplane could cause injury or equipment damage due to possible unexpected operation. Failure to remove power from the backplane could cause module damage, degradation of performance, or injury. 2. Place the module in the plastic tracks on the top and bottom of the slot that guides the module into position. 3. Do not force the module into its backplane connector. Apply firm even pressure on the module to seat it properly. 4. Snap the chassis latch over the top of the module to secure it. European Union Directive Compliance If this product is installed within the European Union or EEA regions and has the CE mark, the following regulations apply. EMC Directive The Series B module is tested to meet Council Directive 89/336 Electromagnetic Compatibility (EMC) using a technical construction file and the following standards, in whole or in part: • EN 50081-2 EMC – Generic Emission Standard, Part 2 – Industrial Environment • EN 50082-2 EMC – Generic Immunity Standard, Part 2 – Industrial Environment The product described in this manual is intended for use in an industrial environment. Low Voltage Directive The Series B module is also designed to meet Council Directive 73/23 Low Voltage, by applying the safety requirements of EN 61131–2 Programmable Controllers, Part 2 – Equipment Requirements and Tests. Publication 1771–6.5.117 – March 1998 Installing the Module Rockwell Automation Allen-Bradley ALLEN-BRADLEY PUBLICATION INDEX October 1995 Installing the Remote Termination Panel (RTP) 2–7 For specific information that the above norm requires, see the appropriate sections in this manual, as well as the following Allen-Bradley publications: • Industrial Automation Wiring and Grounding Guidelines, publication 1770-4.1 • Guidelines for Handling Lithium Batteries, publication AG-5.4 • Automation Systems Catalog, publication B112 For the Weigh Scale Module, you must use the 1771-RT44 remote termination panel. The remote termination panels are designed for mounting on standard DIN 1 or DIN 3 mounting rails. Mounting dimensions are shown in Figure 2.2. Figure 2.2 Mounting Dimensions for the 1771-RT44 Remote Termination Panels 1771-RT 44 75 (3.0) Millimeters (Inches) J1 J2 J3 J4 59 (2.3) 89 (3.5) Publication 1771–6.5.117 – March 1998 2–8 Installing the Module Connecting the Module to the Remote Termination Panel Use the 1771-NC6 or -NC15 cable to connect the module to the RTP: Step 1 Step 2 Step 3 Place locking bar in up position. Insert connector into mating connector on the processor front panel. Slide the locking bar down over the mating pins on the module. Locking bar To lock, slide locking bar down. Step 4 Connect the other end of the cable to the remote termination panel. Use the thumbscrews on the panel to lock the connector in place.. 1771-RT44 Module End of 1771-NC cable DIN Rail RTP End of 1771-NC cable To Load Cell Publication 1771–6.5.117 – March 1998 Installing the Module Connecting the Junction Box to the Remote Termination Panel 2–9 You must provide a cable from the junction box to the RTP. For this cable, if you are not using an external power supply and if the sense loop is needed, you must connect the conductors and the shield to terminals on the remote termination panel as shown in Figure 2.3. Figure 2.3 Connecting Wires from the Junction Box to the Remote Termination Panel — Using the Module-generated Excitation and a Sense Loop + – + – + + 0–30mV Weight Signal – – – – + C2 Cal + + 10V Excitation – + Sense – SH R4 I4 R3 I3 R2 I2 R1 I1 Junction Box To Load Cell W1 S4 O4 S3 O3 S2 O2 S1 O1 RTP ! ATTENTION: The C2-Cal connections apply only to those applications using C2 Second-Generation-Calibration load points. The load cell manufacturer may specify a cable length under which a sense loop is not needed. In that case, and if you are not using an external power supply, jumper the excitation signal to the sense signal at the termination panel as shown in Figure 2.4. STOP When using C2 load cells, connect the sense lines between the junction box and the remote termination panel. Figure 2.4 Connecting Wires from the Junction Box to the Remote Termination Panel — with the Module-generated Excitation Voltage Jumpered to the Sense Input + 10V Excitation – + 0–30mV Weight Signal – – C2 Cal + SH R4 I4 R3 I3 R2 I2 R1 – Junction Box To Load Cell – + I1 W1 S4 O4 S3 O3 S2 O2 S1 O1 ! RTP + – + ATTENTION: The C2-Cal connections apply only to those applications using C2 Second-Generation-Calibration load points. Publication 1771–6.5.117 – March 1998 2–10 Installing the Module If you are using an external power supply for the excitation voltage, jumper the common of the excitation output (I1) to the common of the sense input (R1) at the remote termination panel as shown in Figure 2.5. Figure 2.5 Connecting Wires from the Junction Box to the Remote Termination Panel — with the Excitation Voltage Generated by an External Power Supply ! ATTENTION: In this configuration you must also jumper +excitation to +sense and –excitation to –sense in the junction box. SH R4 I4 R3 I3 R2 I2 R1 10V External Power Supply + + Sense – – + + 0–30mV Weight Signal – – – – C2 Cal + + Junction Box To Load Cell I1 ! W1 S4 O4 S3 O3 S2 O2 S1 O1 ATTENTION: The C2-Cal connections apply only to those applications using C2 Second-Generation-Calibration load points. If the RTP is physically close to the the load cell, you can bypass the junction box and connect directly from the RTP to a load cell with no sense connection points. Connect the sense conductors from the RTP directly to the connection points where the excitation voltage is connected at the load cell. Use Table 2.A to determine connection points. Table 2.A Connection Points RTP terminal designation if you use the modules excitation voltage and a sense loop is needed, connect to if you use the modules excitation voltage and a sense loop is not needed, connect to if you use an external power supply for an excitation voltage, connect to I1 – Excitation to junction box – Excitation to junction box 1 on RTP R1 – Sense from junction box I1 on RTP – Sense from junction box S1 Shield Shield Shield O1 – C2-Cal from junction box 1 – C2-Cal from junction box 1 – C2-Cal from junction box 1 I2 – Signal from junction box – Signal from junction box – Signal from junction box R2 + Signal from junction box + Signal from junction box + Signal from junction box S2 Shield Shield Shield O2 + C2-Cal from junction box 1 + C2-Cal from junction box 1 + C2-Cal from junction box 1 I3 + Sense from junction box R3 on RTP + Sense from junction box Publication 1771–6.5.117 – March 1998 Installing the Module 2–11 RTP terminal designation if you use the modules excitation voltage and a sense loop is needed, connect to if you use the modules excitation voltage and a sense loop is not needed, connect to if you use an external power supply for an excitation voltage, connect to R3 + Excitation to junction box + Excitation to junction box Not Used S3 Shield Shield Shield O3 Not Used Not Used Not Used I4 Not Used Not Used Not Used R4 Not Used Not Used Not Used S4 Shield Shield Shield O4 Not Used Not Used Not Used SH Ground Ground Ground W1 Not Used Not Used Not Used 1 These connections apply only to those applications using C2 Second-Generation-Calibration load points. A sense loop is required when using C2 Second-Generation-Calibration. When selecting a cable to connect between the junction box and the remote termination panel, follow the load-cell manufacturer’s specifications. Route this cable in a separate conduit and follow all guidelines for category-2 conductors as described in the PLC-5 user manual, publication 1785-6.5.12. To connect the cable wiring from the junction-box at the remote termination panel: 1. Strip 9 mm (3/8 inch) of insulation from the wire. 2. Insert the wire into the open connector slot. 3. Tighten the screw to clamp the wire. Important: The cable from the load cell to the remote termination panel can be connected through intrinsic-safety barriers of class I, II, III, div. 1 and 2, groups A through G. However, if you install the cable that is connected through any other type of intrinsic-safety barrier, the signals may be distorted such that the module will not meet the performance specifications. Publication 1771–6.5.117 – March 1998 2–12 Installing the Module Grounding the Shield On the cable from the junction box to the RTP, connect the shield drain wire to the S1, S2, S3, or S4 terminal on the RTP. All shield connections are internally connected together in the RTP so that only one wire is required to ground the entire remote termination panel. In Figures 2.3, 2.4, and 2.5, we show a connection to S2 for simplicity of illustration. Ground the shield at only one end of the cable. Because we don’t know whether you have the ability to provide a good ground at the other end, we recommend that you ground the RTP by connecting a wire from the “SH” terminal on the RTP to a ground bus in the metal enclosure in which the remote termination panel is mounted. Interpreting the Indicator Lights The front panel of the 1771-WS module contains two bi-color indicators: a red/green RUN/FLT (fault) indicator and a red/green CAL/COM indicator. (See Figure 2.6.) Figure 2.6 Diagnostic Indicators Run/Fault — will flash green until the module has passed its self check and has been successfully calibrated, at which time it becomes a steady green. If a fault is found initially or occurs later, it turns red. RUN/FLT CAL/COM Calibrate/Communication — will flash green when doing block-transfers. It will flash red in 1-second intervals during calibration. IF EEPROM fails, flashes red at intervals shorter than 1 second. At power-up, the module runs through an initial self-diagnostic check. During this check, the RUN/FAULT indicator flashes green at a rate of 5 to 10 times a second. This self-diagnostic check lasts from 2 to 30 seconds, depending on the WAVERSAVER selection; the lower the frequency, the longer the time. When it completes this check satisfactorily, the RUN/FAULT indicator becomes a steady green. However, if the module does not have valid calibration data, the RUN/FAULT indicator will flash green at a rate of once a second. If a fault is found initially or occurs later, the RUN/FLT indicator turns red. The bottom indicator is the calibrate/communication indicator. This indicator flashes green when doing block-transfers; it flashes red during calibration. Publication 1771–6.5.117 – March 1998 Installing the Module What to do Next 2–13 To learn more about the laddder logic utility supplied with the WeighScale Module, read Chapter 3, “Using the Ladder Logic Utility.” Publication 1771–6.5.117 – March 1998 2–14 Installing the Module Notes: Publication 1771–6.5.117 – March 1998 Using the Ladder Logic Utility What’s in This Chapter? This chapter tells you how to use the ladder logic utility and interface to your man-machine interface (MMI) supplied with WeighScale Configuration software. What is the Ladder Logic Utility? WeighScale Configuration software includes a ladder logic utility to minimize the programming you need to do to use the module. The utility provides: • all the ladder logic code required for using the configuration software with your module • logic and data table files to use another MMI with WeighScale Configuration software The ladder logic utility includes software that you can use with your own MMI, such as RSViewt, PanelViewt, or any MMI that can read and write to a PLC-5 processor data table. This software we provide functions as an “interface” to the MMI package you are using. This “MMI interface” lets you program logic to enter values and set and clear bits to do certain functions. The software we provide allows your MMI software and WeighScale Configuration software to work independently of one another. So you can use WeighScale Configuration software to configure the module, and your own MMI to calibrate the module or monitor your process. Important: This utility can be used only with Series B or later modules in double density mode on enhanced PLC-5 processors. If you are using a Series A module, a Series B module in single density mode, or a Classic PLC–5, you must write your own ladder logic. See Appendices A and B of this manual. Important: Do not use your MMI and WeighScale Configuration software to perform functions that access the same part of the data table. Unpredictable system operation may result. For example, if you are using the WeighScale calibration wizard to perform a calibration, do not try to calibrate the module at the same time with your own MMI. Series B only Publication 1771–6.5.117 – March 1998 3–2 Using the Ladder Logic Utility Using the Ladder Logic Utility To use the ladder logic utility: 1. Select an unused program file to be used for the utility. 2. Determine the rack and group values for the module. 3. Allocate an integer data table block for the module. Each module requires 160 contiguous integer elements. 4. Allocate a floating-point data table block for the module. Each module requires 30 contiguous floating-point elements. 5. Copy the ladder logic utility to your development computer. to use this ladder logic programming format " copy these files 6200 \IPDS\ARCH\PLC5\WEIGH.* AI \PLC5\PROGS\AI\WEIGH.* Avoiding losing comments and symbols To avoid losing your comments and symbols when editing your ladder logic, do the following: A. Export the ladder logic and documentation to ASCII file(s). B. Use a text editor to edit the files. C. Import the files into your programming software. You can import both 6200 and AI format files into RSLogix5. Publication 1771–6.5.117 – March 1998 Using the Ladder Logic Utility " 3–3 Changing ladder logic utility defaults The ladder logic utility uses program file 2 as a default, and assumes that the module is located in rack 0, group 1, module 0. The utility also assumes that the integer block is N9:0 to N9:159, and the floating point block is F10:0 to F10:29. If your module differs from the default, you need to modify the ladder logic utility code. We tell you how in steps 6 and 7, below. 6. Use your programming software to change the following to reflect your choices: • default program file number • rack, group, and module values in the BTR and BTW instructions • input bit addresses (rungs 4 and 5) for the rack and group • all references to N9:XXX and F10:XXX 7. Adjust all element numbers if your integer or floating point blocks do not begin with element 0. 8. Download the program to the PLC processor. Publication 1771–6.5.117 – March 1998 3–4 Using the Ladder Logic Utility Using the Interface to the MMI Publication 1771–6.5.117 – March 1998 To use the interface we provide to the MMI, you must write logic to enter values and set and clear bits (described in the table below). See table 3.C for symbolic identifiers. to perform this function your logic should tare set MMI_TARE (N9:1/1) the module performs the tare until the bit is cleared zero set MMI_ZERO (N9:1/2) the module perform the zero until the bit is cleared change setpoints, deadbands, or preacts 1. Enter new values in floating point words 2 through 7. Current values are in words 8 through 13. 2. Set MMI_SETPOINTS (N9:1/0). 3. Clear MMI_SETPOINTS (N9:1/0). hard calibration 1. Configure the module by using WeighScale Configuration software, or manually setting configuration parameters. 2. Toggle MMI_HARD_CAL (N9:1/3) on, then off. 3. When MOD_STS_CAL_MODE (N9:71/1) is set, place the low weight on the scale and enter the value in F10:20. 4. Toggle MMI_ACCEPT_LOW (N9:1/6) on, then off. Important: Step 5, below, is optional and can be skipped. 5. When MOD_STS_LOW_GOOD (N9:72/8) is set, place the midpoint linearization weight on the scale and enter the value in F10:21. 6. Toggle MMI_ACCEPT_MID (N9:1/7) on, then off. 7. When MOD_STS_MID_GOOD (N9:72/9) is set, place the high weight on the scale and enter the value in F10:22. 8. Toggle MMI_ACCEPT_HIGH (N9:1/8) on, then off. 9. When MOD_STS_HIGH_GOOD N9:72/10) is set, toggle MMI_ACCEPT_CAL (N9:1/9) on, then off. To cancel the calibration, set MMI_CANCEL_CAL (N9:1/10). soft calibration 1. Configure the module by using WeighScale Configuration software, or manually setting configuration parameters. 2. Enter the sensitivity value in F10:23. 3. Toggle MMI_SOFT_CAL (N9:1/4) on, then off. 4. When MOD_STS_CAL_MODE (N9:71/1) is set, place the low weight on the scale and enter the value in F10:20. 5. Toggle MMI_ACCEPT_LOW (N9:1/6) on, then off. 6. When MOD_STS_LOW_GOOD (N9:72/8) is set, toggle MMI_ACCEPT_CAL (N9:1/9) on, then off. C2 calibration 1. Configure the module by using WeighScale Configuration software, or manually setting configuration parameters. 2. Toggle MMI_C2_CAL (N9:1/5) on, then off. 3. When MOD_STS_C2_READ_GOOD (N9:71/12) is set, place the low weight on the scale and enter the value in F10:20. 4. Toggle MMI_ACCEPT_LOW (N9:1/6) on, then off. 5. When MOD_STS_LOW_GOOD (N9:72/8) is set, toggle MMI_ACCEPT_CAL (N9:1/9) on, then off. Using the Ladder Logic Utility Understanding the Data Table Layout 3–5 to perform this function your logic should restore calibration 1. Configure the module by using WeighScale Configuration software, or manually setting configuration parameters. 2. Copy the voltage values from the BTR to the BTW block (ladder and configuration software do this automatically on completion of a successful calibration). 3. Toggle MMI_RESTORE_CAL (N9:1/11) on, then off. The following tables show the location of the integer and floating point blocks the ladder logic utility uses. Important: Avoid using any locations marked “reserved.” Table 3.A Integer file layout address description N9:0 internal control bits N9:1 MMI interface bits N9:2–3 internal control bits N9:4–8 reserved N9:9/1 and /2 copy of single transferred preact bits N9:10–58 configuration/calibration block N9:59–69 reserved N9:70–133 status block N9:134–139 reserved N9:140–145 BTW control block N9:150–155 BTR control block N9:156–159 reserved Publication 1771–6.5.117 – March 1998 3–6 Using the Ladder Logic Utility Table 3.B Floating point file layout address Understanding Symbolic Names Used by the Utility description F10:1 net weight for display F10:2 new setpoint 1 F10:3 new setpoint 2 F10:4 new deadband 1 F10:5 new deadband 2 F10:6 new preact 1 F10:7 new preact 2 F10:8 current setpoint 1 F10:9 current setpoint 2 F10:10 current deadband 1 F10:11 current deadband 2 F10:12 current preact 1 F10:13 current preact 2 F10:14–19 reserved F10:20 low weight for calibration F10:21 midpoint weight for calibration F10:22 high weight for calibration F10:23 sensitivity for soft calibration F10:24–27 reserved F10:28 reserved F10:29 reserved The ladder logic utility uses symbolic names to identify certain events that occur when a bit is set. We list the symbolic names here. symbolic names that begin with are an underscore local variables and control bits MMI_ MMI interface bits MOD_CMD_ command bits to the module MOD_STS_ status bits from the module Table 3.C Symbolic names address Publication 1771–6.5.117 – March 1998 symbolic name I:001/10 PREACT1INPUTSTATUS I:001/11 PREACT2INPUTSTATUS N9:0/0 _CS_BTW_COMMAND N9:0/1 _CAL_BTW_COMMAND N9:0/2 _MMI_BTW_COMMAND N9:1/0 MMI_SETPOINTS N9:1/1 MMI_TARE N9:1/2 MMI_ZERO N9:1/3 MMI_HARD_CAL N9:1/4 MMI_SOFT_CAL N9:1/5 MMI_C2_CAL Using the Ladder Logic Utility address 3–7 symbolic name N9:1/6 MMI_ACCEPT_LOW N9:1/7 MMI_ACCEPT_MID N9:1/8 MMI_ACCEPT_HIGH N9:1/9 MMI_ACCEPT_CAL N9:1/10 MMI_CANCEL_CAL N9:1/11 MMI_RESTORE_CAL N9:2/0 _SETPOINTS_LATCH N9:2/1 _SETPOINTS_CHANGED N9:2/2 _TARE_OK N9:2/3 _ZERO_OK N9:2/4 _HARD_CAL N9:2/5 _SOFT_CAL N9:2/6 _C2_CAL N9:2/10 _EXIT_CAL N9:2/11 _MMI_ZERO_LATCH N9:2/12 _MMI_TARE_LATCH N9:2/13 _CS_BTW_CMD_LATCH N9:2/14 _CAL_GOOD N9:2/15 _RESTORE_CAL N9:9/1 MOD_STS_PREACT_1 N9:9/2 MOD_STS_PREACT_2 N9:12/0 MOD_CMD_TARE N9:12/1 MOD_CMD_ZERO N9:42/0 MOD_CMD_CAL_MODE N9:42/1 MOD_CMD_RESTORE_CAL N9:42/2 MOD_CMD_HARD_SOFT N9:42/3 MOD_CMD_SOFT_C2 N9:42/4 MOD_CMD_READ_LOW N9:42/5 MOD_CMD_READ_MID N9:42/6 MOD_CMD_READ_HIGH N9:42/7 MOD_CMD_ACCEPT_CAL N9:42/8 MOD_CMD_READ_C2 N9:70/7 MOD_STS_TARE_GOOD N9:70/8 MOD_STS_ZERO_GOOD N9:71/1 MOD_STS_CAL_MODE N9:71/4 MOD_STS_WRITE_GOOD N9:71/12 MOD_STS_C2_READ_GOOD N9:71/14 MOD_STS_RESTORE_GOOD N9:72/8 MOD_STS_LOW_GOOD N9:72/9 MOD_STS_MID_GOOD N9:72/10 MOD_STS_HIGH_GOOD N9:140/13 _BTW_DONE N9:140/15 _BTW_ENABLE N9:150/13 _BTR_DONE N9:150/15 _BTR_ENABLE Publication 1771–6.5.117 – March 1998 3–8 Using the Ladder Logic Utility What to do Next Publication 1771–6.5.117 – March 1998 To help learn how to install and use WeighScale Configuration software, read Chapter 4, “Getting Started With WeighScale Configuration Software.” Getting Started With WeighScale Configuration Software This chapter shows you how to install WeighScale Configuration software for the 1771-WS module. Introducing WeighScale Configuration Software WeighScale configuration software version 2.0 lets you configure, calibrate, and monitor your WeighScale modules (1771-WS, Series B and higher). Version 2.0 is compatible with versions 1.0 and 1.1. However: You cannot open a project file that was created in a newer version of the WeighScale software in an older version of the software. For example, if you are using v1.1 of WeighScale software, you cannot open project files that you created with newer versions of the software. The software provides: • simple screens for viewing and modifying configuration parameters • an operator screen for monitoring module operation and changing operating parameters (such as setpoints) • a ladder logic utility to minimize programming • installation over a network • tips for using the software on all input fields (not available in Windows 3.1) • a Wizard to guide you through the calibration process Windows Compatibility WeighScale Configuration software is compatible with Microsoft Windows 3.1 and 3.11, Windows 95 and Windows NT3.51 and 4.0. See page 4–4 for more on system requirements. Publication 1771–6.5.117 – March 1998 4–2 Getting Started With WeighScale Configuration Software Communication Software Compatibility WeighScale configuration software version 2.0 is compatible with INTERCHANGE or RSLinx communication software (see the table below). INTERCHANGE software is no longer supplied with the software. Contact your Rockwell Automation representative for assistance in obtaining communication software. on this operating system WeighScale software is compatible with INTERCHANGE (version 6.1.0 or later) WeighScale software is compatible with RSLinx, RSLinx C Development, or RSLinx OEM1 Windows 3.1 or 3.11 Yes No Windows 95 Yes Yes (version 1.7 or later) No Yes Windows NT 3.51 or 4.0 1 WeighScale software is not compatible with RSLinx Lite. For Information about INTERCHANGE software You can refer to the INTERCHANGE Software for Windows Release Notes, publication 5850-6.5.2-RN1 and publication 5850-6.5.2-RN2, and the INTERCHANGE Software for Windows User Manual, publication 5850-6.5.2, if you have specific questions about INTERCHANGE software. For Information about RSLinx software You can refer to the RSLinx OEM User’s Guide, publication Doc ID 9399-WABOUG, if you have specific questions about RSLinx software. Important: When using RSLinx, you must perform the client application configuration. To do this: 1.Start RSLinx. 2. Select Communications...Configure Client Applications. 3.Select the INTERCHANGE port mapping tab. 4.Choose an INTERCHANGE port (typically (1KT:0). 5. Select the RSLinx driver to use (for example, AB_kt–1). 6.Click on Ok. Publication 1771–6.5.117 – March 1998 Getting Started With WeighScale Configuration Software Obtaining Weigh Scale Software 4–3 WeighScale configuration software is no longer supplied with the module. You can obtain the software by: • downloading it from the Internet at http://www.ab.com • ordering diskettes by mailing the response card included with your module, or • ordering diskettes by calling the toll-free number printed on the response card Downloading Software from the Internet To obtain WeighScale software over the World Wide Web, your computer must have access to the Internet with web browser software, such as Netscape Navigator or Microsoft Internet Explorer. Follow these steps to download the software from the Internet: 1. Connect to the Internet and launch your web browser. 2. Type the url (or address) of the Rockwell Automation web site. The url is http://www.ab.com. Click Enter. 3. When the Rockwell Automation home page displays, click on “Search our Site”. 4. Type Weigh Scale Module Configuration Software in the Search field. Click Search. 5. Click on the link to WeighScale configuration software. The WeighScale configuration software page displays. 6. Download the required files. Refer to the following table: to download get a description of features the Help file only download the software to the same computer you will run it on the WeighScale configuration software file for Windows 3.1, 3.11, 95 or NT systems Important: Do not copy this file to a diskette. The file is too large for a single diskette. download the software to the computer you will access over a network the WeighScale configuration software file for Windows 3.1, 3.11, 95 or NT systems Important: Do not copy this file to a diskette. The file is too large for a single diskette. install the software from diskettes diskette image files Important: For Windows 3.1 or 3.11 installations, you will need the Win32s utility (included with 3.1 and 3.11 files). Publication 1771–6.5.117 – March 1998 4–4 Getting Started With WeighScale Configuration Software Ordering Software by Mail or Telephone The WeighScale module ships with a reply card you can use to order configuration software on diskettes. You do not need to specify the operating system when you order diskettes. The diskettes can be used with any of the supported operating systems. To order diskettes, complete the card and mail it to the address show, or call the toll-free number shown on the card. Communicating with PLC-5 and ControlNet Processors over the DH+ and Ethernet Networks When using WeighScale Configuration software, remember: • WeighScale Configuration software is compatible with 1785 PLC-5 processors It is not compatible with PLC-5/250 processors. • Weigh Scale Configuration software is compatible with ControlNet processors over a DH+ or serial network • WeighScale Configuration software communicates with PLC-5 processors over a DH+ network using a 1784-KT/B, 1784-KL, 1784-KTX, 1784-KTXD, or 1784-PCMK communication adapter If you are using DF1 protocol, you can also communicate with the processor through a serial port. • You can use RSLinxt for Ethernet communication with the PLC-5 processor WeighScale Configuration software communicates through a DH+ port on an Ethernet PLC-5 processor. System Requirements To use WeighScale Configuration software, your system must meet these requirements: Hardware • computer with an 80486 or greater microprocessor • at least 16 Mbytes of RAM • Hard drive with adequate free disk space (15 Mbytes or greater) • 1.44 Mbyte floppy disk drive or Internet connection (for installing the software) • VGA or higher-resolution adapter/monitor with small fonts (640x480, 800x600, 1024x786 modes supported) We recommend a Super VGA resolution adapter/monitor. • mouse • DH+ port (on KT- or KL-type module), serial port • Ethernet port (with RSLinx only) Publication 1771–6.5.117 – March 1998 Getting Started With WeighScale Configuration Software TM TM Installing the Software 4–5 Software • Microsoft Windows 95, or NT 3.51 or 4.0 • Microsoft Windows v3.1 running in 386 enhanced mode (a permanent swap file of at least 20 Mbytes in size is recommended) You can also use Microsoft Windows for Workgroups v3.11. • WeighScale Configuration software Install WeighScale software to configure the Weigh Scale Module. To install WeighScale Configuration software, do one of the following: • install the program from the 5 installation diskettes you received by mail by executing setup.exe on disk 1, or • Double-click on the executable file (filename.exe) you downloaded to extract the installation program. Then run setup.exe. The wizard guides you through the installation process. Starting the Software After you’ve rebooted your computer, follow these steps to start the software: STOP Do not start a second copy of WeighScale Configuration software while one copy is already running on the same computer. The software cannot prevent you from doing this. However, if you do, communication conflicts or memory shortages can cause errors or other problems. Windows 3.1, 3.11, or NT 3.5.1 From the Allen-Bradley program group, double-click on Windows 95 or NT 4.0 From the Start menu, select Programs Allen-Bradley WeighScale Configuration Software Publication 1771–6.5.117 – March 1998 4–6 Getting Started With WeighScale Configuration Software When the software is loaded, you see the Weigh Scale Module Project screen: To close WeighScale software, from the File menu, choose Exit. " Creating projects For more information on creating projects, see Chapter 6. Configuring and calibrating the module Read Chapter 8 and Chapter 9 to learn how to use WeighScale software to configure and calibrate your module. Using the software with earlier versions of project files If you created project files using earlier versions of WeighScale software, you can open them with this version of the software. For example, if you are using v2.0 of WeighScale software, you can open project files that you created using v1.0 or 1.1 of the software. After you have opened the file, you can save the file in the same file format as that of the software version that you are using. Once you have opened an older version of a project file and saved it to the current version, you can no longer open it in the older version of the software. You cannot open a project file that was created in a newer version of the WeighScale software in an older version of the software. For example, if you are using v1.1 of WeighScale software, you cannot open project files that you created with newer versions of the software. Publication 1771–6.5.117 – March 1998 Getting Started With WeighScale Configuration Software Using Online Help 4–7 To access the WeighScale software online help, from the Help pull-down menu, select Contents. if you are using you see so you should Windows 3.1, 3.11, or NT 3.5.1 the help contents screen double-click on a topic to view it Windows 95 or NT 4.0 book icons double-click on a book to open the topic To view help for a particular screen, click on a field for which you want help. What to do Next To help learn how to configure the security system, read Chapter 5, “Supervising the Security System.” Publication 1771–6.5.117 – March 1998 4–8 Getting Started With WeighScale Configuration Software Notes: Publication 1771–6.5.117 – March 1998 Supervising the Security System This chapter shows you how to supervise the security system for accessing WeighScale Configuration software. Controlling Security WeighScale Configuration software provides optional security access. You do not have to use security to access the system. If you are the person who possesses the software disks, you ultimately have control of security because you can always re-install the software. However, the security system is set up for a user with the username of “supervisor” to control security. The supervisor can set up usernames with passwords and privileges or change them at any time. The supervisor can even set up another username with the privilege to set up usernames with passwords and privileges. ! ATTENTION: If the supervisor gives someone else edit-users privileges, that person then has the privilege to edit the supervisor’s password. When the software is first installed, there are no security restrictions; no usernames or passwords are needed. Anyone can access any screen to do any task. The security privilege selections take effect only after you enable security, shut down (return to Windows), and then reenter WeighScale software. Once security is enabled, you need a username, password, and the appropriate privilege to use the software. Also, once security is enabled, only the supervisor or someone who has the privilege can disable security. Publication 1771–6.5.117 – March 1998 5–2 Supervising the Security System We list privilege categories in the following table: if you select this category Calibrate and this privilege users can View Calibrate Read On–board Resistance view the calibration selections calibrate the module read module resistance for testing restore a previously saved calibration view monitor selections tare or zero the scale update setpoints view the configuration selections update the configuration selections view the module list update the module list Restore Calibration Monitor View Perform Tare or Zero Update Setpoints View Scale Configurer on i urer Update Module o ule List i t Security System View Update Edit Users Disable Security Accessing the Security System •add users •delete users •add privileges for users •remove privileges for users •change passwords disable the security system To access the security system: 1. If it is not already started, start the software. You see the Weigh Scale Module Project screen: 2. On the Weigh Scale Module Project screen, from the Access pull-down menu, select Configure Security System. You see the Security System screen. Publication 1771–6.5.117 – March 1998 Supervising the Security System 5–3 Initially, only the username “supervisor” is listed. As you add users, their usernames are also listed. From this screen, you can: • add users • list privileges • delete users • edit privileges • change passwords Adding a User To add a user to the security system: 1. At the Security System screen, click on STOP . If security is enabled and you try to add a user, and if you are not the supervisor or do not have the “Edit Users” privilege, you cannot access the Add User screen. You see the Add User screen: 2. On the Add User screen, enter the username and password. 3. Re-enter the password to verify it. 4. Select the privilege categories as appropriate for the particular user. 5. Select the privileges under each category as appropriate for the particular user. Publication 1771–6.5.117 – March 1998 5–4 Supervising the Security System " Selecting privileges Clicking on selects all listed privileges; clicking on deselects previous selections. 6. Click on Listing Privileges . To list privileges assigned for a user: 1. At the Security System screen, cursor to the username. 2. Click on STOP . If security is enabled and you try to view someone else’s privileges, and if you are not the supervisor or do not have the “Edit Users” privilege, you cannot access the List Privileges screen. You see the List Privileges screen: From this screen, you can view your own privileges. For example, the user “Calibration Wizard” can view calibration data, calibrate a module, read on-board resistance, and restore calibration data. 3. When you are done viewing the privileges, click on Publication 1771–6.5.117 – March 1998 . Supervising the Security System Deleting a User 5–5 To delete a user from the security system: 1. At the Security System screen, cursor to the username. . 2. Click on You see: 3. Click on STOP Editing Privileges . If security is enabled and you try to delete a user, and if you are not the supervisor or do not have the “Edit Users” privilege, you cannot delete a user. To edit privileges assigned for a user: 1. At the Security System screen, cursor to the username. 2. Click on STOP . If security is enabled and you try to edit privileges, and if you are not the supervisor or have the “Edit Users” privilege, you cannot access the Edit Privileges screen. You see the Edit Privileges screen: 3. Select the privilege categories as appropriate for the particular user. 4. Select the privileges under each category as appropriate for the particular user. " Selecting privileges Clicking on selects all listed privileges; clicking on deselects previous selections. 5. Click on . Publication 1771–6.5.117 – March 1998 5–6 Supervising the Security System Changing a Password To change the password assigned for a user: 1. At the Security System screen, cursor to the username. 2. Click on . You see the Change Password dialog box: 3. Enter the new password. 4. Re-enter the password to verify it. 5. Click on STOP Enabling Security . You can change your own password. However, if security is enabled and you try to change a password, and if you are not the supervisor or do not have the “Edit Users” privilege, you cannot change the password. To enable security: 1. At the Security System screen, select the Security Enabled/Disabled checkbox. (This is a toggle selection.) Click on the Security Enabled checkbox. Publication 1771–6.5.117 – March 1998 Supervising the Security System 5–7 2. The Information prompt tells you that you must shut down and re-start the application for security to be enabled. Click on . STOP The security privilege selections take effect only after you: • enable security • exit WeighScale software and return to Windows • restart WeighScale software After security is enabled: • a username, password, and the appropriate privileges are needed to use the software • only the supervisor or someone delegated the privilege can disable security Logging in Once security is enabled, you access WeighScale software functions by logging into the software. 1. If it is not already started, start the software. You see the Weigh Scale Module Project screen: 2. On the Weigh Scale Module Project screen, from the Access pull-down menu, select Login. You see the User Login dialog box: 3. Enter your username and password. 4. Click on Logging out . To log out of the WeighScale software: 1. Bring up the Weigh Scale Module Project screen. 2. From the Access pull-down menu, select Logout. 3. When the software prompts you if you are sure you want to log out, click on . Publication 1771–6.5.117 – March 1998 5–8 Supervising the Security System What to do Next Publication 1771–6.5.117 – March 1998 To help learn how to create projects, read Chapter 6, “Managing Projects.” Before you can begin using Weigh Scale Configuration software to configure and operate your modules, you must set up a project file and add your module(s) to the project. This chapter shows you how to set up the project file. What is a Project File? You can use a project file to organize or group modules (for example, all modules on a manufacturing line could be grouped in a project file). The project file stores configuration information about the module(s) you added to the project. The file can include any number of modules. WeighScale Configuration software supports an unlimited number of project files. " Creating a New Project File Project files have a .wsc extension. Follow these steps to create a new project file. 1. Start WeighScale Configuration Software. You see the Project Manager screen. lists the project files in the selected directory (empty when the software is first started) lists directories where project files are stored (empty when the software is first started) indicates the types of files displayed in the file list. To change the selection, from the View menu, choose All Files, Project List, or Select. lists the full name and description of the project. (empty when the software is first started) indicates the sort order of the files in the file list (by name, type. size, or date). To change the selection, from the View menu, choose Sort By. 2. From the Project Manager screen, select File...New. The New File dialog box appears. 3. Type a name for the new project. The filename cannot contain spaces. You can use an underscore (_), however. 4. Click on . The Module List screen opens. Publication 1771–6.5.117 – March 1998 6–2 Managing Projects 5. On the Module List screen, select Project...Save as. 6. Type the name you want to save the file as. This saves the file to your computer’s hard drive. " Using the Module List screen We tell you how to use the Module List screen in chapter 7. " Deleting the project file To delete a project file, highlight the project file name in the project list. Press the Delete key on your keyboard, or from the File menu, select Delete. Confirm the delete by clicking on . Opening an Existing File To open an existing file: if Publication 1771–6.5.117 – March 1998 then the directory containing the existing project is shown in the Previous Directories field 1. Click on the directory to select it. 2. Double-click on the project file. or 1. Select the directory by highlighting it. 2. From the Tools menu, select Go to Selection the directory containing the existing project is not shown on the Previous Directories field 1. From the File menu, select Open. 2. In the File Open dialog, select the desired directory and file. you are not sure which project to open Single-click on the project file name in the Files field. You see the full filename and description. Managing Projects 6–3 Specifying Files to Be Displayed To specify the files to be displayed in the File field: to do this display only files with a .wsc extension From the View menu, select Project List display all files in the selected directory From the View menu, select All Files display files based on a filter you specify 1. From the View menu, select Select. 2. Type a selection filter in the dialog box. You can use the * wildcard to specify any characters and the ? wildcard to specify a single character. 3. Click on . Specifying How Files are Sorted You can sort files by name, type, size, or date. To specify how files are sorted: 1. Select View...Sort by. 2. Select Name, Type, Size, or Date. Renaming an Existing File To rename an existing file: 1. Select the file to be renamed. 2. Select File...Rename. 3. In the dialog box that appears, type the new filename. 4. Click on . Publication 1771–6.5.117 – March 1998 6–4 Managing Projects Copying an Existing Project To copy an existing project: 1. Select the file to be copied. 2. Select File...Copy. 3. In the dialog box that appears, select the directory to which you want to copy the file. 4. Type a filename for the copy of the project. 5. Click on Creating a New Directory . To create a new directory, either use Windows Explorer or File Manager, or follow these steps: 1. Select File...Create Directory. 2. In the dialog box that appears, enter the directory pathname. 3. Click on . The new directory is automatically added to the Previous Directories list. " Removing a directory from the Previous Directories list To remove a directory from the the Previous Directories list, highlight the directory. From the File menu, select Remove Directory from List. Publication 1771–6.5.117 – March 1998 Managing Projects Entering or Modifying the Project Description 6–5 You can enter descriptive information for a project to be used when you print reports. To modify the project description: 1. On the Module List screen, select the project you want to modify by using your cursor to highlight it. 2. Select Project...Description. You see the Change Project Description dialog with the current settings displayed. 3. Make the desired changes. 4. Click on What to do Next . To help learn how to manage modules in your project, read Chapter 7, “Managing Modules.” Publication 1771–6.5.117 – March 1998 6–6 Managing Projects Notes: Publication 1771–6.5.117 – March 1998 Before you can use WeighScale Configuration software to configure or control a module, you must add the module to a project with the Module List screen. When you create a new project or open an existing one, the Module List screen displays. On this screen you can enter descriptive information, such as: • • • • • • • • module name PLC processor Data Highway node address module Series data table address block transfer read address block transfer write address setpoint achieved address block transfer write trigger address Before you can communicate with the modules you add, you must configure your development computer (workstation). We tell you how in this chapter. Also, we show you how to use the Module List screen to manage the modules in your project. " Accessing commands on the Module menu You can access all of the commands on the Module menu by placing the mouse pointer on the Module List screen and right-clicking. Configuring a Workstation Follow these steps to configure your development computer to communicate with modules in your project. 1. On the Module List screen, select Project...Configure Workstation. Publication 1771–6.5.117 – March 1998 7–2 Managing Modules 2. On the Configure Workstation dialog that appears, select the communications protocol. Choose from INTERCHANGE or RSLinx. Important: If you are using RSLinx, you must perform the client application configuration. We tell you how in Chapter 3 of this manual. 3. Select the communications port. 4. Set the workstation node address (the DH+ node address of your computer). 5. Click on Adding a Module to a Project . Follow these steps to add modules to your project. Adding a Module When You Are Using the Ladder Logic Utility You can use the ladder logic utility supplied with WeighScale Configuration software to perform block transfers to and from the module. To add a new module that will use the ladder logic utility, follow these steps: 1. On the Module List screen, select Module...New...Use Utility. Publication 1771–6.5.117 – March 1998 Managing Modules 7–3 2. In the New Module dialog that appears, type this information: in this field type Name the name of the module (cannot use spaces, but can include underscores) PLC address the PLC processor Data Highway node address (does not apply to serial connection, but you must still specify a node address of 1) Series the module Series (ladder logic utility supported by Series B or later) DT Address the address of the first word of the data table block allocated to this module 3. Click on . The module is added to the list. Adding a Module When You Are Not Using the Ladder Logic Utility If you are using a method other than the ladder logic utility to perform block transfers to and from the module, follow these steps: 1. On the Module List screen, select Module...New...Do Not Use Utility. 2. In the New Module dialog that appears, type this information: Publication 1771–6.5.117 – March 1998 7–4 Managing Modules in this field the name of the module (cannot use spaces, but can include underscores) PLC Address the PLC processor Data Highway node address (does not apply to serial connection, but you must still specify a node address of 1) Series the module Series BTR Data Address the starting address for the PLC processor block transfer read data BTW Data Address the starting address for the the PLC processor block transfer write data Setpoint Achieved Address the address of the data table word where your ladder logic copies the setpoint status bits from the input image file BTW Trigger Bit Address the address of the PLC processor data table bit that triggers a block transfer write 3. Click on Moving a Module From One Project to Another type Name . The module is added to the list. To move a module from one project to another: 1. On the Module List screen, select the module you want to move by highlighting it. 2. Select Edit...Cut. 3. Open the destination project. 4. Select Edit...Paste Into New...Use Utility or Edit...Paste Into New...Do Not Use Utility. 5. Complete the New Module dialog box as described previously. 6. Click on Publication 1771–6.5.117 – March 1998 . The module is added to the list. Managing Modules Modifying the Module List Screen 7–5 Once you have added modules to the Module List screen, you can change the information you already entered. Modifying an Existing Module To change the name, PLC node, data table address, or port of an existing module, follow these steps: 1. On the Module List screen, select the module you want to modify by using your cursor to highlight it. 2. Select Module...Modify. You see the Modify Module dialog with the current settings displayed. 3. Make the desired changes. 4. Click on . Publication 1771–6.5.117 – March 1998 7–6 Managing Modules Entering or Modifying a Module Description You can enter descriptive information for a module to be used when you print reports, such as: • the manufacturing step where the module is used • the physical location of the machine in which the module is used To view, enter, or modify a description, follow these steps: 1. On the Module List screen, select the module you want to modify by using your cursor to highlight it. 2. Select Module...Description. You see the Change Module Description dialog with the current settings displayed. 3. Make the desired changes. 4. Click on Publication 1771–6.5.117 – March 1998 . Managing Modules 7–7 Deleting a Module from the Module List Screen To delete a module from the Module List screen, follow these steps: 1. On the Module List screen, select the module you want to delete by using your cursor to highlight it. 2. Select Module...Delete. 3. The software prompts you to confirm the delete. Select . Saving Your Changes You can save additions or changes you make to the Module List screen. When you save a project, the project file is written to your computer’s hard disk, not to the PLC processor. " Downloading your project to the PLC processor To write data to the PLC processor, you must download it from the Configuration, Calibration, or Monitor screens. We show you how in Chapter 8. to What to do Next do this save your changes select Project....Save save your changes with a different file name select Project....Save As To help learn how to configure the WeighScale module, read Chapter 8, “Using WeighScale Configuration Software to Configure the Module.” Publication 1771–6.5.117 – March 1998 7–8 Managing Modules Notes: Publication 1771–6.5.117 – March 1998 Using WeighScale Configuration Software to Configure the Module WeighScale Configuration software lets you download configuration information directly to the PLC processor data table in online mode, or to a file on disk in offline mode. The software also lets you upload information from the processor or from a file. Once you have made your selections (described in this chapter), you should download the configuration information to the processor and to a file. We tell you how in this chapter. When you open the Configuration screen for a module you have just added to a project, the screen displays default values for all configuration parameters. The Module Status pane displays the message: Offline. Status is not available. The Module Status pane displays status messages. Once you have changed the values and dowloaded the data to a file or the PLC processor (explained later in this chapter), the software no longer displays the default values when you open the Configuration screen. Instead, the software tries to read configuration values from the PLC processor so that the screen will always display the current values. If the configuration values are successfully read from the processor, the Module Status pane shows real-time status from the module.This information is updated every second. If the software is not successful in accessing the PLC processor, (for example, if no communication link to the module exists), the software uploads configuration information from the offline file. The Module Status pane continues to report that status is not available. The status bar indicates whether values are defaults, uploaded from the processor, or uploaded from a file. While the software uploads information from the processor or the file, it checks that each value is within the allowable range for that particular parameter. If you are uploading data from a module that has never been configured, the data table will contain random data. Some values may be outside of the normal range. If the value is outside allowable limits, it is reset to the default value, and you see a warning message. The status bar at the bottom of the window indicates whether the values displayed on the screen are defaults, uploaded from the processor, or uploaded from a file. Publication 1771–6.5.117 – March 1998 8–2 Using WeighScale Configuration Software to Configure the Module Important: Using the Module Configuration Screen The ModuleMonitor screen and theCalibration Wizard help you configure the module by interacting with an operating module. In offline mode, these tools will not work, nor will they access configuration information from a file. If you try to open the Monitor screen or Calibration Wizard without being connected to the processor, you see an error message, and the screen or wizard closes. Use the Module Configuration screen to enter and view configuration data for the WeighScale module. 1. On the Module List screen, select the module you want to configure by highlighting it. 2. Select Module...Configure. Or, with the mouse pointer over the Module pull-down menu, click the right mouse button to display a pop-up menu. Select Configure. You see the Configuration screen. Publication 1771–6.5.117 – March 1998 Using WeighScale Configuration Software to Configure the Module 8–3 3. Enter or select information on the Configuration screen. We tell you more about the information you will need to configure the module in the following section. Configuring the WeighScale Module Follow these steps to use WeighScale Configuration software to configure the module. Selecting the Unit of Weight in this field Unit of Weight do this select pounds (lb.) or kilograms (kg) Selecting Auto-zero Tracking in this field Auto-Zero do this select on or off Auto-zero tracking lets a scale automatically compensate for small variations at the zero point of the scale. These variations may be caused by slight material buildup on the scale platform or vessel, or by temperature fluctuations near the scale. The auto-zero function automatically sets the gross weight to zero when: • auto-zero is on • the scale is not in motion (the weight on the scale is constant for a period of time), and • the weight on the scale is near the calibration zero point (is in the active range) For the scale to be considered not in motion, the weight on the scale must be constant (within the in-motion tolerance) for a period of: 1 second + (moving average sample size + 1) (0.05 seconds) For example, if: zero tolerance = 5 lb. moving average sample size = 10 auto-zero tracking = on weight is between – 5 lb. and +5 lb. scale is motionless for 1.55 seconds then gross weight = zero Publication 1771–6.5.117 – March 1998 8–4 Using WeighScale Configuration Software to Configure the Module This diagram shows the range of weight over which auto-zero tracking is active. The calibration zero point determines the active range, not the current gross weight zero point. This prevents the scale zero from drifting from the true calibration zero point. ÇÇÇ ÇÇÇ ÇÇÇ ÇÇÇ ÇÇÇ ÇÇÇ ÇÇÇ Calibration zero + zero tolerance w e i g h t Calibration zero point Calibration zero – zero tolerance Auto-zero tracking active within shaded area Selecting the Number of Load Cells in this field No. of Load Cells do this enter the number of load cells used in the scale Selecting the Decimal Point Location in this field Digits to Right of Decimal Point do this enter the number of digits (0 – 6) to the right of the decimal point you want to be displayed on all weight display and entry fields When you select a decimal point location, you specify the number of digits ( 0 – 6) to be located to the right of the decimal point in weight display and entry fields. When you enter calibration or setpoint weights, you can enter only as many digits to the right of the decimal point as this setting specifies. Publication 1771–6.5.117 – March 1998 Using WeighScale Configuration Software to Configure the Module 8–5 For example, if: gross weight as measured by the scale = 90.7725765, and decimal point location = 2 then gross weight displayed = 90.77 Important: " When you change the decimal point location, calibration weight values are not automatically adjusted. You must recalibrate the scale. Failure to recalibrate the scale will result in gross and net weight displays being incorrect by a factor of whatever you changed the decimal point location to. Determining the decimal point loacation To determine the correct decimal point location, consider the following: • Weight values are limited to six digits, regardless of the decimal point location. This means that if you specify 2 places to the right of the decimal point, the maximum weight you can display or enter is 9999.99. • For most mechanical scales using load cells, the practical resolution limit is, at most, 1 part in 40,000. Changes smaller than this are rarely repeatable or accurate. Setting the decimal point location so large that one increment of the least significant digit represents a resolution finer than 1 in 40,000 will result in an unstable reading. • Although WAVERSAVER circuitry helps minimize the effect of vibrations, scales in high shock or vibration environments should use the smallest possible decimal point setting. Selecting the In-motion Tolerance Value in this field In-motion Tolerance do this enter the amount of weight change that will indicate to the module that the scale is in motion As the module operates, it repeatedly reads the signals from the load cell(s) and calculates the weight value. When you change the weight on the scale, the scale requires a little time to stabilize at the new reading, since changing a weight can cause the scale to swing or vibrate slightly. If you tried to zero (or tare) the scale while it was still moving, the zero or tare value would be inaccurate. Publication 1771–6.5.117 – March 1998 8–6 Using WeighScale Configuration Software to Configure the Module The module determines when the scale is in motion, and will not allow you to zero or tare the scale while the scale is moving. You can specify the amount of weight change the module uses to decide if the scale is moving. When the module senses scale motion, it disregards certain functions when scale motion exceeds the parameters you set. To specify the amount of weight change, enter a number (as many as six digits). The module subtracts the current weight reading from the previous weight reading. If the difference in the two values (ignoring the sign) is greater than the setting you entered, the scale is in motion. The module sets the in-motion bit in the data table. Selecting the Zero-tolerance Value in this field Zero Tolerance do this enter the range above or below the calibration zero point where auto-zero tracking or manual zero is permitted The zero-tolerance value defines a range of weights over which a manual or auto-zero is permitted. The zero point of a scale may vary slightly from what it was when the the scale was calibrated (the calibration zero point) due to causes such as: • mechanical wear • material buildup • temperature variations You can use auto-zero and manual zero to compensate for normal variations without recalibrating the scale. Important: If the variation from the calibration zero point grows too large, it may be an indication of a serious problem with the scale. Unless you identify and correct the problem, you may not be able to obtain accurate weight measurements. To specify the zero-tolerance value, enter a number (as many as six digits) that represents the maximum variation from the caibration zero point that you can compensate for with a manual or auto-zero. Publication 1771–6.5.117 – March 1998 Using WeighScale Configuration Software to Configure the Module 8–7 This diagram shows how the zero tolerance value affects the manual and auto-zero operation. Calibration zero + zero tolerance Calibration zero point Calibration zero – zero tolerance ÇÇ ÇÇ ÇÇ ÇÇ ÇÇ ÇÇ ÇÇ w e i g h t Auto-zero tracking and manual zero permitted within shaded area Selecting the WAVERSAVER Setting in this field WAVERSAVER Min. Noise Freq. select 7.5 Hz 3.5 Hz 1.0 Hz 0.5 Hz 0.25 Hz to get this faster response to weight changes less stable readings increased noise in weight signal slower response to weight changes more stable readings decreased noise in weight signal The WeighScale module includes a proprietary filter called WAVERSAVER that reduces the effect of noise or excess vibration in the weight signal. The filter rejects all variations in the weight signal above the minimum (or cutoff) noise frequency you set for your application. You can select one of five minimum noise frequency settings based on your application needs. The chart above gives you an idea of the advantages and disadvantages of selecting a higher or lower minimum noise frequency. Selecting Rate of Change Settings The WeighScale module (Series B or later) calculates the rate at which the weight value is changing by measuring the weight at the beginning and end of a defined time period. The difference in weight divided by the time interval is the rate of change. This value can help control the rate at which an ingredient is added to a vessel, for example. Publication 1771–6.5.117 – March 1998 8–8 Using WeighScale Configuration Software to Configure the Module Selecting the Rate of Change Evaluation Period in this field RoC Time Period do this enter the rate of change of evaluation period in increments of 0.05 (or use the keys) Set the time interval during which the module calculates weight change. You can enter an interval between 0.05 and 32.750 in increments of 0.05. Rate of Change Evaluation Period setting scale response shorter evaluation period faster updates of rate of change value value less stable and less accurate longer evaluation period slower updates of rate of change value value more stable and more accurate Selecting the Rate of Change Time Period in this field RoC Evaluation Period do this select seconds, minutes, or hours The rate of weight change is expressed in lb. or kg per second, minute, or hour, depending on your selections. Select seconds, minutes, or hours. Selecting the Moving Average Sample Size in this field Moving Average Sample Size do this enter the moving average sample rate in increments of 1 or use the keys) The WeighScale module reads the signal from the load cell and calculates weight every 50 milliseconds. To provide a more stable reading, the module can calculate a moving average using a sample size (from 1 – 200) you specify. For example, if you set the moving average sample size to 10, each reading is added to the previous 9 readings and the sum divided by 10 to determine the current weight. Moving Average Sample Size setting Publication 1771–6.5.117 – March 1998 scale response larger sample size slower response to weight changes more accurate reading (noise and variation may be reduced when more samples averaged) shorter sample size faster response to weight changes less accurate reading (noise and variation may increase when less samples averaged) Using WeighScale Configuration Software to Configure the Module 8–9 Selecting the Real-time Sampling Period in this field do this Real-time Sampling Period enter the real-time sampling period in milliseconds from 50 to 10000 in increments of 0.5 (or use the keys) Enter a real-time sampling period in milliseconds to control the period during which the module places new weight values into the block transfer read block. If a block transfer read is not executed within the real-time sampling period, the BTR time-out bit (bit 1 of word 0) in the status block is turned on. If a second BTR is executed within a real-time sampling period, the new data bit (bit 9 of word 0) in the status block turns off. This tells you that the values you just read in the block transfer have not been updated since the previous BTR. Viewing the Module’s Firmware Series and Revision in this field do this Firmware Series view the firmware series when uploaded from processor Revision view the firmware revision level when uploaded from processor Viewing the Module Density in this field Module Density do this view whether the module uses single- or double-density mode You can configure Series B and later WeighScale modules to use single- or double-density mode by setting a jumper within the module. We tell you how in Chapter 2 of this manual. Viewing the Module Status in this field Module Status do this view real-time status information On-line status information displays when the Configuration screen is opened, unless: • the module has not been previously configured, or • no communication link to the processor is available Publication 1771–6.5.117 – March 1998 8–10 Using WeighScale Configuration Software to Configure the Module WeighScale Configuration software displays messages about the status of the module, calibration and configuration: • messages about downloaded data appear on the right side of the status bar on the Module Configuration screen • messages about uploaded data appear on the left side of the status bar on the Module Configuration screen Understanding Download Messages These download messages are displayed on the right side of the status bar on the Configuration screen. this message Publication 1771–6.5.117 – March 1998 means Values written to disk file you have successfully downloaded configuration data to a disk file Values written to PLC you have successfully downloaded configuration data to the PLC processor data table Values written to PLC and file you have successfully downloaded configuration data to the PLC processor data table and a disk file Using WeighScale Configuration Software to Configure the Module 8–11 Understanding Upload Messages These upload messages are displayed on the left side of the status bar on the Configuration screen. this message means Default values displayed You see this message when you create a new module on the Module List screen, then access the Configuration screen. Default values are displayed on the Configuration screen until you perform an upload or download. Values updated from PLC you have successfully uploaded configuration data from the PLC processor data table Values updated from disk file you have successfully uploaded from the disk file Corrupt data uploaded from PLC (default values displayed) the application has found invalid configuration information in the PLC processor data table, and is displaying default values for corrupt data Values updated from clipboard you have cut or copied configuration values from a module to the clipboard, then pasted the values into a selected module on the Module List screen Understanding Configuration Messages You see these pop-up messages on the Configuration screen. if then you have made configuration changes and try to close the Configuration screen you are prompted to download your changes you performed an upload from the PLC processor and the PLC data table contains invalid configuration values When you click , default values will replace corrupt values on the Configuration screen. Verify configuration data and download it to the PLC processor. Publication 1771–6.5.117 – March 1998 8–12 Using WeighScale Configuration Software to Configure the Module Downloading Configuration Values All configuration settings you make take effect only when you download to a file or to the PLC processor. Important: We recommend that you download configuration information to the processor and to a project file. When you download to a project file, configuration information is stored with the project file. You can use the file to restore lost or damaged configuration data to the processor. Important: To use online mode to download configuration information, you must have a Data Highwayt Plus, serial, or Ethernet connection to the PLC processor, and INTERCHANGE or RSLinx software must be installed and running. Use RSLinx with Ethernet connections. Follow these steps to download configuration information. 1. On the Module Configuration screen, select Module...Download...PLC Module...Download...File or Module...Download...Both to download configuration values to select the PLC processor data table block to be transferred via ladder logic to the WeighScale module Module...Download...PLC disk to be uploaded as needed Module...Download...File both the PLC processor and a file Module...Download...Both You see the data source (processor or file) here. When you perform a download, you see the destination here. 2. View the right-hand side of the status bar to confirm that the values were downloaded. Publication 1771–6.5.117 – March 1998 Using WeighScale Configuration Software to Configure the Module " 8–13 Downloading tips Downloading to a file lets you perform configuration functions while your development computer is disconnected from the PLC processor. When you connect your development computer to the processor, you can transfer information between the file and the processor. Downloading only to the PLC processor may be useful when you are testing changes. The file will retain your unaltered settings. If you want to revert to the unaltered settings, do the following: 1. Upload the configuration information from the file. 2. Download the configuration information to the PLC processor. 3. When you are done making changes, download them to the file to save them. Uploading Configuration Values When you first select a project to open, configuration data you previously downloaded is uploaded automatically. You can perform a manual upload at any time, however. This is useful, for example, when you want to transfer data stored in the file to the processor. Follow these steps to upload configuration information. 1. On the Module Configuration screen, select Module...Upload...PLC or Module...Upload...File to upload configuration values from select the PLC processor data table block Module...Upload...PLC disk to be downloaded as needed Module...Upload...File 2. View the left-hand side of the status bar to confirm that the values were uploaded. When you perform an upload, you see the destination here. Publication 1771–6.5.117 – March 1998 8–14 Using WeighScale Configuration Software to Configure the Module Copying Configuration Values Between Modules If you have several modules with similar (or identical) configurations, you can configure one module, then use that module to configure other similar modules. This procedure assumes that you have already added the destination module to your project (see Chapter 6 of this manual). To copy configuration data from one module to another: 1. On the Module List screen, select the source module by highlighting it. 2. Select Edit...Copy. 3. Select the destination module by highlighting it. The destination module can be in the same project or a different project. 4. Select Edit...Paste Into Selection. 5. Access the Configuration screen for the destination module. From the Configuration screen: A. View the pasted data. B. Make any required changes. C. Download configuration information to: • the PLC processor • a file, or • both the processor and a file Copying Configuration Values into a New Module When You Are Using the Ladder Logic Utility If you have several modules with similar (or identical) configurations, you can configure one module, then use that module to configure other similar modules. To copy configuration data from one module to another when using the ladder logic utility: 1. On the Module List screen, select the source module by highlighting it. 2. Select Edit...Copy. 3. Select Edit...Paste Into New...Use Utility. Publication 1771–6.5.117 – March 1998 Using WeighScale Configuration Software to Configure the Module 8–15 4. Enter this information in this field type Name the name of the module (you cannot use spaces; however, you can use underscores) the PLC processor Data Highway node address (does not apply to serial connection, but you must still specify a node address) PLC Address Series DT Address the module series (the ladder logic utility is supported by Series B or later) the data table starting address 5. Once you have entered information, click on . 6. Access the Configuration screen for the destination module. From the Configuration screen: A. View the pasted data. B. Make any required changes. C. Download configuration information to: • the PLC processor • a file, or • both the processor and a file Copying Configuration Values into a New Module When You Are Not Using the Ladder Logic Utility If you have several modules with similar (or identical) configurations, you can configure one module, then use that module to configure other similar modules. To copy configuration data from one module to another when you are not using the ladder logic utility: 1. On the Module List screen, select the source module by highlighting it. 2. Select Edit...Copy. 3. Select Edit...Paste Into New...Do Not Use Utility. Publication 1771–6.5.117 – March 1998 8–16 Using WeighScale Configuration Software to Configure the Module 4. Enter this information: in this field type Name the name of the module(you cannot use spaces; however, you can use underscores) the PLC processor Data Highway node address(does not apply to serial connection, but you must still specify a node address) the module series PLC Address Series BTR Data Address BTW Data Address the starting address for the PLC processor block transfer read data the starting address for the PLC block transfer write data Setpoint Achieved Address the address of the PLC processor data table word where your ladder logic copies the setpoint status bits from the input image file BTW Trigger Bit Address the address of the PLC processor data table bit that triggers a block transfer write 5. Click on . The module is added to the list. 6. Access the Configuration screen for the destination module. From the Configuration screen: A. View the pasted data. B. Make any required changes. C. Download configuration information to: • the PLC processor • a file, or • both the processor and a file What to do Next Publication 1771–6.5.117 – March 1998 To help learn about how to calibrate the WeighScale module, read Chapter 9, “Using WeighScale Configuration Software to Calibrate the Module.” Using WeighScale Configuration Software to Calibrate the Module WeighScale Configuration Software provides you with three types of calibrations: use this type of calibration Before You Begin STOP hard physically measuring low and high weights soft entering sensitivity and resistance values for each load cell C2 automatically uploading sensitivity and resistance values from Hardy Instruments load cells Before you can calibrate the module: • you must configure the module (see Chapter 8 of this manual) • you will need the following: to perform this type of calibration Which Type of Calibration is Best for Your Application? to calibrate the scale by you will need hard •an accurate, known weight near the maximum scale capacity to use as the high weight •optional: an accurate, known weight between 0 and the high weight soft the sensitivity and output resistance values for each load cell in your scale (from the manufacturer’s specifications or the load cell certificate) C2 Hardy Instruments’ load cells compatible with C2 calibration You can accurately calibrate a scale using any of the three methods we describe in this chapter. The three methods differ in ease of use and information and supplies required. We describe the benefits of each type of calibration here. C2 Calibration C2 calibration is the easiest of the three calibration types, since only one test weight (which can be zero) is required. C2 calibration requires that you use Hardy Instruments’ load cells, however. Publication 1771–6.5.117 – March 1998 9–2 Using WeighScale Configuration Software to Calibrate the Module Soft Calibration Soft calibration, like C2 calibration, requires only one test weight. You can use soft calibration on any manufacturer’s load cells. You need to know the sensitivity and output resistance for all your load cells. You can get this information from the manufacturer’s specifications, or the load cell certificate. Hard Calibration Hard calibration requires two or three accurate, known test weights. You can use hard calibration on any manufacturer’s load cells. You do not need to know the sensitivity and output resistance for your load cells. " Achieving calibration accuracy If you are using only a portion of your scale’s range, you can achieve the greatest calibration accuracy by: • performing a hard calibration • choosing low, middle, and high test weights that cover the operating portion of your scale’s range For example, if you are using a 10,000 lb. scale, but use it in the range of 2,000 – 5,000 lb., you could use test weights of 2,000, 3,500, and 5,000 lb. Accessing the Calibration Wizard Follow theses steps to access the Calibration Wizard. from Publication 1771–6.5.117 – March 1998 do this the Module List screen 1. Select the module you want to calibrate by highlighting it. 2. Select Module...Calibrate. or click the right mouse button, then select Calibrate the Configuration screen select Module...Calibrate Using WeighScale Configuration Software to Calibrate the Module " 9–3 Gross and net weight displays The Calibration Wizard displays the gross and net weight in real-time values. These values are updated constantly in the active window. The Calibration Wizard also displays the unit of weight you selected in configuring the module. The Calibration Wizard allows you to enter calibration weight values in the units you selected. " Previous calibration date and ID The Calibration Wizard displays the date of the last successful calibration, and the ID that was used. The ID value is provided so you can identify the person performing the calibration. It is not used by the module. The ID can be as many as four alpha-numeric characters. " Module status The Calibration Wizard displays real-time status messages from the module. " Enabling buttons A button appears gray when it is disabled. When you are instructed to click on a button on the screen, you may have to wait as many as 15 seconds before the button is enabled. Buttons are not enabled until all conditions are right to continue. " Advancing to the next step If the wizard does not appear to advance to the nest step, check the Status pane for error messages. " Going back to a previous page You can go back to a previous page by clicking the button. When you go back, you must repeat all steps on the previous and subsequent pages. Publication 1771–6.5.117 – March 1998 9–4 Using WeighScale Configuration Software to Calibrate the Module Performing a Hard Calibration Follow these steps to perform a hard calibration. 1. If you have not already done so, access the Calibration screen. 2. In the ID field, enter an ID you select. The ID can be as many as four alpha-numeric characters or spaces. 3. Select the 4. Click on radio button. . 5. Place a low calibration weight (the weight could be zero) on the scale. 6. Enter the low calibration weight in the appropriate field. 7. Click on . After 12–15 seconds, you see a message telling you the low calibration weight has been accepted. 8. Click on Optional: You are not required to enter a midpoint linearization weight. Doing so is useful for ensuring more accurate weighing. . 9. Place a midpoint linearization calibration weight on the scale. 10. Enter the midpoint linearization calibration weight in the appropriate field. 11. Click on . You see a message telling you the midpoint linearization calibration weight has been accepted. 12. Click on . 13. Place the high calibration weight on the scale. " Selecting a high calibration weight We recommend that you select a high calibration weight value that is 80–100% of the scale capacity. Publication 1771–6.5.117 – March 1998 Using WeighScale Configuration Software to Calibrate the Module 9–5 14. Enter the high calibration weight in the appropriate field. 15. Click on . After about 12–15 seconds, you see a message telling you the high calibration weight has been accepted. 16. Click on . You see the Accept Values screen. to click on store the values you entered in the module’s non-volatile memory discard the values you entered Performing a Soft Calibration Follow these steps to perform a soft calibration. 1. If you have not already done so, access the Calibration screen. 2. In the ID field, enter an ID you select. The ID can be as many as four alpha-numeric characters or spaces. 3. Select the 4. Click on radio button. . 5. Click on . You see the Set Soft Calibration Load Cell Values screen. 6. Enter the load cell’s sensitivity and output resistance from the manufacturer’s specifications, or the load cell certificate. A numbered field is displayed for each load cell you are using. You can enter the values in any order as long as you enter the sensitivity and output resistance values for a given load cell in the same numbered field. enter sensitivity values in units of millivolts per Volt of excitation (m V/V) and within this range 0.5–4.0m V/V enter output resistance in units of ohms Publication 1771–6.5.117 – March 1998 9–6 Using WeighScale Configuration Software to Calibrate the Module to click on accept the sensitivity and output resistance values discard the values you entered 7. Place a low calibration weight (the weight could be zero) on the scale. 8. Enter the low calibration weight in the appropriate field. 9. Click on . After about 12–15 seconds, you see a message telling you the low calibration weight has been accepted. 10. Click . You see the Accept Values screen. to click on store the values you entered in the module’s non-volatile memory discard the values you entered Performing a C2 Calibration Follow this procedure to perform a C2 calibration. 1. If you have not already done so, access the Calibration screen. 2. In the ID field, enter an ID you select. The ID can be as many as four alpha-numeric characters or spaces. 3. Select the radio button. 4. Place a low calibration weight (the weight could be zero) on the scale. 5. Enter the low weight in the appropriate field. 6. Click on . After about 12–15 seconds, you see the a message telling you the low calibration weigh has been accepted. 7. Click on . You see the Accept Values screen. to click on store the values you entered in the module’s non-volatile memory discard the values you entered 8. When calibration values have been stored, you see a status message. Click on . Publication 1771–6.5.117 – March 1998 Using WeighScale Configuration Software to Calibrate the Module Restoring a Calibration 9–7 The WeighScale module always saves the last successful calibration to its non-volatile memory. When you want to replace an existing WeighScale module with a new one without calibrating the module, you can restore a previously saved calibration. You can also restore a calibration when you want to use the previously saved calibration instead of one you are currently working on, or to replace calibration data from a failed module. Important: You should only restore a calibration as a short–term solution for replacing a failed module. Weight readings obtained from a module whose calibration was restored from another module may not be as accurate as readings from the original module. After you have replaced the failed module, recalibrate it as soon as possible. To restore a calibration, follow these steps. 1. If you have not already done so, access the Calibration screen. 2. In the ID field, enter an ID you select. The ID can be as many as four alpha-numeric characters or spaces. 3. Select the 4. Click on 5. Click on radio button. . You see the Restore Calibration screen. . 6. When calibration values have been stored, click on . Publication 1771–6.5.117 – March 1998 9–8 Using WeighScale Configuration Software to Calibrate the Module Reading Resistance To isolate problems with the module, or with the external load cells or wiring, you can read the WeighScale module’s internal resistance. During factory testing and calibration, the module is set to read the value of an internal resistor. This resistance is stored in the module’s non-volatile RAM. When you want to test the module, follow this procedure: 1. If you have not already done so, access the Calibration screen. 2. In the ID field, enter an ID you select. The ID can be as many as four alpha-numeric characters or spaces. 3. Select the radio button. You see the Read Counts screen. As the internal resistor is read, the software displays the resistance count. 4. Verify that the count stabilizes after 10 – 15 seconds. if then the resistance count is within acceptable tolerance of the stored value (count stabilizes after 10 – 15 seconds), and a test resistance failure does not occur (status block word 1, bit 13 is not set) The module is operating properly. If you still experience problems, the load cells or wiring may be bad, and may need to be replaced. a test resistance value failure occurs (status block word 1, bit 13 is set) The value is out of tolerance. You see an error message in the status window on the screen. The module is not operating properly. Contact your Rockwell Automation representative. 5. When you are finished reading resistance, click on What to do Next Publication 1771–6.5.117 – March 1998 . To help learn how to interpret status information returned by the WeighScale module, read Chapter 10, “Using the Module Monitor Screen.” Using the Module Monitor Screen This chapter tells you how to monitor and control WeighScale module operation using the Monitor screen. You can also view status data directly from the data table. See Appendix C of this manual for more information on monitoring status data from the data table. Accessing the Monitor Screen To monitor and control a module, access the Monitor screen. 1. On the Module List screen, select the module you want to monitor by highlighting it. 2. Select Module...Monitor. Or 1. With the mouse pointer over the module list, click the right button to display the pop-up Module menu. 2. Select Monitor. You see the Monitor screen. Publication 1771–6.5.117 – March 1998 10–2 Using the Module Monitor Screen Viewing or Entering Data Publication 1771–6.5.117 – March 1998 View or enter data on the Monitor screen. in this field do this Net Weight view the net weight on the scale (net weight = gross weight – tare weight) Gross Weight view the gross weight on the scale Rate of Change view the rate at which weight on the scale is changing Scale Capacity view the maximum scale capacity (determined by multiplying the number of load cells by the individual load cell capacity) Module Status view status messages, warnings, and errors from the module Zero Enable/Disable Press the button to toggle the zero enabled/disabled function. The gross weight is set to zero when the zero function is enabled, the scale is not in motion, and the gross weight is within the zero tolerance value specified on the Configuration screen. If security is enabled, you must have the Perform Tare or Zero privilege to perform this operation. Tare Enable/Disable Press the button to toggle the tare enabled/disabled function. When the tare function is enabled and the scale is not in motion, the tare value is continuously set to the gross weight. This results in anet weight of zero. Close/Cancel Press the button when it is labeled “Close” or “Cancel” to close the screen. If you press the button when it is labeled “Cancel”, you see a message warning you that setpoint, deadband, and preact values have been changed but not downloaded. Using the Module Monitor Screen Series B only What to do Next 10–3 These field are active only with Series B or later modules. in this field do this Current Setpoint 1 Current Setpoint 2 view the current values for setpoints 1 and 2 Setpoint 1 indicator Setpoint 2 indicator View the indicator (glows red when the corresponding setpoint status output from the module is on). This occurs when the net weight is greater than the setpoint plus the preact value. Current Deadband 1 Current Deadband 2 view the weight value in use for deadbands 1 and 2 Current Preact 1 Current Preact 2 view the weight value in use for preacts 1 and 2 New Setpoint 1 New Setpoint 2 enter a new value for setpoint 1 or 2 (takes effect after it has been downloaded to the module) New Deadband 1 New Deadband 2 enter a new value for deadband 1 or 2 (takes effect after it has been downloaded to the module) New Preact 1 New Preact 2 enter a new value for preact 1 or 2 (takes effect after it has been downloaded to the module Download Press the button to download new setpoints, deadbands, or preacts to the PLC processor. If security is enabled, you must have the Update Setpoints privilege to perform this operation. To help learn how to produce a printed report for you project or module, read Chapter 11, “Documenting Projects.” Publication 1771–6.5.117 – March 1998 10–4 Using the Module Monitor Screen Notes: Publication 1771–6.5.117 – March 1998 This chapter shows you how to use WeighScale Configuration software to view or print descriptive reports for each project or module, as well as the values of all configuration parameters. Each section of the report includes: • a header showing the name of each item and its descriptive information • a list of all parameters • the current value of each parameter The reports can display data values: • on-line (from the PLC processor), or • offline (from a file) to Viewing a Project do this view reports on screen use the print preview option (select Project...Print Preview) print reports to a printer attached to your computer use the print option (select Project...Print) To view a project: 1. On the Project Manager screen, select the project you want to view by highlighting it. 2. View the project on-line or offline. A. To view values from the PLC processor, select Project...Print Preview...Online (PLC) Values. B. To view values from a file, select Project...Print Preview...Offline (File) Values. 3. On the print dialog box that appears, click on one of the following: to click on include all modules in the project in the report include only the selected module in the report 4. Click on . The file is displayed on the screen. Publication 1771–6.5.117 – March 1998 11–2 Documenting Projects Printing a Project To print a project: 1. On the Project Manager screen, select the project you want to print by highlighting it. 2. Print the project on-line or offline. A. To print values from the PLC processor, select Project...Print...Online (PLC) Values. B. To print values from a file, select Project...Print...Offline (File) Values. 3. On the print dialog box that appears, click on one of the following: to click on include all modules in the project in the report include only the selected module in the report 4. Check that all printer information is correct, and click on . What to do Next Publication 1771–6.5.117 – March 1998 To help learn how to troubleshoot the module, read Chapter 12, “Troubleshooting the Module.” This chapter gives you information for troubleshooting your system. We list these in order of ease of performing and likelihood of helping you isolate the problem. Diagnostics Reported by the Module At power-up, the module checks for: • correct RAM operation • EPROM operation • EEPROM operation During this self-diagnostic check, the RUN/FLT (fault) indicator flashes green at a rate of 5 to 10 times a second. (We show the indicators in Figure 12.1.) This self-diagnostic check lasts from 2 to 30 seconds, depending on the WAVERSAVERt selection; the lower the frequency, the longer the time. When it completes this check satisfactorily, the RUN/FAULT indicator stops this rapid flashing. However, if the module does not have valid calibration data, the RUN/FAULT indicator flashes green at a rate of once a second. When it completes this check satisfactorily and the module has valid calibration data, the RUN/FAULT indicator becomes a steady green. If a fault is found initially or occurs later, the RUN/FAULT indicator turns red. The bottom indicator is the calibrate/communication indicator: • This indicator flashes green when doing block transfers • It flashes red during calibration Figure 12.1 Indicators indicator when green when red RUN/FAULT flashes 5HZ — during self check at power-up flashes 1HZ — after self check until valid calibration solid — after self check and valid calibration solid — a fault is found CAL/COM flashes — during block-transfer flashes — during calibration RUN/FLT CAL/COM Publication 1771–6.5.117 – March 1998 12–2 Troubleshooting the Module Troubleshooting with the Indicators Table 12.A shows indications, probable causes and recommended actions to correct common faults which may occur. Table 12.A Troubleshooting Chart indication Bot indicators in icator are OFF FF Both probable cause recommended action No power to module Check power to I/O chassis. Recycle as necessary. Possible short on the module LED driver failure Microprocessor, oscillator or EPROM failure If immediately after power-up, indicates RAM or EPROM failure. If during operation, indicates possible microprocessor or backplane interface failure. RUN/FLT indicator ON red Replace module. Replace module. Replace module. Replace module. RUN/FLT indicator is flashing green at 5–10Hz Power–up diagnostics in progress. Normal operation for the first 2 to 30 seconds. RUN/FLT indicator is flashing green at 1Hz, but CAL/COM indicator is off Power–up diagnostics successfully completed, but no valid calibration data. Calibrate the module. RUN/FLT indicator is solid green Power-up diagnostics successfully completed, and valid calibration data on board. Normal operation. CAL/COM indicator is flashing green Block transfer in progress. Normal operation. CAL/COM indicator is flashing red Calibration in progress. Normal operation. Reading On-board Resistance Checking Resistance with a Simulator Connected To read on-board resistance, using either WeighScale software, or bit 9 of word 32 in the write block, select to connect the on-board resistance across the sense and signal lines: if the weight reading with this resistance connected is then not stable and repeatable replace the WeighScale Module with a spare stable and repeatable the input section of the module is functioning correctly; try connecting a simulator To perform resistance checks with a simulator connected: 1. Remove all power from the remote termination panel by disconnecting the cable from the module. 2. Disconnect the load cell cable or junction box cable from the remote termination panel. Publication 1771–6.5.117 – March 1998 Troubleshooting the Module 12–3 3. Connect a load-cell simulator to the remote termination panel. Follow the color code of the simulator, and if possible, connect it in the same configuration you used for the load cell. (See Figures 2.3, 2.4, and 2.5.) If the simulator cannot be connected in the same configuration as the load cell, connect it in the configuration for which it is intended. 4. With all power removed and the cable from the module disconnected, at the remote termination panel, check the resistance from +excitation to –excitation and from +signal to –signal. 5. Compare these values with the resistance ratings of your simulator. 6. If the resistance values you read don’t match the ratings of your simulator, re-check your wiring. 7. If you are satisfied that your wiring is OK and the resistance values you read don’t match the ratings of your simulator, replace the simulator. 8. If the resistance values you read match the ratings of your simulator, reconnect the cable from the module to the remote termination panel and check the block-transfer communication with the PLC processor. Publication 1771–6.5.117 – March 1998 12–4 Troubleshooting the Module Checking Block-transfer Communication To check the block-transfer communication with the PLC processor: 1. Check to see that the block-transfer addressing is consistent with the addressing mode (½-slot, 1-slot, or 2-slot) on the I/O chassis containing the Weigh Scale Module. 2. Ensure that the words in the block-transfer control structures and read and write blocks in the data table are not being written over by some other ladder logic. 3. Check for errors reported in the block-transfer control structures. If you are addressing the module correctly and are receiving block-transfer error indications, replace the Weigh Scale Module with a spare. 4. Read the value in read-block words 26 and 27 as you change the output of the simulator. If this value does not change, check the status of bits 3 and 4 in word 0 of the read block. If either of these bits is on (indicating over range of under range), recheck the wiring to the simulator. If the counts in words 26 and 27 changes as you change the output of the simulator, the block-transfer communication is OK: Calibrating the Module to the Simulator Publication 1771–6.5.117 – March 1998 for this simulator you will see a change of approximately 0-20mV/V 656,000 counts as you adjust the simulator from 0 to 100% 0-30mV/V 985,000 counts as you adjust the simulator from 0 to 100% Once you have established communication between the PLC processor and the Weigh Scale Module, calibrate the module to the simulator. If you use the WeighScale software to configure the module, check the status messages displayed on the calibration screen. If you use ladder logic to directly manipulate the write block to configure the module, check the status values in the read block. If you cannot calibrate the module at this point, replace the Weigh Scale Module with a spare. If you can calibrate the module, the module is probably OK; reconnect the load cell. Troubleshooting the Module Checking Resistance of the Scale System 12–5 To perform resistance checks of the scale system: 1. Remove all power from the remote termination panel by disconnecting the cable from the module. 2. Disconnect the simulator from the remote termination panel. 3. Reconnect the load cell or junction box to the remote termination panel. 4. With all power removed and the cable from the module disconnected, at the remote termination panel and the junction box, check the resistance from +excitation to –excitation and from +signal to –signal. 5. Compare these values with the resistance ratings of your load cells. Remember that if you have multiple load cells connected through a junction box, they are connected in parallel; therefore the total resistance would be: RL RT = — N Where: RT = the total resistance RL = the resistance per load cell N = the number of load cells For example, if 4 load cells are each rated at 350.0W, the total resistance would be 87.5W at the junction box. If the distance between the junction box and the remote termination panel is significant, the resistance measured at the remote termination panel because of resistance in the wiring. If the resistance doesn’t match the rating and the wiring is OK, replace load cells until you find the one that is faulty. If the resistance does match, check the load-cell mounting. Checking Load-cell Mounting Check to see that none of the load cells are mounted upside down. By load cell, we mean specifically the device in which the strain gage is mounted — not the mounting assembly. Also check to see that the load cells are free from any binding. If the mounting seems to be OK, try disconnecting the piping. Publication 1771–6.5.117 – March 1998 12–6 Troubleshooting the Module Calibrating with Piping Disconnected Try calibrating the module with piping disconnected: 1. Disconnect all piping from your vessel. 2. Try to calibrate the module and test your calibration with weights: • If you are still unable to calibrate your module, recheck the load-cell mounting • If you are able to calibrate the module, continue 3. Reconnect one pipe. 4. Try to calibrate the module and test your calibration with weights. 5. Continue reconnecting one pipe at a time and trying to recalibrate each time until you find any point that may be binding on your vessel. Troubleshooting Load Cells Inspect each load cell for physical damage. Look for distortion or cracks in all metal parts. Excessive rippling of the diaphragm on a canister may indicate damage. All welds should be free of cracks and deep pox marks. Cables should also be free of cuts, crimps, and excessive abrasion. Make note of anything that looks out of the ordinary. The following three electrical tests can be useful in troubleshooting potential load-cell problems. Zero Balance Test Changes in zero balance can be caused by overloading the load cell. Some changes may be tolerated in some applications. With a milli-voltmeter, measure the load cell output under no-load conditions. It should be less than 1% (the typical tolerance for zero balance) of the full scale output. (Check the specification for zero balance tolerance and output sensitivity.) Cells can shift as much as approximately 10% of full scale and still be correctly functioning. Re-gaging may be recommended if the output has shifted more than 10%.. A typical value for a 1% shift in zero balance is 0.3mV. This assumes 10V excitation on a load cell with 3mV/V output sensitivity. Full scale output with these conditions is 30mV. One percent of 30mV is 0.3mV. Publication 1771–6.5.117 – March 1998 Troubleshooting the Module 12–7 Bridge Resistance Changes in bridge resistance are most often caused by a failure of a compensating element or by a broken or burned bridge wire,, usually caused by an electrical transient such as lightning. Either type of failure must be repaired. With an ohmmeter, measure the resistance across each pair of input and output leads. The values are the input and output resistance of the bridge. The resistance is normally approximately 350W for single-ended beams and canisters and 700W for double-ended beams. Refer to the load-cell drawing or data sheet for actual specified values. Readings should be within 1.0% of specified values. Reading outside of this tolerance suggest damage; thoroughly inspect the load cell. Resistance to Ground Electrical leakage is usually caused by water contamination within the load cell or cables. Whether the leakage can be tolerated depends on the application and the electronic instrumentation being used. An unstable output is most often caused by contamination. With a megohmmeter, measure the resistance between all 5 leads tied together (4 live leads plus the ground lead) and the metal body of the load cell. The reading should be 500 megohms or more. If the cell fails this test, remove the ground wire and test with only the 4 live leads. If it tests OK with the ground wire removed after failing with the ground wire included, the cable probably has an insulation problem. " Repairing failed load cells If the load cell needs to be returned to the factory for further examination or repair, be as detailed in the description of the failure as possible. As an example, if the load cell has drifted, mention the circumstances. Does it drift with load, without load, under temperature variation, etc.? Only factory technicians should perform any additional tests and make repairs. Publication 1771–6.5.117 – March 1998 12–8 Troubleshooting the Module Notes: Publication 1771–6.5.117 – March 1998 Writing Custom Ladder Logic In this chapter, we describe what you need to know to write custom ladder logic for the WeighScale module. " Addressing the WeighScale Module Also refer to Appendix B, “Editing the Configuration/Calibration Block.” In double density (Series B) mode, I/O data is both single and block transferred between the WeighScale Module and the PLC processor. The module uses a word of input image table and a word of output image table: Output Image Table 17 17 Reserved 12 11 High Byte 10 07 Low Byte 00 10 1= weight matches setpoint 1 within tolerance of preact 1 and deadband 1 Reserved For block transfer instructions, For single transfer control, read from address the low byte (0). the high input byte (control bits). 1= weight matches setpoint 2 within tolerance of preact 2 and deadband 2 17 High Byte Low Byte 10 07 Input Image Table 00 Publication 1771–6.5.117 – March 1998 A–2 Writing Custom Ladder Logic • The low byte of the input and output image word is used exclusively for block-transfer if you configure the I/O chassis for address the WeighScale Module through ½-slot addressing byte 0 of the low I/O group used for addressing the slot containing the module 1-slot addressing byte 0 of the I/O group used for addressing the slot containing the module • The high byte of the output image word is not used • The high byte of the input image word is used exclusively for single-transfer read this bit Updating Weight Values for bit 10 comparison result for setpoint 1 bit 11 comparison result for setpoint 2 The module’s A/D conversion period is 50ms. After each A/D conversion, the value of that sample is used together with the value of each of a specified number of preceding samples to calculate an average weight value to place into the status block. The number of samples used to calculate the average weight is a value you specify (1 through 200) when you configure the module. Important: Time Although a number of samples is used to calculate an average before a weight value is put into the status block, a new average is calculated after each sample is taken (every 50ms). 50ms A/D 100ms A/D 150ms A/D 200ms A/D 250ms A/D 300ms A/D Use the value of this sample together with the specified number of preceding samples to calculate the average weight. The module places a new average weight value into the status block each real-time sampling period. You specify this sampling period (50ms through 10,000ms in increments of 50ms) when you configure the module. (See Chapter 8, “Using WeighScale Configuration Software to Configure the Module” or Appendix B, “Editing the Configuration/Calibration Block.”) Publication 1771–6.5.117 – March 1998 Writing Custom Ladder Logic A–3 Although the module can place a new average weight value into the status block every 50ms, the amount of time it takes, in the worst case, before a change of weight at the load cell is fully reflected in the average weight reported in the status block is expressed by the formula: T = S x 50ms + R Where: • T = the amount of time it takes before a change of weight at the load cell is fully reflected in the average weight reported in the status block • S = the number of samples specified for the average • R = the time delay based on the WAVERSAVERt frequency-rejection level you select as indicated in the following table: if the WAVERSAVER frequency-rejection level is: then: 7.50Hz R = 0.1s 3.50Hz R = 0.4s 1.00Hz R = 0.8s 0.50Hz R = 1.7s 0.25Hz R = 3.3s Publication 1771–6.5.117 – March 1998 A–4 Writing Custom Ladder Logic Update Example Consider this example in which you have selected a real-time sampling period of 50ms, and the weight at the load cell instantaneously increases from 0 to 40 lb: Time 50ms 100ms 150ms 200ms 250ms 300ms 350ms 40 lb 30 lb Actual weight at load cell 20 lb 10 lb 0 lb Sample weight reflecting a 100ms time delay resulting from a frequency-rejection selection of 7.5Hz 40 lb 30 lb 20 lb 10 lb 0 lb 40 lb Average weight based on 4 samples 30 lb 20 lb 10 lb 0 lb In this example, if you have selected a WAVERSAVER frequency-rejection level of 7.50Hz, the full change in weight is not reflected in the samples taken in the module until after a 100ms delay. With a selection of 4 samples used to calculate the average, this average weight entered into the status block does not reflect the actual weight of 40 pounds until 200ms later, or a total of 300ms after the weight change occurred at the load cell. Publication 1771–6.5.117 – March 1998 Writing Custom Ladder Logic A–5 New Data Real-time sampling lets you cycle data between the module and the PLC processor at a rate you specify. You set the real-time sampling period based on the required system response time and the rate at which the system can execute block-transfer reads. Set the real-time sampling period to be greater than the required system response time and less than the BTR period. (If you do not configure the real-time sampling period, the module uses the default setting stored in its memory.) At the completion of each real-time sampling period, as newly calculated averages are entered into the status block, the new-data bit (bit 9 of word 0) in the status block is turned on. As each block transfer read is executed, the new-data bit is turned off. If your ladder logic causes a second block transfer read to be executed within a real-time sampling period, the module will not respond. This tells you that the values you just read in that block transfer have not been updated since the previous block transfer read. This is an indication that you are unnecessarily using up I/O scan time without getting any new data. The rate at which you need to execute block transfer reads is entirely dependent on how quickly a response is needed to a change in weight for your application. Consider an application example in which you have determined that a total system response time of 1500ms is adequate, and the module is in a remote I/O chassis. In this example: • the valve turn-off time is 200ms • the I/O scan time is 20ms • the program scan time is 35ms • the time it takes to do the block-transfer read is 2 I/O scans plus 1 program scan plus 10ms for 29 words, for a total of 85ms • the WAVERSAVER frequency-rejection level selected is 7.5Hz, and the number of samples selected for the weight averaging is 4, which generates a total time delay on the module of 250ms For this example, if a block-transfer read were executed every I/O scan, the system response time would be: T = (250 + 85 + 35 + 20 + 200) = 690ms Therefore, for this application example you could set a real-time sample period of 900ms and use an 850ms timer to trigger the block-transfer read instruction to save I/O scan time and still meet the total system response time of 1500ms. Publication 1771–6.5.117 – March 1998 A–6 Writing Custom Ladder Logic Real-Time Sample Period BTR Time-out Once the module enters new data into the status block at the end of real-time sample period, it checks to see whether a block-transfer read occurs during the following real-time sample period. If none occurs, the module turns on the real-time sample period BTR time-out bit (bit 1 of word 0) in the status block. If you find that the BTR time-out bit in the status block is turned on, you should either lengthen the real-time sample period or shorten the BTR period by trying to execute a block-transfer read more often. If you are using a timer to trigger the block-transfer read, set a smaller preset time in the timer. If you are attempting to execute a block transfer read on each program scan and you are still getting a time-out, you may be able to shorten the time between block transfer reads by either shortening the effective program scan or shortening the I/O scan. You can shorten the effective program scan by repeating the BTR rung in the ladder logic. You can shorten the scan time of a remote I/O link by moving some I/O chassis from that remote I/O link to another remote I/O link. You can also shorten the I/O scan time for the WeighScale Module by moving it from a remote I/O chassis to a local chassis. Are you using single-density (Series A) mode? No You don’t need to calculate the flow. Use this formula: Yes F= WC – WP P Where: F = flow WC = weight from current sampling period WP = weight from previous sampling period P = real-time sampling period In double-density (Series B) mode, the module automatically calculates the rate-of-change value. Publication 1771–6.5.117 – March 1998 Calculating Flow Giving you control over the real-time sampling period allows you to calculate flow or rate of change from the change in weight that you measure. To calculate flow, the real-time sampling period must be greater than the block transfer read period. If bit 1 of word 0 in the status block is set to 1, this indicates that a block transfer read did not occur within the real-time sampling period because the block transfer read period is too great. Therefore, the calculation is invalid. Also, you must disregard values from any block not identified as new data. The status block is identified as new data by bit 9 of word 0 being set to 1. Writing Custom Ladder Logic Setting up Communication A–7 Comparison result bits 10 and 11 (octal) are returned by single transfers. All other communication with the WeighScale Module is by block transfer. Your ladder logic must provide the proper sequence of block transfer communication with the module. 1. At initial start-up, write (block transfer) the configuration/calibration block to the module from the processor. 2. Read (block transfer) the status block from the module continuously at a rate based on the period of time it takes for the module to update the weight values and the real-time sampling period you select. 3. Whenever you need to recalibrate the module, reconfigure the module, reset the tare value, or zero the gross weight, write (block transfer) the configuration/calibration block to the module. " Understanding how the module communicates The pages that follow use programming examples to show you how you can communicate with the module. Editing the Configuration/Calibration Block if you’re using this mode the configuration/calibration block contains single density (Series A) 33 words double density (Series B) 64 words In Chapter 8 and Chapter 9, we tell you how to enter the values for this block from the Configuration and Calibration screens. Most of this block is transparent to you. We list the entire block in Appendix B for reference. However, words 0, 1, and 2 provide selections that you may want to change “on the fly” through your ladder logic from operator-panel switch inputs. Setting the Block Transfer Write Trigger Address You can generate block transfers to and from the WeighScale Module: • To generate a block transfer to the 1771-WS module, your ladder logic must execute a block transfer write instruction • To generate a blocktransfer from the 1771-WS module, your ladder logic must execute a block transfer read instruction After you have edited your ladder logic file, you can use WeighScale Configuration software to specify the block transfer write trigger address and enable the bit. Publication 1771–6.5.117 – March 1998 A–8 Writing Custom Ladder Logic These examples apply to a WeighScale Module located in the 0 slot of I/O group 1 of I/O rack 0 (the processor-resident local I/O chassis) with a configuration and calibration block starting at N140:100 and a status block starting at N140:150. Therefore, with these arbitrarily chosen starting addresses for these blocks and arbitrarily chosen addresses for digital I/O, we use the following addresses in these examples. Publication 1771–6.5.117 – March 1998 this is the address of N140:100 the first word of the configuration and calibration (write) block N140:100/0 the write-block bit to select a frequency-rejection level of 7.50 Hz N140:100/1 the write-block bit to select a frequency-rejection level of 3.50 Hz N140:100/2 the write-block bit to select a frequency-rejection level of 1.00 Hz N140:100/3 the write-block bit to select a frequency-rejection level of 0.50 Hz N140:100/4 the write-block bit to select a frequency-rejection level of 0.25 Hz N140:102/0 the write-block bit to select “set tare” N140:102/1 the write-block bit to select “zero” N140:132/0 the write-block bit to select “enable calibration mode” N140:150 the first word of the status (read) block N140:150/7 the read-block bit to indicate “tare successful” N140:150/8 the read-block bit to indicate “zero successful” N140:151/1 the read-block bit to indicate “calibration mode” I:000/00 input from selector switch to select a frequency-rejection level of 7.50 Hz I:000/01 input from selector switch to select a frequency-rejection level of 3.50 Hz I:000/02 input from selector switch to select a frequency-rejection level of 1.00 Hz I:000/03 input from selector switch to select a frequency-rejection level of 0.50 Hz I:000/04 input from selector switch to select a frequency-rejection level of 0.25 Hz I:000/05 input from pushbutton switch to select “set tare” I:000/06 input from pushbutton switch to select “zero” I:000/11 input from pushbutton switch to enable a block-transfer write whenever you want to configure, calibrate, or select a new frequency-rejection level F141:0 the floating-point gross weight value read from words N140:155 and N140:156 in the status block F141:1 the floating-point net weight value read from words N140:157 and N140:158 in the status block Writing Custom Ladder Logic Programming the Module A–9 On the pages that follow, we’ve included both single density and double density examples. Single Density (Series A) Programming Examples This section lists and explains ladder logic programming examples for the module when it is configured for single density (Series A) mode. These are programming examples; your ladder logic code may be different. to see an example of this refer to this figure on this page block transfer write logic A.1 A–10 copying gross and net weight values to a floating-point file A.2 A–10 block transfer read logic A.3 A–10 block transfer error alarms A.4 A–10 calibration logic A.5 A–11 taring the module A.6 A–11 zeroing the module A.7 A–12 block transfer write permissive logic A.8 A–13 changing WAVERSAVER logic A.9 A–14 changing motion tolerance A.10 A–15 changing zero tolerance A.11 A–15 alarm points A.12 A–16 Publication 1771–6.5.117 – March 1998 A–10 Writing Custom Ladder Logic Figure A.1 Block transfer write logic BTR BTW ENABLED ENABLED BTW PERMISSIVE N155:0 / 15 N150:0 / 15 N13:0 0 WEIGHSCALE SOFTWARE BTW TRIGGER N13:0 WeighScale software block-transfer write trigger bit 2 BTW BLOCK TRANSFER WRITE 00 Rack 1 Group 0 Module N150:0 Control block N140:100 Data file Length 33 Continuous N ( EN) ( DN) ( ER) Figure A.2 Copying gross and net weight values to a floating-point file BTR DONE BIT N155:0 COP COPY FILE Source Destination Length 13 #N140:155 #F141:0 2 Figure A.3 Block transfer read logic BTW BTR ENABLED ENABLED N155:0 / 15 N150:0 / 15 BTR BLOCK TRANSFER READ 00 Rack 1 Group 0 Module N155:0 Control block N140:150 Data file Length 29 Continuous N Figure A.4 Block transfer error alarms BTR BTR ERROR BIT ERROR ALARM N155:0 12 BTW BTW ERROR BIT ERROR ALARM N150:0 12 Publication 1771–6.5.117 – March 1998 B3 ( L ) 9 B3 ( L ) 10 ( EN) ( DN) ( ER) Writing Custom Ladder Logic A–11 Figure A.5 contains an example of how to start the block-transfer write for calibration or configuration. You can use the block-transfer write trigger bit only for configuration changes, such as WAVERSAVER settings. Figure A.5 Calibration logic BTW CALIBRATE-CONFIGURE PERMISSIVE MODULE CALIBRATE REQUEST BIT N140:132 N13:0 ( ) 1 0 CALIBRATE MODULE PERMISSIVE MODULE IN CALIBRATE MODE N13:0 N140:151 1 1 WEIGHSCALE SOFTWARE BTW TRIGGER N13:0 2 Figure A.6 Taring the module CHANGE ZERO TOLERANCE PERMISSIVE MODULE TARE SUCCESSFUL CMP COMPARE Expression F141:1 < 1.000000 N140:150 7 N13:0 ( ) 5 CHANGE ZERO TOLERANCE PERMISSIVE USER TARE PB I:000 / 05 N13:0 5 USER TARE PB MODULE TARE REQUEST CHANGE ZERO TOLERANCE PERMISSIVE I:000 N140:102 ( ) 0 N13:0 / 5 05 MODULE TARE REQUEST N140:102 0 MODULE TARE REQUEST N140:102 0 When a tare is requested, a timer starts. If the TARE SUCCESSFUL bit is not MODULE TARE SUCCESSFUL N140:150 / 7 TON TIMER ON DELAY Timer Time base Preset Accum ( EN) T4:0 1.0 2 0 ( DN) returned in two seconds, the ALARM bit is set. Publication 1771–6.5.117 – March 1998 A–12 Writing Custom Ladder Logic Figure A.7 Zeroing the module UNLATCH ZERO REQUEST MODULE ZERO SUCCESSFUL CMP COMPARE Expression F141:0 < 1.000000 N140:150 8 USER ZERO PB N13:0 ( ) 6 UNLATCH ZERO REQUEST I:000 / 06 N13:0 6 USER ZERO PB MODULE ZERO REQUEST UNLATCH ZERO REQUEST I:000 N140:102 ( ) 1 N13:0 / 6 06 MODULE ZERO REQUEST N140:102 1 MODULE ZERO REQUEST N140:102 1 When a zero is requested, a timer starts. If the ZERO SUCCESSFUL bit is not returned in two seconds, the ALARM bit is set. Publication 1771–6.5.117 – March 1998 MODULE ZERO SUCCESSFUL N140:150 / 8 TON TIMER ON DELAY Timer Time base Preset Accum ( EN) T4:0 1.0 2 0 ( DN) Writing Custom Ladder Logic A–13 Figure A.8 Block transfer write permissive logic BTW PERMISSIVE USER TARE PB I:000 N13:0 ( ) 0 05 MODULE TARE REQUEST N140:102 0 MODULE TARE REQUEST N140:102 / 0 MODULE TARE SUCCESSFUL N140:150 / 7 MODULE TARE SUCCESSFUL N140:150 7 USER TARE PB I:000 06 MODULE ZERO REQUEST MODULE ZERO SUCCESSFUL N140:102 N140:150 / 8 1 MODULE ZERO SUCCESSFUL N120:102 / 0 N140:150 8 CALIBRATE MODULE PERMISSIVE N13:0 1 GENERAL ENABLE FOR BTW I:000 11 N13:0 3 Publication 1771–6.5.117 – March 1998 A–14 Writing Custom Ladder Logic Figure A.9 Changing WAVERSAVER logic SET WAVERSAVER 7.5HZ I:000 00 MOV MOVE Source Destination 1 N140:100 0 ENABLE BTW N13:0 ( ) 3 SET WAVERSAVER 3.5HZ I:000 01 MOV MOVE Source Destination 2 N140:100 0 ENABLE BTW SET WAVERSAVER 1.00HZ I:000 02 N13:0 ( ) 3 MOV MOVE Source Destination 4 N140:100 0 ENABLE BTW SET WAVERSAVER .50HZ I:000 03 MOV MOVE Source Destination N13:0 ( ) 3 8 N140:100 0 ENABLE BTW N13:0 ( ) 3 SET WAVERSAVER .25HZ I:000 04 MOV MOVE Source Destination 16 N140:100 0 ENABLE BTW N13:0 ( ) 3 Publication 1771–6.5.117 – March 1998 Writing Custom Ladder Logic A–15 Figure A.10 Changing motion tolerance CHANGE MOTION TOLERANCE PB I:001 COP COPY FILE Source Destination Length 01 #N140:4 #N140:104 2 ENABLE BTW N13:0 (L ) 3 Figure A.11 Changing zero tolerance CHANGE ZERO TOLERANCE PB I:001 02 COP COPY FILE Source Destination Length #N140:6 #N140:106 2 ENABLE BTW N13:0 (L ) 3 Publication 1771–6.5.117 – March 1998 A–16 Writing Custom Ladder Logic Figure A.12 Alarm points BTR TIME-OUT N140:150 1 INPUT OVER RANGE N140:150 3 INPUT UNDER RANGE N140:150 4 ATTEMPTED TARE WHILE IN MOTION N140:150 5 ATTEMPTED ZERO WHILE IN MOTION N140:150 6 MOTION TOLERANCE ENTRY ERROR N140:150 12 ZERO TOLERANCE ENTRY ERROR N140:150 13 WAVERSAVER ENTRY ERROR N140:150 15 SET ALARM IF TARE SUCCESSFUL BIT NOT RETURNED IN TWO SECONDS T4:0 DN SET ALARM IF ZERO SUCCESSFUL BIT NOT RETURNED IN TWO SECONDS T4:1 DN Publication 1771–6.5.117 – March 1998 BTR TIME-OUT ALARM BIT B3 ( L ) 1 INPUT OVER RANGE ALARM B3 ( L ) 2 INPUT UNDER RANGE ALARM B3 ( L ) 3 ATTEMPTED TARE WHILE IN MOTION ALARM B3 ( L ) 4 ATTEMPTED ZERO WHILE IN MOTION ALARM B3 ( L ) 5 MOTION TOLERANCE ENTRY ERROR ALARM B3 ( L ) 6 ZERO TOLERANCE ENTRY ERROR ALARM B3 ( L ) 7 WAVERSAVER ENTRY ERROR ALARM B3 ( L ) 8 1771WS TARE ERROR ALARM B3 ( L ) 11 1771WS ZERO ERROR ALARM B3 ( L ) 12 Writing Custom Ladder Logic A–17 Double Density Programming Examples This section lists and explains ladder logic programming examples for the module when it is configured for double density mode. These are programming examples; your ladder logic code may be different. to see an example of this refer to this figure on this page block-transfer write logic A.13 A–18 copying gross and net weight values to floating-point file A.14 A–18 block transfer read logic A.15 A–18 block transfer error alarms A.16 A–18 calibration logic A.17 A–19 taring the module A.18 A–19 zeroing the module A.19 A–20 block transfer write permissive logic A.20 A–21 calibration logic A.21 A–22 changing WAVERSAVER logic A.22 A–23 verifying WAVERSAVER logic A.23 A–24 changing motion tolerance A.24 A–24 verifying motion tolerance A.25 A–24 changing zero tolerance A.26 A–24 verifying zero tolerance A.27 A–25 alarm points A.28 A–25 Publication 1771–6.5.117 – March 1998 A–18 Writing Custom Ladder Logic Figure A.13 Block transfer write logic BTR ENABLED N155:0 / 15 BTW ENABLED N150:0 / 15 PLC PROGRAM BTW TRIGGER N13:0 0 WEIGHSCALE SOFTWARE BTW TRIGGER N13:0 2 BTW BLOCK TRANSFER WRITE 00 Rack 1 Group 0 Module N150:0 Control block N140:100 Data file Length 49 Continuous N ( EN) ( DN) ( ER) Figure A.14 Copying gross and net weight values to a floating-point file BTR DONE BIT N155:0 COP COPY FILE Source Destination Length 13 #N140:155 #F141:0 2 Figure A.15 Block transfer read logic BTR ENABLED BTW ENABLED N155:0 / 15 N150:0 / 15 BTR BLOCK TRANSFER READ 00 Rack 1 Group 0 Module N155:0 Control block N140:150 Data file Length 64 Continuous N ( EN) ( DN) ( ER) Figure A.16 Block transfer read error alarms BTR ERROR BIT N155:0 12 BTW ERROR BIT N150:0 12 BTR ERROR ALARM B3 ( L ) 9 BTW ERROR ALARM B3 ( L ) 10 Figure A.17 contains an example of how to start the block-transfer write for calibration or configuration. You can use the block-transfer write trigger bit only for configuration changes, such as WAVERSAVER settings. Publication 1771–6.5.117 – March 1998 Writing Custom Ladder Logic A–19 Figure A.17 Calibration logic BTW CALIBRATE-CONFIGURE CALIBRATE MODULE REQUEST BIT PERMISSIVE N140:132 N13:0 ( ) 1 0 MODULE IN CALIBRATE MODE BTW CALIBRATE PERMISSIVE N140:151 N13:0 1 1 WEIGHSCALE SOFTWARE BTW TRIGGER N13:0 2 Figure A.18 Taring the module UNLATCH TARE REQUEST BIT MODULE TARE SUCCESSFUL BIT CMP COMPARE Expression F141:1 < 1.000000 N140:150 7 N13:0 ( ) 5 UNLATCH TARE REQUEST BIT USER TARE PB I:000 / 05 N13:0 5 MODULE TARE REQUEST BIT UNLATCH TARE REQUEST BIT USER TARE PB I:000 N140:102 ( ) 0 N13:0 / 5 05 MODULE TARE REQUEST BIT N140:102 0 MODULE TARE REQUEST BIT N140:102 0 When a tare is requested, a timer starts. If the TARE SUCCESSFUL bit is not returned in two seconds, the ALARM bit is set. MODULE TARE SUCCESSFUL BIT N140:150 / 7 TON TIMER ON DELAY Timer Time base Preset Accum ( EN) T4:0 1.0 2 0 ( DN) Publication 1771–6.5.117 – March 1998 A–20 Writing Custom Ladder Logic Figure A.19 Zeroing the module UNLATCH MODULE ZERO REQUEST BIT MODULE ZERO SUCCESSFUL BIT CMP COMPARE Expression F141:0 < 1.000000 N140:150 8 N13:0 ( ) 6 UNLATCH MODULE ZERO REQUEST BIT USER ZERO PB I:000 / 06 N13:0 6 UNLATCH MODULE ZERO REQUEST BIT USER ZERO PB I:000 MODULE ZERO REQUEST BIT N140:102 ( ) 1 N13:0 / 6 06 MODULE ZERO REQUEST BIT N140:102 1 MODULE ZERO REQUEST BIT N140:102 1 When a zero is requested, a timer starts. If the ZERO SUCCESSFUL bit is not returned in two seconds, the ALARM bit is set. Publication 1771–6.5.117 – March 1998 MODULE ZERO SUCCESSFUL BIT N140:150 / 8 TON TIMER ON DELAY Timer Time base Preset Accum ( EN) T4:0 1.0 2 0 ( DN) Writing Custom Ladder Logic A–21 Figure A.20 Block transfer write permissive logic PLC PROGRAM BTW TRIGGER USER TARE PB I:000 N13:0 ( ) 0 05 MODULE TARE REQUEST BIT MODULE TARE SUCCESSFUL BIT N140:102 N140:150 / 7 0 MODULE TARE REQUEST BIT MODULE TARE SUCCESSFUL BIT N140:102 / 0 N140:150 7 USER ZERO PB I:000 06 MODULE ZERO REQUEST BIT MODULE ZERO SUCCESSFUL BIT N140:102 N140:150 / 8 1 MODULE ZERO REQUEST BIT MODULE ZERO SUCCESSFUL BIT N120:102 / 0 N140:150 8 BTW CALIBRATE PERMISSIVE N13:0 1 ZERO TOLERANCE CHANGE PERMISSIVE N13:0 9 MOTION TOLERANCE CHANGE PERMISSIVE N13:0 10 SETPOINT1 DOWNLOAD PERMISSIVE N13:0 11 SETPOINT2 DOWNLOAD PERMISSIVE N13:0 12 WAVERSAVER CHANGE PERMISSIVE N13:0 3 ROC CHANGE PERMISSIVE N13:0 8 GENERAL ENABLE FOR BTW I:000 11 Publication 1771–6.5.117 – March 1998 A–22 Writing Custom Ladder Logic Figure A.21 contains an example of how to start the block transfer write for calibration or configuration. You can use the block transfer write trigger bit only for configuration changes, such as WAVERSAVER settings. Figure A.21 Calibration logic BTW CALIBRATECALIBRATE MODULE REQUEST BIT CONFIGURE PERMISSIVE N140:132 N13:0 ( ) 1 0 BTW CALIBRATE PERMISSIVE MODULE IN CALIBRATE MODE N13:0 1 WEIGHSCALE SOFTWARE BTW TRIGGER N13:0 2 Publication 1771–6.5.117 – March 1998 N140:151 1 Writing Custom Ladder Logic A–23 Figure A.22 Changing WAVERSAVER logic SET WAVERSAVER 7.5HZ I:000 00 MOV MOVE Source Destination N140:0 1 N140:100 1 WAVERSAVER CHANGE PERMISSIVE N13:0 ( L ) 3 SET WAVERSAVER 3.5HZ I:000 01 MOV MOVE Source Destination 2 N140:100 1 WAVERSAVER CHANGE PERMISSIVE N13:0 ( L ) 3 SET WAVERSAVER 1.00HZ I:000 02 MOV MOVE Source Destination 4 N140:100 1 WAVERSAVER CHANGE PERMISSIVE N13:0 ( L ) 3 SET WAVERSAVER .50HZ I:000 03 MOV MOVE Source Destination 8 N140:100 1 WAVERSAVER CHANGE PERMISSIVE N13:0 ( L ) 3 SET WAVERSAVER.250HZ I:000 04 MOV MOVE Source Destination 16 N140:100 1 WAVERSAVER CHANGE PERMISSIVE N13:0 ( L ) 3 Publication 1771–6.5.117 – March 1998 A–24 Writing Custom Ladder Logic Figure A.23 Verifying WAVERSAVER changes WAVERSAVER CHANGE PERMISSIVE N13:0 3 WAVERSAVER CHANGE PERMISSIVE EQU EQUAL Source A Source B N13:0 ( U ) 3 N140:209 8 N140:100 1 Figure A.24 Changing motion tolerance CHANGE MOTION TOLERANCE PB I:000 COP COPY FILE Source Destination Length 07 #N140:4 #N140:104 2 MOTION TOLERANCE CHANGE PERMISSIVE N13:0 ( L ) 10 Figure A.25 Verifying motion tolerance changes MOTION TOLERANCE CHANGE PERMISSIVE N13:0 10 MOTION TOLERANCE CHANGE PERMISSIVE EQU EQUAL Source A Source B EQU EQUAL N140:200 0 N140:104 1 Source A Source B N140:201 3 N140:105 200 N13:0 ( U ) 10 Figure A.26 Changing zero tolerance CHANGE ZERO TOLERANCE PB I:000 10 COP COPY FILE Source Destination Length #N140:6 #N140:106 2 ZERO TOLERANCE CHANGE PERMISSIVE N13:0 ( L ) 9 Publication 1771–6.5.117 – March 1998 Writing Custom Ladder Logic A–25 Figure A.27 Verifying zero tolerance changes ZERO TOLERANCE CHANGE PERMISSIVE ZERO TOLERANCE CHANGE PERMISSIVE EQU EQUAL N13:0 9 Source A Source B EQU EQUAL N140:212 0 N140:106 10 Source A Source B N140:213 1000 N140:107 0 N13:0 ( U ) 9 Figure A.28 Alarm points BTR TIME-OUT N140:150 1 INPUT OVER RANGE N140:150 3 INPUT UNDER RANGE N140:150 4 ATTEMPTED TARE WHILE IN MOTION N140:150 5 ATTEMPTED ZERO WHILE IN MOTION N140:150 6 MOTION TOLERANCE ENTRY ERROR N140:150 12 ZERO TOLERANCE ENTRY ERROR N140:150 13 WAVERSAVER ENTRY ERROR N140:150 15 SP WEIGHT DESCRIPTOR ERROR N140:178 1 SP VALUE ERROR N140:178 2 DEADBAND VALUE ERROR N140:178 3 PREACT VALUE ERROR N140:178 4 BTR TIME-OUT ALARM BIT B3 ( L ) 1 INPUT OVER RANGE ALARM B3 ( L ) 2 INPUT UNDER RANGE ALARM B3 ( L ) 3 ATTEMPTED TARE WHILE IN MOTION ALARM B3 ( L ) 4 ATTEMPTED ZERO WHILE IN MOTION ALARM B3 ( L ) 5 MOTION TOLERANCE ENTRY ERROR ALARM B3 ( L ) 6 ZERO TOLERANCE ENTRY ERROR ALARM B3 ( L ) 7 WAVERSAVER ENTRY ERROR ALARM B3 ( L ) 8 SP WEIGHT DESCRIPTOR ERROR ALARM B3 ( L ) 11 SP VALUE ERROR ALARM B3 ( L ) 12 DEADBAND VALUE ERROR ALARM B3 ( L ) 13 PREACT VALUE ERROR ALARM B3 ( L ) 14 Publication 1771–6.5.117 – March 1998 A–26 Writing Custom Ladder Logic Figure A.29 More alarm points SETPOINT SETUP ERROR SETPOINT SETUP ERROR ALARM N140:178 B3 ( L ) 15 5 ROC WEIGHT DESCRIPTOR ERROR ALARM ROC WEIGHT DESCRIPTOR ERROR N140:178 B3 ( L ) 16 6 ROC EVAL PERIOD ERROR ALARM ROC EVAL PERIOD ERROR N140:178 B3 ( L ) 17 7 ROC TIME UNITS ERROR ROC TIME UNITS ERROR ALARM N140:178 B3 ( L ) 18 8 SET ALARM IF TARE SUCCESSFUL BIT NOT RETURNED IN TWO SECONDS 1771WS TARE ERROR ALARM T4:0 B3 ( L ) 19 DN 1771WS ZERO ERROR ALARM SET ALARM IF ZERO SUCCESSFUL BIT NOT RETURNED IN TWO SECONDS T4:1 B3 ( L ) 20 DN Reading Floating-point Values The gross weight and net weight values are available in 32-bit floating-point format in words 5 through 8 of the status block. Since the status block must be in an integer file, each 32-bit floating-point value takes up two 16-bit integer words. To copy floating-point values into a floating-point file, use a COPY FILE instruction: COP COPY FILE Source Destination Length This rung unconditionally copies the gross weight from integer words N140:155 and N140:156 into floating-point word F141:0, and copies the net weight from integer words N140:157 and N140:158 into floating-point word F141:1. Publication 1771–6.5.117 – March 1998 #N140:155 #F141:0 2 for this value use source the address of the first integer word (containing the 16 most-significant bits of the floating-point value) destination the address of the floating-point word length indicate the length of the destination block being written to in 32-bit floating-point words To copy the gross and net weight values together, enter a length of 2. Writing Custom Ladder Logic A–27 Selecting the Frequencyrejection Value To illustrate how to select a WAVERSAVER frequency-rejection level, we use a 5-position selector switch and examine each switch position to directly control the corresponding frequency-rejection bit in the write block. To view examples of ladder logic code, refer to Figures A.9—single density (Series A) example— and A.22—double density (Series B) example. Setting the Tare Value To illustrate how to set the tare value: N140:150 7 CMP COMPARE Expression F141:1 < 1.000000 I:000 N13:0 05 5 I:000 N13:0 N13:0 ( ) 5 Set Tare I:000/05 05 N140:102 5 N140:102 ( ) 0 0 with this rung first when the tare-successful bit (N140:150/7) is turned on and the net weight (F141:1) is less than 1.000000, we turn on bit N13:0/5 until the pushbutton is released second we use a pushbutton switch input (I:000/05) to turn on the set-tare bit (N140:102/0) and hold it on through a hold-in path In your application, you may use other events to trigger a set tare. For example, it may be useful to use the event of the net weight reaching a certain level to trigger a set tare. Publication 1771–6.5.117 – March 1998 A–28 Writing Custom Ladder Logic Zeroing the Gross Weight To illustrate how to zero the gross weight: CMP COMPARE Expression F141:0 < 1.000000 N140:150 8 I:000 Zero I:000/06 N13:0 ( ) 6 N13:0 06 6 I:000 N13:0 06 N140:102 6 N140:102 ( ) 1 1 with this rung Publication 1771–6.5.117 – March 1998 first when the zero-successful bit (N140:150/8) is turned on and the gross weight (F141:0) is less than 1.000000, we turn on bit N13:0/6 until the pushbutton is released second we use a pushbutton switch input (I:000/06) to turn on the zero bit (N140:102/1) and hold it on through a hold-in path Writing Custom Ladder Logic Creating Setpoints A–29 If you set the module for double density (Series B) mode, it supports two setpoints. Each setpoint is made up of: • weight description — defines the unit of measure for weight in setpoint calculations. Valid values for weight descriptions are: – 0 = kilograms – 1 = pounds • setpoint value — target weight value. Valid values for setpoint values are -999999 through 999999 • deadband — used to separate the “turn-off” weight. At the actual switching point, the deadband prevents switching “chatter.” Valid values for deadband values are -999999 through 999999 • preact value — accounts for delay in the weighing system due to mechanical delays, material in flight, or other system delays. Valid values for deadband values are -999999 through 999999 Example values are shown below: Weight Description = pounds Setpoint = 100 lb. Preact = -10 lb. Deadband = -15 lb. The module sets the comparison result bit to ON when the weight value isw (greater than or equal to) 90 lb., i.e., (100 lb. + (-10 lb.))w90 lb. (preact) When the weight value is v (less than or equal to) 85 lb., i.e., (100 lb. + (-15 lb.))v85 lb. (deadband) then the module sets the comparison result bit to OFF. In addition, taring the module, zeroing the module, emptying the vessel, or reducing the weight below the deadband value resets these bits to OFF. Figures A.30 and A.31 provide additional setpoint examples. Publication 1771–6.5.117 – March 1998 A–30 Writing Custom Ladder Logic In Figure A.30: • the comparison result bit will transition to ON when the weight value is w 8 lb., i.e., setpoint + preact, where: setpoint = 10 lb. preact = -2 lb. • the comparison result bit will transition to OFF when the weight value is v 7 lb., i.e., setpoint + deadband, where: setpoint = 10 lb. deadband= -3 lb. When the weight value reaches 8 lb., the comparison result bit is turned ON. (If you have established alarms to notify you when the weight value reaches this value, they will sound at this point.) The comparison result bit will remain ON until the weight value drops to 7 lb. Figure A.30 Setpoint Example – Weight Gain Weight Gain W E I G H 13 T 10 ON ON 8 7 OFF The comparison result bit transitions to ON when you reach 8 lb. Publication 1771–6.5.117 – March 1998 OFF Setpoint 10 Preact -2 Deadband -3 The comparison result bit transitions to OFF when you drop to 7 lb. Writing Custom Ladder Logic A–31 In Figure A.31: • the comparison result bit will transition to ON when the weight value is w -8 lb., i.e., setpoint + preact, where: setpoint = -10 lb. preact = 2 lb. • the comparison result bit will transition to OFF when the weight value is v -7 lb., i.e., setpoint + deadband, where: setpoint = -10 lb. deadband= 3 lb. When the weight value drops to -8 lb., the comparison result bit turns ON. (If you have established alarms to notify you when the weight value reaches this value, they will sound at this point.) The comparison result bit will remain ON until the weight value reaches -7 lb. Figure A.31 Setpoint Example – Weight Loss Weight Loss W E I G H-7 T -8 The comparison result bit transitions to ON when you drop to -8 lb. OFF The comparison result bit transitions to OFF when you reach -7 lb. OFF ON ON -10 -12 -13 Setpoint -10 Preact 2 Deadband 3 The figures that follow provide examples of how you can create setpoints. Publication 1771–6.5.117 – March 1998 A–32 Writing Custom Ladder Logic In Figure A.32, we place setpoint parameters in a floating-point file and copy the parameters to the module’s block transfer write data block. Figure A.32 Copying setpoints to block transfer write data block SETPOINT1 DOWNLOAD PERMISSIVE setpoint N13:0 11 preact deadband COP COPY FILE Source Destination Length #F8:0 #N140:133 2 COP COPY FILE Source Destination Length #F8:1 #N140:137 2 COP COPY FILE Source Destination Length #F8:2 #N140:141 2 weight description BTD BIT FIELD DISTRIB Source Source bit Destination Destination bit Length Publication 1771–6.5.117 – March 1998 N7:0 5 0 N140:145 0 0 1 Writing Custom Ladder Logic A–33 In Figure A.33, to verify that the module has the new setpoints, we copy the module’s setpoints from the block-transfer read data block to a floating-point file. The setpoints are then compared with setpoints in the recipe. Figure A.33 Verifying the module has new setpoints SETPOINT1 DOWNLOAD PERMISSIVE N13:0 11 COP COPY FILE Source Destination Length #N140:180 #F8:10 1 COP COPY FILE Source Destination Length #N140:184 #F8:11 1 COP COPY FILE Source Destination Length #N140:188 #F8:12 1 SETPOINT1 DOWNLOAD PERMISSIVE EQU EQUAL Source A Source B EQU EQUAL F8:0 90.00000 F8:10 90.00000 Source A Source B EQU EQUAL F8:1 -8.000000 F8:11 -8.000000 Source A Source B F8:2 -3.000000 F8:12 -3.000000 N13:0 ( U ) 11 Publication 1771–6.5.117 – March 1998 A–34 Writing Custom Ladder Logic Figure A.34 Setpoint2 logic SETPOINT2 DOWNLOAD PERMISSIVE N13:0 12 COP COPY FILE Source Destination Length #F8:3 #N140:135 2 COP COPY FILE Source Destination Length #F8:4 #N140:139 2 COP COPY FILE Source Destination Length #F8:5 #N140:143 2 BTD BIT FIELD DISTRIB Source Source bit Destination Destination bit Length N7:0 5 1 N140:145 0 0 1 SETPOINT2 DOWNLOAD PERMISSIVE N13:0 12 COP COPY FILE Source Destination Length #N140:182 #F8:13 1 COP COPY FILE Source Destination Length #N140:186 #F8:14 1 COP COPY FILE Source Destination Length #N140:190 #F8:15 1 SETPOINT2 DOWNLOAD PERMISSIVE EQU EQUAL Source A Source B Publication 1771–6.5.117 – March 1998 EQU EQUAL F8:3 -200.0000 F8:13 -200.0000 Source A Source B EQU EQUAL F8:4 -20.00000 F8:14 -20.00000 Source A Source B F8:5 -2.000000 F8:15 -2.000000 N13:0 ( U ) 12 Writing Custom Ladder Logic A–35 In Figure A.35, the comparison result bits are single transferred to bits 10 and 11 (octal) to the input image word that corresponds to the module’s physical location in the chassis. When the weight value is y to the sum of (setpoint1 + preact1), then bit 10 is set to ON. Bit 11 is set to ON when the weight value y to the sum of (setpoint2 + preact2). These bits are set to OFF when the weight value is t (setpoint + preact); for example, when we tare or zero the scale. Figure A.35 Using comparison result bits SETPOINT 1 COMPARISON RESULT CLOSE VALVE PERMISSIVE I:001 B3 ( ) 100 10 SETPOINT 2 COMPARISON RESULT CLOSE VALVE PERMISSIVE I:001 B3 ( ) 101 11 Configuring Rate-of-change The rate-of-change represents the rate-of-change in weight as measured by the module. This calculation is based on three parameters: • weight description—defines the unit of measure for weight in rate-of-change calculations. Valid values for weight descriptions are: – 0 = kilograms – 1 = pounds • time units—unit of measure for time in rate-of-change calculations. Valid values for time units are: – 0 = seconds – 1 = minutes – 2 = hours • evaluation period—the time over which a rate-of-change calculations are made. Valid values for evaluation periods are 1 millisecond-32.767 seconds The figures that follow provide examples of how you can specify a rate-of-change value. Publication 1771–6.5.117 – March 1998 A–36 Writing Custom Ladder Logic Figure A.36 Configuring rate-of-change ROC CONFIGURE PB time units – 0=seconds 1=minutes 2=hours MOV MOVE Source I:000 12 Destination evaluation period – 1 millisecond to 32.767 seconds MOV MOVE Source Destination weight description – 0=kg. 1=lb. 0 N140:146 0 500 N140:147 500 MOV MOVE Source Destination " 0 N140:148 0 Rate-of-change parameters To write the rate-of-change parameters to the module, you must initiate a block-transfer write. Figure A.37 Copying rate-of-change value to floating-point file to display BTR DONE BIT N155:0 13 COP COPY FILE Source Destination Length #N140:196 #F8:20 1 Saving Configuration Changes Configuration changes that are made when the module is not in calibration mode are saved to non-volatile memory when the save flag in the block transfer is set. If this flag is not set, the values reside in volatile, run-time memory until you reset or power up the module. At this time, the values are initialized to their previously stored values. To set the save flag, you must edit your ladder logic code. Verifying Configuration Data If you have configured the module for double density mode, the module returns configuration parameters in the block transfer read data block. To configure the module for double density mode, see Chapter 2 of this manual. Words 48-63 store the configuration parameter values. For a complete list of the block-transfer read data block, see Appendix C of this manual. Publication 1771–6.5.117 – March 1998 Editing the Configuration/Calibration Block This appendix shows you how to calibrate the module by directly manipulating the configuration/calibration block in the data table rather that using the WeighScale software as described in Chapter 8, “Configuring the Module.” This appendix contains these sections: Words 33 – 48 are shaded gray in this table to indicate that these words apply to double-density (Series B) mode only. Performing a Hard Calibration To perform a hard calibration by editing the configuration block, you must: • enter the configuration values for the appropriate words in the configuration/calibration block, then • perform the hard calibration Publication 1771–6.5.117 – March 1998 B–2 Editing the Configuration/Calibration Block Enter Values in the Block Before performing a hard calibration, enter the appropriate values for these words in the configuration/calibration block: " word description 0 WAVERSAVER setting 1 weight units & auto-zero status 3 decimal-point location 4 motion tolerance (MSW) 5 motion tolerance (LSW) 6 zero tolerance (MSW) 7 zero tolerance (LSW) 8 number of samples used for averaging (1—200) 9 real-time sample period (50—10,000ms) 14 calibration low weight (MSW) 15 calibration low weight (LSW) 16 calibration mid weight (MSW) 17 calibration mid weight (LSW) 18 calibration high weight (MSW) 19 calibration high weight (LSW) 26 calibration year (xxxx) 27 calibration month (0—12) 28 calibration day 29 calibration identification (MSW) 30 calibration identification (LSW) Configuration/calibration block For more on these configuration/calibration block words, refer to page B–9. Publication 1771–6.5.117 – March 1998 Editing the Configuration/Calibration Block B–3 Perform the Hard Calibration To perform a hard calibration: 1. To place the module in calibration mode, in write-block word 32, set bit 0 to 1. In read-block word 1, bit 1 is set to 1 to indicate the calibration mode. If the module has not previously been calibrated, in read-block word 1, bit 0 is set to 1. 2. Perform a CAL-LO: A. Place the calibration low weight value in words 14 and 15. Be sure to observe the correct decimal point location. (CAL–LO read) B. With the low calibration weight (or no weight) on the scale, in write-block word 32, set bit 4 to 1. If no errors occur, in approximately 12 seconds, read-block word 2, bit 8 is set to 1. (CAL-LO successful) C. In write-block word 32, reset bit 4 to 0. 3. Optionally, perform a MID-LIN: A. Place the calibration low weight value in words 16 and 17. Be sure to observe the correct decimal point location. B. With the midpoint linearization calibration weight on the scale, in write-block word 32, set bit 5 to 1. If no errors occur, in approximately 12 seconds, in read-block word 2, bit 9 is set to 1. (MID-LIN successful) C. In write-block word 32, reset bit 5 to 0. 4. Perform a CAL-HI: A. Place the calibration high weight value in words 18 and 19. Be sure to observe the correct decimal point location. B. With the high calibration weight on the scale, in write-block word 32, set bit 6 to 1. If no errors occur, in approximately 12 seconds, in read-block word 2, bit 10 is set to 1. (CAL-HI successful) C. In write-block word 32, reset bit 6 to 0. Publication 1771–6.5.117 – March 1998 B–4 Editing the Configuration/Calibration Block 5. Accept the calibration data: A. In write-block word 32, set bit 7 to 1. If no errors occur, in read-block word 1, bit 4 is set to 1. (The write is successful.) B. In write-block word 32, reset bit 7 to 0. 6. To exit calibration mode, in write-block word 32, reset bit 0 to 0. In read-block word 1, bit 1 is set to 0. Performing a Soft Calibration To perform a soft calibration by editing the configuration/calibration block, you must: • enter the appropriate values for these words in the configuration/calibration block • perform the soft calibration Enter Values in the Block Before performing a soft calibration, enter the appropriate values for these words in the configuration/calibration block: word description 0 WAVERSAVER setting 1 weight units & auto-zero status 3 decimal-point location 4 motion tolerance (MSW) 5 motion tolerance (LSW) 6 zero tolerance (MSW) 7 zero tolerance (LSW) 8 number of samples used for averaging (1—200) 9 real-time sample period (50—10,000ms) 10 system sensitivity (MSW)1 11 system sensitivity (LSW)1 12 range (MSW) 13 range (LSW) 14 calibration low weight (MSW) 15 calibration low weight (LSW) 26 calibration year (xxxx) 27 calibration month (0—12) 28 calibration day 29 calibration identification (MSW) 30 1 Publication 1771–6.5.117 – March 1998 calibration identification (LSW) System sensitivity is a value derived from the sensitivity and output resistance of all the load cells in the system. Editing the Configuration/Calibration Block " B–5 Configuration/calibration block For more on these configuration/calibration block words, refer to page B–9. Perform the Soft Calibration To perform a soft calibration: 1. To place the module in calibration mode, in write-block word 32, set bit 0 and bit 2 to 1. In read-block word 1, bit 1 and bit 5 are set to 1. If the module has not previously been calibrated, in read-block word 1, bit 0 is set to 1. 2. Perform a CAL-LO: A. With the low calibration weight (or no weight) on the scale, in write-block word 32, set bit 4 to 1. If no errors occur, in approximately 12 seconds, read-block word 2, bit 8 is set to 1. (CAL-LO successful) B. In write-block word 32, reset bit 4 to 0. 3. Accept the calibration data: A. In write-block word 32, set bit 7 to 1. If no errors occur, in read-block word 1, bit 4 is set to 1. (write successful) B. In write-block word 32, reset bit 7 to 0. 4. To exit calibration mode, in write-block word 32, reset bit 0 to 0. In read-block word 1, bit 1 and bit 5 are set to 0. Publication 1771–6.5.117 – March 1998 B–6 Editing the Configuration/Calibration Block Performing a C2 Calibration To perform a C2 calibration by editing the configuration/calibration block, you must: • enter the appropriate values for these words in the configuration/calibration block • perform the C2 calibration Enter Values in the Block Before performing a C2 calibration, enter the appropriate values for these words in the configuration/calibration block: " word description 0 WAVERSAVER setting 1 weight units & auto-zero status 3 decimal-point location 4 motion tolerance (MSW) 5 motion tolerance (LSW) 6 zero tolerance (MSW) 7 zero tolerance (LSW) 8 number of samples used for averaging (1—200) 9 real-time sample period (50—10,000ms) 14 calibration low weight (MSW) 15 calibration low weight (LSW) 26 calibration year (xxxx) 27 calibration month (0—12) 28 calibration day 29 calibration identification (MSW) 30 calibration identification (LSW) 31 number of load points Configuration/calibration block For more on these configuration/calibration block words, refer to page B–9. Publication 1771–6.5.117 – March 1998 Editing the Configuration/Calibration Block B–7 Perform the C2 Calibration To perform a C2 calibration: 1. To place the module in calibration mode, in write-block word 32, set bit 0, bit 2, bit 3, and bit 8 to 1. In read-block word 1, bits 1, 5, and 6 are set to 1. If the module has not previously been calibrated, in read-block word 1, bit 0 is set to 1. If no errors occur, in approximately 12 seconds, read-block word 1, bit 12 is set to 1. (C2-Cal read complete) 2. Perform a CAL-LO: A. With the low calibration weight (or no weight) on the scale, in write-block word 32, set bit 4 to 1. If no errors occur, in approximately 12 seconds, read-block word 2, bit 8 is set to 1. (CAL-LO successful) B. In write-block word 32, reset bit 4 to 0. 3. Accept the calibration data: A. In write-block word 32, set bit 7 to 1. If no errors occur, in read-block word 1, bit 4 is set to 1. (write successful) B. In write-block word 32, reset bit 7 to 0. 4. To exit calibration mode, in write-block word 32, reset bit 0 to 0. In read-block word 1, bit 1 and bit 5 are set to 0. Publication 1771–6.5.117 – March 1998 B–8 Editing the Configuration/Calibration Block Restoring the Module After you have calibrated the module, you must copy the voltage values in the read block words 20, 21, 22, 23, 24, and 25 into the write block words 20, 21, 22, 23, 24, and 25. Note that the values in the read block are not in the same order as those in the write block. If these values are not in the write block, the restore function does not work. All of these parameters must have valid values before the restore function can be completed. • low weight • mid weight • high weight • low volts • mid volts • high volts • cal year • cal month • cal day • cal ID first byte • cal ID next bite To restore the module: 1. To place the module in calibration mode, in write-block word 32, set bit 0 to 1. 2. Wait for the module to enter calibration mode (read block word 1, bit 1 is set to 1, and the Cal/Com LED flashes red). 3. Set bit 1 (the restore bit) to 1. In read-block word 1, bit 1 is set to 1. If the module has not previously been calibrated, in read-block word 1, bit 0 is set to 1. When the restore is complete, in read-block word 1, bit 14 is set to 1 (restore data complete). 4. In write block word 32, set bit 7 to 1. 5. Wait for read block word 1, bit 4 to be set to 0. 6. To exit calibration mode, in write-block word 32, reset bit 0, bit 1, and bit 7 to 0. In read-block word 1, bit 1 and bit 14 are set to 0. Publication 1771–6.5.117 – March 1998 Editing the Configuration/Calibration Block Saving the Tare and Zero Values in Non-volatile Memory B–9 By default, the WeighScale module typically stores the tare and zero values in internal memory. These values are not included in read or write block transfer data, so they are not stored in the PLC processor data table. This means that any time the module loses power, the tare and zero values are reset. You must repeat the tare and zero functions to restore the tare and zero values in use before power to the module was lost. To avoid having to repeat the tare and zero functions, you can store the current tare and zero values in non-volatile memory. These values are restored automatically when power is restored to the module. To store tare and zero values in non-volatile memory: 1. In write block word 32, set bit 7 (accept data) to 1. 2. Wait until the module sets read block word 1, bit 2 (write successful) to 1. 3. In write block word 32, reset bit 7 to 0. Configuration/Calibration Block The configuration/calibration block contains 33 words as follows: " Terminology If you need definitions of the Weigh Scale Module terms used in this chapter, see the Glossary at the end of this manual. Words shaded in gray in this table indicate that these words apply to double density (Series B) mode only. Series B only word bits description WAVERSAVER Selection — Use one of these bits to select the lowest frequency to reject. Only changes of weight at frequencies below this value is reflected in the input value passed on in the status block as the weight value. This frequency-rejection action eliminates process noise and causes a more stable weight reading. These selections are mutually exclusive. If you turn on more than one bit, the WAVERSAVER selection error is reported in bit 15 of word 0 in the status block. N140:100 0 •1 = Reject all frequencies of 7.50 Hz and above. 1 •1 = Reject all frequencies of 3.50 Hz and above. 2 •1 = Reject all frequencies of 1.00 Hz and above. 3 •1 = Reject all frequencies of 0.50 Hz and above. (Default selection.) 4 •1 = Reject all frequencies of 0.25 Hz and above. Publication 1771–6.5.117 – March 1998 B–10 Editing the Configuration/Calibration Block word bits description Weight Modes — These are modes that can be changed at any time. If you save the data to non-volatile memory, these mode selections are saved. 1 0 Unit of Weight (Lb/Kg) — Set this bit to reflect the units of the calibration weight at the time of calibration. •0 = The weight unit is Kg. •1 = The weight unit is Lb. (Default selection.) 1 Auto-Zero — With auto-zero enabled, whenever the weight on the scale (the absolute value of the zero offset from the calibration zero point) is within zero tolerance and the scale is not in motion for 1s + (#samples + 1)(0.05s), the gross weight is set to zero. Where #samples is the number of weight samples used to calculate the average current weight. You enter the #samples value in word 8. You enter the motion-tolerance value in words 4 and 5. You enter the zero-tolerance value in words 6 and 7. •0 = Auto-Zero disabled. (Default selection.) •1 = Auto-Zero enabled. Weight Functions — Use these functions to modify the module reference points. 2 0 Set Tare — If this bit is on while the scale is in motion, the “attempt to set tare while in motion” error bit is turned on. •0 = Leave the tare value unchanged. •1 = If the scale is not in motion, continually set the tare value equal to the gross weight, resulting in a zero value for the net weight. 1 Zero — If this bit is on while the scale is in motion, the “attempt to zero while in motion” error bit is turned on. •0 = Leave the gross weight value unchanged. •1 = If the scale is not in motion and the gross weight (the absolute value of the zero offset from the calibration zero point) is within zero tolerance, continually set the gross weight value to zero. N140:103 0–15 Decimal-Point Location — Enter this value to set the number of digits to the right of the decimal point for all weight integer values. (0 through 6) 4 0–15 Motion Tolerance (MSW) — This word contains the 3 most-significant decimal digits (stored in natural binary format) of the 6-digit value that defines the weight change that will trigger the in-motion flag to be set. The weight change is measured as the difference between the current average weight value and the average weight value sampled one second earlier. (0 through 999) 5 0–15 Motion Tolerance (LSW) — This word contains the 3 least-significant decimal digits (stored in natural binary format) of the 6-digit value that defines the weight change that will trigger the in-motion flag to be set. (0 through 999) 6 0–15 Zero Tolerance (MSW) — This word contains the 3 most-significant decimal digits (stored in natural binary format) of the 6-digit value that defines the acceptable tolerance for zero weight. (0 through 999) 7 0–15 Zero Tolerance (LSW) — This word contains the 3 least-significant decimal digits (stored in natural binary format) of the 6-digit value that defines the acceptable tolerance for zero weight. (0 through 999) 8 0–15 #Samples — The number of weight samples used to calculate the average current weight. Since an A/D conversion takes 50ms, the weight is sampled every 50ms. After each sample, the average is calculated based on the last number of samples as specified. (1 through 200) Publication 1771–6.5.117 – March 1998 Editing the Configuration/Calibration Block B–11 word bits description 9 0–15 Real-Time Sampling Period — This value sets the period at which the module puts a new average weight value into the read block and turns on the new-data bit (bit 9 of word 0). If a real-time sample period has passed without a block-transfer read, the real-time sample period read-block time-out bit (bit 1 of word 0) in the status block is turned on. Enter the period value in milliseconds. (50 through 10,000 in increment of 50) 10 0–15 Sensitivity (MSW) (Soft-Cal Only) — This word contains the 3 most-significant decimal digits (stored in natural binary format) of the 6-digit full-scale voltage value as taken from the load-cell calibration data sheet for the load cell being used. 11 0–15 Sensitivity (LSW) (Soft-Cal Only) — This word contains the 3 least-significant decimal digits (stored in natural binary format) of the 6-digit full-scale voltage value as taken from the load-cell calibration data sheet for the load cell being used. 12 0–15 Range (MSW) (Soft-Cal Only) — This word contains the 3 most-significant decimal digits (stored in natural binary format) of the 6-digit weight-capacity value as taken from the load-cell calibration data sheet for the load cell being used. For multiple load cells, this is the range value generated by the calibration program. 13 0–15 Range (LSW) (Soft-Cal Only) — This word contains the 3 least-significant decimal digits (stored in natural binary format) of the 6-digit weight-capacity value as taken from the load-cell calibration data sheet for the load cell being used. For multiple load cells, this is the range value generated by the calibration program. 14 0–15 Calibration Low Weight (MSW) — This word contains the 3 most-significant decimal digits (stored in natural binary format) of the 6-digit weight value used for the CAL-LO reference point. 15 0–15 Calibration Low Weight (LSW) — This word contains the 3 least-significant decimal digits (stored in natural binary format) of the 6-digit weight value used for the CAL-LO reference point. N140:116 0–15 Calibration Midpoint-Linearization Weight (MSW) — This word contains the 3 most-significant decimal digits (stored in natural binary format) of the 6-digit weight value used for the MID-LIN reference point. (Optional. Set to 0 if not used.) 16 0–15 Calibration Midpoint-Linearization Weight (LSW) — This word contains the 3 least-significant decimal digits (stored in natural binary format) of the 6-digit weight value used for the MID-LIN reference point. (Optional. Set to 0 if not used.) 17 0–15 Calibration High Weight (MSW) — This word contains the 3 most-significant decimal digits (stored in natural binary format) of the 6-digit weight value used for the CAL-HI reference point. 18 0–15 Calibration High Weight (LSW) — This word contains the 3 least-significant decimal digits (stored in natural binary format) of the 6-digit weight value used for the CAL-HI reference point. 19 0–15 Calibration Low Volts (MSW) — This is the most-significant 16 bits of the 32-bit floating-point format volts value calculated for the CAL-LO reference point. This data is used only when bit 1 of word 32 is on. 20 0–15 Calibration Low Volts (LSW) — This is the least-significant 16 bits of the 32-bit floating-point format volts value calculated for the CAL-LO reference point. This data is used only when bit 1 of word 32 is on. Publication 1771–6.5.117 – March 1998 B–12 Editing the Configuration/Calibration Block word bits description 21 0–15 Calibration Midpoint Linearization Volts (MSW) — This is the most-significant 16 bits of the 32-bit floating-point format volts value calculated for the MID-LIN reference point. This data is used only when bit 1 of word 32 is on. (Optional. Set to 0 if not used.) 22 0–15 Calibration Midpoint Linearization Volts (LSW) — This is the least-significant 16 bits of the 32-bit floating-point format volts value calculated for the MID-LIN reference point. This data is used only when bit 1 of word 32 is on. (Optional. Set to 0 if not used.) 23 0–15 Calibration High Volts (MSW) — This is the most-significant 16 bits of the 32-bit floating-point format volts value calculated for the CAL-HI reference point. This data is used only when bit 1 of word 32 is on. 24 0–15 Calibration High Volts (LSW) — This is the least-significant 16 bits of the 32-bit floating-point format volts value calculated for the CAL-HI reference point. This data is used only when bit 1 of word 32 is on. 25 0–15 Calibration Year — This is the year in which the module was calibrated. (1994–2100) 26 0–15 Calibration Month — This is the month of the year in which the module was calibrated. (1–12) 27 0–15 Calibration Day — This is the day of the month in which the module was calibrated. (1–31) 28 0–15 Calibration Identification (MSW) — The two most-significant upper-case alpha-numeric (ASCII) characters representing the ID of the person who last calibrated this module. 29 0–15 Calibration Identification (LSW) — The two least-significant upper-case alpha-numeric (ASCII) characters representing the ID of the person who last calibrated this module. 30 0–15 Number of Load points in C2-Cal — This is the number of load points connected. It is used to verify that all of the load points were found during the automatic search for calibration data. (0 through 8) Publication 1771–6.5.117 – March 1998 Editing the Configuration/Calibration Block word bits B–13 description Calibration/Diagnostic Control — Use these bits to calibrate the module, run diagnostics on the module, and control data storage in the non-volatile memory on the module. N140:131 0 Calibration Mode — If you turn off this bit before you turn off the accept data bit (bit 7 of word 32) the new calibration is lost. •0 = Disable calibration mode. •1 = Enable calibration mode. 1 Restore Calibration Data — This bit determines whether to use the calibration data in this block to restore calibration values regardless of the state of the accept data bit (bit 7 of word 32). Calibration data here refers to all calibration data including calibration-volts reference points. Using calibration data here refers to using old calibration data stored in the PLC data table to restore the calibration data on the module. •0 = Disable the writing of calibration restoration data into non-volatile memory. •1 = Enable the writing of calibration restoration data into non-volatile memory. 2 Hard/Soft Calibration — This bit is relevant only if bit 1 is off. •0 = Hard calibration mode. •1 = Soft calibration or C2 calibration mode. 3 Soft-CalC2-Cal Mode — This bit is relevant only if bit 1 is off and bit 2 is on. •0 = Set Soft-Cal mode. •1 = Set C2-Cal mode. The module will ignore the configuration block values for sensitivity and range. 4 Calibration-Low Read •0 = Disable calibration-low read. •1 = Enable calibration-low read. The module sets the averages to 200, waits 12 seconds, reads the value from the scale, stores it as the calibration-low value, and uses it in conjunction with the calibration-low weight for the CAL-LO reference point. As long as this bit is on and the scale is not in motion, the module will read the calibration-low value continually. 5 Midpoint-Linearization Read (Optional) •0 = Disable midpoint linearization read. •1 = Enable midpoint linearization read. The module sets the averages to 200, waits 12 seconds, reads the value from the scale, stores it as the midpoint linearization value, and uses it in conjunction with the midpoint linearization weight for the MID-LIN reference point. As long as this bit is on and the scale is not in motion, the module will read the midpoint linearization value continually. 6 Calibration-High Read •0 = Disable calibration-high read. •1 = Enable calibration high read. The module sets the averages to 200, waits 12 seconds, reads the value from the scale, stores it as the calibration-high value, and uses it in conjunction with the calibration-high weight for the CAL-HI reference point. As long as this bit is on and the scale is not in motion, the module will read the calibration-high value continually. Publication 1771–6.5.117 – March 1998 B–14 Editing the Configuration/Calibration Block Series B only word bits description N140:131 7 Accept Data — For accepting new calibration data. •0 = Disable accept data. •1 = Enable accept data. If in calibration mode (bit 0), write CAL-LO, MID-LIN, and CAL-HI reference-point data to the module’s non-volatile memory. 8 Read Load-Point Data in C2-Cal •0 = Disable read load-point data. •1 = Enable read load-point data. Read the calibration data from all load-points found on the C2-Cal 2-wire bus and is used to automatically calculate the information for sensitivity and range for C2-Cal. 9 Read On-Board Resistance (Diagnostics Use Only) — Use this bit to connect resistance across the sense and signal lines to isolate weight-reading problems. If the weight reading with this resistance connected is stable and repeatable, the input section of the module is functioning correctly. •0 = Disconnect on-board resistance. •1 = Connect on-board resistance. 10 Run Diagnostics •0 = Disable on-board diagnostics. •1 = Run the module’s on-board diagnostics. The module does not block-transfer while this is running. 33 0-15 Setpoint 1 (MSW) — This is the most-significant 16 bits of the 32-bit floating-point format setpoint 1 value. 34 0-15 Setpoint 1 (LSW) — This is the least-significant 16 bits of the 32-bit floating-point format setpoint 1 value. 35 0-15 Setpoint 2 (MSW) — This is the most-significant 16 bits of the 32-bit floating-point format setpoint 2 value. 36 0-15 Setpoint 2 (LSW) — This is the least-significant 16 bits of the 32-bit floating-point format setpoint 2 value. 37 0-15 Deadband 1 (MSW) — This is the most-significant 16 bits of the 32-bit floating-point format deadband 1 value. 38 0-15 Deadband 1 (LSW) — This is the least-significant 16 bits of the 32-bit floating-point format deadband 1 value. 39 0-15 Deadband 2 (MSW) — This is the most-significant 16 bits of the 32-bit floating-point format deadband 2 value. 40 0-15 Deadband 2 (LSW) — This is the least-significant 16 bits of the 32-bit floating-point format deadband 2 value. 41 0-15 Preact 1 (MSW) — This is the most-significant 16 bits of the 32-bit floating-point format preact 1 value. 42 0-15 Preact 1 (LSW) — This is the least-significant 16 bits of the 32-bit floating-point format preact 1 value. 43 0-15 Preact 2 (MSW) — This is the most-significant 16 bits of the 32-bit floating-point format preact 2 value. 44 0-15 Preact 2 (LSW) — This is the least-significant 16 bits of the 32-bit floating-point format preact 2 value. Publication 1771–6.5.117 – March 1998 Editing the Configuration/Calibration Block B–15 word bits description N140:145 0-15 SP Weight Description — This word stores the unit of measure for weight in setpoint calculations: •0 = kilograms •1 = pounds 46 0-15 RoC Time Units — This word stores the unit of measure for time in rate-of-change calculations: •0 = seconds •1 = minutes •2 = hours 47 0-15 RoC Evaluation Period — This word stores the value for time over which a rate-of-change calculation is made. (1 millisecond - 32.767 seconds) 48 0-15 RoC Weight Description — This word stores the unit of measure for weight in rate-of-change calculations: •0 = kilograms •1 = pounds Publication 1771–6.5.117 – March 1998 B–16 Editing the Configuration/Calibration Block Notes: Publication 1771–6.5.117 – March 1998 This chapter shows you how to monitor status data by reading information directly from the data table. Reading Floating-Point Values Reading 6-Digit Integer Values The gross weight and net weight values are available in 32-bit floating-point format in words 5 through 8. Since the status block must be in an integer file, each 32-bit floating-point value takes up two 16-bit integer words. To copy floating-point values into a floating-point file, use a COPY FILE instruction: for this value enter the source address of the first integer word (containing the 16 most-significant bits of the floating-point value) destination address of the floating-point word length length of the destination block being written to in 32-bit floating-point words To copy the gross and net weight values together, enter a length of 2. The status block contains 6-digit integer values. However, a 16-bit integer word has limits of –32,768 and +32,767. Therefore, 2 words are used for each 6-digit integer value. The 3 most-significant decimal digits are placed in natural binary format in one word, and the 3 least-significant decimal digits are placed in natural binary format in the other word. For example, if the most-significant word has a value of 783 and the least-significant word has a value of 26, the total value is 783026. Unless the most-significant word has a value of zero, its sign must match that of the least-significant word or the value is invalid. Implied Decimal Point For all weight integer values, the decimal-point location is implied by the decimal-point-location value you select: if you have selected the decimal-point location value of the implied decimal point location would be 0 1 2 3 4 5 6 xxxxxx. xxxxx.x xxxx.xx xxx.xxx xx.xxxx x.xxxxx 0.xxxxxx Publication 1771–6.5.117 – March 1998 C–2 Monitoring Status Data Status Block Read the status block from the Weigh Scale Module using a block-transfer read instruction. The status block contains 64 words (listed below). Words shaded gray in this table indicate that these words apply to double density (Series B) mode only. Series B only " Terminology If you need definitions of the Weigh Scale Module terms used in this chapter, see the Glossary at the end of this manual. word bits General Status and Error Bits 0 Publication 1771–6.5.117 – March 1998 description 0 Just Up •0 = The module has received a block-transfer write since the last power-up or reset. •1 = The module has gone through a power-up or reset since it last received a block-transfer write. 1 Real-Time Sample Period BTR Time-out •0 = A block-transfer read had been executed during the last real-time sample period. •1 = A real-time sample period has passed without a block-transfer read. 2 In Motion — based on the motion tolerance value. •0 = The scale is not in motion. •1 = The scale is in motion. 3 Input Over Range •0 = The input signal is not over range. •1 = The input signal differential is greater than can be measured accurately. 4 Input Under Range •0 = The input signal is not under range •1 = The input signal differential is more negative than can be measured accurately. 5 Attempt to Set Tare While in Motion •0 = Either the tare function is not active or the scale is not in motion. •1 = The tare function is active and the scale is in motion. 6 Attempt to Zero While in Motion •0 = Either the zero function is not active or the scale is not in motion. •1 = The zero function is active and the scale is in motion. 7 Tare Successful •0 = Either the tare function is not active, the scale is in motion, or the tare function was not successfully completed. •1 = The tare function was successfully completed. 8 Zero Successful •0 = Either the zero function is not active, the scale is in motion, or the zero function was not successfully completed. •1 = The zero function was successfully completed. Monitoring Status Data C–3 word bits description 0 9 New Data •0 = The status-block data has not been updated by the module since the last block-transfer read. •1 = The status-block data has been updated by the module since the last block-transfer read. 10 Decimal-Point Location Error •0 = The decimal-point location value is valid. •1 = An invalid value was entered for the decimal-point location. 11 #Samples Entry Error •0 = The #Samples value is valid. •1 = An invalid value was entered for the number of samples. 12 Motion-Tolerance Entry Error •0 = The motion-tolerance value is valid. •1 = An invalid value was entered for motion tolerance. 13 Zero-Tolerance Entry Error •0 = The zero-tolerance value is valid. •1 = An invalid value was entered for zero tolerance. 14 Real-Time Sample Period Entry Error •0 = The real-time sample period value is valid. •1 = An invalid value was entered for the real-time sample period. 15 WAVERSAVER Selection Error •0 = Only one WAVERSAVER selection bit is on. •1 = Multiple WAVERSAVER selection bits are on. General and Soft Calibration Bits 1 0 Not Calibrated •0 = The current values in the non-volatile memory are valid calibration values. •1 = The current values in the non-volatile memory are not valid calibration values — the module is new (uncalibrated) or has bad non-volatile memory. 1 Calibration Mode •0 = Not in a calibration mode. •1 = In a calibration mode. 2 Last Calibration Mode •0 = The module was last calibrated in Hard-Cal mode. •1 = The module was last calibrated in either Soft-Cal or C2-Cal mode 3 Last Soft-Cal/C2-Cal Mode — This bit is only valid if bit 2 is on. •0 = The module was last calibrated in Soft-Cal mode. •1 = The module was last calibrated in C2-Cal mode. 4 Write Successful •0 = Write not successful. •1 = Write to non-volatile memory successful. 5 Current Calibration Mode •0 = Set for Hard-Cal. •1 = Set for Soft-Cal or C2-Cal. 6 Current Soft-Cal/C2-Cal Mode — This bit is only valid if bit 5 is on. •0 = Set for Soft-Cal mode. •1 = Set for C2-Cal mode. Publication 1771–6.5.117 – March 1998 C–4 Monitoring Status Data word bits description 1 7 Calibration Date or ID Error •0 = No error •1 = An invalid value was entered for the calibration year, month, day, or identification. 8 Sensitivity Error •0 = Sensitivity value is valid. •1 = Sensitivity value entered is invalid. 9 Range Error •0 = Range value is valid. •1 = Range value entered is invalid. 10 Incorrect Load-Point Count in C2-Cal •0 = The number of load points found during the read matched the number specified. •1 = The number of load points found during the read did not match the number specified. 11 Load-Point Error in C2-Cal •0 = No load-cell error. •1 = Either no load points were found, or there was a communication error. 12 C2-Cal Read Complete •0 = The load-point data has not yet been read, or errors were reported. •1 = The load-point data was read successfully, and no errors were reported. 13 Test-Resistance Value Failure •0 = Test-resistance value is within tolerance of the test-resistance value taken at the factory. •1 = Test-resistance value is not within tolerance of the test-resistance value taken at the factory. 14 Restore Data Complete •0 = Processing of values block-transferred to the module for restoring calibration data is not complete. •1 = Processing of values block-transferred to the module for restoring calibration data is complete. If no errors were found, the values have been loaded into the module’s non-volatile memory. If errors were found, they have been reported with the error bits. 15 EEPROM Failure •0 = Successful write to EEPROM detected •1 = Unsuccessful write to EEPROM detected Series B only Hardware Calibration Bits 2 Publication 1771–6.5.117 – March 1998 0 Calibration Low-Weight Error •0 = The CAL-LO reference weight value entered was OK. •0 = The CAL-LO reference weight value entered was invalid. 1 Midpoint Linearization Weight Error •0 = The MID-LIN reference weight value entered was OK. •0 = The MID-LIN reference weight value entered was invalid. 2 Calibration High-Weight Error •0 = The CAL-HI reference weight value entered was OK. •0 = The CAL-HI reference weight value entered was invalid. 3 Calibration Low Attempted with Scale in Motion •0 = Scale not in motion during calibration low attempt. •1 = The calibration control “Calibration-Low-Read” bit was set on, and the scale was in motion. Monitoring Status Data word C–5 bits description 4 Midpoint Linearization Attempted with Scale in Motion •0 = Scale not in motion during midpoint linearization attempt. •1 = The calibration control “Midpoint-Linearization-Read” bit was set on, and the scale was in motion. 5 Calibration High Attempted with Scale in Motion •0 = Scale not in motion during calibration high attempt. •1 = The calibration control “Calibration-High-Read” bit was set on, and the scale was in motion. 6 Midpoint Linearization to Low Difference Error •0 = The difference between the CAL-LO and MID-LIN reference points is OK (greater than 100). •1 = The difference between the CAL-LO and MID-LIN reference points is not greater than 100. 7 Calibration High-to-Low Difference Error •0 = The difference between the CAL-LO and CAL-HI reference points is OK (greater than 100). •1 = The difference between the CAL-LO and CAL-HI reference points is not greater than 100. 8 CAL-LO Successful •0 = The calibration-low read bit is off, or the the scale is in motion. •1 = The values for the CAL-LO reference point have been successfully recorded. 9 MID-LIN Successful •0 = The midpoint-linearization read bit is off, or the the scale is in motion. •1 = The values for the MID-LIN reference point have been successfully recorded. 10 CAL-HI Successful •0 = The calibration-high read bit is off, or the the scale is in motion. •1 = The values for the CAL-HI reference point have been successfully recorded. 11 Calibration-Low Volts Error •0 = A calibration-low value was entered within the range of –1.0mV/V through +5.0V/V. •1 = A calibration-low value of less than –1.0mV/V or greater than +5.0V/V was entered. 12 Midpoint-linearization Volts Error •0 = A midpoint-linearization value was entered within the range of –1.0mV/V through +5.0V/V. •1 = A midpoint-linearization value of less than –1.0mV/V or greater than +5.0V/V was entered. 13 Calibration-High Volts Error •0 = A calibration-low value was entered within the range of –1.0mV/V through +5.0V/V. •1 = A calibration-low value of less than –1.0mV/V or greater than +5.0V/V was entered. 14 Reserved. 15 Configuration-in-Change — For the first seven seconds after the module is powered up, or when you change WAVERSAVER settings, the module reports a busy state. Do not attempt BTRs, BTWs, or try to access values. 3 0–15 Gross Weight (16-bit Integer Format) — This is the current average gross weight value. It can be in the range of –32,768 through +32, 767. Use this value in applications for which 16-bit resolution is adequate. 4 0–15 Net Weight (16-bit Integer Format) — This is the current average gross weight value. It can be in the range of –32,768 through +32, 767. Use this value in applications for which 16-bit resolution is adequate. 2 Series B only Publication 1771–6.5.117 – March 1998 C–6 Monitoring Status Data word bits description 5 0–15 Gross Weight (32-bit Floating-Point Format) (MSW) — This is the most-significant 16 bits of the current average gross weight value in 32-bit floating-point format. 6 0–15 Gross Weight (32-bit Floating-Point Format) (LSW) — This is the least-significant 16 bits of the current average gross weight value in 32-bit floating-point format. 7 0–15 Net Weight (32-bit Floating-Point Format) (MSW) — This is the most-significant 16 bits of the current average net weight value in 32-bit floating-point format. 8 0–15 Net Weight (32-bit Floating-Point Format) (LSW) — This is the least-significant 16 bits of the current average net weight value in 32-bit floating-point format. 9 0–15 Calibration Year — This is the year in which the module was calibrated. (1994–2100) 10 0–15 Calibration Month — This is the month of the year in which the module was calibrated. (1–12) 11 0–15 Calibration Day — This is the day of the month in which the module was calibrated. (1–31) 12 0–15 Calibration Identification (MSW) — The two most-significant alpha-numeric (ASCII) characters representing the ID of the person who last calibrated this module. 13 0–15 Calibration Identification (LSW) — The two least-significant alpha-numeric (ASCII) characters representing the ID of the person who last calibrated this module. 14 0–15 Calibration Low Weight (MSW) — This word contains the 3 most-significant decimal digits (stored in natural binary format) of the 6-digit weight value used for the CAL-LO reference point. 15 0–15 Calibration Low Weight (LSW) — This word contains the 3 least-significant decimal digits (stored in natural binary format) of the 6-digit weight value used for the CAL-LO reference point. 16 0–15 Calibration High Weight (MSW) — This word contains the 3 most-significant decimal digits (stored in natural binary format) of the 6-digit weight value used for the CAL-HI reference point. 17 0–15 Calibration HIgh Weight (LSW) — This word contains the 3 least-significant decimal digits (stored in natural binary format) of the 6-digit weight value used for the CAL-HI reference point. 18 0–15 Calibration Midpoint-Linearization Weigh (MSW) — This word contains the 3 most-significant decimal digits (stored in natural binary format) of the 6-digit weight value used for the MOD-LIN reference point. (Optional) 19 0–15 Calibration Midpoint-Linearization Weigh (LSW) — This word contains the 3 least-significant decimal digits (stored in natural binary format) of the 6-digit weight value used for the MOD-LIN reference point. (Optional) 20 0–15 Calibration Low Volts (MSW) — This is the most-significant 16 bits of the 32-bit floating-point format volts value calculated for the CAL-LO reference point. 21 0–15 Calibration Low Volts (LSW) — This is the least-significant 16 bits of the 32-bit floating-point format volts value calculated for the CAL-LO reference point. 22 0–15 Calibration High Volts (MSW) — This is the most-significant 16 bits of the 32-bit floating-point format volts value calculated for the CAL-HI reference point. 23 0–15 Calibration High Volts (LSW) — This is the least-significant 16 bits of the 32-bit floating-point format volts value calculated for the CAL-HI reference point. Publication 1771–6.5.117 – March 1998 Monitoring Status Data C–7 word bits description 24 0–15 Calibration Midpoint Linearization Volts (MSW) — This is the most-significant 16 bits of the 32-bit floating-point format volts value calculated for the MID-LIN reference point. (Optional) 25 0–15 Calibration Midpoint Linearization Volts (LSW) — This is the least-significant 16 bits of the 32-bit floating-point format volts value calculated for the MID-LIN reference point. (Optional) 26 0–15 Test Resistance Values (MSW) — This word contains the 3 most-significant decimal digits (stored in natural binary format) of a 6-digit raw input value for testing the module and troubleshooting the system. 27 0–15 Test Resistance Values (LSW) — This word contains the 3 least-significant decimal digits (stored in natural binary format) of a 6-digit raw input value for testing the module and troubleshooting the system. 28 0–7 Firmware Revision — In ASCII. (A through Z) 8–15 Firmware Series — In ASCII. (A through Z) 29 0 Double Density Mode — This word stores the jumper (J1) location: •0 = The module is in single-density (Series A) mode. •1 = The module is in double-density (Series B) mode. 29 1 Setpoint Weight Descriptor Error •0 = Valid value entered for setpoint weight description. •1 = Value entered for setpoint weight description is invalid. Valid values are 0 (kilograms) and 1 (pounds). 2 Setpoint Value Error •0 = Valid value entered for setpoint. •1 = Value entered for setpoint is invalid. Valid values are -999999 through 999999. 3 Deadband Value Error •0 = Valid value entered for deadband. •1 = Value entered for deadband is invalid. Valid values are -999999 through 999999. 4 Preact Value Error •0 = Valid value entered for preact. •1 = Value entered for preact is invalid. Valid values are -999999 through 999999. 5 Setpoint Setup Error •0 = Valid setpoint setup. •1 = Improper configuration of setpoint, preact, and deadband. 6 RoC Weight Descriptor Error •0 = Valid value entered for RoC weight description. •1 = Value entered for RoC weight description is invalid. Valid values are 0 (kilograms) and 1 (pounds). 7 RoC Evaluation Period Error •0 = Valid value entered for RoC evaluation period. •1 = Value entered for RoC evaluation period is invalid. Valid values are 1 millisecond through 32.767 seconds. 8 RoC Units Error •0 = Valid value entered for RoC units. •1 = Value entered for RoC unit is invalid. Valid values are 0 (seconds), 1 (minutes), and 2 (hours). 9-15 Reserved. Publication 1771–6.5.117 – March 1998 C–8 Monitoring Status Data word bits description 30 0-15 Setpoint 1 (MSW) — This is the most-significant 16 bits of the 32-bit floating-point format setpoint 1 value. This data is used only when bit 0 of word 29 is on. 31 0-15 Setpoint 1 (LSW) — This is the least-significant 16 bits of the 32-bit floating-point format setpoint 1 value. This data is used only when bit 0 of word 29 is on. 32 0-15 Setpoint 2 (MSW) — This is the most-significant 16 bits of the 32-bit floating-point format setpoint 2 value. This data is used only when bit 0 of word 29 is on. 33 0-15 Setpoint 2 (LSW) — This is the least-significant 16 bits of the 32-bit floating-point format setpoint 2 value. This data is used only when bit 0 of word 29 is on. 34 0–15 Deadband 1 (MSW) – This is the most-significant 16 bits of the 32-bit floating-point format deadband 1 value. This data is used only when bit 0 of word 29 is on. 35 0–15 Deadband 1 (LSW) — This is the least-significant 16 bits of the 32-bit floating-point format deadband 1 value. This data is used only when bit 0 of word 29 is on. 36 0–15 Deadband 2 (MSW) — This is the most-significant 16 bits of the 32-bit floating-point format deadband 2 value. This data is used only when bit 0 of word 29 is on. 37 0–15 Deadband 2 (LSW) — This is the least-significant 16 bits of the 32-bit floating-point format deadband 2 value. This data is used only when bit 0 of word 29 is on. 38 0–15 Preact 1 (MSW) – This is the most-significant 16 bits of the 32-bit floating-point format preact 1 value. This data is used only when bit 0 of word 29 is on. 39 0–15 Preact 1 (LSW) — This is the least-significant 16 bits of the 32-bit floating-point format preact 1 value. This data is used only when bit 0 of word 29 is on. 40 0–15 Preact 2 (MSW) — This is the most-significant 16 bits of the 32-bit floating-point format preact 2 value. This data is used only when bit 0 of word 29 is on. 41 0–15 Preact 2 (LSW) — This is the least-significant 16 bits of the 32-bit floating-point format preact 2 value. This data is used only when bit 0 of word 29 is on. 42 0–15 SP Weight Description – This word stores the unit of measure for weight in setpoint calculations: •0 = kilograms •1 = pounds 43 0–15 RoC Time Units – This word stores the rate-of-change in time units: •0 = seconds •1 = minutes •2 = hours 44 0–15 RoC Evaluation Period — This word stores the value for time over which a rate-of-change calculation is made. (1 millisecond - 32.767 seconds) 45 0–15 RoC Weight Description – This word stores the unit of measure for weight in rate-of-change calculations: •0 = kilograms •1 = pounds 46 0–15 RoC Calculation (MSW) — This is the most-significant 16 bits of the 32-bit floating-point format RoC value. This data is used only when bit 0 of word 29 is on. 47 0–15 RoC Calculation (LSW) — This is the least-significant 16 bits of the 32-bit floating-point format RoC value. This data is used only when bit 0 of word 29 is on. Publication 1771–6.5.117 – March 1998 Monitoring Status Data C–9 word bits description 48 0–15 Calibration/Diagnostics Control — This word stores calibration and diagnostic information that you view on the active window for configuration verification. 49 0–15 Decimal Point Location — This word stores the number of digits to the right of the decimal point for all weight integer values. 50 0–15 Motion Tolerance (MSW) — This word stores the 3 most-significant decimal digits (stored in natural binary format) of the 6-digit value that defines the weight change that will trigger the in-motion flag to be set . You entered this value on the Configuration screen. 51 0–15 Motion Tolerance (LSW) — This word stores the 3 least-significant decimal digits (stored in natural binary format) of the 6-digit value that defines the weight change that will trigger the in-motion flag to be set. You entered this value on the Configuration screen. 52 0–15 Number of Averages — This word stores the number of weight samples used to calculate the average current weight that you entered on the Configuration screen. 53 0–15 Number of Load Cells — This word stores the number of load cells that you entered on the Calibration screen. 54 0–15 Reserved. 55 0–15 Reserved. 56 0–15 Real-time Sample Period — This word stores the period at which the module puts a new average weight value into the read block and turns on the new-data bit. You entered this value on the Configuration screen. 57 0–15 Reserved. 58 0–15 Reserved. 59 0–15 WAVERSAVER Selection — This word stores the lowest frequency you want to reject. You entered this value on the Configuration screen. 60 0–15 Weight Functions — This word stores the tare-enable and zero-enable values you selected on the Configuration screen. 61 0–15 Weight Modes — This word stores the value (lb. or kg.) that you selected on the Configuration screen. 62 0–15 Zero Tolerance (MSW) — This word stores the 3 most-significant decimal digits (stored in natural binary format) of the 6-digit value that defines the acceptable tolerance for zero weight. You entered this value on the Configuration screen. 63 0–15 Zero Tolerance (LSW) — This word contains the 3 least-significant decimal digits (stored in natural binary format) of the 6-digit value that defines the acceptable tolerance for zero weight. You entered this value on the Configuration screen. Publication 1771–6.5.117 – March 1998 C–10 Monitoring Status Data Notes: Publication 1771–6.5.117 – March 1998 I/O Chassis Location any single I/O module slot Compatible I/O Chassis 1771-A1B, -A2B, -A3B, -A3B1, -A4B, 1771-AM1, -AM2 Number of Input Image Bits •Single density (Series A) •Double density (Series B) •8 •16 Number of Output Image Bits •Single density (Series A) •Double density (Series B) •8 •16 Number of Read-Block Words •Single density (Series A) •Double density (Series B) •29 •64 Number of Write-Block Words •Single density (Series A) •Double density (Series B) •33 •49 Inputs •sense 5V dc 5% (10V dc 5% differential) •signal –0.3mV through +30.3mV dc •C2-Cal Outputs •excitation 10V dc 5% 1.5W (maximum) A/D Conversion Period 50 ms Resolution: •Reported •1:985,000 (for 3mV/V load cell) •1:656,000 (for 2mV/V load cell) •Internal •1:1,048,576 Non-Linearity 0.0040% of full scale (maximum) Common-Mode Rejection 100dB at or below 60Hz (minimum) Common-Mode Voltage Range 2.5V dc Continuous Input Voltage 40.0V dc (maximum) Offset Drift Typical: 100nV/°C Maximum: 300nV/°C Gain Drift Typical: 3 ppm/°C Maximum: 13 ppm/°C Electrical Isolation between I/O circuits and backplane logic circuitry 1,000V Max Backplane Current Load 1.5A Publication 1771–6.5.117 – March 1998 D–2 Specifications Conductors Wire Size per load-cell manufacturer’s specification, in a stranded-conductor shielded cable 1 Category Environmental Conditions: •Operating Temperature •Storage Temperature •Relative Humidity Keying Between 24 and 26 Between 32 and 34 Remote-Termination-Panel Choice 1771-RT44 Connecting Cable(s) 1771-NC6 = 1.8m (6 ft) 1771-NC15 = 4.6m (15 ft) Agency Certification (when product or packaging is marked) 1 Publication 1771–6.5.117 – March 1998 •0 to 60°C (32 to 140°F) •–40 to 85°C (–40 to 185°F) •5 to 95% (without condensation) CE – marked for all applicable directives You use this conductor-category information for planing conductor routing as described in the system-level installation manual. Understanding 1771ĆWS Terminology This glossary defines terms that we use throughout the Weigh Scale Module (Cat. No. 1771-WS) User Manual, publication 1771-6.5.117. auto zero Tells the module to set the gross weight value equal to zero when the weight on the scale is within zero tolerance and the scale is not in motion. This resets the zero weight of the scale. See also gross weight display, net weight display, zero tolerance. block transfer The main means of communication between the PLC processor and the module. Transfers a block (64 words maximum) of data to and from an I/O module. block transfer read address Starting address of the data table file where status data is stored after being block transferred from the module. This address is assigned by the user and read by WeighScale Configuration software during calibration. block transfer write address Starting address of the data table file where configuration and calibration data is stored before being block transferred to the module. This address is assigned by the user and read by WeighScale Configuration software during calibration. C2 calibration A calibration technique that uploads calibration data from Hardy Instruments’ C2 second-generation load cells. This calibration data lets the software automatically calibrate the module. See also calibration, hard calibration, soft calibration. Publication 1771–6.5.117 – March 1998 G–2 Understanding 1771-WS Terminology calibration Sets gain/range data in the module for a given load cell to convert input information to a weight. You must configure the module before you can calibrate or use it. The Weigh Scale module supports the three basic types of calibration: • hard – expects you to manually put weights on the scale to calibrate it. • soft – expects you to enter the scale sensitivity and output resistance for each load cell. • C2 – uploads calibration data from Hardy Instruments’ C2 second-generation load cells. See also C2 calibration, hard calibration, soft calibration. Calibration screen Use this WeighScale Configuration software screen to interact with the module to calibrate your scale. configuration Establishes basic module operation. You must configure the module before you can calibrate or use it. Your selections do not take effect until you download them to the PLC data table. See also download/upload. Configuration screen Use this WeighScale Configuration software screen to interact with the module to configure your module. deadband Used to separate the “turn-off” weight from the setpoint, preventing switching “chatter.” download/upload Refers to the reading and writing of blocks of data from one device to another. When data is transferred to a device, it’s considered an upload; when data is transferred from a device, it’s considered an download. Publication 1771–6.5.117 – March 1998 Understanding 1771-WS Terminology G–3 gross weight display Tells you the total weight of the vessel being measured. See also net weight display. hard calibration Expects you to manually put weights on the scale to calibrate it. See also C2 calibration, calibration, soft calibration. high calibration weight High reference point for hard calibration. Equal to the high weight being placed on a scale. Should be equal to 80 – 90% of scale capacity. See also hard calibration. in-motion tolerance Tells the module what amount of weight change will indicate that there has been a change in the weight value. low calibration weight Low reference point for hard, soft, and C2 calibration. Equal to the low weight being placed on the scale. See also C2 calibration, hard calibration, soft calibration. midpoint linearization weight Middle reference point for hard calibration, if the scale needs to be calibrated for linear operation. See also hard calibration. Module List screen This WeighScale Configuration software screen displays the modules in the project and lets you modify already existing modules or add new modules to the list. Publication 1771–6.5.117 – March 1998 G–4 Understanding 1771-WS Terminology net weight display Tells you the difference between the gross weight and the tare value. See also gross weight display, tare value. number-of-digits selection Number of digits displayed to the right of the decimal point. number-of-samples selection Number of weight samples module uses to calculate the average current weight. on-board resistance Disconnects the module input (i.e., stops the module from reading weight values from the scale) and forces the internal millivolt signal to 0 millivolts. This is used to detect drift in the module. preact Used to account for delay in shutting of feeders in the weighing system due to mechanical delays, material in flight, or other system delays. PLC address Node number on the DH+ link of the PLC-5 processor for the module. Project screen This screen is the first screen you see when you start WeighScale Configuration software. From this screen, you can: • create new projects • open, rename, copy, delete, and print files • view a list of files and projects • change the order in which files are listed • access the Security System screen • go to the Module List screen • login and logout of the system Publication 1771–6.5.117 – March 1998 Understanding 1771-WS Terminology G–5 rate-of-change value The rate-of-change represents the rate-of-change in weight as measured by the module over a defined time period. Can be used to track material flow. This calculation is based on three parameters: • weight description — defines the unit of measure for weight in rate-of-change calculations • time units — unit of measure for time in rate-of-change calculations • evaluation period — the time over which a rate-of-change calculations are made real-time sampling period Tells the PLC processor how often to read the weight value from the module. Used to provide a consistent change over time (n/T) n the weight sample. scale sensitivity Voltage value. You get this value from the load cell supplier (typically from the load cell certificate). This value is used to calibrate the module. setpoint The value or target value for turning feeders on and off. The WeighScale Module supports two setpoints. Each setpoint is made up of: • weight description — defines the unit of measure for weight in setpoint calculations • setpoint value — target weight value • deadband — used to separate the “turn-off” weight. At the actual switching point, the deadband also prevents switching “chatter” • preact value — accounts for delay in the weighing system due to mechanical delays, material in flight, or other system delays Publication 1771–6.5.117 – March 1998 G–6 Understanding 1771-WS Terminology soft calibration A method of calibration that eliminates the use of weights. This method expects you to enter the scale sensitivity and output resistance for each load cell. You get these values from the load cell supplier (typically from the load cell certificate). For an accurate calibration, the scale sensitivity value must be to four digits to the right of the decimal point, and the output resistance value must be to digit to the right of the decimal point. See also calibration, C2 calibration, hard calibration. tare Equal to the gross weight when you tare the scale. See also gross weight display, tare enable selection. tare enable selection Sets or resets the net weight equal to zero. See also net weight display. unit-of-weight selection Tells you whether the weight is currently displayed in pounds or kilograms. WAVERSAVER setting Sets the input noise frequencies to reject. Only noise at frequencies below this value will be rejected. This helps minimize process noise and give you a more stable weight reading. zero-enable selection Sets the gross and net weight values to zero. See also gross weight display, net weight display. zero-tolerance selection If the current weight is less than this value and the in-motion tolerance is turned off, you can set the gross weight and net weight to zero using the auto-zero function or the zero-enable function. See also auto-zero, gross weight display, net weight display, zero-enable selection. Publication 1771–6.5.117 – March 1998 Index Numbers 1771–NC15, 2–4, 2–8 1771–NC6, 2–4, 2–8 1771–RT44, 2–4, 2–7 1784-KL, 4–4 defined. See C2 calibration, hard calibration, soft calibration hard, 9–4, B–1 restoring, 9–7 soft, 9–5, B–4 which type is best for your application?, 9–1 1784-KT/B, 4–4 calibration block, B–1, B–9 1784-PCMK, 4–4 Calibration screen, defined, G–2 Calibration Wizard, accessing, 9–2 A categories, privileges, 5–2 access privileges, 5–2 CE mark, 2–6 access the security system, 5–2 chassis, 1–3, 2–3, 2–4, 2–5 add user, 5–3 addressing, 1–3, 2–3 communication, 4–4, 12–4 block transfer, A–7 discrete transfer, A–7 setting up, A–7 addressing the module, A–1 communication sequence, A–7 audience, P–1 compatibility, 1–2 communication software, 4–2 I/O chassis, 1–3 PLC processors, 4–4 processor, 1–3 remote termination panel, 1–3 use of data table, 1–3 Windows 95, 4–1 Windows NT, 4–1 adding to a project, modules, 7–2, 7–3 auto zero, defined. See gross weight, net weight, zero tolerance auto–zero tracking, selecting, 8–3 B backplane current load, 2–3 block transfer, 12–4, A–7 defined, G–1 block transfer read address, defined, G–1 block transfer write address, defined, G–1 block-transfer programming, A–7, A–9 bridge resistance, 12–7 BTR period, A–6 BTR sample period, A–6 C C2 calibration, 9–6, B–6 defined. See calibration, hard calibration, soft calibration cables, 2–8 calculating flow, A–6 computer requirements, 4–4 configuration defined. See download, upload saving changes, A–36 verifying data, A–36 configuration block, B–1, B–9 Configuration screen, defined, G–2 configuration values copying between modules, 8–14 copying to a new module using ladder logic utility to, 8–14 without using ladder logic utility to, 8–15 downloading, 8–12 uploading, 8–13 configuration/calibration block, A–7, B–1, B–9 calibrating, using WeighScale Configuration software, 9–1 connecting RTP to junction box, 2–9 calibration, 12–4, 12–6 C2, 9–6, B–6 control of security, 5–1 connection points, 2–10 Publication 1771–6.5.117 – March 1998 I–2 Index ControlNet, 4–4 conventions, P–4 COPY FILE instruction, C–1 D data ready, A–5 data table use, 1–3 deadband, A–29 defined, G–2 See also setpoint decimal point, C–1 decimal point location, selecting, 8–4 definitions, G–1 delete user, 5–5 DH+, 4–4 diagnostic indicators, 2–12, 12–1 zeroing the gross weight, A–28 examples alarms, A–16, A–18, A–25, A–26 block–transfer read, A–17, A–18 block–transfer read logic, A–9, A–10 block–transfer write, A–17, A–18 block–transfer write logic, A–9 calibration, A–9, A–11 error alarms, A–10 floating–point file, A–10, A–18, A–36 gross weight, A–10, A–18 net weight, A–10, A–18 permissive, A–9, A–13, A–21 setpoint, A–32, A–33 setpoint status, A–35 tare, A–11, A–19 WAVERSAVER, A–14, A–23, A–24 zero, A–12, A–20 motion tolerance, A–15, A–24 zero tolerance, A–15, A–24, A–25 DIN mounting rails, 2–7 F directory creating a new, 6–4 removing, 6–4 features, 1–4 discrete transfer, A–7 firmware series, viewing, 8–9 disks, 4–4 floating–point values, C–1 double–density (Series B), 2–2 floating-point values, A–26 download, defined, G–2 flow calculation, A–6 downloading, tips, 8–13 functionality, 1–2 drive convention, P–4 G E edit privileges, 5–5 editing the configuration/calibration block, B–1 glossary, G–1 gross weight, C–1 defined. See net weight grounding shields, 2–12 electrostatic damage, 2–1 EMC, 2–6 enable security, 5–6 enclosure depth, 2–4 Ethernet, 4–4 European Union Directive Mark, 2–6 evaluation period defined. See rate–of–change valid values, A–35 H hard calibration, 9–4, B–1 defined. See C2 calibration, calibration, soft calibration hardware, 4–4 help, P–3, 4–7 high calibration weight, defined. See hard calibration example, A–9, A–17 example programming block-transfer, A–7, A–9 selecting frequency-rejection value, A–27 selecting WAVERSAVER value, A–27 setting the tare value, A–27 Publication 1771–6.5.117 – March 1998 I I/O chassis, 1–3 I/O image, 1–3, A–1 Index implied decimal point, C–1 M in–motion tolerance, defined, G–3 managing projects, 6–1 in–motion tolerance value, selecting, 8–5 manual organization, P–2 indicators, 2–12, 12–1 CAL/COM, 12–1 RUN/FLT, 12–1 messages configuration, 8–11 download, 8–10 upload, 8–11 input image table, A–1 installation of module, 2–6 of remote termination panel, 2–7 software, 4–1 I–3 midpoint linearization weight, defined. See hard calibration installation procedure, software, 4–5 MMI supplied with WeighScale software, 3–4 using interface to, 3–4 installing, cables, 2–8 modifying Module List screen, 7–5 installing the module, 2–1 module configuring, 8–1, 8–3 restoring, B–8 installing the utility software, 4–1 integer values, C–1 J module configuration screen, using, 8–2 module density, viewing, 8–9 module installation, 2–1, 2–6 jumper, 1–2, 2–2 module list, 6–1 junction box connections, 2–9 module list configuration, 6–1 K Module List screen defined, G–3 modifying, 7–5 keying, 2–5 module location, 2–4 keying positions, 2–5 module status, viewing, 8–9 L ladder logic, writing custom, A–1 ladder logic utility changing defaults, 3–3 data table layout, 3–5 symbolic names used by, 3–6 using, 3–2 leakage, 12–7 list privileges, 5–4 load cells, 12–5 repairing, 12–7 selecting the number of, 8–4 troubleshooting, 12–6 location for the module, 2–4 login, 5–7 modules adding to a project, 7–2, 7–3 deleting from Module List screen, 7–7 entering or modifying description, 7–6 managing, 7–1 moving from one project to another, 7–4 Monitor screen accessing, 10–1 entering data, 10–2 using, 10–1 viewing data, 10–2 monitoring status data, C–1 mounting, 12–5 mounting positions, 2–7 moving average sample size, selecting, 8–8 moving from one project to another, modules, 7–4 logout, 5–7 low calibration weight, defined. See C2 calibration, hard calibration, soft calibration low voltage, 2–6 N net weight, C–1 defined. See gross weight, tare value Publication 1771–6.5.117 – March 1998 I–4 Index new data, A–5 R number–of–digits, defined, G–4 rate of change settings, selecting, 8–7 number–of–samples, defined, G–4 rate–of–change, A–35, A–36 defined. See ROC evaluation period, A–35 evaluation period, defined, G–5 time units, A–35 time units, defined, G–5 weight description, A–35 weight description, defined, G–5 O on–board resistance, 12–2 defined, G–4 online help, 4–7 output image table, A–1 overview, 1–1 rate–of–change evaluation period, selecting, 8–8 rate–of–change time period, selecting, 8–8 P password, changing, 5–6 reading 6-digit integer values, C–1 piping, 12–6 reading floating-point values, A–26, C–1 PLC address, defined, G–4 reading resistance, 9–8 PLC processors, 4–4 real-time sample period, A–2, A–5, A–6 power requirements, 2–3 real–time sampling period, 1–2 defined, G–5 selecting, 8–9 pre-installation considerations, 2–1 preact, A–29 defined, G–4 preact value, defined. See setpoint privilege categories, 5–2 related publications, P–3 remote termination panel, 2–4, 2–7 requirements for your computer, 4–4 privileges, 5–4, 5–5 resistance, 12–2, 12–5, 12–7 reading, 9–8 process weighing, 1–1 restoring, the module, B–8 processor, 1–3 restoring a calibration, 9–7 programming, block-transfer, A–7, A–9 restoring the module, B–8 programming example, A–9, A–17 revision, viewing, 8–9 project copying an existing, 6–4 documenting, 11–1 entering or modifying description, 6–5 printing, 11–2 viewing, 11–1 ROC. See rate–of–change project file, 6–1 creating a new, 6–1 deleting, 6–2 opening an existing, 6–2 saving, 7–7 project files displaying, 6–3 renaming, 6–3 sorting, 6–3 Project screen, defined, G–4 projects, managing, 6–1 purpose, P–1 Publication 1771–6.5.117 – March 1998 read block, C–2 S sample period of BTR, A–6 saving configuration changes, A–36 scale sensitivity, defined, G–5 security, 5–1 accessing, 5–2 add user, 5–3 delete user, 5–5 edit privileges, 5–5 enable, 5–6 list privileges, 5–4 login, 5–7 Index logout, 5–7 password, 5–6 tare value, defined. See gross weight, tare enable security system control, 5–1 terminology, G–1 security system supervision, 5–1 time units defined. See rate–of–change valid values, A–35 sequence of communication, A–7 setpoint, A–29 deadband, A–29 deadband, defined, G–5 defined, G–5 example, A–30, A–31 example values, A–29 preact, A–29 preact value, defined, G–5 setpoint value, A–29 setpoint value, defined, G–5 weight description, A–29 weight description, defined, G–5 troubleshooting, 12–1 indicators, 12–2 with indicators, 12–2 U understanding 1771–WS terminology, G–1 unit of weight, selecting, 8–3 unit–of–weight, defined, G–6 update of weight values, A–2 setpoint value, defined. See setpoint upload, defined, G–2 setpoints, example, A–30, A–31 Using this Document, P–1 setting the tare value, example programming, A–27 shield, grounding, 2–12 V simulator, 12–2, 12–4 verifying configuration data, A–36 single–density (Series A), 2–2 vocabulary, P–4 single–transfer, A–1 soft calibration, 9–5, B–4 defined. See calibration, C2 calibration, hard calibration software, 4–5 help, 4–7 installing, 4–1 starting, 4–5 W WAVERSAVER, A–4 defined, G–6 example programming, A–27 WAVERSAVER setting, selecting, 8–7 starting the software, 4–5 WeighScale Configuration software downloading from the Internet, 4–3 getting started with, 4–1 help, 4–7 installing, 4–1 obtaining, 4–3 ordering, 4–4 starting, 4–5 status, C–1 WeighScale software, 1–1 status block, C–2 supervising the security system, 5–1 weight description defined. See rate–of–change; setpoint valid values, A–29, A–35 system status block, C–2 weight values, update, A–2 software disks, 4–4 software installation procedure, 4–5 software, starting, 4–5 specifications, D–1 status data, monitoring, C–1 Windows 95, compatibility, 4–1 T I–5 workstation, configuring, 7–1 write block, A–7, B–9 tare enable, defined. See net weight Publication 1771–6.5.117 – March 1998 I–6 Index Z zero enable, defined. See gross weight, net weight zero tolerance, defined. See auto zero, gross weight, net weight, zero enable zero–balance test, 12–6 zero–tolerance value, selecting, 8–6 zeroing the gross weight, example programming, A–28 Publication 1771–6.5.117 – March 1998 Allen-Bradley Publication Problem Report If you find a problem with our documentation, please complete and return this form. Pub. Name WeighScale Module User Manual Cat. No. N/A Check Problem(s) Type: Pub. No. 1771-6.5.117 Pub. Date March 1998 Part No. 955131-31 Describe Problem(s): Internal Use Only Technical Accuracy text Completeness procedure/step illustration definition info in manual example guideline feature (accessibility) explanation other What information is missing? illustration info not in manual Clarity What is unclear? Sequence What is not in the right order? Other Comments Use back for more comments. Your Name Location/Phone Return to: Marketing Communications, Rockwell Automation, 1 Allen-Bradley Drive, Mayfield Hts., OH 44124-6118 Phone: (440)646-3176 FAX: (440)646-4320 Publication ICCG-5.21-August 1995 PN 955107-82 PLEASE FASTEN HERE (DO NOT STAPLE) PLEASE FOLD HERE NO POSTAGE NECESSARY IF MAILED IN THE UNITED STATES BUSINESS REPLY MAIL FIRST-CLASS MAIL PERMIT NO. 18235 CLEVELAND OH POSTAGE WILL BE PAID BY THE ADDRESSEE 1 ALLEN BRADLEY DR MAYFIELD HEIGHTS OH 44124-9705 PLEASE REMOVE Other Comments Rockwell Automation Support Rockwell Automation offers support services worldwide. Local Product Support Contact your local Rockwell Automation representative for: • sales and order support • product technical training • warranty support • support service agreements Technical Product Assistance If you need to contact Rockwell Automation for technical assistance, first review the information in Chapter 12, “Troubleshooting the Module.” For assistance that requires on-site support, contact your local sales office, distributor, or system integrator. During non-office hours, contact the Rockwell Automation 24-hour Hotline at 1-800-422-4913 in the United States or contact your local Customer Support Center outside the United States. The table below lists Customer Support Center telephone numbers: Region or Area Customer Support Center Telephone Number Canada (Cambridge, Ontario) 519-623-1810 Latin America (Mexico) 52-5-259-0040 United Kingdom (Milton Keynes) 44-908-838800 France (Paris) (33-1) 3067-7200 Germany (Gruiten) (49) 2104-6900 Italy (Milan) (39-2) 939-721 Asia Pacific (Hong Kong) (852) 887-4788 Spain (Barcelona) (34-3) 331-7004 Your Questions or Comments on this Manual If you find a problem in this manual, please notify us of it on the enclosed Publication Problem Report. If you have any suggestions for how this manual could be made more useful to you, please contact us at the address below: Rockwell Automation Control and Information Group Technical Communication Dept. 1 Allen-Bradley Drive Mayfield Heights, Ohio 44124 Allen-Bradley, a Rockwell Automation Business, has been helping its customers improve productivity and quality for more than 90 years. We design, manufacture and support a broad range of automation products worldwide. They include logic processors, power and motion control devices, operator interfaces, sensors and a variety of software. Rockwell is one of the world’s leading technology companies. Worldwide representation. Argentina • Australia • Austria • Bahrain • Belgium • Brazil • Bulgaria • Canada • Chile • China, PRC • Colombia • Costa Rica • Croatia • Cyprus • Czech Republic • Denmark • Ecuador • Egypt • El Salvador • Finland • France • Germany • Greece • Guatemala • Honduras • Hong Kong • Hungary • Iceland • India • Indonesia • Ireland • Israel • Italy • Jamaica • Japan • Jordan • Korea • Kuwait • Lebanon • Malaysia • Mexico • Netherlands • New Zealand • Norway • Pakistan • Peru • Philippines • Poland • Portugal • Puerto Rico • Qatar • Romania • Russia–CIS • Saudi Arabia • Singapore • Slovakia • Slovenia • South Africa, Republic • Spain • Sweden • Switzerland • Taiwan • Thailand • Turkey • United Arab Emirates • United Kingdom • United States • Uruguay • Venezuela • Yugoslavia Allen-Bradley Headquarters, 1201 South Second Street, Milwaukee, WI 53204 USA, Tel: (1) 414 382-2000 Fax: (1) 414 382-4444 Publication 1771–6.5.117 – March 1998 Supersedes Publication 1771-6.5.117 – April 1996 PN 955131–31 Copyright1771–6.5.117 1998 Allen-Bradley–Company, Inc. Printed in USA Publication March 1998