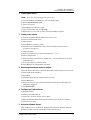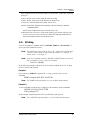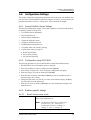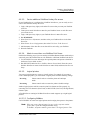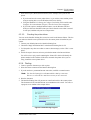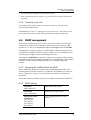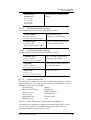
Download User's Manual

Transcript
User’s
Manual
FastPrint Server
Printer Sharing Device
FCC Statement:
This device complies with the limits for a Class B digital device, pursuant to Part 15 of
the FCC rules. Operation is subject to the following two conditions:
This device may not cause harmful interference, and,
This device must accept any interference received, including interference that may cause
undesired operation.
CE Marking Warning
This is a Class B product. In a domestic environment this product may cause radio
interference in which case the user may be required to take adequate measures.
Copyright 1998 Allied Telesyn International. ALL RIGHTS RESERVED.
Document Version: 1.1
All trademark and trade names are the properties of their respective owners.
♦ Important Safety Instructions
1. Unplug this device from its power source before cleaning. Use only a slightly
dampened cloth for cleaning. Do not use liquid or aerosol cleaners.
2. Avoid using this product near water. Exposure to water poses an electric-shock
hazard.
3. Do not place this device on an unstable surface. The device may fall causing serious
damage to the device.
4. This device should only be used with the power supply type specified on the marking
label. If you are not sure of the type of your local power supply, consult your dealer or
local power company.
5. Do not pinch, crimp or otherwise damage the power cord. If exposed to foot traffic,
ensure that the cable is properly shielded and does not pose a tripping hazard.
6. If using an extension cord, make sure the total ampere rating of the products using
the cord does not exceed the extension cord’s ampere rating.
7. Do not attempt to service this device, as opening or removing casing may expose you
to dangerous voltage points or other risks. Refer all servicing to qualified service
personnel.
8. The device should be serviced by qualified service personnel under the following
conditions:
•
•
•
•
The power cord is damaged or frayed.
Liquid has been spilled on the product.
The product has been exposed to rain or water.
The product does not operate normally in accordance with the operating
instructions.
• The device has been dropped or the casing has been damaged.
TABLE OF CONTENTS
1. Introduction ............................................................. 1
1.1. Package contents ........................................................... 1
1.2. Features.......................................................................... 2
1.2.1. LED Indicators ...............................................................3
1.2.2. 10/100BaseT Switches ...................................................3
2. LAN Installation....................................................... 4
2.1. Installation procedure ................................................... 4
3. AppleTalk ................................................................ 6
3.1.
3.2.
3.3.
3.4.
Software requirements .................................................. 6
AppleTalk setup ............................................................. 6
Printing........................................................................... 6
Advanced setup and management ............................... 7
3.4.1. Changing the FastPrint configuration ..............................7
3.4.1.1. Windows software ........................................................ 7
3.4.1.2. Macintosh software ...................................................... 7
3.4.2. AppleTalk Settings .........................................................8
4. Novell NetWare ....................................................... 9
4.1. Configuration overview ................................................. 9
4.1.1. Requirements ................................................................9
4.1.2. Operating modes...........................................................9
4.1.2.1. Print Server mode ........................................................ 9
4.1.2.2. Remote printer mode.................................................... 9
4.1.3. Configuration methods ................................................10
4.2. Preparation .................................................................. 10
4.3. Configuration using Quickset ...................................... 10
4.3.1. NetWare Print Server mode ..........................................10
4.3.1.1. Syntax........................................................................ 11
4.3.2. Novell Remote Printer Mode.........................................11
4.3.2.1. Syntax........................................................................ 12
4.4. Using PCONSOLE / PSCONFIG..................................... 12
4.4.1. Novell Print Server mode..............................................13
4.4.1.1. Print server mode in NetWare 2.x, 3.x........................ 13
4.4.1.2. Print server mode in NetWare 4.x (bindery emulation)14
4.4.1.3. Printer server mode in NetWare 4.X (NDS mode) ...... 15
4.4.2. Novell remote printer mode .........................................15
4.4.2.1. Remote printer assignments ....................................... 15
4.4.2.2. Remote printer mode in NetWare 2.x, 3.x .................. 16
FastPrint Server User’s Guide
i
4.4.2.3. Remote printer mode in NetWare 4.X (NDS mode) .... 16
4.5. Printing......................................................................... 18
4.6. Configuration Settings ................................................. 19
4.6.1. General FastPrint Server Settings ..................................19
4.6.2. Configuration using PSCONFIG....................................19
4.6.3. NetWare-specific settings .............................................19
4.6.3.1. Novell remote printer mode........................................ 19
4.6.3.2. Novell Print Server mode ........................................... 20
4.6.3.3. Service additional NetWare bindery file servers.......... 21
4.6.3.4. Attach to more than one NetWare Print Server........... 21
4.6.3.5. Logical printers.......................................................... 21
4.6.3.5.1. Configuring NetWare ................................21
4.6.3.5.2. Configuring the FastPrint Server ..............22
5. TCP/IP .................................................................... 23
5.1. Software requirements ................................................ 23
5.2. FastPrint Server configuration..................................... 23
5.2.1.
5.2.2.
5.2.3.
5.2.4.
IP address configuration...............................................23
FastPrint Server IP address............................................24
Other configuration settings .........................................24
Logical printers ............................................................25
5.2.4.1. Logical printer setup .................................................. 25
5.3. Unix host configuration................................................ 25
5.3.1. Static IP address configuration ......................................25
5.3.2. Dynamic IP address Configuration ................................26
5.3.2.1. Using DHCP .............................................................. 26
5.3.2.2. Using BOOTP............................................................ 26
5.3.2.3. Using RARP............................................................... 27
5.4. Printing configuration.................................................. 28
5.4.1. LPD configuration ........................................................29
5.4.1.1. LPD on IBM AIX 4.15............................................... 29
5.4.1.2. LPD on System V....................................................... 29
5.4.1.2.1. Adding remote printers..............................30
5.4.2.
5.4.3.
5.4.4.
5.4.5.
5.4.1.3.
Printing
Printing
Printing
Printing
5.4.5.1.
LPD on BSD .............................................................. 31
using LPD........................................................31
using FTP ........................................................31
using DSI ........................................................32
using PSfilter ...................................................32
PSfilter Setup ............................................................. 32
5.4.5.1.1. Setup instructions......................................32
5.4.5.2. PSfilter printing methods ........................................... 33
5.5. Windows NT host configuration................................... 33
5.5.1. IP address configuration...............................................33
5.5.2. Preparing for TCP/IP Printing ........................................34
FastPrint Server User’s Guide
ii
5.5.2.1. Windows NT 3.51 ...................................................... 34
5.5.2.2. Windows NT 4.0 ........................................................ 34
5.5.3. Adding a TCP/IP remote printer ....................................34
5.5.3.1. Windows 3.51 ............................................................ 34
5.5.3.2. Windows NT 4.0 ........................................................ 35
5.5.4. Printing with Windows NT ............................................35
5.5.4.1. Windows applications ................................................ 35
5.5.4.2. Command line............................................................ 35
6. TCP/IP Features ..................................................... 36
6.1. FTP ................................................................................ 36
6.1.1. Using FTP ....................................................................36
6.1.1.1. Files ........................................................................... 36
6.1.1.2. Commands................................................................. 36
6.1.1.3. Example: Initial configuration.................................... 37
6.2. Internet printing .......................................................... 38
6.2.1. System requirements....................................................38
6.2.2. Internet mail printing configuration ..............................39
6.2.3. User software ..............................................................40
6.2.3.1. Installation ................................................................. 40
6.2.3.2. Using the new port ..................................................... 41
6.2.3.3. Checking the printer driver ........................................ 42
6.2.4. Printing .......................................................................42
6.2.5. Canceling a print job ...................................................43
6.3. SNMP management ..................................................... 43
6.3.1. Preparing the FastPrint Server for SNMP ........................43
6.3.2. SNMP settings .............................................................43
6.3.2.1. Management station settings ...................................... 44
6.3.2.2. Trap receiving station settings.................................... 44
6.3.2.3. FastPrint Server MIB ................................................. 44
7. Windows Peer-to-Peer ........................................... 45
7.1. Software requirements ................................................ 45
7.2. Configuration requirements ........................................ 45
7.3. Software installation .................................................... 45
7.3.1. Windows 95 / Windows NT ..........................................45
7.3.2. Windows for Workgroups .............................................46
7.4. FastPrint Server configuration..................................... 46
7.4.1. NetBEUI ......................................................................46
7.4.2. TCP/IP.........................................................................46
7.5. Software configuration ................................................ 47
7.5.1. Configuration settings..................................................47
7.5.2. Windows 95/NT 4.0.....................................................47
7.5.2.1. First port configuration .............................................. 47
7.5.2.2. Configuring additional ports ...................................... 48
FastPrint Server User’s Guide
iii
7.5.3. Windows NT 3.51 ........................................................50
7.5.3.1. First port configuration .............................................. 50
7.5.3.2. Configuring additional ports ...................................... 51
7.5.4. Windows for Workgroups .............................................52
7.5.4.1. Pserver main screen ................................................... 52
7.5.4.2. Pserver icons and commands...................................... 52
7.5.4.3. Pserver configuration ................................................. 53
7.5.4.4. Control Panel configuration ....................................... 53
7.6. Printing......................................................................... 54
8. Management Tools ................................................ 55
8.1. FPSAdmin ..................................................................... 55
8.1.1. Installation ..................................................................55
8.1.2. Main screen ................................................................55
8.1.3. Icons...........................................................................56
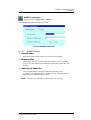
8.1.3.1. NetBEUI Settings....................................................... 59
8.1.3.2. Printer configuration .................................................. 61
8.1.4. Menu Options .............................................................62
8.1.4.1. InitDevice menu......................................................... 62
8.1.4.2. Configuration menu ................................................... 62
8.1.4.3. Diagnostics menu....................................................... 63
8.1.4.4. Control menu ............................................................. 63
8.2. WebAdmin.................................................................... 63
8.2.1. System requirements....................................................63
8.2.2. Server installation ........................................................63
8.2.3. Running the program...................................................64
8.2.3.1. Status ......................................................................... 65
8.2.3.2. Configuration............................................................. 65
8.2.3.3. Diagnostics ................................................................ 66
8.3. WPCONFIG ................................................................... 67
8.3.1.
8.3.2.
8.3.3.
8.3.4.
Appendix A.
Installation ..................................................................67
Using WPCONFIG .......................................................67
Icons...........................................................................68
Menu options ..............................................................69
Troubleshooting ....................................70
A.1.
A.2.
A.3.
A.4.
A.5.
A.6.
A.7.
FastPrint Server User’s Guide
Hardware
Printing - General
Printing - AppleTalk
Printing - NetWare
Printing - Unix
Printing - Windows
Internet Printing
70
70
71
74
77
79
80
iv
A.8.
WebAdmin
81
Appendix B.
Specifications ........................................82
Appendix C.
Configuration File Format .....................83
Appendix D.
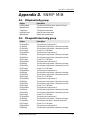
SNMP MIB .............................................87
D.1.
D.2.
D.3.
D.4.
D.5.
D.6.
D.7.
D.8.
D.9.
D.10.
D.11.
D.12.
FastPrint Server User’s Guide
PSSystemConfig group
PSLogicalPrinterConfig group
PSNetwareConfig group
PSTcpipConfig group
PSAppleTalkConfig group
PSNetbeuiConfig group
PSStatus group
PSIPXStatistics
PSAppleTalkStatistics
PSTcpipStatistics
PSControl group
Traps
87
87
88
88
88
89
89
89
89
90
90
90
v
1. Introduction
This chapter provides an overview of your FastPrint Server’s
features.
Congratulations on the purchase of your new FastPrint Server. The FastPrint is designed
to provide a simple and efficient network printing solution. It is packed with features,
including:
Ø Versatility. The FastPrint Server supports up to five protocols: NetWare, TCP/IP,
SMB (Service Message Block), AppleTalk (EtherTalk), and NetBEUI. It features
two Ethernet interface ports. Operating system support includes Unix, Linux,
Novell, and Microsoft Windows.
Ø Easy Installation. The FastPrint Server makes adding printers or plotters to your
network simple. It supports both 10BaseT and 100BaseT connections. Its LAN
interface auto-sensing feature means that there is no need to set jumpers or perform
software configuration to select the network interface used.
Ø Compact Size. The FastPrint can be used even where space is limited.
Ø Remote Management Tools. A variety of software tools are provided. In most
environments, both the FastPrint Server and attached bi-directional printers can be
configured remotely.
Ø SNMP Support. The FastPrint Server can act as a SNMP agent, with its own MIB.
This allows TCP/IP users to monitor, configure and troubleshoot the FastPrint using
their existing SNMP management tools.
Ø Internet Printing. Using TCP/IP, the FastPrint can be configured to allow clients,
suppliers, colleagues and others to print to one of your printers from anywhere on
the Internet.
1.1. Package contents
You should find the following items packaged with your FastPrint Server. If any items
are missing, contact your dealer immediately.
• The FastPrint Server
• Power adapter
• One CD-ROM containing all support programs and this manual
FastPrint Server User’s Guide
1
Chapter 1. Introduction
Features
1.2. Features
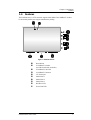
The FastPrint Server’s UTP connector supports both 10BaseT and 100BaseT. Its three
bi-directional parallel ports support simultaneous printing.
Figure 1 FastPrint Server
Œ
•
Ž
•
•
‘
’
“
”
•
Reset Button
10/100BaseT Switches.
(See DIP switch table for details.)
10/100BaseT Link LED
10/100BaseT Connector
12V Power port
Parallel Port 1
Parallel Port 2
Parallel Port 3
Red Error LED
Green Link LED
FastPrint Server User’s Guide
2
Chapter 1. Introduction
Features
1.2.1. LED Indicators
There are two LED indicators on the top of the FastPrint Server. The red LED is the
Status/Error indicator. The green LED is the Power/Link indicator. See the previous
figures to locate the LEDs on your model. The LED indicator modes are described in the
following table.
Green LED
Red LED
Status Description
Solid Off
Solid Off
No power.
Solid On
Solid On
Hardware error.
Solid On
Solid Off
Normal operation.
Flashing
Off
Transmitting or receiving
packets from the network.
Table 1: LED Indicators
1.2.2. 10/100BaseT Switches
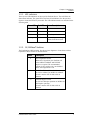
The FastPrint has 2 DIP switches. See the previous diagrams to locate these switches.
Operation of these switches is described below.
Switch
Description
1
Auto Negotiation Switch.
When ON (UP position), the FastPrint will
select 10BaseT/100BaseT and Full/Half
Duplex as required. The recommended
position is ON; switches 2 & 3 are disabled
when Auto Negotiation is ON.
2
10/100BaseT Manual Select Switch.
Set UP for 100BaseT or DOWN for 10BaseT.
Switch 1 must be OFF for this switch to
function.
3
Full/Half Duplex Switch.
Set UP for Full duplex operation or DOWN for
Half Duplex operation.
Switch 1 must be OFF for this switch to
function.
Table 2: DIP Switches
FastPrint Server User’s Guide
3
2. LAN Installation
This chapter will help you to install the FastPrint Server in your
Local Area Network.
Once installed, the FastPrint Server acts as a node in the local area network with its own
unique network address.
2.1. Installation procedure
1. Find the default FastPrint Server name
The default name is located on a bar code sticker attached to the bottom of the
FastPrint. It will be in the form “SCxxxxxx”.
Note: The default name begins with the letters “SC”, followed by 6 hexadecimal
characters. These characters may include the numbers “0” through “9”
and the letters “A” through “F”.
This name will be needed during configuration.
Note: During configuration you will be able to change the FastPrint Server
name. The new name must not contain any spaces or blanks.
2. Connect the printer cables
Connect the printer or plotter cable(s) to the appropriate port(s) on the FastPrint .
Parallel port cables should be less than 3 meters long.
Note: Leave the FastPrint Server powered OFF while connecting it to the
printer(s) and the LAN.
3. Connect the network cable
• Connect the network cable (BNC or UTP) to the proper connector on the
FastPrint Server. The FastPrint Server will automatically recognize whichever
connector is used.
• Set the 10/100BaseT Switches as described in Chapter 1. Whenever possible, use
the auto negotiation setting. If the auto negotiation fails, the 10/100BaseT Link
LED will not light when the FastPrint is powered up. In this case, check the
cable, then press the reset button. If the 10/100BaseT Link LED still does not
light, disable the auto negotiation function and manually set switches 2 and 3.
4. Connect the power adapter cable
Plug in the power adapter cable. Check the Power and Status LED indicators on the
top of the FastPrint. When the Red Status indicator LED goes out and the Green
Power indicator LED remains lit or flashes, the FastPrint is ready.
Warning!
Use only the power supply provided with the FastPrint. Other power
supplies may not function correctly, and may void your warranty.
FastPrint Server User’s Guide
4
Chapter 2. LAN Installation
Installation procedure
5. Mount the FastPrint Server
The FastPrint may be “snapped” on to other members of the LanEdge family to
conserve working space.
FastPrint Server User’s Guide
5
3. AppleTalk
This chapter explains the use of the FastPrint Server in the
AppleTalk environment.
The FastPrint Server supports AppleTalk (EtherTalk), PAP, ATP, NBP, ZIP and DDP
protocols, enabling Macintosh computers on the network to view and use the FastPrint as
a regular AppleTalk printer. Configuring and printing in the EtherTalk environment
operates normally.
The PSTool program has been provided specifically for the Macintosh environment, to
allow easy configuration of your FastPrint.
3.1. Software requirements
• System 7.x OS or newer.
3.2. AppleTalk setup
1. Click the apple icon and choose Control Panel.
2. Click Network.
3. Make sure that EtherTalk is selected under AppleTalk Connection. If it is not
selected, do so now.
4. Click Chooser. The Chooser panel will open.
5. Click on either the LaserWriter 8 icon (recommended) or the LaserWriter 7 icon.
LaserWriter 8 makes use of the fonts installed in the printer itself, so the printing
response time is quicker. LaserWriter 7 uses the fonts installed in the computer,
which increases network traffic and takes more printing time.
Note: Be sure you are using the LaserWriter 8.5.1 driver.
6. Select a FastPrint Server from the printer list by clicking on the appropriate name.
Note: The default FastPrint name begins with the letters “SC”, followed by 6
hexadecimal characters. These characters may include the numbers “0”
through “9” and the letters “A” through “F”.
You can find this name on the bar code label on the bottom of the
FastPrint.
7. Click on the Close box. This closes Chooser and completes the FastPrint setup
process. Printing commands will operate as usual, with output routed to the FastPrint
Server printer.
3.3. Printing
Printing with the FastPrint installed in an AppleTalk network is identical to normal
printing. For example, select a document that you want to print and then select File Print. Chose the desired printer.
FastPrint Server User’s Guide
6
Chapter 3. AppleTalk
Advanced setup and management
3.4. Advanced setup and management
This section explains the configuration changes that can be made to your FastPrint.
3.4.1. Changing the FastPrint configuration
3.4.1.1.
Windows software
Chapter 8 - Management Tools describes the general-purpose management tools that can
be used to configure and manage your FastPrint. All of these programs require a version
of Microsoft Windows.
The FPSAdmin program, which requires Windows 95 or Windows NT, allows access to
all settings, not just those important in the AppleTalk environment.
3.4.1.2.
Macintosh software
In AppleTalk, you can use SimpleText to edit the FastPrint Server’s CONFIG file and
the supplied PSTool program to send it to the FastPrint. The procedure is as follows:
1. Copy the following files from the Utility\Apple folder on the CD-ROM to an
appropriate folder on your hard disk.
PSTool
CONFIG.3p
2. Use Chooser to select the desired FastPrint Server.
3. Double click the CONFIG file, and edit it. The file should look similar to the
example below, although it may vary a bit.
begin CMD
0001 Device Name: SCxxxxxx
3000 Apple Zone : *
3001 Printer Type (P1): LaserWriter
3002 Printer Type (P2) LaserWriter
3004 Printer Type (P3) LaserWriter
3101 AP_PCOMM1: No
3102 AP_PCOMM2: No
3103 AP_PCOMM3: No
3104 AP_PCOMM4: No
9002
The appropriate values for each line are described in the AppleTalk Settings section,
below.
Note: Do not modify the following lines:
beginCMD
9002:
4. Save the file.
5. Double click the icon for PSTool.
6. Click the Printer submenu and choose Download Postscript File. A panel will appear
with a list of files.
7. Click the CONFIG file. Then click Download.
FastPrint Server User’s Guide
7
Chapter 3. AppleTalk
Advanced setup and management
3.4.2. AppleTalk Settings
When editing the CONFIG file, only the parameter should be changed. The parameter is
the last part of the line, after the colon (:). Be sure that you use only valid parameters.
0001 Device name: SCxxxxxx
The default name will be in the form “SCxxxxxx”.
Note: The default FastPrint name begins with the letters “SC”, followed by 6
hexadecimal characters. These characters may include the numbers “0”
through “9” and the letters “A” through “F”.
You can find this name on the bar code label on the bottom of the
FastPrint.
You may change this name if you like. However, the new name must not exceed
19 characters in length.
3000 Apple Zone: *
The default value “*” allows all AppleTalk zones to access the FastPrint’s
printers. To restrict access to a particular zone, enter the zone name here.
3001 Printer type (P1): LaserWriter
3002 Printer type (P2) LaserWriter
3004 Printer type (P3) LaserWriter
These are text fields, used to describe the printer driver used for each port. P1, P2
and P3 refer to the specific parallel ports. The name can be up to 19 characters
long.
3101 AP_PCOMM1: No
3102 AP_PCOMM2: No
3104 AP_PCOMM4: No
These settings determine whether the port uses ASCII or binary Communication
Protocol. Enter NO for ASCII or YES for binary. The lines refer to the following
ports.
3101 AP_PCOMM1:
3102 AP_PCOMM2:
3104 AP_PCOMM4:
Parallel Port 1
Parallel Port 2
Parallel Port 3
In choosing which protocol to use, consider the following points.
• Binary communication is twice as fast as ASCII.
• ASCII communication is more reliable.
• The computer, FastPrint Server and printer must all be configured to use the
SAME protocol. Check your printer manual for details of printer
configuration, and use the Print menu to configure your computer, so that they
use the same settings as the FastPrint.
FastPrint Server User’s Guide
8
Chapter 4. Novell NetWare
Configuration overview
4. Novell NetWare
This chapter will help you to configure and use the FastPrint
Server in the Novell NetWare environment.
4.1. Configuration overview
This section outlines the checks and decisions to be made before proceeding with
configuration under NetWare.
4.1.1. Requirements
• NetWare 2.2, NetWare 3.1x or NetWare 4.x.
• NetWare PCONSOLE V1.21 or higher in the file server.
• NetWare Print Server V1.22 or higher (remote printer mode only).
• DOS 3.3 or higher on workstations.
• Hardware installation must be completed.
4.1.2. Operating modes
Two operating modes are possible: Print Server and Remote Printer.
Print Server mode is faster and uses fewer resources than Remote Printer mode.
However, it does occupy a user login slot. Remote Printer mode does not use a login
slot, but it is slower and uses more resources.
Print Server mode should be used if possible.
4.1.2.1.
Print Server mode
The FastPrint Server emulates NetWare PSERVER. When activated, the FastPrint
will perform the following operations:
• Login to specified NetWare file server(s).
• Poll the specified print queues.
• If there are print jobs in the print queues, then the FastPrint Server will send them
to the printer(s).
4.1.2.2.
Remote printer mode
The FastPrint Server emulates a NetWare remote printer. After the FastPrint is
activated, it will perform the following operations:
• Connect to NetWare PSERVER.
• Receive the print jobs sent by PSERVER.
• Convert the packet format to an acceptable printer format, and send the data to
the printer.
FastPrint Server User’s Guide
9
Chapter 4. Novell NetWare
Preparation
4.1.3. Configuration methods
Either of the following methods can be used to set up the FastPrint Server in the
NetWare environment.
♦ Quickset
The QUICKSET program will configure both the FastPrint Server and the current
Novell server in a single operation.
♦ PCONSOLE and PSconfig
If you prefer, you may use PCONSOLE to set up the FastPrint configuration in the
NetWare file servers. You will then need to use PSCONFIG to configure the
FastPrint.
4.2. Preparation
Copy all files in the \Utility\Dos directory on the CD-ROM to your workstation’s hard
disk. The QUICKSET and PSCONFIG programs are in this directory.
If you want to install the FastPrint on an NDS network, log in the NDS network as
ADMIN or as a user with Admin rights.
If you want to install the FastPrint on bindery-based file servers, such as NetWare 2.X or
3.X, log in to a bindery-based file server as a SUPERVISOR or as a user with
supervisory rights.
4.3. Configuration using Quickset
This section tells you how to use the Quickset program to configure the Novell server
and the FastPrint Server.
Note: Enter “Quickset /?” to display a help screen.
In the “Syntax” sections, brackets ( ) indicate optional parameters.
To use more than one bindery file server, see Service additional NetWare
bindery file servers on page 21.
4.3.1. NetWare Print Server mode
Quickset uses the following settings in NetWare Print Server mode:
Parameter
Setting
Ethernet 802.2 frame type
Ethernet 802.3 frame type
Ethernet SNAP frame type
Ethernet II frame type
Polling NetWare queues interval
Job notification
Master file server
Enable
Enable
Enable
Enable
1 second
By login name
Set this as the specified server (in
bindery based file server environment)
Set this to the current context name (in
NDS environment)
Context name
FastPrint Server User’s Guide
10
Chapter 4. Novell NetWare
Configuration using Quickset
NDS tree name
NetWare operation mode:
Device name
Device password
4.3.1.1.
Set this to the current NDS tree name
(in NDS environment)
Print Server mode
Set this as specified in the parameter list
NULL
Syntax
Bindery-based file server
Quickset Name (/UN=P) (/Q1=W) (/Q2=X) (/Q3=Y) (/FS=F)
NDS Network
Quickset Name (/UN=P) (/Q1=W) (/Q2=X) (/Q3=Y)
Parameter
Meaning
Name
The default name as displayed on the bar code label on the
bottom of the FastPrint Server.
P
New name of the FastPrint.
W, X, Y
W, X and Y are the names of the queues to be serviced by
parallel ports 1 to 3. P1, P2 and P3 are the default queue names.
F
F is the name of the master file server of the FastPrint. When
multiple file servers are serviced, this information is stored in
the master file server.
QUICKSET will create a print server object, printer objects and queue objects with the
current context and current tree that the user logs on to. The printer names will be set to
dv_P1, dv_P2 and dv_P3, where dv is the FastPrint Server default name, and P1, P2 and
P3 indicate the port.
Example: Bindery environment
Quickset SC123456 /UN=Marketing /FS=Net311
In this example, FastPrint SC123456 has been set up as a Novell Print Server. Its new
name is Marketing and its Master File Server is Net311.
Example: NDS environment
Quickset SC123456 /UN=Marketing
In this example, SC123456 has been renamed Marketing and set up as a Novell Print
Server in the current NDS network.
4.3.2. Novell Remote Printer Mode
In NetWare Remote Printer mode, Quickset uses the following settings:
Parameter
Setting
Ethernet 802.2 frame type
Ethernet 802.3 frame type
Ethernet SNAP frame type
Ethernet II frame type
NetWare Print Server
Enable
Enable
Enable
Enable
Set the attached NetWare Print Server
as the specified server
Remote Printer Mode
NetWare Operation Mode
FastPrint Server User’s Guide
11
Chapter 4. Novell NetWare
Using PCONSOLE / PSCONFIG
FastPrint name
Set this as specified in the parameter list
Note: Quickset configures all the FastPrint’s printer ports to service the same
NetWare Print Server. If you want to configure the ports to service
different NetWare Print Servers, please see Attach to more than one
NetWare Print Server on page 21.
4.3.2.1.
Syntax
Bindery-based file server
Quickset Name R (UN=P) (/Q1=W) (/Q2=X) (/Q3=Y) /FS=F)
NDS Network
Quickset Name R (/UN=P) (/Q1=W) (/Q2=X) (/Q3=Y)
Parameter
Meaning
Name
The default FastPrint Server name, as displayed on the bar code
label on the bottom of the FastPrint.
R
R is the name of the NetWare Print Server that the FastPrint
Server will connect to.
P
The new name of the FastPrint.
W,X, Y
W, X and Y are the names of the queues to be serviced by
parallel ports 1 to 3, respectively. If you do not enter W, X or Y,
then the default queue names will be P1, P2 and P3 for parallel
ports 1 to 3.
F
F is the name of the file server that the NetWare Print Server R
logs on to.
Example: Bindery environment
Quickset SC123456 PS1 /UN=Marketing /FS=Net311
In this example, FastPrint SC123456 has been set up as a remote printer that is attached
to the NetWare Print Server, PS1, on the Net311 file server.
Example: NDS environment
Quickset SC123456 PS1 /UN=Marketing
In this example, FastPrint SC123456 has been set up as a remote printer that is attached
to the NetWare Print Server PS1. Its new name is Marketing.
4.4. Using PCONSOLE / PSCONFIG
After you use PCONSOLE to configure the Novell server, the FastPrint must be
configured.
This section tells you how to use PSCONFIG to perform this task. However, the other
programs described in Chapter 8 - Management Tools could be used instead.
FastPrint Server User’s Guide
12
Chapter 4. Novell NetWare
Using PCONSOLE / PSCONFIG
4.4.1. Novell Print Server mode
Before you begin, please note the following information:
♦ Novell printer numbers
NetWare printer numbers match FastPrint ports as follows.
Novell printer number
FastPrint Server port
Printer number 0
Parallel port 1
Printer number 1
Parallel port 2
Printer number 2
Parallel port 3
♦ Assigning users to printer queues
If you have created new printer queues, you may also need to use PCONSOLE to
designate any users who need to use the print queues as queue users.
4.4.1.1.
Print server mode in NetWare 2.x, 3.x
Follow the steps listed below to configure the FastPrint in NetWare Print Server mode.
1. Create queues
Note: If you are setting up the FastPrint Server for use with existing queues,
proceed to step 2.
(a) Log into a NetWare file server as a SUPERVISOR or as a user with
SUPERVISOR rights.
(b) Run PCONSOLE program.
(c) Select Print Queue Information (or skip to step 6 if you do not need to add new
queues).
(d) Press [Ins] key to add a new queue.
(e) Type a queue name, and press [ENTER].
(f) Repeat steps (d) and (e) until you have the desired number of queues.
2. Add a Novell Print Server
Follow these steps to inform NetWare that a FastPrint Server exists.
(a) From the PCONSOLE Main Menu, select Print Server Information
(b) Press [Ins] key to add a new Print Server.
(c) Enter your desired Print Server name.
3. Assign printers
Follow these steps to associate the NetWare printer objects with the FastPrint’s
printer ports.
(a) Select the Novell Print Server added in step 2.
(b) Select Print Server Configuration.
(c) Select Printer Configuration.
(d) Select the print number, using the printer numbers shown on page 13.
(e) Press [Esc].
(f) Select YES.
FastPrint Server User’s Guide
13
Chapter 4. Novell NetWare
Using PCONSOLE / PSCONFIG
(g) Repeat steps (d), (e) and (f) for each printer port.
4. Associate printers with print queues
Follow the steps below to associate print queues with the printer(s) attached to the
FastPrint Server.
(a) Select Queues Serviced by Printer from the Print Server Configuration Menu.
(b) Select a printer to which you want to assign a print queue.
(c) Press [Ins].
(d) Select the queue that you want the printer to service.
(e) Press [Enter] twice.
(f) Repeat steps (a) to (e) until all printer and queue associations are configured
completely.
(g) Exit PCONSOLE.
5. Configure the FastPrint Server
(a) Run the PSCONFIG program.
(b) Select your FastPrint Server.
(c) Select Set to NetWare Print Server Mode.
(d) Enter the file server you are logged on to. This will be the master file server to the
FastPrint.
(e) Replace Print Server name with the name used in step 2(c).
(f) Select Execute Setup.
4.4.1.2.
Print server mode in NetWare 4.x (bindery emulation)
This procedure configures the FastPrint Server as a NetWare Print Server under
NetWare 4.x Bindery Emulation Mode.
1. Quick Setup on a File Server
(a) Login as ADMIN or a user with Admin rights.
(b) Run PCONSOLE and press [F4] to switch to bindery mode.
(c) Select Quick Setup
(d) Enter the desired names in the following fields:
Print server
New printer
New print queue
(e) Press [F10] to save.
(f) Repeat steps (b) to (e) for parallel ports 2 and 3.
Note: If the desired Print Server name already exists, you must delete that object
first.
2. Configure the FastPrint Server
(a) Run the PSCONFIG program.
(b) Select your FastPrint.
(c) Select Set to NetWare Print Server Mode.
(d) Select the file server you logged on in step 1(a) to be the master file server.
FastPrint Server User’s Guide
14
Chapter 4. Novell NetWare
Using PCONSOLE / PSCONFIG
(e) Replace the FastPrint name with the name set in step 1(d).
(f) Select Execute Setup.
4.4.1.3.
Printer server mode in NetWare 4.X (NDS mode)
Follow the steps below to configure the FastPrint Server in NDS Print Server mode:
1. Quick Setup on a NDS network
(a) Login as ADMIN or a user with Admin rights.
(b) Run PCONSOLE.
(c) Select Quick Setup.
(d) Enter your desired FastPrint name in the Print Server field. Record the context.
(e) Enter the desired names in the following fields:
New printer
New print queue
Print Queue Volume
(f) Press [F10] to save.
(g) Repeat steps (b) to (f) for parallel ports 2 and 3.
(h) Exit PCONSOLE.
(i) Enter the command whoami and record the Tree name.
2. Configure the FastPrint Server
(a) Run PSCONFIG.
(b) Select your FastPrint Server. Replace the FastPrint name with the name used in
step 1(d).
(c) Select Set to NetWare Print Server Mode.
(d) Enter data as follows:
NDS Tree name: Tree name recorded in step 1(i).
Print Server NDS Context: As recorded in step 1(d).
(e) Select Execute Setup.
4.4.2. Novell remote printer mode
4.4.2.1.
Remote printer assignments
The following assignments should be used in remote printer mode, where SCxxxxxx is
the FastPrint Server name.
Note: The default FastPrint name begins with the letters “SC”, followed by 6
hexadecimal characters. These characters may include the numbers “0”
through “9” and the letters “A” through “F”.
FastPrint Server
NetWare
Port
Printer Type
Printer Name
Parallel 1
Remote Parallel, LPT1
SCxxxxxx
Parallel 2
Remote Parallel, LPT2
SCxxxxxx_P2
Parallel 3
Remote Parallel, LPT3
SCxxxxxx_P3
FastPrint Server User’s Guide
15
Chapter 4. Novell NetWare
Using PCONSOLE / PSCONFIG
4.4.2.2.
Remote printer mode in NetWare 2.x, 3.x
Follow the steps listed below to configure the FastPrint to Novell Remote Printer mode.
1. Create queues
Follow the steps below to create queues for the FastPrint.
Note: If you are using existing queues, go to step 2.
(a) Run PCONSOLE.
(b) Select Print Queue Information.
(c) Press the [INS] key to add a new queue.
(d) Type a queue name, and press [ENTER].
(e) Repeat steps (c) and (d) until you have the desired number of queues.
2. Assign printers
(a) Run PCONSOLE and select Print Server Information.
(b) Select a NetWare Print Server.
(c) Select Print Server Configuration.
(d) Select Printer Configuration.
(e) Select printers that show Not Installed.
(f) Enter the correct data in the Name and Type Fields. (See Remote printer
assignments on page 15 for more information about these fields).
(g) Press [ESC], then select Yes.
(h) Repeat steps (b) to (g) until all printers are assigned.
(i) Press [ESC].
3. Associate printers with print queues
(a) Select Queues Serviced by Printer.
(b) Select a printer to which you want to assign a print queue.
(c) Press [INS].
(d) Select the queue that you want the printer to service, and press [ENTER].
(e) Repeat steps (a) to (d) until all printer and queue associations are configured.
(f) Exit PCONSOLE.
4. Configure the FastPrint Server
(a) Run PSCONFIG.
(b) Select your FastPrint Server.
(c) Select Set to NetWare Remote Printer Mode.
(d) For all print ports, enter the NetWare Print Server Name you selected in step 2(b).
(e) Select Execute Setup.
4.4.2.3.
Remote printer mode in NetWare 4.X (NDS mode)
If you are in NDS mode, you can follow the steps listed below to configure the FastPrint
as a Novell Remote Printer. These steps will help you to install a new FastPrint as a
remote printer or to connect a new printer to the FastPrint.
FastPrint Server User’s Guide
16
Chapter 4. Novell NetWare
Using PCONSOLE / PSCONFIG
1. Create queue objects
Note: If you are using existing queues, go to step 2.
(a) Login to NetWare as ADMIN or a user with Admin rights.
(b) Run the PCONSOLE program.
(c) Select Print queues.
(d) Press [INS] key to add a new queue.
(e) Type a queue name, and press [ENTER].
(f) Repeat steps (c) to (e) until you have the desired number of queues.
2. Create printer objects
(a) From the PCONSOLE Main Menu, select Print servers.
(b) Select a NetWare Print Server.
(c) Select Printers.
(d) Press [INS] Key to insert a printer.
(e) Enter the correct information in the Name Field. (Refer to Remote printer
assignments on page 15.)
(f) Select the printer.
(g) In the Type field, select parallel for parallel port 1, 2, or 3.
(h) Select Configuration
(i) In the Port field, select LPT1 for parallel port 1, LP2 for parallel port 2 or LPT3
for parallel port 3.
(j) In Location field, set to Manual Load.
(k) Press [ESC] to exit Configuration sub-menu.
3. Associate queue objects and print objects
Follow the instructions below to associate the printers with the queues to be serviced:
(a) Select Print queues assigned.
(b) Press [INS].
(c) Select the queue that you want the printer to service.
(d) Press [ESC] twice.
(e) Repeat steps 2(d) to 3(d) until all associations between queues and printers are
completely configured.
(f) Exit PCONSOLE.
4. Configure the FastPrint Server
(a) Run PSCONFIG.
(b) Select your FastPrint Server.
(c) Select Set to NetWare Remote Printer Mode.
(d) Enter the NetWare Print Server Name selected in step 2(b) for all print ports.
(e) Select Execute Setup.
5. Unload and Reload Pserver
If the NetWare Pserver, to which the FastPrint Server has been installed, has been
previously loaded, you must unload and reload it. Start at step (a).
FastPrint Server User’s Guide
17
Chapter 4. Novell NetWare
Printing
If the NetWare Pserver has not been loaded, you must load it. In this case, go directly
to step (d).
(a) Go to the file server console where the NLM is running
(b) Press Alt-ESC until you get to the Print Server NLM screen.
(c) Press ESC to halt the Print Server NLM. Answer Yes.
(d) After the NetWare NLM has been unloaded, enter the following command:
load pserver XXXX
XXXX is the NetWare Print Server selected in step 2 (b).
(a) When the Enter Print Server Name menu appears, press INSERT until you get to
Contents of Current Context. Select the context that holds the FastPrint Server.
Select the FastPrint from the list and press ENTER.
4.5. Printing
You can use NetWare’s standard utilities, CAPTURE, NPRINT, or PCONSOLE, to
print a job to the FastPrint SCxxxxxx.
Note: The default name begins with the letters “SC”, followed by 6 hexadecimal
characters. These characters may include the numbers “0” through “9”
and the letters “A” through “F”.
Note: If you are not familiar with the CAPTURE or NPRINT utilities, the on-line
help is available by typing /? after the command.
CAPTURE /? [ENTER]
In the following examples, print queue P1 is serviced by FastPrint SCxxxxxx. To print,
the file is sent to print queue P1.
Example 1
If you want to use NPRINT to print the file c:\config.sys to SCxxxxxx, use the
command:
NPRINT c:\config.sys /Q=P1 /NOTI /T=4 /NFF /NB
Note: For NPRINT usage and options, see your NetWare documentation.
Example 2:
To use CAPTURE to print the file c:\config.sys to the FastPrint, use the commands:
CAPTURE /L=1 /Q=P1 /NOTI /NT /FF /NB
COPY c:\config.sys LPT1
In this example, output destined for LPT1 is redirected to print queue P1.
Note: For CAPTURE usage and options, see your NetWare documentation.
FastPrint Server User’s Guide
18
Chapter 4. Novell NetWare
Configuration Settings
4.6. Configuration Settings
This section explains the configuration settings that can be altered in your FastPrint, and
tells you how to use PSCONFIG to make these changes. (Of course, you may also use the
programs described in Chapter 8 - Management Tools to make these changes.)
4.6.1. General FastPrint Server Settings
The following configuration changes can be made, regardless of which network protocol
or operating systems are being used:
ü Get FastPrint Server information.
ü Reset FastPrint Server.
ü Restore default configuration.
ü Change the FastPrint’s name.
ü Change the FastPrint password.
ü Disable/Enable network protocols.
ü Get printer status (idle, off-line, printing).
ü Logical printer setup (see page 21).
• Define logical printer.
• Set pre-print-job string.
• Set post-print-job string.
4.6.2. Configuration using PSCONFIG
The following procedure lets you use PSCONFIG to change the FastPrint settings:
1. Run PSCONFIG. A list of FastPrint Servers will appear.
2. Select the FastPrint you want to configure and press [ENTER].
3. Select Change Configuration. A list of category configurations will appear.
4. Select the category you want to edit and press [ENTER].
5. Select the item you want to edit and press [Enter]. If you are prompted to enter a
character string, enter a string.
6. Change any other items you wish. If you wish to select another category, the [ESC]
key will return you to the main menu.
7. Select Execute Change and press [ENTER] to save the configuration changes to the
FastPrint Server.
4.6.3. NetWare-specific settings
4.6.3.1.
Novell remote printer mode
Device name
Enter either the default name “SCxxxxxx” or the new
name of the FastPrint Server.
Note: The default FastPrint Server name begins
with the letters “SC”, followed by 6
hexadecimal characters, including “0”
through “9” and “A” through “F”.
FastPrint Server User’s Guide
19
Chapter 4. Novell NetWare
Configuration Settings
You can find this name on the bar code label
on the bottom of the FastPrint.
If you rename your FastPrint, the new name must be
no longer than 19 characters, and must not contain
any spaces.
Novell printer server
for P1, P2 & P3
Enter the name of the NetWare Print Server that will
service the FastPrint’s P1, P2 & P3 ports.
Frame type
Select the frame types used by your network. (Choose
between Ethernet 802.2, Ethernet 802.3, Ethernet
SNAP, and Ethernet II.)
4.6.3.2.
Novell Print Server mode
Device name
Use the default name SCxxxxxx or the new name of
the FastPrint Server.
Note: The default name begins with the letters
“SC”, followed by 6 hexadecimal characters,
including the numbers “0” through “9” and
the letters “A” through “F”.
If you rename your FastPrint, the new name must be
no longer than 19 characters, and must not contain
any spaces.
NDS tree name
NetWare 4.X NDS mode only. Enter the file server’s
NDS tree name (root name).
FastPrint Server NDS
context
NetWare 4.X NDS mode only. Enter the FastPrint
Server NDS Context. The entry should contain the
path to the context, but not the context itself. Each OU
should be separated by a period.
example: department.company
Master file server
(bindery mode only)
Enter the name of the FastPrint’s master file server.
Polling queue
interval
Defines how often the FastPrint Server will poll the
queues to be serviced.
Job notification by
connection ID
Set this to Yes if you want to receive a job notification
at only the workstation where the print job originated.
No means that a job notification will be received at all
workstations that you have logged on.
Frame type
Select the frame types used by your network. (Choose
between Ethernet 802.2, Ethernet 802.3, Ethernet
SNAP, and Ethernet II.)
NetWare password
The password on the NetWare Print Server. The
FastPrint Server needs this password to connect to
NetWare.
FastPrint Server User’s Guide
20
Chapter 4. Novell NetWare
Configuration Settings
4.6.3.3.
Service additional NetWare bindery file servers
If your FastPrint Server is configured as a NetWare Print Server, you can easily set it to
service more than one bindery file server.
1. Login, with supervisory rights, to the other file servers that you want your FastPrint
to service.
2. Create queues and a Print Server name for your FastPrint Server on each file server
you want to service.
3. Login, with supervisory rights, to your FastPrint Server’s master file server.
4. Run PCONSOLE.
5. Select Print Server Information, and then select your FastPrint Server in the Print
Server list.
6. Select Printer Server Configuration, then select File Server To Be Serviced.
7. Add the names of the other file servers that will be serviced by your FastPrint.
8. Reset the FastPrint.
4.6.3.4.
Attach to more than one NetWare Print Server
Perform the following steps if you are running in NetWare Remote Printer mode and you
want each port of the FastPrint Server to be attached to a different NetWare Print Server.
1. Use PCONSOLE to create and assign the required printers and queues as detailed in
the Remote Printer Mode section.
2. Run PSCONFIG and select Set to NetWare Remote Printer Mode. Enter the correct
NetWare Print Server names in the Print Server name fields, and then select Execute
Setup.
4.6.3.5.
Logical printers
You can use logical printers to create a “virtual” printer. For example, if you want to
create a landscape printer, you could define a logical printer with the following settings:
Pre-string
Printer control codes to switch the printer to Landscape
mode.
Post-string
Printer control codes to restore the printer’s default settings.
Another logical printer could be created to print Unix-format text files properly, by
converting Unix LF characters (Line Feeds) to DOS LF/CR (Line Feed, Carriage Return)
character pairs.
A FastPrint Server running in NetWare Print Server mode supports up to eight logical
printers.
4.6.3.5.1. Configuring NetWare
Use PCONSOLE to create new logical printers and to assign print queues to the printers.
Note: When you create a logical printer, be sure to select a printer number
greater than 7 from the Configured Printer listing.
In NetWare, all printer numbers greater than 7 are logical printers. This
FastPrint Server User’s Guide
21
Chapter 4. Novell NetWare
Configuration Settings
means that printer 8 corres1ponds to logical printer L1, printer 9
corresponds to logical printer L2, and so on, up to printer 15 which
corresponds to logical printer L8.
4.6.3.5.2. Configuring the FastPrint Server
Perform the following steps to define the pre-string, post-string, and the physical output
port of a logical printer:
1. Run PSCONFIG.
2. Select Change Configuration.
3. Select Logical Printer Configuration and set the following items for each logical
port. (Logical printers are numbered from L1 to L8.)
Physical port
Select the physical port for this logical printer (P1 to P3).
String before job
The printer control string (in hex) to be sent to the printer
before each print job.
String after job
The printer control string (in hex) to be sent to the printer
after each print job.
Convert LF to
CR+LF
If this is ON, LF (line feed) characters are changed to
CR+LF (carriage return + line feed). If it is OFF, no
conversion will be done.
Note: The maximum size of a printer control string is 15 characters.
FastPrint Server User’s Guide
22
5. TCP/IP
This chapter will help you to configure and use the FastPrint
Server in the TCP/IP environment.
5.1. Software requirements
The FastPrint Server can work with most UNIX systems and Windows NT 3.5 or later.
You will need the following software:
• TCP, IP, telnet, ftp (option - BOOTP, rarp)
• Either LPD (for NT and Unix) or C Compiler (for PSfilter under Unix).
5.2. FastPrint Server configuration
Note: The FastPrint Server should be configured FIRST.
You may use any of the following methods to configure your FastPrint:
♦ FPSAdmin
This management program requires Windows 95 or Windows NT. See Chapter 8 Management Tools for details.
♦ WebAdmin
This management program runs on an NT Server and is accessed by a web browser.
See Chapter 8 - Management Tools for details.
♦ FTP (File Transfer Protocol)
With FTP, you copy the configuration file from the FastPrint, edit it, and send it
back. Further information on using FTP can be found on pages 36 to 37.
5.2.1. IP address configuration
In the TCP/IP environment, IP addresses are essential. You must enter the following IP
addresses. (The entry in brackets shows the line number and token in the FastPrint’s
configuration file.)
IP address
[4000 IP_ADDR]
The FastPrint’s IP address. (See the next section.)
Gateway address
[4001 GATEWAY]
If your network segment has a router, enter the router
address here.
If there is no router, leave the address as 0.0.0.0.
Subnet mask
[4002 MASK]
If the gateway address above is 0.0.0.0, the subnet mask
should also be left at 0.0.0.0.
If you have a router, enter the subnet mask for the
segment to which the FastPrint is attached.
FastPrint Server User’s Guide
23
Chapter 5. TCP/IP
FastPrint Server configuration
5.2.2. FastPrint Server IP address
The FastPrint Server is normally assigned a static IP address. (You may use either
FPSAdmin or WebAdmin to do this.)
You may also use FTP to assign an IP address. However, some host configuration will be
necessary to allow connection to a FastPrint Server without an IP address. See IP
address configuration on page 25 for details.
If you leave the FastPrint Server IP address at the default value of 0.0.0.0, its sequence
for finding an address is as follows:
1. DHCP
2. BOOTP
3. RARP
See “Dynamic IP address Configuration” on page 26 for more details.
5.2.3. Other configuration settings
When assigning the IP addresses, you should also check the following configuration
settings.
Device name
(0001 BOX_NAME)
The default name will be in the form SCxxxxxx
(SC followed by 6 numbers).
Note:
The default FastPrint name begins
with the letters “SC”, followed by 6
hexadecimal characters, These
characters may include the numbers “0”
through “9” and the letters “A” through
“F”.
You can find this name on the bar code
label on the bottom of the FastPrint.
If you rename your FastPrint, the new name
must not be longer than 19 characters, and
must not include any spaces.
TCP session retry interval
(4010 TCP_INT)
Indicates the length of time the FastPrint
should wait before retrying a TCP/IP
connection that has been lost.
By default, this is set to two seconds. You may
enter a value from 0 to 255 seconds.
TCP session retry count
(4011 TCP_CNT)
Indicates the number of attempts at
reconnection that will be made. After that, the
TCP/IP session will be terminated.
By default, this is set to 254. You may enter a
value from 0 to 255.
FastPrint Server User’s Guide
24
Chapter 5. TCP/IP
Unix host configuration
5.2.4. Logical printers
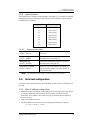
The FastPrint Server supports 8 logical printers. The names (L1..L8) cannot be changed.
Each logical printer has 4 settings as shown above. The line numbers in the FastPrint’s
CONFIG file are as follows:
5.2.4.1.
Logical printer
Line numbers
L1
0100 to 0103
L2
0120 to 0123
L3
0140 to 0143
L4
0160 to 0163
L5
0180 to 0183
L6
0200 to 0203
L7
0220 to 0223
L8
0240 to 0243
Logical printer setup
Physical port
(0100 L1_PROUT)
FastPrint Port to which the printer is attached
(P1 to P3).
String before job
(0101 L1_PREST)
The printer control string (in hex) to be sent to
the printer before each print job.
String after job
(0102 L1_POSTR)
The printer control string (in hex) to be sent to
the printer after each print job.
Convert LF to CR+LF
(0103 L1_CHGLF)
If ON, LF (line feed) characters are changed to
CR+LF (carriage return + line feed). If OFF, no
conversion is done.
Note: The maximum size of a printer control string is 15 characters.
5.3. Unix host configuration
You must first give the FastPrint Server an IP address so that it will be a valid device on
the LAN.
5.3.1. Static IP address configuration
1. Determine the physical address of the FastPrint Server from the default name shown
on a sticker on the base of the FastPrint. It will be in the form SCxxyyzz (SC
followed by 6 hex numbers). If its name is SCxxyyzz, then the physical address is
00:c0:02:xx:yy:zz.
2. Login to the UNIX host as root.
3. Add the FastPrint to the /etc/hosts file by adding the following line to the file:
IP_Address NAME # comment
FastPrint Server User’s Guide
25
Chapter 5. TCP/IP
Unix host configuration
where:
IP_Address is the IP address for the FastPrint Server. This must match the IP
address stored in the FastPrint.
NAME is the FastPrint’s name. This must match the name stored in the
FastPrint.
# comment. Add the Default Name as a comment.
example:
192.10.2.54 PS_Rm203 #Default name SC123456
In the example above, SC123456 is assigned the IP address 192.10.2.54 and
the name “PS_Rm203”.
4. Use the arp command to associate the physical address with the FastPrint Server’s
IP address:
arp -s NAME 00:c0:02:xx:yy:zz
where:
NAME is the name assigned to the FastPrint.
00:c0:02:xx:yy:zz is the physical address of the FastPrint, as determined from
the default name.
example:
arp -s PS_Rm203 00:c0:02:12:34:56
5. Check the IP address using the ping command:
ping NAME
You should receive a response. If you get a Timeout message, the above procedure
has failed.
6. If the FastPrint Server is not configured yet, you can now connect and configure it
using FTP. (See “Example: Initial configuration” on page 37).
5.3.2. Dynamic IP address Configuration
If the FastPrint’s IP address is left at 0.0.0.0, it will try to obtain a dynamic IP address by
using the following methods in sequence: DHCP, BOOTP, RARP.
5.3.2.1.
Using DHCP
You may only use DHCP if you have DHCP management software which allows you to
take advantage of this feature. Otherwise, the FastPrint’s IP address will be unknown,
and connection to it will be impossible. In this case, configure the FastPrint to use a
static IP address. (See preceding section.)
5.3.2.2.
Using BOOTP
1. Determine the physical address of the FastPrint Server from the default name shown
on a sticker on the base of the FastPrint. It will be in the form SCxxyyzz (SC
followed by 6 hex numbers). If its name is SCxxyyzz, then the physical address is
00:c0:02:xx:yy:zz.
2. Login to the UNIX host as root.
3. Add the FastPrint to the /etc/hosts file by adding the following line to the file:
IP_Address NAME # comment
FastPrint Server User’s Guide
26
Chapter 5. TCP/IP
Unix host configuration
where:
IP_Address is the IP address for the FastPrint Server. This must match the IP
address stored in the FastPrint Server.
NAME is the FastPrint’s name. This must match the name stored in the
FastPrint.
# comment. Add the Default Name as a comment.
example:
192.10.2.54 PS_Rm203 #Default name SC123456
In the example above, SC123456 is assigned the IP address 192.10.2.54 and
the name “PS_Rm203”.
4. Add the following entry to the Boot Table /etc/booptab
NAME:ht=ether:vm=rfc1024::ha=PA:ip=IP:sm=SM:gw=GW
where:
NAME is the FastPrint’s name.
PA is the physical address of the FastPrint.
IP is the FastPrint’s IP address.
SM is the subnet mask.
GW is the gateway IP address.
5. If it is not running, start the bootp daemon (the usual command is bootpd) and
then reset the FastPrint. It should then acquire an IP address using bootp.
6. If the FastPrint Server is not configured yet, you can now configure it using FTP.
(See page 37 for details.) Otherwise, check with the ping command:
ping NAME
You should receive a response. If you get a Timeout message, the above procedure
has failed.
5.3.2.3.
Using RARP
1. Determine the physical address of the FastPrint from the default name shown on a
sticker on the base of the FastPrint. It will be in the form SCxxyyzz (SC followed by
6 hex numbers). If its name is SCxxyyzz, then the physical address is
00:c0:02:xx:yy:zz.
2. Login to the UNIX host as root.
3. Add the FastPrint to the /etc/hosts file by adding the following line to the file:
IP_Address NAME # comment
where:
IP_Address is the IP address for the FastPrint. This must match the IP
address stored in the FastPrint.
NAME is the FastPrint’s name. This must match the name stored in the
FastPrint.
# comment. Add the Default Name as a comment.
example:
192.10.2.54 PS_Rm203 #Default name SC123456
In the example above, SC123456 is assigned the IP address 192.10.2.54 and
the name “PS_Rm203”.
4. If the rarp daemon is not running, start it with the command:
rarpd -a
FastPrint Server User’s Guide
27
Chapter 5. TCP/IP
Printing configuration
5. Add a line to the Ethernet Address table /etc/ethers
00:c0:02:xx:yy:zz NAME
where:
00:c0:02:xx:yy:zz is the physical address of the FastPrint.
NAME is the name of the FastPrint.
6. Reset the FastPrint. When it reboots, it should acquire an IP address from rarp.
7. If the FastPrint is not configured yet, you can now configure it using FTP. (See page
37 for details.) Otherwise, check the address with the ping command:
ping NAME
You should receive a response. If you get a Timeout message, the above procedure
has failed.
5.4. Printing configuration
There are four printing methods to choose from. All are explained in the following
sections. Select whichever is the most convenient in your environment.
♦ LPD
LPD is a standard print method for most UNIX systems. This eliminates the need to
install additional software on the host.
However, in most cases the LPD protocol sends out the data file before the control
file. The FastPrint Server will print the data file immediately, ignoring any print
options set in the control file. To solve this problem, use PSfilter instead.
♦ PSfilter
PSfilter is a proprietary print method provided with the FastPrint. This method
provides many print options such as banner print, copies, and so on.
To use PSfilter, a C compiler must be installed on every UNIX host so that the
PSfilter source code can be compiled into executable code and installed on the UNIX
host.
♦ FTP (File Transfer Protocol)
FTP is also a standard print method in most UNIX systems, but it is not
recommended except as a test and back-up method of printing.
LPD and PSfilter work well with a large number of users because they both employ
print queue processes. FTP does not implement a print queue. If the printer is busy,
the print command will fail.
♦ DSI (Direct Socket Interface)
DSI is a Unix-based method of providing a “direct” connection between a host
computer and a printer. The host and the FastPrint Server establish a TCP
connection, using a special socket number. All data sent over this connection is
treated as print data, and sent transparently to a logical printer defined on the
FastPrint Server.
FastPrint Server User’s Guide
28
Chapter 5. TCP/IP
Printing configuration
5.4.1. LPD configuration
LPD is a built-in printing protocol for most UNIX systems, including BSD type UNIX. It
is also supported in Windows NT 3.5 or later.
5.4.1.1.
LPD on IBM AIX 4.15
Before proceeding, make sure that the FastPrint Server has been assigned an IP address.
To set up your AIX system for LPD printing, perform the following steps.
1. Add the FastPrint to /etc/hosts.lpd, using the name you assigned to the FastPrint.
2. Start the LPD daemon if it is not running, using the following command:
start src -s qdaemon
3. Start the system administration tool smit and select Print Spooling
4. Create the required number of queues (one for each logical printer) by selecting:
Add a Print Queue
Remote (Printer attached to Remote Host)
Standard Processing
5. Use the following information:
Field
Entry
Name of queue to add
Use a single-word queue name that
indicates which printer is attached.
Hostname for remote server
FastPrint name as used in /etc/hosts.lpd.
Name of queue on remote
server
Logical printer number (L1..L8) to service
this queue.
Type of print spooler on
remote server.
Use default value (AIX version xxx)
6. Ensure the logical printers are configured in the FastPrint. See page 24 for more
information.
7. Print using the following command:
lp -d printer_queue file_name
where:
printer_queue is one of the entries used in Name of queue to add.
file_name is the file you wish to print.
5.4.1.2.
LPD on System V
Before beginning LPD Setup, make sure that an IP address has been assigned to the
FastPrint Server. Keep the following points in mind:
• The remote host name is the name of the FastPrint Server.
• The remote printer name is the print queue name for the logical printer.
Logical printers also need to be configured on the FastPrint Server itself. (See
page 24).
• If your UNIX asks for the LPD type, be sure to identify the service type as BSD.
The FastPrint’s LPD protocol meets BSD system standards.
FastPrint Server User’s Guide
29
Chapter 5. TCP/IP
Printing configuration
• In the sample commands shown, printer_name is the name of the print queue
serviced by the FastPrint Server, and Spooler_directory is the name of the
directory used to spool the print jobs.
Action
Sample command
Stop print services
/usr/lib/lpshut
Add a system printer
/usr/lib/lpadmin -p printer_name -v /dev/null
Restart the print services
/usr/lib/lpsched
Enable printing to the new
printer device
enable printer_name
Start accepting jobs for the
new printer device
accept printer_name
Create a spooling directory
mkdir /usr/spool/Spooler_directory
Make spooling daemon the
owner of this directory
chown daemon /usr/spool/Spooler_directory
Create read/write permissions
chmod 775 /usr/spool/Spooler_directory
Give permissions to LPD
processes.
chgrp daemon /usr/spool/Spooler_directory
Add remote printer(s)
(See following section).
5.4.1.2.1. Adding remote printers
A remote printer is added by inserting the following line in the /etc/printcap file.
Note: The entry is really one line, but can be entered as shown.
Use a TAB character where shown.
printer_name|Remote_Printer_Alias:\
[TAB] :lp=:\
[TAB] :rm=PS_NAME:\
[TAB] :rp=Logical_Printer_name:\
[TAB] :sd=Spooler_directory:\
[TAB] :mx#0:
where:
printer_name is the Print Queue name used to store jobs for the corresponding
logical printer.
PS_NAME is the FastPrint Server name defined in /etc/hosts.
Logical_Printer_name is the logical printer name on the FastPrint (L1..L8).
Spooler_directory is the directory you created in step 6.
example:
Marketing|RP1_SC123456:\
[TAB] :lp=:\
[TAB] :rm=PS_Rm203:\
[TAB] :rp=L1:\
[TAB] :sd=/usr/spool/Marketing:\
[TAB] :mx#0:
FastPrint Server User’s Guide
30
Chapter 5. TCP/IP
Printing configuration
Repeat this process for each logical printer/print queue combination that you wish to
create.
5.4.1.3.
LPD on BSD
Before continuing, ensure that an IP address has been assigned to the FastPrint.
Remember the following:
• The remote host name is the name of the FastPrint.
• The remote printer name is the logical printer (L1..L8) on the FastPrint.
• If asked for the LPD type, enter the service type as BSD.
• In the sample commands shown, printer_name is the Print Queue serviced by the
logical printer on the FastPrint, and Spooler_dir is the name of the directory used to
spool the print jobs.
Action
Sample command
Create a spooling directory
mkdir /usr/spool/Spooler_dir
Set spooling daemon as owner
of this directory.
chown daemon /usr/spool/Spooler_dir
Create read/write permissions.
chmod 775 /usr/spool/Spooler_dir
Give permissions to LPD
processes.
chgrp daemon /usr/spool/Spooler_dir
Add remote printer(s)
See Adding remote printers on page 30.
Start lpc print mechanism
lpc start printer_name
5.4.2. Printing using LPD
For LPD printing instructions, refer to your UNIX manual. The following example is for
a BSD system:
lpr -P printer_name filename
where:
printer_name is the name of the print queue defined on the Unix host.
filename is the name of the file you wish to print.
example:
lpr -P Marketing /etc/hosts
In the above example, the /etc/hosts file is sent to the printer queue Marketing. It will
then be sent to the logical printer associated with this queue.
5.4.3. Printing using FTP
FTP printing lets you send print jobs to the printers directly. There is no spooling;
therefore, if the printer is not ready, the print job will be terminated immediately. The
advantage of FTP is that no host configuration is required.
To print using FTP, enter the following command lines:
#ftp Name
ftp>put FileName Ln
FastPrint Server User’s Guide
31
Chapter 5. TCP/IP
Printing configuration
where:
Name is the name of the FastPrint Server.
FileName is the file you wish to print.
n is the number of the logical printer you wish to print to.
5.4.4. Printing using DSI
Logical printers must be configured on the FastPrint Server, as explained on page 24.
Note: Although the FastPrint supports 8 logical printers, DSI on the FastPrint
supports only 3 logical printers.
Socket numbers are defined as follows:
Logical printer no.
Socket no.
1
4010
2
4020
3
4030
5.4.5. Printing using PSfilter
PSfilter is a proprietary printing system that provides many print options.
Note: If you want to use PSfilter, a C compiler and Socket Library must exist on
the host so that psfilter.c can be compiled to an executable file.
5.4.5.1.
PSfilter Setup
The PSfilter program is shipped in source code as psfilter.c. Three methods are provided
to set up the FastPrint Server for PSfilter printing.
• Quickset
• Interactive setup
• Manual setup
Quickset and Interactive setup execute the proprietary install.sh program which will
compile psfilter.c. Using one of these methods is recommended. However, for IMB AIX,
you must use the Manual setup.
5.4.5.1.1. Setup instructions
Detailed instructions for installing and configuring PSfilter are provided in the following
files. These files, and PSfilter.c, are stored on the CD-ROM in the following directories:
\driver\lpti\lpsource (text format)
\driver\lpti\tar (tar format)
Operating system
File
SCO UNIX System V Release 3
SCO.TXT
HP UXIX on HP workstation
HP.TXT
Sun 5.x on Sun SPARC workstation
SUN5.TXT
FastPrint Server User’s Guide
32
Chapter 5. TCP/IP
Windows NT host configuration
Sun 4.x on Sun SPARC workstation
SUN4.TXT
AT&T UNIX SV Release 4
SVR4.TXT
DEC/OSF1
DECOSF1.TXT
IBM AIX
AIX.TXT
UNIXWare
UNIXWARE.TXT
Note: If your system is not listed above, do not attempt to use Psfilter.
5.4.5.2.
PSfilter printing methods
PSfilter printing provides two ways to print jobs:
♦ Redirect Printing
With Redirect printing, you print jobs using system print commands (e.g. lp). The
print job is redirected though PSfilter to the FastPrint. Redirect printing is the
recommended print method because jobs are spooled.
♦ Direct Printing
Here, PSfilter commands are used to print your job without going through the host
print queue. This method is recommended only for test purposes.
5.5. Windows NT host configuration
This section covers the configuration of a Windows NT host. The FastPrint should be
configured first. For Windows NT configuration in a Peer-to-Peer environment, see
Chapter 7 - Windows Peer-to-Peer.
5.5.1. IP address configuration
To have the FastPrint Server recognized as a valid device, you must first configure it.
Once this has been done, then follow this procedure.
1. Add an entry for the FastPrint to the hosts file:
\SYSTEM32\DRIVERS\ETC\HOSTS
The entry consists of the following line:
xxx.xxx.xxx.xxx Name
where:
xxx.xxx.xxx.xxx is the IP address you assigned to the FastPrint.
Name is the FastPrint’s name. If you have not changed the name, use the
default name shown on a sticker on the base of the FastPrint.
2. Reboot to have these changes take effect.
3. Have Windows NT automatically add an entry to the ARP table by entering the
following commands:
ping Name
arp –a
Note: If the FastPrint doesn’t respond to the ping, there is something wrong with
the IP addressing.
FastPrint Server User’s Guide
33
Chapter 5. TCP/IP
Windows NT host configuration
5.5.2. Preparing for TCP/IP Printing
If you want to create a TCP/IP remote printer, Microsoft TCP/IP printing support must
be installed. The procedure is as follows.
5.5.2.1.
Windows NT 3.51
1. Start the Network option in Control Panel. When the Network Settings dialog box
appears, click Add Software to display the Add Network Software dialog box.
2. Select TCP/IP Protocol And Related Components in the Network Software list box,
and then click the Continue button.
3. In the Windows NT TCP/IP Installation Options dialog box, check the TCP/IP
Network Printing Support option.
4. Click the OK button. Windows NT Setup will display a message asking for the full
path to the Windows NT distribution files. Provide the appropriate location and click
the Continue button. All necessary files will be copied to your hard disk.
5. If you did not check the Enable Automatic DHCP Configuration option in the
Windows NT TCP/IP Installation Options dialog box, you must complete all the
required TCP/IP configuration procedures manually.
6. After you finish configuring TCP/IP, the Network Settings dialog box will reappear,
click the Close button and then restart your computer for the changes to take effect.
5.5.2.2.
Windows NT 4.0
1. Go to StartèSettingsèControl PanelèNetwork.
2. Click the Service option and ensure that Simple TCP/IP Service and Microsoft
TCP/IP Printing are enabled. If they are not enabled, select the Add option and
enable them as usual.
3. If you added services in step 2, reboot the computer for the changes to take effect.
5.5.3. Adding a TCP/IP remote printer
5.5.3.1.
Windows 3.51
1. From the Printer menu in Print Manager, choose Create Printer. Enter the following
information:
2.
Printer name
Enter a name (up to 32 characters). This name appears in the
title bar of the printer window.
Driver
Select the appropriate driver for the attached printer.
Description
Enter a printer description for other network users to
reference.
Print to
Select Other.
A Print Destinations dialog box will appear after selecting Other. In the Available
Print Monitor list, select LPR Port, then OK. Enter the following data in the Add
LPR compatible printer window:
Name or address of host providing LPD
The FastPrint’s IP address.
Name of printer on that machine
The appropriate logical printer
number (e.g. L1)
FastPrint Server User’s Guide
34
Chapter 5. TCP/IP
Windows NT host configuration
3. When the Create Printer dialog box reappears, check the Share This Printer On The
Network option.
4. In the Share Name box, Printer Manager creates an MS-DOS compatible resource
name, which you can change if you wish. In the Location box, you can enter
information concerning the printer location.
Network users will see this information when browsing to find this printer.
5. Complete any other configuration information in the Create Printer dialog box.
5.5.3.2.
Windows NT 4.0
1. Go to StartèSettingsèPrinter and invoke the Add Printer wizard.
2. When prompted with This printer will be managed by, select My Computer and
click Next.
3. Select Add Port…, then select LPR Port and click New Port.
4. In the Name of Address of server providing LPD: dialog box, enter the FastPrint’s IP
address.
5. In the Name of printer or print queue on that server dialog box, enter the appropriate
logical printer number (L1..L8) as previously configured on the FastPrint Server.
6. Click OK. When returned to the Printer Ports window, simply elect Close and then
install your printer driver as usual.
7. When prompted whether or not the printer will be shared, select the Sharing radio
button
8. In the Shared dialog box, enter the shared printer name. The shared name is how
other users will see this printer.
5.5.4. Printing with Windows NT
5.5.4.1.
Windows applications
The FastPrint’s printers will appear as network printers to users on the LAN. To print a
file from an application, select the remote printer as the destination, and print the file as
usual.
5.5.4.2.
Command line
To print a file from the command prompt, type:
lpr -S NT_Host -P printer_name file_name
where:
NT_Host is the name of the NT host on which the remote printer is
configured.
printer_name is the name assigned to the remote printer.
file_name is the name of the file you wish to print.
To check the print status, type:
lpq -S NT_Host -P printer_name
FastPrint Server User’s Guide
35
6. TCP/IP Features
This chapter describes some features of the FastPrint Server that
are only available in the TCP/IP environment.
6.1. FTP
FTP (File Transfer Protocol) allows a user to log-on to a remote host and manipulate
files on the host. The FastPrint Server can act as an FTP host, with the following
limitations:
• Only one FTP user can connect to the FastPrint Server.
• Only “command line” FTP programs can be used. FTP programs which attempt
to “browse” the file system are not supported.
6.1.1. Using FTP
1. Start your FTP client from the command prompt (GUI interface FTP clients are not
supported) and connect to the FastPrint using its IP address.
e.g. ftp 203.70.212.155
Note: If your system has been configured as described in Unix host configuration
on page 25 , you can connect using the FastPrint Server’s name, rather
than the IP address.
2. The FastPrint Server will respond with “Print Server Ready” and prompt for “User”.
Enter the FastPrint’s name. If you have not previously assigned a name, you must use
the default name shown on the sticker on the base of the FastPrint Server.
3. You will now be prompted for the device password. If no password has been
assigned, just press ENTER to continue.
6.1.1.1.
Files
The following files will appear on the FastPrint when it is acting as an FTP host.
6.1.1.2.
Filename
Purpose
Mode
CONFIG
Configuration file
Read/Write (get, put)
DEFAULTC
Reset FastPrint to default
configuration
Read (get)
PSINF
FastPrint information
Read (get)
PASSRESET
Clear password
Read (get)
RESET
Reset FastPrint
Read (get)
SETIP
Save current IP address
Read (get)
Commands
Only the following commands are implemented. Commands are usually case sensitive.
Where the command requires a parameter, the parameter is shown in italics.
FastPrint Server User’s Guide
36
Chapter 6. TCP/IP Features
FTP
♦ dir
List files (as shown in the previous table).
♦ get FILENAME
Retrieve a file. The only files that can be retrieved are CONFIG and PSINF.
Using GET with the other “files” will activate a command, as follows:
get DEFAULTC
Set the FastPrint back to its default configuration.
get RESET
Reset the FastPrint Server. This also terminates the
current connection.
get PASSRESET
Clear password (no password).
get SETIP
Set the current IP address as a static IP address.
Warning!
Do not use the SETIP command if the FastPrint has an IP address
assigned by a DHCP server. This will cause an Address conflict.
♦ put CONFIG
Copy the file CONFIG to the FastPrint, overwriting the existing CONFIG file.
Details of the format of CONFIG files are contained in Appendix B Configuration File Format.
Note: After using the put CONFIG command to write a new configuration file to
the FastPrint, you should issue a get RESET command.
The red LED should then go on while the FastPrint Server is resetting.
When the red LED goes OFF and the green LED starts flashing, the
FastPrint is ready. A RESET will terminate the current connection.
♦ put PASSWORD
Copy the file PASSWORD to the FastPrint Server, giving it a new password.
Passwords can be up to 19 bytes in length.
♦ put filename Ln
Copy the file filename to the printer connected to logical port n, where n is a
logical port number. This will print the file.
♦ quit
Terminate the current FTP session.
♦ Other FTP commands
The other FTP commands are not implemented, and will usually return the error
message Invalid command.
6.1.1.3.
Example: Initial configuration
1. Connect to the FastPrint Server.
ftp NAME
Note: You can only connect using a name instead of an IP address if your system
has been configured as described on page 24.
2. You will be prompted for User. Enter the default name (on the base of the FastPrint).
When prompted for the password, press ENTER.
FastPrint Server User’s Guide
37
Chapter 6. TCP/IP Features
Internet printing
3. Copy the configuration file CONFIG, to your system, then quit.
ftp>get CONFIG
ftp>quit
4. Edit the CONFIG file to set parameters in the following four lines in the file.
0001 BOX_NAME:Name
4000 IP_ADDR:x.x.x.x
4001 GATEWAY:y.y.y.y
4002 MASK:z.z.z.z
where:
New_Name is the FastPrint Server’s name.
x.x.x.x is the IP address assigned to the FastPrint.
y.y.y.y is the IP address of your router.
z.z.z.z is the network mask, if assigned.
5. Copy the CONFIG file back to the FastPrint, reset, and quit:
ftp NAME
ftp>put CONFIG
ftp>get RESET
ftp>quit
6.2. Internet printing
The InterNet Printing System allows users to print data to your printer across the
Internet. Users send the Internet Print Server an e-mail, with the print job sent as an
attachment to the e-mail. The FastPrint Server will retrieve the e-mail and print it.
6.2.1. System requirements
♦ Mail server
• Accessibility. The Mail Server must be accessible by the intended clients or
users. Normally, this means a permanent connection to the Internet.
• Protocols. The Mail Server must support the POP3 and SMTP protocols. The
Internet Printing System uses these protocols and the most common e-mail
formatting standards:
MIME (Multipurpose Internet Mail Extensions)
Base64 Encoding (for mail attachments)
♦ Internet Print Server
• TCIP/IP protocol. The LAN must use the TCP/IP protocol.
• Mail server access. The FastPrint Server must be able to access the Mail Server
using a single IP address.
• Mail account. The FastPrint must have a Mail Account. Users print by sending
an e-mail to this mail account.
♦ User (client) requirements
• Internet connection. Either through a LAN, or dial-up.
• E-mail address. This is used to notify the user that their print job has been done,
or if there are any problems.
FastPrint Server User’s Guide
38
Chapter 6. TCP/IP Features
Internet printing
• Printer driver. Users must have a printer driver which matches the printer
connected to the remote Internet Print Server.
• Print capture software. To print more than plain text, users require InterNet
Printing Port software to capture the print job and convert it into an e-mail
attachment.
The InterNet Printing Port software is available for the following operating
systems:
Microsoft Windows 95
Microsoft Windows NT 3.51 or later.
6.2.2. Internet mail printing configuration
The FPSAdmin program (see Chapter 8 - Management Tools) can be used to set the
following entries on the TCP/IP screen. FTP can also be used; the number in brackets
shows the line number in the FastPrint’s CONFIG file.
Mail server IP address
(4100 MAIL_IP)
The IP address of the e-mail server used by the
FastPrint Server.
Mail account
(4101 MAIL_ACC)
The name of the e-mail account used by the
FastPrint Server.
Mail account password
(4102 MAIL_PAS)
Enter the password for the above mail account
here.
Check mail interval
(4103 MAIL_INT)
Sets how often to check for mail. Values range
from 0 to 65,535 minutes, with 0 meaning a
continuous connection. By default, this is set to 1.
Print banner
(4104 MAIL_BAN)
If YES (default), a banner page is printed to
identify the owner of the print job.
Redirect mail account
(4105 MAIL_RED)
Jobs that can’t be printed will be sent to this
account. If blank, unprintable jobs will be
discarded.
Default printer number
(4106 MAIL_POR)
Printer number for all internet print jobs. Only
one port can be selected. Users on the LAN can
also use this port.
Print every e-mail
(4107 MAIL_EVR)
If ON, then all e-mail received is printed.
Otherwise, only e-mail from the InterNet
Printing Port will be printed.
Activate response mail
(4108 MAIL_NOT)
If YES, all print jobs receive an e-mail response.
If NO, only users who set this option in their
InterNet Printing Port software receive an e-mail.
Printer model ID string
(4109 MAIL_MOD)
This text field identifies the printer used for
internet printing. This value is sent to remote
users upon request.
FastPrint Server User’s Guide
39
Chapter 6. TCP/IP Features
Internet printing
6.2.3. User software
The software provided for remote users (InterNet Printing Port) should be installed by
everyone intending to use Internet printing. Otherwise, remote users can print correctly
only if:
• They send an e-mail directly to the FastPrint Server Mail Account, using their
normal e-mail application.
• The e-mail contains plain text only.
• The Internet Print Server is configured with Print every e-mail ON.
Installation of the InterNet Printing Port software will create a new printer port. After
attaching the correct printer to this port, users can print to the internet printer using any
Windows application.
6.2.3.1.
Installation
1. Run the InterNet Printing Port installation program SETUP.EXE.
2. Default values for the installation are:
Directory
C:\LanEdge\FastPrint Server\Internet
Start Menu folder
InterNet Printing Port Driver
3. You will then see the Configure Port screen, as shown in the following screenshot.
Figure 2 InterNet Printer Port
FastPrint Server User’s Guide
40
Chapter 6. TCP/IP Features
Internet printing
4. The following data must be provided.
Port name
Enter a descriptive name (e.g., “WAN”) for the
new printer port.
Remote printer
E-mail address
The e-mail address for the internet printer. Your
print jobs will be sent to this e-mail address.
Mail server name
or IP address
This is the name or IP address of your mail
server. If you are on a LAN, ask the LAN
administrator. If using a dial-up connection, use
the data provided by your ISP.
Your internet
e-mail address
The address that people use to send you e-mail.
Retry interval
(seconds)
If unable to connect to the e-mail server, another
connection attempt will be made after this time
period (1 to 255 seconds; 30 is usually OK).
Reply notification mail
Check to receive an e-mail when your print job
has been processed.
5. On completion, a new printer port will have been created.
6.2.3.2.
Using the new port
The Windows Control Panel is used to connect the correct printer to the InterNet
Printing Port. In Windows 95/NT, the procedure is:
1. Select the printer that matches the remote printer. Next, choose Properties, as shown
in the example below.
Figure 3 InterNet Printer Properties
FastPrint Server User’s Guide
41
Chapter 6. TCP/IP Features
Internet printing
2. Select the new port (WAN (InterNet Printer) in the example) as the port for this
printer.
• If you do not have the correct printer driver, or you wish to create another printer
using an existing driver, use the Windows Add Printer facility.
• Using the Windows Port Settings or Configure Port facility will reveal the same
Configure Port screen shown in Figure 2 InterNet Printer Port on page 40.
• If you wish to print to multiple Internet Printers, use the Windows Add Port
facility to add a new InterNet Printer port. Ensure that the correct data is entered
in each port, and that each port has a unique name.
6.2.3.3.
Checking the printer driver
You can use the InterNet Printing Port to send an e-mail to the Internet Printer. This lets
you make sure that the correct printer driver for the remote printer is installed on your
system.
1. Connect your default printer to the InterNet Printing Port.
2. Check that “Reply Notification Mail” in the InterNet Printing Port is ON.
3. Use Notepad or any other text editor to create a short message (such as “This is a test
print”).
4. Follow the steps in the next section to print the document to the Internet Printer.
You will receive a reply e-mail containing the “Printer ID” which will identify the
printer attached to the FastPrint. If this does not match the printer driver you are
using, install the correct printer driver.
6.2.4. Printing
1. Create or open the document you wish to print.
2. Select the Printer connected to the InterNet Printing Port.
3. If you do not have a permanent Internet connection, establish a connection now.
Note: The InterNet Printing Port will not establish a dial-up connection.
However, it will send the e-mail the next time you are connected.
4. Print the document.
5. The InterNet Printing Port will generate an e-mail and send it to the remote printer.
The document will be encoded and sent as an attachment to the e-mail. You will see
a progress screen similar to the example below:
Figure 4 InterNet Printing Progress
FastPrint Server User’s Guide
42
Chapter 6. TCP/IP Features
SNMP management
6. Close the Internet connection if you opened it in step 3.
7. If the “Notify after print job” option is set, you will receive an e-mail when your job
is printed.
6.2.5. Canceling a print job
Users cannot cancel a print job once it has been sent. However, print jobs can be
canceled at the FastPrint Server.
In FPSAdmin (see Chapter 8 - Management Tools), the Control - Abort Mail Print Job
menu option can be used to cancel a print job which has already started printing.
6.3. SNMP management
The FastPrint’s SNMP support allows network supervisors to monitor and control the
FastPrint Server using network management platforms such as HP OpenView, IBM
SystemView, etc. This is accomplished through the SNMP agent and the SNMP MIB.
The agent (device software) responds to standard SNMP commands and reports device
configuration and conditions. When a change in condition occurs, the SNMP agent will
send a message (a Trap) to the associated management station.
The FastPrint’s SNMP MIB is a collection of objects that are monitored and controlled
using SNMP’s get and set commands. The MIB file is in the MIB folder on the FastPrint
CD-ROM. You must import the MIB3P.MIB file into your SNMP management
program.
6.3.1. Preparing the FastPrint Server for SNMP
Before attempting to manage the FastPrint using a SNMP Management station, the
following settings should be assigned to it, in addition to the IP addresses covered in IP
address configuration on page 23. You may do this with either FTP, FPSAdmin, or
WebAdmin.
The number and token in brackets shows the line number in the FastPrint CONFIG file.
6.3.2. SNMP settings
SysContact
(6000 CONTACT)
Name of the contact person.
SysLocation
(6001 LOCATION)
Location of the contact person.
Management station
IP address(es)
(6011 M1_IP)
(6021 M2_IP)
(6031 M3_IP)
(6041 M4_IP)
Up to 4 management stations can be
entered.
FastPrint Server User’s Guide
43
Chapter 6. TCP/IP Features
SNMP management
Trap receiving
IP address(es)
(6111 T1_IP)
(6121 T2_IP)
(6131 T3_IP)
(6141 T4_IP)
6.3.2.1.
Up to 4 trap receiving stations can be
entered.
Management station settings
The following fields are available for each management station.
Access permission
(6012 M1_ACCP)
6022 M2, 6032 M3, 6042 M4
Choose from Read Only,
Read/Write or Not Accessible.
Community string
(6013 M1_CSR)
6023 M2, 6033 M3, 6043 M4
If this is left blank, management by
this station will be disabled.
6.3.2.2.
Trap receiving station settings
For each trap receiving station, the following fields are available.
Community string
(6113 T1_CSTR)
6123 T2, 6133 T3, 6143 T4
If this is left blank, management by
this station will be disabled.
Trap enable
(6114 T1_ENAB)
6124 T2, 6134 T3, 6144 T4
Use this option to Enable/Disable trap
receiving by this station.
Trap severity
(6112 T1_S)
6122 T2, 6132 T3, 6142 T4
All traps are level 1.
6.3.2.3.
FastPrint Server MIB
The FastPrint Server MIB contains 96 objects that have been divided into 13 distinct
groups, including one trap, according to their functions. The following list shows the
MIB groups as they are seen in the MIB:
PSStatus
PSSystemConfig
PSIpxStatistics
PSLogicalPrinterConfig
PSAppletalkStatistics
PSNetwareConfig
PSTcpipStatistics
PSTcpipConfig
PSControlConfig
PSAppletalkConfig
Traps
PSNetbeuiConfig
Appendix C - SNMP MIB contains a complete listing of all MIB objects.
The FastPrint Server MIB must be installed on each management station, using the
Import-Compile commands of your SNMP management program. Check your
management program for details on this procedure.
FastPrint Server User’s Guide
44
7. Windows Peer-to-Peer
This chapter will help you use the FastPrint Server in a Windows
Peer-to-Peer Networking environment.
7.1. Software requirements
♦ Operating systems
Windows 95, Windows NT 4.0, Windows NT 3.51, or Windows for Workgroups.
♦ LAN protocols
For Windows 95 or NT, either TCP/IP or NetBEUI protocols can be used. In Windows
for Workgroups, only the NetBEUI protocol is available.
7.2. Configuration requirements
The following steps must be carried out.
• Software installation
• FastPrint Server configuration
• Software configuration
7.3. Software installation
Software installation must be carried out on every workstation that will use the
FastPrint’s printers.
7.3.1. Windows 95 / Windows NT
1. Run the SETUP program in the \Driver\ptp_95nt folder on the CD-ROM.
2. At the Select Components window, select either NetBEUI or TCP/IP.
3. If you select TCP/IP, you will see the Select Components screen.
The Device Driver must be installed on all workstations.
4. Complete the installation as normal. Reboot your system when Setup is complete.
Setup will do the following:
• Create Readme and UnInstall icons.
• Add the prtserv.dll driver to the Windows\System directory (Win 95) or
Windows\System32 directory (Windows NT).
• Add the Uninstall program to the Windows directory.
• Add Uninstall information files and the Readme file to the installation directory.
FastPrint Server User’s Guide
45
Chapter 7. Windows Peer-to-Peer
FastPrint Server configuration
7.3.2. Windows for Workgroups
The following procedure will install the Pserver program. This program is required on
every Windows for Workgroups system requiring access to the FastPrint’s printers.
1. Run the Setup program in the Driver\Ptp_wfw directory on the CD-ROM.
2. Follow the on-screen instructions to complete the installation. It is not necessary to
reboot your system.
3. The Setup program will:
• Copy all program files to the installation directory.
• Copy Uninstall information files and UNINST16.EXE to the installation
directory.
• Create a program group.
7.4. FastPrint Server configuration
7.4.1. NetBEUI
If you are using the NetBEUI protocol, no device configuration is necessary. Simply
install and configure the software.
7.4.2. TCP/IP
The FastPrint Server must be configured with the following information prior to
software configuration.
Setting
Recommended value
Device name
The default FastPrint name can be found on the
bar code label on the bottom of the FastPrint. It
begins with the letters “SC”, followed by 6
hexadecimal characters. These characters may
include the numbers “0” through “9” and the
letters “A” through “F”.
If you rename your FastPrint, the new name must
not be longer than 19 characters, and must not
include any spaces.
Device IP address
192.168.0.1 (if not already assigned)
Gateway IP address
0.0.0.0
Subnet mask
0.0.0.0
These values are appropriate in the Peer-to Peer environment. For more complicated
situations, refer to Chapter 5 - TCP/IP. Ensure that the IP address assigned to the
FastPrint is not already in use.
Use FPSAdmin (see Chapter 8) to configure the FastPrint Server.
FastPrint Server User’s Guide
46
Chapter 7. Windows Peer-to-Peer
Software configuration
7.5. Software configuration
7.5.1. Configuration settings
During the software configuration process you will have to provide the following
configuration information.
IP address
(TCP/IP only)
Enter the IP address that was assigned to the FastPrint
Server
Device name
(NetBEUI only)
Click Browse and select the correct FastPrint. The name
should not be changed; it is only visible when configuring
the FastPrint.
Select device port
Select the FastPrint port that the printer is connected to
(e.g. Parallel port 1).
Port name
Each port must have a unique name (8 alpha-numeric
characters). The port name will be shown in the Printer’s
properties. Select a name which describes the port used
(e.g. Par_1)
Enable banner
Select this option to enable a banner page. The Banner
page contains the value in the User Name field.
PostScript
If you are using a PostScript printer and the banner page
is enabled, you must enable this option. Failure to enable
this option will cause errors in the print job.
User name
The user or work group name to be printed on the banner
page.
Retry interval
Sets how often Windows will poll the FastPrint Server to
establish a connection when the printer is busy. Values
range from 40-110 seconds.
7.5.2. Windows 95/NT 4.0
This procedure must be carried out on every workstation requiring access to the
FastPrint’s printers. The FastPrint Server driver must be installed first.
Follow the same process for Windows 95 and Windows NT 4.0. The sample screens are
from Windows 95; Windows NT 4.0 screens will be slightly different.
Before proceeding, check the following:
• The FastPrint Server is ON and configured (if using TCP/IP).
• One or more printer(s) are connected to the FastPrint, and on-line.
• The LAN is operational and using the appropriate protocol (either TCP/IP or
NetBEUI).
7.5.2.1.
First port configuration
1. Go to StartèSettingsèPrinters. Invoke the Add Printer Wizard.
2. Select the Local printer (or My Computer on NT) option.
FastPrint Server User’s Guide
47
Chapter 7. Windows Peer-to-Peer
Software configuration
3. Choose the Printer Model on the FastPrint Server’s first port.
4. Select PrintServer as the port in the Select Port screen.
5. Select the Configure Port button. The following Configure FastPrint Server screens
show both the TCP/IP and NetBEUI windows.
Figure 5 TCP/IP Configuration (Win95 PtP)
Figure 6 - NetBEUI Configuration (Win95 PtP)
6. Enter the configuration information as detailed in Software configuration on page 47.
7. Follow the on-screen instructions to finish adding a printer as you normally would.
7.5.2.2.
Configuring additional ports
To add additional ports and printers, follow the steps below.
1. Go to the Printers folder and click on the printer just added. Then select
FileèProperties. The Properties screen will appear.
2. Select the Details tab and the following screen will appear:
FastPrint Server User’s Guide
48
Chapter 7. Windows Peer-to-Peer
Software configuration
Figure 7 Printer Details (Win95 PtP)
3. Select Add Port and the following Add Port screen will appear:
Figure 8 Add Port (Win95 PtP)
4. Select Other as the type of port you want to add and select PrintServer from the port
list, as shown above.
5. Then click OK and the Configure PrintServer window will appear.
6. Enter the configuration information as described in Software configuration on page
47. Ensure that you select a different FastPrint port each time, and assign a unique
name to that port (e.g. pserv_2 for parallel port 2).
7. Repeat steps 3, 4, and 5 until all FastPrint ports have been added.
8. Install the correct printer for each port. When prompted with the following screen, be
sure that you select the port to which the printer is connected.
Figure 9 Select Port (Win95 PtP)
Configuration is now complete. You can now print using the printers attached to the
FastPrint Server.
FastPrint Server User’s Guide
49
Chapter 7. Windows Peer-to-Peer
Software configuration
7.5.3. Windows NT 3.51
This procedure must be carried out on every workstation requiring access to the
FastPrint’s printers. The FastPrint driver must be installed first.
Before proceeding, check the following:
• The FastPrint Server is ON and configured (if using TCP/IP).
• One or more printer(s) are connected to the FastPrint, and on-line.
• The LAN is operational and using the appropriate protocol (either TCP/IP or
NetBEUI).
7.5.3.1.
First port configuration
1. Go to Printer Manager. Select PrinterèCreate Printer.
2. Select the appropriate printer driver for the printer connected to the FastPrint’s first
port.
3. In the Print to dialogue box, select PrintServer.
4. Click on Settings. The Configure FastPrint Server window will appear. It will look
like one of the screens below.
Figure 10 TCP/IP Configuration (NT 3.51 PtP)
Figure 11 NetBEUI Configuration (NT 3.51 PtP)
5. Enter the configuration information as described in Software configuration on page
47.
6. When finished, click OK and then follow the on-screen instructions to finish adding
a printer as you normally would.
FastPrint Server User’s Guide
50
Chapter 7. Windows Peer-to-Peer
Software configuration
7.5.3.2.
Configuring additional ports
Next, you must add additional ports and printers. Follow the steps below.
1. Select the newly added printer using Printer Manager. Then go to the Printer menu
and select Properties. The following Printer Properties screen will appear.
Figure 12 Printer Properties (NT 3.51 PtP)
2. In the Print to dialogue box, select Other… and click OK. The Print Destinations
screen will appear:
Figure 13 Print Destinations (NT 3.51 PtP)
3. Select PrintServer and click OK. The Configure PrintServer window shown
previously will appear.
4. Enter the configuration information as described in Software configuration on page
47. Ensure that you select a different FastPrint Server port each time, and assign a
unique name to that port (e.g. pserv_2, pserv_3).
5. Repeat steps 2 to 4 until all ports have been added.
6. Install the correct printer for each port. When prompted with the following Create
Printer screen, ensure that the appropriate Print to option is selected for each
printer.
Figure 14 Create Printer (NT 3.51 PtP)
FastPrint Server User’s Guide
51
Chapter 7. Windows Peer-to-Peer
Software configuration
7.5.4. Windows for Workgroups
The Setup program will install the Pserver utility, which is used to configure and
manage the FastPrint, printer and print jobs. It must be installed on all PCs intending to
print using the FastPrint. Pserver will transfer the print job through the network to the
FastPrint Server and then to the printer. The process is as follows:
• A print queue is created for each port during configuration.
• When a user prints, the job is sent to Windows Print Manager.
• When Print Manager is finished spooling the print file, Pserver fetches the print job
and stores it in the appropriate queue, using a name generated by Pserver.
• Pserver sends the print job to the correct FastPrint printer when the printer is free.
Before printing, both Pserver and Window Control Panel must be configured.
7.5.4.1.
Pserver main screen
Pserver must be loaded prior to printing via the FastPrint. Therefore, it is recommended
that you add Pserver to the Windows Start Up group.
When started, the Pserver Status window will appear, and will list all connected printers,
and any print jobs in each printer’s queue. An example screen is shown below.
Figure 15 Pserver Main Screen
7.5.4.2.
Pserver icons and commands
Add printer
Create and configure a printer. See the following section for more
details.
Remove printer
Delete all configuration data for the current printer, including any
print job files, and the queue.
Update
Modify the configuration data for the current printer.
Clear print queue
Remove all print jobs in the current printer’s queue.
Pause print queue
Pause the printing of all print jobs in the current printer’s queue. This
should only be used if the printer requires attention.
FastPrint Server User’s Guide
52
Chapter 7. Windows Peer-to-Peer
Software configuration
Resume print queue
Resume printing the current printer’s queue.
Resume all print queues
Execute this command to resume the printing of all paused queues.
Delete job
Delete the selected print job.
Pause job
(Red)
Pause the selected print job. This makes the printer unavailable for
other users.
Resume job
Resume a paused print job.
(Green)
7.5.4.3.
Pserver configuration
Before you can print using the printers connected to your FastPrint, both Pserver and
Windows must be configured. To configure Pserver, follow the instructions below.
1. Start the Psever utility by clicking on its Icon.
2. Select the Printer Menu and choose Add.
3. When prompted with the Add Printer dialogue box (see example below), enter the
configuration information as described in Software configuration on page 47.
Figure 16 Pserver Add Printer
4. Upon clicking OK, the Pserver utility will automatically create a print queue for the
port just added.
5. Repeat steps 2 to 4 for each printer. Ensure that you select a different FastPrint port
each time, and that each port has a unique name.
7.5.4.4.
Control Panel configuration
1. Go to Control Panel and invoke the Printers icon. The following Printer dialog box
will appear:
FastPrint Server User’s Guide
53
Chapter 7. Windows Peer-to-Peer
Printing
Figure 17 Control Panel - Printers (WfW)
2. Follow the normal process to add each printer that is attached to the FastPrint.
3. Each printer must be associated with the print queue it will service. Click the
Connect button and the following Connect dialogue box will appear:
Figure 18 Printer Connect (WfW)
4. From the Ports list, select the queue that services the FastPrint Server port to which
the printer is connected.
5. Repeat steps 3 and 4 to associate each printer with a queue.
6. Setup is complete. Now whenever you select Windows Print Setup, the printer and
its associated queue will appear in the printer list as shown in the example below.
Figure 19 Print Setup (WfW)
7.6. Printing
Printing with the FastPrint Server in the Windows Peer-to-Peer environment is the same
as printing with the printer attached directly to your local LPT port. Simply select
FileèPrint. When the Print screen appears, select the appropriate printer and options
and click OK.
Note: In Windows for Workgroups, use Pserver to manage your print jobs, rather
than Windows Print Manager.
FastPrint Server User’s Guide
54
8. Management Tools
This chapter explains the general-purpose management tools
provided with your FastPrint Server.
Your FastPrint is shipped with a variety of software programs to assist you to configure
and manage the FastPrint and printers attached to it. Software that is specific to a
particular platform is discussed in the relevant chapter. The general-purpose
management programs explained in this chapter are as follows.
Program
LAN Protocol
Wpconfig
AppleTalk, Novell,
TCP/IP, NetBEUI
AppleTalk, Novell,
TCP/IP, NetBEUI
AppleTalk, Novell,
TCP/IP, NetBEUI
FPSAdmin
WebAdmin
Operating System
SNMP
I.P.
C.P.
Win 3.1
No
No
No
Win 95, Win NT
Yes
Yes
Yes
Win NT Server
+ Browser
Yes
No
Yes
I.P.: Internet Printing Configuration.
C.P.: Configure Printer
FPSAdmin is recommended because it supports all FastPrint Server features.
8.1. FPSAdmin
This section covers the installation and operation of the FPSAdmin management
program. This program will run only on Windows 95 or Windows NT.
8.1.1. Installation
1. Insert the supplied CD-ROM into your drive.
2. Run the Setup program in the \Utility\FPSAdmin directory.
3. Follow the on-screen instructions to complete the installation process.
8.1.2. Main screen
When you run FPSAdmin, the program searches the network for all active FastPrints,
then lists them on screen. See the example screen below.
Figure 20 FPSAdmin Main Screen
FastPrint Server User’s Guide
55
Chapter 8. Management Tools
FPSAdmin
8.1.3. Icons
The icons provide status information as well as access to the selected FastPrint settings.
If an icon is grayed out, that option is unavailable. For example, unsupported protocols
are grayed out.
Device Information
Menu equivalent: Status - Device Information
This option allows you to view all of the FastPrint settings in a scrollable list. The
data can not be changed.
Printer Status
Menu equivalent: Status - Port Status
There is one icon for each parallel port. Non-existent ports are grayed out.
Selecting an icon will result in a screen like the following example:
Figure 21 Printer Status
If the printer is bi-directional, and the printer is not busy, the Configuration
button will be available, allowing you to change the configuration of the attached
printer. See Printer configuration, below, for more details.
NetWare
Menu equivalent: Configuration – NetWare
Select the Operation Mode (Print Server or Remote Printer) and click Print Server
Configuration. You will see one of the following screens:
Figure 22 NetWare Print Server Configuration
FastPrint Server User’s Guide
56
Chapter 8. Management Tools
FPSAdmin
Figure 23 NetWare Remote Printer Configuration
See NetWare-specific settings on page 19 for details.
TCP/IP Configuration
Menu equivalent: Configuration - TCP/IP
Selecting this icon will cause the following screen to appear.
Figure 24 TCP/IP Configuration
See IP address configuration on page 23 for details of the IP addresses (top half of
the screen).
See Internet mail printing configuration on page 39 for details of Internet Mail
Printing Configuration (bottom half of the screen).
FastPrint Server User’s Guide
57
Chapter 8. Management Tools
FPSAdmin
AppleTalk Configuration
Menu equivalent: Configuration - AppleTalk
Selecting this icon will cause the following screen to appear. See AppleTalk
Settings on page 8 for details of these configuration settings.
Figure 25 AppleTalk Configuration
FastPrint Server User’s Guide
58
Chapter 8. Management Tools
FPSAdmin
NetBEUI Configuration
Menu equivalent: Configuration - NetBEUI
Selecting this icon leads to the following screen.
Figure 26 NetBEUI Configuration
8.1.3.1.
NetBEUI Settings
♦ Domain name
Enter the designated work group to be serviced by the FastPrint.
♦ Response Time
Sets how fast jobs are sent to the printer. By default, this is set to no delay
(zero). This value should only be increased if your printer cannot cope with
no delay.
♦ Abort Job As Paper Out
YES will terminate the current print job when a printing error is
encountered. NO (default) will try to continue but may cause print errors. If
errors occur, try setting this value to YES.
Note: Normally, there should be no need to adjust these settings.
FastPrint Server User’s Guide
59
Chapter 8. Management Tools
FPSAdmin
SNMP Configuration
Menu equivalent: Configuration - SNMP
See Preparing the FastPrint Server for SNMP on page 43 for details of these
configuration settings.
After clicking this icon, the top section of the screen will look like this:
Figure 27 SNMP Configuration
If you select a management station (M1..M4), the bottom part of the screen will
look like the following example.
Figure 28 SNMP Management Station
If you select a trap (T1..T4), the bottom part of the screen will change. The
following example is for T1.
Figure 29 SNMP Trap Configuration
Logical Port Configuration
Menu equivalent: Configuration - Logical Port
Logical printers can be used in the NetWare environment (see page 21) and under
UNIX (see page 24). This option allows you to configure each logical printer.
FastPrint Server User’s Guide
60
Chapter 8. Management Tools
FPSAdmin
Refresh
Menu Equivalent: None
Select this icon to update the FastPrint listing after changing the name or IP
address, or after powering up additional FastPrints.
Exit
Menu Equivalent: Help - Exit
Exit FPSAdmin.
Note: Remember to save any changes to the FastPrint before you exit.
Set to Default
This button appears on many screens. Clicking it replaces the on-screen values
with the default settings. They are not saved until you click Save to Device.
To set all FastPrint Server values to the default, use the menu option InitDevice Restore Factory Default.
Save to Device
Clicking this will write any changed configuration information to the FastPrint,
updating the FastPrint’s NVRAM configuration file.
You must then reset the FastPrint Server. You may either use the InitDevice menu
option to do this, or reboot the FastPrint.
8.1.3.2.
Printer configuration
Clicking the Configuration button in the Printer Status window will reveal a window
like the following example. This button will be grayed out if the printer does not support
this option, or if the printer is busy printing.
Figure 30 Printer Configuration
Environment variable
This list of printer configuration variables will vary from printer to printer.
FastPrint Server User’s Guide
61
Chapter 8. Management Tools
FPSAdmin
Variable value
Displays the current setting. To change the variable value (if Read Only is NO),
double click the line you wish to change, then enter or select a new value.
Read only
Indicates whether or not the environment variable is adjustable.
8.1.4. Menu Options
8.1.4.1.
InitDevice menu
♦ Reset device
This will reboot the FastPrint. You should do this after making any configuration
changes, or if the FastPrint Server stops responding after some problem.
♦ Restore factory default
This will restore all FastPrint values to their factory defaults. To restore only the
current screen, use the Set to Default button on the screen.
♦ Set IP address
Use this to set a FastPrint IP address, gateway IP address, and network mask for a
TCP/IP network.
You must enter the default FastPrint Server name, even if you have changed the
name. See IP address configuration on page 23 for configuration details.
Save the data to the FastPrint Server and reset it.
If you want the main screen listing to reflect the new data, you must refresh the
listing. Since the Refresh operation is fairly time-consuming, FPSAdmin won’t
run it automatically. This lets you make several changes at once, before refreshing
all of them.
♦ Attach remote
This is used to connect to a FastPrint Server on another LAN segment. Enter the
IP address of the remote FastPrint Server. The Gateway (router) address must be
set correctly.
♦ Connected protocol
This option allows you to designate which LAN protocol will be used for
communication between the selected FastPrint and this application. You should
only select one protocol.
You may choose any protocol that is installed on your PC, even if it is not
installed on the LAN.
8.1.4.2.
Configuration menu
♦ System
Use this option to change the FastPrint name, and to set the LAN protocol(s)
supported by the FastPrint. The protocol used by your LAN (which is also the
Connected protocol described above) should be enabled. To improve
performance, any other protocols should be disabled.
FastPrint Server User’s Guide
62
Chapter 8. Management Tools
WebAdmin
Note: By default, all protocols are enabled. This allows operation in any
environment, but may degrade operation to some degree.
8.1.4.3.
Diagnostics menu
♦ Print test page
Use this option to print a test sheet from the selected FastPrint Server port. The
test print out will include status information.
8.1.4.4.
Control menu
♦ Abort mail print job
This option allows you to cancel a print job that has been received though the
Internet Printing feature, and is currently printing. This can be used to terminate
a print job that is not printing correctly.
8.2. WebAdmin
WebAdmin must be installed on a supported WEB server, and a compatible WEB
browser used to run the WebAdmin program.
8.2.1. System requirements
Server Operating
Systems
Microsoft Windows NT 3.51 and 4.0. (Workstation and
Advanced Server)
Intel or Intel-compatible processors.
Web Servers
Microsoft Internet Information Server (IIS) 1.0 and 2.0.
Internet Browsers
Microsoft Internet Explorer 2.0, 3.0 and above.
NetScape Navigator 2.0, 3.0 & above.
8.2.2. Server installation
1. Run the SETUP program in the Utility\Webadmin directory on the CD-ROM.
2. Follow the on-screen instructions.
3. By default, the program files will be installed to the following CGI directory:
C:\ LanEdge\FastPrint Server\WebAdmin
4. The alias webadmn for the CGI directory will be created and added to the system
registry. If you wish to change the alias of the CGI directory, the procedure is as
follows:
• Choose: Start|Programs|MicroSoft Internet Server(Common)|Internet Service
Manager.
• Click the computer which has the service: WWW to display service content.
• Click the Directory option to display directory content.
• Select the Alias field, and type the name you want.
• Check the access rights and ensure the directory is both readable and executable,
then click OK.
5. Restart the PC to complete the setup.
FastPrint Server User’s Guide
63
Chapter 8. Management Tools
WebAdmin
8.2.3. Running the program
• Start your WEB browser.
• In the Address box, type either the IP address or the domain name of the WebAdmin
program, followed by the string:
?application/x-msdownload
example:
http://202.70.111.20/webadmin/webadmin.exe?application/x-msdownload
You should then see a screen like the following example.
Figure 31 WebAdmin Home Screen
♦ Home button
Clicking on the Home button from any other screen will return you to the Home screen
shown above.
♦ Browse button
The Browse button will generate a list of FastPrint Servers. Click on the selected
FastPrint to configure it. You will see a screen like the following:
Figure 32 WebAdmin Selected Device
FastPrint Server User’s Guide
64
Chapter 8. Management Tools
WebAdmin
8.2.3.1.
Status
These options allow you to check the status of connected printers or FastPrint Servers.
Device information
A list of the current FastPrint Server settings will be displayed.
Printer port status
Click the button for any port to check the status of the attached printer, as shown
by the sample screen below.
Figure 33 WebAdmin Port Status
If the printer is bi-directional and is not busy, it can be configured by clicking the
Configuration button. See Printer configuration on page 61 for details.
8.2.3.2.
Configuration
These options allow you to configure the current FastPrint.
System
Allows you to change the FastPrint Server name, and to set the LAN protocol(s)
used by the current FastPrint. Only the Connected protocol referred to on page
67, and your LAN protocol, should be enabled.
Note: By default, all protocols are enabled. This allows operation in any
environment, but degrades performance.
Netware
Configure NetWare with this icon. See NetWare-specific settings on page 19 for
configuration details.
TCP/IP
Use Settings -IP addresses to initially assign an IP address, and this button for
any subsequent changes. See IP address configuration on page 23 for details.
AppleTalk
See AppleTalk Settings on page 8 for details of these configuration settings.
NetBEUI
Allows NetBEUI (Windows SMB) changes to be made. For details, see NetBEUI
Settings on page 59.
FastPrint Server User’s Guide
65
Chapter 8. Management Tools
WebAdmin
Logical port
Logical ports (printers) can be used under NetWare (see page 21) or Unix (see
page 24).
SNMP
See Preparing the FastPrint Server for SNMP on page 43 for details of the
settings available from this button.
8.2.3.3.
Diagnostics
This column of buttons allows you to perform tasks that are seldom required.
Reset device
Use this option to reset the FastPrint Server. This is equivalent to a power off and
on. Resetting should be done after changing the configuration, or if the FastPrint
ceases responding after a LAN or printer problem.
Restore factory defaults
Select this option to return all parameters to their factory default settings.
Print test page
Use this option to print a test sheet from the selected FastPrint Server port. The
test page will contain status information.
Settings button
The Settings button will reveal the Setup Options screen:
Figure 34 WebAdmin Setup Options Screen
IP addresses
See IP address configuration on page 23 for details of the IP addresses. You need
to know the FastPrint’s default name.
Note: With the TCP/IP protocol, you must set an IP address before anything else.
FastPrint Server User’s Guide
66
Chapter 8. Management Tools
WPCONFIG
Attach remote
Connect to a FastPrint on another network segment.
Connected protocol
Change the protocol used for communication between the program and the
current FastPrint Server.
8.3. WPCONFIG
WPCONFIG can be run from any Windows PC that has IPX and SPX protocols loaded.
For Windows 95 or NT, the FPSAdmin Program is recommended, because WPCONFIG
does not support the following features.
• Printer configuration
• SNMP configuration
• Internet printing
8.3.1. Installation
1. Run the SETUP program in the Utility\Wpconfig directory on the CD-ROM.
2. Follow the on-screen instructions.
The Setup program will automatically create a WPCONFIG group containing two icons:
WPCONFIG and Readme.
8.3.2. Using WPCONFIG
When run, WPCONFIG searches the network for all active FastPrints, listing them as
shown below.
Figure 35 WPCONFIG Main Screen
FastPrint Server User’s Guide
67
Chapter 8. Management Tools
WPCONFIG
8.3.3. Icons
The icons provide status information as well as access to the selected FastPrint settings.
If an icon is grayed out, that option is unavailable.
Device information
This presents configuration information about the FastPrint in a
scrollable, read-only list.
Printer port status
Shows current printer status (on-line, printing, off-line) for all ports.
NetWare
Configure NetWare with this icon. See NetWare-specific settings on
page 19 for details.
TCP/IP
Initial configuration for TCP/IP must be done with FPSAdmin; later
changes can be made here. See IP address configuration on page 23 for
details.
AppleTalk
See AppleTalk Settings on page 8 for details of these configuration
settings.
NetBEUI
NetBEUI (Windows SMB) changes can be made using this icon.
Normally, there is no need to make any changes. See NetBEUI Settings
on page 59 for details.
Logical Printers
Logical printers can be used under NetWare (see page 21) or Unix (see
page 24).
Refresh
Update the FastPrint listing. You must always do this after changing the
FastPrint Server name or IP address.
Exit
Exit WPCONFIG.
Help
Show WPCONFIG version information.
Set to Default button
This button will restore current screen values to their factory defaults.
Save to Device button
Press this button to save any changes to the FastPrint Server.
Note: Changed values will not be saved until you click this button!
FastPrint Server User’s Guide
68
Chapter 8. Management Tools
WPCONFIG
8.3.4. Menu options
♦ Configuration menu
System
Allows you to change the FastPrint name and to set the LAN protocol(s) used by
the current FastPrint. Only the IPX and your LAN protocol should be enabled.
Note: By default, all protocols are enabled. This allows operation in any
environment, but degrades performance.
Reset device
This should be done after making any configuration changes, or if the FastPrint
stops responding.
Restore factory defaults
This restores all values to the factory defaults. To restore only the current screen,
use the Set to Default button on the screen.
♦ Diagnostics menu
Print test page
Use this option to print a test sheet from the selected FastPrint Server port. The
test printout will include status information.
FastPrint Server User’s Guide
69
Appendix A. Troubleshooting
If your FastPrint Server is not working correctly, follow the
advice in this appendix.
If you encounter printing difficulties, please refer to the Hardware section first, and then
go to the Printing section. If, after following the advice in this chapter, the FastPrint still
does not function properly, please contact your dealer for further advice.
A.1. Hardware
All the FastPrint Server’s LEDs are off.
Check the power supply or power connection.
FastPrint’s status light continuously stays lit.
Reset the FastPrint by unplugging the power supply and plugging it back in.
FastPrint Server status light and power light stay on continuously and
do not turn off.
Reset the FastPrint by unplugging the power supply or by pushing the reset button.
I am using DHCP, and getting an IP address conflict involving the
FastPrint.
If the FastPrint Server is left on, but the DHCP server is turned off, then the FastPrint
will retain its IP address without the DHCP Server being aware of it. Simply reset the
FastPrint so it will obtain a new IP address.
This problem will also arise if you assign a static IP address which is within the range
used by the DHCP server.
If so, use another address which is not within the range used by the DHCP server.
I am using WPCONFIG on Windows 95, and having problems
configuring the FastPrint Server.
WPCONFIG is designed for Windows 3.1 only. For Windows 95/NT, you should use
FPSAdmin.
A.2. Printing - General
When using 10BaseT cabling, the FastPrint Server does not work.
Check the hub’s link LED for the port to which the FastPrint is connected. If it is off,
there is a problem in the network cable.
If using 10BaseT or 100BaseT, check the LED next to the connector. It should be on if
the network connection is OK.
FastPrint Server User’s Guide
70
Appendix A.
Troubleshooting
A printer connected to a FastPrint Server port cannot print or prints
garbage.
Try the following:
• Check the cable connection between the FastPrint and the printer.
• Make sure the printer driver in the application program or Windows matches the
printer.
The Configuration button on the Printer Status screen in FPSAdmin is
grayed out, even though my printer is bi-directional.
The button is unavailable if the printer is busy. You must wait until the printer is idle.
A.3. Printing - AppleTalk
Why do I get an incorrect prin t out?
• You may have chosen binary encoding to print the file. Try to use ASCII encoding.
• Some of the fonts in your print file may not be supported by the printer. If you are
using the LaserWriter 8.1.1 driver, try either LaserWriter 7 or LaserWriter 8.5.1
instead.
I can’t find the FastPrint Server’s name in the Chooser.
Try the following:
1. Make sure that AppleTalk is on (the button next to Active is highlighted in the
Chooser).
2. Make sure the printer has been on and in the READY state for a few minutes.
3. Make sure the printer has not been renamed since its last appearance in the Chooser.
4. If the printer resides on a network with multiple zones, make sure the correct zone is
selected from the AppleTalk Zones box in the Chooser.
My document didn’t print to the right printer.
Check the following:
• Another FastPrint with the same name may have received your print job. Use the
PSTOOL to reconfigure your FastPrint Server name and make sure all FastPrint
Servers have unique names.
• Make sure your application output encode is set to ASCII. If not, change it to ASCII.
My file doesn’t print with the correct fonts.
If you are using the LaserWriter 8.1.1 driver, try either LaserWriter 7 or LaserWriter
8.5.1 instead
My EPS file doesn’t print with the correct fonts.
This problem occurs in some programs. Try downloading the fonts contained in the EPS
file before printing the saved EPS file.
I can’t select the Remaining from: item in the print dialog box.
If you have selected the Layout value, 2 Up, or 4 Up, you cannot access the Remaining
from item. Choose other selections.
FastPrint Server User’s Guide
71
Appendix A.
Troubleshooting
A cover page prints either on the first or last page of the document.
Select one of these solutions:
• Turn the cover page feature off.
• Insert extra page breaks in your document to avoid the cover page printing on the
first or last page of your document.
• If you are using the Apple LaserWriter 8.1.1 driver, install either version 7 or 8.5.1.
Why do I have trouble printing with the LaserWriter 8.1.1?
Your application software may not be compatible with the LaserWriter 8.1.1 driver or
your system may not meet the requirements of the LaserWriter 8.1.1 driver. Use the
Apple LaserWriter 8.5.1 or 7 driver instead.
Why don’t the colors on my printed output match the colors on my
computer screen?
When the printer receives a color file, it tries to match the printed output color to the
color on the computer screen. Sometimes the printer cannot match up the colors as
closely as you want. To alleviate this problem, perform the following steps:
1. Choose Calibrated Color/Grayscale in the Print pop-up menu in the Print Options
dialog box. The printer will make adjustments to match the colors.
2. Check your monitor to make sure all settings (for example, brightness) are adjusted
correctly.
The blue color I chose on my screen is printing out purple.
Choose Calibrated Color/Grayscale in the Print pop-up menu in the Print Options dialog
box.
When I send a print job, I get a PostScript Command error or no print
out.
Check the communication protocols. The computer, FastPrint Server and printer
must all be configured to use the same communication protocol (either binary or
ASCII). To configure your system:
1. Choose the protocol you are going to use. Check your printer as well; it may require
that you use a particular protocol.
2. Set your printer to the correct protocol.
3. Use the computer’s print submenu to configure your computer to use the protocol
(ASCII or binary) you have chosen.
4. Configure the FastPrint Server as described on page 8.
A.3.1. The LaserWriter 8.1.1 driver
Some application programs have incompatibilities with this driver. The following list
describes known problems. If you experience problems, upgrade to the LaserWriter 8.5.1
driver. You may also contact the publisher of the program. A newer version of the
program may be available.
Aldus Freehand 3.11
You cannot print using Layout options in the Print dialog box. If you select a layout
option, the document does not print and no error message appears.
FastPrint Server User’s Guide
72
Appendix A.
Troubleshooting
EPS files created from within Freehand cannot be used in other programs.
Selecting the Unlimited Downloadable Fonts option in the Page Setup option dialog box
results in a PostScript error.
Aldus PageMaker 4.2a
You cannot scale EPS images in documents printed using the Layout option in the Page
Setup dialog box.
Aldus Persuasion 2.1.2
When you print a document that contains gradient fill patterns, the document is printed
with solid patterns instead of gradients.
Documents that contain EPS graphics may not print correctly if you select 2-Up or 4-Up
printing.
Canvas 3.0.6
Printing with substituted fonts may result in incorrect line layout.
Informed Manager 1.3.5
Shaded headings in a document may not print correctly. Some documents will print with
extra pages.
MacDraft 2.1
When you print using the Cut Marks option, a PostScript error results.
Microsoft PowerPoint
In PowerPoint version 2.01f, you cannot import an EPS file created with the Apple
LaserWriter 8.1.1 driver that has been saved without preview information.
When importing EPS files, you may need to increase the memory allocated to the
application.
Microsoft Works 3.0
Printing documents that have rotated objects with rounded corners results in a PostScript
error.
More 3.1
When creating EPS files with the Apple LaserWriter 8.1.1 driver, be sure you have
enough disk space to hold the file.
QuarkXPress 3.11
You cannot print EPS files that contain certain TrueType fonts.
Using Calibrated Color results in a PostScript error.
Studio/8 and Studio/32
For EPS files and the Apple LaserWriter 8.1.1 driver, you must select the QuickDraw
Printer option.
FastPrint Server User’s Guide
73
Appendix A.
Troubleshooting
A.4. Printing - NetWare
My FastPrint Server prints garbage.
The following steps will help to identify the problem:
1. Use PSCONFIG to print a diagnostic file.
(a) Run PSCONFIG and select your FastPrint from the list. Then select Print
Diagnostic Report
(b) Select each port in turn and print a diagnostic report.
(c) Check whether the diagnostic report printed correctly.
If the diagnostic report printed OK, the problem may be caused by incorrect
system configuration. Go to step 2.
If the diagnostic report printout is not OK, check your printer.
If your printer is OK, call your dealer.
2. Print a test text file and a test graphic file. If the text file prints correctly but the
graphic file prints garbage, then specify /NT (no tabs) option for the NPRINT or
CAPTURE commands and print again. If both print incorrectly, go to step 3.
3. Temporarily disable the FastPrint servicing the print queue following the step-by-step
instructions below:
• NetWare 2.x and 3.x
(a) Run PCONSOLE. Select Print Queue Information, select the print queue that the
FastPrint Server services, and then select Current Queue Status.
(b) Set Servers can service entries in queue to NO.
(c) Press Esc and select Print Queue ID. Record its queue ID.
(d) Send your test files to the print queue using normal print commands.
• NetWare 4.x bindery and NDS modes
(a) Run PCONSOLE. Select Print Queues, select the print queue that your FastPrint
services, and then select Status.
(b) Set Allow service by current print servers to NO.
(c) Press Esc and select Information, and record its queue ID.
(d) Send your test files to the print queue using normal print commands.
4. Re-route network printing to local printing.
(a) Disconnect the printer attached to your FastPrint and connect it to LPT1 of your
PC.
(b) Change to the drive and then the directory on the file server that contains the
print queue. The directory will have the name of the queue ID (e.g. \queues\Q_ID
for NDS mode or system\Q_ID for bindery mode).
5. The test files you printed in step 3 should be in the queue directory. Print these files
to the local printer using the COPY command with the /b option.
example:
Copy /b test.txt LPT1
6. Compare the printouts from the PC and the FastPrint Server.
If the printouts are the same, then the problem is not the FastPrint. The problem
might be that an incorrect printer driver was chosen or the timeout setting in the
CAPTURE command is too short.
If the printouts are not the same, there may be a problem with the FastPrint. Call
your dealer.
FastPrint Server User’s Guide
74
Appendix A.
Troubleshooting
7. Re-enable queue service.
(a) Disconnect the printer attached to LPT1 of your PC and connect it to your
FastPrint.
(b) For NetWare 2.x or 3.x, run PCONSOLE and select Print Queue Information.
Then select the print queue and select Current Queue Status. Set Servers can
service entries in queue to YES.
For NetWare 4.x bindery and NDS modes, run PCONSOLE and select Print
Queues. Then select the print queue and select Status. Set Allow service by
current print servers to YES.
My FastPrint Server does not appear in PSCONFIG’s Active Device List.
• Ensure that the FastPrint Server is on the same network segment as your PC.
• Load the NetBEUI protocol on your PC, so that PSCONFIG can try connecting using
NetBEUI. Once connected, check the following:
• The NetWare protocol must be enabled.
• The Ethernet frame type of your PC may not be the same as your FastPrint’s.
Enable all Ethernet frame types.
My FastPrint Server is configured as a Novell Print Server, and cannot
log in to a file server.
The following steps may solve this problem:
1. Get the FastPrint information using PSCONFIG. If the FastPrint is configured as a
Novell Print Server, the information will look like the following:
Server Name: SC110049
NetWare Information:
Master File Server: ICE
Print Server Mode Status:
Your_File_Server: Current Status
Remote Printer Mode Status: N/A
2. Make sure the master file server name is assigned correctly.
3. Check the current status of Your_File_Server:
Connected:
No action required
No file server:
Assign a master file server using PSCONFIG
Connecting to Server:
Wait and check whether the file server exists
Password Mismatch
Clear the NetWare password with PCONSOLE, or use WPCONFIG or
FPSAdmin to set the correct password for the FastPrint Server.
FastPrint Server Not Defined
Install the FastPrint again
4. Check NetWare to see whether the login status of the FastPrint to the file servers is
Ready. If it isn’t, check the error message and perform the required corrective action.
5. Check the Novell file server's name. If it is over 20 characters long, rename it using
no more than 20 characters.
FastPrint Server User’s Guide
75
Appendix A.
Troubleshooting
6. If the file server is not in the status list and the FastPrint Server has logged into the
master file server, it means that the file server has not been serviced by the FastPrint.
Check to see if the file server is in the list of File Server To Be Serviced item of
PCONSOLE. If not, insert the file server name to the list.
My FastPrint Server is configured as a Novell Remote Printer, and
can’t log in to the Novell Print Server.
1. Get the FastPrint Server information as described in “My printer is configured as a
Novell Print Server”, above.
2. Check the fields after the following.
Remote Printer Mode Status:
For each logical printer, there will be a status entry. The status will be one of the
following.
Connected:
No action required
Unable to find server:
Load NetWare Print Server.
Connecting to server:
Wait and check whether the NetWare Print server is loaded
Printer not defined
Install the FastPrint Server as a remote printer of a NetWare Print
Server.
3. Check NetWare to see whether the FastPrint Server is ready. If it is not, check the
error message and perform the required corrective action.
4. Check the NetWare Print Server's name. If it is over 20 characters, rename it using
no more than 20 characters.
My FastPrint Server cannot print the jobs sent to the print queue.
1. Check whether the printer attached to the FastPrint is on-line.
2. Check whether your FastPrint Server is logged into the file server. (See “My printer
is configured as a Novell Print Server”, above.)
3. Check the current status of the queue.
Run PCONSOLE and select Print Queue Information. Then select the queue and
select Current Queue Status. See if there are three YES’s. If not, set them to YES.
4. Check whether the NetWare printer number is correct.
0 = parallel port 1 of the FastPrint.
1 = parallel port 2 of the FastPrint.
2 = parallel port 3 of the FastPrint
5. Check to see if the FastPrint Server is a static queue server to the queue.
Run PCONSOLE and select FastPrint Server Information. Then select FastPrint
Server Configuration and select Queues Serviced by Printer. Select your desired
printer and check whether the queue is on the list. If it is not, insert the queue into
the list by pressing [Insert] key and select the queue. Then reset the FastPrint to
service the new queue.
6. The total number of queues to be serviced may be over the limit of 56. If so, reduce
the number of queues.
FastPrint Server User’s Guide
76
Appendix A.
Troubleshooting
I used the Capture command to print a job, but the job was separated
into two parts.
The timeout setting in the Capture command may be too short. You should increase the
timeout value of the Capture command.
Use the option /TI=n of the Capture command to increase the time out value, where n is
the value of timeout.
PSCONFIG shows "No Response."
This may be due to the following:
• The network traffic is busy now. Wait for a minute and then try it again.
• The FastPrint is not powered on. Power it on.
• The network cable is disconnected. Check the cable.
• The node address of the FastPrint may be the same as the node address of another
device on the network.
QUICKSET timed out while checking if the FastPrint Server had logged
in to the file servers.
This means that the FastPrint Server did not log in the master file server. It might be
that the Ethernet frame types do not match.
1. Try to find a workstation that uses the same frame type as the FastPrint so that
PSCONFIG can see the FastPrint. Or load the NetBEUI protocol on your PC and use
WPCONFIG to connect to the FastPrint Server.
2. Set the FastPrint’s frame type to the frame type that the master file server uses and
disable all other frame types.
I cannot receive Notify message in NetWare 4.x environment.
1. Make sure you are a Notify member of the FastPrint.
2. Run NetAdmin and set the name of the Default Server to receive notification.
I cannot use PCONSOLE to see Printer Status. or
The current server status in FastPrint Server Information is showing
Down in the NetWare 4.x environment.
It may be that you created the Print Server object in NetWare 3.x environment and used
PCONSOLE in NetWare 4.x to view the status. Try the following:
1. Make sure the FastPrint is ON.
2. Delete the Print Server object of the FastPrint.
3. Install the FastPrint again in NetWare 4.x NDS environment.
The “String Before Job” and/or “String After Job” settings in the
logical printers don’t work properly.
• Check the length of the control strings. No string can exceed 15 characters.
• Check that the control strings are in HEX.
A.5. Printing - Unix
FastPrint Server is not recognized.
Check the following:
FastPrint Server User’s Guide
77
Appendix A.
Troubleshooting
• There are no routers between the FastPrint and the UNIX host during IP address
assignment.
• Every NetWare file server must have TCP/IP support between the FastPrint and the
UNIX host.
• The network cable to be used by the FastPrint Server is intact. Connect the cable to
another network device and test it.
• You have used the correct physical address derived from the FastPrint default name.
• Use the ping command to see if the FastPrint Server is a valid device on the network.
The standard interface program on SUN 5.2 cannot be used with
Psfilter.
Use dumb_int.sh which is the interface program shipped with FastPrint.
When the interface program detects that the printer device is not a
printer, a printer error message appears on the screen.
Mark out all stty commands in the interface script.
The .psopts file format is not accepted by BSD UNIX.
If the prefix string and suffix string must contain control words or are too long, use
headfile or tailfile instead of prefix string or suffix string.
The FastPrint Server’s IP address has been forgotten, and it needs to
be installed in a new environment.
Follow the steps below to set the FastPrint Server configuration back to the factory
default settings:
1. Enter the command:
arp -s yyy.yyy.yyy.yyy 00:c0:02:xx:xx:xx
where:
yyy.yyy.yyy.yyy is the new IP address assigned to the FastPrint Server and xx:xx:xx
is the default name of the FastPrint Server, without the leading “SC”.
Combined with 00:c0:02, this gives the hardware address of the FastPrint Server.
2. Enter the commands:
ftp yyy.yyy.yyy.yyy
ftp>get DEFAULTC
ftp>quit
This will reset the configuration to the factory defaults (including setting the IP
address back to 0.0.0.0).
3. Reconfigure as for a new FastPrint.
While printing via FTP, I receive an error message:
Invalid print queue
Print queue not ready
• Check that the printer is ready.
• Check that logical printer(s) are defined on the FastPrint. With FTP, you can print
ONLY to a logical printer.
• Reset the FastPrint.
FastPrint Server User’s Guide
78
Appendix A.
Troubleshooting
I can’t print using LPD.
Try printing with FTP. If this works, the problem is the LPD daemon on your UNIX
host. Reconfigure the remote printer and the LPD daemon. Check the following points:
• The remote host name is the name of the FastPrint.
• The remote printer name is the logical printer name on the FastPrint Server (e.g.,
L1).
• If your UNIX asks for the LPD type, be sure to identify the service type as BSD.
I can’t print using PSfilter,
Run PSfilter directly with the command:
PSfilter -D P_name -v <file_name&
where:
P_name is the FastPrint’s name
file_name is the file you wish to print.
If this fails, check for an error log file (e.g. PSErrLog XXXXX) in the /tmp directory. If
there is not an error log file, recompile PSfilter.
Also, check the Troubleshooting section of the Psfilter .TXT file for your system.
The “String Before Job” and/or “String After Job” settings in the
logical printers don’t work properly
• Check the length of the control strings. No string can exceed 15 characters.
• Check that the control strings are in HEX.
A.6. Printing - Windows
When printing from some software applications such as PowerPoint, it
takes a long time and the printout is incorrect.
The problem is that the printer has been configured to Start printing after the first
page is spooled. To change this setting:
1. Go to Control PanelèPrinters and click on your printer.
2. Then select FileèPropertiesèDetails.
3. When the Details screen appears, click the Spool Settings button.
4. When the Spool Settings dialogue box appears, choose Start printing after last page
is spooled and click OK.
While adding my printer as instructed in Windows 95, I received a
message stating that Printer could not be found.
Some printer drivers, when configured as a local printer, will poll the printer to see if it
is connected. Since the printer is networked, the printer can’t be detected. To fix this,
perform the following steps:
1. Select Network printer when asked How is the printer attached to your computer?
When prompted for Network Path or Queue name, enter a dummy value such as
\\54321 and select Next The printer wizard will display a message stating the
Network Printer is off-line. Continue to install the printer as you normally would.
2. When finished, go to Control PanelèPrinters and select your printer. The printer
icon will be grayed out indicating the printer is not ready. Select PropertiesèDetails.
FastPrint Server User’s Guide
79
Appendix A.
Troubleshooting
In the Print to the following port box, select FastPrint Server. Click Apply, then OK,
then close the Properties window.
3. Select the printer and go to the File menu. Check the Work off-line option is OFF.
4. If the printer is connected and powered On, the printer icon should no longer be
grayed out, and you should be able to print.
I connected and configured a WPS (Windows Printing System) printer
as described, but I can’t get the print job to print.
WPS printer drivers poll the printer before sending print data. Since the printer is
networked, the printer is not found and no data is sent. The solution is to add your
printer as a network printer as described in “While adding my printer as instructed …”
above. The following lists some common WPS printers:
Canon LBP-430W
Epson EPL-5500/W
Epson ActionLaser 1300/W
HP LaserJet 5L
Lexmark WinWriter Series
NEC SuperScript series Olivetti PG304
Samsung MyLaser Series
A.7. Internet Printing
I don’t know my mail server’s IP address.
Use the PING command to connect to the Mail Server by name.
Example
ping ms.hinet.net
The reply will say
Reply from xxx.xxx.xxx.xxx
where: xxx.xxx.xxx.xxx is the IP address of the Mail Server.
Plain text e-mails are not printed.
Text e-mail messages are printed only if the FastPrint Server is configured with Print
every e-mail ON.
Plain text e-mails print OK, but if I include an attachment, I get an email reply “Wrong Encoding Method”.
The Internet Printer system supports only Base64 encoding. Using the Internet Printing
Port driver will ensure a correctly encoded attachment.
A print job is printing garbage.
Users must use the correct printer driver. The print job can be canceled using the
Control - Abort Mail Print Job menu option in the FPSAdmin program.
Two print jobs are printing on the same page.
Change the port used for Internet Printing from a physical port to a logical port (printer).
Configure the logical printer so that the String after Job contains a FF (form feed,
decimal 12 or 0C in hex). See page 24 for details of logical printers.
The print job seemed to go through OK, but it was never received.
Check the e-mail address. If you use more than one internet printer with the same printer
driver, ensure that you use the correct port each time you print.
FastPrint Server User’s Guide
80
Appendix A.
Troubleshooting
Only the banner page was printed.
• This could be the same problem as “Plain text e-mails are not printed” on page 79.
• This could also be caused by using the wrong encoding method. Ask the user to use
the InterNet Printing Port.
The banner page is not correct; the first row has disappeared.
This may be caused by the previous print job not sending a form feed after finishing
printing.
Try sending print jobs to a logical printer with a post string of FF (form feed; 0C in hex).
To do this, define the logical printer, and set the port used for Internet Printing to this
logical printer. See page 24 for details of logical printers.
A.8. WebAdmin
WebAdmin doesn’t find all items within the “NDS Tree Names” and
“Master File Servers”.
This occurs only with IPX/SPX. The solution is to manually enable all 4 Ethernet frame
types - Ethernet II, SNAP, 802.3, and 802.2.
WebAdmin won’t run on my browser.
Check the following:
• Is your LAN/WAN connection OK?
• Is the URL correct? (Was WebAdmin installed in a directory other than the default?)
• Is the program name correct?
webadmin.exe?application/x-msdownload
• Is the alias name “webadmin” set correctly?
The screen contents have become scrambled.
Click on any button or link to update it, or use your Browser’s “Refresh” command.
The picture on the home screen doesn’t change.
The picture is an animated GIF. Older browsers do not support animated GIFs.
FastPrint Server User’s Guide
81
Appendix B. Specifications
FastPrint Server
Power consumption
5W max.
External power adapter
12V DC
LEDs
3
Parallel port
Three Centronic female DB-25 connectors
Ethernet cables
10BaseT, 100BaseT
Environmental Specifications
Operating temperature
0 ~ 40°C
Storage temperature
-10 ~ 70°C
Shipping temperature
-40 ~ 70°C
Operating humidity
10 ~ 80%
Storage humidity
5 ~ 90%
Shipping humidity
5 ~ 100%
Parallel Port Pin Assignments
Pin
Signal Name
Direction
1
-Strobe
To printer
2
+Data 0
To printer
3
+Data 1
To printer
4
+Data 2
To printer
5
+Data 3
To printer
6
+Data 4
To printer
7
+Data 5
To printer
8
+Data 6
To printer
9
+Data 7
To printer
10
- ACK
To server
11
+ Busy
To server
12
+ Paper End
To server
13
+ Select
To server
14
- Auto Feed
To printer
15
- Error
To server
16
- Init
To printer
17
- Select In
To printer
GND
Ground
18-25
FastPrint Server User’s Guide
82
Appendix C.
Configuration File Format
Appendix C.
Configuration File Format
The following table shows the CONFIG file details. It contains the following
information:
♦ Default line
The line as obtained from the FastPrint Server. Each line has the following
structure:
Line_number Token:Parameter
where:
Line_number is a system parameter and must not be changed.
Token is a readable identifier for the line.
Parameter is the current setting. A colon separates the Token from the
Parameter.
♦ Allowable values
This column lists the values that may be used for the Parameter. The following
items are used:
Text[n], where n is a number, indicates a text field with a maximum length of n
characters.
Numeric[0..n], where n is a number, indicates the acceptable range of values for
a numeric field.
Access Code, where the allowable values are: Read Only, Read/Write, Not
Accessible.
♦ Description
Explains the purpose of the parameter.
Default Line
Allowable
Values
Description
0001 BOX_NAME:SCxxxxxx
0011 IPXSPX_P:Enable
0012 TCPIP_P :Enable
0013 APTALK_P:Enable
0014 NETB_P:Enable
0100 L1_PROUT:P1
0101 L1_PREST:
0102 L1_POSTR:
0103 L1_CHGLF:No
0120 L2_PROUT:P1
0121 L2_PREST:
0122 L2_POSTR:
Text [19]
Enable, Disable
Enable, Disable
Enable, Disable
Enable, Disable
P1, P2, P3
Text [15] (hex)
Text [15] (hex)
Yes, No
P1, P2, P3
Text [15] (hex)
Text [15] (hex)
FastPrint Server name
NetWare protocol
TCP/IP protocol
AppleTalk protocol
NetBEUI protocol
Port used by logical printer 1
Pre-string LP 1
Post-string LP 1
Convert LF to LF/CR
Port used by logical printer 2
Pre-string LP 2
Post-string LP 2
FastPrint Server User’s Guide
83
Appendix C
Configuration File Format
Default Line
Allowable
Values
Description
0123 L2_CHGLF:No
0140 L3_PROUT:P1
0141 L3_PREST:
0142 L3_POSTR:
0143 L3_CHGLF:No
0160 L4_PROUT:P1
0161 L4_PREST:
0162 L4_POSTR:
0163 L4_CHGLF:No
0180 L5_PROUT:P1
0181 L5_PREST:
0182 L5_POSTR:
0183 L5_CHGLF:No
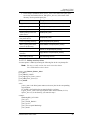
0200 L6_PROUT:P1
0201 L6_PREST:
0202 L6_POSTR:
0203 L6_CHGLF:No
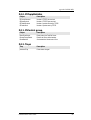
0220 L7_PROUT:P1
0221 L7_PREST:
0222 L7_POSTR:
0223 L7_CHGLF:No
0240 L8_PROUT:P1
0241 L8_PREST:
0242 L8_POSTR:
0243 L8_CHGLF:No
2000 NOP_MODE:PS
Yes, No
P1, P2, P3
Text [15] (hex)
Text [15] (hex)
Yes, No
P1, P2, P3
Text [15] (hex)
Text [15] (hex)
Yes, No
P1, P2, P3
Text [15] (hex)
Text [15] (hex)
Yes, No
P1, P2, P3
Text [15] (hex)
Text [15] (hex)
Yes, No
P1, P2, P3
Text [15] (hex)
Text [15] (hex)
Yes, No
P1, P2, P3
Text [15] (hex)
Text [15] (hex)
Yes, No
PS, RP
2001 NFREthII:Enable
2002 NFR802.2:Enable
2003 NFR802.3:Enable
2004 NFRSNAP :Enable
2101 NFS_NAME:
2102 N_NOTIFY:No
2103 N_FREQ :1
2110 NDS_TREE:
2111 NCONTEXT:
2501 NR_NAME1:
2502 NR_NAME1:
2504 NR_NAME1:
3000 AP_ZONE:*
Enable, Disable
Enable, Disable
Enable, Disable
Enable, Disable
Text [20]
Yes, No
Numeric [0..255]
Text [39]
Text [235]
Text [19]
Text [19]
Text [19]
Text [19]
Convert LF to LF/CR
Port used by logical printer 3
Pre-string LP 3
Post-string LP 3
Convert LF to LF/CR
Port used by logical printer 4
Pre-string LP 4
Post-string LP 4
Convert LF to LF/CR
Port used by logical printer 5
Pre-string LP 5
Post-string LP 5
Convert LF to LF/CR
Port used by logical printer 6
Pre-string LP 6
Post-string LP 6
Convert LF to LF/CR
Port used by logical printer 7
Pre-string LP 7
Post-string LP 7
Convert LF to LF/CR
Port used by logical printer 8
Pre-string LP 8
Post-string LP 8
Convert LF to LF/CR
NetWare mode
Print Server (PS) or remote printer (RP)
Ethernet II frame type
802.2 frame type
802.3 frame type
SNAP frame type
Master file server
Notification by node address
Polling queue interval
NDS tree name
NDS context
NetWare Print Server for parallel port 1
NetWare Print Server for parallel port 2
NetWare Print Server for parallel port 3
AppleTalk zone
FastPrint Server User’s Guide
84
Appendix C.
Configuration File Format
Default Line
Allowable
Values
Description
3001 AP_TYPE1:
LaserWriter
3002 AP_TYPE2:
LaserWriter
3004 AP_TYPE4
LaserWriter
3101 AP_PCOMM1:No
Text [19]
Printer type for parallel port 1
Text [19]
Printer type for parallel port 2
Text [19]
Printer type for parallel port 3
Yes, No
3102 AP_PCOMM2:No
Yes, No
3104 AP_PCOMM4:No
Yes, No
4000 IP_ADDR:0.0.0.0
4001 GATEWAY:0.0.0.0
4002 MASK :0.0.0.0
4010 TCP_INT:2
4011 TCP_CNT:254
4100 MAIL_IP:0.0.0.0
4101 MAIL_ACC:
4102 MAIL_PAS:********
4103 MAIL_INT:0
4104 MAIL_BAN:No
4105 MAIL_RED:
4106 MAIL_POR:P1
IP address
IP address
IP Mask
Numeric [0..255]
Numeric [0..255]
IP address
Text [19]
Text [19]
Numeric [0..64K]
Yes, No
Text [19]
P1..P3
L1..L8
Yes, No
Yes, No
Text [19]
Text [19]
Yes, No
Numeric [0..255]
Text [31]
Text [31]
IP address
Access Code
ASCII (No) or binary (Yes)
communication for parallel port 1
ASCII (No) or binary (Yes)
communication for parallel port 2
ASCII (No) or binary (Yes)
communication for parallel port 3
FastPrint Server IP address
Gateway
Subnet mask
Delay before reconnection attempt
No. of reconnection attempts.
Mail A/C IP address
Mail A/C name
Mail A/C password
Check mail interval
Mail banner page
Mail A/C name for redirection
Printer port (physical or logical) for
Internet (mail) printing
Print every e-mail
Notify mail printed
Mail printer model
NetBEUI group (domain) name
Abort print job if error
Delay time
SNMP person
Contact location
Management station 1
Access rights
Text [7]
IP address
Access Code
Community string
Management station 2
Access rights
Text [7]
Community string
4107 MAIL_EVR:No
4108 MAIL_NOT:No
4109 MAIL_MOD:
5000 SMBGNAME:
5001 SMBDROP:No
5002 SMBDELAY:0
6000 CONTACT:
6001 LOCATION:
6011 M1_IP:0.0.0.0
6012 M1_ACCP:
Not Accessible
6013 M1_CSTR:
6021 M2_IP:0.0.0.0
6022 M2_ACCP:
Not Accessible
6023 M2_CSTR:
FastPrint Server User’s Guide
85
Appendix C
Configuration File Format
Default Line
Allowable
Values
Description
6031 M3_IP:0.0.0.0
6032 M3_ACCP:
Not Accessible
6033 M3_CSTR:
6041 M4_IP:0.0.0.0
6042 M4_ACCP:
Not Accessible
6043 M4_CSTR:
6111 T1_IP:0.0.0.0
6112 T1_S:0
6113 T1_CSTR:
6114 T1_ENAB:Disable
6121 T2_IP:0.0.0.0
6122 T2_S:0
6123 T2_CSTR:
6124 T2_ENAB:Disable
6131 T3_IP:0.0.0.0
6132 T3_S:0
6133 T3_CSTR:
6134 T3_ENAB:Disable
6141 T4_IP:0.0.0.0
6142 T4_S:0
6143 T4_CSTR:
6144 T4_ENAB:Disable
IP address
Access Code
Management station 3
Access rights
Text [7]
IP address
Access Code
Community string
Management station 4
Access rights
Text [7]
IP address
Numeric [0.2]
Text [7]
Enable, Disable
IP address
Numeric [0.2]
Text [7]
Enable, Disable
IP address
Numeric [0.2]
Text [7]
Enable, Disable
IP address
Numeric [0.2]
Text [7]
Enable, Disable
Community string
Trap 1 address
Severity level
Community string
Trap receive station 1
Trap 2 address
Severity level
Community string
Trap receive station 2
Trap 3 address
Severity level
Community string
Trap receive station 3
Trap 4 address
Severity level
Community string
Trap receive station 4
FastPrint Server User’s Guide
86
Appendix D. SNMP MIB
D.1. PSSystemConfig group
Object
Description
PrintServerName
NetwareProtocol
TcpipProtocol
AppleTalkProtocol
NetbeuiProtocol
The name of the FastPrint Server; default is SCxxxxxx.
Netware protocol stack status.
TCP/IP protocol stack status.
AppleTalk protocol stack status.
Netbeui protocol stack status.
D.2. PSLogicalPrinterConfig group
Object
Description
LP1PhysicalPort
LP1PreString
LP1PostString
LP1LFChange
LP2PhysicalPort
LP2PreString
LP2PostString
LP2LFChange
LP3PhysicalPort
LP3PreString
LP3PostString
LP3LFChange
LP4PhysicalPort
LP4PreString
LP4PostString
LP4LFChange
LP5PhysicalPort
LP5PreString
LP5PostString
LP5LFChange
LP6PhysicalPort
LP6PreString
LP6PostString
LP6LFChange
LP7PhysicalPort
LP7PreString
LP7PostString
LP7LFChange
LP8PhysicalPort
LP8PreString
The physical port of logical printer 1.
The string sent to logical printer 1 whenever a job begins.
The string sent to logical printer 1 whenever the job ends.
Convert LF to LF+CR status.
The physical port of logical printer 2.
The string sent to logical printer 2 whenever a job begins.
The string sent to logical printer 2 whenever the job ends.
Convert LF to LF+CR status.
The physical port of logical printer 3.
The string sent to logical printer 3 whenever a job begins.
The string sent to logical printer 3 whenever the job ends.
Convert LF to LF+CR status.
The Physical port of logical printer 4.
The string sent to logical printer 4 whenever a job begins.
The string sent to logical printer 4 whenever the job ends.
Convert LF to LF+CR status.
The physical port of logical printer 5.
The string sent to logical printer 5 whenever a job begins.
The string sent to logical printer 5 whenever the job ends.
Convert LF to LF+CR status.
The physical port of logical printer 6.
The string sent to logical printer 6 whenever a job begins.
The string sent to logical printer 6 whenever the job ends.
Convert LF to LF+CR status.
The physical port of logical printer 7.
The string sent to logical printer 7 whenever a job begins.
The string sent to the printer 7 whenever the job ends.
Convert LF to LF+CR status.
The physical port of logical printer 8.
The string sent to logical printer 8 whenever a job begins.
FastPrint Server User’s Guide
87
Appendix DSNMP MIB
LP8PostString
LP8LFChange
The string sent to logical printer 8 whenever the job ends.
Convert LF to LF+CR status.
D.3. PSNetwareConfig group
Object
Description
FrameethernetIIEnable
Frame802-2Enable
Frame802-3Enable
FrameSnapEnable
OperationMode
EthernetII frame type status
Ethernet 802.2 frame type status
Ethernet 802.3 frame type status
Ethernet 802.2 SNAP frame type status
The current Netware operation mode. PS: Print Server
mode, RP: Remote Printer mode.
The name of the file server that the FastPrint will connect
to first. The master file server contains all the information
that the FastPrint needs, including a list of all other file
servers to be serviced. (Netware 2.x, 3.x)
The NDS tree name for Netware Print Server to login into.
(Netware 4.x)
The NDS context where the Print Server's object belongs.
The Netware Print Server polling interval. The range is 1255 minutes.
When the job ends, Print will notify the user by the
connection ID.
The Netware Print Server to connect to for parallel port 1,
when the FastPrint is operating as a remote printer.
The Netware Print Server to connect to for parallel port 2,
when the FastPrint is operating as a remote printer.
The Netware Print Server to connect to for parallel port 3,
when the FastPrint is operating as a remote printer.
MasterFileSrvrName
NDSTreeName
NDSContext
NetwareQPollingInterval
JobNotifyByConnID
NetwarePrintServerP1
NetwarePrintServerP2
NetwarePrintServerP3
D.4. PSTcpipConfig group
Object
Description
IPAddr
GatewayAddr
SubnetMask
The FastPrint Server’s IP address.
The default gateway IP address.
The subnet network mask.
D.5. PSAppleTalkConfig group
Object
Description
AppleTalkZone
PrinterTypeP1
PrinterTypeP2
PrinterTypeP3
BinaryCommEnableP1
The zone name where the FastPrint Server is located.
The printer driver type for parallel port 1.
The printer driver type for parallel port 2.
The printer driver type for parallel port 3.
Binary communication protocol status. When disabled, the
data is transparently sent to the printer.
Binary communication protocol status. When disabled, the
data is transparently sent to the printer.
BinaryCommEnableP2
FastPrint Server User’s Guide
88
Appendix D. SNMP MIB
BinaryCommEnableP3
Binary communication protocol status. When disabled, the
data is transparently sent to the printer
D.6. PSNetbeuiConfig group
Object
Description
SMBGroupName
SMBdropJob
SMBDelayInterval
SMB group name.
Do you want to drop the job when printer is out of paper?.
SMB delay interval.
D.7. PSStatus group
Object
Description
SystemInfo
This field contains the system information, including the
F/W version, hardware address and current protocol status
settings.
This field shows the current printer status.
Displays the device ID for each of the supported ports.
PrinterStatus
PrinterInfo
D.8. PSIPXStatistics
Object
Description
IPXPrintJobServiced
IPXBytesServiced
IPXEtherIIPacketReceived
IPX8022PacketReceived
Number of NetWare jobs serviced.
Number of NetWare data bytes serviced.
Number of IPX packets received of EthernetII frame type.
Number of IPX packets received of Ethernet 802.2 frame
type.
Number of IPX packets received of Ethernet 802.3 frame
type.
Number of IPX packets received of Ethernet 802.2 SNAP
frame type.
Number of IPX packets sent of EthernetII frame type.
Number of IPX packets sent of Ethernet 802.2 frame type.
Number of IPX packets sent of Ethernet 802.3 frame type.
Number of IPX packets sent of Ethernet 802.2 SNAP
frame type.
IPX8023PacketReceived
IPXSnapPacketReceived
IPXEtherIIPacketSend
IPX8022PacketSend
IPX8023PacketSend
IPXSnapPacketSend
D.9. PSAppleTalkStatistics
Object
Description
APPrintJobServiced
APBytesServiced
APPacketReceived
APPacketSend
Number of AppleTalk jobs serviced.
Number of AppleTalk bytes serviced
Number of packets received by AppleTalk.
Number of packets sent by AppleTalk.
FastPrint Server User’s Guide
89
Appendix DSNMP MIB
D.10. PSTcpipStatistics
Object
Description
IPPrintJobServiced
IPBytesServiced
IPPacketReceived
IPPacketSend
Number of TCP/IP jobs serviced.
Number of TCP/IP bytes serviced.
Number of packets received by TCP/IP.
Number of packets sent by TCP/IP.
D.11. PSControl group
Object
Description
ResetPrinterServer
RestoreFactoryDefault
ResetStatistics
Reset (reboot) the FastPrint Server.
Restore the factory default settings.
Set the statistics counter back to zero.
D.12. Traps
Trap
Description
printserverTrap
Printer status changed.
FastPrint Server User’s Guide
90