1
III. Affixing the panel sheet
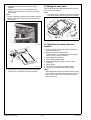
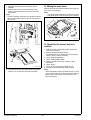
4. Open the tabs of the slot of the MFP board
(MFPB).
5. Making sure of the correct orientation of the
memory, insert the memory into the slot of the
MFP board.
Note:
Push the memory all the way into position until the
tabs on both sides of the slot fit into the cutouts in
the memory.
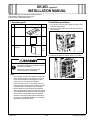
Affix the panel sheet furnished with this kit to the surface of the control panel.
Note:
• The panel sheet is affixed on customer request.
• The panel sheet must be kept by the customer.
A0YDIXC004DA
IV. Check after the memory has been
Installed
A0YDIXC003DA
1. Plug the power cord into the power outlet and
turn on the machine.
2. Display the Service Mode screen.
(For details of how to display the Service Mode
screen, see the service manual.)
3. Touch “State Confirmation.”
4. Touch “Memory/HDD State.”
5. Make sure that the volume of memory was
increased.
6. Touch “END.”
7. Touch “Exit” on the Service Mode screen.
8. Turn OFF and ON the Main Power Switch.
Note:
When displayed the Service Mode screen, be sure
to turn off the main power after exiting the Service
Mode screen and wait for 10 seconds or more
before turning on.
Tab
A06HIXC003DB
6. To install the covers and other parts removed in
steps 2 to 3, reverse the removal procedure.
Installation Manual
E-4
Y110491-4