1
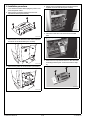
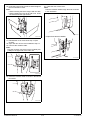
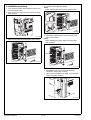
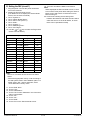
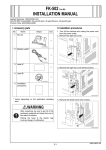
8. Remove the left shield cover (two screws).
Note:
When installing the FAX kit to add a line, remove
the right shield cover.
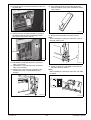
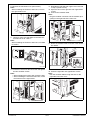
11. Reinstall the right side rear upper cover removed
in step 7 (three screws).
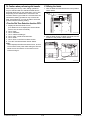
12. Open the door of the right side rear upper/lower
covers.
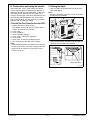
13. Connect the modular cable.
Note:
Plug the modular connector into the modular jack
(LINE) on the right side of the main unit.
A0P0IXC001DA
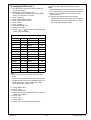
9. Check to make sure that SW2 on the FAX control board is set to “LINE-1.”
Note:
When installing the FAX kit to add a line, set SW2
to LINE-2.
A0P0IXC003DA
14. Route the modular cable as shown in the illustration below.
4037IXC166DC
A0P0IXC004DB
10. Insert the FAX kit into the left socket and tighten
the two shoulder screws.
Note:
• When inserting the board, align it with the slits.
• When installing the FAX kit to add a line, insert
the FAX kit into the right socket.
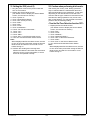
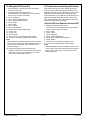
15. Close the right side rear upper/lower covers.
Note:
Run the modular cable through the hole on the
right side rear lower cover.
A0P0IXC005DA
A0P0IXC002DA
Y110431-2
E-11
Installation Manual