1
4
zolo installation manual
2.0. Preparing and mounting the PROTECT Fog Cannon
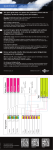
By scanning this QR code with a smartphone
you can watch the short installation video
about ZOLO. The video is also available on
www.protectglobal.com/zolo.
Insert and connect the ZOLO Communication
Card into the fog cannon.
1
2
The enclosed PCB attached to a wire (ZOLO
Communication Card) is placed on the rear
metal plate of the fog cannon (it is magnetic)
and is wired to the PCB of the fog cannon*. Turn
PCB-side away from the heating element. See
diagrams for correct connection on page 5 and 6.
*Models PROTECT FOQUS, 600i, 1100i and 2200i.
PROTECT QUMULUS: See special quick guide following the product.
Connect the verifying PIR sensor to the PCB
and the fog cannon.
3
Take the wire of the enclosed PIR sensor/verifying sensor, through the hole in the rear metal
plate of the fog cannon – and connect the wire
to the PCB of the fog cannon. See diagrams for
correct connection on page 5 and 6.
Connect the antenna to the ZOLO Communication Card.
Take the wire of the enclosed antenna through
the hole in the rear metal plate of the fog cannon – and connect it to the ZOLO Communication Card.
4