1
TM
Model No.: 03702 , 03712, 03722
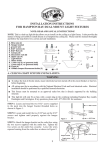
INSTALLATION INSTRUCTIONS
FOR HAMPTON BAY DUAL MOUNT LIGHT FIXTURES
NOTE: READ AND SAVE ALL INSTRUCTIONS!
NOTE: This is a dual use light kit that allows you to install it to the ceiling as a light fixture. It also provides the
feature of being convertible to install directly to a Hampton Bay ceiling fan. Please read this manual thoroughly
and follow the steps below for a correct and safe installation.
A. Wire connectors (2)
B. Circular Strap with ground screw
C. Ground wire
D. Mounting screw (2)
E. Small Hex Nuts (2)
F. Canopy (1)
G. Decorative nuts (2)
H. Upper cap (1)
I. Light fixture
J. Glass shade
K. Lower cap (3, w/ grommet hole)
K1. Glass Lower cap (1, w/ grommet hole)
L. Lower cap (3, no grommet hole)
M. Finial (3)
M1. Plastic Finial (1)
N. 13 Watt compact fluorescent bulbs (2)
O. Outlet Box screw (2)
P. Lock washer (2)
Q. Hex Nut (1)
R. Pull chain (2)
A
H
K
B
I
C
K1
O
L
D
M
E
J
M1
R
N
P
Q
F
Remark: Part shapes of J, K, L and M
will vary per each actual model.
G
A. CEILING LIGHT FIXTURE INSTALLATION:
WARNING
To reduce the risk of electric shock, insure electricity has been turned off at the circuit breaker or fuse box
before beginning.
All wiring must be in accordance with the National Electrical Code and local electrical codes. Electrical
installation should be performed by a qualified licensed electrician.
This fixture must be mounted to an approved outlet box that is directly supported by the building structure.
This light kit will only fit on Hampton Bay listed fans. If any question, please call 1-877-898-1881 for
assistance.
STEP 1: Locate and thread the two mounting screws
supplied in the pack into the circular strap threaded holes
as shown in Figure 1.
STEP 2: Locate and install the two small hex huts on the
mounting screws and tighten until properly against the
circular strap.
STEP 3: Attach the circular strap on the outlet box using
the two outlet box screws supplied in the pack. Tighten
the two outlet box screws securely. Leave the wires
exposed coming from the outlet box as shown in Figure 2.
mounting screw
circular strap
small hex nut
Figure 1
Outlet box
circular strap
Figure 2
1
Supply wires
Outlet box
screw
mounting
screw
STEP 4: Lift up light fixture to make wire connections.
Please refer to Figure 3 and 4.
Note: make sure the power is off.
1. Disassemble the upper cap, and install the canopy to
the fixture, install the nut, lock washer, ground wire to
the threaded pipe of light fixture. See figure 3. Tighten
until canopy is well secured.
2. Locate the supply ground wires from the outlet box and
the ground wire coming out of the light fixture. Connect
both ground wires with green ground screw and secure
on the circular strap.
3. Using approved wire connectors:
- Connect the light kit white wire to the white supply wire
from outlet box; and
- Connect the light kit black wire to the black supply wire
from outlet box.
4. After connection the wires, spread them apart so that
green and white wires are on one side of the outlet box
and the black wires are on the other side. Refer to figure
4.
Hex Nut
Lock washer
Lock washer
Canopy
Ground wire
Light fixture
Figure 3
Ground screw
Wire
connectors
mounting screws
Ground wire
Canopy
Decorative nuts
STEP 5: Finish the installation.
Light fixture
1. Assemble the light fixture to the circular strap by placing
the holes in the canopy over the two mounting screws
protruding from the circular strap. See Figure 4.
2. Install the two decorative nuts over the two mounting
screws and tighten securely.
NOTE: It may be necessary to adjust the mounting
screws length from the circular strap by turning the
screws out of the circular strap. If this is necessary,
reassemble the fixture by completing above sub-steps
1 and 2.
Figure 4
CFL Bulbs
Light fixture
3. Install two 13 watts maximum compact fluorescent bulbs
(included) into the bulb socket. CAUTION-RISK OF
FIRE, USE MAXIMUM 13 WATT COMPACT
FLUORESCENT BULBS.
4. Insert the pipe nipple and pull chain of light fixture
through the eyelet in the glass shade.
5. Place the lower cap (the one without grommet hole) over
the pipe nipple and up against the glass. Raise whole
glass shade assembly to the light fixture.
6. Place the finial over the threaded pipe nipple,in the mean
time, let the pull chain of light fixture go through
finial. Tighten the finial securely. Refer to Figure 5.
Your ceiling light fixture installation is completed!
2
Pipe nipple
Glass shade
Lower cap
Finial
Figure 5
B. CEILING FAN LIGHT KIT INSTALLATION:
WARNING
To reduce the risk of electric shock, insure electricity has been turned off at the circuit breaker or fuse box
before beginning. Note: Turning power off using fan switch is not sufficient to prevent electric shock.
All wiring must be in accordance with the National Electrical Code and local electrical codes. Electrical
installation should be performed by a qualified licensed electrician.
STEP 1: Remove the cover from the switch housing below
the fan by removing the mounting screws.
Note: If your ceiling fan has a removable switch
housing, follow Section C. "Installation of Light Kit to
Fans with Removable Switch Housings" for that
installation.
STEP 2: Remove the plug from the center of the switch
housing cover.
STEP 3: Route the black and white wires exiting the top of
the light fixture through the switch housing cover and
thread the cover onto the center tube of the fixture until it
fits snugly. Install the lock washer and the nut and tighten
securely. Refer to figure 7.
STEP 4: Connect the white wire from the ceiling fan to the
white wire of the light fixture, and connect the blue wire
from the fan to the black wire of the light fixture. Carefully
tuck all wires and wire connectors into the switch housing.
Note: You have to cut off the terminals of wires from
ceiling fan.
STEP 5: Attach the switch housing cover/light fixture
assembly to the switch housing of fan by using the screws
removed in STEP 1. Tighten securely.
Switch housing
Switch housing
cover
Screws
Plug
Figure 6
Screws
Nut
Lock washer
Switch housing
cover
CFL Bulbs
STEP 6: Finish the installation.
1. Install two 13 watts maximum compact fluorescent bulbs
(included) into the bulb socket. CAUTION-RISK OF
FIRE, USE MAXIMUM 13 WATT COMPACT
FLUORESCENT BULBS.
Light fixture
Pipe nipple
2. Insert the pipe nipple and pull chain of light fixture
through the eyelet in the glass shade.
3. Place the lower cap (the one with grommet hole) over
the pipe nipple and up against the glass. In the mean
time, let the pull chain of ceiling fan go through the
side grommet hole of the lower cap. Raise whole glass
shade assembly to the light fixture.
4. Place the finial over the threaded pipe nipple,in the mean
time, let the pull chain of light fixture go through
finial. Tighten the finial securely. Refer to Figure 7.
Your ceiling fan light kit installation is completed!
3
Glass shade
Lower cap
Finial
Figure 7
Grommet
hole
C. INSTALLATION OF LIGHT KIT TO FANS WITH REMOVABLE SWITCH
CAUTION: Make sure power is removed from the fan before attempting to install the light kit.
STEP 1: Remove the switch housing from the fan by
removing the mounting screws. Unplug the wires by pulling
apart the connector-plug. The switch housing now can be
removed from the fan and you may take it to a convenient
work site for light kit attachment. Refer to figure 8.
STEP 2: Route the black and white wires exiting the top of
the light fixture through the switch housing cover and
thread the cover onto the center tube of the fixture until it
fits snug. Install the lock washer and the nut and tighten
securely. Connect the white wire from the switch housing
to the white wire of the light fixture, and connect the blue
wire from the switch housing to the black wire of the light
fixture using the wire connectors supplied in the pack.
Refer to figure 9.
Note: You have to cut off the terminals of wires from
ceiling fan.
STEP 3: Bring this switch housing/light fixture assembly
back to the fan for final installation.
STEP 4: Re-connect the connector-plug. Carefully tuck all
wires and wire connectors into the switch housing. Attach
the switch housing/light fixture assembly to the switch
housing plate of fan by using the screws removed in STEP
1. Tighten securely. Refer to figure 10.
STEP 5: Finish the installation.
1. Install two 13 watts maximum compact fluorescent bulbs
(included) into the bulb socket. CAUTION-RISK OF
FIRE, USE MAXIMUM 13 WATT COMPACT
FLUORESCENT BULBS.
2. Insert the pipe nipple and pull chain of light fixture
through the eyelet in the glass shade.
3. Place the lower cap (the one with grommet hole) over
the pipe nipple and up against the glass. In the mean
time, let the pull chain of ceiling fan go through the
side grommet hole of the lower cap. Raise whole glass
shade assembly to the light fixture.
4. Place the finial over the threaded pipe nipple,in the mean
time, let the pull chain of light fixture go through
finial. Tighten the finial securely. Refer to Figure 10.
Your ceiling fan light kit installation is completed!
4
Screws
Switch housing
plate
Switch housing
Plug
Figure 8
Nut
Lock washer
Switch housing
Light fixture
Figure 9
Switch housing
plate
Screws
Switch housing
CFL Bulbs
Light fixture
Pipe nipple
Glass shade
Lower cap
Finial
Figure 10
Grommet
hole