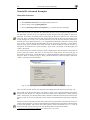
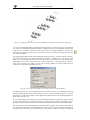
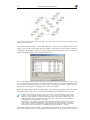
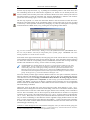
1
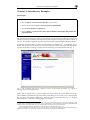
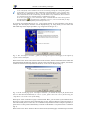
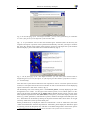
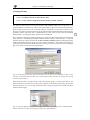
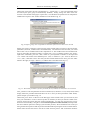
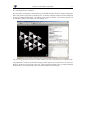
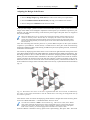
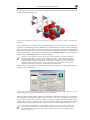
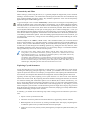
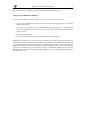
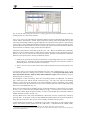
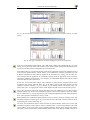
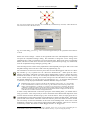
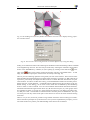
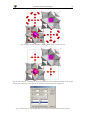
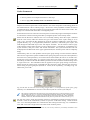
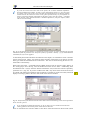
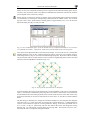
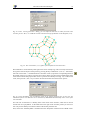
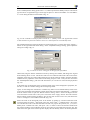
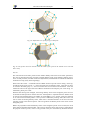
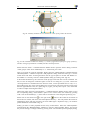
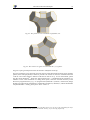
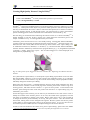
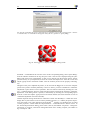
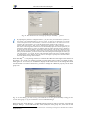
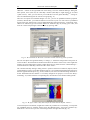
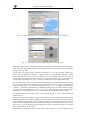
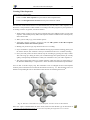
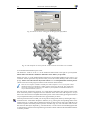
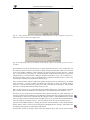
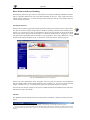
Tutorial B: Advanced Examples
31
Fig. 41: According to these settings, DIAMOND will create polyhedra around the W and P atoms
with O at the corners of the polyhedra. The coordinating atoms are selected according to the settings
in the ”Connectivity” dialog.
Fig. 42: We would like the colors of the faces of the polyhedra to correspond to the colors of their
central atoms.
The next step is to investigate how these Keggin ions are arranged in the overall crystal structure.
Leave the tracking mode by clicking the ”No tracking” button in the bottom toolbar. Afterwards,
please return to the previous viewing direction along the c-axis in order to have a better overview:
Select the ”Viewing direction...” command from the ”Picture” menu in order to open the corresponding dialog (fig. 44). As has already been mentioned, we would like to view along the c-axis, so please
click on the corresponding button at the top of the dialog and close it by pressing ”OK”.
We now have to add the rest of the unit cell. This can easily be achieved by pressing the ”Fill
Unit Cell” button in the toolbar in the lower corner on the left hand side. As you see, the Keggin
ion is placed in one octant of the unit cell. Obviously, there is a second Keggin ion in the opposite octant of the cell for which we should also create polyhedra similar to the first one. Select
”Build/Polyhedra.../Add Polyhedra...”, then click on the ”Design...” button in the ”Add Polyhedra”
dialog which opens. Change the ”Fill” color of the polyhedron faces to ”Central atom” as described
above, and press ”OK”. The atom groups for the central atoms and ligands are still present from the
previous usage of this dialog, so simply close the dialog by pressing ”OK”. The second Keggin unit
in the cell will now become clearly visible (fig. 45).
You can now see that the space between the Keggin ions is filled by O and H atoms, most probably
water molecules. In order to check this, you should connect the atoms (i.e. create bonds between
them, based on the settings in the ”Connectivity” dialog). You can achieve this rather quickly, either
by clicking on the ”Connect Atoms” button in the toolbar, by selecting the corresponding command
from the ”Build” menu, or simply by pressing the combination <Shift+Ctrl+N> on your keyboard.
The water molecules will now become clearly visible.