1
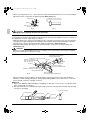
cover.fm Page 1 Friday, September 14, 2001 11:09 AM
INSTALLATION MANUAL
English
PACKAGED AIR CONDITIONER
Deutsch
Model No.
Urban Multi Series
Français
(Ceiling suspended type)
CS-32TMJPL
CS-63TMJPL
CS-100TMJPL
READ THESE INSTRUCTIONS CAREFULLY BEFORE INSTALLATION.
KEEP THIS MANUAL IN A HANDY PLACE FOR FUTURE REFERENCE.
Español
Italiano
ÅëëçíéêÜ
LESEN SIE DIESE ANWEISUNGEN VOR DER INSTALLATION SORGFÄLTIG DURCH.
BEWAHREN SIE DIESE ANLEITUNG FÜR SPÄTERE BEZUGNAHME GRIFFBEREIT AUF.
LIRE SOIGNEUSEMENT CES INSTRUCTIONS AVANT L’INSTALLATION.
CONSERVER CE MANUEL A PORTEE DE MAIN POUR REFERENCE ULTERIEURE.
LEA CUIDADOSAMENTE ESTAS INSTRUCCIONES ANTES DE INSTALAR.
GUARDE ESTE MANUAL EN UN LUGAR A MANO PARA LEER EN CASO DE TENER
ALGUNA DUDA.
PRIMA DELL’INSTALLAZIONE LEGGERE ATTENTAMENTE QUESTE ISTRUZIONI.
TENERE QUESTO MANUALE A PORTATA DI MANO PER RIFERIMENTI FUTURI.
ÄÉÁÂÁÓÔÅ ÐÑÏÓÅÊÔÉÊÁ ÁÕÔÅÓ ÔÉÓ ÏÄÇÃÉÅÓ ÐÑÉÍ ÁÐÏ ÔÇÍ ÅÃÊÁÔÁÓÔÁÓÇ Å×ÅÔÅ ÁÕÔÏ
ÔÏ ÅÃ×ÅÉÑÉÄÉÏ ÅÕÊÁÉÑÏ ÃÉÁ ÍÁ ÔÏ ÓÕÌÂÏÕËÅÕÅÓÔÅ ÓÔÏ ÌÅËËÏÍ.
LEES DEZE INSTRUCTIES ZORGVULDIG DOOR VOOR INSTALLATIE. BEWAAR DEZE HANDLEINDING WAAR U HEM KUNT TERUGVINDEN VOOR LATERE NASLAG.
LEIA COM ATENÇÃO ESTAS INSTRUÇÕES ANTES DE REALIZAR A INSTALAÇÃO.
MANTENHA ESTE MANUAL AO SEU ALCANCE PARA FUTURAS CONSULTAS.
Nederlands
Portugues
3VA10807-4C_Eng.fm Page 1 Friday, September 14, 2001 11:15 AM
-CONTENTS
1
2
3
4
5
6
7
8
9
10
11
12
SAFETY CONSIDERATIONS ........................................................................................ 1
BEFORE INSTALLATION .............................................................................................. 2
SELECTING INSTALLATION SITE ............................................................................... 4
PREPARATIONS BEFORE INSTALLATION................................................................. 5
INDOOR UNIT INSTALLATION ..................................................................................... 7
REFRIGERANT PIPING WORK .................................................................................... 8
DRAIN PIPING WORK................................................................................................. 10
ELECTRIC WIRING WORK ......................................................................................... 12
WIRING EXAMPLE AND HOW TO SET THE REMOTE CONTROLLER ................... 13
FIELD SETTING........................................................................................................... 16
INSTALLATION OF THE SUCTION GRILLE AND THE AIR FILTER ......................... 17
TEST OPERATION ...................................................................................................... 17
1. SAFETY CONSIDERATIONS
Please read these “SAFETY CONSIDERATIONS” carefully before installing air conditioning equipment and
be sure to install it correctly. After completing the installation, make sure that the unit operates properly during
the start-up operation. Please instruct the customer on how to operate the unit and keep it maintained.
Also, inform customers that they should store this installation manual along with the operation manual for
future reference.
This air conditioner comes under the term “appliances not accessible to the general public”.
Meaning of warning and caution symbols.
WARNING ........Failure to observe a warning may result in death.
CAUTION ..........Failure to observe a caution may result in injury or damage to the equipment.
•
•
•
•
•
•
•
•
1
WARNING
Ask your dealer or qualified personnel to carry out installation work. Do not try to install the machine yourself.
Improper installation may result in water leakage, electric shocks or fire.
Perform installation work in accordance with this installation manual.
Improper installation may result in water leakage, electric shocks or fire.
Be sure to use only the specified accessories and parts for installation work.
Failure to use the specified parts may result in water leakage, electric shocks, fire or the unit falling.
Install the air conditioner on a foundation strong enough to withstand the weight of the unit.
A foundation of insufficient strength may result in the equipment falling and causing injuries.
Carry out the specified installation work after taking into account strong winds, typhoons or earthquakes.
Improper installation work may result in the equipment falling and causing accidents.
Make sure that a separate power supply circuit is provided for this unit and that all electrical work is carried
out by qualified personnel according to local laws and regulations and this installation manual.
An insufficient power supply capacity or improper electrical construction may lead to electric shocks or fire.
Make sure that all wiring is secured, the specified wires and used, and no external forces act on the terminal
connections or wires.
Improper connections or installation may result in fire.
When wiring the power supply and connecting the wiring between the indoor and outdoor units, position the
wires so that the switch box cover can be securely fastened.
Improper positioning of the switch box cover may result in electric shocks, fire or the terminals overheating.
English
3VA10807-4C_Eng.fm Page 2 Friday, September 14, 2001 11:15 AM
• If the refrigerant gas leaks during installation, ventilate the area immediately.
Toxic gas may be produced if the refrigerant gas comes into contact with fire.
• After completing the installation work, check that the refrigerant gas does not leak.
Toxic gas may be produced if the refrigerant gas leaks into the room and comes into contact with a source
of fire, such as a fan heater, stove or cooker.
• Before touching electrical parts, turn off the unit.
•
•
•
•
•
•
CAUTION
Ground the air conditioner.
Do not connect the ground wire to gas or water pipes, lightning conductor or a telephone ground wire.
Incomplete grounding may result in electric shocks.
Be sure to install an earth leakage breaker.
Failure to install an earth leakage breaker may result in electric shocks.
While following the instructions in this installation manual, install drain piping in order to ensure proper
drainage and insulate piping in order to prevent condensation.
Improper drain piping may result in water leakage and property damage.
Install the indoor and outdoor units, power cord and connecting wires at least 1 meter away from televisions
or radios in order to prevent image interference or noise.
(Depending on the radio waves, a distance of 1 meter may not be sufficient enough to eliminate the noise.)
Remote controller (wireless kit) transmitting distance can result shorter than expected in rooms with electronic fluorescent lamps. (inverter or rapid start types)
Install the indoor unit as far away from fluorescent lamps as possible.
Do not install the air conditioner in the following locations:
(a) where a mineral oil mist or an oil spray or vapor is produced, for example in a kitchen
Plastic parts may deteriorate and fall off or result in water leakage.
(b) where corrosive gas, such as sulfurous acid gas, is produced
Corroding copper pipes or soldered parts may result in refrigerant leakage.
(c) near machinery emitting electromagnetic waves
Electromagnetic waves may disturb the operation of the control system and result in a malfunction of
the equipment.
(d) where flammable gases may leak, where there are carbon fiber or ignitable dust suspensions in the air,
or where volatile flammables such as thinner or gasoline are handled.
Operating the unit in such conditions may result in fire.
2. BEFORE INSTALLATION
• Decide upon a line of transport.
• Leave the unit inside its packaging while moving, until reaching the installation site. Use a sling of soft material, where unpacking is unavoidable or protective plates together with a rope when lifting, to avoid damage
or scratches to the unit.
• Refer to the installation manual of the outdoor unit for items not described in this manual.
2-1 PRECAUTIONS
• Be sure to read this manual before installing the indoor unit.
• Entrust installation to the place of purchase or a qualified serviceman. Improper installation could lead to
leaks and, in worse cases, electric shock of fire.
• When installing the unit in a small room, take measures against to keep refrigerant concentration from
exceeding allowable safety limits in the event of refrigerant leakage. Contact the place of purchase for more
information. Excessive refrigerant in a closed ambient can lead to oxygen deficiency.
• Use only parts provided with the unit or parts satisfying required specifications. Unspecified parts could
cause the unit to fall out of place, or could lead to leaks and, in worse cases, electric shock or fire.
• Do not install or operate the unit in rooms mentioned below.
English
2
3VA10807-4C_Eng.fm Page 3 Friday, September 14, 2001 11:15 AM
• Laden with mineral oil, or filled with oil vapor or spray like in kitchens. (Plastic parts may deteriorate which could eventually cause the unit to fall out of place, or could lead to leaks.)
• Where corrosive gas like sulfurous gas exists. (Copper tubing and brazed spots may corrode,
which could eventually lead to refrigerant leaks.)
• Where exposed to combustible gases and where volatile flammable gas like thinner or gasoline
is used. (Gas in the vicinity of the unit could ignite.)
• Where machines can generate electromagnetic waves. (Control system may malfunction.)
• Where the air contains high levels of salt such as that near the ocean and where voltage fluctuates greatly such as that in factories.
Also in vehicles or vessels.
• When selecting installation site, refer to the paper pattern.
• This unit, both indoor and outdoor, is suitable for installation in a commercial and light industrial environment.
If installed as a household appliance it could cause electromagnetic interference.
2-2 ACCESSORIES
Check if the following accessories are included with your unit.
Name
(1) Drain hose
(2) Clamp metal
(3) Washer for
hanging bracket
Quantity
1 pc.
1 pc.
8 pcs.
(4) Clamp
(5) Paper pattern for installation
6 pcs.
1 pc.
Shape
Name
Quantity
Shape
Insulation for fitting
Sealing pad
1 each
1 each
(6)For gas pipe
(8) Large
(7)For liquid pipe
(9) Small
(Other)
• Operation manual
• Installation manual
2-3 OPTIONAL ACCESSORIES
• These are two types of remote controllers: wired and wireless. Select a remote controller according to
customer request and install in an appropriate place.
Remote controller type
Wired type
Wireless type
Cooling only type
Heat pump type
CZ-01RT11P
–
CZ-01RWT12P
NOTE
• If the customer wishes to use a remote controller that is not listed above, select a suitable remote controller
after consulting catalogs and technical materials.
3
English
3VA10807-4C_Eng.fm Page 4 Friday, September 14, 2001 11:15 AM
FOR THE FOLLOWING ITEMS, TAKE SPECIAL CARE DURING CONSTRUCTION AND
CHECK AFTER INSTALLATION IS FINISHED.
Items to be checked after completion of work
Items to be checked
Is the indoor unit fixed firmly?
Is the gas leak test finished?
Is the unit fully insulated?
Does drainage flow smoothly?
Does the power supply voltage correspond
to that shown on the name plate?
Are wiring and piping correct?
Is the unit safely grounded?
Is wiring size according to specifications?
Is something blocking the air outlet or inlet
of either the indoor or outdoor units?
Are refrigerant piping length and additional
refrigerant charge noted down?
If not properly done, what is likely to occur
The unit may drop, vibrate or make noise.
It may result in insufficient cooling.
Condensate water may drip.
Condensate water may drip.
The unit may malfunction or the components burn out.
The unit may malfunction or the components burn out.
Dangerous at electric leakage.
The unit may malfunction or the components burn out.
Check
It may result in insufficient cooling.
The refrigerant charge in the system is not
clear.
2-4 NOTE TO THE INSTALLER
• Read this manual carefully to ensure correct installation. Be sure to instruct the customer how to operate
the system showing him/her the enclosed operation manual.
• Explain to the customer what system is installed on the site and be sure to fill in what is required in the column shown on “WHAT TO DO BEFORE OPERATION” of the operation manual.
3. SELECTING INSTALLATION SITE
(1) Select an installation site where the following conditions are fulfilled and that meets your customer’s approval.
• Where optimum air distribution can be ensured.
• Where nothing blocks air passage.
• Where condensate can be properly drained.
• If supporting structural members are not strong enough to take the unit’s weight, the unit could fall out
of place and cause serious injury.
• Where the false ceiling is not noticeably on an incline.
• Where sufficient clearance for maintenance and service can be ensured. (Refer to Fig. 1)
If sufficient clearance could be ensured at∗, leave a space of 200 mm or more between the unit and it’s
surroundings easier maintenance and service.
• Where piping between indoor and outdoor units is possible within the allowable limit. (Refer to the installation manual for the outdoor unit.)
• Keep the indoor and outdoor units, power cable and transmission wiring, at least 1 m from TVs and
radios, to prevent distorted pictures and static. (Depending on the type and source of the electrical
waves, static may be heard even when more than 1 m away.)
English
4
3VA10807-4C_Eng.fm Page 5 Friday, September 14, 2001 11:15 AM
Air outlet
∗≥30
Required service
space
≥300
∗≥30
Air inlet
2500 or higher
from the floor
For installation
in high places
Obstruction
Floor
(Length : mm)
Fig. 1
(2) Use suspension bolts for installation. Check whether the ceiling is strong enough to support the
weight of the unit or not. If there is a risk, reinforce the ceiling before installing the unit.
(Installation pitch is marked on the paper pattern for installation. Refer to it to check for points requiring
reinforcing.)
(3) This indoor unit may be installed on ceilings up to 3.5 m in height. However, if the ceiling is higher
than 2.7m, the remote control will have to be set locally. (Refer to “10. FIELD SETTING” on page 16)
4. PREPARATIONS BEFORE INSTALLATION
(1) Relative positions of indoor unit, suspension bolt, piping hole, drain piping hole, and electric wire
hole position. (Refer to Fig. 2)
A (Decoration panel)
160
Front view
Left side piping hole
Rear side piping hole
(φ 100 )
B (Suspension bolt pitch)
260
210
G
135
F
680 (Decoration panel)
185
85
C
D
E
160
B (Suspension bolt pitch)
False ceiling view
Top side drain
piping hole
Top gas piping hole
Suspension
bolt (ⴒ4)
Air outlet
Top liquid hole
(Length : mm)
Fig. 2
Model
CS-32TMJPL
CS-63TMJPL
CS-100TMJPL
5
A
960
1160
1400
B
920
1120
1360
C
390
490
610
D
375
475
595
E
310
410
530
F
400
500
620
G
375
475
595
English
3VA10807-4C_Eng.fm Page 6 Friday, September 14, 2001 11:15 AM
(2) Make the suspension bolt hole, piping hole, drain piping hole.
• Refer to the paper pattern for installation for hole positions.
• Fix the positions for suspension bolt, piping hole, drain piping hole, and electric wire hole, and make the
openings.
(3) Detach the parts for indoor unit.
1) Detach the suction grille.
• Slide the suction grille fixing knobs (2 parts) backward (arrow direction) and open the suction grille
widely. (Refer to Fig. 3)
• Keep the suction grille opened. Holding the knob on the back of suction grille, pull to the front direction
to remove. (Refer to Fig. 4)
Fig. 4
Fig. 3
2) Detach the side panel.
• Remove the side panel fixing screw 1) and
pull to the front direction (arrow direction) to
remove. (Refer to Fig. 5)
• Pull out of the accessories.
3) Remove the hanger bracket.
• Loosen two hanger bracket setting bolts
(M8) (two on each side) on each side for less
than 10 mm. (Refer to Fig. 6 and 7)
• Remove two hanger bracket fixing bolts (M5)
on the rear side. Detach the hanger bracket
by pulling backwards. (Refer to Fig. 7)
Accessories
Dressing board securing
screw (M4)
Dressing board
Fig. 5
Hanger bracket
fixing bolt (M5)
Indoor unit
Hanger bracket
setting bolt (M8)
Length of loosening
should be less than
10 mm.
Hanger bracket
Hanger bracket
Fig. 6
Fig. 7
4) Set the suspension bolt. (Use W3/8 or M8-M10 size suspension bolts.)
• Adjust the distance from the unit to the ceiling slab beforehand. (Refer to Fig. 8)
Ceiling slab
25 - 55
Anchor
Suspension bolt
False ceiling
Fig. 8
(Length : mm)
Use a hole-in-anchor for existing ceilings, and a sunken insert,
sunken anchor or other part to be procured in the field for new
ceilings to reinforce the ceiling to bearing the weight of the unit.
Adjust clearance from the ceiling before proceeding further.
NOTE
• All the above parts are part to be procured in the field.
English
6
3VA10807-4C_Eng.fm Page 7 Friday, September 14, 2001 11:15 AM
5. INDOOR UNIT INSTALLATION
Installing optional accessories before installing the indoor unit is easier.
As for the parts to be used for installation work, be sure to use the provided accessories and specified parts
designated by our company.
(1) Secure the hooks to the eyebolts. (Refer to Fig. 9)
NOTE
• To ensure they are safely secured, use the included washers, and secure them with a double nut to make sure.
(2) Lift the indoor unit’s main body, insert the bolt (M8) for the hook into the attachment part on the
hook, while sliding the main body from the front. (Refer to Fig. 10)
(3) Fasten the bolts for the hooks (M8) securely in the four locations, left and right. (Refer to Fig. 10)
(4) Replace the screws for the hooks which had been removed (M5) securely in 2 places left and right.
This is necessary to prevent any forward and back deviance in the main body of the indoor unit.
(Refer to Fig. 10)
Hanger bracket
Nut (Part to be procured in the field)
Washer (3) (attached)
Attachment part
Hanger bracket
setting bolt (M8)
Double nut
Hanger bracket
Fig. 9
Hanger bracket
fixing bolt (M5)
Fig. 10
(5) When hanging the indoor unit main body, be sure to use a level or a plastic tube with water in it to
make sure the drain piping is set either level or slightly tilted, in order to ensure proper drainage.
(Refer to Fig. 11)
A
A.B
≤ 1⬚
≤ 1⬚
B
≤ 1⬚
Fig. 11
A.When the drain piping is tilted to the right, or to the right and back.
Place it level, or tilt it slightly to the right or the back. (Within 1°.)
B.When the drain piping is tilted to the left, or to the left and back.
Place it level, or tilt it slightly to the left or the back. (Within 1°.)
CAUTION
Setting the unit at an angle opposite to the drain piping might cause leaks.
7
English
3VA10807-4C_Eng.fm Page 8 Friday, September 14, 2001 11:15 AM
6. REFRIGERANT PIPING WORK
〈For refrigerant piping of outdoor units, see the installation manual attached to the outdoor unit.〉〉
〈Be sure to thermally insulate both the gas pipes and fluid pipes. Water leakage may result if the pipes
are not insulated. (Only use insulation resistant to at least 120 °C.)
Furthermore, if the temperature/humidity in the refrigerant piping are expected to exceed 30 °C or
80% RH, the thermal insulation of the refrigerant pipes should be strengthened (to be a thickness of
20 mm or more). There may be some condensation on the surface of the insulation material.〉〉
〈Before rigging tubes, check which type of refrigerant is used. Proper operation is not possible if the
types of refrigerant are not the same.〉〉
(1) In case of backward piping
• Remove the rear cover for piping. (Refer to Fig. 12, 14)
(2) In case of upward piping
• In case of upward piping,optional L-shape piping kit is required.
• Remove the cover for ceiling outlet and use optional L-shape piping kit for piping. (Refer to Fig.12, 13)
(3) In case of right side piping
• Cut the slit on the decorative laminated sheet (Right) and perform piping. (Refer to Fig. 14)
Top plate
Cut out
Upward-facing
refrigerant piping
L-shaped branch piping
kit (sold separately)
Rear
penetration lid
Top penetration lid
Cut out
Fig. 13
Fig. 12
Top penetration
lid cramp section Thermistor lead line
Clamp
Right-facing
refrigerant
piping
Rear-facing
refrigerant piping
Electric valve lead line
Rear right-facing
drain piping
Thermistor
lead line
Right-facing drain piping
Swing motor
lead line
Dressing board (right)
removable part
If only setting the drain piping to
face right, cut this section only.
Fig. 14
Fig.15
• When piping is complete, cut the removed penetration lid into the shape of the piping using scissors and
attach. As when before removing the top penetration lid, secure the lead lines for the swing motor and thermistor by passing them through the cramp part on the top penetration lid. (Refer to Fig. 12, 15)
• When doing this, block any gaps between the piping penetration lid and the pipes using putty to prevent
dust from entering the indoor unit.
CAUTION
• Use a pipe cutter and flare suitable for the type of refrigerant.
• Apply ether oil or ester oil around the flare portions before connecting.
• To prevent dust, moisture or other foreign matter from infiltrating the tube, either pinch the end or
cover it with tape.
• Be sure to use both a spanner and torque wrench together, when connecting or disconnecting pipes to/from
the unit. (Refer to Fig. 16)
• Refer to Table1 for flare measurements.
English
8
3VA10807-4C_Eng.fm Page 9 Friday, September 14, 2001 11:15 AM
• When connecting the flare nut, coat the flare both inside and outside with ether oil or ester oil and initially
tighten by hand 3 or 4 turns before tightening firmly. (Refer to Fig. 17)
Torque wrench
Coated with ester oil or ether oil
Spanner
Piping union
Flare nut
Fig. 17
Fig. 16
CAUTION
Overtightening may damage the flare and cause leaks.
Use “ Tabel 2 ” as a reference if a torque wrench is not available. Once work is complete, make sure there is
no gas leaking. As the flare nut is tightened with the wrench, the torque will suddenly increase. From that position, tighten the nut to the angle shown on “ Tabel 2 ”.
• Make absolutely sure to execute heat insulation works on the pipe-connecting section after checking gas
leakage by thoroughly studying the following figure and using the attached heat insulating materials for
fitting (6) and (7). (Fasten both ends with the clamps (4) (attached).) (Refer to Fig. 18)
• Wrap the sealing pad (9) (attached) only around the insulation for the joints on the gas piping side.
(Refer to Fig. 19)
CAUTION
Be sure to insulate any field piping all the way to the piping connection inside the unit. Any exposed piping
may cause condensation or burns if touched.
Small sealing pad (9) (attached)
Wrap from the bottom up
Insulation for gas pipe (6) (attached)
Insulation for local piping
(Part to be procured in the field)
(Up to the flare part)
Flare nut
Fig. 19
Flare nut
Gas piping
Insulation for field piping
(Part to be procured in the field)
Liquid piping
Insulation for liquid pipe (7) (attached)
Clamp (4) (attached) (× 4)
Attach to the bottom
(For both gas piping and liquid piping)
Fig. 18
• When brazing the refrigerant piping, only begin brazing after having carried out nitrogen substitution
(NOTE 1) or while inserting nitrogen into the refrigerant piping (NOTE 2). Once this is done, connect the
indoor unit with a flared or a flanged connection.
NOTES
1. Refer to the “Manual for Multi Installation for Buildings” for directions on how to carry out nitrogen substitution. (Inquire with your dealer.)
2
2. Nitrogen should be set to 0.02 Mpa (0.2 kg/cm ) with a pressure-reducing valve if brazing while inserting
nitrogen into the piping.
Pressure-reducing valve
Refrigerant piping
Part to be brazed
Taping
hands valve
Nitrogen
Nitrogen
9
English
3VA10807-4C_Eng.fm Page 10 Friday, September 14, 2001 11:15 AM
The flare nuts used must be those included with the main body.
• Refer to Table 1 for tightening torque.
Table 1
12.0 – 12.4
φ 12.7
49.5 – 60.3N·m (504 – 616 kgf·cm)
15.4 – 15.8
φ 15.9
61.8 – 75.4N·m (630 – 770 kgf·cm)
18.6 – 19.0
φ 19.1
97.2 – 118.6N·m (990 – 1210 kgf·cm)
22.9 – 23.3
0
32.7 – 39.9N·m (333 – 407 kgf·cm)
R0.4-0.8
0
φ 9.5
45 Ⳳ2
8.3 – 8.7
A
14.2 – 17.2N·m (144 – 176 kgf·cm)
0
φ 6.4
Flare shape
0
Flare dimension
A (mm)
90 Ⳳ0.5
Tightening torque
Pipe gauge
Not recommendable but in case of emergency
You must use a torque wrench but if you are obliged to install the unit without a torque wrench, you may
follow the installation method mentioned below.
After the work is finished, make sure to check that there is no gas leak.
When you keep on tightening the flare nut with a spanner, there is a point where the tightening torque
suddenly increases. From that position, further tighten the flare nut the angle shown below:
Table 2
Pipe size
φ 6.4 (1/4”)
φ 9.5 (3/8”)
φ 12.7 (1/2”)
φ 15.9 (5/8”)
φ 19.1 (3/4”)
Further tightening angle
60 to 90 degrees
60 to 90 degrees
30 to 60 degrees
30 to 60 degrees
20 to 35 degrees
Recommended arm length of tool
Approx. 150mm
Approx. 200mm
Approx. 250mm
Approx. 300mm
Approx. 450mm
7. DRAIN PIPING WORK
Rig the drain pipe as shown below and take measures against condensation. Improperly rigged piping could
lead to leaks and eventually wet furniture and belongings.
(1) Rig drain piping
• For drain work, rig the pipes so that they drain reliably.
• The drain pipe outlet direction can be chosen from the right rear, right, left rear, and left. Refer to
“REFRIGERANT PIPING WORK” for right rear and right direction, and refer to Fig. 20 for left rear and
left direction.
Rear side (metal plate)
removable part
Rear left-facing drain piping
Left dressing board
removable part
Left-facing drain piping
Fig. 20
• For left drain pipe outlet, remove the rubber plug and the insulation on the drain pipe connecting opening
on the left side of the unit and change the position to the right side.
English
10
3VA10807-4C_Eng.fm Page 11 Friday, September 14, 2001 11:15 AM
• Insert the rubber stopper securely, all the way to the base, in order to prevent water leakage.
• The diameter of the drain pipe should be greater than or equal to the diameter of the connecting pipe.
(Vinyl tube; pipe size: 20 mm; outer dimension: 26 mm)
• Keep the drain pipe short and sloping downwards at a gradient of at least 1/100 to prevent air pockets
from forming. (Refer to Fig. 21)
• Use the attached drain hose (1) and clamp (2).
Insert the drain hose into the drain socket, up to the gray tape.(Refer to Fig. 22)
Tighten the clamp until the screw head is less than 4 mm from the hose. (Refer to Fig. 23)
(Be careful of the installation direction. Install so that the clamp metal does not contact the intake grill.)
• Wrap the attached sealing pad (8) over the clamp and drain hose to insulate. (Refer to Fig. 23)
• No folding of drain hose inside the indoor unit. (Refer to Fig. 24)
(If there is slack in the drain hose, it may cause damage to the intake grill.)
(When drain hose is connected)
Wrong
Good
Clamp metal (2) (attached)
Do not lift
Tilt down
Make sure there
is no slack
Make sure it is
not in the water
Taping area
(Gray)
Drain hose (1)
(attached)
Fig. 22
Fig. 21
Clamp metal (2)
(attached)
Sealing pad (8)
(attached)
≤4
Wrong
Clamp metal (2)
(attached)
≤4
Sealing
pad (8)
(attached)
(Length : mm)
< Facing rear right or right >
Fig. 24
< Facing rear left or left >
Fig. 23
(2) Confirm that smooth drainage is achieved after the piping work.
• Add 600 cc of water in the drain pan from the air outlet for confirming drainage. (Refer to Fig. 25)
Air outlet
Pump used for
kerosene stoves.
Bucket
Fig. 25
CAUTION
Drain piping connections
Do not connect the drain piping directly to sewage pipes that smell of ammonia. The ammonia in the sewage might enter the indoor unit through the drain pipes and corrode the heat exchanger.
11
English
3VA10807-4C_Eng.fm Page 12 Friday, September 14, 2001 11:15 AM
8. ELECTRIC WIRING WORK
8-1 GENERAL INSTRUCTIONS
• All field supplied parts and materials, electric works must conform to local codes.
• Use copper wire only.
• Follow the “WIRING DIAGRAM” attached to the unitbody to wire the outdoor unit, indoor units and the
remote controller. For details on hooking up the remote controller, refer to the “INSTALLATION MANUAL OF
REMOTE CONTROLLER.”
• All wiring must be performed by an authorized electrician.
• This system consists of multiple indoor units. Mark each indoor unit as unit A, unit B . . . , and be sure the
terminal board wiring to the outdoor unit and HR box are properly matched. If wiring and piping between the
outdoor unit and an indoor unit are mismatched, the system may cause a malfunction.
• Do not turn on the power until all work is done.
8-2 ELECTRICAL CHARACTERISTICS
Units
Model
CS-32TMJPL
CS-63TMJPL
CS-100TMJPL
Hz
50
Power supply
Volts
Voltage range
220-240
MCA: Min. Circuit Amps (A);
kW: Fan Motor Rated Output (kW);
Max. 264
Min. 198
Fan motor
MCA
MFA
kW
FLA
0.8
15
0.062
0.6
0.8
15
0.062
0.6
0.9
15
0.130
0.7
MFA: Max. Fuse Amps (A)
FLA: Full Load Amps (A)
8-3 SPECIFICATIONS FOR FIELD SUPPLIED FUSES AND WIRE
Power supply wiring
Model
Field fuses
Wire
Size
Wire
Size
H05VV-U3G
Wire size must
comply with
local codes.
Vinyl cord with
sheath or cable
(2 wire) (NOTE 2)
0.75 - 1.25 mm2
CS-32TMJPL
CS-63TMJPL
15A
CS-100TMJPL
Transmission wiring
NOTES
1. Allowable length of transmission wiring between indoor/outdoor units and between the indoor unit and the
remote controller is as follows.
(1) Outdoor unit – Indoor unit:
Max. 1000 m (Total wiring length: 2000 m)
(2) Indoor unit – Remote controller:
Max. 500 m
2. Insulated thickness:1 mm or more
English
12
3VA10807-4C_Eng.fm Page 13 Friday, September 14, 2001 11:15 AM
9. WIRING EXAMPLE AND HOW TO SET THE REMOTE CONTROLLER
9-1 HOW TO CONNECT WIRINGS
〈Method of wiring power supply, units and connecting remote controller cords〉〉 (Refer to Fig. 26)
• Power wire
Hold the switchbox lid and loosen the anchoring screws (2 pc.), then remove the switchbox lid. Align the
phase and connect the wire to the power terminal block (6P) inside the switchbox. After connecting, use the
included clamps (4) to bind the wire, together with the ground wire, to the anchor. (Refer to Fig. 27)
• Remote control wire and connecting wire
Hold the switchbox lid and loosen the anchoring screws (2 pc.), then remove the switchbox lid. Connect the
wires to the power terminal block (6P) inside the switchbox. After connecting, use the included clamps (4)
to bind the remote control wire, together with the connecting wire, to the anchor. (Refer to Fig. 27)
CAUTION
• When cramping wiring, use the included cramping material to do an appropriate cramp to prevent undue
pressure on the wiring connections. When carrying out the wiring, bundle the wires to prevent the switch
box lid from lifting, and attach the lid firmly. When attaching the switch box avoid getting wires caught always
use a wiring through-lid to prevent damage to the wires.
• Make sure to avoid external force to the field wiring(∗) such as by laying them in protection pipes or in the
wall. (Refer to Fig. 26)
[ PRECAUTIONS ]
1. Use ring-type crimp-style terminals for connecting
wires to the power supply terminal board. If
unavailable, observe the following points when
Ring-type
crimp-style
wiring.
terminal
• Do not connect wires of different gauge to the
Electric wire
same power supply terminal. (Looseness in the
connection may cause overheating.)
Connect wires of the
Do not connect wires
Do not connect wires
• When connecting wires of the same gauge, con- same gauge to both
of the same gauge to
of different gauges.
side. (GOOD)
one side. (WRONG)
(WRONG)
nect them according to the right-hand figure.
• Use the specified electric wire. Connect the wire
securely to the terminal. Lock the wire down
without applying excessive force to the terminal.
2. Keep total current of crossover wiring between
indoor units less than 12 A.
Good
Wrong
Wrong
Branch the line outside the terminal board of the
unit in accordance with electrical equipment standards, when using two power wiring of a gauge greater
2
than 2 mm (φ1.6).
The branch must be sheathed to provide an equal or greater degree of insulation as the power supply wiring itself.
3. Do not connect wires of different gauge to the same grounding terminal. Looseness in the connection may
deteriorate protection.
4. Keep transmission wiring at least 50 mm away from power supply wiring. The equipment may malfunction
if subjected to electrical (external) noise.
5. For remote controller wiring, refer to the “INSTALLATION MANUAL OF REMOTE CONTROLLER”
attached to the remote controller.
6. Never connect power supply wiring to the terminal board for transmission wiring. A mistake of the
sort could damage the entire system.
7. Use only specified wire and tightly connect wires to terminals. Be careful wires do not place external stress
on terminals. Keep wiring in neat order and so as not to obstruct other equipment such as popping open
the service cover. Make sure the cover closes tight. Incomplete connections could result in overheating,
and in worse case, electric shock or fire.
13
English
3VA10807-4C_Eng.fm Page 14 Friday, September 14, 2001 11:15 AM
Terminal board for remote
controller (6P)
Power supply terminal board (2P or 3P)
Electric parts box
Ground terminal
Refer to Fig. 27
Piping through-lid
Ground wire (∗)
Wiring between
units (∗)
Remote controller wire and connecting wire (∗)
power supply cord
Electric parts box lid
fixation screw (2 P)
Electric parts box
L N
Electric wiring
diagram plate
Fig. 26
Clamp 4) (attached)
power supply
How to connect power supply terminal
board (2P)
Fastener
Ground wire
Wiring between
units
After securing the
cramp material
to the bracket,
cut off any extra
material.
Clamp 4) (attached)
Remote controller wire and
connecting wire
Fastener
Fig. 27
9-2 WIRING EXAMPLE
• Fit the power supply wiring of each unit with a switch and fuse as shown in the drawing.
COMPLETE SYSTEM EXAMPLE (3 systems)
Power supply
Power supply wiring
Transmission wiring
Main
switch
Switch
Fuse
HR box
(Only for
Heat
recovery system)
Indoor unit
Remote controller
English
14
3VA10807-4C_Eng.fm Page 15 Friday, September 14, 2001 11:15 AM
1. When using 1 remote controller for 1 indoor unit. (Normal operation)
Power supply
220-240V
50Hz
or
220V
Power supply
220-240V
Outdoor unit
Control box
IN/D OUT/D
F1 F2 F1 F2
L N
L N
No. 1
System
60Hz
LN
Power supply
220-240V
50Hz
or
220V
L N
60Hz
P1 P2 F1 F2 T1 T2
LN
Indoor
unit A
L N
60Hz
P1 P2 F1 F2 T1 T2
LN
Indoor
unit B
P1 P2
50Hz
or
220V
Power supply
220-240V
50Hz
or
220V
60Hz
P1 P2 F1 F2 T1 T2
LN
P1 P2 F1 F2 T1 T2
Indoor
unit C
P1 P2
P1 P2
Most
downstream
Indoor unit
P1 P2
2. For group control or use with 2 remote controllers
Power supply
220-240V
50Hz
or
220V
Outdoor unit
Control box
L N
IN/D OUT/D
F1 F2 F1 F2
No. 2
System
60Hz
Indoor
unit C
Indoor
unit B
Indoor
unit A
LN
P1 P2 F1 F2 T1 T2
LN
P1 P2 F1 F2 T1 T2
LN
P1 P2 F1 F2 T1 T2
LN
P1 P2 F1 F2 T1 T2
P1 P2
P1 P2
Most downstream
indoor unit
P1 P2
For use with 2
remote controllers
3. When including HR box
Power supply
220-240V
50Hz
or
220V
L N
Outdoor unit
Control box
IN/D OUT/D
F1 F2 F1 F2
No. 3
System
HR box
Control box
OUT/D IN/D
F 1 F2 F1 F2
60Hz
Indoor unit A
LN
P 1 P2 F 1 F2 T 1 T2
P 1 P2
NOTE
• It is not necessary to designate indoor unit address when using group control. The address is automatically
set when power is activated.
[ PRECAUTIONS ]
1. A single switch can be used to supply power to units on the same system. However, branch switches and
branch circuit breakers must be selected carefully.
2. Do not ground the equipment on gas pipes, water pipes or lightning rods, or crossground with telephones.
Improper grounding could result in electric shock.
15
English
3VA10807-4C_Eng.fm Page 16 Friday, September 14, 2001 11:15 AM
10. FIELD SETTING
Field setting must be made from the remote controller in accordance with the installation condition.
• Setting can be made by changing the “Mode No.”, “FIRST CODE NO.”, and “SECOND CODE NO.”.
• For setting and operation, refer to the “FIELD SETTING” in the installation manual of the remote controller.
10-1 Setting ceiling height
• Select the SECOND CODE NO. that corresponds to the ceiling height. (Refer to Table 3).
(SECOND CODE NO. is factory set to “01” for a ceiling height of 2.7m or less.)
Table 3
Ceiling height (m)
2.7 or less
2.7- 3.5
Mode No.
FIRST CODE NO.
13 (23)
0
SECOND CODE NO.
01
02
10-2 Setting air filter sign
• Remote controllers are equipped with liquid crystal display air filer signs to display the time to clean air filters.
• Change the SECOND CODE NO. according to Table 4 depending on the amount of dirt or dust in the room.
(SECOND CODE NO. is factory set to “01” for filter contamination-light.)
Table 4
Setting
Air filter contaminationlight
Air filter contaminationheavy
Spacing time of display air filter
sign (long life type)
Mode No.
FIRST CODE
NO.
SECOND
CODE NO.
Approx. 2500 hrs
01
10 (20)
0
Approx. 1250 hrs
02
When using wireless remote controllers
• When using wireless remote controllers, wireless remote controller address setting is necessary. Refer to
the installation manual attached to the wireless remote controller for setting instructions.
10-3 Control by 2 Remote Controllers (Controlling 1 indoor unit by 2 remote controllers)
• When using 2 remote controllers, one must be set to “MAIN” and the other to “SUB”.
MAIN/SUB CHANGEOVER
(1) Insert a wedge-head screwdriver into the recess between
the upper and lower part of remote controller and, working
from the 2 positions, remove carefully the upper part. The
remote controller PC board is attached to the upper part of
remote controller.
Upper part of
remote controller
Lower part of
remote controller
Insert the screwdriver
here and gently work
off the upper part of
remote controller
(2) Turn the MAIN/SUB changeover switch on one of the two
remote controller PC boards to “S”. (Leave the switch of the
other remote controller set to “M”.)
(Factory setting)
(Only one remote
controller needs
to be changed if
factory settings
have remained
untouched.)
English
S
M
Remote
controller
PC board
S
M
16
3VA10807-4C_Eng.fm Page 17 Friday, September 14, 2001 11:15 AM
10-4COMPUTERISED CONTROL (FORCED OFF AND ON/OFF OPERATION)
(1) Wire specifications and how to perform wiring
• Connect input from outside to terminals T1 and T2 of the terminal board. (remote controller to transmission wiring)
F2
T1
T2
FORCED
OFF
Input A
Wire specification
Gauge
Length
External terminal
Sheathed vinyl cord or cable (2 wire)
0.75 - 1.25 mm2
Max. 100 m
Contact that can ensure the minimum applicable load of 15 V DC, 10 mA.
(2) Actuation
• The following table explains FORCED OFF and ON/OFF OPERATIONS in response to Input A.
FORCED OFF
ON/OFF OPERATION
Input “ON” stops operation (impossible by remote controllers.)
Input OFF → ON turns ON unit.
Input OFF enables control by remote controller.
Input ON → OFF turns OFF unit.
(3) How to select FORCED OFF and ON/OFF OPERATION
• Turn the power on and then use the remote
controller to select operation.
SECOND
CORD NO.
• Set the remote controller to the field set
mode. For details, refer to the “HOW TO
SET IN THE FIELD”, in the remote control- FIRST
CORD NO.
ler manual.
• When in the field set mode, select mode
No. 12, then set the first code (switch) No. to
“1”. Then set second code (position) No. to
“01” for FORCED OFF and “02” for ON/OFF
OPERATION. (FORCED OFF at factory set)
Mode
No.
SETTING
FIELD SET
MODE
10-5CENTRALIZED CONTROL
• For centralized control, it is necessary to designate the group No. For details, refer to the manual of each
optional controllers for centralized control.
11. INSTALLATION OF THE SUCTION GRILLE AND THE AIR FILTER
Install side panel and suction grille properly in the order opposite to detachment.
12. TEST OPERATION
Refer to the installation manual of the outdoor unit.
• The operation lamp of the remote controller will flash when an error occurs. Check the error code on the liquid crystal display to identify the point of trouble. An explanation of error codes and the corresponding trouble is provided in “CAUTION FOR SERVICING” of the indoor unit.
17
English
cover.fm Page 2 Friday, September 14, 2001 11:09 AM
3VA10807-4C EM01A143
(0110) HT