1
Installing the Capture Card
You are likely to need a flat blade and /or a cross head screwdriver for the installation of the
VisionAV-HD card; it would be useful to have these to hand before you begin.
•
•
•
•
•
•
•
Power down the PC (including peripherals), switch off at the mains and disconnect all the cables
connected to the computer, noting the positions for accurate reconnection
Remove the PC cover
Locate a vacant PCI Express slot (x4 or higher) on the motherboard and remove the blanking plate
(retain all screws)
If you are in doubt consult your motherboard documentation to correctly identify a PCI Express slot. If
the card is forced into a 32 or 64 bit PCI or PCI-X slot it will be irreparably damaged when the system is
powered up and the warranty will be void.
Reconnect all cables to the PC then connect a DVI cable (not supplied) distributing the DVI source
signal to the connector on the VisionAV-HD capture card
A standard definition signal can be connected to the RCA connector on the VisionAV-HD
An Audio feed can be connected to the Audio Module via the Audio Breakout Cable
Power up the PC and commence the software installation
How to Connect Input Sources
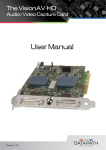
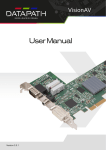
The VisionAV-HD card has two DVI-I and one RCA (female) connectors, The DVI-I connectors support DVI,
HDMI, Component and RGB (VGA) inputs using the supplied adapters where required.
A DVI input is connected directly into the DVI-I connector which accepts DVI-D (digital) or DVI-A (analog)
inputs:
5