1
1473-1-8162 │ Rev. 01 │ 17.12.2012
Operating Instructions
Busch-Jalousiecontrol® II
Pos : 2 /#N eus truktur #/Online-Dokumentation (+KN X)/Titelbl ätter/Ti mer/Titelbl att 6411 Jal ousiec ontrol II-Ei ns atz @ 30\mod_1348658450813_15.doc x @ 239241 @ @ 1
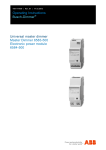
Busch-Jalousiecontrol® II
Flush-mounted inserts
6411 U-101
6411 U/S-101
=== Ende der Liste für T extmar ke Cover ===
Operating Instructions
Busch-Jalousiecontrol ® II
Pos : 4 /#N eus truktur #/Online-Dokumentation (+KN X)/Inhalts verz eic hnis (--> Für alle D okumente <--)/Inhalts verz eichnis @ 19\mod_1320649044386_15.doc x @ 109653 @ @ 1
1
2
3
4
5
6
7
Safety ....................................................................................................................................................................... 3
Intended use ............................................................................................................................................................ 3
Environment ............................................................................................................................................................. 3
Setup and function ................................................................................................................................................... 4
4.1
Modules .................................................................................................................................................. 4
4.2
Overview of devices ................................................................................................................................ 5
4.3
Features of function and equipment ........................................................................................................ 5
4.4
Extension unit inputs ............................................................................................................................... 6
4.5
Brightness sensor ................................................................................................................................... 7
4.6
Glass break sensor ................................................................................................................................. 7
Technical data.......................................................................................................................................................... 8
Installation and electrical connection ....................................................................................................................... 9
6.1
Requirements for the electrician ............................................................................................................. 9
6.2
Mounting in connection with other devices............................................................................................ 10
6.2.1
Mounting with IR control element .......................................................................................................... 10
6.2.2
Mounting with sensors .......................................................................................................................... 10
6.2.3
Mounting with extension units ............................................................................................................... 10
6.3
Mounting ............................................................................................................................................... 10
6.4
Electrical connection ............................................................................................................................. 12
6.4.1
Brightness sensor and glass break sensor ........................................................................................... 14
Operation ............................................................................................................................................................... 15
7.1
Operating modes................................................................................................................................... 15
7.1.1
Changing the operating mode ............................................................................................................... 15
7.2
Operation in connection with other devices........................................................................................... 16
7.2.1
Operation via control element 6430 ...................................................................................................... 16
7.2.2
Operation via IR control element 6066 .................................................................................................. 16
7.2.3
Operation via extension units ................................................................................................................ 16
7.2.4
Brightness sensor ................................................................................................................................. 17
7.2.4.1
Setting for control elements 6430 and 6066.......................................................................................... 18
7.2.4.2
Setting for timer control elements 6455 and 6412-101.......................................................................... 18
7.2.5
Programming the travel times ............................................................................................................... 19
7.2.6
Party function ........................................................................................................................................ 20
7.3
Fault rectification ................................................................................................................................... 20
=== Ende der Liste für T extmar ke TOC ===
Operating Instructions | 1473-1-8162
—2—
Operating Instructions
Busch-Jalousiecontrol ® II
Safety
Pos : 6 /#N eus truktur #/Online-Dokumentation (+KN X)/Ü bersc hriften (--> Für alle Dokumente <--)/1. Ebene/S - T/Sicherheit @ 18\mod_1302612791790_15.doc x @ 103357 @ 1 @ 1
1
Safety
Pos : 7 /#N eus truktur #/Online-Dokumentation (+KN X)/Sicherheits hinweis e und Hi nweis e (--> F ür all e D okumente <--)/Warnhinweis e/Sicherheit - 230 V @ 18\mod_1302606816750_15.doc x @ 103308 @ @ 1
Warning
Electric voltage!
Risk of death and fire due to electrical voltage of 230 V.
– Work on the 230V supply system may only be performed by authorised electricians!
– Disconnect the mains power supply prior to installation and/or disassembly!
Pos : 8 /#N eus truktur #/Online-Dokumentation (+KN X)/Ü bersc hriften (--> Für alle Dokumente <--)/1. Ebene/A - F/Bes timmungsgemäß er Gebrauc h @ 18\mod_1302763321316_15.doc x @ 103483 @ 1 @ 1
2
Intended use
Pos : 9 /#N eus truktur #/Online-Dokumentation (+KN X)/Bes timmungsgemäß er Gebrauc h (--> Für alle Dokumente <--)/Bus ch-Di mmer /Besti mmungsgemäß er Gebr auch @ 23\mod_1335350449857_15.doc x @ 208763 @ @ 1
The device is to be used exclusively with the components that are supplied and licensed as described in chapter
"Setup and function".
Pos : 10.1 /#N eustr uktur#/Modul- Struktur/Online-Dokumentati on/Übersc hriften (--> Für alle D okumente <--)/1. Ebene/U - Z/U mwelt @ 18\mod_1302614158967_15.doc x @ 103383 @ 1 @ 1
3
Environment
Pos : 10.2 /#N eustr uktur#/Online-Dokumentati on (+KN X)/Sic her hei tshi nweise und Hinweis e (--> Für alle Dokumente <--)/Hinweis e/Hi nweis - U mwelt - Hinweis Elektrog eräte @ 18\mod_1302763973434_15.doc x @ 103500 @ @ 1
Consider the protection of the environment!
Used electric and electronic devices must not be disposed of with domestic waste.
– The device contains valuable raw materials which can be recycled. Therefore, dispose of the
device at the appropriate collecting depot.
Pos : 10.3 /#N eustr uktur#/Online-Dokumentati on (+KN X)/Sic her hei tshi nweise und Hinweis e (--> Für alle Dokumente <--)/Hinweis e/Hi nweis - U mwelt - Entsorgung El ektr ogeräte @ 20\mod_1325760695972_15.doc x @ 136583 @ @ 1
All packaging materials and devices bear the markings and test seals for proper disposal. Always dispose of the
packaging material and electric devices and their components via the authorized collecting depots and disposal
companies.
The products meet the legal requirements, in particular the laws governing electronic and electrical devices and
the REACH ordinance.
(EU Directive 2002/96/EC WEEE and 2002/95/EC RoHS)
(EU REACH ordinance and law for the implementation of the ordinance (EC) No.1907/2006)
Pos : 11 /#Neustr uktur#/Online-Dokumentati on (+KN X)/Steuer modul e - Online-Dokumentation (--> Für alle Dokumente <--)/++++++++++++ Seitenumbruc h ++++++++++++ @ 9\mod_1268898668093_0.doc x @ 52149 @ @ 1
Operating Instructions | 1473-1-8162
—3—
Operating Instructions
Busch-Jalousiecontrol ® II
Setup and function
Pos : 12 /#Neustr uktur#/Online-Dokumentati on (+KN X)/Übersc hriften (--> Für all e D okumente <--)/1. Ebene/A - F /Aufbau und Funkti on @ 11\mod_1279185435352_15.doc x @ 83027 @ 111 @ 1
4
Setup and function
Pos : 13 /#Neustr uktur#/Online-Dokumentati on (+KN X)/Aufbau und Funkti on/Ti mer/Verwendung 6411 @ 30\mod_1348659984049_15.doc x @ 239254 @ 2 @ 1
The flush-mounted inserts described in this instruction manual are for the control of
•
Blinds / slats
•
Roller shutters
•
Awnings
•
Dome light covers, etc
The U/S version additionally has the option of connecting a brightness sensor and a glass break sensor, as well
as a adjusting wheel for setting the threshold value of the brightness sensor.
In the following the term "Blind" is also used representatively for other applications.
Pos : 14 /#Neustr uktur#/Online-Dokumentati on (+KN X)/Übersc hriften (--> Für all e D okumente <--)/2. Ebene/M - O/M odul e @ 26\mod_1343044917069_15.doc x @ 224737 @ 22 @ 1
4.1
Modules
Pos : 15 /#Neustr uktur#/Online-Dokumentati on (+KN X)/Aufbau und Funkti on/Ti mer/M odul e - 6411 @ 30\mod_1348662976407_15.doc x @ 239332 @ 1 @ 1
6411 U/S-101
6430-…
Fig. 1:
6411 U-101
6066-…
6455
Flush-mounted inserts with control elements
Three control elements are available for the flush-mounted inserts. Different functions are available depending on
the control element.
Mechanical control element 6430-…
Local operation:
•
Brief press of the button = moving to end position
•
Long press of the button = adjusting
IR control element 6066-...
Local operation:
Like the mechanical control element plus control option via IR remote control.
Comfort timer control element 6455
Local operation:
Like the mechanical control element plus moving and positioning of the blind via time and brightness that can be
freely adjusted.
Pos : 16 /#Neustr uktur#/Online-Dokumentati on (+KN X)/Steuer modul e - Online-Dokumentation (--> Für alle Dokumente <--)/++++++++++++ Seitenumbruc h ++++++++++++ @ 9\mod_1268898668093_0.doc x @ 52149 @ 222 @ 1
Operating Instructions | 1473-1-8162
—4—
Operating Instructions
Busch-Jalousiecontrol ® II
Setup and function
Pos : 17 /#Neustr uktur#/Online-Dokumentati on (+KN X)/Übersc hriften (--> Für all e D okumente <--)/2. Ebene/G - L/Ger äteübersic ht @ 26\mod_1343892510336_15.doc x @ 226594 @ 3333333 @ 1
4.2
Overview of devices
Pos : 18 /#Neustr uktur#/Online-Dokumentati on (+KN X)/Aufbau und Funkti on/Ti mer/Geräteübersicht - 6411 @ 30\mod_1348733391180_15.doc x @ 239721 @ 444444 @ 1
Fig. 2:
Device view
Item
Designation
1
Flush-mounted insert
2
Network / extension unit connection
3
Connection of blind motor
4
Adjusting wheel for changing the operating mode
5
Removable cover with shock protection (fitted at the factory)
6
Terminal block for connecting the brightness sensor / glass break sensor
Not available on flush-mounted
7
Adjusting wheel for setting the threshold value for the brightness sensor
insert 6411 U-101
8
Loop compartment for sensor line
9
Connection to the control element / terminal tower
Pos : 19 /#Neustr uktur#/Online-Dokumentati on (+KN X)/Übersc hriften (--> Für all e D okumente <--)/2. Ebene/A - F /Funkti ons- und Aus stattungs mer kmal e @ 23\mod_1336557630140_15.doc x @ 209136 @ 31111112222224 @ 1
4.3
Features of function and equipment
Pos : 20 /#Neustr uktur#/Online-Dokumentati on (+KN X)/Aufbau und Funkti on/Ti mer/Funkti onen 6411 @ 30\mod_1348661844882_15.doc x @ 239268 @ 222222 @ 1
•
•
•
•
•
•
•
•
Suitable for roller shutter, blind and awning drives with mechanical or electronic limit switch shut-off.
With two 230 V extension unit inputs (Up/Down) for group control
Connection possibility for brightness sensor and glass break sensor (6411 U/S-101)
With operating mode switch for operating modes:
Normal
Slat
– Central unit
Position
– Awning (only 6411 U/S-101)
With party function (deactivation of the local control station) in combination with Busch Blind Control II control
element 6430-…-…, 6066-…-…
Wind alarm, cleaning functions can be realised via extension unit input
Running time: 3 minutes
Suitable for polyphase operation
Pos : 21 /#Neustr uktur#/Online-Dokumentati on (+KN X)/Steuer modul e - Online-Dokumentation (--> Für alle Dokumente <--)/++++++++++++ Seitenumbruc h ++++++++++++ @ 9\mod_1268898668093_0.doc x @ 52149 @ 2 @ 1
Operating Instructions | 1473-1-8162
—5—
Operating Instructions
Busch-Jalousiecontrol ® II
Setup and function
Pos : 22 /#Neustr uktur#/Online-Dokumentati on (+KN X)/Übersc hriften (--> Für all e D okumente <--)/2. Ebene/M - O/N ebenstelleneingänge @ 30\mod_1348666010862_15.doc x @ 239390 @ 232233331333342224444444 @ 1
4.4
Extension unit inputs
Pos : 23 /#Neustr uktur#/Online-Dokumentati on (+KN X)/Aufbau und Funkti on/Ti mer/Nebens tell eneing änge - 6411 @ 30\mod_1348665401930_15.doc x @ 239346 @ 222333344444444 @ 1
Fig. 3:
Extension unit inputs with connected sensors
Group and central controls can be implemented via the connection of the 230 V extension unit inputs (1) and (2).
In case of group and central controls, any number of local control points can be joined and operated from an
overriding switching point. Additionally, it is also possible to connect sensors via the extension unit inputs.
Pos : 24 /#Neustr uktur#/Online-Dokumentati on (+KN X)/Steuer modul e - Online-Dokumentation (--> Für alle Dokumente <--)/++++++++++++ Seitenumbruc h ++++++++++++ @ 9\mod_1268898668093_0.doc x @ 52149 @ 43111124 @ 1
Operating Instructions | 1473-1-8162
—6—
Operating Instructions
Busch-Jalousiecontrol ® II
Setup and function
Pos : 25 /#Neustr uktur#/Online-Dokumentati on (+KN X)/Übersc hriften (--> Für all e D okumente <--)/2. Ebene/G - L/H elligkeitss ensor @ 28\mod_1347004848616_15.doc x @ 232236 @ 11111222233333333333333 @ 1
4.5
Brightness sensor
Pos : 26 /#Neustr uktur#/Online-Dokumentati on (+KN X)/Aufbau und Funkti on/Ti mer/Hellig keits sens or (Ansc hlus s an 6411) @ 30\mod_1348667038101_15.doc x @ 239443 @ 3332333333333333333 @ 1
A brightness sensor can be attached directly to flushmounted insert 6411 U/S-101 including sensor
connection, which is attached to the pane with the aid
of a suction cup. The values at which a function is
triggered can be set individually on the flush-mounted
insert via a potentiometer and on the comfort timer
control element 6455 in the display, so that the blind
closes at the desired brightness.
For detailed information see chapter "Operation".
Fig. 4:
Connected brightness sensor
Pos : 27 /#Neustr uktur#/Online-Dokumentati on (+KN X)/Übersc hriften (--> Für all e D okumente <--)/2. Ebene/G - L/Glas bruc hmelder @ 26\mod_1343719382251_15.doc x @ 226232 @ 33333333333333311111111111111311213333 @ 1
4.6
Glass break sensor
Pos : 28 /#Neustr uktur#/Online-Dokumentati on (+KN X)/Aufbau und Funkti on/Ti mer/Glasbr uchmel der ( Ans chl uss an 6411) @ 30\mod_1348667197912_15.doc x @ 239457 @ 3111111111121111111 @ 1
Note
The glass break sensor can only be used in connection with flush-mounted insert 6411 U/S-101.
Please note that flush-mounted insert 6411 U/S-101 in connection with the glass break sensor is
not suitable as an intrusion or attack alarm, since it lacks the required safety against sabotage in
accordance with the German VdS (Authority on Safety and Security).
The glass break sensor is an optional sensor which
can detect a broken window pane. When a window
pane cracks, ultrasonic signals are created which are
evaluated by the sensor evaluates. The sensor
triggers a DOWN command.
During or after triggering of the switch command the
blind cannot be moved up, neither via the brightness
sensor nor via a timer signal nor via an extension unit.
The lowered blind can only be raised again via the
control element of the affected flush-mounted insert.
When using a timer control element, a separate signal
is sent to the control element; see the relevant
operating manual.
The flush-mounted insert automatically detects a
connected glass break sensor. For larger glass areas
up to four glass break sensors can be combined on a
single pane and connected to a flush-mounted insert.
Fig. 5:
Connected glass break sensor
Pos : 29 /#Neustr uktur#/Online-Dokumentati on (+KN X)/Steuer modul e - Online-Dokumentation (--> Für alle Dokumente <--)/++++++++++++ Seitenumbruc h ++++++++++++ @ 9\mod_1268898668093_0.doc x @ 52149 @ 2222222222212222 @ 1
Operating Instructions | 1473-1-8162
—7—
Operating Instructions
Busch-Jalousiecontrol ® II
Technical data
Pos : 30 /#Neustr uktur#/Online-Dokumentati on (+KN X)/Übersc hriften (--> Für all e D okumente <--)/1. Ebene/S - T /Technisc he Daten @ 11\mod_1279185386320_15.doc x @ 83019 @ 222222222333333333333333333333333333333333333333311322 @ 1
5
Technical data
Pos : 31 /#Neustr uktur#/Online-Dokumentati on (+KN X)/Technisc he Daten/Ti mer/Technisc he Daten 6411 @ 30\mod_1348729828630_15.doc x @ 239537 @ 333333333333333333333333311333333333333333344443333 @ 1
Designation
Value
Nominal voltage
230 V AC ± 10%, 50 Hz
Maximum switching current:
3 A (cos ϕ 0.5)
Power consumption
<1W
Relay ON period
Approx. 3 minutes
Relay switchover pause
>500 ms
Maximum power consumption per extension
unit input
Sensor connection
<3 mA
SELV potential
Protective low voltage
Ambient temperature
0 ...35 °C
Pos : 32 /#Neustr uktur#/Online-Dokumentati on (+KN X)/Steuer modul e - Online-Dokumentation (--> Für alle Dokumente <--)/++++++++++++ Seitenumbruc h ++++++++++++ @ 9\mod_1268898668093_0.doc x @ 52149 @ 11111111111112333333333222 @ 1
Operating Instructions | 1473-1-8162
—8—
Operating Instructions
Busch-Jalousiecontrol ® II
Installation and electrical
connection
Pos : 33 /#Neustr uktur#/Online-Dokumentati on (+KN X)/Übersc hriften (--> Für all e D okumente <--)/1. Ebene/M - O/M ontage und el ektrisc her Anschl uss @ 23\mod_1336477157864_15.doc x @ 209033 @ 3332222222222222223332222221111212222222222222222222222222222222222222222222222222222422443333 @ 1
6
Installation and electrical connection
Pos : 34 /#Neustr uktur#/Online-Dokumentati on (+KN X)/Sic herheits hinweise und Hinweis e (--> Für alle Dokumente <--)/Warnhinweise/Sic herheit - Ni eders pannungs- und 230 V-Leitungen @ 23\mod_1336558868201_15.doc x @ 209164 @ 222222222211112122222222222222222222222222222222222222223322222 @ 1
Warning
Electric voltage!
Risk of death due to electrical voltage of 230 V during short-circuit in the low-voltage line.
– Low-voltage and 230 V lines must not be installed together in a flush-mounted socket!
Pos : 35 /#Neustr uktur#/Online-Dokumentati on (+KN X)/Sic herheits hinweise und Hinweis e (--> Für alle Dokumente <--)/Warnhinweise/Sic herheit - F ac hkenntniss e @ 23\mod_1336559183027_15.doc x @ 209179 @ 222222222113333223333333332222222222222222222222222222222222222 @ 1
6.1
Requirements for the electrician
Warning
Electric voltage!
Install the device only if you have the necessary electrical engineering knowledge and experience.
•
Incorrect installation endangers your life and that of the user of the electrical system.
•
Incorrect installation can cause serious damage to property, e.g. due to fire.
The minimum necessary expert knowledge and requirements for the installation are as follows:
•
Apply the "five safety rules" (DIN VDE 0105, EN 50110):
1. Disconnect from power;
2. Secure against being re-connected;
3. Ensure there is no voltage;
4. Connect to earth and short-circuit;
5. Cover or barricade adjacent live parts.
•
Use suitable personal protective clothing.
•
Use only suitable tools and measuring devices.
•
Check the supply network type (TN system, IT system, TT system) to secure the following
power supply conditions (classic connection to ground, protective earthing, necessary
additional measures, etc.).
Pos : 36 /#Neustr uktur#/Online-Dokumentati on (+KN X)/Steuer modul e - Online-Dokumentation (--> Für alle Dokumente <--)/++++++++++++ Seitenumbruc h ++++++++++++ @ 9\mod_1268898668093_0.doc x @ 52149 @ 222113333222223333333222222222222222222222222222222222233333222 @ 1
Operating Instructions | 1473-1-8162
—9—
Operating Instructions
Busch-Jalousiecontrol ® II
Installation and electrical
connection
Pos : 37 /#Neustr uktur#/Online-Dokumentati on (+KN X)/Übersc hriften (--> Für all e D okumente <--)/2. Ebene/M - O/M ontage i n Ver bindung mit anderen Ger äten @ 31\mod_1348832778182_15.doc x @ 240455 @ 2233333333333333333333222 @ 1
6.2
Mounting in connection with other devices
6.2.1
Mounting with IR control element
•
In combination with IR control element 6066 the installation site must lie within the IR receiving range of 15 m.
•
The address of the IR control element is set on number "1" at the factory and can be changed via the address
wheel on the rear of the control element.
•
Observe the "IR receiving range" when addressing.
Pos : 38 /#Neustr uktur#/Online-Dokumentati on (+KN X)/Montage/Ti mer/M ontage mit anderen Ger äten - 6411 @ 30\mod_1348817071795_15.doc x @ 240096 @ 33333333333333333333333333333333333333323311122333333332222222233422432443333 @ 1
Note
The IR receiving range may vary due to extraneous light (e.g., sunlight, illumination).
6.2.2
Mounting with sensors
•
If the connection of a brightness sensor or glass break sensor is planned for flush-mounted insert 6411U/S101, consider the factory cable length of 2 m.
6.2.3
Mounting with extension units
•
The maximum cable length depends on the permissible ripple voltage of the auxiliary post inputs. The ripple
voltage, however, must not exceed 100 V. In practice this corresponds to a cable length of at least 100 m.
•
To prevent interference from switching processes of the blind drives, do not install the motor and extension
unit lines in the one cable or close to each other. The minimum distance is 5 cm.
•
To calculate the maximum number of devices to be operated in parallel in a safety circuit, observe the
following:
– The current consumption of the motors and the extension unit inputs
– The power consumption of the flush-mounted inserts
Pos : 39 /#Neustr uktur#/Online-Dokumentati on (+KN X)/Übersc hriften (--> Für all e D okumente <--)/2. Ebene/M - O/M ontage @ 18\mod_1302615960458_15.doc x @ 103424 @ 222222233333322222222222222222222222222222222222233333333 @ 1
6.3
Mounting
Pos : 40 /#Neustr uktur#/Online-Dokumentati on (+KN X)/Sic herheits hinweise und Hinweis e (--> Für alle Dokumente <--)/Warnhinweise/Sic herheit - 230 V @ 18\mod_1302606816750_15.doc x @ 103308 @ 222222222222222222221122222233321223333322222222222222222222222222222223332222222222222243333 @ 1
Warning
Electric voltage!
Risk of death and fire due to electrical voltage of 230 V.
– Work on the 230V supply system may only be performed by authorised electricians!
– Disconnect the mains power supply prior to installation and/or disassembly!
Pos : 41 /#Neustr uktur#/Online-Dokumentati on (+KN X)/Montage/alle Geräte/M ontage - U P-Dos en - D IN 49073-1 oder geeignetes Aufputzgehaeus e - Ohne Doc vari abl e @ 25\mod_1340354979636_15.doc x @ 219890 @ 2222123332223333332333222 @ 1
The flush-mounted insert must only be installed in flush-mounted wall boxes according to DIN 49073-1, Part 1, or
suitable surface-mounted housings.
Operating Instructions | 1473-1-8162
— 10 —
Operating Instructions
Busch-Jalousiecontrol ® II
Installation and electrical
connection
Pos : 42 /#Neustr uktur#/Online-Dokumentati on (+KN X)/Montage/Ti mer/M ontage - 6411_6418 @ 30\mod_1348812663208_15.doc x @ 240083 @ 2233333333322223333331133333333333333333333222233323333333333222222444443333 @ 1
1.
Connect the cables to the flush-mounted insert.
For the connection assignment see chapter
"Electrical connection" on page 12.
2.
Mount the flush-mounted-insert.
3.
Plug the attachment together with the frame onto
the flush-mounted insert.
Ensure that the plug-in connection on the rear
side does not get jammed.
If mounting is difficult, check whether a burr has
formed at the lock-in opening of the flushmounted insert and remove it.
The device is now mounted.
4.
Actuate the UP and DOWN button while at the
same time checking the travel direction of the
blind.
Pos : 43 /#Neustr uktur#/Online-Dokumentati on (+KN X)/Steuer modul e - Online-Dokumentation (--> Für alle Dokumente <--)/++++++++++++ Seitenumbruc h ++++++++++++ @ 9\mod_1268898668093_0.doc x @ 52149 @ 33333332222333333113333333333323322223333333322444443333 @ 1
Operating Instructions | 1473-1-8162
— 11 —
Operating Instructions
Busch-Jalousiecontrol ® II
Installation and electrical
connection
Pos : 44 /#Neustr uktur#/Online-Dokumentati on (+KN X)/Übersc hriften (--> Für all e D okumente <--)/2. Ebene/A - F /El ektrisc her Ansc hluss @ 21\mod_1328177051724_15.doc x @ 138042 @ 1132233333333333333333333333333333332233 @ 1
6.4
Electrical connection
Pos : 45 /#Neustr uktur#/Online-Dokumentati on (+KN X)/Ansc hlus s/Ti mer /Ansc hlus s - 6411 @ 30\mod_1348726074195_15.doc x @ 239523 @ 23333332333322222222113333333333222 @ 1
6411 U/…-101
Fig. 6:
Individual control
Fig. 7:
Group control
Blind control 1
2
3
Blind control 1 controls the entire group of blind motors. All other blind control devices can be used to also move
the blinds individually.
Note
A combination of flush-mounted inserts 6411U/…-101, 6411 U/… and 6410U-102 is possible.
Operating Instructions | 1473-1-8162
— 12 —
Operating Instructions
Busch-Jalousiecontrol ® II
Extension unit
Fig. 8:
Installation and electrical
connection
6411 U/…-101
Polyphase operation
Warning
Electric voltage!
Risk of death due to electrical voltage. Polyphase operation is permitted only in Germany.
Switch off all phases of the device during a fault or when working on the system.
If you wish to connect several motors in parallel, observe the instructions of the respective
manufacturers of the blind motors.
Neither persons nor objects are permitted in the vicinity of the operating radius of the blind.
If polyphase operation (two phases) is desired for the control and function of flush-mounted insert 6411U/...-101,
the following conditions must be fulfilled according to DIN VDE 0100:
•
Connection according to the circuit diagram in the Busch Blind Control II user manual.
When using in different FI circuits
When using via 3 phases
•
The phase for the extension unit inputs (terminal 1 and 2) must be equal and in the same electric circuit.
Pos : 46 /#Neustr uktur#/Online-Dokumentati on (+KN X)/Steuer modul e - Online-Dokumentation (--> Für alle Dokumente <--)/++++++++++++ Seitenumbruc h ++++++++++++ @ 9\mod_1268898668093_0.doc x @ 52149 @ 2233332222222211333333333322222333333333333332222222222222222221122222233321223332222222222222222222243333 @ 1
Operating Instructions | 1473-1-8162
— 13 —
Operating Instructions
Busch-Jalousiecontrol ® II
Installation and electrical
connection
Pos : 47 /#Neustr uktur#/Online-Dokumentati on (+KN X)/Ansc hlus s/Ti mer /Ansc hlus s H elligkeitss ens or @ 31\mod_1348834080607_15.doc x @ 240611 @ 33333322222222233333333333333222233333331111111111222222222222222 @ 1
6.4.1
Brightness sensor and glass break sensor
Note
The brightness sensor and the glass break sensor can only be used in connection with flushmounted insert 6411 U/S-101.
1.
2.
3.
4.
If necessary, remove the control element from the
flush-mounted insert.
Lever off the cover (3) carefully.
Pull the terminal block (1) out carefully.
Connect the brightness sensor and / or the glass break
sensor:
Ensure that the polarity of the cables is correct on the
brightness sensor.
S
= Brightness sensor (light grey)
= Earth (white)
G
5.
6.
= Glass break sensor
As a strain relief install the sensor cable with a small
loop in the loop compartment (2).
Do not extend the sensor cable, otherwise impairment
of functions can result.
Fig. 9:
Connecting the sensor
For additional information on fixing the glass break sensor,
see the relevant operating manual.
Pos : 48 /#Neustr uktur#/Online-Dokumentati on (+KN X)/Steuer modul e - Online-Dokumentation (--> Für alle Dokumente <--)/++++++++++++ Seitenumbruc h ++++++++++++ @ 9\mod_1268898668093_0.doc x @ 52149 @ 111111111111111113333333333333332222333333233333111222322222233333333333333333331111111111333333222233333 @ 1
Operating Instructions | 1473-1-8162
— 14 —
Operating Instructions
Busch-Jalousiecontrol ® II
7
Operation
Operation
Pos : 49 /#Neustr uktur#/Online-Dokumentati on (+KN X)/Übersc hriften (--> Für all e D okumente <--)/1. Ebene/A - F /Bedi enung @ 11\mod_1279185541649_15.doc x @ 83043 @ 11111111111111111111111133333113332222321112222 @ 1
Pos : 50 /#Neustr uktur#/Online-Dokumentati on (+KN X)/Übersc hriften (--> Für all e D okumente <--)/2. Ebene/A - F /Betriebs arten @ 13\mod_1286276050737_15.doc x @ 91535 @ 1111111111111111113333333333 @ 1
7.1
Operating modes
Pos : 51 /#Neustr uktur#/Online-Dokumentati on (+KN X)/Bedi enung/Ti mer/Betriebs arten - 6411 @ 30\mod_1348734504324_15.doc x @ 239735 @ 23333333333333333333333311111112112113111111111111122222221111132222223 @ 1
6411 U/S-101
6411 U-101
Fig. 10: Operating mode selector
Operating mode
Actuation / Function
Normal operation (N)
- A brief actuation (touch) of the operating surface triggers a travel command, which causes the blind to travel
=factory setting
to its upper or lower end position.
Another actuation interrupts the upward or downward travel.
- A long actuation of the operating surface causes the blind to travel UP/DOWN for the duration of the
actuation. If the actuation is longer than three minutes, the flush-mounted insert will switch itself off.
Slat operation (L)
- The brief actuation of the operating surface is identical to standard operation.
- A long actuation of the operating surface causes the blind to travel Up/Down clocked for the duration of the
actuation. If the actuation is longer than 3 minutes, the flush-mounted insert will switch itself off.
Central unit (Z)
- In this operating mode a flush-mounted blind control insert is used as central unit for additional blinds.
- At each actuation (brief or long) of the central unit, the blinds move to their end position.
- Programmed down-times of the extension units are executed.
Programming (P)
- Individual travel times of the blind can be programmed. E.g., if the blind is to travel automatically down to a
certain position and adjust the slats.
- The programmed travel time will become active after a switchover into a different operating mode only if
previously the blind travelled up as a result of a travel command (3 minutes). Only this will ensure that the
blind will travel to the desired position.
Awning function (M) /
- This operating mode is effective only in version 6411 U/S-101 with a brightness sensor connected.
only for 6411 U/S-101
- Without a brightness sensor this operating mode has no effect and is identical with standard operation (N).
Awning function:
- When the set brightness value is exceeded the blind travels down for 3 minutes or for a pre-programmed
down-time.
- The blind automatically travels up when the brightness value becomes too low only when the travel time
ensures that the sensor has an “unrestricted view” of the sun.
7.1.1
Changing the operating mode
Note
The operating mode can be changed when the electric voltage is connected.
1.
2.
3.
Pull the control element from the flush-mounted insert with your hands.
See separate operating manual of the control element.
Turn the operating mode selector (adjusting wheel) to the desired operating mode.
The selected operating mode becomes active immediately.
Re-attach the control element to the flush-mounted insert.
Pos : 52 /#Neustr uktur#/Online-Dokumentati on (+KN X)/Steuer modul e - Online-Dokumentation (--> Für alle Dokumente <--)/++++++++++++ Seitenumbruc h ++++++++++++ @ 9\mod_1268898668093_0.doc x @ 52149 @ 21133333333333333333332333321132222333333333323333311122223211111333322222222222 @ 1
Operating Instructions | 1473-1-8162
— 15 —
Operating Instructions
Busch-Jalousiecontrol ® II
Operation
Pos : 53 /#Neustr uktur#/Online-Dokumentati on (+KN X)/Übersc hriften (--> Für all e D okumente <--)/2. Ebene/A - F /Bedi enung in Verbi ndung mi t anderen Geräten @ 31\mod_1348832888297_15.doc x @ 240498 @ 222233333222232111333333133 @ 1
7.2
Operation in connection with other devices
Pos : 54 /#Neustr uktur#/Online-Dokumentati on (+KN X)/Bedi enung/Ti mer/Bedi enung - 6411 @ 31\mod_1348824708779_15.doc x @ 240442 @ 32222321113333322223333333311111111113333332 @ 1
The operation of the blind depends on the control element used and the use of the sensors.
When the control element is attached, the insert recognizes it automatically.
7.2.1
Operation via control element 6430
When operating mode N or M is set:
Button
Function
Actuation / Result
Brief press of the button:
Blind UP
- The blind travels to the top or bottom end position.
- A renewed brief press of the button stops the blind immediately.
Blind DOWN
Long button press:
- The blind travels up or down as long as the button is pressed.
When operating mode L is selected:
Button
Function
Actuation / Result
Brief press of the button:
Blind UP
Blind DOWN
- The blind travels to the top or bottom end position.
- A renewed brief press of the button stops the blind immediately.
Long button press:
- The blind travels up or down clocked as long as the button is pressed.
This causes the angle of the slats to be changed in stages.
7.2.2
Operation via IR control element 6066
Manual local operation as well as remote control via IR remote control 6010-25 takes place analogous to the
actuation of control element 6430. On IR control element 6066, the red LED flashes during sending operation.
7.2.3
Operation via extension units
All types of signal generators that supply a 230 V signal (no continuous signal) to extension unit inputs "1" and "2"
are suitable as extension units. The operation depends on the respective scope of functions of the extension unit
and the operating mode selected. The flush-mounted insert interprets the brief voltage pulses as a "brief actuation
(touch)" and the long voltage pulses as a "long actuation".
Priority of operation
•
The glass break sensor has the highest priority. When it is triggered, the extension unit inputs are
deactivated. The blind travels down and can only travel up again with a local operation.
•
Extension unit input "2" for UP has the second highest priority (Wind alarm). If voltage is applied to the input,
the blind travels up and remains up as long as voltage is applied to extension unit input "2".
•
All other operations have equal priority.
Pos : 55 /#Neustr uktur#/Online-Dokumentati on (+KN X)/Steuer modul e - Online-Dokumentation (--> Für alle Dokumente <--)/++++++++++++ Seitenumbruc h ++++++++++++ @ 9\mod_1268898668093_0.doc x @ 52149 @ 33111111111133333233331112333333322223322 @ 1
Operating Instructions | 1473-1-8162
— 16 —
Operating Instructions
Busch-Jalousiecontrol ® II
Operation
Pos : 56 /#Neustr uktur#/Online-Dokumentati on (+KN X)/Bedi enung/Ti mer/Einstellung Hellig keitssens or - 6411 @ 31\mod_1349072104858_15.doc x @ 240683 @ 222223211122223322242 @ 1
7.2.4
Brightness sensor
Note
Brightness sensor 6414 can only be used in connection with flush-mounted insert 6411 U/S-101.
The values at which the sun protection function is triggered can be set individually on the flush-mounted insert via
a adjusting wheel and on the comfort timer control element in the display, so that the blind closes at the desired
brightness.
The sun protection function can be combined with operating modes "N" and "L". Prerequisite for faultless function
is that the blind can move past the sensor. If this is not the case, the awning function (see operating mode "M")
must be used.
Procedure
•
The sensor continuously measures the brightness and compares this value with the threshold value.
•
If the threshold value exceeds 90 seconds, the blind travels down.
•
As soon as the downward travelling blind darkens the sensor, downward travel is stopped.
•
´The blind travels up again and stops just above the sensor position.
•
The blind travels back to the top end position when the sensor exceeds the set threshold value for more than
15 minutes or a control signal is sent from a control element or an extension unit.
•
An operation from an extension unit or a control element interrupts the sun protection function, and manual
operation is executed.
•
A renewed activation of the sun protection function is carried out with an UP command (3 minutes travel time)
or the next bright / dark changeover. This happens automatically by means of the exterior brightness (evening
twilight).
Note
The twilight function is possible only in connection with the timer control element. See the
relevant operating manual.
Operating Instructions | 1473-1-8162
— 17 —
Operating Instructions
Busch-Jalousiecontrol ® II
Operation
7.2.4.1
Setting for control elements 6430 and 6066
The threshold value of the brightness sensor is set on the adjusting wheel of the flush-mounted insert.
Warning
Risk of damaging the device and sustaining injuries!
When setting or re-positioning the brightness sensor the blind may be directly set in motion.
Keep the travel path of the blind free.
Setting the threshold value independent of the current brightness
1. Ensure that the brightness sensor is attached to the planned location and is not covered
up.
2. Turn the adjusting wheel (1)
– to the right if the sun protection function is to be triggered at minimum brightness.
– to the left if the sun protection function is to be triggered only at extreme brightness.
Setting current brightness as threshold value
1. Turn the adjusting wheel (1) to the minimum value (right end stop).
2. Wait a few seconds.
3. Turn the adjusting wheel (1) to the maximum value (left end stop).
This activates the programming of the brightness value. The blind travels (if it is not already at the top) to the
top as a sign of having acknowledged this operating mode.
4. Now turn the adjusting wheel (1) slowly to the right in the direction of reducing brightness until the blind
travels down.
This stores the current brightness value. The sun protection function is directly active.
7.2.4.2
Setting for timer control elements 6455 and 6412-101
The sun protection function and the twilight function can only be set in connection with the timer control elements.
The setting is made via the timer control element. The adjusting wheel of the flush-mounted insert then has no
function. Fore more detail, see the relevant operating manual of the timer control element.
Pos : 57 /#Neustr uktur#/Online-Dokumentati on (+KN X)/Steuer modul e - Online-Dokumentation (--> Für alle Dokumente <--)/++++++++++++ Seitenumbruc h ++++++++++++ @ 9\mod_1268898668093_0.doc x @ 52149 @ 333333323333222223321112222232222222222242 @ 1
Operating Instructions | 1473-1-8162
— 18 —
Operating Instructions
Busch-Jalousiecontrol ® II
Operation
Pos : 58 /#Neustr uktur#/Online-Dokumentati on (+KN X)/Bedi enung/Ti mer/Programmi erung - 6411 @ 30\mod_1348743948747_15.doc x @ 239749 @ 2222223 @ 1
7.2.5
Programming the travel times
Individual travel times can be programmed in operating mode "Programming (P)", to move the blind to a specific
intermediate position.
Programming procedure
1. Prior to programming, move the blind to the top end position.
2. Set operating mode "Programming (P)". See chapter "Changing the operating mode", page 15.
3. Move the blind down to the desired position with a long actuation of the operating surface.
An interim stopping of the blind is possible. All DOWN times are added and stored.
Note
If an extension unit is installed, this can also be used for moving the blind UP and DOWN. This
makes removing and re-attaching the control element during a change of operating mode
unnecessary.
4.
5.
Set the return travel pulse by moving the blind UP.
The slats of the blind are adjusted or the roller shutters are moved to the ventilation position via the return
travel pulse.
Before programming a return travel time, the DOWN time must amount to at least 10 seconds.
The return travel pulse starts with the initial UP movement of the blind. All subsequent travel times are added
during the up movement and subtracted during the DOWN movement and stored as a total return travel pulse.
The maximum return travel time is 25 seconds. Exceeding or dropping below this time is signalled with a stop
of the blind.
Exit operating mode "Programming (P)“ and set the original operating mode again. See chapter "Changing the
operating mode", page 15.
Programming is complete.
Check of programming
Preconditions:
•
Programming has been carried out correctly.
•
The blind is in the upper end position.
Sequence:
•
At a DOWN command the blind travels down at the programmed DOWN time.
•
The blind stops for 0.5 seconds.
•
The blind travels back to the top for the time of the programmed return travel pulse.
If the blind is not in the top end position, the DOWN command is carried out without the programmed intermediate
position. The blind travels down for 3 minutes.
Deleting programming
1. Switch into operating "Programming (P)" while the control element is pulled off.
2. Switch back to the previous operating mode.
Programming has been deleted
Pos : 59 /#Neustr uktur#/Online-Dokumentati on (+KN X)/Steuer modul e - Online-Dokumentation (--> Für alle Dokumente <--)/++++++++++++ Seitenumbruc h ++++++++++++ @ 9\mod_1268898668093_0.doc x @ 52149 @ 2222223333333 @ 1
Operating Instructions | 1473-1-8162
— 19 —
Operating Instructions
Busch-Jalousiecontrol ® II
Operation
Pos : 60 /#Neustr uktur#/Online-Dokumentati on (+KN X)/Bedi enung/Ti mer/Partyfunktion - 6411 @ 30\mod_1348754487880_15.doc x @ 240033 @ 3 @ 1
7.2.6
Party function
The Party function can be activated only when combining the flush-mounted inserts 6411 U/...-101 and control
elements 6430-... With this function the flush-mounted insert is excluded from a group control. This means that
signals which arrive via the extension unit inputs and local operation are ignored.
The function can only be activated when the blind is in the top end position. Please observe the relay operating
time of 3 minutes.
Enable
•
Activate the UP button for 5 seconds.
As acknowledgement, the blind travels down for two seconds and then back up to the top end position.
Deactivate
•
Actuate the DOWN button for 5 seconds.
As acknowledgment, the blind moves down. The deactivation is carried out automatically after approximately
8 hours.
Activating the party function deactivates the sun protection, the twilight and the awning function. The Party
function cannot be activated in "Central unit" and "Programming" operating modes.
Pos : 61 /#Neustr uktur#/Online-Dokumentati on (+KN X)/Übersc hriften (--> Für all e D okumente <--)/2. Ebene/S - T /Stör ungs bes eitigung @ 21\mod_1330945986708_15.doc x @ 201048 @ 3333333 @ 1
7.3
Fault rectification
Pos : 62 /#Neustr uktur#/Online-Dokumentati on (+KN X)/Stör ungs bes eitigung/Ti mer /Störungs bes eitigung - 6411 @ 31\mod_1349182561196_15.doc x @ 241392 @ 333333 @ 1
Diagnosis
Possible cause
Fault rectification
Blinds move differently (with group control)
Outputs have been switched
Switch outputs on 6411 U/S-101
Extension units have been switched
Switch extension unit inputs on 6411 U/S101
Blind does not move during group control
Load and control lines have been installed
Separate load lines and control lines
too close
Adhere to a minimum distance of 5 cm
Extension unit input with higher highest
priority is active (e.g. wind alarm)
–
Blind does not move
Thermal protection of motor is active
Wait for a short period
Slats are not adjustable
Incorrect operating mode is set
Check operating mode
Blind no longer travels via extension unit
Party function is active
Deactivate party function
and local control
=== Ende der Liste für T extmar ke Content ===
Operating Instructions | 1473-1-8162
— 20 —
Operating Instructions
Busch-Jalousiecontrol ® II
A member of the ABB Group
Busch-Jaeger Elektro GmbH
PO box
58505 Lüdenscheid
Freisenbergstraße 2
58513 Lüdenscheid
Germany
www.BUSCH-JAEGER.com
[email protected]
Central sales service:
Phone:
+49 (0) 2351 956-1600
Fax:
+49 (0) 2351 956-1700
Notice
We reserve the right to at all times make
technical changes as well as changes to the
contents of this document without prior notice.
The detailed specifications agreed to at the time
of ordering apply to all orders. ABB accepts no
responsibility for possible errors or
incompleteness in this document.
We reserve all rights to this document and the
topics and illustrations contained therein. The
document and its contents, or extracts thereof,
must not be reproduced, transmitted or reused by
third parties without prior written consent by ABB.
Copyright© 2012 Busch-Jaeger Elektro GmbH
All rights reserved
=== Ende der Liste für T extmar ke Bac kc over ===
1473-1-8162 | Rev. 01 | 17.12.2012
Pos : 64 /#Neustr uktur#/Online-Dokumentati on (+KN X)/Rüc ksei ten (--> Für alle Dokumente <--)Rüc ks eite - Busc h-J aeg er - Allgemein (2013-01-03 09:23:43) @ 28\mod_1347009779995_15.doc x @ 232282 @ @ 1