1
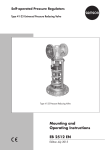
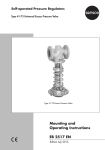
Self-operated Pressure Regulators Excess Pressure Valve Type 2408 Fig. 1· Type 2408 Excess Pressure Valve Mounting and Operating Instructions EB 2528 EN Edition June 2010 Contents Contents Page 1 1.1 Design and principle of operation . . . . . . . . . . . . . . . . . . . . . . 4 Process medium, application range, versions. . . . . . . . . . . . . . . . . 4 2 2.1 2.2 2.3 2.4 2.5 Installation . . . . Mounting position . Strainer . . . . . . Shut-off valve . . . Pressure gauge . . Control line . . . . . . . . . . . . . . . . . . . . . . . . . . . . . . . . . . . . . . . . . . . . . . . . . . . . . . . . . . . . . . . . . . . . . . . . . . . . . . . . . . . . . . . . . . . . . . . . . . . . . . . . . . . . . . . . . . . . . . . . . . . . . . . . . . . . . . . . . . . . . . . . . . . . . . . . . . . . . . . . . . . . . . . . . . . . 4 4 6 6 6 6 3 3.1 3.2 3.3 Operation . . . . . . Start-up. . . . . . . . Adjusting the set point . Decommissioning . . . . . . . . . . . . . . . . . . . . . . . . . . . . . . . . . . . . . . . . . . . . . . . . . . . . . . . . . . . . . . . . . . . . . . . . . . . . . . . . . . . . . . . . . . . . . . . . . . . . . . . . . . . . . . . 7 7 7 8 4 4.1 Maintenance and troubleshooting . . . . . . . . . . . . . . . . . . . . . . 8 Pressure fluctuations . . . . . . . . . . . . . . . . . . . . . . . . . . . . . 8 5 Nameplate . . . . . . . . . . . . . . . . . . . . . . . . . . . . . . . . . 9 6 Service . . . . . . . . . . . . . . . . . . . . . . . . . . . . . . . . . . . 9 7 Technical data . . . . . . . . . . . . . . . . . . . . . . . . . . . . . . . 10 8 Dimensions . . . . . . . . . . . . . . . . . . . . . . . . . . . . . . . . 11 . . . . . . Definitions of the signal words used in these instructions CAUTION! Indicates a hazardous situation which, if not avoided, could result in minor or moderate injury. NOTICE Indicates a risk of property damage. 2 EB 2528 EN Note! Indicates supplementary explanations, information and tips. Safety instructions General safety instructions Observe the following instructions on installation, start-up and operation of the regulator for your own safety: 4 The regulator is to be mounted, started up or serviced by fully trained and qualified personnel only, observing the accepted industry codes and practices. Make sure employees or third persons are not exposed to any danger. All safety instructions and warnings in these mounting and operating instructions, particularly those concerning assembly, start-up and maintenance, must be observed. 4 According to these mounting and operating instructions, trained personnel is referred to as individuals who are able to judge the work they are assigned to and recognize possible dangers due to their specialized training, their knowledge and experience as well as their knowledge of the applicable standards. 4 The regulator fulfils the requirements of the European Pressure Equipment Directive 97/23/EC. 4 For appropriate operation, make sure that the regulator is only used in areas where the operating pressure and temperatures do not exceed the operating values specified in the order that the valve sizing data are based on. 4 The manufacturer does not assume any responsibility for damage caused by external forces or any other external influence! 4 Any hazards that could be caused in the regulator by the process medium, the operating pressure or by moving parts are to be prevented by means of the appropriate measures. 4 Proper shipping and storage are assumed. Note! Non-electric valve versions whose bodies are not lined with an insulating material coating do not have their own potential ignition source according to the risk assessment stipulated in EN 13463-1:2001, section 5.2, even in the rare incident of an operating fault. Therefore, such valve versions do not fall within the scope of Directive 94/9/EC. EB 2528 EN 3 Design and principle of operation 1 Design and principle of opera- 2 Installation tion See also Fig. 2, page 5. See also Fig. 2, page 5. The process medium flows through the valve in the direction indicated by the arrow on the body. The position of the valve plug (3) determines the flow rate across the area released between the valve's plug and seat (2). In pressureless state (control line not connected or no pressure applied), the valve is closed by the force of the set point springs (7). The upstream pressure p1 to be controlled is tapped upstream of the regulator. Using an external control line, this pressure is transmitted to the tapped connection (9) on the actuator housing (6) where it is converted into a positioning force by the diaphragm plate with operating diaphragm (5). This positioning force is used to move the plug stem (4) and thus the valve plug depending on the force of the set point springs (7). The spring force can be adjusted on the set point adjuster (8). When the force resulting from the upstream pressure p1 exceeds the adjusted set point, the valve opens proportionally to the change in pressure. 1.1 Process medium, application range, versions Excess pressure valve for set points between 5 mbar to 1000 mbar for gases at temperatures from –20 to +60 °C. Valves with flanged body in DN 15 and DN 25 as well as with G ½, G ¾ and G 1 female thread. 4 EB 2528 EN NOTICE Install a strainer (e.g. SAMSON Type 2 NI) upstream of the regulator (refer to section 2.2). Make sure the regulator is mounted free of stress. If necessary, support the piping near the connecting flanges. Never attach supports directly to the valve or actuator. 2.1 Mounting position Mounting position (preferable) – Install the regulator in a horizontal pipeline with the actuator housing and set point adjuster pointing vertically up, – The direction of flow must correspond to the arrow on the body, – Install the control line with a downward slope of approx. 10 % towards the tapping point to allow condensed liquid to flow back into the tank or pipeline. Other mounting positions – Install the regulator in a vertical pipeline with the actuator housing and set point adjuster pointing to the side. Note! Higher system deviations may occur in this mounting position. – Make sure the direction of flow matches the arrow on the body (from bottom to top). Installation 10 1 2 3 4 5 6 7 8 9 Valve body Seat Plug Plug stem Diaphragm plate with operating diaphragm Actuator housing Set point spring Set point adjuster Control line connection (G ¼ tapped connection for upstream pressure p1) 10 Cap Fig. 2 · Design and principle of operation, Type 2408 Excess Pressure Valve EB 2528 EN 5 Installation 2.2 Strainer 2.4 Install a strainer upstream of the regulator (Fig. 3). Install the strainer with the direction of flow matching the arrow on the body. Make sure the filter element is vertically suspended. Remember to leave enough space to remove it. 2.3 Shut-off valve Install a hand-operated shut-off valve both upstream of the strainer and downstream of the regulator (Fig. 3) to be able to shut down the plant for cleaning and maintenance, and when the plant is not used for longer periods of time. p1 1 3 2 min. 3 x DN min. 5 x DN 2 1 4 2 Pressure gauge To monitor the pressures in the plant, install a pressure gauge both upstream and downstream of the regulator (Fig. 3). 2.5 Control line G ¼ tapped connection (9) at the actuator housing. Install a control line with at least 6 mm inside diameter on site, preferably an 8 x 1 mm pipe made of steel or stainless steel. Always attach the control line connection for pressure tapping directly to the tank or vessel as the medium is fully expanded and free of turbulence at this point. ≈10 % slope towards pressure tapping point min. 2 x DN ≈10 % slope towards pressure tapping point p2 1 1 2 3 4 EB 2528 EN 4 Type 2408 3 6 p2 DN 1 p1 Fig. 3 · Sample installation Type 2408 4 Shut-off valve Pressure gauge (upstream pressure) Strainer Pressure gauge (downstream pressure) Operation When tapping the pressure at a straight pipeline section, observe a minimum distance of at least twice the nominal valve size to the regulator. Connect the control lines to the side or top of the main horizontal pipeline. If possible, install the tapping connection in a pipe expansion. Install other fittings that may cause flow turbulence (e.g. shut-off valves, restrictions, bows, bends or branches) at an appropriate distance to the control line connection (at least three times the nominal valve size). Note! If the gas to be controlled contains moisture, condensate may form in the control line, which can damage the regulator. To allow the gas to flow back into the tank or pipeline, install the control line with a downward slope of approx. 10 % towards the pressure tapping point. We recommend to open shut-off valves slowly from the downstream side. Avoid pressure surges. NOTICE The max. permissible pressure at the operating diaphragm must not exceed 0.5 bar with A = 1200 cm², 1 bar with A = 640 cm², 2 bar with A = 320 cm² and 4 bar with A = 160 cm². Make sure this pressure is not exceeded, particularly when pressure-testing the plant with the regulator installed or when starting up the plant. 3.2 Adjusting the set point Adjust the desired set point by tensioning the set point springs using the set point adjuster (SW 27/¾" adjustment screw). 4 Remove the cap (10). 4 Turn the adjustment screw using a socket wrench with width across flats SW 27. 3 Operation 3.1 Start-up See also Fig. 2, page 5. NOTICE Do not start up the regulator before all components have been installed. Make sure the control line is free of dirt or other contaminations that may impair the proper medium flow. Connect the line properly. 4 Turn the adjuster clockwise P to increase the set point and counterclockwise Q to reduce it. 4 Remount the cap. Adjustment screw SW 27 (¾") Fig. 4 · Set point adjustment; view from top EB 2528 EN 7 Maintenance and troubleshooting Check the adjusted set point on the pressure gauge installed upstream of the regulator (Fig. 3). 3.3 Decommissioning We recommend to close the upstream shut-off valve before closing the shut-off valve installed downstream of the regulator. 4 Maintenance shooting and trouble- The pressure regulator is maintenance free. Nevertheless, it is subject to natural wear, particularly at the seat, plug and operating diaphragm. Depending on the operating conditions, the regulator needs to be checked at regular intervals to detect and remove possible malfunctions. CAUTION! For installation and maintenance work on the regulator, make sure the relevant plant section has been depressurized and, depending on the process medium, drained as well. We recommend to remove the regulator from the pipeline. If necessary, allow the regulator to cool down to reach ambient temperature before starting any work on it. Disconnect or shut off the control line to avoid any hazards that could be caused by moving regulator parts. As valves are not free of cavities, remember that residual process medium might still be contained in the valve. 8 EB 2528 EN 4.1 Pressure fluctuations NOTICE Pressure fluctuations (oscillation) may damage the regulator and plant. As a result, prevent them from occurring or remove their cause immediately. To stop oscillation from occurring, the following actions may be helpful: 4 Check the pressure tapping point at the control line (refer to section 2.5); if necessary, move the tapping point. 4 Screw a SAMSON restriction into the sleeve for the tapped connection (9): order no. 1991-7114 for 1200 and 640 cm², order no. 1991-7113 for 320 and 160 cm². 4 Check the regulator's sizing data. If nec- essary, change the KVS coefficient, seat diameter or diaphragm area. Contact SAMSON (refer to section 6) if the problems persist. Nameplate 5 Nameplate 3 7 9 Legend 2 1 5 4 6 1 Configuration ID (VAR-ID) 2 Manufacturing data 3 Type designation (2408) 4 Max. perm. differential pressure in bar 5 Max. perm. temperature in °C 6 Nominal size DN or connection thread G 7 KVS coefficient 8 Set point range in bar 9 Nominal pressure PN 8 SAMSON Fig. 5 · Nameplate 6 Service If malfunctions or defects occur, contact the SAMSON After-sales Service for support. The addresses of SAMSON AG, its subsidiaries, representatives and service facilities worldwide can be found on the Internet at www.samson.de, in a SAMSON product catalog or on the back of these mounting and operating instructions. 4 Installation drawing indicating the exact location of the regulator and all additionally mounted units (shut-off valves, pressure gauges etc.) Include the following details when making inquiries: 4 Type and nominal size of the regulator 4 Configuration ID (Var-ID) 4 Upstream and downstream pressures 4 Temperature and process medium 4 Min. und max. flow rates 4 Has a strainer been installed? EB 2528 EN 9 Technical data 7 Technical data Table 1 · Technical data Connection · Nominal size G ½, G ¾ and G 1 Stainless steel Nominal pressure DN 15 and DN 25 Spheroidal graphite iron PN 25 Control line connection for 8 x 1 mm pipe G¼ 0.25 · 1.0 · 2.5 · 3.21) · 5.01) KVS coefficients Max. perm. differential pressure Δp 6 bar Max. perm. pressure at the actuator Actuator area A = 1200 cm² Actuator area A = 640 cm² Actuator area A = 320 cm² Actuator area A = 160 cm² 0.5 bar 1 bar 2 bar 4 bar Permissible temperature range of the medium –20 to +60 °C Leakage class acc. to DIN EN 60534-4 Set point ranges Soft seal, at least class IV 5 to 15 mbar · 10 to 30 mbar · 25 to 60 mbar · 50 to 200 mbar 100 to 1000 mbar 1) Only in conjunction with 100 to 1000 mbar set point range 10 EB 2528 EN Dimensions 8 Dimensions Flanged body made of spheroidal graphite iron Body with screwed ends made of stainless steel Table 2 · Dimensions in mm Connection G½ G¾ G1 DN 15 Female thread ½” ¾” 1” – – Length L 65 75 90 130 160 Width across flats SW 34 34 46 – – Height H3 5 to 15 mbar 10 to 30 mbar 25 to 60 mbar 50 to 200 mbar 100 to 100 mbar Approx. weight in kg DN 25 45 Height H 360 Actuator Actuator Ø D = 490 mm, actuator area A = 1200 cm² Height H 360 Actuator Actuator Ø D = 380 mm, actuator area A = 640 cm² Height H 360 Actuator Actuator Ø D = 285 mm, actuator area A = 320 cm² Height H 360 Actuator Actuator Ø D = 285 mm, actuator area A = 320 cm² Height H 360 Actuator Actuator Ø D = 225 mm, actuator area A = 160 cm² 5 to 60 mbar set point range 50 to 1000 mbar set point range 15.5 15.7 15.9 17 18 12 12.2 12.4 13.5 14.5 Fig. 6 · Dimensions EB 2528 EN 11 EB 2528 EN S/Z 2010-08 SAMSON AG · MESS- UND REGELTECHNIK Weismüllerstraße 3 · 60314 Frankfurt am Main · Germany Phone: +49 69 4009-0 · Fax: +49 69 4009-1507 Internet: http://www.samson.de Conversion from chromate coating to iridescent passivation Conversion from chromate coating to iridescent passivation We at SAMSON are converting the surface treatment of passivated steel parts in our production. As a result, you may receive a device assembled from parts that have been subjected to different surface treatment methods. This means that the surfaces of some parts show different reflections. Parts can have an iridescent yellow or silver color. This has no effect on corrosion protection. For further information, go to u www.samson.de/chrome-en.html