1
Installation and Operating Instructions
INSTABUS DALI gateway REG-K/1/16/64
Art. no. 680129
Submenu GROUP ASSIGNMENT – Level 2 and 3
GROUP
ASSIGNMENT
ECG Nr.: 12
GROUP:
--
ECG Nr.: 12
GROUP: 1
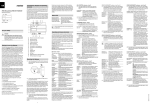
A short push on the Prg/Set key leads from level 1 menu GROUP ASSIGNMENT to a submenu allowing to assign
ECGs to one of the 16 DALI groups. Within the submenu, it is possible to create new assignments for ECGs or to
modify existing ones.
A short push on the SCROLL button navigates from one ECG to the next. The first display line shows the number
of the selected ECG. The corresponding light will blink for as long as its ECG is selected. This allows to easily identify which number is assigned to which light.
A long push of the Prg/Set button switches the device to programming mode. A short push on the SCROLL-Button
allows to select the group to which the ECG is to be assigned. Once the assignment completed, a short push on
the Prg/Set button will confirm and save the selection. For a new installation, this task needs to be completed for
each ECG that was discovered during the search process. By pushing the ESC button or by simply waiting for more
than 30 seconds, the parent menu item is again activated.
Submenu GROUP PARAMETERS – Level 2 and 3
GROUP
PARAMETERS
GROUP: 01
PARAMETERS
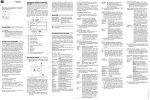
A short push on the Prg/Set key leads from level 1 menu GROUP PARAMETERS to a submenu allowing to set all
parameters of a DALI Group. It is recommended to set the group parameters within ETS and only use this function
for quick modification of individual settings. Please note that each ETS download overwrites these manual settings.
A short push of the SCROLL button navigates from one group to the next. The first display line indicates the current
group number. A long push of the Prg/Set button switches the device to programming mode and the parameter
type and its value are shown on the second display line. The following parameters can be modified directly on the
device:
•
•
•
•
GROUP: 12
ON VALUE: 100
GROUP: 12
MIN VAL: 0
GROUP: 12
MAX VAL: 100
GROUP: 12
DURATION: 10s
Initial (ON) Value:
Lower Dimming Limit (MIN VAL):
Upper Dimming Limit (MAX VAL):
Dimming Duration for 0..100%:
0 to 100% in 5% steps
0 to 40% in 5% steps
50 to 100% in 5% steps
5 sec. to 60 sec.
Once the programming mode is active, the first parameter (ON VALUE) is displayed. The parameter value can be
changed with a short push of the SCROLL button. If no change is required, don’t use the SCROLL button. A short
push of the Prg/Set button saves the parameter value and jumps to the next parameter of this group (MIN VAL)
which can in turn be modified or not. A short push again of the Prg/Set button saves the parameter value and jumps
to the next parameter of this group (MAX VAL) which can in turn be modified or not. And finally another short push
of the Prg/Set button saves the parameter value and jumps to the next parameter of this group (DURATION) which
can in turn be modified or not. A short push of the Prg/Set button saves the value and jumps again to the first parameter (ON VALUE). It is possible to escape back to the next higher menu with the ESC button or by simply waiting for more than 30 seconds.
Submenu SCENE ASSIGNMENT – Level 2 and 3
SCENE
ASSIGNMENT
SCENE01 XXXX
XXXXXXXXXXXX
SCENE03 ---XXXX------XX
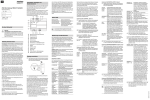
A short push on the Prg/Set key leads from level 1 menu SCENE ASSIGNMENT to a submenu allowing to associate DALI Groups to up to 16 DALI Scenes.
With a short push of the SCROLL button, it is possible to navigate from one scene to the next. The first display line
shows the number of the currently selected scene. Symbols show which of the 16 groups are associated with this
scene. An ‘X’ at the corresponding location means that the group is part of the scene, a ‘–’ means that it is not. The
four characters following the scene number represent groups 1 through 4, the 12 characters on line two represent
groups 5 through 16.
A long push of the Prg/Set button switches the device to programming mode. A blinking cursor on the first X shows
that Group 1 is currently selected. A short push of the SCROLL button toggles between selected (‘X’) and not selected (‘–’). A short push of the Prg/Set button moves the cursor to the next Group field, which in turn can be selected or not with the SCROLL button, etc. Once all 16 Groups have been moved through, the configuration is
saved and immediately active. After completion of the last group, this submenu is closed automatically and the device returns to the next higher menu item. To avoid saving changes, don’t complete the line, and use the ESC button instead, or simply wait for more than 30 seconds.
Merten GmbH & Co. KG
7/10