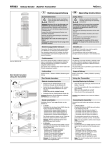
1
Operating Instructions
Technical Details
Frequency:
Power supply:
Current consumption:
Relay output:
Max. contact rating:
Opertg. temperature:
Type of protection:
Dimensions:
Weight:
Warranty
868.3 MHz or
433.92 MHz
24 V AC/DC ± 10 %
approx. 3 VA
1 relay contact (N.O.)
DC: max. 60 V /
max. 1 A/ max. 30 W
-20°C to +60°C
IP66
180 x 94 x 59 mm
approx. 480 g
Disposal
Waste electrical products may not be
disposed of with household waste!
Dispose of the waste product via a
collection point for electronic scrap
or via your specialist dealer.
Put the packaging material into the
recycling bins for cardboard, paper
and plastics.
Within the statutory warranty period we undertake to rectify free of charge by repair or
replacement any product defects arising from
material or production faults.
Any unauthorized tampering with, or modifications to, the product shall render this warranty
null and void.
L
LED »L«
E
LED »E«
REL1
Conformity
Display
This product complies with the
essential requirements of the
R&TTE Directive 1999/5/EC.
The Declaration of Conformity can be acquired from the supplier referred to in the
delivery documents.
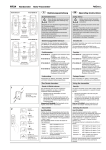
ST2
Customer Service
If, despite correct handling, faults or malfunctions occur or if the product was damaged,
please contact the company at the address
below:
ELDAT GmbH
Im Gewerbepark 14
15711 Zeesen/Deutschland
Telefon: + 49 (0) 33 75 / 90 37-310
Telefax: + 49 (0) 33 75 / 90 37-90
Internet: www.eldat.de
E-Mail: [email protected]
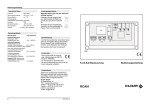
Fig. 1
87274 1108 GB
24 V
AC/DC
Relay Controlled
Device
Radio Access Control
RCA02
8
L1
1
ST1
Operating instructions
Operating Instructions
Operating Instructions
Model
General Information
RCA02-4101M-01
433,92 MHz
RCA02-5001M-01
868,30 MHz
Scope of Delivery
Radio Access Control
PG screw fittings set
Mounting accessories
Safety Advice
Before connecting and starting-up
the unit, carefully read through the
operating instructions!
We will not accept any liability for personal
injury or damage to property caused by
failure to observe the operating instructions
and in particular the safety advice!
Caution! Electrical installation may only
be carried out by a qualified electrician!
While installing, make sure that the electric circuit into which the radio access
control is to be integrated is at zerovoltage!
Warning! When being programmed, the
Radio Access Control is live!
4 History
The Radio Access Control works within a
frequency range which is also used by other
radio services.
The operation and range can therefore be
affected by devices working on the same or
an adjacent frequency.
The reception quality can be affected by a
number of factors:
• location
• equipment and systems without interference suppression
• other transmitters within the frequency
range
• atmospheric conditions and other factors.
In the case of malfunctions, contact your
specialist dealer or the manufacturer.
Press the right button.
Each time the button is pressed, the memory
location numbers of the last 10 telegrams are
displayed counting down.
Note:
This is how to end programming without
saving data:
• Switch to the next additional function:
press button »E«
• Switch to operating mode:
press buttons »L« and »E« simultaneously
When a memorized radio telegram is received, a relay impulse is generated and a
relay is switched.
Have faulty units checked by the manufacturer!
5 Deleting the Memory Completely
After switching to the »Deleting the Memory
Completely« menu, »E A« is displayed.
Press the left and right buttons simultaneously.
The entire contents of the memory are deleted. During the deleting procedure
(approx. 8 s), the display flashes.
Note:
It is not possible to interrupt the deleting
procedure!
Intended Use
The RCA02 Radio Access Control is exclusively developed and manufactured as a
receiving unit for 48-bit radio telegrams.
After the deleting procedure:
• Switch to the next additional function:
press button »E«
• Switch to operating mode:
press buttons »L« and »E« simultaneously
The manufacturer does not assume any
liability for damage caused as a result of
improper or non-intended use.
87274 1108 GB
After switching to the numerical code menu,
»C_ _« is displayed.
How to enter a new numerical code:
1. Using the buttons, select the desired
numerical code.
2. Confirm the new code by pressing button
»L«.
1. Using the buttons, select the numerical
code »000«.
•
Do not make any unauthorized alterations or
modifications to the unit!
6 Entering/Altering the Numerical Code
You can use this function if you want to release the programming modes (learn-delete
mode and additional function mode) using a
numerical code.
How to delete a numerical code:
Function
The RCA02 Radio Access Control is an 868
MHz or 433 MHz receiving unit. It receives up
to 700 individual 48-bit telegrams.
Programming may only be performed
with the protective cover installed!
2
After switching to the history menu, »H_ _« is
displayed.
2. Confirm the new code by pressing button
»L«.
Note:
If a code with less than three digits is selected,
the error message »err« is displayed.
Note:
This is how to end programming without saving data:
• Switch to the next additional function:
press button »E«
• Switch to operating mode:
press buttons »L« and »E« simultaneously
87274 1108 GB
7
Operating Instructions
Additional Function Mode
In order to enter the additional function mode,
first press buttons »L« and »E« simultaneously.
Then switch from one additional function to
the other by pressing button »E«.
In order to quit the additional function mode,
press buttons »L« and »E« simultaneously.
1 Length of the Relay Impulse
After switching to the impulse menu, an »I«
(left) and the impulse length in seconds (right)
is displayed. A standard value of 1 sec is set
at the factory.
You can set another impulse length between
1 and 99 seconds. If no relay impulse shall be
generated, select the impulse length »0«.
1. Using the middle and/or right button,
select the desired impulse length (in s).
The display flashes.
2. Confirm the new impulse length by pressing button »L«.
Once the new value has been memorized,
the display stops flashing.
Note:
This is how to end programming without
saving data:
• Switch to the next additional function:
press button »E«
• Switch to operating mode:
press buttons »L« and »E« simultaneously
2 Blocking Specific Memory Locations
After switching to the blocking menu, the
memory location »001« is displayed.
Using the buttons, select the memory
location to be blocked.
Operating Instructions
The current status of the memory location is
displayed via the two LEDs »LED-L« and
»LED-E«:
Status:
LED
»L«:
LED
»E«:
occupied
OFF
nonoccupied
ON
blocke
d
ON
ON
OFF
ON
In order to alter the status of the selected
memory location, press button »L«:
• Case a) memory location is occupied
-> memory location is blocked
• Case b) memory location is blocked
-> blocking is cancelled
Note:
It is not possible to block non-occupied memory locations.
Note:
This is how to end programming without
saving data:
• Switch to the next additional function:
press button »E«
• Switch to operating mode:
press buttons »L« and »E« simultaneously
3 Function Test
After switching to the function text menu, »F«
is displayed and the set impulse length of the
relay impulse in seconds.
Press button »L«.
The radio access control generates a relay
impulse and the relay is switched. The display
flashes for the period of the impulse length.
Operating Mode
(Details in chapter »Operating Mode«)
In the operating mode the access control
receives radio telegrams and generates a
relay impulse.
Learn-Delete Mode
(Details in chapter »Learn-Delete Mode«)
In the learn-delete mode you can memorize
transmitter telegrams and delete specific
memory locations.
Additional Function Mode
(Details in chapter »Additional Function
Mode«)
The additional function mode offers the following additional functions:
Additional Function
Display
Application
1 Length of the relay impulse
I..
Changing the impulse length of the relay
impulse (standard value: 1 sec) or
deactivating the relay output
2 Blocking specific memory locations
e.g. 001
Time-limited access authorization for particular visitors
3 Function test
F..
Generating a relay impulse
4 History
H
Display of the last 10 telegrams
5 Deleting the memory completely
E A
Reprogramming the radio control
6 Entering/altering the numerical code
C
Release of programming modes (learndelete mode and additional function mode)
using a numerical code
Note:
This is how to end programming without
saving data:
• Switch to the next additional function:
press button »E«
• Switch to operating mode:
press buttons »L« and »E« simultaneously
87274 1108 GB
6
Function Modes
There are three function modes:
• Operating Mode
• Learn-Delete Mode
• Additional Function Mode
87274 1108 GB
3
Operating Instructions
Mounting and Connecting
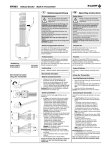
1. Unscrew the housing cover.
Operating Instructions
Start-Up
Radio Access Control first carries out
an LED check.
»_ _ _« is displayed.
2. Remove the protective cover.
3. Mount the Radio Access Control .
4. Connect the device to be switched (e.g.
garage door opener) to the ST2 connecting terminals (see title, fig. 1).
.
5. Connect the power supply cable to the
ST1 connecting terminals (see title,
fig. 1).
The permissible supply voltage is
24 V AC/DC ± 10%.
Note: All the cables must be fed into the
device via the M 16/20 openings using
watertight PG screw fittings supplied
with the Radio Access Control.
1.
2.
3.
6. Screw on again the cover plate.
Learn-Delete Mode
1. Switch on the supply voltage. The
4.
5.
The Radio Access Control is then in the
operating mode (see also section „Operating Mode“).
If a relay impulse is longer than 1 sec or
no relay impulse should be transmitted:
Change the preset impulse length. The
details are in the chapter »Additional
Function Mode > Length of the Relay
Impulse«.
Memorize the individual transmitter
telegrams into the Radio Access
Control.
The details are in the chapter »LearnDelete Mode > Memorizing Transmitter
Telegrams«.
If needed, set additional functions.
For this, read the chapter »Additional
Function Mode«.
Switch back to operating mode by
pressing buttons »L« and »E« simultaneously.
The Radio Access Control is now ready
to operate.
Screw on the housing cover.
In the Learn-Delete Mode you can memorize
a total of 700 individual transmitter telegrams
(memory locations 000 to 699) or you can
delete specific memory locations.
Note: If you have protected access to the
programming modes (Learn-Delete Mode and
Additional Function Mode ) with a numerical
code (see chapter »Additional Function Mode
> Entering/Altering the Numerical Code«), the
display flashes »000«.
Select the code using the buttons and
press button »L«. When the correct code is
entered, the first non-occupied memory location is displayed.
Memorizing Transmitter Telegrams
A) Memorizing automatically
1. Press one of the buttons once. The first
non-occupied memory location is displayed.
2. Press button »L« for 1 sec. LED »L«
flashes for 30 s. During this time, a
transmitter telegram can be memorized.
3. Press the button of the transmitter which
code is to be memorized. Once the Radio
Access Control has memorized the
transmitter telegram, »rdy« is displayed.
After approx. 2 s the next free memory
location is displayed.
Operating Mode
When a radio telegram is received, LED »L«
lights up.
After receiving a memorized telegram,
• the memory location of the telegram is
displayed,
• a relay impulse is generated.
87274 1108 GB
4
4. If you want to memorize additional transmitter telegrams please repeat Step 2
and Step 3.
Switch to operating mode: press buttons »L«
and »E« simultaneously
B) Memorizing manually:
1. Use the buttons, to select the desired
memory location.
Note: If you selected a memory location
already used, the error message »err« is
displayed. Afterwards a free memory location is suggested.
2. Press button »L« for 1 s. LED »L« flashes
for 30 s. During this time, a transmitter
telegram can be memorized.
3. Press the button of the transmitter which
code is to be memorized. Once the radio
access control has memorized the transmitter telegram, »rdy« is displayed.
After approx. 2 s the next free memory location is displayed.
4. If you want to memorize additional transmitter telegrams please repeat Step 1 and
Step 3.
Switch to operating mode: press buttons »L«
and »E« simultaneously
Notes: If no button is pressed on the transmitter within time of learning, after 30 s the error
message »err« appears for approx. 3 s.
You can abort and quit the programming within
the time of learning and return to the operating
mode by pressing button »L«. The display will
show »rdy« for approx. 3 s and then »_ _ _«.
Deleting Specific Memory Locations
1. Using the buttons, to select the memory
location to be deleted.
2. Press button »E«.
LED »E« flashes for approx. 5 s. When a
transmitter telegram has been deleted,
»rdy« is displayed.
Note:
It is not possible to delete non-occupied or
blocked memory locations (see chapter »Additional function mode > Blocking specific memory locations«). In such instances, the error
message »err« is displayed.
In order to quit the deleting mode, press buttons »L« and »E« simultaneously.
87274 1108 GB
5