1
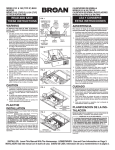
FINAL ASSEMBLY
ENSAMBLADO FINAL
FIG. 6 (CONT')
1. Protect motor, bulb sockets and wiring from construction
dust, drywall spray, paint, etc. by using the plaster shield. Cut
it from the carton and follow directions printed on it. (Fig. 7)
2. Finish all ceiling work as necessary.
3. Remove plaster shield and check if bottom of housing is
flush with finished ceiling. If not, loosen vertical adjusting
screws, reposition housing, and retighten screws.
4. Attach grille by hooking springs onto clips on side of
housing. (Fig. 8)
5. Install BR40 or R40-size 250W infrared bulb(s). Center
grille around bulb(s).
MODEL / MODELO 164
Vent & Heat operate together Light separately
El Ventilador y Calentador funcionan a la vez
-La Luz por separado
BLACK to BLACK,
& YELLOW
NEGRO a
NEGRO
y AMARILLO
3 WHITE / GRAY WIRES
3 ALAMBRES
BLANCO / GRIS
RED to RED
& BLUE
ROJO a ROJO
y AZUL
WHITE to
WHITE
BLANCO a
BLANCO
GROUND / TIERRA
1. Proteja el motor, enchufe de la bombilla y cableado contra el
polvo de la construcción, rocíos de yeso, pintura, etc., usando
el escudo de yeso. Córtelo de la caja de cartón y siga las instrucciones que aparecen impresas en la misma. (Fig. 7)
2. Termine el trabajo de cielo raso ségun se necesite.
3. Quite el escudo de yeso y verifique si la parte inferior de la caja
está a nivel con el cielo raso terminado. De lo contrario, afloje
los tornillos de ajuste vertical, cambie la posición de la caja y
vuelva a apretar los tornillos.
4. Fije la rejilla enganchando los resortes a los sujetadores al
costado de la caja. (Fig. 8)
5. Instale bombilla(s) infrarrojas 250W de tamaño BR40 o R40.
Centre la rejilla alrededor de la(s) bombilla(s).
LIGHT
LUZ
BLACK
NEGRO
VENT & HEAT
VENTILADOR y
CALEFACCION
RED
ROJO
GROUND
TIERRA
DUAL CONTROL
CONTROLE DE 2 FUNCCIONES
120 VAC LINE IN
LINEA DE ENTRADA 120 VCA
MODEL / MODELO 164
Lamps operate together Vent separately
Las Lamparas funcionan a la vez El ventilador por separado
BLACK to
BLUE
NEGRO a
AZUL
MODEL / MODELO 164
Light & Vent operate together Heat separately
La luz y el ventilador funcionan a la vez -Calentador por separado
BLACK to
BLACK, & BLUE
NEGRO a
NEGRO y AZUL
3 WHITE / GRAY WIRES
3 ALAMBRES
BLANCO / GRIS
WHITE to
WHITE
BLANCO a
BLANCO
GROUND / TIERRA
HEAT
CALEFACCION
3 WHITE / GRAY WIRES
3 ALAMBRES
BLANCO / GRIS
WHITE to
WHITE
BLANCO a
BLANCO
GROUND / TIERRA
VENT
VENTILADOR
HEAT & LIGHT
CALEFACCION
y LUZ
RED
ROJO
GROUND
TIERRA
120 VAC LINE IN
LINEA DE ENTRADA 120 VCA
DUAL CONTROL
CONTROLE DE 2 FUNCCIONES
BLACK
NEGRO
GROUND
TIERRA
120 VAC LINE IN
LINEA DE ENTRADA 120 VCA
BLUE
AZUL
WHITE
BLANCO
YELLOW
AMARILLO
RED
ROJO
GROUND
TIERRA
FIG. 7
FIG. 8
5
RED to BLUE
ROJ O a AZUL
BLACK to YELLOW
NEGRO a AMAR ILLO
WIRE COLOR LEGEND
For wiring diagrams
on pages 2 & 3
RED
ROJO
WHITE toWHITE
BLANCO a BLANCO
BLACK to BLACK
NEGRO a NEGRO
DUAL CONTROL
CONTROLE DE 2 FUNCCIONES
BLACK
NEGRO
MODEL / MODELO 164
Light, Vent & Heat operate separately. La luz,
ventilador y calentador funcionan por separado
RED to RED
ROJ O a ROJO
BLACK
NEGRO
RED to RED
& YELLOW
ROJO a ROJO
y AMARILLO
LIGHT
& VENT
LUZ y
EXTRACCION
RED to RED,
BLACK &
YELLOW
ROJO a ROJO,
NEGRO y
AMARILLO
WHITE toWHITE / GRAY
BLANCO a BLANCO / GRIS
3 WHITE WIRES
3 ALAMBRES
BLANCOS
GROUND / TIERRA
BLACK
NEGRO
LIGHT
LUZ
HEAT
CALIFACCION
VENT
EXTRACCION
GROUND
TIERRA
RED / R
OJO
3-FUNCTION CONTROL
CONTROL DE TRES FUNCCIONES
3 BLACK WIRES
3 ALAMBRES NEGR OS
120 VAC LINE IN
LINEA DE ENTRADA 120VCA