1
Wall Surrounds
INSTALLATION / WALL SuRROuNdS
®
CeILING PANeL INSTALLATION
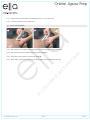
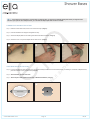
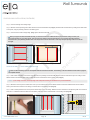
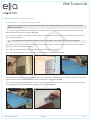
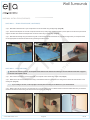
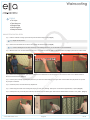
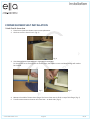
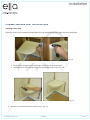
Step 1: Measure the depth from the soap dish wall to where the new ceiling panel will end in three separate locations. (Image D)
Step 2: Measure the width from the back wall to the plumbing wall in three separate locations. (Image E)
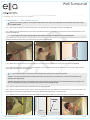
Step 3: Place the small wall template flush against the ceiling, with the long edge against the soap dish wall. This will measure the angles. (Image F)
Step 4: Adjust the template accordingly to find the angles for both sides of the ceiling that touch the walls. Note any gaps due to bowed walls or other
miscellaneous reasons and adjust accordingly. Once you have the correct angle, tighten the lock-knobs and remove the template.
Tip: Keep the clear or blue plastic slip sheeting on all the panels throughout the installation and make marks and cuts with it on. This will
help keep the panel from becoming scratched or damaged.
d
e
F
Tip: In normal weather conditions, allow a 1/8” gap on all sides for standard expansion and contraction. This can be achieved by simply
cutting off your reference lines during the cutting process.
In extreme temperatures, the acrylic material may expand or contract up to ¼”. Allow around 20 minutes for the material to adjust to the climate
conditions inside the house.
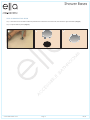
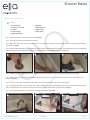
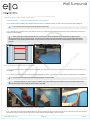
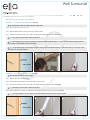
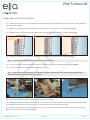
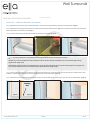
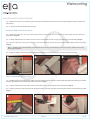
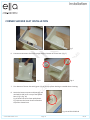
Step 5: Identify which end of your panel is the plumbing wall and which is the soap dish wall and mark accordingly. Transfer the depth marks on the panel,
measuring back from the bullnose edge to the soap dish wall side.
Tip: The measurements will be reversed when they are transferred to the ceiling panel. The sheeted side where the markings are made will
actually be the new ceiling surface when installed. Be sure that you accurately identify which end of the panel is your plumbing wall and mark
it appropriately.
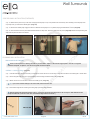
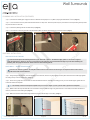
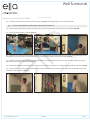
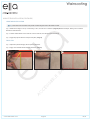
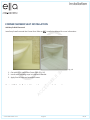
Step 6: Connect depth marks with a straight edge. Place the template on the panel. Use the template to trace the angle onto the acrylic ceiling panel.
Tip: Be extremely careful not to bump the template once you have set your angles. If you do, you will need to go back and re-template.
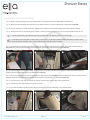
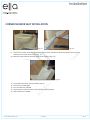
Step 7: Hold the template up to your depth line and mark the plumbing wall angle. Remove the template and connect the marks using a straight edge.
Step 8: When measuring to get the width, use the plumbing wall template line as a starting point and create the opposite wall line. Double-check
your measurements.
G
H
Plumbing
Wall Side
1
Soap Dish Wall Side
2
Bullnose Edge
www.ellasbubbles.com
www.bciacrylic.com
Plumbing
Wall Side
3
I
Soap Dish Wall Side
Plumbing
Wall Side
Soap Dish Wall Side
1
Bullnose Edge
Bullnose Edge
2
3
Page 1508/14
INSTALLATION / WALL SuRROuNdS 38