1
INSTALL AND MAKE WIRE CONNECTION:
1.) Make sure the electric power was turned off.
2.) Ceiling fan must be set at HIGH speed and light kit (if any) at
ON position by pulling the "Pull Switch" after installation.
3.) Once the connection has been made, the receiver inserts into
the drop rod hanging bracket. The canopy comes up to cover
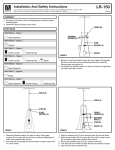
the receiver and bracket. (See Fig.3)
4.) Make Wire Connection: (See Fig.4)
a. The Motor white wire to the white "To Motor N" wire from Receiver with a wire nut.
b. The Motor black wire to the black "To Motor L" wire from Receiver with a wire nut.
c. The Motor blue wire to the blue "For Light" wire from Receiver with a wire nut.
d. The white wire from Outlet Box to the red "AC in N" wire from Receiver with a wire nut.
e. The black wire from Outlet Box to the red "AC in L" wire from Receiver with a wire nut.
Make sure all of wire nuts are connected firmly.
Tuck all wire nuts and wires carefully up into the Outlet Box, EXCEPT antenna, which should
remain outside Outlet Box.
Antenna
(Leave unconnected
and do not cut)
Receiver
e.
d.
Antenna:
DO NOT CUT
OR SPLICE
Hanger Bracket
a.
b.
VIEW AFTER INSTALLATION
c.
Hanger Ball
Fig.3
Fig.4
5.) Install a 9V battery (not included) into the transmitter. Turn on the power, press button of
transmitter to operate the fan. (See Fig.5)
Note:
6.) Functions of Transmitter. (See Fig.6)
This remote controller has memory function
HI:
Turn on the fan at high speed.
setting. The fan will operate at the same
MED:
Turn on the fan at medium speed. speed and the fan light will stay at the same
LOW:
Turn on the fan at low speed.
status as the last time the power supply was
FAN/OFF:
Turn off the fan.
turned off.
LIGHT ON/OFF:
Press and release immediately to turn on or off the light.
7.) Install the transmitter wall bracket in wall by two screws and hang transmitter in it carefully.
(See Fig.7)
TO INSTALL THE BATTERY, PRESS DOWN AND
SLIDE OUT BATTERY HOUSING COVER.
Transmitter
FAN/OFF
LIGHT
ON/OFF
Battery Housing
Cover
LIGHT
ON/OFF
HI
HI
MED
LOW
Battery 9V
Fig.5
FA N / O F F
Wall Bracket
MED
LOW
Screw
TRANSMITTER
Fig.6
Page 2
Fig.7