1
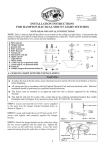
B. CEILING FAN LIGHT KIT INSTALLATION:
WARNING
To reduce the risk of electric shock, insure electricity has been turned off at the circuit breaker or fuse box
before beginning. Note: Turning power off using fan switch is not sufficient to prevent electric shock.
All wiring must be in accordance with the National Electrical Code and local electrical codes. Electrical
installation should be performed by a qualified licensed electrician.
STEP 1: Remove the cover from the switch housing below
the fan by removing the mounting screws.
Note: If your ceiling fan has a removable switch
housing, follow Section C. "Installation of Light Kit to
Fans with Removable Switch Housings" for that
installation.
STEP 2: Remove the plug from the center of the switch
housing cover.
STEP 3: Route the black and white wires exiting the top of
the light fixture through the switch housing cover and
thread the cover onto the center tube of the fixture until it
fits snugly. Install the lock washer and the nut and tighten
securely. Refer to figure 7.
STEP 4: Connect the white wire from the ceiling fan to the
white wire of the light fixture, and connect the blue wire
from the fan to the black wire of the light fixture. Carefully
tuck all wires and wire connectors into the switch housing.
Note: You have to cut off the terminals of wires from
ceiling fan.
STEP 5: Attach the switch housing cover/light fixture
assembly to the switch housing of fan by using the screws
removed in STEP 1. Tighten securely.
Switch housing
Switch housing
cover
Screws
Plug
Figure 6
Screws
Nut
Lock washer
Switch housing
cover
CFL Bulbs
STEP 6: Finish the installation.
1. Install two 13 watts maximum compact fluorescent bulbs
(included) into the bulb socket. CAUTION-RISK OF
FIRE, USE MAXIMUM 13 WATT COMPACT
FLUORESCENT BULBS.
Light fixture
Pipe nipple
2. Insert the pipe nipple and pull chain of light fixture
through the eyelet in the glass shade.
3. Place the lower cap (the one with grommet hole) over
the pipe nipple and up against the glass. In the mean
time, let the pull chain of ceiling fan go through the
side grommet hole of the lower cap. Raise whole glass
shade assembly to the light fixture.
4. Place the finial over the threaded pipe nipple,in the mean
time, let the pull chain of light fixture go through
finial. Tighten the finial securely. Refer to Figure 7.
Your ceiling fan light kit installation is completed!
3
Glass shade
Lower cap
Finial
Figure 7
Grommet
hole