1
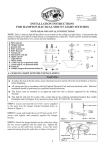
STEP 4: Lift up light fixture to make wire connections.
Please refer to Figure 3 and 4.
Note: make sure the power is off.
1. Disassemble the upper cap, and install the canopy to
the fixture, install the nut, lock washer, ground wire to
the threaded pipe of light fixture. See figure 3. Tighten
until canopy is well secured.
2. Locate the supply ground wires from the outlet box and
the ground wire coming out of the light fixture. Connect
both ground wires with green ground screw and secure
on the circular strap.
3. Using approved wire connectors:
- Connect the light kit white wire to the white supply wire
from outlet box; and
- Connect the light kit black wire to the black supply wire
from outlet box.
4. After connection the wires, spread them apart so that
green and white wires are on one side of the outlet box
and the black wires are on the other side. Refer to figure
4.
Hex Nut
Lock washer
Lock washer
Canopy
Ground wire
Light fixture
Figure 3
Ground screw
Wire
connectors
mounting screws
Ground wire
Canopy
Decorative nuts
STEP 5: Finish the installation.
Light fixture
1. Assemble the light fixture to the circular strap by placing
the holes in the canopy over the two mounting screws
protruding from the circular strap. See Figure 4.
2. Install the two decorative nuts over the two mounting
screws and tighten securely.
NOTE: It may be necessary to adjust the mounting
screws length from the circular strap by turning the
screws out of the circular strap. If this is necessary,
reassemble the fixture by completing above sub-steps
1 and 2.
Figure 4
CFL Bulbs
Light fixture
3. Install two 13 watts maximum compact fluorescent bulbs
(included) into the bulb socket. CAUTION-RISK OF
FIRE, USE MAXIMUM 13 WATT COMPACT
FLUORESCENT BULBS.
4. Insert the pipe nipple and pull chain of light fixture
through the eyelet in the glass shade.
5. Place the lower cap (the one without grommet hole) over
the pipe nipple and up against the glass. Raise whole
glass shade assembly to the light fixture.
6. Place the finial over the threaded pipe nipple,in the mean
time, let the pull chain of light fixture go through
finial. Tighten the finial securely. Refer to Figure 5.
Your ceiling light fixture installation is completed!
2
Pipe nipple
Glass shade
Lower cap
Finial
Figure 5