1
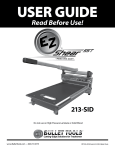
USER GUIDE
Read Before Use!
series
RCT 526
www.BulletTools.com • 208-772-0175
RCT 520
PRT-INS-5RCT.RevA.11.13 ©2013 Bullet Tools
WARNING: FAILURE TO FOLLOW THIS GUIDE MAY RESULT IN SERIOUS
INJURY! USING THIS MACHINE WITH RESPECT AND CAUTION WILL
CONSIDERABLY REDUCE THE RISK OF PERSONAL INJURY.
SAFETY GUIDE FOR THE
MAGNUM™ RCT Series
1�����READ AND UNDERSTAND THIS INSTRUCTION MANUAL BEFORE OPERATING THE RCT.
2�����If you are not thoroughly familiar with the operation of the RCT Shear, obtain advice from a
qualified instructor or call 800-406-8998 (Intl.: 208-772-0175).
3�����Stay alert. Do not operate while under the influence of drugs, alcohol, or medication.
4�����Always wear safety approved eye protection with side shields (ANSI Z87.1).
5�����Keep work area clean and free of debris.
6�����Recommended operating temperature range: 20° F (-6° C) to 115° F (46° C)
7�����Keep children and unauthorized persons away from the Shear and work area.
8�����Make sure tool is secure. Operate only on a firm substrate or solid stand.
9�����Use the right tool. Do not force the RCT Shear or use it for a job for which it was not intended;
the RCT Shear is designed to cut carpet tile, VCT, LVT, PVC tile, vinyl tile & residential grade/
low-pressure laminate flooring. See Cut Guide page 7.
10���Keep Blade sharp. A dull Blade will not perform properly.
11���Always keep hands away from Blade while operating or carrying.
12���Do not alter or misuse this tool. The RCT Shear is precision built; modifications not specified in
this manual may result in a dangerous condition.
13���Maintain RCT Shear with care. Keep Blade sharp and clean. Follow instructions for lubricating
and changing accessories. See page 7.
14���Use only recommended accessories. The use of improper accessories may cause hazards or
injury.
15���Never leave the RCT Shear unattended. Secure the Handle with the Safety Lock when not in
use. See page 6.
16���Warning: The dust generated by cutting certain wood, wood fiber and/or PVC products can
be hazardous to your health. The RCT Shear generally does not produce any dust; however,
minimal creation of dust may be possible. Avoid ingesting any dust created through cutting.
1
520 Set up
Welcome! Your MAGNUM RCT SHEAR Comes ready to assemble.*
*You will need #2 & #3 Phillips head screwdrivers
and a 1/2” (13mm) socket or wrench.
Please Review and Verify Parts Included in Box:
1. Power Assembly
1a. Safety Lock pin
2. Handle Assembly
3. Table
4. Tail
5. Rails (2)
6. Angle Guide
7. Hone Stone
8. Hardware Kit
F.
1a.
2.
6.
D.
1.
4.
H.
E.
A.
C.
3.
7.
Hardware kit:
Item A. Item B. Item C. Item D.
Item E. Item F.
Item G.
5.
B.
(4) 6mm x 60mm PH Phillips Machine Screws
(4) M6 Star Washers
(4) 6mm x 25mm PH Phillips Machine Screws
(5) M6 x 16mm FH Phillips Machine Screws
(4) #10 x 1 FH Phillips Self Tapping Screws
(2) M8 x 50mm Hex Bolts
(1) M6 Thumbscrew
A.
B.
C.
F.
G.
D.
E.
Assembly
1. Attach Rails
2. Attach Tail
Attach rails to Power Assembly base using Item A
machine screws, fitted with Item B star washers.
Attach tail to rails using Item C machine screws.
Make sure holes in tail are facing up.
2
1
2
526 Set up
Welcome! Your MAGNUM RCT SHEAR Comes ready to assemble.*
*You will need #2 & #3 Phillips head screwdrivers
and a 1/2” (13mm) socket or wrench.
Please Review and Verify Parts Included in Box:
1. Power Assembly
1a. Safety Lock pin
2. Handle Assembly
3. Table
4. Tail
5. Rails (4)
6. Angle Guide
7. Hone Stone
8. Hardware Kit
1a.
F.
2.
D.
1.
7.
G.
A.
4.
C.
E.
3.
7.
Hardware kit:
Item A. Item B. Item C. Item D.
Item E. Item F.
Item G.
5.
B.
(8) 6mm x 65mm PH Phillips Machine Screws
(8) M6 Star Washers
(8) 6mm x 25mm PH Phillips Machine Screws
(6) M6 x 16mm FH Phillips Machine Screws
(4) #10 x 1 FH Phillips Self Tapping Screws
(2) M8 x 50mm Hex Bolts
(1) M6 Thumbscrew
A.
B.
C.
F.
G.
D.
E.
Assembly
1. Attach Rails
2. Attach Tail
Attach rails to Power Assembly base using Item A
machine screws, fitted with Item B star washers.
Attach tail to rails using Item C machine screws.
Make sure holes in tail are facing up.
2
1
3
Set Up
3. Attach Table
3
3A
3B
Item E
A.Attach front of table to base,
using Item D screws. Tighten
with #3 Phillips.
B. Attach back of table to tail using
Item E self tapping screws.
Tighten with #2 Phillips.
4. To Attach Handle:
Tail
Item D
4
Item F
Insert Item F screws and tighten with 1/2”
(13mm) wrench.
Note: To ensure correct alignment, start each of
the bolts by hand before using wrench.
5. attach angle Guide
5
Install angle guide and tighten Item G thumbscrew.
Item G
4
MAKING CUTS
Caution! Wear hand and eye protection while operating the EZ Shear™
1
While gently pushing handle
down, pull Safety Lock pin
out, then lift handle.
Pull Safety Lock pin
2
Place product on table. Bring
handle down until blade
touches material.
3
Push the handle down
until the material is
completely cut.
DO NOT USE ON HIGH PRESSURE LAMINATE OR SOLID WOOD!
Warning! Blade is very sharp. Keep fingers away from blade.
Most materials listed on page (6) shear cleanly with just one cut. However, some types of laminate flooring and
fiber cement siding may require cutting twice to produce a better cut.
DOUBLE CUTTING: Simply make your first cut 1/8” to 1/4” (3mm to 6mm) longer than your mark and then
make a second cut on your mark. This is very useful to create a cleaner cut on exposed ends or when you cannot
cover the cut edge with molding or trim.
5
Your RCT Shear cuts a wide variety of products.
Please refer to this cut guide for
recommended products and thicknesses.
RCT CUT GUIDE
MAINTENANCE
Honing the Blade
520 Maximum Thickness = 15mm or 5/8”
526 Maximum Thickness = 25mm or 1”
Material
Carpet Tile
Commercial Vinyl Tile
Luxury Vinyl Tile
Parquet
PVC Tile
Hone every 100 cuts
Push the handle down until blade is 1/4” (6mm) open.
Lay the hone stone against the flat face of the blade
(side toward the table). Slide from end to end 2 or 3
times.
Rubber Cove Base
Rubber Tile
Soft Plastic
Greasing / Lubricating
Grease
Garage Tile
Please note: Approved materials may vary in density and
hardness. If extreme pressure is required to cut a product,
it may result in damage to your machine. Please contact
Bullet Tools before proceeding. Warranty is void if an
unapproved product damages the machine.
Oil
After every 100 cuts, lubricate the wear points of the
pins and the bearings as shown. Use a light oil (i.e. 10W
motor oil). This will prevent the machine from wearing
out prematurely. Apply grease (wheel bearing grease)
frequently to the bearings where indicated.
Do NOT Use on
High Pressure Laminate
or Solid Wood!
Replacement Blade for RCT520 is part #520B
Replacement Blade for RCT526 is part #526B
6
WARRANTY
30 Day Satisfaction Guarantee
Bullet Tools™ is confident that you will be absolutely pleased with the purchase of our product. If, for any reason, you are not
completely satisfied with your tool, we will refund your purchase price at any time within 30 days of your original purchase (receipt
required). If you want to return your product under our 30-day no risk trial offer (valid only for purchases made in the US), please
contact us at 1-800-406-8998 or 208-772-0175 for return instructions.
BULLETPROOF WARRANTY GOLD (5 Year)
Bullet Tools™ warrants only to the original purchaser of this product, when purchased from an authorized reseller or distributor,
that this product will be free from defects in material and workmanship under normal use and service for five (5) years from initial
purchase. This warranty includes all parts except the blade and cosmetic appearance (chips, dings, scratches) caused by normal
use and wear. This warranty does not cover any damage due to accident, misuse, abuse or negligence. Further, it is valid only if
the product is used with the cut products specified in the cut guide. Please refer to the User Guide for details or call Bullet Tools™
technical support. In order to recover under this limited warranty, the purchaser must make claim to Bullet Tools™ within 60 days
of occurrence and must present acceptable proof of original ownership (such as original receipt, warranty card registration, on-line
registration, or other documentation Bullet Tools™ deems acceptable) for the product. Bullet Tools™, at its option, shall repair or
replace the defective unit covered by this warranty. To obtain warranty service, please contact Bullet Tools™ at 1-800-406-8998 or
1-208-772-0175, for pre-authorization and further instructions.
Bullet Tools™ disclaims all warranties, express or implied, including all warranties of merchantability and/or fitness for a particular
purpose. Additional rights may be available under the laws of your state or province. Any and all warranties, written or implied, are
void with any alterations to the product. Note: Bullet Tools™ shall not be liable for any special, incidental or consequential damages,
including but not limited to lost revenue, lost profits, rental or replacement equipment, downtime, damage to property and thirdparty claims, arising out of any theory of recovery, including warranty, contract, statutory or tort.
www.BulletTools.com • 1-208-772-0175