1
Installation Instructions
INSTALLING THE COOKTOP UNIT
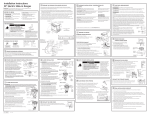
4 LOCATE MOUNTING PARTS
1 LOCATE ELECTRICAL OUTLET AND
GAS SHUT-OFF VALVE BENEATH
CABINET
NEVER REUSE OLD
CONNECTORS WHEN
INSTALLING THIS
UNIT.
Shut Off
Valve
Remove the hold down brackets from the
literature package.
Electrical
Outlet 12″
Below
Countertop
5 ATTACH BRACKETS TO COOKTOP
Install a manual shut-off valve in the gas line in an
easily accessible location outside the cooktop. Be
sure you know how and where to shut off the gas
supply to the cooktop. Install the electrical outlet
12″ below the countertop.
Remove the screw from the side of the cooktop
and screw the hold-down bracket
to the side of the cooktop unit. Repeat for opposite
side of cooktop.
Bottom of
Cooktop
2 PROTECT SURFACE OF COOKTOP
Pre-drilled
hole
Foam Tapes
Place a towel or tablecloth onto the
countertop. Lay the cooktop upside down onto the
protected surface.
Cooktop
Glass
Bottom of cooktop
6 INSERT COOKTOP INTO CUTOUT
Insert the cooktop centered into the cutout
opening. Make sure the front edge of the countertop
is parallel to the cooktop. Make final check that all
required clearances are met.
Cloth under Cooktop
Once the unit is in place, screw the
Cooktop
3 ATTACH FOAM TAPE
(glass maintop models only)
Apply the foam tape around the outer edge
of the glass. Do not overlap the foam strips.
Bottom of Cooktop
Foam Tapes
hold- down bracket into the cabinet sides
to secure the unit into place.
Cooktop Glass
5