1
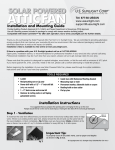
Installation and Mounting Guide Tel: 877-50-USSUN www.ussunlight.com [email protected] Radiant Flexible Tube Kit Thank you for purchasing the Skylight Tube from U.S. Sunlight Corp. We are committed to providing alternative energy products that can improve your everyday life and our environment. If there is a problem with your U.S. Sunlight product call us at 1-877-50-USSUN Spare parts, installation advice, or recommendations for professional installers in your area are only a phone call away. Professional installation may be much less than you expect, please call us to get average rates for your area. Please note that this product is designed for asphalt shingles. If you have spanish tile, s-tile, concrete, metal or flat roof, please call us before attempting to install the product. Before beginning the installation of your new SkylightTube, please read through the entire installation instructions and call us if you have any questions. TOOLS REQUIRED • Ladder • Reciprocating saw or jig saw • Power drill with a 1/2” - 1” drill bit (only one needed) • 1“ - 2” deck screw bit • Hammer & roofing nails or self tapping galvanized screws (inluded) • Tin snips or wire cutters • • • • • • • • ASTM D 4586 Type 1 Asphalt Roofing Cement Measuring tape or ruler Pencil or chalk Roofing knife or box cutter Flat pry bar Sheetrock saw Adjustable Wrench or Pliers Philips Screwdriver or Drill Bit When deciding on a location for the Radiant Skylight Tube, it is important to: a. Make sure you are locating the final position centered between two ceiling joists. if your ceiling joist spacing is less than the recommended spacing, refer to your local building code prior to cutting a rafter or ceiling joist. b. Before begining the installation, make sure there are no obstructions in the attic space and on the roof where you would like to install the Skylight Tube. c. Confirm the greatest distance between the ceiling hole location and the dome location is no more than 5½ ft. If the distance is greater than 5½ ft., contact U.S. Sunlight directly at 1-877-50-USSUN. ATTENTION: Please consult a professional installer if you are unsure of where to locate you Skylight Tube or if you do not feel comfortable with the installation process. © Copyright 2013 US Sunlight Corp, Inc. Radiant Skylight Tube C01 ver 2 Step 1 - Location of the diffuser Determine where you wish to install the SkylightTube (fig. 1) and from inside the attic, clear out the insulation in the desired location, center a nail or piece of wire between the ceiling joists and through the drywall so it is visible from the ceiling below. (fig. 2) If using wire, put a 90 degree bend in the wire so it won’t drop through. (fig. 3) Alternately, you can drive a nail up into the ceiling where you wish to locate the ceiling lens and find the location in the attic. Then find the closest center between rafters. Desired location Inside attic fig. 2 fig. 3 fig. 1 Step 2 - Cutting out the ceiling hole Use the included template (included in the Ceiling Parts Box) for marking the ceiling hole; or simply use the ceiling frame as a template and draw the hole to be cut. Begin cutting the circle with a drywall saw (fig. 4) as you get to the end of the cut, hold on to the wire or nail to brace the material for removal. (fig. 5) fig. 5 fig. 4 Step 3 - Preparing and Installing the Ceiling Frame fig. 6 Take the two halves of the ceiling lens (fig. 6) and slide the connectors in place on both ends of each ring (fig. 7a and 7b). Insert the Ceiling Frame and attach with the included 2” Ceiling Frame Screws and plastic lugs. The plastic lugs are placed on the top side of the ceiling. Fasten the screws through the holes in the ceiling frame, the ceiling and into the white plastic lugs and tighten. (fig. 8a and 8b) Plastic Lug Drywall Ceiling Frame Ceiling Frame Screw Screw Cap fig. 7a fig. 7b fig. 8a fig. 8b Step 5 - Cutting the roof opening From inside the attic, locate the desired position for the flashing and dome opening. Generally, directly above the ceiling opening is optimal but this position can vary depending on your particular attic conditions - keep bends to a minimum and do not bend more than a 45o angle. Start by measuring the distance between the 2 rafters and mark the center location. (fig. 9) You should have a minimum distance between them to allow for a 14.5” hole to be cut. Drive the 2” deck screw through so that it shows on the outside roof surface. (fig. 10 and 11) fig. 9 fig. 10 fig. 11 From on the roof, measure 7.25”, (fig. 12) repeat this at 90 and 45 degree angles to achieve a circular pattern (or use provided template as in Step 2). Then draw in the pattern with chalk. (fig. 13) Using a 1/2” drill bit, drill a pilot hole on the edge of the circle to fit the saw blade for cutting. (fig. 14) Start cutting the circle with a reciprocating saw, as you reach the end of the cut secure the material by holding onto the exposed screw so it won’t fall into the attic space (fig. 15) Remove the disk of material and discard (fig. 16) fig. 12 fig. 13 fig. 14 fig. 15 fig. 16 fig. 17 fig. 18 Step 6 - Dome Installation Preparation Drop the flex tube into the roof opening (fig. 17) then set the flashing assembly into position and make a note of the outer footprint or mark with chalk. (fig. 18) Step 7 - Remove the surrounding shingles Once you know the outline of the flashing, remove the surrounding shingles with a pry bar. (fig. 19) Composition asphalt shingles can be installed in various sizes depending on your roof configuration so it is recommended that you remove the entire piece as you find it in the footprint of the Skylight Tube flashing (fig. 20) Make sure you remove enough shingles to allow the upper 2/3rds of the flashing to make direct contact with the sheathing and roof underlayment (fig. 21) Save all of the pieces you remove for re-installation later. fig. 19 fig. 20 fig. 21 Step 8 - Install the flashing assembly When you are ready to install the flashing assembly, first apply a bead of asphalt roofing cement to the underside of the flashing base. (fig. 22) Re-install the flex tube into the roof opening and carefully place the top of the flashing underneath the top-most row of shingles. (fig. 23) Line up the bottom of the flashing with the shingle line and drive a screw into the center hole on the bottom as shown in (fig. 24) This will allow you to fine tune the angle if necessary. Use standard 1.5” roofing nails or screws (not included) to secure the flashing in place (fig. 25) There are 7 positions as shown in (fig. 26) fig. 23 fig. 25 fig. 24 fig. 22 fig. 26 Step 9 - Replace the shingles Use a framing square to cut the replacement shingles to size. (fig. 27) Generally, you will want to reinstall each row so that they overlap the flashing up to 5 1/2 inches from the outer edge of the flashing as shown in (fig. 28) Trim excess material from shingles so they can fit around with the same 5 1/2 inch overlay. (fig. 29) Use roofing nails and asphalt roofing cement to re-attach the shingles. For ideal fit and finish, we recommend covering the flashing with shingles leaving only the bottom center area of the flashing exposed as shown. (fig. 30) fig. 27 fig. 29 fig. 28 fig. 30 Step 10 - Secure the flex tube to the ceiling frame Reach through the ceiling frame and pull the flex tube through the ceiling frame and into the room. Continue pulling until it is tight, the wires will lock onto the lip at the top of the ceiling frame. Cut the flex tube off level with the bottom of the ceiling frame. (fig. 31) Fit the white plastic flex tube locking ring into position with the provided countersunk screws. Start at one end and work your way around the locking ring. Be sure to line up the recesses in the flex tube locking ring with the recesses in the ceiling frame to ensure the flex tube and locking ring are not overhanging the ceiling frame lip. (fig. 32) Snap the ceiling lens onto the ceiling frame. (fig. 33) fig. 31 fig. 32 fig. 33 Parts List TM Tel: 877-50-USSUN www.ussunlight.com [email protected] 1. Roof Parts 1. 2. Roof Dome Metal Flashing Clear Acrylic Dome 2 1 Flexible Tube 3. 4. 5. 72” Flexible Tube pre-attached to Roof dome Snap Ring Aluminum Foil Tape 3 3. Ceiling Parts 4 5 6. Ceiling Frame 7. Ceiling Lens 8. Included Hardware A. Ceiling Frame Screws B. Plastic Lugs C. Screw Caps 6 7 8 A B C W A R R A N T Y Manufacturer’s Limited Warranty Manufacturer warrants that certain of its product components are free from defects of workmanship and/or materials for a period of time commencing on the date of original purchase and continuing as noted hereafter: (a) roof flashing for a period of ten (10) years (b) flexible tubing for a period of ten (10) years (c) ceiling lens diffuser house for a period of ten (10) years. Disclaimer Except as expressly set forth herein, all Manufacturer’s products, including components thereof, are sold “AS IS” without warranty of merchantability, fitness for intended purpose, or other warranty, express or implied. In no event shall Manufacturer be liable for the loss of profits, indirect, special, incidental, consequential or other similar damages, including but not limited to any claim or demand arising out of the installation, furnishing, or functioning of a product or use by purchaser or any third party. The warranty terms and conditions detailed above do not extend to misuse, neglect, abuse, alteration, exposure to extreme weather conditions, lightning strikes, physical damage to any product, or damages caused by transportation or installation of any product. Manufacturer explicitly does not warrant any labor, shipping, or service fees incurred by purchaser for the replacement, repair, or exchange of any product or product components claimed under the above warranty terms and conditions. Warranty Claims Warranty claims shall be submitted in writing to Manufacturer at its principal place of business. Claims shall include a copy of the original purchase invoice, purchaser’s name, address, telephone number, and e-mail address, and such other particulars as are necessary to describe the claimed defect. If requested by Manufacturer, purchaser shall ship the claimed defective component(s) to Manufacturer’s principal place of business, FOB destination, freight prepaid, for evaluation. As to any product component determined by Manufacturer to contain a defect covered by its warranty, Manufacturer reserves the right, at its discretion, to repair or replace the defective component, or rebate a portion of the purchase price prorated based on the balance of the warranty term. General This limited warranty contains all of the terms and conditions of Manufacturer’s warranty of the purchased product and its components. No representation, arrangement, or agreement not appearing herein shall be binding on Manufacturer. This limited warranty is issued in and shall be governed by the laws of the State of Nevada. CUT HERE R E G I S T R A T I O N WE WOULD LOV E TO HE AR F ROM YOU! To register please visit our website: www.ussunlight.com or simply fill out this form and mail to: 923 Tahoe Blvd. Suite 110 | Incline Village, Nevada 89451 Name ________________________________________________________Phone________________________________________ Address ___________________________________________________________________________________________________ City __________________________________________________________ State ______________ Zip _____________________ Email _____________________________________________________ Would you like to be included in our newsletter? Y or N Product Name __________________________________________ Date of Purchase ___________________________________ Purchased From ______________________ Name of Installer _____________________________________________ (self Phone # of Installer ___________________ How satisfied are you with the install? Not Satisfied Somewhat ) Very Comments ____________________________________________________________________________________________