Transcript
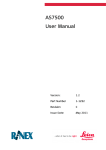
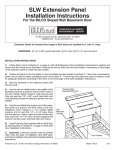
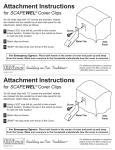
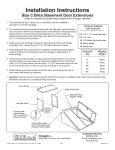
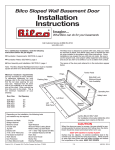
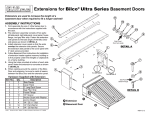
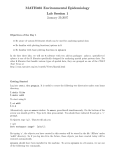
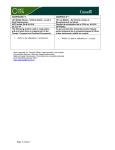
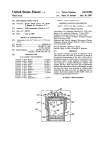
IMPORTANT
proper installation. Add fasteners and washers
Install bottom window well module so that it rests as required if there are not enough back-out
on flat, undisturbed soil as shown in Figure 2. screws to meet this requirement (see wall mountMount and anchor lower module into position as ing instructions for fastener requirements).
instructed below.
Wall Mounting: It is important to maintain a 53Buck Mounting: Utilize the back-out screws pro- 1/2” on center dimension between the keyholes
vided in the buck for attachment. IMPORTANT: on each flange to ensure proper fit of the optional
Use washers provided with buck (or minimum well cover. Anchor module to wall using 1/4”
3/4” diameter) and a minimum of (3) fasten- (.250”) diameter masonry fasteners* with washers per mounting flange (6 per module) for ers* (minimum 3/4” diameter). Fasteners must be
designed for the wall material to which attachment will occur and be at least 1-3/4”
Figure 1
in length. IMPORTANT: Use a minimum
of (3) fasteners per mounting flange (6
per module) for proper installation.
Method of attachment must be adequate
to restrain earth loads imposed on the well.
MODULE INSTALLATION
Installation Instructions
Read BEFORE Backfilling
After the first module is fully anchored, remove
the top inserts so that the next module can be
installed. This is done by removing the retaining
screw and washer as shown in Figure 1. Slide
the next module in place and anchor module as
instructed above. Replace the inserts into the
lower module and secure with retaining screw and
washer. Make sure that insert tabs are placed under the retaining pins as shown in Figure 3. Repeat process until all modules are installed.
Outside of Well: Backfill evenly by hand on all
sides as the hole is filled in; Do not do one side at
a time. Always use 3/4” clean free-draining rock
or A6 stone completely around the well at least
12” in width to isolate the well from the earth. Fill
area to within 4” of top module. This will keep
window well movement to a minimum during cold
weather freeze/thaw conditions and settling soil.
Do not use expansive soils, frozen soils, material
that has debris, or organic material.
BACKFILLING
Inside of Well: Place the free-draining rock in
the bottom of the well to within 1” of the window
sill. If a perimeter drainage system exists, it is best
to tie the well drainage into this system by runIf sandy soil exists, line the opening with a per- ning a pipe extension up from the drain line to
manent barrier (such as house wrap) to restrict the base of the well. Make sure that the free draining rock fills the space directly under the deepest
sand from washing into rock.
well module to the bottom of the excavation. Do
* Not supplied with window well
not settle material around the well with water.
Insert
Figure 2
FAILURE TO PROPERLY BACK FILL WILL
VOID WARRANTY
Figure 3
Insert
Remove
upper inserts
to inter-lock
modules
STKLBL002 R-5
Tab
Retaining
screw and
washer
turb
Undis
ed So
il
The Bilco Company, New Haven, CT, 06505, www.bilco.com
7
8 3 4 4 6 0501 2
8