1
FCC INFORMATION (U.S.A)
1. IMPORTANT NOTICE : DO NOT MODIFY THIS UNIT!
This product, when installed as indicated in the instructions contained in this manual, meets FCC requirements. Modifications not expressly approved
by Yamaha may void your authority, granted by the FCC, to use the product.
2. IMPORTANT: When connecting this product to accessories and/or another product use only high quality shielded cables. Cable/s supplied with this
product MUST be used. Follow all installation instructions. Failure to follow instructions could void your FCC authorization to use this product in the
USA.
3. NOTE: This product has been tested and found to comply with the requirements listed in FCC Regulations, Part 15 for Class “B” digital devices.
Compliance with these requirements provides a reasonable level of assurance that your use of this product in a residential environment will not result
in harmful interference with other electronic devices. This equipment generates/uses radio frequencies and, if not installed and used according to the
instructions found in the user’s manual, may cause interference harmful to the operation of other electronic devices. Compliance with FCC regulations
does not guarantee that interference will not occur in all installations. If this product is found to be the source of interference, which can be determined
by turning the unit “OFF” and “ON”, please try to eliminate the problem by using one of the following measures:
Relocate either this product or the device that is being affected by the interference.
Utilize power outlets that are on different branch (circuit breaker or fuse) circuits or install AC line filter/s.
In the case of radio or TV interference, relocate/reorient the antenna. If the antenna lead-in is 300 ohm ribbon lead, change the lead-in to co-axial type
cable.
If these corrective measures do not produce satisfactory results, please contact the your local retailer authorized to distribute this type of product. If
you can not locate the appropriate retailer, please contact Yamaha Corporation of America, Electronic Service Division, 6600 Orangethorpe Ave,
Buena Park, CA 90620
* The above statements apply ONLY to those products distributed by Yamaha Corporation of America or its subsidiaries.
CANADA
THIS DIGITAL APPARATUS DOES NOT EXCEED THE “CLASS B”
LIMITS FOR RADIO NOISE EMISSIONS FROM DIGITAL APPARATUS SET OUT IN THE RADIO INTERFERENCE REGULATION OF
THE CANADIAN DEPARTMENT OF COMMUNICATIONS.
* This applies only to products distributed by Yamaha Canada Music
LTD.
SPECIAL MESSAGE SECTION
This product utilizes batteries or an external power supply
(adapter). DO NOT connect this product to any power supply or
adapter other than one described in the manual, on the name
plate, or specifically recommended by Yamaha.
WARNING: Do not place this product in a position where anyone could walk on, trip over, or roll anything over power or
connecting cords of any kind. The use of an extension cord is not
recommended! If you must use an extension cord, the minimum
wire size for a 25’ cord (or less) is 18 AWG. NOTE: The smaller
the AWG number, the larger the current handling capacity. For
longer extension cords, consult a local electrician.
This Product should be used only with the components supplied
or; a cart, rack, or stand that is recommended by Yamaha. If a
cart, etc., is used, please observe all safety markings and instructions that accompany the accessory product.
SPECIFICATIONS SUBJECT TO CHANGE: The information contained in this manual is believed to be correct at the time
of printing. However, Yamaha reserves the right to change or
modify any of the specifications without notice or obligation to
update existing units.
This product, either alone or in combination with an amplifier and
headphones or speaker/s, may be capable of producing sound levels that could cause permanent hearing loss. DO NOT operate for
long periods of time at a high volume level or at a level that is
uncomfortable. If you experience any hearing loss or ringing in the
ears, you should consult an audiologist. IMPORTANT: The
louder the sound, the shorter the time period before damage occurs.
Some Yamaha products may have benches and/or accessory
mounting fixtures that are either supplied with the product or as
optional accessories. Some of these items are designed to be
dealer assembled or installed, Please make sure that benches are
stable and any optional fixtures (where applicable) are well secured BEFORE using. Benches supplied by Yamaha are designed
for seating only. No other uses are recommended.
Battery Notice: This product MAY contain a small non-rechargeable battery which (if applicable) is soldered in place. The
average life span of this type of battery is approximately five
years. When replacement becomes necessary, contact a qualified
service representative to perform the replacement.
This Product may also use “household” type batteries. Some of
these may be rechargeable. Make sure that the battery being
charged is a rechargeable type and that the charger is’ intended
for the battery being charged.
When installing batteries, do not mix old batteries with new, or
with batteries of a different type. Batteries MUST be installed
correctly. Mismatches or incorrect installation may result in overheating and battery case rupture.
Warning: Do not attempt to disassemble, or incinerate any battery. Keep all batteries away from children. Dispose of used
batteries promptly and as regulated by the laws in your area.
Note: Check with any retailer of household type batteries in your
area for battery disposal information.
Disposal Notice: Should this Product become damaged beyond
repair, or for some reason its useful life is considered to be at an
end, please observe all local, state, and federal regulations that
relate to the disposal of products that contain lead, batteries,
plastics, etc. If your dealer is unable to assist you, Please contact
Yamaha directly.
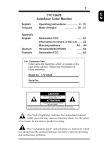
NAME PLATE LOCATION: The name Plate is located on the
bottom of the product. The model number, serial number, power
requirements, etc., are located on this plate. You should record
the model number, serial number, and the date of purchase in the
spaces provided below and retain this manual as a permanent
record of your purchase.
NOTICE: Service charges incurred due to lack of knowledge
relating to how a function or effect works (when the unit is
operating as designed) are not covered by the manufacturer’s
warranty, and are therefore the owners responsibility. Please
study this manual carefully and consult your dealer before requesting service.
ENVIRONMENTAL ISSUES: Yamaha strives to produce
products that are both user safe and environmentally friendly.
We sincerely believe that our products and the production methods used to produce them, meet these goals. In keeping with both
the letter and the spirit of the law, we want you to be aware of
the following:
PLEASE KEEP THIS MANUAL
92-BP
Precautions .................................................. iv
About This Manual ...................................... vi
The QY300: An Overview .......................... vii
Sequencer Functions ................................................ vii
Accompaniment Sequencing ................................... vii
Voice & Effects . . . . . . . . . . . . . . . . . . . . . . . . . . . . . . . . . . . . . . . . . . . . . . . . . . . . . . viii
Power & Connections ................................... 1
Power Supply ......................................................................
Setting Up Your System .....................................................
The Connectors ..........................................................
Audio Connections ....................................................
MIDI Connections .....................................................
1
2
2
3
3
The Controls .................................................. 5
Song Mode —
Part 1 : Playback & Control . . . . . . . . . . . . . . . . . . . . . . 8
Play the Demo Song ............................................................ 8
Loop Playback .......................................................... 10
Location ............................................................................. 10
The Measure/Beat Parameter .................................. 10
The Shuttle Dial . . . . . . . . . . . . . . . . . . . . . . . . . . . . . . . . . . . . . . . . . . . . . . . . . . . . . . . 10
The Mark/Jump Function ........................................ 11
Tempo Control .................................................................. 12
Transposition .................................................................... 12
Track Muting, Effect Bypass, &
Keyboard Track Setting ................................................... 13
Track Muting ............................................................ 13
Effect Bypass ............................................................. 13
Keyboard Track ........................................................ 14
Voices, Assignment & Effects .......................................... 14
Try Out the Voices ................................................... 14
The Pan Pots ............................................................ 15
The Faders ............................................................... 15
Reverb ....................................................................... 15
Coarse & Fine Tuning ............................................... 16
Pitch Bend Range .................................................... 17
ii
Channel Assignments .......................................................
Playback Effects ................................................................
Quantization . . . . . . . . . .. . . . . . . . . . . . . . . . . . . . . . . . . . . . . . . . . . . . . . . . . . . .
Swing ........................................................................
Transpose & Clock Shift ...........................................
Gate Time & Velocity Modify ..................................
The “Per Track” Display ...........................................
18
18
18
20
21
22
22
Song Mode —
Part 2: Basic Recording ........................... 23
Realtime Recording ...............................................
Punch-in Recording ....................................................
Multi-channel Recording ............................................
Step Recording ..................................................................
Drum Assignment & Used Memory Displays ..........
The Song Jobs .............................................
23
26
28
28
33
34
00: Undo/Redo ..................................................................3 4
01: Quantize ...................................................................... 35
02: Modify Velocity .......................................................... 37
03: Modify Gate Time ...................................................... 38
04: Crescendo .................................................................... 39
05: Transpose .................................................................... 40
06: Shift Note ..................................................................... 41
07: Shift Clock ................................................................... 42
08: Chord Sort .................................................................. 43
09: Copy Event .................................................................. 44
10: Erase Event ................................................................. 45
11: Extract Event .............................................................. 46
12: Thin Out . . . . . . .. . . . . . . . . . . . . . . . . . . . . . . . . . . . . . . . . . . . . . . . . . . . . . 47
13: Create Measure .......................................................... 48
14: Delete Measure ........................................................... 48
15: Copy Track ............................................................. 49
16: Mix Track ................................................................... 50
17: Clear Track ................................................................. 50
18: Expand Backing ......................................................... 51
19: Init Play Effect ............................................................ 52
20: Normalize Effect ......................................................... 52
21: Copy Song ................................................................... 53
22: Clear Song ................................................................... 53
23: Song Name .................................................................. 54
Patterns —
Part 1 : Accompaniment Basics ................ 55
Editing Songs & Phrases . . . . . . . . . . . . . . . . . . . . . . . . . . . . 104
Defining “Patterns”, “Styles”, & “Sections” . . . .. . . . . . . . . 55
Loading the Pre-programmed Patterns From Disk ...... 5 5
Selecting & Playing Patterns ........................................... 57
Changing Chords ...................................................... 59
Track Muting & Effect Bypass ................................ 62
Voices, Assignment & Effects ................................. 62
Engaging the Edit Mode & Moving Around ............. 104
n Moving Around ....................................................... 105
Change Mode Editing..................................................... 106
Deleting Events ....................................................... 107
Changing Tracks ..................................................... 107
Assigning a Track Name . . . . . . . . . . . . . . . . . . . . . . . . . . . . . . 107
Insert Mode Editing ....................................................... 107
Editing the Tempo Track (SONG mode) .................... 112
Patterns —
Part 2: Recording Accompaniments ....... 65
The Chain Mode . . . . . . . . . . . . . . . . . . . . . . . . . . . . . . . . . . . . . . 113
Realtime Accompaniment Recording ............................. 65
Step Accompaniment Recording ..................................... 68
“Pat” — Step Record Pattern Changes .................... 69
“Chd” — Step Record Chord Changes .................... 71
Phrases: Creating Patterns ........................... 74
The Preset Phrases ...........................................................
Combining Phrases In the Pattern Mode ......................
Recording Original Phrases .............................................
Realtime Phrase Recording.. ....................................
Step Phrase Recording .............................................
74
75
78
78
81
The Pattern Jobs ......................................... 86
00: Undo/Redo .................................................................. 86
01: Copy Pattern ............................................................... 87
02: Append Pattern ....................................................... 88
03: Split Pattern .................................................................... 88
04: Init Play Effect ............................................................ 89
05: Clear Pattern .............................................................. 90
06: Style Name .................................................................. 90
The Phrase Jobs .......................................... 92
00: Undo/Redo .................................................................. 92
01: Quantize ...................................................................... 93
02: Modify Velocity .......................................................... 95
03: Modify Gate Time ...................................................... 95
04: Crescendo .................................................................... 96
05: Transpose .................................................................... 97
06: Shift Note ..................................................................... 98
07: Shift Clock ................................................................... 98
08: Copy Phrase ................................................................ 99
09: Append Phrase ......................................................... 100
10: Split Phrase ............................................................... 100
11: Get Phrase ................................................................. 101
12: Put Phrase ................................................................. 102
13: Clear Phrase ............................................................. 102
14: Phrase Name ............................................................. 103
Deleting Songs From the Chain ............................ 114
Inserting New Songs In the Chain . . . . . .. . . . . . . . . . . . . 114
The Utility Mode . . . . . . . . . . . . . . . . . . . . . . . . . . . . . . . . . . . . . . 115
System Parameters .........................................................
Master Tuning ........................................................
MIDI Synchronization ............................................
MIDI Control ..........................................................
Echo Back ...............................................................
Interval Time .........................................................
Input Filters ....................................................................
Fingered Chord Zone Assignment ................................
115
115
115
116
116
116
116
117
Disk Operations . . . . . . . . . . . . . . . . . . . . . . . . . . . . . . . . . . . . . 119
Direct Save & Load From the Song, Pattern,
Phrase, & Chain Modes . . . . . . . . . . . . . . . . . . . . . . . . . . . . . . . . . . . . . . . . . . ... 119
Direct Save .............................................................. 120
Direct Load ............................................................. 121
The Disk Mode ................................................................ 121
Save & Load . . . . . . . . . . . . . . . . . . . . . . . . . . . . . . . . . . . . . . . . . . . . . . . . . . 123
Delete . . . . . . . . . . . . . . . . . . . . . . . . . . . . . . . . . . . . . . . . . . . . . . . . . . . . . . . . . . . . . . . . .124
Rename ................................................................... 124
Format ..................................................................... 125
Appendix . . . . . . . . . . . . . . . . . . . . . . . . . . . . . . . . . . . . . . . . . . . . . . .
126
Troubleshooting . . . . . . . . . . . . . . . . . . . . . . . . . . . . . . . . . . . . . . . . . . . . . . . . . . . . . . . . . . . . . 126
Error Messages . . . . . . . . . . . . . . . . . . . . . . . . . . . . . . . . . . . . . . . . . . . . . . . . . . . . . . . . . . . . . . 127
Specifications . . . . . . . . . . . . . . . . . . . . . . . . . . . . . . . . . . . . . . . . . . . . . . . . . . . . . . . . . . . . . . . .. . 128
Index . . . . . . . . . . . . . . . . . . . . . . . . . . . . . . . . . . . . . . . . . . . . . . . . . . . . . . . . . . . . . . . . . . . . . . . . . 129
iii
Location
Do not expose the QY300 to the following conditions to avoid deformation, discoloration, or
more serious damage.
• Direct sunlight (e.g. near a window).
• High temperatures (e.g. near a heat source, outside, or in a car during the daytime).
• Excessive humidity.
• Excessive dust.
• Strong vibration.
Power Supply
• Turn the power switch OFF when the instrument
is not in use.
• The power supply cord should be unplugged
from the AC outlet if the instrument is not to be
used for an extended period of time.
• Unplug the instrument during electric storms.
• Avoid plugging the instrument into the same AC
outlet as appliances with high power consumption, such as electric heaters or ovens. Also avoid
using multi-plug adaptors since these can result
in reduced sound quality and possibly damage.
Turn Power OFF When
Making Connections
• To avoid damage to the instrument and other devices to which it is connected (a sound system,
for example), turn the power switches of all related devices OFF prior to connecting or disconnecting audio and MIDI cables.
iv
MIDI Connections
• When connecting the QY300 to MIDI equipment, be sure to use high-quality cables made
especially for MIDI data transmission.
• Avoid MIDI cables longer than about 15 meters.
Longer cables can pick up electrical noise that
can causes data errors.
HandIing and Transport
• Never apply excessive force to the controls, connectors or other parts of the instrument.
• Always unplug cables by gripping the plug
firmly, not by pulling on the cable.
• Disconnect all cables before moving the instrument.
• Physical shocks caused by dropping, bumping, or
placing heavy objects on the instrument can result in scratches and more serious damage.
Cleaning
• Clean the cabinet and panel with a dry soft cloth.
• A slightly damp cloth may be used to remove
stubborn grime and dirt.
• Never use cleaners such as alcohol or thinner.
• Avoid placing vinyl objects on top of the instrument (vinyl can stick to and discolor the surface),
Electrical Interference
• This instrument contains digital circuitry and
may cause interference if placed too close to radio or television receivers. If this occurs, move
the instrument further away from, the affected
equipment.
Data Backup
• The QY300 contains a special long-life battery
that retains the contents of its internal memory
even when the power is turned OFF. The backup
battery should last for several years. When the
backup battery needs to be replaced “Battery
Low” will appear on the display when the power
is turned on. When this happens, have the backup
battery replaced by qualified Yamaha service
personnel. DO NOT ATTEMPT TO REPLACE
THE BACKUP BATTERY YOURSELF!
• Internal memory data can be corrupted due to
incorrect operation. Be sure to save important
data to floppy disk frequently so you have a
backup to revert to if something happens to damage the data in memory. Also note that magnetic
fields can damage data on the disk, so it is advisable to make a second back-up copy of disks that
contain very important data, and keep backup
disks in a safe place away from stray magnetic
fields (i.e. away from speakers, appliances containing motors, etc.).
Handle Floppy Disks and the
Disk Drive With Care
again, or push the disk back into the slot and then
repeat the eject procedure carefully.
• Do not insert anything but floppy disks into the
disk drive. Other objects may cause damage to
the disk drive or the floppy disk.
Service and Modification
• The QY300 contains no user serviceable parts.
Opening it or tampering with it in any way can
lead to irreparable damage and possibly electric
shock. Refer all servicing to qualified YAMAHA
personnel.
Third-party Software
• Yamaha can not take any responsibility for software produced for this product by third-party
manufacturers. Please direct any questions or
comments about such software to the manufacturer or their agents.
YAMAHA is not responsible for damage caused
by improper handling or operation.
• Use only 3.5” 2DD type floppy disks.
• Do not bend or apply pressure to the floppy disk.
Do not open the shutter and touch the surface of
the floppy disk inside.
• Do not expose the disk to high temperatures. (e.g.
direct sunlight, a car interior, etc.)
• Do not expose the disk to magnetic fields. Magnetic fields can partially or totally erase data on
the disk, rendering the disk unreadable.
• To eject a floppy disk, press the eject button
slowly as far as it will go then, when the disk is
fully ejected, remove it by hand.
The disk may not be ejected properly if the eject
button is pressed too quickly, or it is not pressed
in as far as it will go (the eject button may become stuck in a half-pressed position and the disk
extends from the drive slot by only a few
millimeters). If this happens, do not attempt to
pull out the partially ejected disk. Using force in
this situation can damage the disk-drive mechanism or the floppy disk. To remove a partially
ejected disk, try pressing the eject button once
V
The following simple icons are used throughout this manual to draw attention to important
points and information where necessary. The icons also make it easier to differentiate between information that ‘you should read immediately’ and information that can be skipped
until later, hopefully helping you to become familiar with the QY300 in the quickest, most
efficient manner possible.
This icon warns of possible hardware damage, software malfunction, or
any other serious problem that may occur due to improper operation or
set up.
This icon marks information that you must read — i.e. important steps or
procedures that are essential for proper, efficient, or easy operation.
The magnifying-glass icon indicates information that may not be essential for
general operation, but is a more detailed explanation of a feature, a description
of the principle involved, etc. You can skip this information if full details are
not required immediately.
Suggestions as to how a feature or function can be applied musically are
identified by this icon.
Hints or ideas that are not specifically musical but may make operation easier
or more interesting are marked by the light-bulb icon.
vi
The QY300 is more than just a sequencer. It is a complete music production system with a
16-track sequencer, 128-voice tone generator, and advanced auto-accompaniment capability
all integrated with a sophisticated control interface. It also features a floppy disk drive for
convenient data storage and retrieval, and a built-in micro-keyboard for easy programming
without an external MIDI keyboard.
Sequencer Functions
The QY300 sequencer has 16 “normal” sequencer tracks to which you can
individually assign any of the internal voices and record either via the QY300’s
own micro keyboard or an external keyboard connected to the QY300 MIDI IN
connector. You can use the real-time record mode so that the QY300 records
exactly what you play as you play it, or the step record mode in which notes
can be entered one at a time. There’s also a “multi” real-time record mode in
which all 16 sequencer tracks can be recorded simultaneously, and a punch-in
real-time record mode in which you can re-record any specified section of an
already-recorded track. The step record mode lets you record extremely fast or
complex passages that would be impossible to play in real time. It’s also useful
for adding finishing touches to tracks recorded in real time. The QY300 provides an extensive range of advanced editing functions that make modifying
and refining your recorded data an easy, efficient process.
Accompaniment Sequencing
One feature that truly sets the QY300 apart from other sequencers is its advanced accompaniment sequencing capability. Accompaniments are produced
by specifying a sequence of “patterns” to be played rather than by recording
individual notes or chords. A pattern is in itself a separate sequence consisting
of a combination of up to eight “phrases” — e.g. a drum phrase, a bass phrase,
and several chord or harmony phrases. The QY300 provides 2,000 preset
phrases that you can combine to create a virtually unlimited variety of patterns,
and memory for up to 100 user phrases that you can record yourself “from
scratch”. Each pattern can have 8 variations — intro, main A, main B, fill AA,
fill BB, fill AB, fill BA, and an ending — that you can sequence, along with
chord changes, to quickly create complete accompaniment tracks. Chord
changes are programmed simply by entering the name of the chord —
Yamaha’s advanced ABC (Auto Bass Chord) auto-accompaniment system automatically re-harmonizes the pattern accordingly. The QY300’s accompaniment sequencing features mean you can whip up a complete accompaniment in
a fraction of the time it would normally take, significantly simplifying and
speeding up the overall production process.
vii
Voices & Effects
See “VOICE LISTS AND
MIDI DATA” booklet
page 2) for a complete
list of the QY300 voices.
viii
The QY300’s internal AWM tone generator provides 128 top-quality voices
plus 8 complete drum kits with different drum and percussion instruments
assigned to different notes. You can assign any of these voices to the sequencer
tracks and phrases, or play them directly from an external keyboard or other
MIDI controller via the MIDI interface. The QY300 also features a highquality internal DSP (Digital Signal Processor) system which provides a range
of reverb and delay effects, so you can produce a warm, polished sound without the need for external equipment.
Power Supply
Your QY300 comes supplied with a Yamaha PA-1207 optional AC adaptor.
Plug the DC output cable from the AC adaptor into the DC IN jack on the rear
panel, then plug the adaptor into a convenient wall AC power socket. It is also
a good idea to clip the adaptor’s DC cable into the cable clip on the QY300
rear panel to minimize the possibility of accidentally unplugging the cable
during operation.
•
Do not attempt to
use an AC adaptor
other than the supplied unit or an appropriate replacement provided by your
Yamaha dealer to power the
QY300. The use of an incompatible adaptor may cause irreparable damage to the
QY300, and might pose a serious shock hazard!
•
Be sure to unplug the AC
adaptor from the AC mains
socket when the QY300 is not
in use.
1
Setting Up Your System
What you will connect the QY300 to, and what you will connect to the QY300,
will depend entirely on your individual requirements. A few examples are
provided below to help you get started.
The Connectors
MIDI IN & OUT Connectors
If you plan to use a MIDI keyboard or other instrument to play and program
the QY300, it should be connected to QY300 MIDI IN connector (see “MIDI
Connections,” below). The MIDI OUT connector can be connected to an external tone generator or synthesizer if you want to drive external voices from
the QY300 sequencer.
L/MONO & R OUTPUT Jacks
These are the main stereo outputs from the QY300’s internal tone generator
system (see “Audio Connections,” below). Both are standard 1/4” mono phone
plugs. When a plug is inserted into only the L/MONO output, the left- and
right-channels signals are mixed and delivered via that output to allow direct
connection to mono sound systems. The output level is adjusted via the VOLUME control
page 7).
PHONES Jack
Any pair of stereo headphones with a 1/4” stereo phone plug can be plugged in
here for convenient monitoring. The PHONES output level is adjusted via the
VOLUME control.
DC IN Jack
The DC output cable from the Yamaha PA-1207 AC Power Adaptor supplied
with the QY300 is plugged in here.
2
Audio Connections
Make sure that both the
QY300 and your sound
system are turned OFF
when making connections.
The simplest way to monitor the QY300 sound is via a pair of stereo headphones (1/4” stereo phone plug type) plugged into the PHONES jack. If want
to use an external stereo sound system, however, use the L/MONO and R
OUTPUT jacks. Since the QY300 output jacks are 1/4” phone types, you
might have to use adaptors to connect to a sound system with different input
connectors — e.g. RCA type pin jacks. You can connect the QY300 directly to
most mixing consoles and instrument amplifiers via standard phone-plug cables (use the L/MONO output when connecting to a mono sound system).
MIDI Connections
Although the QY300 can be played and programmed from the built-in microkeyboard, an external MIDI keyboard connected to the MIDI IN connector
provides the added advantages of standard keyboard size and key velocity
sensitivity (if your keyboard has a velocity-sensitive keyboard). Connect the
MIDI OUT connector of the keyboard to the MIDI IN connector of the QY300,
and make sure that your keyboard is set to transmit on the appropriate MIDI
channel. The QY300 MIDI channel-to-track assignments are described on page
18.
3
Always use high-quality
MIDI cables when
connecting MIDI devices, and avoid cables longer
than about 15 meters — longer
cables can pick up electrical
noise that can cause data errors.
4
Although it has a built-in tone generator, the QY300 can drive external tone
generators and synthesizers just like any other MIDI sequencer or music computer. You can even combine the internal voices with those produced by external equipment. Connect the QY300 MIDI OUT connector to the MIDI IN
connector of a single external device, or the first in a “chain” of devices you
want to control. The MIDI THRU connector of the first device in the chain
should then be connected to the MIDI IN connector of the second device, and
so on. It’s a good idea not to chain more than four or five external devices
without the use of a MIDI distributor or “thru box”, to prevent data delays
from having an audible effect on the sound.
The QY300 has fairly simple, consistent control interface that, once understood, makes
operation fast and easy, no matter what operation you are performing. If you read through
this section carefully, and try out the procedures in the Try this: sections, you should have
no problem accessing and operating the QY300’s many advanced features.
POWER Switch
Press in to turn the QY300 on, and press again to turn it
off, When the power is on one of the mode key indicators will light and the SONG mode display will appear
on the LCD (Liquid Crystal Display).
LCD Display & CONTRAST Control
This large multi-function liquid crystal display panel
shows all parameters and prompts you need to operate
the QY300 with optimum ease and efficiency.
Use the CONTRAST control on the rear panel to
achieve the best display visibility (LCD visibility varies
greatly with viewing angle and lighting).
5
Mode Keys
These six keys select the QY300’s main operating
modes:
SONG
The main “sequencer” mode in which the QY300’s 16
sequencer tracks can be recorded, edited, and played
back. Pattern, chord, and tempo changes are also recorded
in this mode to create accompaniments.
PATTERN
The PATTERN mode is used to create patterns by combining or “patching” phrases from the PHRASE mode.
PHRASE
The individual phrases that are used to create accompaniment patterns can be selected, played, and created in this
mode. There are 2,000 preset patterns, and memory for
100 user phrases.
CHAIN
The CHAIN mode is used to specify a “chain” of songs
to be automatically played in sequence.
UTILITY
The QY300’s MIDI, data filter, and ABC utility functions
are all accessed via the UTILITY mode.
DISK
Although you can directly save and load data to and from
floppy disk from the SONG, PATTERN, PHRASE, and
CHAIN modes, the DISK mode provides access to a full
range of important disk and data management functions.
6
Cursor and [-1/NO] and [+1/YES] Keys
This block of six keys includes four cursor keys — the
ones labeled with the triangular arrow-heads — and
two data decrement/increment keys.
The cursor keys move the “cursor” around the display screen, highlighting the various parameters that
are available for editing (the QY300 cursor appears as a
dark block with inverse characters).
The [-1/NO] and [+1/YES] keys are used to edit
(change the value of) the parameter at which the, cursor
is currently located. The [-1/NO] key decrements (decreases stepwise) the value of the selected parameter,
while the [+1/YES] key increments (increases stepwise)
the parameter. Press either key briefly to decrement or
increment the parameter by one, or hold the key for
continuous decrementing of incrementing in the specified direction.
The [-1/NO] and [+1/YES] keys are also used to
respond to certain prompts when they appear. Press
[+1/YES] to go ahead with the operation, or [-1/NO] to
cancel.
Numeric Keypad & Enter Key
These keys allow direct entry of numeric values where
applicable. Enter the required value via the numeric
keys — the entered number will flash on the display —
then press the [ENTER] key to actually enter the specified value. The [ENTER] key is also used ‘to enter
notes and other events when editing sequence data; and
to execute a specified job or disk function. The numeric
keys are also used to specify note lengths and dynamics
when step recording.
Data and Shuttle Dials
These concentric dials have different functions: The inner “data dial” can be used for data entry in the same
situations as the [-1/NO] and [+1/YES] keys or numeric keypad. Rotate the dial clockwise to increment
the select value or counter-clockwise to decrement. The
data dial is handy for quickly covering a large range of
values or searching for a specific item or value.
The outer “shuttle dial” is used to move forward or
backward in the SONG, PATTERN, or PHRASE mode
at varying speed, both during playback and when playback is stopped. The more you rotate the shuttle dial in
the clockwise direction the faster you will shuttle forward through the song, pattern, or phrase. The same
applies to reverse shuttling in the counter-clockwise direction. If you use the shuttle dial during playback you
will be able to monitor the sound while shuttling forward or backward.
Function & [SHIFT] Keys
The function keys — [F1] through [F6] — select the
corresponding items from the menu that appears on the
display immediately above the keys. The available
functions are different in each mode.
The [SHIFT] keys are used to access several secondary or “background” functions that you might only
need in special situations. For example, the [SHIFT]
key can be used when you want to mute all tracks simultaneously instead of muting the tracks one at a time.
[EDIT] and [JOB] Keys
The [EDIT] key accesses the QY300 edit mode from
the SONG or PHRASE modes, allowing detailed eventby-event editing of the recorded data.
The [JOB] key accesses the various “jobs” available in the SONG, PATTERN, and PHRASE modes.
The jobs include functions such as quantization, data
copying, track mixing, data modification, name entry,
and much more.
Sequencer Keys
The sequencer keys control recording and playback in
the SONG, PATTERN, and PHRASE modes.
REC
Activates the record-ready mode in the QY300 SONG and PHRASE
modes. The red REC key indicator will light, then recording will begin as
soon as the [PLAY] key is pressed. The [REC] key can be pressed again
to cancel the record-ready mode before recording is actually started by
pressing the [PLAY] key.
PLAY
Starts playback from the current point in the song or phrase if the recordready mode is not active, or recording from the same point if the recordready mode is active.
STOP
Stops playback or recording.
TOP
Instantly returns to the first beginning of the current song or phrase (i.e.
the fast beat of the first measure).
Micro Keyboard
This tiny 2-octave keyboard makes it possible to program
the QY300 without having to connect an external MIDI
keyboard. It’s even polyphonic, so you can directly enter
chords as well as single notes. The only thing it lacks is
velocity sensitivity. The QY300 does, however, accept
velocity information from an external MIDI keyboard.
When programming an accompaniment the microkeyboard is also used to specify the chord roots and types
to be entered.
Octave Keys
Since the 2-octave range of the micro-keyboard is not
enough for serious music programming, the [OCT
DOWN] and [OCT UP] keys allow the pitch of the keyboard to be shifted up or down in octave steps, over a range
of 8 octaves. Each time the [OCT DOWN] key is pressed
the pitch of the keyboard is shifted down by one octave,
until the lower limit is reached. The [OCT UP] key shifts
the pitch of the keyboard up in the same way.
When recording the accompaniment chord tracks in
the step mode the octave keys perform several secondary functions, such as specifying “on-bass” or syncopated chords.
The keyboard octave is reset to the “normal” range (E2 ... F4)
when the power is turned off.
VOLUME Control
The VOLUME control adjusts the volume of the sound
delivered via the OUTPUT and PHONES jacks. Rotate
the control toward “MAX.” to increase the volume.
Set the VOLUME control to its minimum setting when
connecting the QY300 to a sound system for the first time,
then gradually increase the volume level until the required
listening level is reached. This simple precaution can prevent unexpectedly high volume levels from damaging your speaker system (and
maybe even your ears!).
7
Playback in the QY300 SONG mode involves much more than simply starting and stopping
playback. You have extensive control over a number of important parameters that dramatically affect the final sound. Use the demo song provided on the QY300 data disk to try out
the various features and functions described in this section.
Before you begin, be sure to select the SONG mode by pressing the [SONG] mode
button.
Play the Demo Song
If for some, reason the
demo song has been
erased or overwritten, it
can be re-loaded from the supplied QY300 data disk. Follow
the instructions on page 56 of
this manual to load the all-data
type file “DEMO”.
The QY300 is shipped with a demonstration song and the required data already
loaded. Play the demonstration song (Song number 01) to hear an example of
what the QY300 can do, and use the demonstration song data to try out the
playback features and parameters described in this chapter.
NOTE Actual file names on the
data disk supplied with the
QY300 may be different from
those given in the manual.
Select Song Number 01
Move the cursor to the song number on the LCD and select song number 01
(use the data dial, the numeric keypad, or the [-1/NO] key to do this).
Note that the name of
the selected song
appears to the right of
the song number, and tracks
which contain data are indicated
by solid blocks below the track
numbers (these are actually mute
buttons, described below).
8
Play the Demo Song
Press the
key to start playback. The demo will automatically stop when it
finishes, or you can press the
key to stop playback at any time.
Loop Playback
For continuous “loop” playback — i.e. playback of the song will repeat until
stopped by pressing the
key — hold the [SHIFT] key while pressing the
key. The loop playback symbol
will appear to the right of the song
name.
9
Location
The QY300 lets you locate any measure within a song quickly and easily in
three ways:
The Measure/Beat Parameter
The large number to the left of the colon in this parameter is the measure
number and the small number to the right of the shows the number of the
current quarter-note beat within the current measure during playback and recording. To go directly to any measure within a song, place the cursor at the
measure number and use the [-1/NO] and [+1/YES] keys, the data dial, or the
numeric keypad to enter the number of the measure you want to go to. Remember to press [ENTER] after entering a measure number via the numeric
keypad. The beat number will always be reset to “1” when you locate a
measure.
The Shuttle Dial
The outer ring of the QY300 data dial is a “shuttle” dial that lets you move
forward or backward through the current song at varying speed, both during
playback and when playback is stopped. The more you rotate the shuttle dial in
the clockwise direction the faster you will shuttle forward through the song.
The same applies to reverse shuttling in the counter-clockwise direction. If you
use the shuttle dial during playback you will be able to monitor the sound of
the song while shuttling forward or backward. No monitor sound is available if
the shuttle dial is used when playback is stopped.
10
The Mark/Jump Function
The mark/jump function lets you “mark” (memorize) up to 10 locations within
the current song and “jump” to any one of the marked locations in one easy
step.
Marking a Location
To mark the current location, press the [F4] function key (“Mark”). This calls
the Mark/Jump display.
When the Mark/Jump display appears, make sure the cursor is located at a
clear number (“2” in the example display above) and press [ENTER]. This
records the current measure/beat location in the specified Mark/Jump number,
and returns you to the SONG mode.
Jumping to a Marked Location
To jump to a marked location, press the [F6] key (“Mark”) from any other
location, move the cursor to the appropriate Mark/Jump number (or enter the
Mark/Jump number via the numeric keypad), and press [ENTER]. You will
immediately be returned to the SONG mode at the specified location.
Clearing a Marked Location
To clear a marked location go to the Mark/Jump display, move the cursor to
the Mark/Jump number you want to clear, and press the [F1] function key
(“Clear”).
11
Tempo Control
The QY300 allows precise tempo settings from 25 to 300 beats per minute in
fine one-tenth of a quarter-note increments.
The number to the left of the period in the tempo parameter is the number of
quarter-note beats per minute, an the number to the right of the period represents tenths of a quarter note. The cursor can be independently placed at the
ones or tenths section of the tempo parameter to set as required.
Transposition
The pitch of song playback can be transposed up or down by as much as an
octave in semitone increments.
Please note that the
transpose parameter
does not affect the recorded sequence data, only the
pitch of playback.
12
To transpose playback pitch place the cursor at the transpose parameter (“Trs”
on the LCD) and set as required. Each increment corresponds to one semitone,
and the maximum range is from -12 (down one octave) to +12 (up one
octave).
Track Muting, Effect Bypass, & Keyboard Track Settings
The “Chd” (chord) and
“Tmp” (tempo) tracks
cannot be muted or effect-bypassed.
The mute “buttons” below each track number on the SONG mode display can
be used to mute (turn off) the corresponding track, or bypass the internal
effects for that track.
Track Muting
Move cursor to the appropriate mute button, then press [+1/YES] to mute that
track (you may have to press [+1/YES] twice if the track is effect-bypassed —
see below), or press [-1/NO] to turn a muted track back on. The letter “M”
appears in the mute buttons of tracks that are muted. Tracks that do not contain
data cannot be muted, and their mute buttons appear as white blocks with a
dotted outline rather than solid dark blocks. In the display below, for example,
tracks 1 through 4 are muted, tracks 5 through 10 and the tempo track (“Tmp”
on the display) contain data and are on, while the rest contain no data. The
cursor is currently located at the track 4 mute button.
The mute buttons are a
handy way to simply
turn tracks that you
don’t want to hear off. When recording, they also make it easy
to mute a “busy” track or several
tracks that might make it difficult
to hear an important track.
Simultaneous Track Mute/Un-mute
This function can be
very handy when you
want to “solo” monitor
a track: first mute all tracks, then
turn on only the track you want
to hear.
You can mute or un-mute all tracks simultaneously by placing the cursor at
any mute button and pressing the [+1/YES] or [-1/NO] key while holding the
[SHIFT] key — [+1/YES] to mute, or [-1/NO] to un-mute.
Effect Bypass
To bypass the internal effects for a track (see next section), move the cursor to
the mute button for that track and, from the un-muted state, press the [-1/NO]
button. A "–" (minus) symbol appears in the mute buttons aill appear in the
mute button. All tracks can be set to effect-bypass or normal simultaneously in
the same as described above: hold one of the [SHIFT] keys while pressing the
[-1/NO] button to bypasss all tracks, or the [+1/YES] key to return all tracks
to the normal non-bypassed state.
13
Keyboard Track
Track 1 becomes the
keyboard track when
the cursor is located at
the “Pat”, “Chd”, or “Tmp”
track.
When the cursor is located at a specific track number/mute button (the track
number is inverted), that track becomes the QY300 “keyboard track” — i.e.
the track played by the micro-keyboard. The keyboard track setting is maintained even if the cursor is moved to other parameters on the display. The
current keyboard track setting determines which internal tone generator channel will be played by the micro-keyboard, and via which MIDI channel the
note data corrresponding to what is played on the micro-keyboard will be
output — according to the channel assignments made in the Output Select
display
page 18).
Voices, Assignment & Effects
The QY300 has 128 voices and 8 drum kits that can be selected, played, and
assigned to the 16 SONG mode sequencer tracks via the voice display. The
voice mode also features a graphic on-screen “mixer” that has pan pots and
faders for each tone-generator channel as well as reverb, tuning, and pitch
bend range controls (tone generator channel to sequencer track assignments are
described in the “Channel Assignments” section,
page 18).
Press the [F3] function key (“Voice”) to select the voice mode and then, if
necessary, press [F1] (“Mixer”) to select the mixer display.
•
Press the [F6] function
key (“Exit”) from any
of the voice-mode
displays to return to the normal
SONG mode display.
• The master (“M”) fader also affects the pattern tracks —
page 65.
Try Out the Voices
• In any QY300 mode, the
micro keyboard plays
the voice assigned to the
currently selected track. A MIDI keyboard connected to the MIDI IN connector, however, will only play the
voice assigned to the track that is set
to receive on the MIDI channel that
the external keyboard is transmitting
on. MIDI track assignments are discussed on page 18.
• To conform to General MIDI protocol, only the drum voices can be
assigned to track 10.
• See the “VOICE LISTS AND MIDI
DATA” booklet
page 3) for a
complete list of note assignments
(i.e. which drum instruments are assigned to which notes) for all 8
drum kits.
If you’re playing the micro
keyboard, use the octave
keys to access the full range
of instruments in each drum kit.
14
Move the cursor to the channel-1 voice parameter immediately below “1” on
the display (as in the display shown above). Note that the name of the voice
currently assigned to channel 1 appears in the upper right corner of the display,
while an abbreviation indication the voice category appears at the voice
parameter location (the voices and their category abbreviations are listed on
page 2 of the separate “VOICE LISTS AND MIDI DATA” booklet). Play the
micro keyboard and you’ll hear that voice. Use any of the QY300’s data entry
methods to select and try out the various voices.
The Pan Pots
The pan pots actually
cover a ±7 range relative
to their default positions,
so they may not always go from
full left to full right.
Like the pan pots on a mixing console, the voice display pan pots can be used
to position the sound of the corresponding track anywhere from left to right in
the stereo sound field. Position the cursor at the pan pot, then use any data
entry method to set the pan position. The graphic pan pot will rotate to the
corresponding position. The pan positions also have numeric values (1 through
7) that appear in the upper right corner of the display: “Left 7” is full left and
“Right 7” is full right (see “DETAIL”, below). Hold the [SHIFT] key while
setting a pan pot to change the settings of all pan pots by the same amount.
The Faders
You can switch back
and forth between the
SONG and VOICE
modes even while a song is
playing, so you can adjust all
VOICE mode parameters
(change voices, mute tracks,
pan, and change volume settings) while listening to the resuits in real time!
Each track has a graphic “fader” that can be set to produce the best “mix”
(balance) between the various voices. Position the cursor at a fader, then use
any data entry method to set the fader level. The graphic fader will move to the
corresponding position (higher for higher volume, and lower for lower volume). The fader positions also have numeric values (000 through 127) that
appear in the upper right corner of the display: “000” is minimum volume (no
sound) and “127” is maximum volume. The default setting is “100” for all
tracks. Hold the [SHIFT] key while setting a fader to change the settings of all
faders by the same amount. The leftmost fader is a “master” fader which can
be used to adjust the overall volume level (including the pattern track).
Reverb
The QY300 features an internal digital signal processor which can be used to
apply high-quality reverb and similar effects to the sequencer-track voices. In
the voice mode press the [F2] function key (“Reverb”) to see the reverb
controls.
The voice parameters in
this display can be used
to change voice assignments in the same way as in the
Mixer display.
15
The effect type parameter on the left side of the display selects the type of
effect to be applied to the QY300 sound. 8 effect types are available, as listed
in the chart below.
Hall 1
Hall 2
Plate 2
This setting is ideal when you want a warm reverb effect but not as
“expansive” as the Hall 1 and Hall 2 effects. Simulates the type of reverb
you might experience in a medium-size room or club.
A slightly tighter reverb than the Room 1 effect, giving the impression of
a smaller room.
A short, tight reverb sound similar to effect produced by studio plate
reverb units.
Another plate delay simulation, with a well-defined initial delay "slap".
Delay 1
A stereo multi-delay effect with well-defined repeats.
Delay 2
In this effect a very dense series of delays is more like the early-reflections portions of a reverb effect than individual repeats.
Room 1
Room 2
Plate 1
A fast way to select the
effect type parameter
when the cursor is located at any fader is to move the
cursor down past the fader.
The reverb settings apply
only to the QY300’s
internal voices — i.e.
they will not affect the sound of
an external tone generator or synthesizer being driven by the
QY300.
This effect simulates the natural reverberation of a fairly large concert
hall.
An even larger hall than the Hall 1 program, with a correspondingly
longer reverb time.
The faders set the reverb level for the corresponding tracks. Position the cursor
at a fader, then use any data entry method to set the reverb level. The graphic
fader will move to the corresponding position (higher for higher reverb level,
and lower for lower reverb level). The fader positions also have numeric
values (00 through 08) that appear in the upper right corner of the display:
“00” is no reverb and “08” is maximum reverb level. Hold the [SHIFT] key
while setting a fader to change the settings of all faders by the same amount.
Coarse & Fine Tuning
The voice mode includes two displays that allow individual tuning of the
sequencer tracks. Press the [F3] function key (“CosTun”) to access the coarse
tuning controls or the [F4] function key (“FinTun”) to access the fine tuning
controls.
16
•
The voice parameters
in these displays can
be used to change
voice assignments in the same
way as in the Mixer display.
• Since track 10 is only used for
drums and drums are not
pitched voices, no tuning
fader is provided for the drum
track in either the coarse or
fine tuning displays.
The tuning settings apply
only to the QY300’s
internal voices — i.e.
they will not affect the sound of
an external tone generator or synthesizer being driven by the
QY300.
The faders in the coarse tuning display individually tune the corresponding
tracks over 4-octave range (±2 octaves) in semitone increments, while those in
the fine tuning display tune the corresponding tracks over approximately a
whole tone (±1 semitone) in one-cent increments (100 cents = 1 semitone)
Position the cursor at a fader, then use any data entry method to set the coarse
or fine tuning as required. The graphic fader will move to the corresponding
position (above center when tuning up and below center when tuning down).
The fader positions also have numeric values that appear in the upper right
corner of the display: in the coarse tuning display the range is from “-24”
(down two octaves) through “00” (standard pitch) to “+24” (up two octaves).
In the fine tuning display the range is from “–100” (down a semitone through
“00’ (standard pitch) to “+99” (up a semitone). Hold the [SHIFT] key while
setting a fader to change the settings of all faders by the same amount.
Pitch Bend Range
The pitch bend range display makes it possible to individually set the pitch
bend range of the sequencer tracks — a valuable feature when programming
the QY300 from an external keyboard or other controller which has a pitch
bend wheel.
In the voice mode press the [F5] function key (“PbRang”) to access the
pitch bend range controls.
•
The voice parameters
in this display can be
used to change voice
assignments in the same way as
in the Mixer display.
•
Since track 10 is only used for
drums and drums are not
pitched voices, no pitch bend
range fader is provided for the
drum track.
17
The pitch bend range
settings apply only to
the QY300's internal
voices — i.e. they will not affect
the sound of an external tone
generator or synthesizer being
driven by the QY300.
The faders set the maximum pitch bend range for the corresponding tracks
over a 2-octave range in semitone increments. Position the cursor at a fader,
then use any data entry method to set the pitch bend range. The graphic fader
will move to the corresponding position (higher for greater pitch bend range).
The fader positions also have numeric values (00 through 24) that appear in
the upper right comer of the display: “00” allows no pitch bend while “24”
allows the maximum pitch bend range of 2 octaves. Hold the [SHIFT] key
while setting a fader to change the settings of all faders by the same amount.
Channel Assignments
The Output Select display, accessed by pressing the [F2] function key (“Output”) from the main SONG mode display, determines the QY300’s track-tochannel assignments.
The “MIDI CH” settings determine which MIDI channels are assigned to the
corresponding tracks for both reception and transmission.
The “TG CH” settings determine which internal tone generator channel
(this is unrelated to the MIDI channel) will be controlled by the corresponding
sequencer track. This type of setting is provided because in some cases it may
be necessary to control a single channel of the internal tone generator from two
or more sequencer tracks.
Playback Effects
The QY300 provides a number of “playback effects” which allow the playback
data to be modified in a number of ways. The data is actually modified “on the
fly” during playback — the data in memory is not affected.
Quantization
Quantization aligns notes in the specified track to the nearest specified beat —
usually to tighten up sloppy timing. Use it judiciously, however, because timing that is too perfect can sound cold and mechanical — unless, of course,
you’re specifically aiming for a cold, mechanical feel.
After selecting the playback effect mode from the main SONG display by
pressing the [F1] function key (“Effect”), press the [F2] function key
("Quant") to select the quantization display.
18
The "Val" (value) parameters for each track (the rotary controls) determine to
what beats the note data in the corresponding track will be aligned. If you
select “d”, for example, all notes in the track will be aligned to the nearest
16th-note beat, to a degree determined by the “strength” parameter. Hold the
[SHIFT] key while setting a value parameter to change all value parameters
by the same amount.
Value
Off
Effect
No quantization. Swing settings also ignored.
Aligns to the nearest 32nd note.
Aligns to the nearest 16th note triplet.
Aligns to the nearest 16th note.
Aligns to the nearest 8th note triplet.
Aligns to the nearest 8th note.
Aligns to the nearest quarter note triplet.
Aligns to the nearest quarter note.
Aligns to the nearest 16th note + 16th note triplet.
Aligns to the nearest 8th note + 8th note triplet.
The “Str” (strength) parameter determines how “strongly” the notes are attracted to the specified quantize value. The strength range is from 0% to 100%.
At a setting of “0%” no quantization will occur, while a setting of “100%” will
cause all notes to be aligned precisely to the nearest specified beat value. Inbetween settings produce a corresponding shift in the position of all off-beat
notes to the nearest specified beat value. With a value setting of “d” and a
strength setting of 50%, for example, a note that does not fall precisely on an
8th-note beat will be shifted about halfway to nearest 8th-note beat.
The faders set the strength value for the corresponding tracks. Position the
cursor at a fader, then use any data entry method to set the strength as required.
The graphic fader will move to the corresponding position. The specified
strength setting will appear in the upper right comer of the display. Hold the
[SHIFT] key while setting a fader to change the settings of all faders by the
same amount.
19
Swing
The Swing effect can only be used when playback quantization (above) is
active. This effect produces a “swing” feel by shifting the timing of “back
beats”, as specified by the quantize effect. For example, if the specified
quantization value is 8th notes, then the swing effect will shift the 2nd, 4th,
6th, and 8th beats of each measure forward to create a swing feel. If the
quantize value is set to a triplet note length, the last note in each triplet group
will be shifted. If the quantize value is set to a compound note length (e.g. 8th
note + 8th note triplet), then the even-numbered back beats will be shifted.
The "Rat" (swing rate) parameter determines how much the timing of the
affected notes will be shifted. The range is from 50% (no swing) to 75%
(maximum swing) for even note lengths, from 66% to 83% for triplet note
lengths, and from 50% to 66% for even-plus-triplet note lengths (e.g. 8th note
+ 8th note triplet). The faders set the amount of swing for the corresponding
tracks. Position the cursor at a fader, then use any data entry method to set the
swing rate as required. The graphic fader will move to the corresponding
position. The current swing setting will appear in the upper right corner of the
display. Hold the [SHIFT] key while setting a fader to change the settings of
all faders by the same amount.
The "Vlc" (velocity) and “Gat” (gate time) parameters increases or decreases the velocity and gate times (length) of all notes affected by the swing
effect. The range of both parameters is from 1% to 200%. The “Vlc” parameter sets the ratio between the lower and higher velocity values. A setting of
“100%” maintains the original relationship between the notes, lower values
produce a narrower dynamic range, and higher values produce a broader dynamic range. The “Gat” parameter sets the ratio between the shorter and
longer gate time values. A setting of “100%” maintains the original relationship between the notes, lower values produce a narrower gate time range, and
higher values produce a broader gate time range.
20
Transpose & Clock Shift
The “Trans” controls in this display transpose all notes in the corresponding
tracks up or down in semitone increments. The “Shift” faders move all notes
and events in the corresponding tracks forward or backward by the specified
number of clocks (96 clocks per 1/4 note).
Since the Clock Shift
parameters shift the
timing of all notes and
other events in the specified track
forward or backward, they can significantly alter the “feel” of the
song. You could move the notes
forward (“+” settings) to create a
more “laid back” feel, or backward (“–” settings) to produce a
more “driving” feel. Of course,
you can also use Clock Shift to
correct timing that is off in the first
place.
The rotary “Trans” controls set the amount of transposition for the corresponding tracks. The transpose range is from “-99” (full left) through “+00” (center
position) to “+99” (full right), with each increment corresponding to a semitone. The current numeric transpose setting for the selected track appears in
the upper right-hand comer of the display.
The faders set the amount of clock shift for the corresponding tracks. Position the cursor at a fader, then use any data entry method to set the clock shift as
required. The graphic fader will move to the corresponding position — above
center for positive clock shift and below center for negative clock shift. The
current clock shift setting will appear in the upper right comer of the display —
the numeric range is from “-999” through “0” to “+999”. Hold the [SHIFT] key
while setting a fader to change the settings of all faders by the same amount.
21
Gate Time & Velocity Modify
The parameters in this screen make it easy to increases or decreases the gate
times (length) and velocity of all notes in the specified track.
•
The gate time can be
modified to give the
entire track a more
staccato or legato feel, as required.
• Modifying the velocity is a
great way to “soften” the
sound of a track that has too
great a variation between the
softest and loudest notes, or,
conversely, to add extra
punch to a dull-sounding
track. Experiment with the parameters to get a feel for what
they do.
The "G.Rat" (gate rate) parameter sets the ratio between the shorter and
longer gate time values. A setting of “100%” maintains the original relationship, between the notes, lower values produce a narrower gate time range
(minimum 1%), and higher values produce a broader gate time range (maximum 200%).
The “V.Rat” (velocity rate) parameter sets the ratio between the lower and
higher velocity values. A setting of “100%” maintains the original relationship
between the notes, lower values produce a narrower dynamic range (minimum
1%), and higher values produce a broader dynamic range (maximum 200%).
The “V.Ofs” (velocity offset) parameters determines the amount of velocity change. "–" settings reduce the velocity while “+” settings increase the
velocity. The range is from “–99” through “00” to “+99”.
The “Per Track” Display
In addition to the playback effect displays described above the QY300 provides a “per track” display which shows all parameters for all effects for one
track at a time. Only the sound of the selected track will be monitored when
this display is selected. Press the [F1] function key (“perTR”) to select the per
track display.
The individual effects and parameters are exactly the same as those described
above. To select a track, move the cursor to the track number bar at the top of
the display, then move the cursor sideways to select the track you want to
program.
22
The QY300 SONG mode provides two main record modes for the 16 sequencer tracks:
realtime and step record. When you use the realtime record mode the QY300 records exactly
what you play as you play it. In the step record mode notes can be entered one at a time.
There’s also a “multi” real-time record mode in which all 16 sequencer tracks can be
recorded simultaneously, and a punch-in real-time record mode in which you can re-record
any specified section of an already-recorded track. The step record mode lets you record
extremely fast or complex passages that would be difficult or impossible to play in real time.
It’s also useful for adding finishing touches to tracks originally recorded in real time.
Realtime Recording
In the realtime record mode you select the track you want to record, and then
play the part on the micro-keyboard or an external MIDI keyboard in real time.
Select a Song
Place the cursor at the song number and use any data entry method to select
the song number you want to record (01 ... 10). If the song doesn’t contain any
data yet, a row of asterisks will appear to the right of the song number
(********).
If for some reason all 10
songs contain data and
you want to start recording with an empty song, use
the “Clear Song” job described
on page 53 to clear a song for
recording. If you want to save
the existing song data to floppy
disk before clearing, see “Disk
Operations” page 119.
Make the Required Voice Assignment(s)
Go to the voice mode ( [F3] key) and assign the voice(s) you want to use to the
track(s) you intend to record, as described on page 14.
Press the [F6] key (“Exit”) to return to the SONG mode when done.
23
Select the Track to Record
Move the cursor to the track area of the display, and then shift the cursor
sideways to select the track you want to record (01 ... 16). Move the cursor
vertically to move to other areas of the screen — the selected track will remain
highlighted.
Engage the Record Ready Mode
Press the
key to engage the record ready mode. The red LED above the
key will light.
Select the Realtime Record Mode
Press the [F4] function key (“REAL”) to select the realtime record mode.
Select the Record Tempo and Time Signature
Move the cursor to the tempo and time signature parameters and set as required. The time signature cannot be changed if the song already contains data.
It’s sometimes easier to
set a slow tempo for
realtime recording, so
you have plenty of time to enter
the data.
24
Record
key to begin recording. The metronome will sound and you’ll be
Press the
given a two-measure count-in prior to the first measure actually recorded. The
count-in is also indicated by negative numbers in the “Meas” parameter. If a
4/4 time signature is selected, for example, the count-in will run from measure
“-08” to “-01”, then recording will begin from measure “001”.
QY300 realtime recording
is “replace” recording,
meaning that any previous
data in the a track will be erased
and replaced when new data is recorded to that track. This is in contrast to “overdub” recording in
which new data is recorded over the
existing data and the existing data
remains intact. In the QY300 step
recording, described later, allows
new material to be added to a track
without erasing the previous data.
You can also use the “Mix Track”
job (page 50) to mix data from two
tracks and place the result on a single track.
The “Click” parameter determines whether the metronome sounds during recording,
playback and recording, or at all times.
The metronome can also be turned off. See “Click (Metronome) Settings” on page 26.
Play the required part either on the micro-keyboard or via an external MIDI
keyboard.
Stop Recording
Press the
key to stop recording. The normal SONG play mode is automatically re-selected when you stop recording, and you’ll automatically be returned to the top (first measure) of the song.
See the “Editing Songs &
Phrases” section, page
104, for information on
how to edit recorded song data.
Record Other Tracks As Required
Repeat steps 2 through 8 to record other sequencer tracks, as required.
25
Click (Metronome) Settings
The click mode parameter in the SONG display determines whether the metronome sounds only during recording, during both recording and playback, at all
times, or not at all. Move the cursor to this parameter and set as required using
the data dial or [-1/NO] and [+1/YES] keys.
Off
Metronome off.
Rec
Metronome sounds during realtime recording only.
Ply
All
Metronome sounds during realtime recording and playback.
Metronome sounds at all times.
The click beat parameter determines on what beat the metronome will sound
(the [PLAY] key indicator will also flash on the specified beat). Move the
cursor to this pararneter and set as required using the data dial or [-1/NO] and
[+1/YES] keys.
The metronone sounds on every sixteenth note.
The metronone sounds on every eighth note.
The metronone sounds on every quarter note.
The metronone sounds on every half-note.
The metronone sounds on every whole note beat.
Punch-in Recording
Punch-in recording is a special type of realtime recording in which you specify
a range of measures you want to record, leaving all other material on the track
intact. This is particularly useful for re-recording a short segment of an otherwise perfect track — so you don’t have to re-record the entire track.
26
Select the Punch-in Record Mode
For punch-in recording you must first select the punch-in mode after engaging
the record ready mode (step 4 of the realtime record process, described above).
Press the [F6] function key (“PUNCH”) to select the punch-in record mode.
Specify the Punch-in & Punch-out Points
Specify the “punch-in” and “punch-out” points, the punch-in point being the
measure and beat at which recording will begin, and the punch-out point being
the measure and beat at which recording will end.
Move the cursor to the punch-in and punch-out measure and beat parameters
and set as required. Then, before actually starting recording, set the measure
parameter a few measures before the punch-in point so you’ll be ready to
record when the punch-in point is reached.
Start the Punch-in Record Operation
Start the punch-in operation by pressing the
key (there is no count-in
when punch-in recording is started). Recording will begin automatically at the
specified punch-in point.
Stop the Punch-in Record Operation
Recording will stop, but playback will continue, when the punch-out point is
reached. Press the
key to stop playback.
In the example display above, playback will begin at the first measure,
recording will begin on the first beat of the third measure and then stop on the
fourth beat of the fifth measure.
27
Multi-channel Recording
The “‘Multi” recording mode allows simultaneous realtime (or punch-in) recording of all 16 sequencer tracks. This can be useful when you want to record
complete sequences from another sequencer or music computer which is not
data-compatible with the QY300.
Select the multi mode by pressing the [F1] function key (“MULTI”) after selecting
either the realtime or punch-in record mode (step 5 of the realtime record process,
descrilbed above). The record procedure is exactly the same as that described for
realtime or punch-in recording, except that all 16 sequencer tracks are recorded
simultaneously (assuming, of course, that appropriate MIDI data is received on the
corresponding MIDI channels — see “Channel Assignments” on page 18).
Step Recording
The step record mode lets you enter data note-by-note, with precise control
over the timing, length, and loudness of each note. You can record complete
tracks using the step mode, or use it to brush-up and add data to existing tracks.
Select a Song
Place the cursor at the song number and use any data entry method to select
the song number you want to record (01 ... 10). If the song doesn’t contain any
data yet, a row of asterisks will appear to the right of the song number
(*********).
Make the Required Voice Assignment(s)
Go to the voice mode ( [F3] key) and assign the voice(s) you want to use to the
track(s) you intend to record, as described on page 14.
28
Press the [F6] key (“Exit”) to return to the SONG mode when done.
Select the Track to Record
Move the cursor to the track area of the display, and then shift the cursor
sideways to select the track you want to record: 1 ... 16. Move the cursor
vertically to move to other areas of the screen. The selected track will remain
highlighted.
Engage the Record Ready Mode
Press the
key to engage the record ready mode. The red LED above the
key will light.
Select the Step Record-Mode
Press the [F5] function key (“STEP”) to select the step record mode.
29
Set the Time Signature (new songs only)
Move the cursor to the time signature parameter and set as required. The time
signature cannot be changed if the song already contains data.
Record
Press the
key to begin recording. The step record display shown below
will appear.
Set the Note Parameters as Required
Move the cursor to the note length, velocity, and gate time parameters and set
as required.
When the cusor is located at the note length parameter the numeric keypad
can be used to enter the note lengths marked on the keys. The dot key (the [0]
key) can be used to add one or more dots to the currently selected note length.
In-between values can be entered using the [-1/NO] and [+1/YES] keys or the
data dial, or by using the numeric keypad while holding a [SHIFT] key.
When the cursor is located at the velocity parameter, the numeric keypad
can be used to directly enter the dynamic values marked on the keys (pp, mf,
etc.). In-between values can be entered using the [-1/NO] and [+1/YES] keys
or the data dial, or by using the numeric keypad while holding a [SHIFT] key.
30
Enter a Note
Once the note parameters have been specified, the note can be entered simply
by playing the appropriate key on the micro-keyboard (or on your external
MIDI keyboard). A note symbol appears on the note display an the note
pointer advances to the next note position. The note symbol always appears as
a 1/4-note, regardless of the actual note entered (chords are also indicated by
the 1/4-note symbol). Here’s how the display will look after two 8th notes
have been entered.
Chords can be entered simply by moving the note pointer back to a note and
entering another note at the same location (this can be repeated as many times
as necessary. See “Moving Around In the Note Display”, below.
The Note & Keyboard Displays
The note display shows up to four 1/4-notes worth of data at once (that’s one
measure in 4/4 time). If the selected time signature results in more than four
1/4 notes per measure, then the display will scroll to show the extra notes.
The keyboard display shows the pitch(es) of the note(s) at the current note
pointer position. In the example below the keyboard displays that a chord (C
major) consisting of three notes exists at the current note pointer location.
31
Moving Around In the Note Display
You can move the cursor down to the note display (the note pointer will appear
filled) and move the note pointer to any position at which you want to enter a
note, or to any note that you want to delete. You will actually hear the appropriate note or chord when the note pointer is moved to an existing note symbol. When you move the note pointer past the end of the note display, the next
measure will appear. If you move past the last measure in the phrase, the first
measure of the phrase will appear.
The Step Mode Function Keys
The six function keys immediately below the display provide access to a
number of handy functions in the step record mode.
[F1] - “Rest”
[F2] - “Tie”
[F3] - "Delete"
[F4] - “BkDelt”
[F5] - “LoKey”
[F6] -- “HiKey”
Enters a rest of the currently selected note length at the note pointer position.
Lengthens the previously entered note by “tying” another note of the same
length and pitch to it. An alternative method is simply to change the length
of the note as required via the note length keys on the numeric keypad.
Deletes the note or chord at the note pointer.
Moves the note pointer backward by the currently selected note length and
deletes the corresponding note or chord.
Displays the lowest range of the keyboard (scrolls the keyboard display two
octaves to the right). Press again to return to the normal “centered” display.
Displays the highest range of the keyboard (scrolls the keyboard display two
octaves to the left). Press again to return to the normal “centered” display.
The Measure/Beat/Clock Display
The “Meas” area of the step record display shows the current position of the
note pointer in measures, 1/4-note beats, and clocks (there are 96 clocks per
1/4 note). If you’re not sure what measure you’re seeing on the note display
while recording, check the measure/beat/clock display.
32
See the “Editing Songs
& Phrases” section,
page 104, for information on how to edit recorded
song data.
Complete the Track
Repeat steps 8 and 9 until the current track is complete, then press
recording.
to stop
Drum Assignment & Used Memory Displays
The QY300 provides “Drum Assignment” and “Used Memory” displays which
can provide valuable information when recording.
Press the left [OCT DOWN] and [OCT UP] keys simultaneously to see
the current pitch of the micro-keyboard (as determined by the [OCT DOWN]
and [OCT UP] keys) and a list of the drum instruments currently played by the
micro-keyboard keys.
Press the right [OCT DOWN] and [OCT UP] keys simultaneously to see how
much of the available QY300 memory is currently used. When the bar approaches 100% it is advisable to save data you want to keep to floppy disk, and
clear song data that you don’t need at the moment to make, as much room as
possible for the current recording operation.
33
The song mode includes 24 song “jobs” that perform a variety of important functions. To access
and use the song jobs, press the [JOB] key while in the SONG play mode. This calls the song
job list. You can select any job on the list simply by moving the cursor to the required job (use
the cursor keys or the data dial) and pressing [ENTER]. You can also move up or down the list
in 1-page steps by using the cursor
and
keys while holding one of the [SHIFT] keys.
An alternative method is to enter the job’s number via the numeric keypad and press [ENTER].
Returning to the SONG Mode
The [F6] function key (“Exit”) can be used to exit from any song job, and then
from the job list thereby returning you to the normal song play mode. You can
also press the [F6] function key (“Exit”) while holding one of the [SHIFT]
keys to directly return to the SONG mode.
00: Undo/Redo
This job will “undo” any other song job, edit, or record function if it is
executed before any other operation is performed. In all cases the affected data
is restored to the state it was in before performing the job, edit, or record
operation. This job will also undo the last undo operation (redo).
The last operation
performed is "forgotten"
by the UNDO job
whenever the SONG or PHRASE
step record mode is engaged,
even if the step record mode is
exited without actually recording
any data.
34
The name of the last operation performed will appear on the display (i.e. the
operation which will be “undone”). In the example display, above, a quantize
opersation will be undone:
Press [ENTER] to execute the Undo/Redo job. The metronome icon will
appear on the display while the data is being processed, then “Completed” will
appear briefly when the job is done. Press the [F6] key (“Exit”) to return to the
job list, or a mode key to go directly to the selected mode.
01: Quantize
Aligns notes in the specified track to or close to the nearest specified beat.
The “TR” parameter selects the track to be affected by the Quantize job: “01”
... “16” for individual tracks, or “All” to quantize all 16 tracks simultaneously.
The “M” parameters above the graphic bar are used to specify the first
measure:beat and last measure:beat of the range to be quantized.
The “Quantize” parameter determines to what beats the note data in the
specified track will be aligned. If you select
, for example, all notes in the
track will be aligned to the nearest 16th-note beat, to a degree determined by
the “Strength” parameter.
Quantize Values
Effect
Value
No quantization. Swing settings also ignored.
Off
Aligns to the nearest 32nd note.
Aligns to the nearest 16th note triplet.
Aligns to the nearest 16th note.
Aligns to the nearest 8th note triplet.
Aligns to the nearest 8th note.
Aligns to the nearest quarter note triplet.
Aligns to the nearest quarter note.
Aligns to the nearest 16th note + 16th note triplet.
Aligns to the nearest 8th note + 8th note triplet.
35
The “Strength” parameter determines how “strongly” the notes are attracted
to the specified quantize value. The strength range is from 0% to 100%. At a
setting of “0%” no quantization will occur, while a setting of “100%” will
cause all notes to be aligned precisely to the nearest specified beat value. Inbetween settings produce a corresponding shift in the position of all off-beat
notes to the nearest specified beat value. With a value setting of “d” and a
strength setting of 50%, for example, a note that does not fall precisely on an
8th-note beat will be shifted about halfway to nearest 8th-note beat.
The “Sens.” parameter (sensitivity) determines the range over which notes
will be quantized. This parameter can be set from “-100%” through “0%” to
“+100%” at “0%” no quantization will occur. A setting of either “-100%” or
“+100%” will cause all notes to be quantized. Refer to the graph below for an
idea of how the quantize range is determined by other settings. The heavy solid
lines in the sensitivity graph represent the range over which notes will be
quantized. At a setting of “+50%”, for example, only notes that fall within the
range that is less than halfway to the quantize range of the adjacent note will
be quantized. Notes outside this range and those of adjacent notes will be left
un-quantized.
The “Swing Rate” parameter produces a “swing” feel by shifting the timing of
“back beats”, as specified by the quantize parameters. For example, if the
specified quantization value is 8th notes, then the swing effect will shift the
2nd, 4th, 6th, and 8th beats of each measure forward to create a swing feel. If
the quantize value is set to a triplet note length, the last note in each triplet
group will be shifted. If the quantize value is set to a compound note length
(e.g. 8th note + 8th note triplet) the even-numbered back beats will be shifted.
The “Swing Rate” parameter determines how much the timing of the affected
notes will be shifted. The range is from 50% (no swing) to 75% (maximum
swing) for even note lengths, from 66% to 83% for triplet note lengths, and
from 50% to 66% for even-plus-triplet note lengths (e.g. 8th note + 8th note
triplet).
36
The “Gate Time” and “Velocity” parameters increase or decrease the gate
times (length) and velocity of all notes affected by the swing parameter. The
range of both parameters is from 0% to 200%. The “Gate Time” parameter sets
the ratio between the shorter and longer gate time values. A setting of “100%”
maintains the original relationship between the notes, lower values produce a
narrower gate time range, and higher values produce a broader gate time range.
The “Velocity” parameter sets the ratio between the lower and higher velocity
values. A setting of “100%” maintains the original relationship between the
notes, lower values produce a narrower dynamic range, and higher values
produce a broader dynamic range.
After setting the parameters as required press [ENTER] to execute the
Quantize job. The metronome icon will appear on the display while the data is
being processed, then “Completed” will appear briefly when the job is done.
Press the [F6] key (“Exit”) to return to the job list, or a mode key to go directly
to the selected mode.
02: Modify Velocity
Increases or decreases the velocity values of all notes in the specified track and
range of measures.
The “TR” parameter selects the track to be affected by the Modify Velocity
job: “01” ... “16”.
The “M” parameters above the graphic bar are used to specify the first
measure:beat and last measure:beat of the range to be modified.
The “rate” parameter sets the ratio between the lower and higher velocity
values. A setting of “100%” maintains the original relationship between the
notes, lower values produce a narrower dynamic range, and higher values
produce a broader dynamic range. The range is from “0%” to “200%”.
The “offset” parameters determines the amount of velocity change. “–”
settings reduce the velocity while “+” settings increase the velocity. The range
is from “-99” through “0” to “+99”.
37
The Modify Velocity job
is a great way to “soften”
the sound of material that
has too great a variation between
the softest and loudest notes, or,
conversely, to add extra punch to
dull-sounding material. Experiment with the parameters to get a
feel for what they do.
New Velocity = Original Velocity x rate/100 + offset
(If the right side of the equation is less than 0, the New Velocity becomes 1.)
After setting the parameters as required press [ENTER] to execute the Modify
Velocity job. The metronome icon will appear on the display while the data is
being processed, then “Completed” will appear briefly when the job is done.
Press the [F6] key (“Exit”) to return to the job list, or a mode key to go directly
to the selected mode.
03: Modify Gate Time
Increases or decreases the gate times (length) of all notes in the specified track
and range of measures.
The “TR” parameter selects the track to be affected by the Modify Gate Time
job: “01” ... “16”.
The “M” parameters above the graphic bar are used to specify the first
measure:beat and last measure:beat of the range to be modified.
The “rate” parameter sets the ratio between the shorter and longer gate time
values. A setting of “100%” maintains the original relationship between the
notes, lower values produce a narrower gate time range, and higher values
produce a broader gate time range. The range is from “0%” to “200%”.
The “offset” parameter determines the amount of gate time modification.
“-” settings shorten the gate time while “+” settings increase the gate time.
The range is from “-99” through “0” to “+99”.
38
New Gate Time = Original Gate Time x rate/100 + offset
(If the right side of the equation is less than 0, the New Gate Time becomes 1.)
The Modify Gate Time
job can be used to
produce a more staccato or legato feel, as required.
Experiment with the parameters
to get a feel for what they do.
After setting the parameters, as required press [ENTER] to execute the Modify
Gate Time job. The metronome icon will appear on the display while the data
is being processed, then “Completed” will appear briefly when the job is done.
Press the [F6] key (“Exit”) to return to the job list, or a mode key to go directly
to the selected mode.
04: Crescendo
Produces a gradual crescendo (increase in note velocity) or decrescendo (decrease in note velocity) in the specified track over the specified range of
measures.
The “TR” parameter selects the track to be affected by the Crescendo job:
“01” ... “16”.
The “M” parameters above the graphic bar are used to specify the first
measure:beat and last measure:beat of the range to be modified.
The “Range” parameter determines the range of velocity values over which
the crescendo will occur. A setting of “+24”, for example, will cause the MIDI
velocity values to increase by 24 over the specified measure range (The MIDI
velocity value range is from 1 to 127).
39
Negative values cause a corresponding decrease in velocity, therby producing
a decrescendo rather than a crescendo. The range of this parameter is from
“-99” through “0” to “+99”.
After setting the parameters as required press [ENTER] to execute the Crescendo job. The metronome icon will appear on the display while the data is
being processed, then “Completed” will appear briefly when the job is done.
Press the [F6] key (“Exit”) to return to the job list, or a mode key to go directly
to the selected mode.
05: Transpose
Transposes all notes in the specified part up or down by the specified number
of semitones.
The “TR” parameter selects the track to be affected by the Transpose job:
“01” ... “16” for the sequncer tracks, or “Chd” for the accompaniment chord
track.
The “M” parameters above the graphic bar are used to specify the first
measure:beat and last measure:beat of the range to be modified.
Of course, you can
transpose all parts as
required to shift the entire song to a different key, but
the Transpose job is actually
more suited to changing the
pitch of a section of a single
track. This can be done to produce temporary “modulations”
to another key, or to create harmony with another track.
40
The “Transpose” parameter determines the amount of transposition in semitone increments. Minus (–) values transpose down while plus (+) values transpose up. the range is from “-99” through “0” to “+99”.
After setting the parameters as required press [ENTER] to execute the Transpose job. The metronome icon will appear on the display while the data is
being processed, then “Completed” will appear briefly when the job is done.
Press the [F6] key (“Exit”) to return to the job list, or a mode key to go directly
to the selected mode.
06: Shift Note
Changes the pitch of all specified notes within the specified range of measures
in the specified track.
The “TR” parameter selects the track to. be affected by the Shift Note job:
“01” ... “16”.
The “M” parameters above the graphic bar are used to specify the first
measure:beat and last measure:beat of the range to be modified.
The source note parameter determines which notes in the specified measure
range will be shifted, and the destination note parameter determines to what
note they will be shifted. to. The range of both parameters is from “C-2” to
“G8”. The notes can be enter via the micro-keyboard, the data dial, or the
[-1/NO] and [+1/YES] keys.
After setting the parameters as required press [ENTER] to execute the Shift
Note job. The metronome icon will appear on the display while the data is
being processed, then “Completed” will appear briefly when the job is done.
Press the [F6] key (“Exit”) to return to the job list, or a mode key to go directly
to the selected mode.
41
07: Shift Clock
Moves all notes and events in the specified track and range of measures forward or backward by the specified number of clocks (96 clocks per 1/4 note).
The “TR” parameter selects the track to be affected by the Shift Clock job:
“01” ... “16” for the sequencer tracks, or “Tmp” for the tempo track.
The “M” parameters above the graphic bar are used to specify the first
measure:beat and last measure:beat of the range to be modified.
The Shift Clock job will
not shift data beyond
the specified measure
range. Events near the beginning
and end of the specified range
may therefore sound “bunched”
together in some cases.
Since the Move Clock
job actually shifts the,
timing of all notes and
other events in the specified
measures forward or backward,
it can significantly alter the
“feel” of the song. You could
move the notes forward (“+” settings) to create a more “laid
back” feel, or backward (“–” settings) to produce a more “driving” feel. Of course, you can
also use Clock Move to correct
timing that is off in the first
place.
42
The “Clock” parameter determines the direction and number of clocks by
which the notes in the specified measure range will be shifted. “+” settings
shift the notes forward (toward the end of the song) and "–" settings shift the
notes backward (toward the beginning of the song). The range is from “-999”
through “0” to “+999”.
After setting the parameters as required press [ENTER] to execute the Shift
Clock job. The metronome icon will appear on the display while the data is
being processed, then “Completed” will appear briefly when the job is done.
Press the [F6] key (“Exit”) to return to the job list, or a mode key to go directly
to the selected mode.
08: Chord Sort
Sorts all notes in the specified measure range which fall on the same beat (i.e.
chords) so that the notes are arranged in order from lowest to highest or from
highest to lowest.
The “TR” parameter selects the track to be affected by the Chord Sort job:
“01” ... “16”.
The “M” parameters above the graphic bar are used to specify the first
measure:beat and last measure:beat of the range to be modified.
The “Type” parameter determines whether the chords in the specified range
are arrange from lowest to highest note (“Norm”) or from highest to lowest
note (“Rev”).
After setting the parameters as required press [ENTER] to execute the Chord
Sort job. The metronome icon will appear on the display while the data is
being processed, then “Completed” will appear briefly when the job is done.
Press the [F6] key (“Exit”) to return to the job list, or a mode key to go directly
to the selected mode.
43
09: Copy Event
Copies all data from a specified range of measures from one track of a specified song to the specified measure in the specified track of the specified song.
This operation overwrites the data from the beginning of the specified destination measure with the data from the source measures. Previous data in the
overwritten measures is therefore lost.
The upper “Song” parameter selects the source song — i.e. the song from
which the data is to be copied: “01” ... “10”.
The lower “Song” parameter selects the destination song — i.e. the song
to which the data is to be copied: “01” ... “10”.
The upper “TR” parameter selects the source track — i.e. the track from
which the data is to be copied: “01” ... “16” for the sequencer tracks, “Pat” for
the’ accompaniment pattern track, “Chd” for the accompaniment chord track,
“Tmp” for the tempo track, or “All” for all tracks. When “Pat”, “Chd”, “Tmp” or
“All” is selected, the lower “TR” parameter is automatically set to the same track.
The, lower “TR” parameter selects the destination track — i.e. the track to
which the data is to be copied: “01” ... “16” for the sequencer tracks, “Pat” for the
accompaniment pattern track, “Chd” for the accompaniment chord track, “Tmp”
for the tempo track, or “All” for all tracks. When “Pat”, “Chd”, “Tmp” or “All” is
selected, the upper “TR” parameter is automatically set to the same track.
The “M” parameters above the upper graphic bar are used to specify the
first measure:beat and last measure:beat of the range to be copied.
•
Previous data in
measures overwritten
by the Copy Event
job will be completely erased
and replaced by the copied data.
•
44
The time signature is copied
by the Copy Event job, but
Voice and Play Effect data is
not copied.
The “M” parameters below the lower graphic bar specifiy the destination
measure:beat to which the data will be copied, as well as the number of times
the data is to be copied.
The Copy Event job
makes it easy to use
phrases or even complete sections (an entire chorus,
for example) in more that one
place in a song. You can copy a
phrase played by one voice, and
have it repeated by a different
voice later in the song. You can
always edit the copied sections
to create variations.
After setting the parameters as required press [ENTER] to execute the Copy
Event job. The metronome icon will appear on the display while the data is
being processed, then “Completed” will appear briefly when the job is done.
Press the [F6] key (“Exit”) to return to the job list, or a mode key to go directly
to the selected mode.
10: Erase Event
Erases all note and event data from the specified measure or range of measures
in the specified track. An erase operation leaves the specified measures intact
but blank.
The “TR” parameter selects the track to be affected by the Erase Event job:
“01” ... “16” for the sequencer tracks, “Pat” for the accompaniment pattern
track, “Chd” for the accompaniment chord track, or “Tmp” for the tempo
track.
The “M” parameters above the graphic bar are used to specify the first
measure:beat and last measure:beat of the range to be erased.
Unlike the Delete Measure
job, the Erase Event job
erases the data from the
specified measures only in the specified track. Also, the data is erased
but the measures remain intact (i.e.
the subsequent measures are not
moved back). After an erase operation you can record new material in
the resulting blank measures as required.
After setting the parameters as required press [ENTER] to execute the Erase
Event job. The metronome icon will appear on the display while the data is
being processed, then “Completed” will appear briefly when the job is done.
Press the [F6] key (“Exit”) to return to the job list, or a mode key to go directly
to the selected mode.
45
11: Extract Event
Allows a specified type of event — note, program change, pitch bend, control
change, channel aftertouch, polyphonic aftertouch, or exclusive — to be extracted (removed) free a specified range of measures in a specified track. The
extracted data can be moved to the same range of measures in any other
specified track.
The upper “TR” parameter selects the source track — i.e. the track from
which the event data is to be extracted: “01” ... “16”.
The lower “TR” parameter selects the destination track — i.e. the track to
which. the extracted event data is to be moved: “01” ... “16”, or “Off” if you
simply want to discard the specified event data.
The “M” parameters above the graphic bar are used to specify the first
measure:beat and last measure:beat of the range from which the event data is
to be extracted.
The event type parameter above the lower graphic bar determines the type of
event data to be extracted:
Although you can remove
events individually in the
edit mode (page 104), the
Extract Event job makes it simple to
remove all occurences of the specified event within the specified measure range in one operation. This is
particularly convenient when removing slow pitch bends or volume
changes that may employ many
individual events to create a single
effect.
46
NOTE
Note events. When this event type is selected a note parameter
appears at the right end of the bar. The note parameter determines
the pitch of the notes to be extracted: “C-2” ... “G8” for individual
notes, or “All” for all notes.
PRGM
Program change events.
P.BEND
Pitch bend events.
CTRL
Control change events. When this event type is selected a control
change number parameter appears at the end of the bar. The control
change parameter determines the MIDI control change number(s)
to be extracted: “000” ... “127” for individual control change numbers, or “All” for all numbers.
CH A.T
Channel aftertouch events.
POILY A.T
Polyphonic aftertouch events.
EXCL
Exclusive events.
After setting the parameters as required press [ENTER] to execute the Extract
Event job. The metronome icon will appear on the display while the data is
being processed, then “Completed” will appear briefly when the job is done.
Press the [F6] key (“Exit”) to return to the job list, or a mode key to go directly
to the selected mode.
12: Thin Out
“Thins out” specified types of data by removing every other event of the
specified type. This is particularly useful for reducing the volume of data
required for pitch bends, aftertouch and other control change operations, thus
making more efficient use of the available memory.
The “TR” parameter selects the track to be affected by the Thin Out job: “01”
... “16” for the sequencer tracks, or “Tmp” for the tempo track.
The “M” parameters above the graphic bar are used to specify the first
measure:beat and last measure:beat of the range to be modified.
The data type parameter determines the type of data to be thinned.
P.BEND
Pitch bend events.
CTRL
Control change events. When this event type is selected a control
change number parameter appears to the right of the type parameter. The control change parameter determines the MIDI control
change number(s) to be thinned: “000” ... “127”.
CH A.T
Channel aftertouch events.
POLY A.T
Polyphonic aftertouch events.
After setting the parameters as required press [ENTER] to execute the Thin
Out job. The metronome icon will appear on the display while the data is being
processed, then “Completed” will appear briefly when the job is done. Press
the [F6] key (“Exit”) to return to the job list, or a mode key to go directly to
the selected mode.
47
13: Create Measure
Creates a specified number of blank measures having the specified time signature for all tracks. The created measures are inserted at a specified measure
number, and all subsequent measures are moved forward to make room.
•
All existing measures
after the point at
which the new measures are created will be moved
forward to make room for the
new measures.
• If you use the Create, Measure
job with an empty song, the
specified new measures will
be placed in track 1 only.
Use Create Measure
when you want to add
new material somewhere in the middle of data
you’ve already recorded, without erasing the existing data.
First create the required measures, then either copy the data
from existing measures using the
Copy Event function, or record
new data as required.
The “M” parameter above the graphic bar specifies the measure at which the
newly created measures will be inserted.
The time signature parameter below the graphic bar determines the time
signature of the measures to be created: 1/16 ... 16/16, 1/8 ... 16/8, 1/4 ... 8/4.
The “Meas” parameter below the bar specifies the number of measures to
be created.
After setting the parameters as required press [ENTER] to execute the Create
Measure job. The metronome icon will appear on the display while the data is
being processed, then “Completed” will appear briefly when the job is done.
Press the [F6] key (“Exit”) to return to the job list, or a mode key to go directly
to the selected mode.
14: Delete Measure
Deletes the specified range of measures from all tracks simultaneously.
The “M” parameters above the graphic bar are used to specify the first measure and last measure of the range to be deleted.
48
Delete Measure is a
great way to completely
cut out unwanted data
from the song. it’s important to
remember, however, that a delete operation affects all tracks
simultaneously, and that measures following the deleted range
are moved back to take the
place of the deleted measures.
After setting the parameters as required press [ENTER] to execute the Delete
Measure job. The metronome icon will appear on the display while the data is
being processed, then “Completed” will appear briefly when the job is done.
Press the [F6] key (“Exit”) to return to the job list, or a mode key to go directly
to the selected mode.
15: Copy Track
Copies all data from the specified track of a specified song to any other
specified track of a specified song.
The upper “Song” parameter selects the source song — i.e. the song from
which the data is to be copied: “01” ... “10”.
The lower “Song” parameter selects the destination song — i.e. the song
to which the data is to be copied: “01” ... “10”.
The upper “TR” parameter selects the source track — i.e. the track from
which the data is to be copied: “01” ... “16”, “Pat”, “Chd” or “Tmp”. When
“Pat”, “Chd” or “Tmp” is selected the lower “TR” parameter is set to the same
track.
The lower “TR” parameter selects the destination track — i.e. the track to
which the data is to be copied: “01” ... “16”, “Pat”, “Chd” or “Tmp”. When
“Pat”, “Chd” or “Tmp” is selected the upper “TR” parameter is set to the same
track.
After setting the parameters as required press [ENTER] to execute the Copy
Track job. The metronome icon will appear on the display while the data is
being processed, then “Completed” will appear briefly when the job is done.
Press the [F6] key (“Exit”) to return to the job list, or a mode key to go directly
to the selected mode.
49
16: Mix Track
Combines the data contained in two specified tracks and places the result in
the second track.
NOTE If there is no data in the
second track, the data from the
first track is simply copied to the
second track (the time signature
is not copied).
In many situations you
may want to “overdub,”
or add new material to
a single track without deleting
the previous material. This is
dangerous, however, since you
can ruin one or more layers of
good material by making a mistake during a later overdub. The
QY300 eliminates this possibility
by allowing only “replace” recording (i.e. all material recorded to a track erases an replaces any previous material on,
that track). In order to ‘record
more than one layer of material
to a single track (using the same
voice, of course), first record the
layers on separate tracks, then
after ensuring that there are no
mistakes, use the Mix Track job
to combine these separate tracks
onto a single track.
The upper and center “Song” parameters select the first and second source
songs- i.e. the songs containing the tracks which are to be mixed: “01” ...
“10”. Both of these Song parameters should be set to the same song number if
you’re mixing tracks from a single song.
The upper and center “TR” parameters select the first and second source
tracks — i.e. the tracks which are to be mixed: “01” ... “16”.
The lower “Song” and “TR” parameters are always the same as the center
parameters.
After setting the parameters as required press [ENTER] to execute the Mix
Track job. The metronome icon will appear on the display while the data is
being processed, then “Completed” will appear briefly when the job is done.
Press the [F6] key (“Exit”) to return to the job list, or a mode key to go directly
to the selected mode.
17: Clear Track
Completely clears the specifed track from the currently selected song (including all Play Effect parameters).
50
The “TR” parameter selects the track(s) to be cleared: “01” ... “16” for the
sequencer tracks, “Pat” for the accompaniment pattern track, “Chd” for the
accompaniment chord track, “Tmp” for the tempo track, or “All” for all tracks.
After setting the parameters as required press [ENTER] to execute the Clear
Track job. The metronome icon will appear on the display while the data is
being processed, then “Completed” will appear briefly when the job is done.
Press the [F6] key (“Exit”) to return to the job list, or a mode key to go directly
to the selected mode.
18: Expand Backing
“Expands” the accompaniment track data — i.e. the pattern and chord data —
and places the results in the normal sequencer tracks after converting the data
to standard MIDI format. The expanded data is placed in sequencer tracks 8, 9,
11, 12, 13, 14, 15, and 16 (see chart below). Any previous data in those tracks
will be erased!
Press [ENTER] to execute the Expand Backing job. The metronome icon will
appear on the display while the data is being processed, then “Completed” will
appear briefly when the job is done. Press the [F6] key (“Exit”) to return to the
job list, or a mode key to go directly to the selected mode.
Pattern Track
1
2
3
4
Sequencer Track
8
9
11
12
5
6
7
13
14
15
8
16
51
19: Init Play Effect:
Resets all playback effect settings for the specified track to their default values.
The “TR” parameter selects the track(s) to be affected by the Init Play Effect
job: “01” ... “16” for the sequencer tracks, or “All” for all tracks.
After setting the parameter as required press [ENTER] to execute the Init Play
Effect job. The metronome icon will appear on the display while the data is
being processed, then “Completed” will appear briefly when the job is done.
Press the [F6] key (“Exit”) to return to the job list, or a mode key to go directly
to the selected mode.
20: Normalize Effect
Actually applies the Play Effect settings to the sequence data, modifying the sequence data accordingly. The Play Effect settings are initialized after execution.
The “TR” parameter selects the track(s) to be affected by the Normalize Effect
job: “01” ... “16” for the sequencer tracks, or “All” for all tracks.
After setting the parameter as required press [ENTER] to execute the Normalize Effect job. The metronome icon will appear on the display while the data is
being processed, then “Completed” will appear briefly when the job is done.
Press the [F6] key (“Exit”) to return to the job list, or a mode key to go directly
to the selected mode.
52
21: Copy Song
Copies all data from all tracks of the specified song to any other specified song (including song name, play effect, voice assignment, and output assignment settings).
The upper “Song” parameter selects the source song — i.e. the song from
which the data is to be copied: “01” ... “10”.
The lower “Song” parameter selects the destination song — i.e. the song
to which the data is to be copied: “01” ... “10”.
After setting the parameters as required press [ENTER] to execute the Copy
Song job. The metronome icon will appear on the display while the data is
being processed, then “Completed” will appear briefly when the job is done.
Press the [F6] key (“Exit”) to return to the job list, or a mode key to go directly
to the selected mode.
22: Clear Song
Completely clears all data from all tracks of the currently selected song. Also
initializes the play effect, voice, and output settings.
The “Song” parameter selects the song to be cleared: “01” ... “10”.
After setting the parameter as required press [ENTER] to execute the Clear
Song job. The metronome icon will appear on the display while the data is
being processed, then “Completed” will appear briefly when the job is done.
Press the [F6] key (“Exit”) to return to the job list, or a mode key to go directly
to the selected mode.
53
23: Song Name
Allows an original name of up to 8 characters to be assigned to the current
song.
The song number parameter selects the song for which a name is to be assigned: “1” ... “10”.
NOTE If a series of asterisks appears in the song name area, the
selected song contains no data
and a song name cannot be assigned.
54
Lower-case
Characters
To enter a lower-case character, use the cursor keys to move
the cursor to the position at which a character is to be entered,
then press the micro-keyboard key corresponding to the
character to be entered.
Upper-case
Characters
Hold the left [OCT DOWN] key (“CAPS”) while pressing the
micro-keyboard key corresponding to the character to be entered.
Symbols
Hold the left [OCT UP] key (“SHIFT”) while entering to enter
the symbols listed above the characters corresponding to each
micro-keyboard key.
Space
The right [OCT DOWN] key enters a space.
Numbers
Numbers can be entered via the numeric keypad.
Delete
The right [OCT UP] key deletes the character at the cursor
position.
When the name has been entered press the [F6] key (“Exit”) to return to the
job list, or a mode key to go directly to the selected mode (it is not necessary to
press the [ENTER] key to enter the specified name).
Using the pre-programmed style data provided with the QY300 you can easily create accompaniments that can be used alone — to play or sing along with, for example — or as the
basis for complete compositions. The pre-programmed styles are provided on disk, and must
be loaded before they can be used. You can also create patterns by combining individual
“phrases”. A phrase is a single “part” of a pattern, such as the drum or bass part. The QY300
provides 2,000 preset phrases in internal ROM memory, or you can record your own. The
procedures for creating patterns by using phrases will be discussed in the “Creating Patterns”
section
page 74).
Defining "Patterns", "Styles", & "Sections"
Although you’ll usually be working with individual patterns in the QY300,
these are actually part of larger structures known as “styles”. A style consists
of a group of genre-related patterns designed to be used together to create a
complete song. Each pattern within a style is a “section” of a song: e.g. an
introduction, two main themes, fill-ins, and an ending (these will be discussed
in more detail in “Selecting & Playing Patterns” on page 57). The number that
appears at the top of the main PATTERN mode display is therefore actually
the “style number”, since it selects a complete set of related patterns. Several
of the PATTERN mode jobs (page 86) also use the term “style” when they
operate on a complete set of patterns rather than an individual pattern.
Loading the Pre-programmed Patterns From Disk
The QY300 is initially
shipped with the styles
already loaded. If for
some reason the styles have
been erased or modified, you
can use the following procedure
to re-load them.
NOTE Actual file names on the
data disk supplied with the
QY300 may be different from
those given in the manual.
So you can load a complete set of styles in one operation, the styles provided
on the QY300 data disk have been saved as an “All Data” file which must be
loaded via the DISK mode. Please note that loading the style data will erase all
other song, phrase, and chain data currently in memory. Be sure to save any
data you want to keep before loading.
Insert the Supplied Disk
Insert the floppy disk supplied with the QY300 into the disk drive slot on the
right side of the unit. The label side of the disk should face up and the sliding
disk door should face the drive slot. Slide the disk in until it clicks firmly in
place.
55
Select the Disk Mode, Select “Load” & “All Data”
The data disk supplied with the QY300 contains a single “All Data” format file
which include 1 demo song and 100 styles x 8 sections (800 patterns). Press
the [DISK] mode key to select the DISK mode, press the [F2] function key
(“Load.”), then use the cursor keys, the [-1/NO] and [+1/YES] keys, or the
data dial to select “All Data”.
Press [ENTER] & Select the “DEMO” File
Press the [ENTER] key top go to the load all data display, then use the cursor
keys, the [-1/NO] and [+1/YES] keys, or the data dial to select the “DEMO”
file.
Press [ENTER]
Press the [ENTER] key to execute the load operation. The QY300 will display
a confirmation prompt asking you if you’re sure you want to delete all previous data in memory.
Press [+1/YES] to Confirm & Load the Data
Press [+1/YES] if you want to go ahead with the load operation, or [-1/NO] if
you want to cancel the load operation. If you choose [+1/YES], an “Executing” bar graph will appear while the data is being loaded.
56
Selecting & Playing Patterns
Although you’ll normally use the PATTERN mode when creating new styles
(page 74), the PATTERN mode is also useful when you want to listen to
individual phrases and experiment with chord changes using the QY300’s
advanced ABC capability.
Select the STYLE Mode
In order to select and play the styles as described in this section you must be in
the QY300 PATTERN mode. Press the [PATTERN] mode key to select the
PATTERN mode.
Select a Style Number
Use the cursor keys to move the cursor to the style number, then use any data
entry method to select the style you want to play. The styles are numbers 001
through 100 (the currently selected section is shown in the square brackets to
the right of the style name).
Note that the “Meas”
(measure) number on
the display includes two
numbers: e.g. “1of4”. The first
number is the current measure
number and the second is the total number of measures in the
pattern (patterns can be up to 8
measures long). “2of4”, therefore, means that the second
measure of a 4-measure pattern
is currently playing.
Start Playback
Press the
key to start playback of the selected style and section. The play
indicator will appear in the display and the green LED above the
key will
flash at the current playback tempo.
Listen to the Sections
Each style can have 8 sections — INTRO, MAIN A, MAIN B, FILL AA,
FILL BB, FILL AB, FILL BA, and ENDING.
INTRO
MAIN A
MAIN B
FILL AA
FILL BB
FILL AB
FILL BA
ENDING
Introduction, When used in a song the introduction will automatically
be followed by the MAIN A section unless another section is specified.
The main section, generally used for the “verse” of a song.
A variation on the main section which can be used as a chorus or bridge.
Fill-in for the MAIN A section.
Fill-in for the MAIN B section.
Fill-in transition from MAIN A to MAIN B. MAIN B will automatically be selected after the fill-in.
Fill-in transition from MAIN B to MAIN A. MAIN A will automatically be selected after the fill-in.
Ending pattern when used in a song, playback will stop when the
ending section finishes.
57
The currently selected section is shown between square brackets to the right of
the style number and name. You can change styles by playing the cursor at the
section name and using the [-1/NO] and [+1/YES] keys or the data dial. The
newly selected section will begin playing from the top of the next measure.
You can also change sections directly by pressing the appropriate key on the
micro-keyboard while the cursor is located at either the style number or the
section name on the display.
If you move the cursor
to the tempo parameter
(indicated by a note
symbol and a number in the upper right corner of the display),
you can use the any data entry
method to set the playback
tempo to anywhere from 25.0 to
300.0 beats per minute. The
number to the right of the decimal point after the tempo value
lets you change the tempo in
1/10th of a beat increments.
58
Select Different Styles & Sections
With the cursor positioned over the style number you can use any data entry
method to select different styles, and use the micro-keyboard section keys to
select different sections during playback. In all, cases the newly selected style
or section will begin playing from the top of the next measure.
Stop Playback When Done
Stop playback at any time by pressing the
key.
Changing Chords
The QY300 features a sophisticated ABC (Auto Bass Chord) system that
automatically re-harmonizes the pattern tracks to match chords you specify.
This makes creating complete accompaniment tracks fast and easy ... just
select a pattern, then specify the required chord changes (details in the next
section). Here’s how you use the micro-keyboard to specify chord changes.
Play a Pattern
Select and play a pattern, as described in the preceding section.
Move the Cursor to the Chord Symbol
The micro-keyboard can be used to enter chords only when the cursor is
located over the chord symbol on the display. Use the cursor keys to move the
cursor to the chord symbol at the bottom of the display.
Enter a Chord
Note that the lower octave of the micro-keyboard has chord root names “E”
through “D” marked on the keys, and the upper octave keys are marked with a
variety of chord types.
To enter a chord, press the key corresponding to the desired chord root, then
the key corresponding to the desired chord type (the chord type keys alternately select the lower and upper chord types marked ... watch the display),
and finally the [ENTER] key.
59
Actually, you can press
the chord type key and
then the root key, the
order doesn’t matter.
The chord is actually entered only when the [ENTER] key is pressed. Until
the [ENTER] key is pressed, the newly specified chord root and type will
flash on the display.
The Chord Types
The "- - -" chord type
marking is a special
“THRU” or “non-ABC”
type that can be used to create
accompaniment patterns without
the harmonic limitations of the
ABC system.
60
add9
M
M7(9)
M7
aug
major added ninth.
major.
major seventh ninth.
6(9)
6
sixth ninth.
7(9)
7
add9
major seventh.
augmented.
sixth
ninth.
seventh.
m
m7(9)
minor added ninth.
minor
minor seventh ninth.
m7
mM7
minor seventh.
minor major seventh.
m6
dim
7(#5)
7(#9)
minor sixth.
diminished
seventh sharp five.
seventh flat five.
seventh sharp nine.
seventh flat nine.
seventh flat thirteen.
7(13)
seventh thirteen.
7sus4
sus4
m7(11)
seventh suspender.
suspended four.
minor seven eleven.
7(#11)
---
seventh sharp eleven.
THRU (see “DETAIL” below).
Specifying the Bass Note For a Chord
You can specify the bass note to be used with any chord by using the left
[OCT DOWN] key (note the “ON BASS” marking below the key). Enter the
chord in the normal way, then while holding the [OCT DOWN/ON BASS]
key press the key on the micro-keyboard corresponding to the desired bass
note (the bass note will appear to the right of the chord). In the example
display, below, the Dm7 chord will be played on a “C” bass note (in this case
the 7th degree of the chord).
Specifying the Bass Phrase Chord Type (Harmonization)
While the “ON BASS” function described above allows you to specify the
actual root of the bass phrase to be used with a chord, the “ORG BASS”
function also lets you specify a chord type on which the bass pattern will be
based. To do this use the left [OCT UP] key (note the “ORG BASS” marking
below the key). Enter the chord in the normal way, then while holding the
[OCT UP/ORG BASS] key press the key on the micro-keyboard corresponding to the desired root note and then the key corresponding to the desired chord
type (the root note and chord type will appear below the chord root). In the
example display, below, the Dm7 chord will be played with a bass phrase
based on a CM7 chord.
If you enter only the
chord root the major
chord type will automatically be selected. If you enter only the chord type the root
will be set to “C” automatically.
Try Out the Various Chords With Different Styles
During playback you can move the cursor up to the style number, select a
different style, then move the cursor back to the chord symbol and try different
chords with the new style.
Stop Playback When Done
Stop playback by pressing the
key.
61
Track Muting & Effect Bypass
The track mute “buttons” in the PATTERN mode function in exactly the same
way as they do in the SONG mode. See page 14 for details.
Voices, Assignment & Effects
The PATTERN mode has basically the same Voice mode Mixer and Reverb
displays, the same Effect (Quantize, Swing, Shift, Gate/Velocity, Per Track)
displays, and the same Output displays and functions as the SONG mode. The
main difference is that while the SONG mode has 16 tracks the PATTERN mode
has only 8. Refer to the page numbers listed with the displays below for details:
Voice: Mixer display for voice assignment, panning and level control
page 14). The “Voice” parameter in this display additionally lets you switch
between the pattern and phrase voice assignments.
Voice: Reverb display for voice assignment, effect selection, and effect
depth control
page 15). As in the Mixer display, above, the “Voice”
parameter lets you switch between the pattern and phrase voice assignments.
62
Effect: Quantization display for playback quantization
Effect: Swing display to automatically create a “swing” feel
page 18).
page 20).
Effect: Transpose & Clock Shift display to transpose tracks and shift note
timing forward or backward
page 21).
Effect: Gate Time/Velocity display to modify gate time and velocity
values
page 22).
63
Effect: Per Track display shows all playback effect parameters for one
track at a time, and allows monitoring of only the selected track
page
22).
Output display for pattern track to MIDI channel assignments for all styles.
64
The QY300 provides two ways to record an accompaniment by specifying patterns and chords:
“realtime” and “step” recording. The realtime method is the fastest and easiest, letting you record
pattern and chord changes “on the fly.” The step method gives you more detailed control, and is
an excellent way to add the finishing touches to an accompaniment recorded in real time.
Realtime Accompaniment Recording
Once you know how to select styles, sections, and enter chords in the PATTERN mode (see the preceding sections), recording a basic accompaniment in
real time is easy. Tempo changes can be added later using the EDIT mode
page 112).
Select the SONG Mode & an Empty Song
Press the [SONG] mode key to select the SONG mode and, with the cursor
located over the song number at the top of the display, use any data entry
method to select an empty song number if necessary. Empty songs are indicated by a row of asterisks (“********” ) following the song number.
If for some reason all 10
songs contain data, use
the “Clear Song” job described on page 53 to clear a song
for recording.
Select the “Pat” Track to Record Style &
Section Changes
Move the cursor to the track area of the display, and then shift the cursor
sideways to select “Pat”. Once selected, move the cursor vertically to move to
other areas of the screen. The selected track will remain highlighted no matter
where you move the cursor.
65
Select the Starting Style, Section, Chord, & Tempo
Move the cursor to the style number, section, chord, and tempo parameters,
and set as required.
It’s sometimes easier to
set a slow tempo for
realtime recording, so you
have plenty of time to enter pattern
and chord changes.
Engage the Record Ready Mode
Press the
key to engage the record ready mode. The red LED above the
key will light.
Select the Realtime Record Mode
Press the [F4] function key (“REAL”) to select the realtime record mode.
Record
Press the
key to begin recording pattern changes. The metronome will
sound and you’ll be given a two-measure count-in prior to the first measure
actually recorded. The count-in is also indicated by negative numbers in the
“Meas” parameter. If a 4/4 pattern is selected, for example, the count-in will
run from measure “-08” to “-01”, then recording will begin from measure
“001”.
Since you selected “Pat” recording, the cursor will automatically move to
the style number when you start recording. All you have to do to record style
and section changes is to select the required style numbers by using any data
entry method, and section changes via the appropriate micro-keyboard keys.
Remember that all style and section changes occur from the top of the next
measure after the change is entered. Also keep in mind that the INTRO will
automatically switch to the MAIN A pattern, FILL AB will automatically
switch to the MAIN B pattern, and FILL BA will automatically switch to the
MAIN A pattern.
66
Stop Recording
Stop recording either by pressing the
key or by selecting the ENDING
section. The normal SONG play mode is automatically re-selected when you
stop recording.
Engage Record Ready Again and Select “Chd”
Press the
key to engage the record ready mode again (the red [REC] key
indicator should light and the “REAL” mode will still be selected), then move
the cursor to the track section of the display and select “Chd” in order to
record chord changes.
Chord changes normally
occur on quarter-note
divisions, so try to press
the [ENTER] key to enter each chord
either exactly on the beat or a fraction of a section before the beat on
which you want the chord change
to occur. Syncopated chord changes
can be recorded by entering the
chord an eighth or sixteenth note
before the beat (syncopated changes
can also be programmed in the STEP
record mode, page 73).
Don’t worry if you’ve
made a few mistakes.
Simple slip-ups made in
the realtime record mode can usually be corrected in the step record
mode ... described next.
Record
Press the
key to begin recording chord changes. The metronome will
sound and you’ll be given a two-measure count-in.
Since you selected “Chd” recording, the cursor will automatically move to
the chord when you start recording. All you have to do to record chord changes
is to enter the required chords as described in the “Changing Chords” section
page 59).
Stop Recording
Press the
key to stop recording when all the required chord changes have
been entered. The normal SONG play mode is automatically re-selected when
you stop recording.
Listen to the Results
Press the
key to make sure you return to the top of the song, then press
the
key to play back and check out the accompaniment you’ve just recorded.
67
Step Accompaniment Recording
The STEP record mode provides two different accompaniment-track dataentry displays: “Pat” (pattern changes) and “Chd” (chord changes). In each of
these you can individually enter or delete pattern and chord changes at precisely the required locations.
Select a Song to Record
Select an empty song if you want to record a new song in the step record
mode, or select a song that already contains data if you want to make changes
or additions.
Engage the Record Ready Mode.
Press the
key to engage the record ready mode. The red LED above the
key will light.
Select the Step record Mode
Press the [F5] function key (“STEP”) to select the step record mode.
“Tmp” track data is
entered in the Edit
mode
page 112).
Select the “Pat” or “Chd” Track
Move the cursor to the track area of the display, and then shift the cursor
sideways to select “Pat” or “Chd”. Once selected, move the cursor vertically if
you want to move to other areas of the screen. The selected track will remain
highlighted no matter where you move the cursor.
Start Recording
Press the
key to call the selected step record display.
68
Enter the Required Pattern or Chord Data
Refer to the following sections for details on how to use the pattern and chord
step-record displays.
Stop Recording
Press the
key to exit from the step record mode and return to the normal
SONG play mode.
“Pat” — Step Record Pattern Changes
Here’s how the STEP record pattern display will look if you’ve selected an
empty song (the appropriate pattern data will appear if the selected song contains data).
Moving Around & Entering Data
As usual, the cursor keys are used to move the cursor to the location at which
you want to enter data, and the [-1/NO] and [+1/YES] keys, data dial, or
numeric keypad are used to actually enter or change data.
The cursor keys also move you forward or backward through the song:
moving the cursor past the bottom of the screen accesses subsequent measures,
while moving it above the top of the screen accesses the preceding measures
(if there are any). In th pattern display moving sideways takes you to the time
signature, pattern number, and section parameters.
In all of the STEP record displays the
key takes you directly to the
first measure.
69
Style Number and Section
Any style number from 001 through 100 can be entered for each measure. The
style name appears to the right of the style number. Only one pattern (style &
section) can entered per measure, and that pattern will begin playing from the
beginning of the measure at which it is entered.
A pattern entered once will continue to play until a different pattern is
entered. If you want to change sections without changing the style number,
only the pattern need be entered.
In the example display below the intro section of style 001 plays for the
first measure, the MAIN A section of the same style is selected in measure 2.
Time Signature
Although the original time signature for the selected pattern is automatically
selected, the time signature value for each measure can be changes as required.
The available time signatures are:
1/16 ... 16/16
l/8 ... 16/8
1/4 ... 8/4
If a time signature is selected that results in shorter measures than the pattern
default, the pattern will be truncated (cut short) accordingly. If the selected
time signature results in longer measures than the pattern default, the pattern
will be repeated to fill the specified measure length.
End-of-Song Marker
• If there is no data in
the pattern track
(sequencer-track data
only) and no Ending section or
end-of-song marker is encountered, playback will stop automatically when the end of the
sequencer-track data is reached.
If the pattern track contains
data and no Ending section or
end-of-song marker is encountered, playback will continue
until stopped by pressing the
key.
70
By moving the cursor to the “End” block and pressing the [+1/YES] key you
can enter an end-of-song marker which will cause playback to stop at the end
of the corresponding measure (in the example display, below, playback will
stop at the end of the 24th measure). This allows you to stop playback at any
point without having to use an Ending section.
Erasing Pattern Changes
The [F6] function key (“Clear”) can be used to clear the style number, section,
or end-of-song marker at which the cursor is located. If you clear a time
signature change, the default time signature value for the current pattern will
be automatically re-selected.
“Chd” — Step Record Chord Changes
Here’s how the STEP record chord display will look if you’ve selected an
empty- song (the appropriate chord data will appear if the selected song contains data).
Chords
One chord can be entered per quarter note. Place the cursor at the required
quarter-note division on the display and enter the chord via the micro-keyboard in the normal way
page 59). In the example display below, a C
major chord is entered on the first beat of the first measure, a D minor seventh
on the first beat of the second measure, and a G seventh on the third beat of the
second measure.
71
Specifying the Bass. Note For a Chord
You can specify the bass note to be used with any chord by using the left
[OCT DOWN] key (note the “ON BASS” marking below the key). Enter the
chord in the normal way, then while holding the [OCT DOWN/ON BASS]
key press the key on the micro-keyboard corresponding to the desired bass
note (the bass note will appear below the chord root). In the example display,
below, the Dm7 chord will be played on a “C” bass note (in this case the 7th
degree of the chord).
You can add bass notes to
existing chords without
having to re-enter the entire chord by simply moving the cursor to the chord and using the [OCT
DOWN/ON BASS] key to specify
the bass note.
Specifying the Bass Phrase Chord Type (Harmonization)
While the “ON BASS” function described above allows you to specify the
actual root of the bass phrase to be used with a chord, the “ORG BASS”
function also lets you specify a chord type on which the bass pattern will be
based. To do this use the left [OCT UP] key (note the “ORG BASS” marking
below the key). Enter the chord in the normal way, then while holding the
[OCT UP/ORG BASS] key press the key on the micro-keyboard corresponding to the desired root note and then the key corresponding to the desired chord
type (the root note and chord type will appear below the chord root). In the
example display, below, the Dm7 chord will be played with a bass phrase
based on a CM7 chord.
You can add bass
phrase harmonization to
existing chords without
having to re-enter the entire
chord by simply moving the cursor to the chord and using the
[OCT UP/ORG BASS] key to
specify the bass chord.
72
Syncopated Chords
Chords can be syncopated (i.e. the chord actually begins a sixteenth-note or
eighth-note before the beat on which it is entered) by using the right [OCT
DOWN] and [OCT UP] keys (note the
and
” markings below the
keys). Enter the chord in the normal way, then press the right [OCT DOWN]
key to syncopate to one sixteenth-note before the beat, or the right [OCT UP]
key to syncopate an eighth-note before the beat (the appropriate syncopation
symbol will appear before the chord root, crossing the beat line). In the example display, below, the G7 chord is syncopated and will begin sounding an
eighth-note before the third beat of the second measure.
You can add syncopation
to existing chords without
having to re-enter the entire chord by simply moving the cursor to the chord and pressing the
right [OCT DOWN] or [OCT UP]
key. Syncopation can be removed
from a chord by placing the cursor
at the chord and pressing the corresponding [OCT DOWN] or [OCT
UP] key.
Clearing Chords
The [F6] function key (“Clear”) can be used to clear the chord at which the
cursor is located.
73
QY300 patterns are created by combining “phrases” — either preset or original — from the
PHRASE mode. A phrase is simply an individual “part” of a pattern — e.g. a drum phrase, a
bass phrase, a keyboard phrase, etc. — using a single voice. The QY300 has 2,000 preset
phrases, and 100 memory locations for original creations. The PHRASE mode lets you both
listen to the preset phrases and record original phrases. The phrases are actually combined to
create complete patterns in the PATTERN mode.
The Preset Phrases
You can listen to the preset phrases in the PHRASE mode by simply selecting
a phrase and pressing the
key.
The preset phrase numbers have four sections, as shown below. The cursor can
be placed at any of these four sections to select as required.
Category
DR
Drums
Percussion
PC
Bass
BA
GC Guitar Chord
GR
Guitar Riff
KC
Keyboard Chord
KR Keyboard Riff
74
Beat
08 8 Beat
16 16 Beat
34 3/4 Beat
Type
M Main
O Fill Loop
X Fill Cross
I Intro
E Ending
S Specific
G General
The category, beat, and type of the selected phrase are listed in full on the
display.
The difference between the “General” and “Specific” types is that while the
General phrases are, as their name implies, for general use, the Specific phrases
are actually parts of specific patterns. In other words, if you combine specific
phrases of the same beat and number from different categories, you will end up
with a specific pattern.
Combining Phrases In the Pattern Mode
The phrases are combined to create patterns which can be used in accompaniments in the PATTERN mode.
Select the PATTERN Mode, a Style, & a Section
Press the [PATTERN] mode key to select the PATTERN mode then, with the
cursor located at the style number, select a style. As in the SONG mode, empty
patterns are indicated by a row of asterisks (********) to the right of the style
number. Also move the cursor to the section name and select the section you
want to create.
75
Set the Pattern Length & Time Signature
If you’re starting with an empty pattern, move the cursor top the pattern length
and time signature parameters and set as required.
Although the pattern
length parameter can be
set from 1 to 8 measures
for the Intro, Main A, Main B,
and Ending sections, the Fill sections can only have a length of 1
measure.
Engage the Patch Mode
Press the [F4] function key (“Patch”) to engage the patch mode — i.e. the
mode in which phrases are “patched” together to create patterns. The patch
display for an empty pattern will appear as follows:
Enter the Required Phrase Numbers
With the cursor in the appropriate locations, use any data entry method to enter
the required phrase numbers. You can enter different phrases at different measures of the same track. If no other data is entered, a phrase entered on the first
measure of a track will repeat for the entire track. Phrases which are longer than
one measure are indicated by a wavy line extending for the length of the phrase.
76
Monitoring the Pattern While Patching
If you press the
button while patching you can hear how the pattern
sounds as the various phrases are added. Press the [F1] key (“Solo”) to hear
only the phrase at which the cursor is currently located. Press [F1] a second
time to disengage the solo function. Press
to stop playback.
Entering Rests
Press the [F4] key (“Rest”) to enter a rest in the measure at which the cursor is
currently located. The rest will stop phrase playback until the end of the
pattern or until the next phrase number is encountered in that track.
Clearing Phrases & Rests
Phrase numbers and rests can be cleared by placing the cursor at the appropriate phrase number or rest and pressing the [F5] key (“Clear”).
Exit From the Patch Mode When Done
Press the [F6] key ("Exit") when the current section of the style is complete.
The mute buttons for tracks which now contain phrases will appear as solid
blocks, and the asterisks will disappear from the pattern name location (use the
“Style Name” job (page 90) to enter an original style name.
See “The Pattern Jobs”
on page 86 for details
on the QY300’s pattern
jobs which allow considerable
versatility in creating and modifying patterns.
Repeat for the Other Sections
Repeat the above procedure to complete the remaining sections of the style, as
required.
77
Recording Original Phrases
The QY300 makes it easy to create original accompaniment phrases. In addition to the preset phrases, the QY300 has 100 phrase memory locations (US--001 through US---100) which can be used to store your own creations. The
PHRASE mode provides two ways to create original phrases: realtime and step
recording.
Realtime Phrase Recording
In the realtime record mode you select the voice you want to record with, and
then play the part on the micro-keyboard or an external MIDI keyboard in real
time.
Select the PHRASE Mode & an Empty User Phrase
Press the [PHRASE] mode key to select the PHRASE mode, place the cursor
at the “category” section of the phrase number and select “US” (user), then
move the cursor to the phrase number and select an empty “user” phrase (the
programmable user phrases are numbered US---001 through US---100). Empty
phrases are indicated by a row of asterisks (“********”) following the phrase
number.
If for some reason all 100
user phrases contain data,
use the “Clear Phrase”
function described on page 102 to
clear a phrase for recording.
Engage the Record Ready Mode
Press the
key to engage the record ready mode. The red LED above the
key will light.
Select the Realtime Record Mode
Press the [F4] function key (“REAL”) to select the realtime record mode.
78
Select the Record Tempo, Time Signature, and Phrase
Length
Move the cursor to the tempo, time signature, and phrase length parameters
and set as required (the time signature and phrase length can only be set if the
phrase does not already contain data).
It’s sometimes easier to
set a slow tempo for
realtime recording, so
you have plenty of time to enter
the data.
You can change the
voice assignment later
in the same way.
The “---” (thru) chord
type can not be
specified as the source
chord.
Select a Voice
Move the cursor to the voice parameter and select the voice you want to record
with.
Select the Source Chord
Move the cursor to the chord parameter and use the standard chord entry
procedure to enter the “source chord” for the phrase you are recording (i.e. the
chord on which the phrase is based). You can also enter “ON BASS” and
“ORG BASS” specifications, as described on page 72. The source chord specification allows the QY300 to correctly re-harmonize the phrase when different
chords are specified for the pattern in which the phrase is eventually used.
79
Since your original ABC
phrase will be automatically re-harmonized as
required by the QY300 ABC system, there are a few rules you
should follow to ensure the best
results:
1: Stick to the harmonic environment of your source chord.
2: Use primarily the root, 3rd,
5th, and major 7th.
3: Keep it rhythmic ... avoid melodic lines.
During phrase recording
the active MIDI transmit
channel is the same as
that assigned to track 1 in the
PATTERN mode.
Record
Press the
key to begin recording. The metronome will sound and you’ll be
given a two-measure count-in prior to the first measure actually recorded. The
count-in is also indicated by negative numbers in the “Meas” parameter. If a
4/4 time signature is selected, for example, the count-in will run from measure
“-08” to “-01”, then recording will begin from measure “001”.
Play the required part either on the micro-keyboard or via an external MIDI
keyboard. The phrase will continuously repeat from the first to last measure, so
you can continue to add notes until the current part is complete.
Delete Mistakes as Required
To delete mistakes, simply play the note to be deleted on the micro-keyboard
while holding one of the [SHIFT] keys. All corresponding notes that occur
while the micro-keyboard key is held will be deleted.
Stop Recording
Press the
key to stop recording. The normal PHRASE play mode is automatically re-selected when you stop recording.
The Retrigger & Type Parameters
These two parameters determine how the phrase will respond to chord changes.
When the Retrigger (“Rtg”) parameter is turned “Off”, any notes playing
when a chord change occurs will be immediately muted. When the Retrigger
parameter is “On”, notes playing when a chord change occurs will continue
playing for their specified length, re-harmonized to match the new chord.
The Type parameter (“Typ”) determines how the phrase will be harmonized to the spcified chords: “Mel” produces harmonization appropriate for
melody or single-line phrases, “Chd” produces harmonization ideally suited to
chords, “Bas” produces bass-line type harmonization, and “Dr” produces no
harmonization so the instruments in a drum track don’t change unexpectedly
when a chord change occurs.
80
Step Phrase Recording
The step phrase record mode lets you enter phrases note-by-note, with precise
control over the timing, length, and loudness of each note. You can record
complete phrases using the step mode, or use it to brush-up and add data to an
existing phrase.
Select the PHRASE Mode & an Empty User Phrase
Press the [PHRASE] mode key to select the PHRASE mode, place the cursor
at the “category” section of the phrase number and select “US” (user), then
move the cursor to the phrase number and select an empty “user” phrase (the
programmable user phrases are numbered US---001 through US---100). Empty
phrases are indicated by a row of asterisks (“********”) following the phrase
number.
If for some reason all 100
user phrases contain
data use the “Clear
Phrase” job described on page
102 to clear a phrase for
recording Patterns
Engage the Record Ready Mode
Press the
key to engage the record ready mode. The red LED above the
key will light.
Select the Step Record Mode
Press the [F5] function key (“STEP”) to select the step record mode.
81
Set Time Signature and Phrase Length (new phrases only)
If you are recording a new phrase, move the cursor to the time signature and
phrase length parameters and set as required.
The time signature and
phrase length parameters
can not be changed if the
selected phrase already contains
data.
You can change the
voice assignment later
in the same way.
Select a Voice
Move the cursor to the voice parameter and select the voice you want to record
with.
The “—” chord type can
not be specified as the
source chord.
Select the Source Chord
Move the cursor to the chord parameter and use the standard chord entry
procedure to enter the “source chord” for the phrase you are recording (i.e. the
chord on which the phrase is based). You can also enter “ON BASS” and
“ORG BASS” specifications, as described on page 72. The source chord specification allows the QY300 to correctly re-harmonize the phrase when different
chords are specified for the pattern in which the phrase is eventually used.
Record
Press the
key to begin recording. The step record display shown below
will appear.
82
Set the Note Parameters as Required
Move the cursor to the note length, velocity, and gate time parameters and set
as required.
When the cusor is located at the note length parameter the numeric keypad
can be used to enter the note lengths marked on the keys. The dot key (the [0]
key) can be used to add one or more dots to the currently selected note length.
In-beween values can be entered using the [-1/NO] and [+1/YES] keys or the
data dial.
When the cursor is located at the velocity parameter, the numeric keypad
can be used to directly enter the dynamic values marked on the keys (pp, mf,
etc.). In-between values can be entered using the [-1/NO] and [+1/YES] keys
or the data dial.
Enter a Note
Once the note parameters have been specified, the note can be entered simply
by playing the appropriate key on the micro-keyboard (or on your external
MIDI keyboard). A note symbol appears on the note display an the note
pointer advances to the next note position. The note symbol always appears as
a 1/4-note, regardless of the actual note entered (chords are also indicated by
the 1/4-note symbol). Here’s how the display will look after two 8th notes
have been entered.
Chords can be entered simply by moving the note pointer back to a note and
entering another note at the same location (this can be repeated as many times
as necessary. See “Moving Around In the Note Display”, below.
The Note & Keyboard Displays
The note display shows up to four 1/4-notes worth of data at once (that’s one
measure in 4/4 time). If the selected time signature results in more than four
1/4 notes per measure, then the display will scroll to show the extra notes.
83
The keyboard display shows the pitch(es) of the note(s) at the current note
pointer position. In the example below the keyboard displays that a chord (C
major) consisting of three notes exists at the current note pointer location.
Moving Around In the Note Display
You can move the cursor down to the note display (the note pointer will appear
filled) and move the note pointer to any position at which you want to enter a
note, or to any note that you want to delete. You will actually hear the appropriate note or chord when the note pointer is moved to an existing note symbol. When you move the note pointer past the end of the note display, the next
measure will appear. If you move past the last measure in the phrase, the first
measure of the phrase will appear.
The Step Mode Function Keys
The six function keys immediately below the display provide access to a
number of handy functions in the step record mode.
[F1] - “Rest”
[F2] - “Tie”
[F3] - “Delete”
[F4] - “BkDelt”
[F5] - “LoKey”
[F6] - ‘HiKey”
84
Enters a rest of the currently selected note length at the note pointer
position.
Lengthens the previously entered note by “tying” another note of the
same length and pitch to it (the “tie” key only works immediately after
entering a note).
Deletes the note or chord at the note pointer.
Moves the note pointer backward by the currently selected note length
and deletes the corresponding note or chord.
Displays the lowest range of the keyboard (scrolls the keyboard display two
octaves to the right). Press again to return to the normal “centered” display.
Displays the highest range of the keyboard (scrolls the keyboard display two
octaves to the left). Press again to return to the normal “centered” display.
The Measure/Beat/Clock Display
The “Meas” area of the step record display shows the current position of the
note pointer in measures, 1/4-note beats, and clocks (there are 96 clocks per
1/4 note). If you’re not sure what measure you’re seeing on the note display
while recording, check the measure/beat/clock display.
• See the “Editing Songs
& Phrases” section,
page 104, for information on how to edit recorded phrase
data.
• See “The Phrase Jobs” on page
92 for details on the QY300’s
phrase jobs which allow considerable versatility in creating
and modifying phrases.
Complete the Phrase
Repeat steps 8 and 9 until the current phrase is complete, then press
stop recording.
to
85
The pattern mode includes 7 pattern "jobs” that perform a variety of important functions. To
access and use the pattern jobs, press the [JOB] key while in the PATTERN mode. This calls
the pattern job list. You can select any job on the list simply by moving the cursor to the
required job (use the cursor keys or the data dial) and pressing [ENTER]. You can also move
and
keys while holding one
up or down the list in 1-page steps by using the cursor
of the [SHIFT] keys. An alternative method is to enter the job’s number via the numeric
keypad and press [ENTER].
Returning to the PATTERN Mode
The [F6] function key (“Exit”) can be used to exit from any pattern job, and
then from the job list thereby returning you to the PATTERN mode. You can
also press the [F6] function key (“Exit”) while holding one of the [SHIFT]
keys to directly return to the PATTERN mode.
00: Undo/Redo
This job will “undo” any other pattern job, edit, or record function if it is
executed before any other operation is performed. In all cases the affected data
is restored to the state it was in before performing the job, edit, or record
operation. This job will also undo the last undo operation (redo).
The name of the last operation performed will appear on the display (i.e. the
operation which will be “undone”). In the example display, above, a quantize
operation will be undone.
86
operation
The
last
performed is “forgotten”
by the UNDO job
whenever the SONG or PHRASE
step reocrd mode is engaged, even
if the step record mode is exited
without acutally recording any data.
Press [ENTER] to execute the Undo/Redo job. The metronome icon will
appear on the display while the data is being processed, then “Completed” will
appear briefly when the job is done. Press the [F6] key (“Exit”) to return to the
job list, or a mode key to go directly to the selected mode.
01: Copy Pattern
Copies all data from a specified track from one section of a specified style to
the specified track of the specified section of any other specified style. This
operation overwrites the data in the specified destination track with the data
from the source track. Previous data in the overwritten track is therefore lost.
The upper “Style” parameter selects the source style — i.e. the style from
which the data is to be copied: “001” ... “100”.
The upper “Section” parameter selects the source section — i.e. the section of
the source style from which the data is to be copied: “Intro”, "MainA!", “MainB”,
“FillAA”, “FillBB”, “FillAB”, “FillBA”, “Ending”, or “All” for all sections (the
destination section is automatically set to “All” if “All” is selected here).
The upper “Track” parameter selects the source track — i.e. the track of
the source section of the source style from which the data is to be copied: “1”
... “8” for individual tracks, or “All” for all tracks (the destination track is
automatically set to “All” if “All” is selected here).
The lower “Style” parameter selects the destination style — i.e. the style
to which the data is to be copied: “001” ... “100”.
The lower “Section” parameter selects the destination section — i.e. the
section of the destination style to which the data is to be copied: “Intro”,
“MainA”, “MainB”, “FillAA”, “FillBB”, “FillAB”, “FillBA”, “Ending”, or
“All” for all sections. If “All” is selected, the same setting is automatically
selected for the source section.
The lower “Track” parameter selects the destination track — i.e. the track
of the destination section of the destination style to which the data is to be
copied: “1” ... “8” for individual tracks, or “All” for all tracks. If “All” is
selected, the same setting is automatically selected for the source track.
After setting the parameters as required press [ENTER] to execute the Copy
Pattern job. The metronome icon will appear on the display while the data is
being processed, then “Completed” will appear briefly when the job is done.
Press the [F6] key (“Exit”) to return to the job list, or a mode key to go directly
to the selected mode.
87
02: Append Pattern
Appends the specified section of one style to the end of the specified section of
a second style.
• If the length of the
destination
plus
appended pattern exceeds 8 measures (the maximum
pattern length), the “Illegal In-put” error message will appear
and the append operation will
be aborted.
• This job does not copy voice
or play effect data from the
source style.
The upper “Style” parameter selects the source style — i.e. the style from
which the data is to be copied: “001” ... “100”.
The upper “Section” parameter selects the source section — i.e. the section of the source style from which the data is to be copied: “Intro”, “MainA”,
“MainB”, “FillAA”, “FillBB”, “FillAB”, “FillBA”, “Ending”.
The lower “Style” parameter selects the destination style — i.e. the style
to which the data is to be appended: “001” ... “100”.
The lower “Section” parameter selects the destination style — i.e. the
section of the destination style to which the data is to be appended: “Intro”,
“MianA,, “MainB”, “Ending” Fills cannot be selected as the destination section since they can be only one measure in length.
After setting the parameters as required press [ENTER] to execute the Append
Style job. The metronome icon will appear on the display while the data is
being processed, then “Completed” will appear briefly when the job is done.
Press the [F6] key (“Exit”) to return to the job list, or a mode key to go directly
to the selected mode.
03: Split Pattern
Splits a specified section of a specified style into two parts at the specified
measure, and moves the latter half to the specified section of a specified style.
88
• If more than 1 measure
is split and a “Fill” is
specified as the destination section, an “Illegal Input” error
will occur since fills can only be one
measure long.
• This job does not copy voice
or play effect data from the
source style.
The upper “Style” parameter selects the source style — i.e. the style which is
to be split: “001” ... “100”.
The upper “Section” parameter selects the source section — i.e. the section of the source style which is to be split: “Intro”, “MainA”, “MainB”,
“FillAA”, “FillBB”, “FillAB”, “FillBA”, “Ending”.
The “M” parameter specifies the measure at which the source section of
the source style is to be split: “1” ... “8”, depending on the length of the source
style (if “1” is selected the entire section is moved to the specified destination).
The lower “Style” parameter selects the destination style — i.e. the style
to which the latter half of the split source section is to be moved: “001” ...
“100”.
The lower “Section” parameter selects the destination section — i.e. the
section of the destination style to which the latter half of the split source
section is to be moved: “Intro”, “MainA”, “MainB”, “FillAA”, “FillBB”,
“‘FillAB”, “FillBA”, “Ending”.
After setting the parameters as required press [ENTER] to execute the Split
Pattern job. The metronome icon will appear on the display while the data is
being processed, then “Completed” will appear briefly when the job is done.
Press the [F6] key (“Exit”) to return to the job list, or a mode key to go directly
to the selected mode.
04: Init Play Effect
Resets all playback effect settings for the specified track to their default values.
The “TR” parameter selects the track(s) to be affected by the Init Play Effect
job: “1” ... “8” for individual tracks, or “All” for all tracks.
After setting the parameter as required press [ENTER] to execute the Init Play
Effect job. The metronome icon will appear on the display while the data is
being processed, then “Completed” will appear briefly when the job is done.
Press the [F6] key (“Exit”) to return to the job list, or a mode key to go directly
to the selected mode.
89
05: Clear Pattern
Clears all data from the specified section of the specified style.
The “Style” parameter selects the style in which the specified section is to be
cleared: “001” ... “100”.
The “Section” parameter selects the section to be cleared: “Intro”,
“MainA”, “MainB”, “FillAA”, “FillBB”, “FillAB”, “FillBA”, “Ending”, or
“All” for all sections.
After setting the parameter as required press [ENTER] to execute the Clear
Pattern job. The metronome icon will appear on the display while the data is
being processed, then “Completed” will appear briefly when the job is done.
Press the [F6] key (“Exit”) to return to the job list, or a mode key to go directly
to the selected mode.
06: Style Name
Allows an original name of up to 8 characters to be assigned to the specified
style.
The style number parameter selects the style for which a name is to be assigned: “001” ... “100”.
90
NOTE If a series of asterisks appears in the style name area, the
selected style contains no data
and a pattern name cannot be
assigned.
Lower-case
Characters
To enter a lower-case character, use the cursor keys to move the
cursor to the position at which a character is to be entered, then
press the micro-keyboard key corresponding to the character to
be entered.
Upper-case
Characters
Hold the left [OCT DOWN] key (“CAPS”) while pressing the
micro-keyboard key corresponding to the character to be entered.
Symbols
Hold the left [OCT UP] key ("SHIFT") while entering to enter
the symbols listed above the characters corresponding to each
micro-keyboard key.
Space
The right [OCT DOWN] key enters a space.
Numbers
Numbers can be entered via the numeric keypad.
Delete
The right [OCT UP] key deletes the character at the cursor
position.
When the name has been entered press the [F6] key ("Exit") to return to the
job list, or a mode key to go directly to the selected mode (it is not necessary to
press the [ENTER] key to enter the specified name).
91
The phrase mode includes 15 phrase “jobs” that perform a variety of important functions. To
access and use the phrase jobs, press the [JOB] key while in the PHRASE mode. This calls the
phrase job list. You can select any job on the list simply by moving the cursor to the required
job (use the cursor keys or the data dial) and pressing [ENTER]. You can also move up or
and
keys while holding one of the
down the list in 1-page steps by using the cursor
[SHIFT] keys. An alternative method is to enter the job’s number via the numeric keypad and
press [ENTER].
Returning to the PHRASE Mode
The [F6] function key (“Exit”) can be used to exit from any phrase job, and
then from the job list thereby returning you to the phrase mode. You can also
press the [F6] function key (“Exit”) while holding one of the [SHIFT] keys to
directly return to the PHRASE mode.
00: Undo/Redo
This job will “undo” any other phrase job, edit, or record function if it is
executed before any other operation is performed. In all cases the affected data
is restored to the state it was in before performing the job, edit, or record
operation. This job will also undo the last undo operation (redo).
The name of the last operation performed will appear on the display (i.e. the
operation which will be “undone”). In the example display, above, a realtime
record operation will be undone.
92
The last operation
performed is “forgotten”
by the UNDO job
whenerver the SONG or PHRASE
step reocrd mode is engaged, even
if the step record mode is exited
without acutally recording any data.
Press [ENTER] to execute the Undo/Redo job. The metronome icon will
appear on the display while the data is being processed, then “Completed” will
appear briefly when the job is done. Press the [F6] key (“Exit”) to return to the
job list, or a mode key to. go directly to the selected mode.
01: Quantize
Aligns notes in the specified user phrase to or close to the nearest specified
beat.
The “Phrase” parameter selects the user phrase to be affected by the Quantize
job: “001” ... “100”.
The “Quantize” parameter determines to what beats the note data in the
specified phrase will be aligned. If you select
for example, all notes in the
phrase will be aligned to the nearest 16th-note beat, to a degree determined by
the “Strength” parameter.
Quantize Values
Value Effect
Off
No quantization. Swing settings also ignored.
Aligns to the nearest 32nd note.
Aligns to the nearest 16th note triplet.
Aligns to the nearest 16th note.
Aligns to the nearest 8th note triplet.
Aligns to the nearest 8th note.
Aligns to the nearest quarter note triplet.
Aligns to the nearest quarter note.
Aligns to the nearest 16th note + 16th note triplet.
Aligns to the nearest 8th note + 8th note triplet.
The “Strength” parameter determines how “strongly” the notes are attracted
to the specified quantize value. The strength range is from 0% to 100%. At a
setting of “0%” no quantization will occur, while a setting of “100%” will
cause all notes to be aligned precisely to the nearest specified beat value. Inbetween settings produce a corresponding shift in the position of all off-beat
notes to the nearest specified beat value. With a value setting of
and a
93
strength setting of 50%, for example, a note that does not fall precisely on an
8th-note beat will be shifted about halfway to nearest 8th-note beat.
The “Sens.” parameter (sensitivity) determines the range over which notes
will be quantized. This parameter can be set from “-100%” through “0%” to
“+100%”. at “0%” no quantization will occur. A setting of either “-100%” or
“+100%” will cause all notes to be quantized. Refer to the graph below for an
idea of how the quantize range is determined by other settings. The heavy solid
lines in the sensitivity graph represent the range over which notes will be
quantized. At a setting of “+50%”, for example, only notes that fall within the
range that is less than halfway to the quantize range of the adjacent note will
be quantized. Notes outside this range and those of adjacent notes will be left
un-quantized.
The “Swing Rate” parameter produces a “swing” feel by shifting the timing of
“back beats”, as specified by the quantize parameters. For example, if the
specified quantization value is 8th notes, then the swing effect will shift the
2nd, 4th, 6th, and 8th beats of each measure forward to create a swing feel.
If the quantize value is set to a compound note length (e.g. 8th note + 8th note
triplet) the even-numbered back beats will be shifted. The “Swing Rate” parameter determines how much the timing of the affected notes will be shifted.
The range is from 50% (no swing) to 75% (maximum swing).
The “Gate Time” and “Velocity” parameters increase or decrease the gate
times (length) and velocity of all notes affected by the swing parameter. The
range of both parameters is from 1% to 200%. The “Gate Time” parameter sets
the ratio between the shorter and longer gate time values. A setting of “100%”
maintains the original relationship between the notes, lower values produce a
narrower gate time range, and higher values produce a broader gate time range.
The “Velocity” parameter sets the ratio between the lower and higher velocity
values. A setting of “100%” maintains the original relationship between the
notes, lower values produce a narrower dynamic range, and higher values
produce a broader dynamic range.
After setting the parameters as required press [ENTER] to execute the
Quantize job. The metronome icon will appear on the display while the data is
being processed, then “Completed” will appear briefly when the job is done.
Press the [F6] key (“Exit”) to return to the job list, or a mode key to go directly
to the selected mode.
94
02: Modify Velocity
Increases or decreases the velocity values of all notes in the specified user phrase.
The “Phrase” parameter selects the user phrase to be affected by the Modify
Velocity job: “001” ... “100”.
The “rate” parameter sets the ratio between the lower and higher velocity
values. A setting of “100%” maintains the original relationship between the
notes, lower values produce a narrower dynamic range, and higher values
produce a broader dynamic range. The range is from “0%” to “200%”.
The “offset” parameters determines the amount of velocity change. “-”
settings reduce the velocity while “+” settings increase the velocity. The range
is from “-99” through “0” to “+99”.
New Velocity = Original Velocity x rate/100 + offset
(If the right side of the equation is less than 0, the New Velocity becomes 1.)
The Modify Velocity job is
a great way to “soften” the
sound of material that has
too great a variation between the
softest and loudest notes, or, conversely, to add extra punch to dullsounding material. Experiment with
the parameters to get a feel for what
they do.
After setting the parameters as required press [ENTER] to execute the Modify
Velocity job. The metronome icon will appear on the display while the data is
being processed, then “Completed” will appear briefly when the job is done.
Press the [F6] key (“Exit”) to return to the job list, or a mode key to go directly
to the selected mode.
03: Modify Gate Time
Increases or decreases the gate times (length) of all notes in the specified user
phrase.
95
The “Phrase” parameter selects the user phrase to be affected by the Modify
Gate Time job: “001” ... “100”.
The “rate” parameter sets the ratio between the shorter and longer gate
time values. A setting of “100%” maintains the original relationship between
the notes, lower values produce a narrower gate time range, and higher values
produce a broader gate time range. The range is from “0%” to "200%".
The “offset” parameter determines the amount of gate time modification.
“-” settings shorten the gate time while “+” settings increase the gate time.
The range is from “-99” through “0” to “+99”.
New Gate Time = Original Gate Time x rate/100 + offset
(If the right side of the equation is less than 0, the New Gate Time becomes 1.)
The Modify Gate Time job
can be used to produce a
more staccato or legato
feel, as required. Experiment with
the parameters to get a feel for what
they do.
After setting the parameters as required press [ENTER] to execute the Modify
Gate Time job. The metronome icon will appear on the display while the data
is being processed, then “Completed” will appear briefly when the job is done.
Press the [F6] key (“Exit”) to return to the job list, or a mode key to go directly
to the selected mode.
04: Crescendo
Produces a gradual crescendo (increase in note velocity) or decrescendo (decrease in note velocity) in the specified user phrase over the specified range of
measures.
The “Phrase” parameter selects the user phrase to be affected by the Cre-
scendo job: “001” ... “100”.
The “M” parameters above the graphic bar are used to specify the first
measure-‘beat and last measure-beat of the range to be modified.
96
The “Range” parameter determines the range of velocity values over which
the crescendo will occur. A setting of “+24”, for example, will cause the MIDI
velocity values to increase by 24 over the specified measure range (The MIDI
velocity value range is from 0 to 127).
Negative values cause a corresponding decrease in velocity, therby producing
a decrescendo rather than a crescendo. The range of this parameter is from “99” through “0” to “+99”.
After setting the parameters as required press [ENTER] to execute the Crescendo job. The metronome icon will appear on the display while the data is
being processed, then “Completed” will appear briefly when the job is done.
Press the [F6] key (“Exit”) to return to the job list, or a mode key to go directly
to the selected mode.
05: Transpose
Transposes all notes in the specified user phrase up or down by the specified
number of semitones.
The “Phrase” parameter selects the user phrase to be affected by the Transpose job: “001” ... “100”.
The “Transpose” parameter determines the amount of transposition in
semitone increments. Minus (-) values transpose down while plus (+) values
transpose up. the range is from “-99” through “0” to “+99”.
After setting the parameters as required press [ENTER] to execute the Transpose job. The metronome icon will appear on the display while the data is
being processed, then “Completed” will appear briefly when the job is done.
Press the [F6] key (“Exit”) to return to the job list, or a mode key to go directly
to the selected mode.
97
06: Shift Note
Changes the pitch of all specified notes within the specified user phrase.
The “Phrase” parameter selects the user phrase to be affected by the Shift
Note job: “001” ... “100”.
The source note parameter determines which notes in the specified phrase
will be shifted, and the destination note parameter determines to what note
they will be shifted to. The range of both parameters is from “C-2” to “G8”.
The notes can be enter via the micro-keyboard as well as by using the data dial
or [-1/NO] and [+1/YES] keys.
After setting the parameters as required press [ENTER] to execute the Shift
Note job. The metronome icon will appear on the display while the data is
being processed, then “Completed” will appear briefly when the job is done.
Press the [F6] key (“Exit”) to return to the job list, or a mode key to go directly
to the selected mode.
07: Shift Clock
Moves all notes and events in the specified user phrase forward or backward
by the specified number of clocks (96 clocks per 1/4 note).
98
Since the Move Clock
job actually shifts the
timing of all notes and
other events- in the specified
phrase forward or backward, it
can significantly alter the “feel”
of the phrase. You could move
the notes forward ("+" settings)
to create a more “laid back” feel,
or backward ("-" settings) to produce a more “driving” feel. Of
course, you can also use Clock
Move to correct timing that is off
in the first place.
The “Phrase” parameter selects the user phrase to be affected by the Shift
Clock job: “001” ... “100”.
The “Clock” parameter determines the direction and number of clocks by
which the notes in the specified phrase will be shifted. “+” settings shift the
notes forward (toward the end of the song) and “-” settings shift the notes
backward (toward the beginning of the song). The range is from “-999”
through “0” to “+999”.
After setting the parameters as required press [ENTER] to execute the Shift
Clock job. The metronome icon will appear on the display while the data is
being processed, then “Completed” will appear briefly when the job is done.
Press the [F6] key (“Exit”) to return to the job list, or a mode key to go directly
to the selected mode.
08: Copy Phrase
Copies the specified preset or user phrase to a specified user phrase number,
using the specified source chord.
The upper “Phrase” parameter selects the source phrase — i.e. the preset or
user phrase to be copied: any preset or user phrase number (preset phrase
numbers have four sections which can be specified: category, beat, type, and
number — page 74).
The “Chord” parameter determines the source chord with which the
phrase will be copied. The chord root and type are entered via the microkeyboard using standard QY300 chord entry procedure (page 59).
The lower “Phrase” parameter selects the destination phrase — i.e. the
user phrase to which the source phrase will be copied: “001” ... “100”.
After setting the parameters as required press [ENTER] to execute the Copy
Phrase job. The metronome icon will appear on the display while the data is
being processed, then “Completed” will appear briefly when the job is done.
Press the [F6] key (“Exit”) to return to the job list, or a mode key to go directly
to de selected mode.
99
09: Append Phrase
Appends the specified user phrase to the end of a second specified user phrase.
The upper “Phrase” parameter selects the source phrase — i.e. the user phrase
from which the data is to be copied: “001” ... “100”.
The lower “Phrase” parameter selects the destination phrase — i.e. the
user phrase to which the data is to be appended: “001” ... “100”.
After setting the parameters as required press [ENTER] to execute the Append
Phrase job. The metronome icon will appear on the display while the data is
being processed, then “Completed” will appear briefly when the job is done.
Press the [F6] key (“Exit”) to return to the job list, or a mode key to go directly
to the selected mode.
10: Split Phrase
Splits a specified user phrase into two parts at the specified measure, and
moves the latter half to another specified user phrase.
The upper “Phrase” parameter selects the source phrase — i.e. the user phrase
which is to be split: “001” ... “100”.
The “M” parameter specifies the measure at which the source phrase is to
be split: “1” ... “8”, depending on the length of the source phrase (if “1” is
selected the entire phrase is moved to the specified destination).
The lower “Phrase” parameter selects the destination phrase — i.e. the
user phrase to which the latter half of the split source phrase is to be moved:
“001” ... “100”.
100
After setting the parameters as required press [ENTER] to execute the Split
Phrase job. The metronome icon will appear on the display while the data is
being processed, then “Completed” will appear briefly when the job is done.
Press the [F6] key (“Exit”) to return to the job list, or a mode key to go directly
to the selected mode.
11: Get Phrase
Copies the data from the specified range of measures in the specified track of a
specified song to the specified phrase.
The Get Phrase job is a
convenient way to
create new phrases by
copying a few appropriate measures from songs. In fact, it’s
sometimes easier to create
phrases in the SONG mode and
then copy them to the PHRASE
mode using the Get Phrase job,
simply because the SONG
mode’s simultaneous monitoring
capability can make recording
easier.
The “Song” parameter selects the source song — i.e. the song from which the
data is to be copied: “01” ... “10”.
The “TR” parameter selects the source track — i.e. the track from which
the data is to be copied: “01” ... “16”.
The “M” parameters above the upper graphic bar are used to specify the
first measure and last measure of the range to be copied.
The “Phrase” parameter specified the user phrase to which the data is to
be copied: “001” ... “100”.
After setting the parameters as required press [ENTER] to execute the Get
Phrase job. The metronome icon will appear on the display while the data is
being processed, then “Completed” will appear briefly when the job is done.
Press the [F6] key (“Exit”) to return to the job list, or a mode key to go directly
to the selected mode.
101
12: Put Phrase
Copies the data from a specified user phrase to the specified ramnge of measures in the specified track of a specified song.
The “Phrase” parameter specified the source phrase — i.e. the user phrase
from which the data is to be copied: “001” ... “100”.
The “Song” parameter selects the destination song — i.e. the song to
which the phrase data is to be copied: “01” ... “10”.
The “TR” parameter selects the destination track — i.e. the track to which
the phrase data is to be copied: “01” ... “16”.
The “M” parameters specifies the measure of the destination track to
which the phrases data is to be copied.
The time signature of
the phrase will not
affect the time signature
of the song.
After setting the parameters as required press [ENTER] to execute the Put
Phrase job. The metronome icon will appear on the display while the data is
being processed, then “Completed” will appear briefly when the job is done.
Press the [F6] key (“Exit”) to return to the job list, or a mode key to go directly
to the selected mode.
13: Clear Phrase
Completely clears all data from the specified user phrase.
The “Phrase” parameter selects the user phrase to be cleared: “001” ... “100”.
After setting the parameter as required press [ENTER] to execute the Clear
Phrase job. The metronome icon will appear on the display while the data is
being processed, then “Completed” will appear briefly when the job is done.
Press the [F6] key (“Exit”) to return to the job list, or a mode key to go directly
to the selected mode.
102
14: Phrase Name
Allows an original name of up to 8 characters to be assigned to the specified
user phrase.
The phrase number parameter selects the user phrase for which a name is to be
assigned: “001” ... “100”.
NOTE If a series of asterisks
appears in the phrase name area,
t
he selected phrase contains no
data and a phrase name cannot
be assigned.
Lower-case
Characters
To enter a lower-case character, use the cursor keys to move
the cursor to the position at which a character is to be entered,
then press the micro-keyboard key corresponding to the
character to be entered.
Upper-case
Characters
Hold the left [OCT DOWN] key (“CAPS”) while pressing the
micro-keyboard key corresponding to the character to be entered.
Symbols
Hold the left [OCT UP] key (“SHIFT”) while entering to enter
the symbols listed above the characters corresponding to each
micro-keyboard key.
Space
The right [OCT DOWN] key enters a space
Numbers
Numbers can be entered via the numeric keypad.
Delete
The right [OCT UP] key deletes the character at the cursor
position.
When the name has been entered press the [F6] key (“Exit”) to return to the
job list, or a mode key to go directly to the selected mode (it is not necessary to
press the [ENTER] key to enter the specified name).
103
The QY300’s editing capability makes it easy to correct mistakes made when recording song
or phrase data, and to generally refine your sound.
The song and phrase edit “change” mode lets you individually modify the timing, pitch
(note), gate time (length) and velocity (loudness) of each note. There’s also an edit “insert”
mode that allows insertion of note, pitch bend, program change, control change, channel
aftertouch, polyphonic aftertouch, or exclusive events at any point in the pattern.
Engaging the Edit Mode & Moving Around
To engage the edit mode, place the cursor at the track you want to edit in the
normal SONG or PHRASE play mode, then press the [EDIT] key.
The edit display will look something like this (of course, the note data will
be different).
The phrase edit display is almost exactly the same. The only differences are
that no track number or name appears at the top of the display, and the
“ChngTr” (change track) and “TrName” (track name) functions are not available.
104
Moving Around
The timing, note, gate time, and velocity values for each note are shown on a
single line of the display. The notes are arranged in order from top to bottom.
You can move around within the pattern by simply moving the cursor. Move
below the bottom of the display and the note data will scroll up, moving
towards the end of the pattern. The opposite occurs when you move up above
the top of the display. The shuttle dial can also be used to move down (forward) or up (backward) through the data.
In addition to the lines of note data, there are markers for the top of the
song, measure lines, and the end of the song.
105
Change Mode Editing
The “Change” edit mode is initially selected when the edit mode is engaged.
To edit any note in the song or phrase, simply move the cursor to the appropriate line, and then to the required parameter within that line. For numeric values
any data entry method can be used to select a new value for the selected
parameter. When the cursor is located at the note length or volume symbol, the
numeric keypad can be used to directly enter the note lengths of volume
symbols marked on the keys. The edited line will flash when any parameter
within it is changed. This indicates that a change has been made but has not yet
been entered. Press the [ENTER] key to actually enter the changes, or move
the cursor to another line to cancel the changes.
Beat-Clock (Location)
The first column contains the note timing data. The left number (not the
measure number, which is the leftmost number on the current line) is the 1/4note beat within the current measure (1 through 4 in a 4/4 measure), and the
right number is the clock within that beat (00 through 95). The beat and clock
values can be selected and edited independently.
Note
This is the actual pitch of the note. The range is from C-2 to G8.
Gate Time
Gate time is the length of the note in clocks. A normal 1/4 note, for example, is
86 clocks long. This is about 90% of the actual length of a 1/4-note division,
which is 96 clocks. The “normal” length of the note is slightly shortened to
prevent notes from running into each other and sounding slurred ( a slur is
produced by setting the full note length). The left number is 1/4-note beats (96clock units) and the right number is clocks. The range is from 00-00 to 99-95.
If you don’t want to enter note lengths using numbers, simply place the cursor
at the note length symbol to the right of the numeric note length value and use
the numeric keypad to directly enter the desired note length. The available
note-length symbols are marked on the keys. The numeric value will change
accordingly.
106
Velocity
This parameter controls the velocity (loudness) of the note. The range is from
001 to 127. Standard velocity values can be entered via the numeric keypad:
place the cursor at the volume symbol to the right of the velocity value and use
the numeric keypad to directly enter the desired volume symbol. The available
volume symbols are marked on the keys. The numeric velocity value will
change accordingly.
n Deleting Events
Notes and other events (sustain on/off, pitch bend, etc.) can be deleted by
placing the cursor at the line corresponding to the event to be deleted, and then
pressing the [F1] function key (“Delete”).
n Changing Tracks
To change tracks without having to return to the SONG mode press the [F3]
function key (“ChngTr”). The cursor will move to the track number at the top
of the screen. Use any data entry method to specify the number of the track
you want to change to (use the [+1/YES] key or data dial to select the tempo
track — see “Editing the Tempo Track”, page 112), and then press the
[ENTER] key.
n
Assigning a Track Name
Each track can be assigned a track name for easy identification when editing.
To assign a name to the current track, press the [F4] function key (“TrName”).
The cursor will move to the track name location at the top of the screen. You
can now use the standard QY300 name entry procedure to enter a name of up
to 8 characters (see page 54 for an example of the name entry procedure).
Press the [F4] key again or the [F6] key (“Exit”) when done.
Insert Mode Editing
The edit insert mode is used to insert new notes and other events at a specified
location in the pattern.
Place the Cursor at the Insert Location
Move the cursor to the edit line corresponding to (or near to) the location at
which you want to insert the new data.
Engage the Insert Edit Mode
Press the [F2] function key (“Insert”) to switch to the insert edit mode.
107
Select the Type of Event to be Inserted
Move the cursor to the event type parameter and use the [-1/NO] and
[+1/YES] keys or the data dial to select the type of event you want to enter.
Set the Event Parameters
All events have at least two parameters. Move the cursor to the event parameters and set as required by using the [-1/NO] and [+1/YES] keys.
Note
New notes can be inserted at any specified location. The note parameters are
the same as those available in the change edit mode.
108
Pitch Bend
Pitch bend events can be used to produce pitch bend effects. The amount of
pitch bend produced by each event can be set from “-8192” through “+00” to
“+8191”. Each increment corresponds to a fraction of a semitone. To produce
smooth pitch bends you’ll need to insert several small pitch bend events,
appropriate spaced, to create smooth pitch bend effects. Remember to use
more pitch bend effects to return the pitch to normal after a bend. The pitch
bend insert display also features bar graph which indicates the amount of pitch
bend applied — positive bends move ‘the bar to the right and negative bends
move the bar to the left.
“PC”: Program Change
Program change events can be used to switch voices at any point in the track.
The program change parameter has three sections: The MSB (most significant
byte) of the bank select number, the LSB (least significant byte) of the bank
select number, and the program change number itself. The bank select number
parameters can be set from “000” through “127”, while the program change
number parameter can be set from “001” through “128”. The bank select
parameters are only useful if you’re sending program change data to an external device that recognizes bank select numbers. Normally you’ll use only the
program change number. Using the program change number (the bank select
parameters should be set to “000”) you can select internal voices “001” through
“128”. The name of the selected voice will appear to the right of the program
change number.
109
“CC”: Control Change
Control change events can be used to apply modulation, sustain, volume, and
other types of control according to the standard MIDI control change controller assignments (see list on page 6 of the separate “VOICE LISTS AND MIDI
DATA” booklet). The left parameter is the control change number (the type of
control), and the right parameter is the control change value (the amount of
control). Both parameters can be set from “000” to “128”.
“ChAT”: Channel Aftertouch
This event can be used to apply channel (monophonic) after-touch, in which
pressure on any key controls all notes being played by the same amount. The
channel aftertouch value can be set from “000” to “127”.
“PAT”: Polyphonic Aftertouch
Polyphonic aftertouch allows independent aftertouch values to be applied to
each note played. This event has two parameters: a note number and a value.
The note number corresponds to standard MIDI note number assignments.
Both parameters can be set from “000” to “127”. The bar graph to the right of
the value parameter provides a visual indication of the amount of after-touch
“pressure” applied by the specified value.
110
“Excl”: Exclusive
This event allows 16-byte exclusive data blocks (first byte = “F0”) to be
inserted in the sequence data to control external MIDI devices as required.
Move the cursor to any of the data byte locations following the initial “F0”
byte and use the [-1/NO] and [+1/YES] keys of the data dial to enter as
required. Since the data is entered in hexadecimal format, the numeric keypad
cannot be used.
In the normal edit mode
only the first 8 bytes of
the exclusive data will
appear on the display, and the
data cannot be edited (only inserted or deleted).
Enter the Specified Event
Press the [ENTER] key to enter the event as specified. A click will be heard as
the event is entered.
Return to the Change Edit Mode
Press the [F6] function key (“Exit”) to return to the change edit display, and
continue editing as required.
Exit From the Edit Mode
Press the [F6] function key (“Exit”) to exit from the change edit mode and
return to the normal SONG or PHRASE play mode.
111
Editing the Tempo Track (SONG mode)
The QY300 tempo track makes it easy to program sudden or gradual tempo
changes to control the “flow” of your music. To edit the tempo track either
select the “Tmp” track in the SONG mode and then press the [EDIT] key, or
use the “ChngTr” (change track) function if you are already in the edit mode.
Editing procedure is essentially the same as for the normal sequencer
tracks. To change an existing tempo parameter — location or tempo value —
simply move the cursor to the appropriate parameter, edit, and press [ENTER]
(or move to a different line to cancel the edit).
To insert new tempo values first move to the insert location, press the [F2]
function key (“Insert”), set the tempo value, and press [ENTER].
Press the [F6] function key (“Exit”) to return to the tempo change edit mode,
and then again to return to the SONG mode.
112
The QY300” CHAIN mode makes it possible to specify a sequence of up to 10 songs to be
played back automatically. Each song within the chain can be repeated up to 99 times.
Engage the CHAIN Mode
Press the [CHAIN] mode key to go to the CHAIN mode. The CHAIN mode
display shows the “chain” numbers from 1 to 10.
Program the Chain
To program a sequence of songs for playback, place the cursor at the appropriate chain numbers and use any data entry method to enter the required song
numbers. The number following the song name is the number of times that
song is to be repeated. Place the cursor at the repeat number and use any data
entry method to set the number of repeats for each song.
In the example chain shown here, the first two songs in the chain will play
through in sequence, then the third song will be repeated twice.
Play the Chain
While still in the CHAIN mode, press the
key to play back the programmed chain. Playback will stop after the last song. You can also press the
key to stop playback at any time.
113
Deleting Songs From the Chain
To delete a song from the chain and move all subsequent songs up to fill the
gap, place the cursor at the song to be deleted and press the [F2] function key
(“Delete”).
Inserting New Songs In the Chain
To insert a new song in the middle of a chain and move all subsequent songs
down to make room, place the cursor at the poing at which the song is to be
inserted and press the [F1] function key (“Insert”). You can then enter a new
song number at the insert point.
114
The QY300 utility mode includes a number of functions that are important for general
operation — e.g. MIDI data handling, interfacing with external equipment, ABC system
operation, and more. Press the [UTILITY] mode key to go to the UTILITY mode, then use the
[F1], [F2], and [F3] function keys to select the system, input filter, or fingered zone parameters described below. Press the [F6] function key (“Exit”) to exit from the UTILITY mode and
return to the previously-engaged mode when done (you can also press any other mode key to
go directly to the selected mode).
System Parameters
The UTILITY mode system parameters include master tuning and basic MIDI
settings that are essential for communication with external equipment. To access the system parameters press the [F1] function key (“System”) after engaging the UTILITY mode.
Master Tuning
This parameter tunes the QY300 tone generator over approximately a whole
tone range (+ one semitone) in l-cent increments (a “cent” is 1/100th of a
semitone). The range is from “-99” through “+00” to “+99”. A setting of
“+00” produces normal pitch. Negative values tune down and positive values
tune up.
n MIDI Synchronization
Determines whether the QY300 is controlled by its own internal clock or MIDI
clock data from an external device.
When set to “Int” the QY300 is controlled by its own internal clock. When
set to “Ext” the QY300 is controlled by a MIDI clock signal received from an
external device such as a sequencer or music computer. Please note that the
QY300 will not run on its own when this parameter is set to “Ext.”
115
MIDI Control
This parameter simply turns MIDI control of the QY300 on or off. “On” is the
normal setting, and with this setting the QY300 receives note, program change,
control change, and exclusive data from an external MIDI keyboard or other
controlling device. When set to “Off” me QY300 will not respond to external
MIDI control.
n Echo Back
Determines whether MIDI data received via the MIDI IN terminal is simultaneously re-transmited (“echoed back”) via the MIDI OUT connector. When
this parameter is set to “Off” no echo back occurs. When set to “Dirt” (Direct)
the received MIDI data is re-transmitted without modification. When “Moni”
(Monitor) is selected, the received data is re-transmitted on the MIDI channel
corresponding to the currently selected record track, and the data is affected by
the Input Filter settings described in the next section.
Interval Time
This parameter sets the delay time between exclusive data blocks between 0 and
900 milliseconds in 100-millisecond increments. This type of delay is sometimes necessary to allow an external device to receive the data without errors.
Input Filters
The input filter parameters allow reception of various types of MIDI data to be
turned on or off as required.
Reception of the various types of data listed on the display is tumed on or off by
placing the cursor at the. appropriate data type and pressing the [-1/NO] button
to turn the corresponding “filter” off (reception on) or the [+1/YES] button to
turn the filter on (reception off). When the filter is off the block at the beginning
of the data type will appear hollow, and when on the block will appear solid.
In the example display below reception of both polyphonic and monophonic aftertouch data has been turned off (their filters are turned on). This is
sometimes a good idea because aftertouch generates a considerable amount of
data that can rapidly take up large amounts of memory when recording from
an external keyboard, for example.
116
Note
Note data filter. This filter should normally be turned off to
allow reception of all note data.
Pitch Bend
Turn this filter on if you do not want to record pitch bend data
received by the QY300, or you simply don’t want received pitch
bend data to affect the QY300 sound.
Cntrl Change
This filter can be used to block reception of all control
change events: modulation, breath controller, volume, sustain
pedal, etc. Control change bank select numbers (0 and 32)
are affected by the Program Change filter (below), not the
Cntrl Change filter.
Program Change
The program change filter can be turned on if you want to switch
voices on an external keyboard or other controller without
switching the QY300 voices as the same time.
Poly After
As mentioned aove, aftertouch generates a lot of data that can
rapidly fill the available memory if used indiscriminately. When
on, this filter blocks reception of polyphonic aftertouch data.
Similar to the polyphonic aftertouch filter, but this filter blocks
reception of monophonic (channel) aftertouch data.
Blocks reception of all system exclusive data when turned on.
Ch. After
Sys Ex.
Fingered Chord Zone Assignment
The QY300’s advanced ABC system can be controlled from an external keyboard, making it useful as an ABC expander module. The Fingered Chord
Zone utility function sets the range of notes in which chords played will be
recognized by the QY300 ABC system.
ABC chord changes will
be ignored during step
or realtime recording of
any track other than the chord
track, and in the edit or job
modes.
117
Use then “Fingered” parameter to turn the QY300 ABC system “On” or “Off”
as required.
The “Low” and “High” parameters at the top of the display set the ABC
range. The maximum range is from C-2 to G8 (the “High” parameter cannot be
set lower than the “Low” parameter). The specified range is indicated by dots
on the graphic keyboard display. When the “Fingered” parameter in this display and the “Fng” parameter in the SONG or PATTERN mode display are
turned “On”, chords played within the specified ABC range will be recognized
by the ABC system and the accompaniment chord will change accordingly
during song playback or realtime chord-track recording. Chords played within
the specified range of either the QY300 micro-keyboard or an external MIDI
keyboard are recognized. A chart of the chords recognized by the QY300 is
provided in the “VOICE LISTS AND MIDI DATA” booklet (page 5).
118
The QY300’s built-in floppy disk drive makes high-volume data
storage and retrieval easy. It also facilitates data management,
allowing you to create a well-organized personal floppy-disk data
library.
• The QY300 uses
2DD (double density)
3.5-inch floppy disks.
When formatted a single disk
provides a total data capacity of
about 713 kilobytes.
• Any new disk you intend to
use with the QY300 must be
formatted first. The format operation is described on page
125.
Direct Save & Load From the Song, Pattern,
Phrase, & Chain Modes
The main SONG, PATTERN, PHRASE, and CHAIN mode displays all provide direct access to the disk save and load functions via the [F5] and [F6]
keys. The type of data saved or loaded corresponds to the mode you’re in.
Mode
Data Saved or Loaded
SONG
Single songs (01 ... 10). When saving you can specify the song
number to be saved and the file name under which it will be saved
on disk. When loading you specify the song file to be loaded and
the song number to which it is to be loaded.
PATTERN
Single styles (001 ... 100). When saving you can specify the
number of the style to be saved and the file name under which it
will be saved to disk. When loading you specify the style file to be
loaded and the style number to which it is to be loaded.
PHRASE
Single user phrases (001 ... 100). When saving you can specify the
number of the phrase to be saved and the file name under which it
will be saved to disk. When loading you specify the phrase file to
be loaded and the phrase number to which it is to be loaded.
CHAIN
All data. All 10 songs, 100 patterns, and 100 user phrases are saved
to disk in a single file. You can specify the file name. When loading you specify the all-data file to be loaded.
119
Direct Save
Press the [F5] function key (“Save”) from the SONG, PATTERN, PHRASE,
or CHAIN mode to go directly to the corresponding, disk save display.
The disk write-protect
slide must be in the
write-enable position to
perform a save operation. If it is
not, the “Write Protected!” error
message will appear when you
attempt to execute the save operation.
After specifying the song, style, or phrase to be saved (there’s no need to
specify a file to be saved from the CHAIN mode since all data is saved), and
the file name under which the data is to be saved, press the [ENTER] key to
begin the save operation.
If the specified file name already exists on the disk, the QY300 will ask
you to confirm that you want to overwrite the existing file with the “Delete
Old Data?” display.
You can use the [F6]
function key (“Exit”) to
exit from the disk display at any time except during
the actual save operation.
120
Press the [+1/YES] key to go ahead with the save operation, or the [-1/NO]
key to cancel. An “Executing” bar graph will appear while the data is being
saved, then the SONG, PATTERN, PHRASE, or CHAIN mode display will
reappear.
Direct Load
Press the [F6] function key (“Load”) from the SONG, PATTERN, PHRASE,
or CHAIN mode to go directly to the corresponding disk load display.
You can use the [F6]
function key (“Exit”) to
exit from the DISK
mode at any time except during
the actual disk operation.
After selecting the file to be loaded and the song, style, or phrase to which it is
to be loaded (there’s no need to specify a destination from the CHAIN mode
since all data is loaded), press the [ENTER] key to begin the save operation.
If the specified destination already contains data, the QY300 will ask you
to confirm that you want to overwrite the existing data with the “Delete Old
Data?’ display.
Press the [+1/YES] key to go ahead with the load operation, or the
[-1/NO] key to cancel. An “Executing” bar graph will appear while the data is
being loaded, then the SONG, PATTERN, PHRASE, or CHAIN mode display
will reappear.
The Disk Mode
In addition to save and load operations, the DISK mode allows you to format
new disks as well as delete and rename existing files.
Press the [DISK] mode button to engage the DISK mode.
121
The first steps in performing any disk operation are to select the save, load,
delete, rename or format operation, and the type of data you want to perform
the operation on (except format, which requires no data type selection).
Use the function keys to select the save, load, delete, rename, or format
operation, then move the cursor to the desired data type (or enter the number
of the desired data type via the numeric keypad).
Phrase
All song, phrase, user pattern, and chain data.
A single specified user phrase (001 ... 100).
Style
A single specified style (001 ... 100).
Song
A single specified song (01 ... 10). The voice, output select, play
Song ESEQ
effect, and tempo track data is also saved.
A single specified song (01 ... 10) saved in or loaded from ESEQ
All Data
format. The ESEQ format is used by some sequencers and synthesizers with built-in sequencers. This option provides data compatibility with such devices. The voice, output select, and play effect
data is not saved with au ESEQ file. The tempo data is saved.
Song SMF
You can use the [F6]
function key (“Exit”) to
exit from the disk display at any time except during
the actual load operation.
122
A single specified song (01 ... 10) saved in or loaded from Standard MIDI File format. The Standard MIDI File format is widely
used by computer music software, sequencers, and synthesizers
with built-in sequencers. This option provides data compatibility
with such devices. The voice, output select, and play effect data is
not saved with an SMF file. The tempo data is saved.
Once you’ve selected a disk operation and data type, press the [ENTER] key
to begin the selected operation.
Save & Load
The save and load operations via the DISK mode are the same as the direct
save and load operations described above.
The disk write-protect
slide must be in the
write-enable position to
perform a save operation. If it is
not, the “Write Protected!” error
message will appear when you
attempt to execute the save operation.
• File names can be up
to 8 characters in
length. Lower-case
characters will be converted to
capitals when saved.
For a save operation specify the data to be saved (not required if saving “1 All
Data”), enter a file name if necessary, and press [ENTER]. If a file having the
specified file name already exists on the current disk, the “Delete Old Data?’
display will appear. Respond to this display with the [+1/YES] key to go
ahead with the operation or the [-1/NO] key to cancel.
An “Executing !” bar graph will appear to show the progress of the save
operation. “Completed” will appear briefly when the operation has finished.
• The last-entered file name is
automatically shown by default.
• If you use characters not recognized by the MS-DOS operating system, the file name
may not be recognized if you
attempt to read the disk on
different equipment.
For a load operation select the file to be loaded, the destination (song, style, or
phrase number — not required if loading “1 All Data”) and press [ENTER]. If
previous data exists in the specified destination the “Delete Old Data?” display
will appear.
Respond to this display with the [+1/YES] key to go ahead with the operation
or the [-1/NO] key to cancel.
An “Executing !” bar graph will appear to show the progress of the load
operation. “Completed” will appear briefly when the operation has finished.
123
Delete
This operation completely erases the specified file from the current disk.
The disk write-protect
slide must be in thewrite-enable position to
perform a delete operation. If it
is not, the “Write Protected!” error message will appear when
you attempt to execute the delete operation.
To (delete a file, move the cursor to highlight the file you want to delete (you
can also use the data dial to select files, or directly enter the file number via the
numeric keypad) then, press the [ENTER] key. Respond to the “Delete Old
Data?’ display with the [+1/YES] key to go ahead with the operation or the
[-1/NO] key to cancel. “Completed” will appear briefly when the operation
has finished.
Rename
The Rename function function makes it easy to directly change the name of a
file on disk.
The disk write-protect
slide must be in the
write-enable position to
perform a rename operation. If it
is not, the “Write Protected!” error message will appear when
you attempt to execute the rename operation.
• File names can be up
to 8 characters in
length.
• File-name extensions (3 characters following a period at
the end of the file name) are
included on ESEQ and SMF
song files.
124
To rename a file, first move the cursor to the file list and highlight the file you
want to rename (you can also use the data dial to select files, or directly enter
the file number via the numeric keypad), then move the cursor to the new
name area and enter the new file name (name entry is accomplished via the
micro-keyboard in the same way as described for the “Song Name” job, page
54). Once the file has been selected and the new name entered, press the
[ENTER] key. “Completed” will appear briefly when the operation has finished.
Format
This operation formats new (blank) 2DD 3.5-inch floppy disks for use with the
QY300. It can also be used to format disks previously used with other equipment for use with the QY300. The format operation is also a convenient way
to clear all data from a disk that contains unwanted material.
The format operation
erases all data from the
disk!
The disk write-protect
slide must be in the
write-enable position to
perform a format operation. If it
is not, the “Write Protected!” error message will appear when
you attempt to execute the format operation.
Select the Format operation, insert the disk to be formatted, and press
[ENTER]. Respond to the “Delete Old Data?” display with the [+1/YES] key
to go ahead with the operation or the [-1/NO] key to cancel.
An “Executing” bar graph will appear to indicate the progress of the format operation. “Completed” will appear briefly when the operation has finished.
125
Troubleshooting
This following table provides troubleshooting hints for some common problems. Because the QY300 is a complicated device with many functions, most
problems are simply the result of incorrect settings. Before calling for professional service, refer to the troubleshooting advice below to see if you can find
and correct the cause of your problem.
Problem
No power
No sound
Possible Cause
The AC adaptor is not fully inserted.
1
The PA-1207 is not being used.
1
The volume level is too low.
12
The volume level of each track is too low.
14
The “Fingered Chord” is set to On.
Keys do not produce correct pitch.
Page
117
Muting is applied to the tracks.
13
The “TG Channel” is Off.
18
“Course Tuning” is not set to 0.
16
“Fine Tuning” is not set to 0.
16
[OCT DOWN] or [OCT UP] has been set.
Sound is choppy and interrupted.
The QY300’s maximum polyphony (maximum number of notes
that can be played at one time) has been exceeded.
[PLAY] button fails to start playback.
The selected song, pattern, or phrase does not contain data.
7
23,75,78
“MIDI Sync” has been set to “external”.
115
Can’t set the time signature.
The song or phrase already contains data.
24,79
Can’t change phrase length.
The phrase already contains data.
79
Song playback stops midway.
An end mark has been set somewhere within the pattern track.
70
The section contains the “Ending” setting.
70
Chord changes within a measure fall to
produce new sound.
The phrase’s retrigger is set to Off.
80
Rhythm and timing at playback are different than at recording.
The “Playback Effects” have been set.
18
Cannot use the Fingered Chord function.
The “Fingered Chord” is set to Off.
117
The “Fingered Chord Zone” is not set correctly.
117
The cursor is not located at a style number, section, chord root,
or chord type.
8, 57
126
Error Messages
Monitor
Illegal Input
Preset Phrase
Improper data was input.
No Data
There is no data. The job could not be executed.
Attempted to change data defining a preset phrase.
MIDI
MIDI Data Error
Received improper MIDI data; the cable may be bad.
Checksum Error
Error receiving bulk data (incorrect checksum).
Buffer Full
MIDI Receive Buffer was full. All buffer contents cleared.
Now Running
Data Exists
Cannot receive bulk data while sequence is playing.
Bulk Ignored
Bulk data was received when the system was not in top of song mode.
Only l-song data for the QY10, 20 is acceptable. The received bulk data was not
the correct type.
Cannot receive bulk data for song that already has data.
DISK
No Disk
No disk in drive.
Illegal Format
Bad Disk
File Not Found
Write Protected
Disk Full
Disk is not in MS-DOS format.
Illegal File
Attempted to read file type not supported by QY300. (QY300 supports SMF and
ESEQ only.)
Can’t Change File Name
Attempted to change existing filename.
Disk is damaged; cannot read data.
Unable to find the specified file.
Cannot write to disk: the disk’s write-protect tab is on.
Cannot write more data to disk: the disk’s data capacity (712K) or directory capacity (112) is full.
System
Memory Full
The sequencer’s memory is full. The sequencer cannot record more data; jobs
cannot execute.
Battery Low
The memory-backup battery is low; memory cannot be backed up.
etc.
Now Working
Restoring internal data. (This message may appear following Power On, immediately after the Greeting.)
Delete Old Data? (Yes/No)
Specified song or file already exists; load/save operation will delete existing data.
Can’t Undo. OK? (Yes/No)
Memory is too full to support Undo; execution will be irreversible.
127
Specifications
Sequencer
Song mode: 19 tracks (TRl ... TR16, Pattern, Chord, Tempo)
Pattern mode: 8 tracks (TR1 ... TR8)
Phrase mode: 1track
Data Capacity Approximately 53,000 notes
10 songs
100 styles x 8 sections (800 patterns)
100 user phrases
Preset Phrases 3093 phrases
Record Modes Realtime, Step, Punch-in Recording, Edit Insert
Preset Chords 28 types (including “thru”)
Note Resolution 96 clocks per quarter note
Polyphony 64 notes
Edit Song Edit, Phrase Edit
Job Song job: 24
Pattern job: 7
Phrase job: 15
Play Effect Quantize, Swing, Transpose, Clock Shift, Gate Time Modify, Velocity Modify
Finger Chord Chord Root, Chord Type, On Bass, Original Bass
Song Chain 10 songs
Sequence File Format QY300 Original Sequence Format, ESEQ, SMF
No. of Trackes
Tone Generator
Type
Max. Polyphony
Multi-timbre Parts
Preset Voices
Voice Parameter
Display
External Memory
Connectors
Power Supply
Dimensions
Weight
AWM (Advanced Wave Memory)
28 notes
Song mode: 24 (sequence track 16 + pattern 8)
Pattern mode: 8
Phrase mode: single (with dynamic voice allocation)
128 normal voices
8 drum kits (GM System Level 1)
Voice Number, Pan Pots, Volume, Reverb Type, Reverb Depth, Coarse Tuning, Fine Tuning,
Pitch Bend Range
64 x 240 dot graphic liquid crystal display
3.5” 2DD-type floppy disk drive
PHONES (1/4 inch stereo phone jack, 8-150ohm)
OUTPUT (1/4 inch phone jack) x2 (L/MONO,R): output inpedence 1kohm
DC IN
MIDI IN, OUT
Supplied AC Adaptor PA-1207
343(W) x 238.2(D) x 64.7(H) (mm) [13-1/2”(W) x9-3/8”(D) x 2-1/2”(H)]
2.1kg (4.6 1bp)
* Specificaions and appearance subject to change without notice.
128
Index
[-1/NO] & [+1/YES] keys . . . . . . . . . . . . . . . . . . . . . . . . . . . . . . . . . . . . . . . . . . . . 6
Crescendo, song job ............................................................ 39
Cursor keys ........................................................................... 6
A
Accompaniment sequencing, overview ............................. vii
Append pattern, pattern job ................................................ 88
Append phrase, phrase job . . . . . . . . . . . . . . . . . . . . . . . . . . . . . . . . . . . . . . 100
Audio connections ................................................................ 3
B
Bass phrase chord type, pattern mode ............................... 61
Bass phrase chord type, chord step record ........................ 72
Beat-clock parameter, edit mode ...................................... 106
C
Chain mode ....................................................................... 113
Channel aftertouch event, insert edit ................................ 110
Channel assignment............................................................ 18
Chord bass note, pattern mode .......................................... 61
Chord bass note, chord step record.. .................................. 72
Chord changes, step record ................................................ 71
Chord sort, song job .......................................................... 43
Chord step record display .................................................. 71
Chord types ......................................................................... 60
Chords, changing ................................................................ 59
Chords, clearing . . . . . . . . . . . . . . . . . . . . . . . . . . . . . . . . . . . . . . . . . . . . . . . . . . . . . . . . . . . .7 3
Chords, syncopated.. ........................................................... 73
Clear pattern, pattern job ................................................... 90
Clear phrase, phrase job ................................................... 102
Clear song, song job .......................................................... 53
Clear track, song job ........................................................... 50
Click (metronome) .............................................................. 26
Connectors ........................................................................... 2
Control change event, insert edit ...................................... 110
Copy event, song job ......................................................... 44
Copy pattern, pattern job . . . . . . . . . . . . . . . . . . . . . . . . . . . . . . . . . . . . . . . . . . . . . 87
Copy phrase, phrase job .................................................... 99
Copy song, song job .......................................................... 53
Copy track, song job .......................................................... 49
Create measure, song job ................................................... 48
Crescendo, phrase job ........................................................ 96
D
Data backup .......................................................................... v
Data dial ................................................................................ 7
Delete disk file.. . . . . . . . . . . . . . . . . . . . . . . . . . . . . . . . . . . . . . . . . . . . . . . . 124
Delete measure, song job .................................................... 48
Deleting events, edit mode ............................................... 107
Demo, playing ...................................................................... 8
Direct load, disk.. . . . . . . . . . . . . . . . . . . . . . . . . . . . . . . . . . . . . . . . . . . . . . . . . . . . . . . . . .1 21
Direct save, disk ............................................................... 120
Disk file types .................................................................. 122
Disk mode.. ....................................................................... 121
Disk operations . . . . . . . . . . . . . . . . . . . . . . . . . . . . . . . . . . . . . . . . . . . . . . . 119
Drum assignment display .................................................. 33
E
Echo back ......................................................................... 116
[EDIT] key ........................................................................... 7
Edit mode, engaging & moving around ........................... 104
Editing songs & phrases ................................................... 104
Editing, change mode ....................................................... 106
Editing, insert mode.. ........................................................ 107
Effect bypass, song mode ................................................... 13
Effect bypass, pattern mode ............................................... 62
End-of-song marker, pattern step record ............................ 70
Enter key ............................................................................... 7
Erase event, song job .......................................................... 45
Exclusive event, insert edit . . . . . . . . . . . . . . . . . . . . . . . . . . . . . . . . . . 111
Expand backing, song job ................................................... 51
Extract event, song job ....................................................... 46
F
Faders . . . . . . . . . . . . . . . . . . . . . . . . . . . . . . . . . . . . . . . . . . . . . . . . . . . . . . . . . . 15
Fingered chord zone assignment ...................................... 117
Floppy disks & drive ............................................................ v
Format disk ....................................................................... 125
Function & [SHIFT] keys . . . . . . . . . . . . . . . . . . . . . . . . . . . . . . . . . . . . . 7
Function keys, step record ................................................. 32
129
G
Gate time & velocity modify, playback ............................. 22
Gate time parameter, edit mode ........................................ 106
Get phrase, phrase job ...................................................... 101
I
Icons .................................................................................... vi
Initialize play effect, pattern job ......................................... 89
Initialize play effect, song job ........................................... 52
Input filters ....................................................................... 116
Interval time ...................................................................... 116
N
Normalize effect, song job ................................................. 52
Note & keyboard displays, step record.. ............................ 31
Note display, moving around in step record mode............ 32
Note entry, step record ...................................................... 31
Note event, insert edit ....................................................... 108
Note parameter, edit mode ............................................... 106
Note parameters, step record .............................................. 30
Numeric keypad .................................................................... 7
O
Octave keys .......................................................................... 7
J
[JOB] key ............................................................................. 7
K
Keyboard track ................................................................... 14
L
LCD & contrast control ....................................................... 5
Location . . . . . . . . . . . . . . . . . . . .. . . . . . . . . . . . . . . . . . . . . . . . . . . . . . . . . . . . . 10
Loop playback ..................................................................... 9
M
Mark/jump function ............................................................ 11
Master tuning .................................................................... 115
Measure/heat parameter.. .................................................... 10
Measure/beat/clock display, step record ............................. 32
Memory display ................................................................. 33
Micro keyboard ................................................................... 7
MIDI connections ................................................................ 3
MIDI control ..................................................................... 116
MIDI synchronization ...................................................... 115
Mix track, song job ............................................................. 50
Mode keys ........................................................................... 6
Modify gate time, phrase job .............................................. 95
Modify gate time, song job ................................................ 38
Modify velocity, phrase job ................................................ 95
Modify velocity, song job ................................................... 37
Multi-channel recording ..................................................... 28
130
P
Pan pots .............................................................................. 15
Patch mode ......................................................................... 76
Pattern changes, erasing ..................................................... 71
Pattern changes, step record ............................................... 69
Pattern jobs ........................................................................ 86
Pattern step record display .................................................. 69
Pattern, monitoring while patching .................................... 77
Patterns, selecting & playing .............................................. 57
Patterns, styles, & sections ................................................. 55
Per Track display ................................................................ 22
Phrase jobs .......................................................................... 92
Phrase name, phrase job ................................................... 103
Phrase, realtime recording .................................................. 78
Phrase, step recording ......................................................... 81
Phrases, combining in pattern mode ................................... 75
Phrases, preset ................................................................... 74
Pitch bend event, insert edit .............................................. 109
Pitch bend range .................................................................. 17
Polyphonic aftertouch event, insert edit ........................... 110
Power & connections............................................................ 1
Power supply ........................................................................ 1
Pre-programmed patterns, loading from disk.. .................. 55
Precautions .......................................................................... iv
Program change event, insert edit .................................... 109
Punch-in recording ............................................................. 26
Put phrase, phrase job ....................................................... 102
Q
Quantization, playback ....................................................... 18
Quantize, phrase job .......................................................... 93
Quantize, song job ............................................................. 35
R
Realtime recording ............................................................ 23
Realtime recording, accompaniment .................................. 65
Record ready mode ............................................................ 24
Rename disk file ............................................................... 124
Retrigger parameter ............................................................ 80
Reverb.. ............................................................................... 15
T
Tempo control .................................................................... 12
Tempo track editing ........................................................ 112
Thin out, song job ............................................................ 47
Time signature, pattern step record................................... 70
Track muting ...................................................................... 13
Track muting, pattern mode ............................................... 62
Track name, edit mode ..................................................... 107
Transpose & clock shift, playback .................................... 21
Transpose, phrase job ........................................................ 97
Transpose, song job . . . . . . . . . . . . . . . . . . . . . . . . . .. . . . . . . . . . . . . . . . . 40
Transposition ...................................................................... 12
Tuning ................................................................................. 16
Type parameter ................................................................... 80
S
Save & load, disk mode.................................................... 123
Sections ............................................................................... 57
Sequencer functions, overview .......................................... vii
Sequencer keys .................................................................... 7
Setting up ............................................................................. 2
Shift clock, phrase job ....................................................... 98
Shift clock, song job .......................................................... 42
Shift note, phrase job ......................................................... 98
Shift note, song job ............................................................. 41
Shuttle dial ...................................................................... 7, 10
Song jobs ............................................................................ 34
Song name, song job.......................................................... 54
Split pattern, pattern job .................................................... 88
Split phrase, phrase job..................................................... 100
Step recording.................................................................... 28
Step recording, accompaniment ........................................ 68
Style name, pattern job ...................................................... 90
Style number & setion, pattern step record ....................... 70
Swing effect, playback ....................................................... 20
System parameters ............................................................ 115
U
Undo/redo, pattern job .......................................................
Undo/redo, phrase job .......................................................
Undo/redo, song job ..........................................................
Utility mode ......................................................................
86
92
34
115
V
Velocity parameter, edit mode ......................................... 107
Voice assignment................................................................ 14
Voices & effects, overview .............................................. viii
Voices, assignment & effects, pattern mode ...................... 62
Volume control .................................................................... 7
131
MEMO
For details of products, please contact your nearest Yamaha or the
authorized distributor listed below.
HEAD OFFICE
Yamaha Corporation, Electronic Musical Instrument Division
Nakazawa-cho 10-1, Hamamatsu, Japan 430
Tel: 053-460-2445
SYO4