1
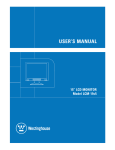
User’s Manual Model LCM-17w7 17" Widescreen LCD Monitor Table of Contents IMPORTANT PRODUCT SAFETY INSTRUCTIONS ...................................................................... 2 CLEANING THE LCD MONITOR ............................................................................................................... 4 SAFETY GUIDELINES ............................................................................................................................... 5 FCC COMPLIANCE STATEMENT .............................................................................................................. 5 INSTALLATION...................................................................................................................................... 6 SETTING UP THE LCD MONITOR ............................................................................................................ 6 Angle Adjustment .............................................................................................................................. 6 Front Control Panel and Rear Side Connectors ................................................................................. 7 CONNECT THE VIDEO AND AUDIO CABLES .............................................................................................. 8 CONNECT THE POWER CABLE ................................................................................................................. 8 TURN THE POWER ON ............................................................................................................................. 8 Automatic Screen Adjustment ........................................................................................................... 8 OSD MENU FUNCTIONS...................................................................................................................... 9 SCREEN DISPLAY ADJUSTMENT (ANALOG SIGNAL) .............................................................................. 10 SCREEN DISPLAY ADJUSTMENT (DIGITAL SIGNAL) ............................................................................... 11 APPENDIX ............................................................................................................................................. 12 SPECIFICATIONS .................................................................................................................................... 12 TROUBLESHOOTING .............................................................................................................................. 13 No Power.......................................................................................................................................... 13 No Image.......................................................................................................................................... 13 Power is ON but no Screen Image ................................................................................................... 13 Fuzzy Image..................................................................................................................................... 13 Image is Too Bright or Too Dark ..................................................................................................... 13 Distorted Image................................................................................................................................ 13 Image is Not Centered (size is not scaled correctly)........................................................................ 13 Colors are Not Correct ..................................................................................................................... 13 No Sound ......................................................................................................................................... 13 Mounting the LCD Monitor on a wall ............................................................................................. 14 Additional Questions ....................................................................................................................... 14 1 IMPORTANT PRODUCT SAFETY INSTRUCTIONS Read carefully and follow all warnings and instructions in this User's Manual and those marked on the product before you use the monitor. Failing to follow these warnings can result in personal injury or damage to the monitor. Keep this User’s Manual in a convenient location for future reference. Important: Save the original box and all packing material for future shipping needs. Proper Handling of the Monitor Always handle the LCD monitor with care. Avoid touching the LCD screen. Skin oils are difficult to remove. Always position the LCD monitor on a stable and level surface. Unstable surfaces can cause the monitor to topple and fall, resulting in possible damage or injury. Avoid exposing the monitor to direct sunlight or high temperatures, which can damage or shorten its useful life. Do not place it near heat sources such as radiators, heat registers, or other appliances that generate heat. Orient the monitor away from direct sunlight to reduce glare. Avoid exposing the monitor to rain, water, moisture or high humidity. Do not place it near basins or sinks where it may come in contact with water. Never place heavy or sharp objects on the LCD monitor, video cable, or power cord. Overloading Outlets Do not overload electrical power sources when installing the LCD monitor. Overloading wall outlets, circuits, or extension cords can result in overheating, fire, or electric shock. Use only grounded or polarized outlets. Power Cord Protection Minimize wear on the power supply cord. The power supply cord should be routed away from foot traffic and contact with other objects. Do not route the power cord under rugs or carpeting. The cord should never be severely bent, pinched, or twisted. Periodically inspect the power cord and each end of the cord for wear or damage. Unplug and replace the cord if it is damaged. Ventilation Slots and openings on the cabinet are provided for ventilation purposes. To ensure reliable operation of the product and to protect it from overheating, these openings must not be blocked or covered. Keep the LCD monitor a minimum of four (4) inches away from any wall to assure sufficient airflow and ventilation. Increased temperatures may cause fire or device failure. 2 To assure proper ventilation, do not block the openings by placing the monitor on a bed, sofa, rug or other similar surface. Do not place it in a built-in installation, such as a bookcase or enclosed rack, unless proper ventilation is provided. Other Notices and Precautions Caution: Never remove the rear cover. There are no user serviceable parts inside. The LCD monitor contains high voltage parts. You may be seriously injured if you touch them. Do not attempt repairs yourself. The warranty does not cover repairs or attempted repairs by anyone not authorized by Westinghouse Digital. Refer all servicing and repairs to qualified service personnel. If the monitor begins to emit smoke, an abnormal noise, or a strange odor, immediately turn it off and unplug the power cord. Contact the Westinghouse Service Center. If the LCD monitor will not be used for an extended period of time, unplug the power cord. 3 Cleaning the LCD Monitor • • MAKE SURE THE LCD MONITOR IS TURNED OFF NEVER SPRAY OR POUR LIQUID DIRECTLY ONTO THE SCREEN OR CASE To Clean the Screen: 1. Wipe the screen with a clean, soft, lint-free cloth. This removes dust and other particles. 2. If it still is not clean, use a small amount of non-ammonia, non-alcohol based glass cleaner on a clean, soft, lint-free cloth to clean the screen. To Clean the Case: 1. Use a soft, dry cloth. 2. If it still is not clean, use a small amount of non-ammonia, non-alcohol based, mild non-abrasive detergent on a clean, soft, lint-free cloth to clean the surface. Disclaimer Westinghouse Digital does not recommend the use of any ammonia or alcohol-based cleaners on the LCD screen or case. Some chemical cleaners have been reported to damage the screen and/or display case. Westinghouse Digital will not be liable for damage resulting from the use of any ammonia or alcohol-based cleaners. 4 Safety Guidelines Warning: This device must be operated with the original power supply, part number ADP-60CF A. CAUTION: The power supply outlet should be located near the equipment and should be easily accessible. Use a power cable that is properly grounded. Always use the appropriate AC cord that is certified for the individual country. Some examples are listed below: USA.................UL Switzerland ..... SEV Canada.............CSA Britain ............. BASE/BS Germany..........VDE Japan ............... Electric Appliance Control Act IMPORTANT NOTICE CONCERNING POWER CORD SELECTION The power cord set for this unit has been enclosed and has been selected according to the country of destination and must be used to prevent electric shock. Use the following guidelines if it is necessary to replace the original cord, or if it is not enclosed. The female receptacle of the power cord must meet IEC-60320 requirements and should look like Figure A1 below: Figure A1 Figure A2 For the United States and Canada In the United States and Canada the male end of the plug is a NEMA5-15 style (Figure A2), UL Listed, and CSA Labeled. For units that are mounted on a desk or table, type SVT or SJT power cords may be used. If the monitor is placed on the floor, only SJT type cords may be used. The power cord must be selected according to the current rating for your unit. Please consult the table below for the selection criteria for power cords used in the United States and Canada. Cord Type SJT SVT Size of Conductors in Cord Maximum Current Rating of Unit 18 AWG 16 AWG 14 AWG 18 AWG 17 AWG 10 Amps 12 Amps 12 Amps 10 Amps 12 Amps FCC Compliance Statement This equipment has been tested and found to comply with the limits for a Class B digital device, pursuant to part 15 of the FCC Rules. These limits are designed to provide reasonable protection against harmful interference in a residential installation. This equipment generates, uses, and can radiate radio frequency energy, and may cause harmful interference to radio communications if not installed and used in accordance with the instructions. However, there is no guarantee that interference will not occur in a particular installation. If this equipment does cause harmful interference to radio or television reception, which can be determined by turning the equipment off and on, the user is encouraged to try to correct the interference by one or more of the following measures: • • • Increase the separation between the equipment and receiver. Connect the equipment into an outlet on a circuit different from that to which the receiver is connected. Consult the dealer or an experienced technician for help. FCC Warning: To assure continued FCC compliance, the user must use a grounded power supply cord and the provided shielded cables. Any unauthorized changes or modifications not expressly approved by Westinghouse Digital could void the user's authority to operate this device. 5 Installation Congratulations on your purchase of a Westinghouse 17” Widescreen LCD monitor. Sleek and practical, this lightweight and wall-mountable LCD monitor delivers a crisp and clear display optimized for 1280 x 768 resolution. Package Contents • • • Widescreen LCD Monitor (17”) Cables o AC Power Cord o 3.5 mm Male – Male Stereo Audio Cable Literature o User’s Manual o Warranty Card Setting Up the LCD Monitor Remove the LCD monitor from the shipping box. Carefully rotate the stand base in position perpendicular to the LCD panel. Place the LCD monitor on a flat, level surface. Angle Adjustment The LCD panel can be adjusted approximately 20° up and 5° down. Caution: - Applying direct pressure with your hands on the LCD panel could damage the panel. - Do not use excessive force or attempt to move the monitor beyond its movement range. - Be careful not to pinch your fingers while adjusting the angle of the LCD monitor. 6 Front Control Panel and Rear Side Connectors 1. “-“ and “+” Buttons 2. MENU Button 3. LED Display 4. and Buttons 5.INPUT/OK Button 6. Power Button 7. AC Power Connector 8. Audio In 9. Digital DVI-D Connector 10. Analog VGA Connector 11. Ventilation Openings 12. Security Lock Anchor When the OSD Menu is displayed: Increase/Decrease Volume (While in the Volume Menu) When the OSD Menu is not displayed: Increase/Decrease Volume Enter/Exit the OSD Menu The LED is lit green when in the monitor is in use and orange when in power-saving mode. When the OSD Menu is displayed: Highlight a menu option or adjust the value of a selected option When the OSD Menu is not displayed: Adjust the backlight brightness When the OSD Menu is displayed: Select a menu option When the OSD Menu is not displayed: Switch the signal input between analog and digital Power On/Off Use the AC power cord to connect the monitor to a grounded AC outlet. Use the 3.5mm audio cable to connect to your PC Audio Output. Use a DVI-D cable (not included) to connect to a computer with a DVI-compatible output terminal (DVI-D: 24 pins) with WXGA output capability. Use an analog VGA cable (not included) to connect to your PC VGA Output. Note: Do not block the ventilation openings. This may cause the monitor to overheat or malfunction. Secure the LCD monitor by using a Kensington Micro Saver Security Lock. 7 Connect the Video and Audio Cables Analog Connection Connect a VGA cable (to the connector labeled “D-SUB”) and the enclosed audio cable (to the connector labeled “AUDIO IN”) from the back panel of the LCD monitor to your PC. Digital Connection Connect a DVI-D cable (to the connector labeled “DVI”) and the enclosed audio cable (to the connector labeled “AUDIO IN”) from the back panel of the LCD monitor to your PC. Connect the Power Cable Connect the AC power cord to the monitor (to the connector labeled “AC IN”) and then plug it into a properly grounded AC outlet. Turn the Power On Press the power button on the front of the LCD monitor. The LED light will turn green if a signal input is detected or it will be orange if no input is detected. Automatic Screen Adjustment Although a computer can detect the new monitor with the built-in VESA Plug & Play feature, the Auto Adjust function can be used to enhance the display. When using an analog signal, perform an automatic screen adjustment under the following conditions: - Using the monitor for the first time. - After having changed the system settings during use. - When connecting to a notebook computer, if the notebook is set so that it is displaying at the same time, the monitor may not display properly. In this case, change the computer settings so that only the monitor is displaying. To Perform the Automatic Screen Adjustment: Turn on the computer and monitor. Press the MENU button on the front control panel and then the OK button to start the automatic screen adjustment. The Auto Adjust message will be displayed. After a few seconds the best screen image will be displayed and the message will disappear. The automatic adjustment is now complete. 8 OSD Menu Functions All the function settings for the LCD monitor are controlled using the control keys located on the bottom part of the front panel. To display the OSD main menu, press the “Menu” button. (Note: The OSD menu display will disappear automatically, if no action is taken.) The LCD monitor has been adjusted to optimal settings before shipment. Adjustments to the monitor settings can be made using the OSD menu. Press the “Menu” button to display the OSD menu. Press the “ ” or “ “ button to select the function to be adjusted. Press the “INPUT/OK” button to enter the OSD sub-menu to be adjusted. Press the “ ” or “ “ keypad button to change the setting of the function. To exit the OSD menu or go back to the previous action, press the “MENU” button. It automatically will save any changes that have been made. Repeat the steps above to change the setting of other functions. The following is a list of the OSD sub-menus to adjust the screen display settings for analog and digital signal sources. 9 Screen Display Adjustment (Analog Signal) OSD Menu Sub-Menu Automatic Screen Adjustment Auto Adjust Contrast/Brightness Contrast Sound Picture OSD Recall Adjust the contrast of the image Brightness Adjust the brightness of the image Black Level Adjust the black level of the image Volume Adjust the audio volume Balance Adjust the audio balance Bass Adjust the audio bass Treble Color Description and Function Adjust the audio treble Mute Turn on or off the audio muting 9300K Set the color temperature to 9300K white color (Blue tone) 7500K Set the color temperature to 7500K white color (Standard tone) User Set the color temperature H-POS Move the image left and right on the screen V-POS Move the image up and down on the screen Clock Adjust the clock pulse of the image (reduce vertical flicker noise) Phase Adjust the focus of the image (reduce horizontal flicker noise) Sharpness Adjust the picture sharpness of lower resolutions. Language Select the OSD language (Chinese, Japanese, English) OSD H-POS Move the OSD menu left and right on the screen OSD V-POS Move the OSD menu up and down on the screen OSD Time Out Adjust the OSD display timer (5, 15, 30, 60 seconds) OSD Background Turn on or off the OSD transparency Restore to factory settings 10 Screen Display Adjustment (Digital Signal) OSD Menu Sub-Menu Contrast/Brightness Contrast Brightness Sound OSD Recall Adjust the contrast of the image Adjust the brightness of the image Black Level Adjust the black level of the image Volume Adjust the audio volume Balance Color Description and Function Adjust the audio balance Bass Adjust the audio bass Treble Adjust the audio treble Mute Turn on or off the audio muting 9300K Set the color temperature to 9300K white color (Blue tone) 7500K Set the color temperature to 7500K white color (Standard tone) User Set the color temperature Language Select the OSD language (Chinese, Japanese, English) OSD H-POS Move the OSD menu left and right on the screen OSD V-POS Move the OSD menu up and down on the screen OSD Time Out Adjust the OSD display timer (5, 15, 30, 60 seconds) OSD Background Turn on or off the OSD transparency Restore to factory settings 11 Appendix Specifications Panel Type 17" Widescreen Color TFT LCD Panel Optimum Resolution 1280 x 768 Response Time 15 ms Contrast Ratio 600:1 Maximum Brightness 450 Nits Viewing Angles 170° (H) / 170° (V) Displayable Colors 16.77 million colors (8 bit) Wall/Arm Mount Physical 100mm VESA® Input Signal Video HD-15 pin mini D-Sub (VGA connector) 24 pin DVI-D Audio Speaker Output 3.5mm Mini-Stereo jack male-male 2.0 watts * 2 channels Power Voltage 100-240 VAC, 50/60 Hz Operating Conditions Temperature 32° F to +104° F (0° C to +40° C) Humidity 20% to 85% (no condensation) Altitude Up to 9,800 feet Temperature -4° F to +130° F (-20° C to +55° C) Humidity 5% to 85% (no condensation) Altitude Up to 39,000 feet Storage Conditions Dimensions Physical Weight Net 17.2 (w) x 15.0 (h) x 7.6 (d) in 10.4 lb Regulations FCC-B, UL, CSA (CUL), Energy Star®, Plug & Play Lamp Life 25,000 hours 12 Troubleshooting No Power • • • Make sure the DC cord is plugged into the back of the LCD monitor. Make sure the AC power cord is securely connected to the AC socket. Plug another electrical device (like a radio) to the power outlet to verify that the outlet is supplying the proper voltage. No Image • • Make sure the power button is ON. Check whether the LCD monitor and computer power cords are plugged in and check the power supply. Power is ON but no Screen Image • • Adjust the brightness and contrast levels. Make sure the VGA or DVI cable is securely connected to both the computer and monitor. Fuzzy Image • Adjust the Phase setting on the monitor. Image is Too Bright or Too Dark • • • • Adjust the brightness and contrast levels using the OSD. Make sure that the computer is not displaying an irregular image. Check the VGA connection between the computer and LCD monitor. Perform Auto Adjust. Distorted Image • • Reset the LCD monitor by performing the “Recall” function using the OSD. Remove extra accessories (such as a VGA extension cord). Image is Not Centered (size is not scaled correctly) • Perform Auto Adjust. • • Adjust the horizontal and/or vertical position of the image using the OSD. Check the image size setting. Colors are Not Correct • Adjust the color setting using the OSD. No Sound • Check the audio connection. 13 Mounting the LCD Monitor on a wall • • • Check the Westinghouse Digital website for wall mounting solutions. Use the 100mm VESA hole pattern to secure a mounting plate to the LCD monitor. Use professional installation to reduce the risk of injury and damage. Additional Questions • • See our website at www.westinghousedigital.com Contact Westinghouse Digital Customer Service at (866) 287-5555 or write us at [email protected] 14 Westinghouse Digital Electronics, LLC. Santa Fe Springs, CA www.westinghousedigital.com SE-UM-1704-0501