1
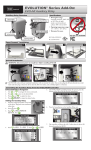
EVOLUTION® Series Add-On:
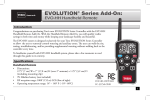
EVO-HH Handheld Remote
Introduction
Congratulations on purchasing Toro’s new EVOLUTION Series Controller with the EVO-HH
Handheld Remote Add-On. With the Handheld Remote Add-On, you will quickly realize
savings in both time and money while keeping your landscape healthy and beautiful.
The EVO-HH system is designed exclusively for your Toro EVOLUTION Series Controller
to allow the user to remotely control watering and auxiliary zones. The user can walk the site,
testing, troubleshooting, and/or providing supplemental watering without walking back to the
controller every time.
To familiarize yourself with EVO-HH handheld system, please take a few moments to read
through this guide in its entirety.
Mode
Setup
PWR (Hold)
Specifications
Handheld Remote
• Dimensions:
2.75” (7 cm) W x 7” (17,8 cm) H (over 2” antenna) x 1.25” (3,2 cm) D
(including mounting clip)
• 9V Alkaline battery (not included)
• RF reception range: 1000’ (152 m) LOS (line of sight)
• Operating temperature range: 14° – 140° F ( -10°– 60°C)
Cancel
Enter
LISTED
FCC-ID: OF7CLR1
IC: 3575A-CLR1
1
Table of Contents
Specifications1
Overview3
Installation3
EVOLUTION® Smart Connect®
3
Installing the Remote Batteries
3
At the Controller4
Menu Navigation4
Adding the Device4
At the Remote5
Set the PIN5
Powering the Remote5
Set the Number of Stations
5
Start Program “A”, “B”, or “C”
5
Run an All Stations Cycle
6
Turn on a Station or Zone Manually
6
Stop All Watering6
Change From One Running Station to Another
6
2
Remote Auxiliary Operation6
Switch to Auxiliary Operation
6
Start a Single Auxiliary Scene
7
Cancel a Single Scene
7
Run All Auxiliary7
Stop All Auxiliary7
Change From One Running Scene to Another
7
Return to Irrigation Mode
7
Toro Support8
Installation
Overview
EVOLUTION® Smart Connect®
Please see the install sheet that came with the Smart Connect
device.
LCD Screen
Installing the Remote Batteries
The remote receives power from a 9-volt battery (not included).
To install the battery:
Setup button
Left arrow
Up arrow
Mode
Setup
PWR (Hold)
USB Cover
(future use)
Down arrow
Power
button
Right arrow
Cancel
Enter
Enter button
1. Remove the three
(3) screws from the
battery cover on the
back of the remote,
then remove the
battery cover.
2. Snap the battery onto
the battery clip and
place the battery into
the compartment.
3. Reinstall the battery
cover with the three
screws.
Battery
Cancel button
3
At the Controller
Menu Navigation
• Use
or
to navigate the menu commands.
to move to the desired
to adjust the value.
ADD/REMOVE DEVICE
WEATHER*
ADD
SOIL 1
ADD
SOIL 2
ADD
SOIL 3
ADD
REMOTE
98 14
→
• To change a value, press
or
field, then press
and
SELECT to input the desired value.
• Press
Adding the Device
For the EVOLUTION® Series controller and remote to
successfully communicate, identical PINs must be set in both
the controller and remote.
4. Press
At the controller:
1. Press
ADVANCED then
2. Press
to ADD/REMOVE DEVICE. Press
→
→
to enter the PIN field of the remote.
Press
.
ADVANCED
ZONE DETAILS
SCHEDULE STARTS
SCHEDULE DETAILS
SENSORS
ADD/REMOVE DEVICE
4
to REMOTE.
3. Press
.
Use
or
or
to change the value.
to move between the numeric fields.
5. Press
to input the desired value.
6. Press
to return to the home screen.
* The WEATHER sensor is not available for the Australia
region.
At the Remote
Set the PIN
1. Press Mode PWR(Hold) to turn on
the remote transmitter.
2.Press
Setup twice. “SET
PIN” appears on the screen.
3.Press
or
to set the first
digit of the PIN number. Press
to move to the next digit.
SET
PIN
98 14
Mode
Setup
PWR (Hold)
08
4.Repeat step 3 to set the other
numbers in the 4-digit PIN.
5.Press
Enter
Set the Number of Stations
To save time using the remote, set the number of stations in the
transmitter to match the number of stations on the
EVOLUTION® Series controller. For example, for a 8-station
controller, set the transmitter to a station maximum of 8.
1. Press
Setup once to view
the Max Station screen.
SET
2. Press
or
to set
MAX
the desired maximum station
number.
3. With the desired number
displayed, press
Enter.
to save the PIN.
Mode
Cancel
Enter
Powering the Remote
• Press Mode PWR(Hold) to turn on the remote.
• Press and hold Mode PWR(Hold) about two seconds to turn off.
Turning off the remote does not turn off irrigation
operations in operation.
Automatic Power Down of Transmitter
The remote powers down after five minutes of button inactivity
to extend battery life.
Setup
PWR (Hold)
Start Program “A” or “B” or ”C”
1. In manual station mode, press
to go beyond the
highest station. “P- A” (Program A) appears.
Press
again for “P- b” (Program
B) or again for
Cancel
Enter
“P- C” (Program C).
2. With the desired Program displayed, press
Enter for a
sequential station run.
A remotely started program runs continuously.
5
Run an All Stations Cycle (ASC)
Running an All Stations Cycle is useful for troubleshooting a
sprinkler system.
1. Follow Step 1 above.
2. Press
to move above Pto “TEST ALL”.
C
3. Press
to start the run time
blinking.
TEST
ALL
03
RUN MIN
TIME
Mode
4. Press
or
to set the run time.
Setup
PWR (Hold)
All stations will run the same length of time, in sequence,
from lowest to highest possible.
5. Press
Enter to start. (Leave the transmitter on
during the ASC sequence.)
Turn On a Station or Zone Manually
Cancel
Enter
1. Turn on the remote and press
or
to scroll to the
station number desired.
2. Press
once to move to run time.
3. Press
or
running time.
to set the station’s one-time manual
4. Press
Enter to start the station. A flashing rain-drop
indicates a running station.
The controller may display a differing countdown. If so, it
has been overridden by the remote’s countdown.
Stop All
Press
Cancel. A slashed-out raindrop indicates an
interrupted irrigation program.
Change from One Running Station to Another
1. Press
or
to select the desired station.
2. Press
3. Press
once to move to run time.
or
to set the run time.
4. Press
Enter to start the station. The previously
running station will shut off .
Remote Auxiliary Operation
The controller is capable of controlling an auxiliary system
(such as a lighting system) using AUX devices. The EVO-HH
handheld remote can control the auxiliary system too.
Switch to Auxiliary Operation
1. Hold down the Mode PWR(Hold)
button for a few seconds until
“A U” appears in the screen.
2. Release the button. The remote is
in Auxiliary mode.
3. Set the PIN on the remote
(see page 5) to communicate
with the auxiliary controller.
A U
Mode
Setup
PWR (Hold)
6
Cancel
Enter
Start a Single Auxiliary Scene
1.Turn on the remote. It defaults to
Manual mode.
2.Press
or
to select the
desired Auxiliary Scene (A1 - A4).
3. Press
to move to run time.
MANUAL
A2 05
SINGLE
RUN MIN
TIME
Stop All Auxiliary
1.Press
several times to display
“AA oF” (off).
2.Press
Enter to turn off all
auxiliary scenes.
MANUAL
AA of
Change from One Running
Auxiliary scene 2 is set
Mode
4.Adjust runtime with
and
Scene to Another
Mode
to run for 5 minutes.
Setup
PWR (Hold)
Setup
PWR (Hold)
.
It is possible to run more than one individual scene at a time.
5.Press
Enter to begin auxiliary run.
Start a single auxiliary scene (above), then simply move to the
next scene and repeat the same steps. Previously running scenes
The Auxiliary Scene numbers (A1, A2, and A3)
continue.
correspond with the EVOLUTION® controller’s
Auxiliary numbers (AUX 1, AUX 2, and AUX 3).
Return to Irrigation Mode
Cancel
Enter
Cancel
Enter
Press and hold down Mode PWR(Hold) until the screen displays
Cancel a Single Scene
“toro”. Release.
Select the currently running scene and press
Cancel.
Run All Auxiliary
Running all scenes is useful for troubleshooting an auxiliary
system.
1.Press
several times to display
MANUAL
“AA on”.
2.Press
Enter to turn on all
auxiliary scenes.
AA on
Mode
Setup
PWR (Hold)
7
Toro Support
Toro Commitment to Quality
Toro is committed to developing and producing the highest quality, best performing,
most dependable products on the market. Because your satisfaction is our first priority,
we have provided the Toro Helpline to assist you with any questions or problems that
may arise. If for some reason you are not satisfied with your purchase or have questions,
please contact us toll free at 1-877-345-8676.
Warranty
The Toro Company and its affiliate, Toro Warranty Company, pursuant to an
agreement between them, jointly warrants, to the owner, against defects in material
and workmanship for a period of one year from the date of purchase. Neither The Toro
Company nor Toro Warranty Company is liable for failure of products not manufactured
by them, even though such products may be sold or used in conjunction with Toro
products.During such warranty period, we will repair or replace, at our option, any part
found to be defective. Return the defective part to the place of purchase. Our liability is
limited solely to the replacement or repair of defective parts. There are no other express
warranties. This warranty does not apply where equipment is used, or installation is
performed, in any manner contrary to Toro’s specifications and instructions, nor where
equipment is altered or modified. Neither The Toro Company nor Toro Warranty
Company is liable for indirect, incidental or consequential damages in connection with
the use of equipment, including but not limited to: vegetation loss, the cost of substitute
equipment or services required during periods of malfunction or resulting non-use,
property damage or personal injury resulting from installer’s negligence.
Some states do not allow the exclusion or limitation of incidental or consequential
damages, so the above limitation or exclusion may not apply to you. All implied
warranties, including those of merchantability and fitness for use, are limited to the
duration of this express warranty. Some states do not allow limitations of how long an
implied warranty lasts, so the above limitation may not apply to you. This warranty gives
you specific legal rights and you may have other rights which vary from state to state.
FCC Part 15 Rules
This equipment has been tested and found to comply with the limits for a Class B digital
device, pursuant to Part 15 of the FCC Rules. These limits are designed to provide
reasonable protection against harmful interference in a residential installation. This
8
equipment generates, uses and can radiate radio frequency energy and, if not installed
and used in accordance with the instructions, may cause harmful interference to radio
communications. However, there is no guarantee that interference will not occur in a
particular installation. If this equipment generates interference to radio or television
reception, which can be determined by turning the equipment on and off, the user is
encouraged to try to correct the interference by one or more of the following measures:
1. Reorient or relocate the receiving antenna.
2. Increase the separation between the equipment and receiver.
3. Connect the equipment into an outlet on a circuit different from that to which
the receiver is connected.
4. Consult the dealer or an experienced radio/TV technician for help.
The user may find the following booklet prepared by the Federal Communications
Commission helpful: “How To Identify and Resolve Radio-TV Interference Problems”.
This booklet is available from the U.S. Government Printing Office, Washington, DC
20402. Stock No. 004-000-00345-4.
Australian Warranty Statement
This product comes with a manufacturer’s guarantee against defects in material
and workmanship when used for its intended purpose. Our obligation under this
guarantee is limited to the repair or replacement of the product at our discretion for the
period stated. In the event of a claim, you must immediately cease using the product
and return the product, together with your proof of purchase and an explanation of
the fault to the store you purchased it from. All costs associated with the return of the
product are the purchasers’ responsibility. To process the warranty, the retailer must
contact Toro Australia via their representative or the phone number listed below.
Our goods come with guarantees that cannot be excluded under the Australian
Consumer Law. You are entitled to a replacement or refund for a major failure and for
compensation for any other reasonably foreseeable loss or damage. You are also entitled
to have the goods repaired or replaced if the goods fail to be of acceptable quality and
the failure does not amount to a major failure.
Toro Australia Pty Ltd, 53 Howards Road, Beverley SA 50091300 130 898,
[email protected]
©2014 The Toro Company, Irrigation Division • www.toro.com • 1-877-345-8676 (US and Canada)
[email protected] (international)
Form Number 373-0808 Rev. B