1
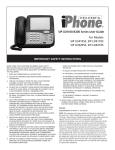
users
guide
Covers models: A100, A101, A102, A103, A105,
A110, A110S; A205, A205S, A210S
REQUIREMENTS OF PART 68
- FCC RULES
This equipment complies with Part 68 of the FCC Rules and the requirements adopted by ACTA. On the bottom of this
telephone is a label that contains, among other information, a product identifier in the format US:AAAEQ##TXXXX.
If requested, this number must be provided to the telephone company. The USOC Jack for this equipment is RJ11C.
A plug and jack used to connect this equipment to the premises wiring and telephone network must comply with the
applicable FCC Part 68 rules and requirements adopted by ACTA. A compliant telephone cord and modular plug are
provided with this telephone. It is designed to be connected to a compatible modular jack that is also compliant. See
installation instructions for details.
The Ringer Equivalence Number (REN) is used to determine the number of devices that may be connected to a telephone line. Excessive RENs on a telephone line may result in the devices not ringing in response to an incoming call.
In most but not all areas, the sum of RENs should not exceed five (5.0). To be certain of the number of devices that
may be connected to a line, as determined by the total RENs, contact the local telephone company. For products
approved after July 23, 2001, the REN for this product is a part of the product identifier that has the format
US:AAAEQ##TXXXX. The digits represented by ## are the REN without a decimal point (e.g., 03 is a REN of 0.3).
For earlier products, the REN is separately shown on the label.
If this telephone causes harm to the telephone network, the telephone company will notify you in advance that temporary discontinuance of service may be required. But if advance notice is not practical, the telephone company will notify the customer as soon as possible. Also, you will be advised of your right to file a complaint with the FCC if you
believe it is necessary.
The telephone company may make changes in its facilities, equipment, operations or procedures that could affect the
operation of the equipment. If this happens, the telephone company will provide advance notice in order for you to
make the necessary modifications to maintain uninterrupted service.
If trouble is experienced with this equipment, for repair or warranty information, please contact Teledex at (800) 7948353. If the equipment is causing harm to the telephone network, the telephone company may request that you disconnect the equipment until the problem is resolved.
There are no user serviceable parts contain in this equipment.
Connection to party line service is subject to state tariffs. Contact the state public utility commission, public service
commission or corporation commission for information.
If your home has specially wired alarm equipment connected to the telephone line, ensure the installation of this (insert
equipment ID) does not disable your alarm equipment. If you have questions about what will disable alarm equipment,
consult your telephone company or a qualified installer.
This telephone receiver is hearing aid compatible.
INDUSTRY OF CANADA REQUIREMENTS
NOTICE: This equipment meets the applicable Industry Canada Terminal Equipment Technical Specifications.
This is confirmed by the registration number. The abbreviation, IC, before the registration number signifies that
registration was performed based on a Declaration of Conformity indicating that Industry Canada technical specifications were met. It does not imply that Industry Canada approved the equipment.”
Before installing this equipment, users should ensure that it is permissible to be connected to the facilities of the
local telecommunications company. The equipment must also be installed using an acceptable method of connection. The customer should be aware that compliance with the above conditions may not prevent degradation of
service in some situations.
Repairs to certified equipment should be coordinated by a representative designated by the supplier. Any repairs
or alterations made by a user to this equipment, or equipment malfunctions, may give the telephone communications company cause to request the user to disconnect the equipment.
Users should ensure for their own protection, that the electrical ground connections of the power utility, telephone
lines and internal metallic water pipe system, if present, are connected together. This precaution may be particularly important in rural areas”.
Caution: Users should not attempt to make such connections themselves, but should contact the appropriate electric inspection authority, or electrician, as appropriate.”
“NOTICE: The Ringer Equivalence Number (REN) assigned to each terminal device provides an indication of the
maximum number of terminals allowed to be connected to a telephone interface. The termination on an interface
may consist of any combination of devices subject only to the requirement that the sum of the Ringer Equivalence
Numbers of all the devices does not exceed 5.”
REN: Z
For warranty and service in Canada, please contact:
Williams Telecommunications
5610 Kennedy Road
Mississauga, Ontario, L4Z2A9
Canada
Phone: 905-712-4242
Fax: 905-712-1754
CONTACTING TELEDEX
Telephone:
Internet:
email:
Mail:
(408) 363-3100
www.teledex.com
[email protected]
6311 San Ignacio Avenue
San Jose, CA USA 95119
INCLUDED IN YOUR PACKAGE
Handset
Base Unit
Coiled Handset Cord
Line Cord
Clear Plastic Overlay
User Guide
CONNECTING THE IPHONE A SERIES
1) Located on the left side of the iPhone (as the phone is facing you) is a modular
jack. Insert one end of the coiled handset cord into this jack (you should hear the coil
cord click when properly inserted).
2) Insert the other end of the coiled handset cord into the modular jack on the handset.
3) Turn the telephone so the back panel is facing you. Insert either end of the line cord
into the jack on the back of the telephone labeled LINE.
4) Insert the other end of the line cord into a telephone wall outlet jack.
5) Once your telephone is connected, remove the plastic overlay and place the paper face
plate over the keys. Replace the plastic overlay by hooking the tabs on the overlay into
the recessed slots located on both sides.
PLACING A CALL USING THE HANDSET
1) Lift the handset. The “LINE” LED will illuminate. (On two-line models, if both lines
are inactive, line 1 will be activated. If one of the two lines is active, the inactive line
will be activated.)
2) Listen for dial tone. Dial the desired number, or press an AUTO DIAL key to
automatically dial a number.
3) To end the call, hang up by placing the handset back in the cradle.
PLACING A CALL USING THE SPEAKERPHONE
(APPLIES ONLY TO MODELS WITH INCLUDED SPEAKERPHONE)
1) With the handset in the cradle, press either the SPEAKER key or the LINE key (on
two-line models, select either inactive LINE key). The telephone will go offhook on
the selected line with speakerphone active.
2. Listen for dial tone, and dial the desired number, or press an AUTO DIAL key to
automatically dial a number.
3. To end the call, press the SPEAKER key.
RECEIVING A CALL
TO ANSWER A CALL USING THE HANDSET:
1. Lift the handset. On two-line models, if one line is already in use, the iPhone will
automatically select the ringing line.
2. To end the call hang up the handset.
TO ANSWER A CALL USING THE SPEAKERPHONE
1. With the handset in the cradle, press the line key associated with the ringing line.
The iPhone will asnwer the line selected with the speakerphone active. You may also:
2. Press the SPEAKER key. The iPhone will select the ringing line and answer with the
speakerphone active.
NOTE: THE RED
SPEAKER LED WILL INDICATE THAT THE SPEAKERPHONE IS ACTIVE.
1
CONFERENCE (TWO-LINE-MODELS ONLY)
On two-line telephones, the CONFERENCE key allows the user to include two other parties
in a three-way conversation. After placing or receiving a call to/from the first party, place
that party on hold by pressing the HOLD key. Using the second line, place or receive the
second call. Press the CONF key to join all three callers.
ADJUSTING THE SPEAKERPHONE VOLUME
To the left of the dialpad, locate the volume up/down arrow keys. With the speakerphone
active, press either the up or down key to raise or lower speaker volume to the desired
level.
ADJUSTING THE RING VOLUME
On the rear panel of the telephone, locate the ringer volume slide swtich. There are three
settings: Low, high, and crescendo. The crescendo setting is indicated by a small triangular
icon. Set the switch to the desired setting.
By selecting the crescendo ringer setting, the phone will first ring at its lowest volume.
With each successive ring, ringer volume will increase slightly, until, by the fourth ring,
ringer volume is at the highest level. Each successive incoming call will begin at the lowest
ring volume and ring accordingly.
USING THE SPEAKERPHONE (SPEAKERPHONE-EQUIPPED MODELS ONLY)
If you are talking on the handset and wish to transfer to the speakerphone, press the
SPEAKER/HSET key, and hang up the handset in the cradle. The speakerphone will now
be active.
If you are talking on the speakerphone and wish to transfer to the handset, pick up the
handset from the cradle. The speakerphone LED will go out and the call can be continued
on the handset.
USING THE HOLD KEY (TWO-LINE MODELS ONLY)
TO PLACE A CALL ON HOLD
1) With a call active, press the red HOLD key.
2) The red line LED will change to a slow blink indicating the call is on hold.
TO REMOVE A CALL FROM HOLD
1) Press the line key of the call on hold. This removes the call from hold
2) The red line LED will remain illuminated for the duration of the active call.
CHANGING PHONES AFTER PLACING A CALL ON HOLD
1) Place the call on hold, as above.
2) Pick up the call at another telephone that is on the same line.
2
MUTE (SPEAKERPHONE-EQUIPPED MODELS ONLY)
1) To mute a call, press the MUTE key. The red MUTE LED will light. You will continue
to be able to hear the other party, but they will not be able to hear you
2) Press the MUTE key again to turn off the mute feature. The MUTE LED will go out.
REDIAL
To redial the last telephone number dialed:
1) Lift the handset from the cradle, or press the SPEAKERPHONE key.
2) Press the REDIAL key. The last number dialed will be redialed.
ADJUSTING THE HANDSET VOLUME
To the left of the dialpad, locate the volume up/down arrow keys. While using the handset,
either during an active call, or preparing to dial, press either the up or down key to raise or
lower handset volume to the desired level.
PROGRAMMING THE AUTO DIAL KEYS
Depending on your iPhone model, there may be programmable guest service keys located
above the dialpad. These keys can be used for one-touch access to commonly dialed numbers or services. To program these auto-dial keys, the telephone must be connected to an
active telephone line.
Programming of these keys is protected from unauthorized tampering, and employs the use
of “hidden” programming keys located underneath the faceplate. With the clear plastic
overlay and faceplate removed from the phone, locate the STORE key as noted in the
phone diagram. This recessed key is located above number ‘3’ in the dialpad.
To program an auto-dial, or guest service, key:
1) Lift the handset from the cradle, or press the
SPEAKERPHONE key.
2) Press the recessed STORE key and release it.
3) Enter the number or extension to be programmed.
4) Press the auto-dial key where the number is to be stored.
5) Repeat this procedure as necessary for additional
auto dial keys.
6) Place the handset back in the cradle, or press the
SPEAKERPHONE key to disconnect.
‘PAUSE’ KEY
‘STORE’ KEY
1
2
3
4
5
6
7
8
9
0
#
PAUSE KEY
The PAUSE key can be used to provide a timed pause between dialed digits within a stored
auto dial number. The timing of the pause is programmable, with the factory default set to
one (1) second. To change the pause timing:
1) Lift the handset or press the SPEAKERPHONE key (speakerphone-equipped models.)
2) Press the STORE key (see diagram on inside front cover for key location.)
3) Press the PAUSE key (see diagram for key location.)
3
4) Press an number from 0 to 5 on the dialpad. The number selected will be the pause
timing in seconds (for example: pressing the ‘3’ key will insert a 3-second pause, etc.)
5) Press the STORE key. The selected pause is now inserted into the dialing string.
FLASH KEY
The FLASH key, when programmed behind an auto dial key, provides a timed line
interrupt typically used for accessing PBX/CO features such as transfer or conference. The
timing of the hookflash is programmable, with the factory default set to 600 milliseconds.
Some PBXs may require you to change the hookflash timing from this default. To change
the hookflash timing:
1)
2)
3)
4)
Lift the handset or press the SPEAKERPHONE key (speakerphone-equipped models.)
Press the STORE key (see diagram on inside front cover for key location.)
Press the FLASH key (see diagram for key location.)
Select 1 - 9 on the DTMF pad. The number selected will be the new flash timing in
hundreds of milliseconds (ie: pressing the ‘3’ key will reset the flash to 300 ms, etc.)
5) Press the STORE key. The selected flash timing is now programmed.
CONVERTING FROM DESK TO WALL MOUNT
The iPhone can be converted for wall mounting applications. The conversion is easiest
when the handset and line cords are not connected.
1) Located on the top of the telephone above the speaker grill is the wall/desk mount clip.
Remove this clip by firmly pushing upward (towards the hookswitch).
2) Flip the clip over (top to bottom) so that the protruding edge is towards the top of the
phone, and reinsert into cutout. This protruding edge will hold the handset.
3) Turn the telephone over so the bottom is up, facing you. Place the telephone on a
non-abrasive surface to prevent scratching.
4) Locate and remove the mounting bracket, firmly push back and pull up to remove two
of the four retaining tabs.
5) Rotate the mounting bracket 180º degrees clockwise so that the mounting eyelet on
the bracket is facing in the same direction as the other mounting eyelet located on the
bottom of the telephone.
6) Insert the top two retaining tabs of the mounting brackets into the mounting bracket
slots (located near the middle of the telephone). Then firmly push down to insert the
retaining tabs on the opposite side of the mounting bracket.
7) Connect a short modular line cord into the jack on the back of the phone (labeled
LINE). Route the line cord through the line cord channel. Connect the other end of
line cord to the phone jack on the wall mounting plate.
8) Turn the telephone over, and slide the telephone down onto the mounting posts in
downward direction. Both eyelets should line up with the mounting posts.
9) Complete the wall mounting by installing the handset and handset cord.
4
5
Copyright © 2005 Teledex LLC. All rights reserved.
606-2700-88