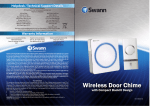
1
™
Advanced security made easy ™
Wireless Mat
Doorchime
SW351-WMA
Operating Instructions
SW351-WMA
www.swannsecurity.com
MWMA170510E
1
Installation
Package Contents:
Chime Unit
Wireless Mat
Wireless Doorbell
Mounting Hardware
2 x 12V A23 Batteries
Operating Instructions
Overview
Congratulations on your purchase of this wireless doormat alarm from Swann! The wireless mat is a
unique and unobtrusive door chime. On top of that, installing is a breeze as it’s wireless - other than
changing the batteries on occasion, it’s practically maintenance free!
Included in the kit is the wireless pressure sensitive mat, as well as a more conventional wireless doorbell
- you can use one, the other, or both depending on your needs. You could use them on the same door
if you wish, or you can split them between two different entrances, provided that you can place the
chime itself in a central position.
All components in this
system are intended for
Installing
SHELTERED ENVIRONMENTS ONLY.
To mount the alarm/chime unit, you’ll need the following tools:
Installing any part of this system in an
• A screwdriver
outdoor environment (one exposed to
• A drill (for hardwood or masonry)
rain, moisture or direct sunlight) may
have undersirable results, and may cause
The Chime Unit
malfunctions or hardware failure.
1. Screw the supplied mounting screws into
the wall you want to mount the chime unit
on. Leave approximately 1/8” (3 - 4mm) of
the screw protruding. If necessary, drill holes
for the screws and/or use wall plugs.
2. Insert the protruding screw ends into the
mounting holes on the rear of the chime
unit.
3. Move the chime unit downwards to lock the
screw ends in place.
The Mat
1. The mat should be inserted underneath a doormat or carpet, somewhere that a person entering
the area you want to protect would have to step.
2. Exercise some care whilst positioning the battery compartment. The case on the battery
compartment is pretty tough, but will break if left underfoot. We’ve provided a self-adhesive set
of mounting pads to allow you to mount the battery compartment on a wall up to 2.5ft (75cm)
from the mat itself.
3. The chime unit itself can be mounted anywhere within approximately 30ft (10m) of the mat.
The Doorbell
1. Remove the rear plate of the doorbell.
2. Screw the rear plate to the wall using the two screw holes. If you’re mounting the doorbell on
glass or metal, then you could use strong double-sided tape or glue - just be sure that you can still
open the doorbell to change the batteries once every few months.
Transmission Range
The reliable range of the mat’s transmission will vary based on your environment. Under ideal conditions
(such as an open environment where the mat has a direct line of sight to the alarm unit, where there is
little or no radio “noise”) the signal will travel up to 100ft (30m).
Conversely, a densely packed environment (such as brick, concrete or metal) with other wireless devices
operating can reduce the range of the signal to 20ft (6m) or less.
Ideally, you should mount the Chime Unit at an equal distance from the wireless mat and the wireless
doorbell, as close as possible to both.
2
Operation
Changing Batteries
Each of the three devices - the mat, the doorbell and the chime unit - are powered by batteries.
The mat and the doorbell each require a 12V A23 battery.
The chime unit requires 3 x AA cells (for a total of 4.5V).
Changing the Chime Tone
You can set the chime unit to emit one sound when the doorbell is pressed, and a different tone when
someone steps on the mat. This is useful if you use the mat and doorbell for different entrances - each
one can have it’s own sound!
DIP Switches and Jumper Settings
Jumpers control the wireless frequency which the doorbell and mat use to communicate with the chime
unit. For the system to function correctly, the mat, doorbell and chime unit must have the same
arrangement of jumpers. The default configuration is for all jumpers to be closed (that is, they have
the black clip attached).
The DIP switches change the tone which the Chime Unit will sound when the mat or doorbell is
triggered. The sounds that you can choose from, and the arrangement of switches to access them are:
ON
1
2
ON
1
ON
1
2
ON
1
2
None
Church Bells
2
ON
1
2
ON
1
2
Classic Doorbell
Loud Bell
ON
1
2
To access the battery compartment, jumper pins and DIP switches of the Wireless Mat control
unit:
ON
1
2
1.
Remove the Wireless Mat control module from the small pouch.
2.
Insert a screwdriver or similar into the locking tab on the top of the doorbell casing, and press
down to release the locking tab.
3.
The battery is located at the base of the control module. The jumper pins and the DIP switches
are located immediately above.
To access the battery, jumper pins and DIP switches
inside the doorbell:
1.
Insert a screwdriver or similar into the locking tab
on the top of the doorbell casing, and press down
to release the locking tab.
2.
Remove the doorbell from the rear plate. The
jumpers, DIP switches and battery are located
within.
Jumper Pins
Jumper Pins
DIP Switches
To access the jumper pins in the Chime Unit:
1.
Locate the jumper compartment cover on the rear of
the chime unit - it’s the small compartment above and
slightly left of the battery compartment.
2.
Using a small Phillips-head screwdriver, remove the
screw and lift the compartment cover. The jumpers are
located within.
3.
Note that there are no DIP switches in the chime unit.
3
Helpdesk / Technical Support Details
Swann Technical Support
All Countries E-mail: [email protected]
Telephone Helpdesk
USA toll free
1-800-627-2799
(Su, 2pm-10pm US PT)
(M-Th, 6am-10pm US PT)
(F 6am-2pm US PT)
USA Exchange & Repairs
1-800-627-2799 (Option 1)
(M-F, 9am-5pm US PT)
AUSTRALIA toll free
1300 138 324
(M 9am-5pm AUS ET)
(Tu-F 1am-5pm AUS ET)
(Sa 1am-9am AUS ET)
NEW ZEALAND toll free
0800 479 266
UK
0203 027 0979
See http://www.worldtimeserver.com for information on time zones and the
current time in Melbourne, Australia compared to your local time.
Warranty Information
Swann Communications USA Inc.
12636 Clark Street
Santa Fe Springs CA 90670
USA
Swann Communications
Unit 13, 331 Ingles Street,
Port Melbourne Vic 3207
Swann Communications LTD.
Stag Gates House
63/64 The Avenue
SO171XS
United Kingdom
Swann Communications warrants this product against defects in workmanship and
material for a period of one (1) year from it’s original purchase date. You must present your receipt as proof of date of purchase for warranty validation. Any unit which
proves defective during the stated period will be repaired without charge for parts or
labour or replaced at the sole discretion of Swann. The end user is responsible for all
freight charges incurred to send the product to Swann’s repair centres. The end user is
responsible for all shipping costs incurred when shipping from and to any country other
than the country of origin.
The warranty does not cover any incidental, accidental or consequential damages arising from the use of or the inability to use this product. Any costs associated with the
fitting or removal of this product by a tradesman or other person or any other costs
associated with its use are the responsibility of the end user. This warranty applies to
the original purchaser of the product only and is not transferable to any third party.
Unauthorized end user or third party modifications to any component or evidence of
misuse or abuse of the device will render all warranties void.
By law some countries do not allow limitations on certain exclusions in this warranty.
Where applicable by local laws, regulations and legal rights will take precedence.
4
Advanced
security made easy™
© Swann
Communications
2010