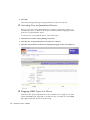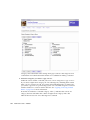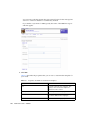
1
Sun Java™ System
Content Delivery Server 5.0
Administration Guide
2005Q4
Sun Microsystems, Inc.
www.sun.com
Part No.: 819-3209-10
2005Q4
Submit comments about this document at: http://docs.sun.com/app/docs/form/comments
Copyright © 2005 Sun Microsystems, Inc., 4150 Network Circle, Santa Clara, California 95054, U.S.A. All rights reserved.
Sun Microsystems, Inc. has intellectual property rights relating to technology embodied in the product that is described in this document. In
particular, and without limitation, these intellectual property rights may include one or more of the U.S. patents listed at
http://www.sun.com/patents and one or more additional patents or pending patent applications in the U.S. and in other countries.
U.S. Government Rights - Commercial software. Government users are subject to the Sun Microsystems, Inc. standard license agreement and
applicable provisions of the FAR and its supplements.
This distribution may include materials developed by third parties.
Sun, Sun Microsystems, the Sun logo, Java, and J2ME are trademarks or registered trademarks of Sun Microsystems, Inc. in the U.S. and other
countries.
UNIX is a registered trademark in the U.S. and other countries, exclusively licensed through X/Open Company, Ltd.
Netscape and Netscape Navigator is a trademark or registered trademark of Netscape Communications Corporation in the United States and
other countries.
Products covered by and information contained in this service manual are controlled by U.S. Export Control laws and may be subject to the
export or import laws in other countries. Nuclear, missile, chemical biological weapons or nuclear maritime end uses or end users, whether
direct or indirect, are strictly prohibited. Export or reexport to countries subject to U.S. embargo or to entities identified on U.S. export exclusion
lists, including, but not limited to, the denied persons and specially designated nationals lists is strictly prohibited.
DOCUMENTATION IS PROVIDED "AS IS" AND ALL EXPRESS OR IMPLIED CONDITIONS, REPRESENTATIONS AND WARRANTIES,
INCLUDING ANY IMPLIED WARRANTY OF MERCHANTABILITY, FITNESS FOR A PARTICULAR PURPOSE OR NON-INFRINGEMENT,
ARE DISCLAIMED, EXCEPT TO THE EXTENT THAT SUCH DISCLAIMERS ARE HELD TO BE LEGALLY INVALID.
Copyright © 2005 Sun Microsystems, Inc., 4150 Network Circle, Santa Clara, California 95054, Etats-Unis. Tous droits réservés.
Sun Microsystems, Inc. détient les droits de propriété intellectuels relatifs à la technologie incorporée dans le produit qui est décrit dans ce
document. En particulier, et ce sans limitation, ces droits de propriété intellectuelle peuvent inclure un ou plus des brevets américains listés à
l’adresse http://www.sun.com/patents et un ou les brevets supplémentaires ou les applications de brevet en attente aux Etats - Unis et
dans les autres pays.
Cette distribution peut comprendre des composants développés par des tierces parties.
Sun, Sun Microsystems, le logo Sun, Java, et J2ME sont des marques de fabrique ou des marques déposées de Sun Microsystems, Inc. aux EtatsUnis et dans d'autres pays.
UNIX est une marque déposée aux Etats-Unis et dans d’autres pays et licenciée exlusivement par X/Open Company, Ltd.
Netscape et Netscape Navigator est une marque de Netscape Communications Corporation aux Etats-Unis et dans d'autres pays.
Les produits qui font l'objet de ce manuel d'entretien et les informations qu'il contient sont regis par la legislation americaine en matiere de
controle des exportations et peuvent etre soumis au droit d'autres pays dans le domaine des exportations et importations. Les utilisations
finales, ou utilisateurs finaux, pour des armes nucleaires, des missiles, des armes biologiques et chimiques ou du nucleaire maritime,
directement ou indirectement, sont strictement interdites. Les exportations ou reexportations vers des pays sous embargo des Etats-Unis, ou
vers des entites figurant sur les listes d'exclusion d'exportation americaines, y compris, mais de maniere non exclusive, la liste de personnes qui
font objet d'un ordre de ne pas participer, d'une facon directe ou indirecte, aux exportations des produits ou des services qui sont regi par la
legislation americaine en matiere de controle des exportations et la liste de ressortissants specifiquement designes, sont rigoureusement
interdites.
LA DOCUMENTATION EST FOURNIE "EN L'ETAT" ET TOUTES AUTRES CONDITIONS, DECLARATIONS ET GARANTIES EXPRESSES
OU TACITES SONT FORMELLEMENT EXCLUES, DANS LA MESURE AUTORISEE PAR LA LOI APPLICABLE, Y COMPRIS NOTAMMENT
TOUTE GARANTIE IMPLICITE RELATIVE A LA QUALITE MARCHANDE, A L'APTITUDE A UNE UTILISATION PARTICULIERE OU A
L'ABSENCE DE CONTREFACON.
Contents
Preface
1.
xv
Introduction
1
Sun Java System Content Delivery Server
Catalog Manager
3
Catalog Manager Processes
4
Automated Content Validation
Content Management
Device Management
Plan Management
Fulfillment Manager
6
6
6
7
7
Vending Manager Processes
Content Management
Plan Management
9
9
9
Account Management
Reporting
5
5
Account Management
Vending Manager
1
9
10
Administration Consoles
Browser Requirements
10
10
iii
2.
Accessing the Administration Consoles
11
▼
Logging in to the Catalog Manager
11
▼
Logging in to the Vending Manager
12
Catalog Manager
Managing Content
13
13
Managing Content Categories
▼
Viewing Categories
14
▼
Adding a Category
16
▼
Editing a Category
17
▼
Deleting a Category
Managing Content Types
Content Submissions
Content Protection
14
18
19
19
20
Inapplicable Content
21
Using CDS DRM Agents and CDS OMA
Forward Lock 21
Using OMA DRM 1.0
23
OMA DRM 1.0 and Non-Compliant Devices
MIME Types for OMA DRM 1.0
24
Associating Content Types with DRMs
Enabling and Disabling a DRM
Pricing Content
25
26
26
Pricing Options
29
Changing the Pricing of Content
29
Disassociating Content From Pricing Options
iv
24
30
▼
Viewing Supported Content Types and MIME Types
▼
Viewing Properties for a Supported MIME Type
▼
Adding a Content Type
Administrator Guide • 2005Q4
32
32
31
▼
Editing a Content Type
▼
Creating a Pricing Option
▼
Editing a Pricing Option
37
▼
Deleting a Content Type
39
▼
Disabling a Pricing Option
▼
Registering a MIME Type
▼
Editing a MIME Type
▼
Deleting a MIME Type
34
35
39
40
41
43
Managing Submitted Content
44
▼
Viewing Submitted Content
44
▼
Viewing Submitted Editions
47
▼
Removing an Edition
48
▼
Searching for Content
49
▼
Changing the Status of Content
50
▼
Changing the Status of Editions
52
▼
Editing Content
52
Managing Published Content
55
▼
Viewing Published Content
▼
Removing Content
▼
Viewing Published Editions
▼
Copying or Moving Categories of Content
▼
Copying or Moving Content Items
56
57
57
62
Setting Custom Prices for Published Content
Managing Devices
58
66
68
Managing Device Libraries
69
▼
Viewing Device Libraries
▼
Viewing Properties for a Specific Device Library
▼
Adding a Device Library
70
70
71
Contents
v
▼
Editing a Device Library
▼
Deleting a Device Library
73
74
Managing Content Descriptor Templates
▼
Viewing Content Descriptor Templates
76
▼
Adding a Content Descriptor Template
77
▼
Editing a Content Descriptor Template
78
Managing Device Definitions
Viewing Devices
▼
78
78
▼
Adding a Device
▼
Specifying Device Capabilities
▼
Activating New or Quarantined Devices
▼
Mapping MIME Types to a Device
▼
Setting a Compatible Device
▼
Adding Supported Devices to Existing Content
▼
Editing a Device
▼
Setting the Default Device
▼
Deleting a Device
▼
Importing Devices
Exporting Devices
80
90
92
92
▼
Changing a Locale
Managing Accounts
88
91
Adding a New Locale
92
94
94
94
Viewing Accounts
95
Managing Vending Manager Accounts
vi
97
▼
Viewing Vending Manager Accounts
97
▼
Adding a Vending Manager Account
97
Administrator Guide • 2005Q4
85
86
91
▼
Deleting a Locale
83
89
Managing Server Locales
▼
74
89
▼
Editing a Vending Manager Account
▼
Deleting a Vending Manager Account
Managing Developer Accounts
99
100
101
▼
Viewing Developer Accounts
101
▼
Adding a Developer Account
101
▼
Editing a Developer Account
103
▼
Deleting a Developer Account
104
Managing Catalog Manager Administrator Accounts
104
▼
Viewing Catalog Manager Administrator Accounts
104
▼
Adding a Catalog Manager Administrator Account
105
▼
Editing a Catalog Manager Administrator Account
106
▼
Deleting a Catalog Manager Administrator Account
Managing Plans
106
107
Managing Vending Plans
107
▼
Viewing Vending Plans
107
▼
Adding a Vending Plan
108
▼
Editing a Vending Plan
110
▼
Viewing Vending Plan Members
▼
Adding a Member to a Vending Plan
▼
Removing a Member from a Vending Plan
▼
Setting the Default Vending Plan
▼
Deleting a Vending Plan
Managing Developer Plans
111
111
112
112
113
114
▼
Viewing Profiles
114
▼
Adding a Profile
115
▼
Editing a Profile
117
▼
Deleting a Profile
▼
Viewing Developer Plans
118
119
Contents
vii
▼
Adding a Developer Plan
119
▼
Editing a Developer Plan
120
▼
Viewing Developer Licensees
▼
Adding a Developer Licensee to a Developer Plan
▼
Removing a Developer Licensee from a Developer Plan
▼
Setting the Default Developer Plan
▼
Deleting a Developer Plan
Getting Background Job Status
▼
Getting Job Status
126
Examining Job Details
127
Clearing a Failed Job
3.
Vending Manager
Administrator Tasks
123
124
125
128
129
130
Managing Categories
130
▼
Adding a Category
130
▼
Editing a Category
132
▼
Deleting a Category
133
Managing Catalog Content
134
▼
Viewing Published Content
▼
Searching for Published Content
▼
Viewing the Properties of Published Content
▼
Viewing Editions of Published Content
Setting Stocking Options
134
Stocking Content Manually
▼
Stocking Multiple Content Items
Stopping a Stocking Job
Administrator Guide • 2005Q4
142
149
Clearing the Stocking Jobs list
▼
137
141
▼
Viewing Stocking Jobs
viii
121
150
150
144
139
137
122
123
Checking the Status of a Stocking Job
▼
Updating the Catalog for Stocked Content
Pricing for Content for a Locale
▼
Setting Local Pricing
152
153
153
Price Update Notification
▼
151
155
Changing the Price of Individual Content Items
Managing Stocked Content
156
Viewing Stocked Content
156
▼
Searching for Stocked Content
▼
Changing the Status of Stocked Content
▼
Unstocking Content
▼
Editing Stocked Content
▼
Editing External Content IDs
156
157
158
Updating Stocked Content
159
161
162
▼
Copying or Moving Categories of Content
▼
Copying or Moving Content Items
▼
Customizing Prices for Stocked Content
Managing Bundles
173
Bundle Pricing
174
156
▼
Creating a Bundle
▼
Viewing Bundle Information
▼
Deleting a Bundle
▼
Editing External Content IDs
▼
Changing the Status of a Bundle
▼
Editing a Bundle
163
167
170
175
179
181
181
182
183
▼
Managing Testing Content
▼
Stocking Testing Content
183
184
Creating Customized Marketing Campaigns
184
Contents
ix
▼
Creating a Campaign
▼
Specifying a Campaign Type
▼
Specifying Campaign Options and Target Audience
▼
Specifying a Campaign Message
▼
Specifying Content for the Campaign
▼
Specifying Campaign Pricing Characteristics
▼
Specifying Campaign Scheduling
▼
Viewing Campaign Details
▼
Editing a Campaign
193
▼
Testing a Campaign
193
185
Working with Subscriber Segments
185
187
188
189
190
191
194
▼
Displaying Subscriber Segments
▼
Creating a Subscriber Segment
▼
Editing a Subscriber Segment
Working with Campaign Templates
195
195
197
197
▼
Displaying Available Campaign Templates
▼
Creating a Campaign Template
▼
Editing a Campaign Template
197
197
201
Managing Vending Manager Administrator Accounts
x
201
▼
Viewing Vending Manager Administrator Accounts
201
▼
Adding a Vending Manager Administrator Account
202
▼
Editing a Vending Manager Administrator Account
204
▼
Deleting a Vending Manager Administrator Account
Customer Care Agent Tasks
▼
186
205
Viewing Stocked Content
206
▼
Setting the Display of Stocked Content for Subscribers
▼
Viewing the Properties of Stocked Content
▼
Viewing Editions of Stocked Content
Administrator Guide • 2005Q4
205
209
208
207
Managing Subscriber Accounts
209
▼
Viewing Subscriber Accounts
210
▼
Adding a Subscriber Account
210
▼
Editing a Subscriber Account
212
▼
Viewing a Subscriber’s Download History
▼
Managing Subscriber Licenses
▼
Extending Trial Usage
▼
Issuing a Refund
▼
Deleting a Subscriber Account
213
214
215
Managing Subscriber Plans
215
216
▼
Viewing Subscriber Plans
216
▼
Adding a Subscriber Plan
217
▼
Editing a Subscriber Plan
218
▼
Viewing Subscriber Plan Members
▼
Adding Members to a Subscriber Plan
▼
Removing Members from a Subscriber Plan
▼
Setting a Default Plan for New Subscribers
▼
Deleting a Subscriber Plan
219
220
Editing Your Administrator Account
▼
Viewing Reports
223
Sending MMS Messages
225
225
225
▼
Creating an MMS Message
▼
Editing an MMS Message
228
▼
Testing an MMS Message
229
226
Testing a New MMS Message
▼
221
223
Choosing MMS as the Content Delivery System
Displaying MMS Messages
221
222
▼
▼
213
229
Testing an Existing MMS Message
230
Contents
xi
A.
▼
Deleting an MMS Message
▼
Using the MMS Test Log
Device Capabilities
230
231
233
Descriptions of the Capabilities
System Capabilities
233
233
Mandatory Capabilities
234
Content Delivery Server-Specific Capabilities
Browser Capabilities
235
User Interface and Software Capabilities
Specifying a Capability Value
List
237
Integer
Boolean
237
237
Device Specifications
Nokia 6310i
237
238
User-Defined Devices
B.
Content Pricing
Pricing Scenarios
Glossary
Index
xii
247
255
Administrator Guide • 2005Q4
241
243
239
236
235
234
Tables
TABLE 2-1
DRM Types
20
TABLE 2-2
CDS DRM Agents
TABLE 2-3
OMA DRM 1.0 Formats
TABLE 2-4
Required MIME Types for OMA DRM 1.0
TABLE 2-5
DRM Options and Associated DRM Types and Content Types
TABLE 2-6
Content Delivery Server Pricing Models
TABLE 2-7
DRM Options and Pricing Models
TABLE 2-8
Content Status Types 44
TABLE 2-9
Content Status Types 50
TABLE 2-10
Content Delivery Server Pricing Models
TABLE 2-11
Content Attributes for Content Descriptor Templates
TABLE 2-12
Account Types
TABLE 2-13
Search and Display Operations
TABLE 2-14
Plan Types
TABLE 2-15
Background Job Indicators
TABLE 3-1
Content Status Symbols
TABLE 3-2
Properties Available for Notification Templates
TABLE A-1
Mandatory Capabilities
TABLE A-2
Content Delivery Server-Specific Capabilities
TABLE A-3
User Interface and Software Capabilities
21
23
24
25
27
28
54
75
95
96
107
125
136
198
234
234
235
xiii
TABLE A-4
Nokia 6310i Device Specifications
TABLE A-5
Device Specifications for a User-Defined Device 1
239
TABLE A-6
Device Specifications for a User-Defined Device 2
239
TABLE B-1
Associated DRMs, Content Types, and Pricing Models
TABLE B-2
Initial Pricing Set for Items 1 and 2
TABLE B-3
Resulting Pricing for Items 1 and 2 in Scenario 1
244
TABLE B-4
Resulting Pricing for Items 1 and 2 in Scenario 2
244
TABLE B-5
Resulting Pricing for Items 1 and 2 in Scenario 3
245
TABLE B-6
Resulting Pricing for Items 1 and 2 in Scenario 4
245
TABLE B-7
Resulting Pricing for Items 1 and 2 in Scenario 5
245
TABLE B-8
Resulting Pricing for Items 1 and 2 in Scenario 6
246
xiv
Administrator Guide • 2005Q4
238
244
241
Preface
This guide provides an overview of the Sun Java™ System Content Delivery Server.
It describes how to administer the Catalog Manager and Vending Manager
components. It describes the device capabilities and the content pricing models
supported by the Sun Java System Content Delivery Server.
Before You Read This Document
This guide is written for system administrators who are responsible for
administering the Catalog Manager or Vending Manager. It assumes some
knowledge of networking, database, and web technologies.
Note – Sun is not responsible for the availability of third-party web sites mentioned
in this document, and does not endorse and is not responsible or liable for any
content, advertising, products, or other materials available through such sites.
How This Document Is Organized
This guide is divided into the following chapters:
■
Chapter 1 introduces the Content Delivery Server and describes the content life
cycle as it relates to the Catalog Manager and Vending Manager. It describes the
automatic content validation process that the Content Delivery Server performs
on submitted content. It also describes how to log in to the Catalog Manager and
Vending Manager administration consoles.
xv
■
Chapter 2 describes how to administer the Catalog Manager. It provides
instructions on how to review, categorize, and publish content. It describes how
to define the mobile devices supported and their capabilities. It also describes
how to manage access for developers and Vending Managers.
■
Chapter 3 describes how to administer the Vending Manager. It describes how to
stock content, manage Administrator and Subscriber Accounts, and run system
reports.
■
Appendix A describes the capability matching process and defines the device
capabilities currently supported by the Content Delivery Server.
■
Appendix B provides a description of the digital rights management types
supported in the Content Delivery Server and provides a set of business scenarios
involving content pricing and availability in the Catalog and Vending Managers.
■
The Glossary defines the terms used in the context of this guide.
Typographic Conventions
The following tables define the typographical conventions and terms used
throughout this guide:
Typefacea
Meaning
Examples
AaBbCc123
The names of commands, files,
and directories; on-screen
computer output
Edit your .login file.
Use ls -a to list all files.
% You have mail.
AaBbCc123
What you type, when
contrasted with on-screen
computer output
% su
Password:
AaBbCc123
Book titles, new words or terms,
words to be emphasized
Read Chapter 6 in the User’s Guide.
These are called class options.
You must be super user to do this.
Command-line variable; replace
with a real name or value
To delete a file, type rm filename.
a The settings on your browser might differ from these settings.
xvi Administrator Guide • 2005Q4
Related Documentation
The Sun Java System Content Delivery Server manuals are available as Portable
Document Format (PDF) and Hypertext Markup Language (HTML) files. These files
are available in the Documentation subdirectory of the directory where the
Content Delivery Server is installed as well as online at http://docs.sun.com.
The following table summarizes the books included in the Content Delivery Server
documentation set.
Book Title
Description
Part Number
Sun Java System Content Delivery Server
Branding and Localization Guide
Describes how to customize the Subscriber Portal
and Developer Portal components of the Content
Delivery Server for the look and feel of your
enterprise. This guide also describes how to localize
the Content Delivery Server interfaces.
819-3210-10
Sun Java System Content Delivery Server
Capacity Planning Guide
Provides guidelines for determining what hardware
and software is needed to efficiently run the Content
Delivery Server.
819-3211-10
Sun Java System Content Delivery Server
Content Developer Guide
Describes how to submit content to the Content
Delivery Server.
819-3212-10
Sun Java System Content Delivery Server
Customization Guide
Describes the Content Delivery Server APIs that can
be used to create customized adapters for use in
integrating Content Delivery Server with the existing
infrastructure.
819-3213-10
Sun Java System Content Delivery Server
Error Messages
Describes error messages that are generated by the
Content Delivery Server and suggests actions to take
to resolve problems reported.
819-3214-10
Sun Java System Content Delivery Server
Installation Guide
Provides information about installing and
configuring the Content Delivery Server.
819-3215-10
Sun Java System Content Delivery Server
Integration Guide
Describes adapters for integrating the Content
Delivery Server with existing systems such as billing,
user data, WAP gateway, and push delivery. It also
describes the framework for creating device-specific
versions of the Subscriber Portal.
819-3216-10
Sun Java System Content Delivery Server
Migration Guide
Describes how to migrate from a previous version of
the Content Delivery Server to the current version.
819-3217-10
Sun Java System Content Delivery Server
System Management Guide
Provides information on running and maintaining
the Content Delivery Server.
819-3218-10
Preface
xvii
Accessing Sun Documentation Online
The Sun Product Documentation web site enables you to access Content Delivery
Server documentation on the web at http://docs.sun.com.
Sun Welcomes Your Comments
Sun is interested in improving its documentation and welcomes your comments and
suggestions.
To share your comments, go to http://docs.sun.com and click Send Comments.
In the online form, provide the document title and part number.
xviii
Administrator Guide • 2005Q4
CHAPTER
1
Introduction
This chapter provides an overview of the Sun Java™ System Content Delivery
Server. It describes the content lifecycle and provides an overview of the Catalog
Manager, Fulfillment Manager, and Vending Manager components. It describes the
automatic content validation process that takes place when content is submitted to
the Content Delivery Server.
This chapter also describes how to log in to the Catalog Manager and Vending
Manager administration components.
Sun Java System Content Delivery
Server
The Sun Java System Content Delivery Server is a high-performance software
solution that lets operators manage the complexity of delivering virtually any type
of wireless content over-the-air (OTA) to their subscribers. The Content Delivery
Server separates content aggregation, presentation, and delivery into two distinct
managers, the Catalog Manager and the Vending Manager. With these managers,
operators can centrally manage content, customize multiple subscriber interfaces,
and provide fast downloads.
The following figure provides a high-level overview of the Content Delivery Server.
1
Content
Providers
Java Applications
Music
Operator
Ringtones
Videos
Games
Wallpapers
Extensible...
Java System Content Delivery Server
Catalog Manager
Vending Manager
Vending Manager
Subscriber
Portal
Fulfillment
Manager
Subscriber
Portal
Fulfillment
Manager
Vending Manager
Subscriber
Portal
Fulfillment
Manager
Subscriber
1. The content provider creates an application and submits it to the Catalog
Manager using the web-based Developer Portal.
2. The Catalog Manager validates the content.
2
Administrator Guide • 2005Q4
3. The Catalog Manager administrator publishes the content, making it available to
the Vending Manager.
4. The Vending Manager administrator selects content published from the Catalog
Manager and stocks the content, making it available to subscribers.
Catalog Manager
The Catalog Manager is the content aggregator or warehouse. It manages all the
content coming from the developer community. After the content is authorized, the
Catalog Manager makes the content available to the Vending Managers. The
Vending Managers then sell the content to their unique subscriber community.
The Catalog Manager supports any type of content. The Catalog Manager
administrators define the type of content that they want to accept for their
enterprise.
The Catalog Manager administrator manages these functions:
■
■
■
■
■
Submitted and published content
Supported mobile devices
Content provider access and pricing
Vending Manager access and content
Administrator access
The following figure provides a high-level overview of the role of the Catalog
Manager in the lifecycle of an application. It also illustrates the Catalog Manager
processes.
Chapter 1
Introduction
3
1. Developers submit content to the Catalog Manager. The Catalog Manager runs an
automated validation process on the content to ensure there is no malicious
content and that the content matches the supported devices.
2. The content goes to the Submitted Content section of the Catalog Manager for
review by the administrator. The administrator reviews the content and, if
required, edits the content and modifies the pricing and category assignments.
The administrator can accept or reject the content.
3. The Catalog Manager publishes the content, which makes it available to the
Vending Manager.
Catalog Manager Processes
As shown in the previous figure, the Catalog Manager manages content submitted
by developers and controls which Vending Managers access which content. The
Catalog Manager is responsible for the following functions:
■
■
■
■
■
4
Automated Content Validation
Content Management
Device Management
Account Management
Plan Management
Administrator Guide • 2005Q4
Automated Content Validation
The Sun Java System Content Delivery Server performs an automated validation of
content. If an application fails at any stage of validation, it is not submitted to the
Catalog Manager.
Note – The default implementation of content validation performs automated
validation on MIDlets only. You can customize the validation process to validate
other types of content.
Content validation includes the following tasks:
■
API Filtering. The API Filter checks that the APIs used in the MIDlet application
are allowed. Developer Plans define the set of APIs allowed. When a developer
submits content, the API Filter checks the APIs used by the submitted application.
If any API is not allowed by the Developer Plans associated with the developer,
the content fails.
■
Instrumentation. The instrumentation process inserts code into the MIDlet
application to interpret the pricing model assigned. For example, the inserted
code interprets whether the application is priced per download, on first
download only, by subscription, or any combination of these.
The instrumented code maintains licensing information on the device and
periodically communicates with the Sun Java System Content Delivery Server to
verify that the subscriber is authorized to run the application. If a license has
expired, the subscriber is given the opportunity to renew the license.
■
Customized Steps. You can customize the validation process to meet the needs of
your organization. You can disable selected processes or add processes as needed.
For example, you might want to add a step to obfuscate an application.
Obfuscation makes the code difficult to understand when it is decompiled and
can reduce the size of the Java Archive (JAR) file.
Content Management
Once content passes the automated validation process, it goes to the submitted
content section for review by the Catalog Manager administrator. This section
describes the content and categories managed by the Catalog Manager:
Chapter 1
Introduction
5
■
Submitted Content. The administrator reviews submitted content and, if
required, edits the content and modifies the pricing and category assignments.
The administrator can accept or reject the content.
■
Published Content. After accepting the content, the administrator publishes the
content to make it available to the Vending Manager.
■
Categories. Content categories are central to content management. They are
logical containers or buckets that hold the content managed by the Sun Java
System Content Delivery Server. The Catalog Manager uses content categories to
control Vending Manager access.
See “Managing Content” on page 13 for more information.
Device Management
The Catalog Manager defines the devices and the device capabilities supported by
the Content Delivery Server. As a Catalog Manager administrator, you can add new
devices, delete devices no longer supported, and edit the characteristics and
capabilities of any device model. “Managing Devices” on page 68 describes how to
manage the devices supported for your network.
Account Management
Accounts define access to the Catalog Manager. The Catalog Manager has three
types of accounts:
■
Vending Manager. A Vending Manager Account is for a specifically-branded
Vending Manager that stocks content from the Catalog Manager. It is associated
with one or more Vending Plans.
■
Developer. Developer Accounts are for corporations or individuals that submit
content to the Catalog Manager. Developer Accounts are associated with one or
more Developer Plans.
■
Administrator. Administrator Accounts are for individuals who administer the
Catalog Manager.
See “Managing Accounts” on page 94 for more information.
Plan Management
The Catalog Manager uses the following plans to control content submission for
developers and content access for Vending Managers:
6
Administrator Guide • 2005Q4
■
Vending Plans. Vending Plans define the categories that a Vending Manager can
access. Vending Plans can contain a nested hierarchy of other Vending Plans. Each
Vending Manager Account is associated with one or more Vending Plans.
■
Developer Plans. Developer Plans define the set of APIs that developers can use
in applications that they submit. Profiles define the classes in a specific library
that developers can use. A Developer Plan contains one or more Profiles.
See “Managing Plans” on page 107 for more information.
Fulfillment Manager
The Fulfillment Manager controls and delivers content to subscribers through a
high-performance and cost-effective download architecture. The following figure
provides a high-level overview of the Fulfillment Manager processes.
No administration tasks are associated with the Fulfillment Manager.
Vending Manager
The Vending Manager handles selling and pricing content. Vending Managers are
generally configured to serve separate enterprises. A single Catalog Manager can
serve multiple Vending Managers.
The Vending Manager manages content published by the Catalog Manager. Content
stocked on the Vending Manager is available for subscribers to download.The
Vending Manager also controls subscriber access and purchase pricing, and provides
daily statistical reports on the Content Delivery Server.
Chapter 1
Introduction
7
The Vending Manager administrator manages the following functions:
■
■
■
■
■
Stocked content
Subscriber access and subscriber licenses
Purchase pricing and trial periods
Administrator access
Statistical reports
In addition to the Vending Manager administrator, the Content Delivery Server can
have Vending Manager Customer Care Agents. Customer Care Agents have limited
administrator privileges. A Customer Care Agent manages the following functions:
■
■
Subscriber access and subscriber licenses
Statistical reports
The following figure provides a high-level overview of the role of the Vending
Manager in the lifecycle of an application. It also illustrates the Vending Manager
processes.
1. The Catalog Manager publishes content and makes it available to the Vending
Manager.
2. The Vending Manager administrator accesses the content published by the
Catalog Manager. The administrator can change the subscriber pricing of the
content, assign it to a new category, and change the properties of the content.
3. The Vending Manager administrator stocks the content and makes it available to
the subscriber. The administrator uses Subscriber Plans to define the content
categories that subscribers can access.
8
Administrator Guide • 2005Q4
Vending Manager Processes
The previous figure illustrates the Vending Manager processes. The Vending
Manager is responsible for the following practices:
■
■
■
■
Content Management
Plan Management
Account Management
Reporting
Content Management
The Catalog Manager publishes content to the Vending Manager. The Vending
Manager is responsible for stocking this content to make it available to the
subscriber. The Vending Manager administrator can change the subscriber pricing of
the content, allow trial usage, and assign the content to a new category. The
administrator can also change the category assignments and add new categories to
control subscriber access to content. See “Managing Catalog Content” on page 134
for more information.
Plan Management
The Vending Manager uses Subscriber Plans to control subscriber access to content.
Each Subscriber Account is assigned to one or more Subscriber Plans. Subscriber
Plans determine what content a subscriber can access and download.
A Subscriber Plan is mapped to selected categories in the Vending Manager. The
content in the selected categories is made available to plan members. If content is in
a category that is not supported by the Subscriber Plan, the subscriber cannot access
it for download. See “Managing Subscriber Plans” on page 216 for more
information.
Account Management
Accounts define access to the Vending Manager. The Vending Manager is
responsible for two types of accounts:
■
Subscriber. Subscriber Accounts are for individuals who subscribe to a service
plan that provides them with the download service. Each Subscriber Account is
associated with one or more Subscriber Plans. See “Managing Subscriber
Accounts” on page 209 for more information.
■
Administrator. Administrator Accounts are for individuals who administer the
Vending Manager. There are two administrator roles: Administrator for
administrators with full privileges for administering the Vending Manager, and
Chapter 1
Introduction
9
Customer Care Agent for administrators with privileges for viewing content and
managing subscribers. Administrator Accounts can be disabled when you do not
want an individual accessing the Vending Manager. See “Managing Vending
Manager Administrator Accounts” on page 201 for more information.
Reporting
The Vending Manager provides daily statistical reports that enable you to view and
track application download information and usage statistics downloads. See
“Viewing Reports” on page 223 for more information.
Administration Consoles
Administer the Catalog Manager using the Catalog Manager administration console.
You administer the Vending Manager using the Vending Manager administration
console. These consoles are accessed through a web browser.
Developers can submit content to the Sun Java System Content Delivery Server
using the Developer Portal. Subscribers can download content from the Sun Java
System Content Delivery Server using the Subscriber Portal from either a PC or a
mobile device.
Note – The Developer Portal and Subscriber Portal are outside the scope of this
guide. See the Sun Java System Content Delivery Server Content Developer Guide for
information on submitting content through the Developer Portal.
Browser Requirements
The administration consoles can be run with:
■
■
■
Internet Explorer 6.0
Netscape NavigatorTM 7.0
Firefox 1.0
Note – Cookies must be enabled in the browser to use the administration consoles.
10
Administrator Guide • 2005Q4
Accessing the Administration Consoles
To access the Catalog Manager and Vending Manager administration consoles for
the first time, use the default login ID and password that were created when you
installed the Sun Java System Content Delivery Server. The default values for the
Login ID and Password are admin and admin.
Change the password after you initially log in (note that the password is case
sensitive). After you log in to the Catalog Manager and Vending Manager, you can
add additional accounts as needed. See “Adding a Catalog Manager Administrator
Account” on page 105 and “Adding a Vending Manager Administrator Account” on
page 202 for more information.
▼
Logging in to the Catalog Manager
To log in to the Catalog Manager, follow these steps:
1. Start the Catalog Manager.
For information on starting the Catalog Manager, see the Sun Java System Content
Delivery Server Installation Guide.
2. From a browser window, enter the following address:
http://localhost/admin/main
The Catalog Manager Log In page is displayed.
Chapter 1
Introduction
11
3. Enter your administrator name and password.
4. Click Log In.
▼
Logging in to the Vending Manager
1. Start the Vending Manager. For information on starting the Vending Manager, see
the Sun Java System Content Delivery Server Installation Guide.
2. From a browser window, enter http://localhost/vsadmin/main.
The Vending Manager Log In page is displayed.
3. Enter your administrator name and password.
4. Click Log In.
12
Administrator Guide • 2005Q4
CHAPTER
2
Catalog Manager
This chapter describes how to administer the Catalog Manager. Following are some
of the responsibilities of the Catalog Manager administrator:
■
Managing Content
■
■
■
■
■
Managing Devices
■
■
■
■
■
■
Adding new devices supported by your network
Deleting devices no longer supported
Adding, editing, and removing characteristics and capabilities of devices
Creating and managing device libraries
Creating and managing descriptor templates
Managing Accounts
■
■
■
■
Accepting or rejecting content submitted by developers
Creating and managing categories
Creating and managing MIME types
Publishing content
Creating and managing Vending Manager Accounts
Creating and managing Developer Accounts
Creating and managing Catalog Manager Administrator Accounts
Managing Plans
■
■
Creating and managing Vending Plans
Creating and managing and Developer Plans and Profiles
Managing Content
The Content section of the Catalog Manager displays content submitted by
developers and published. The Categories section enables you to create custom
catalogs of content. The MIME Types section enables you to define the types of
content that you want the Content Delivery Server to manage.
13
The following content management tasks are described in this section:
■
■
■
■
Managing
Managing
Managing
Managing
Content Categories
Content Types
Submitted Content
Published Content
When an operation is performed (editing, deleting, adding, and so on), the Content
Deliver Server puts a background job notification in the main menu bar. You can
click on the notice to see details of jobs that were or are running in the current
session. See “Getting Job Status” on page 126 for more information.
Managing Content Categories
Content categories are central to content management. They are logical containers
that hold the content that has been submitted to the Content Delivery Server. Your
first task as an administrator is to create appropriate categories for your enterprise.
As an administrator, you use content categories to control Vending Manager access
to content.
A default set of categories is provided with the Catalog Manager. You can edit or
delete these categories. You can also add categories and subcategories.
▼
Viewing Categories
1. From the Catalog Manager administration console, click Content on the main
menu bar.
The Content Database Management page is displayed.
2. Click the Categories tab.
The Categories page displays a list of the main categories defined.
14
Administrator Guide • 2005Q4
3. Click a category to view its subcategories.
The Categories page displays a list of the subcategories for the selected category. The
menu bar at the top of the page displays the hierarchy level of the selected category.
Chapter 2
Catalog Manager
15
To return to the list of main categories, click Home in the category navigation bar. To
display any level of your current category hierarchy, click the category name in the
category navigation bar.
4. Click the arrow keys to move a category up or down the list to change the display
order.
▼
Adding a Category
1. From the Categories page, navigate to the level to which you want to add the
category.
For example, if you want to add a game subcategory to the Entertainment category,
click Entertainment.
2. Click Add New Category.
The Edit Category page is displayed.
16
Administrator Guide • 2005Q4
3. Enter a name and short description of the category.
The name must be unique within the category. You cannot have two categories of the
same name under the same level of hierarchy.
4. Click Add Category.
The Add New Category confirmation page is displayed.
Note – You can set the maximum number of category levels that can be added in a
session in the CommonConsole.properties file in the
$CDS_HOME/deployment/deployment_name/conf/ directory. The default number
of levels of categories is set to 10. That is, top-level and sublevel categories can be
created but sub-sublevel categories cannot. If you modify the property, you must
restart the server to enact the change.
▼
Editing a Category
1. From the Categories page, navigate to the category you want to edit.
2. Click the Edit Category button
.
Chapter 2
Catalog Manager
17
The Edit Category page is displayed.
3. Modify the name or short description as needed, and click OK.
The category is updated in the database.
▼
Deleting a Category
1. From the Categories page, navigate to the category you want to delete.
You can only delete categories that do not contain content. You must either move or
delete content in an undesired category before you can delete that category.
2. When the category is displayed, click the Delete Category button
.
If the category contains content, the delete icon is not present.
3. Click OK.
The category and all its subcategories are deleted and removed from all plans and
content that they are associated with.
4. Click OK to close the confirmation page.
18
Administrator Guide • 2005Q4
Managing Content Types
The default content types supported by the Content Delivery Server are MIDlets,
ring tones, and images. You can define additional content types as needed. Each
content type must be associated with one or more MIME types.
MIME types specify the format of the content and enable information to be
exchanged between applications. The Content Delivery Server provides support for
a default set of common MIME types, each of which is associated with one of the
default content types. You can modify or delete these MIME types, register
additional MIME types, or associate the MIME type to a different content type as
needed.
In addition, each content type needs to be associated with digital rights management
(DRM). The following section discusses the DRM options supported in the Content
Delivery Server and their association with content types.
Content Submissions
The Catalog Manager administrator configures the Content Delivery Server to setup
either separate or single content type submission. By default, the Content Delivery
Server is configured for separate content type submissions. The two setups are
described as follows:
■
Separate content types - Each format of a content item is submitted individually.
Submitting content on a per format basis has the following benefits:
■
Individual formats of content can be submitted and managed individually
■
Defining the metadata and the pricing of content per format (for example, a
higher resolution image can be priced higher while a lower resolution image
can be priced lower)
■
Providing subscribers with the ability to choose from among compatible
content formats
For example, a content provider submits a screen saver image, Sunset, of content
type image and makes a separate submission of Sunset that has that content type
sms_picture. Each format of Sunset has its own metadata and price.
■
Single content types - Content is submitted under one content type. Once the
initial content is submitted, edition can be submitted for each format of the
content. Editions have the same pricing option and preview file, if any, as the
original content. Submitting content on a per content type basis has the following
benefits:
Chapter 2
Catalog Manager
19
■
Defining the metadata and price for all content formats is done once
■
Publishing and stocking for all content formats is done once
■
Choosing and delivering compatible content formats to subscribers is
automatically done for them
For example, a content provider has a ring tone, Melody, to submit. The content is
submitted with the ringtone content type. After the content is submitted, the
content provider then submits an edition of Melody that has a monophonic
format. The monophonic version of Melody is automatically assigned the
metadata and price of the initial submission.
Content Protection
Previously the Content Delivery Server offered digital rights protection of content
with Sun Java System Content Delivery Server Digital Rights Management (CDS
DRM) agents. The current version of the Content Delivery Server offers additional
DRM agents that can be applied to content, as described in TABLE 2-1.
TABLE 2-1
DRM Types
DRM Type
Description
CDS DRM Agents
Content is protected using the CDS DRM Agents available in this
release of the Content Delivery Server. CDS DRM can only be used
for MIDlets.
CDS OMA DRM
Forward Lock
Content is protected using the OMA DRM 1.0 Forward Lock format
only.
Open Mobile
Alliance (OMA)
DRM 1.0
Content is protected per the guidelines defined by OMA DRM 1.0.
OMA DRM 1.0 offers three types of protection formats: Forward
Lock, Combined Delivery, and Separate Delivery.
The system administrator determines which DRM types are available in the Content
Delivery Server at deployment time. The system administrator can choose one or
more of the following DRM options:
■
■
■
■
None (no DRM protection)
CDS DRM
CDS OMA DRM 1.0 Forward Lock
OMA DRM 1.0
To use OMA DRM 1.0 in the Content Delivery Server, you must have an OMA
DRM 1.0 provider. See the Sun Java System Content Delivery Server Installation
Guide for details.
20
Administrator Guide • 2005Q4
Inapplicable Content
Short Messaging Service (SMS) content types (monophonic ringtone, operator
logo, group logo, and sms picture) are supported in the Content Delivery
Server. Due to the delivery format for SMS content, DRM protection cannot be
applied. The No DRM option is associated by default for all SMS content types.
Remotely hosted copyrighted content also cannot have DRM associated with it.
Attempts to submit remotely hosted content items that have content types that are
associated with one of the DRM options (other than No DRM) fail.
See “Pricing Content” on page 26 for information on the pricing models that can be
used for these types of content.
Using CDS DRM Agents and CDS OMA
Forward Lock
The Content Delivery Server provides you with CDS DRM Agents and CDS OMA
DRM 1.0 Forward Lock. CDS DRM Agents can only be used for MIDlet content
types while CDS OMA DRM 1.0 Forward Lock can be used for any supported
content type in the Content Delivery Server. CDS DRM has several agents that verify
a subscriber’s license. TABLE 2-2 describes the CDS DRM Agents.
TABLE 2-2
CDS DRM Agents
Title
Description
Disconnected Time
Sensitive
Supports the download-based (free always, first download only, and
every download) pricing model and the time-based (recurring
subscription and per period) pricing model.
Disconnected Use
Sensitive
Supports the download-based (free always, first download only, and
every download) pricing model, the usage-based (trial and per use)
pricing model and the time-based (per period) pricing model.
Disconnected Use
and Time Sensitive
Supports all pricing models.
Chapter 2
Catalog Manager
21
TABLE 2-2
CDS DRM Agents (Continued)
Title
Description
Small Connected
Use and Time
Sensitive
Supports all pricing models.
Note: To prevent runtime errors, do not use this DRM agent with
applications that perform the following actions:
• Show an alert before calling the startApp method.
• List their Record Stores.
• Modify or remove the Content Delivery Server Record Store.
Midsize Connected
Use and Time
Sensitive
Supports all pricing models.
Note: To prevent runtime errors, do not use this DRM agent with
applications that perform the following actions:
• Show an alert before calling the startApp method.
• Modify or remove the Content Delivery Server Record Store.
Standard
Connected Use and
Time Sensitive
Supports all pricing models.
When no DRM agent is selected, only the download-based (free always, first download
only, and every download) pricing model is supported. No code is added.
Each agent handles license validation differently. For further details of these types,
see the Sun Java System Content Delivery Server Installation Guide.
CDS OMA DRM 1.0 Forward Lock is simply the OMA DRM 1.0 Forward Lock
format (no Combined or Separate Delivery) only and can be used with any content
type. It provides basic copy protection with the content and it does not allow content
to be forwarded to another device.
The default setting of Enabled is used for CDS DRM Agents and CDS OMA DRM 1.0
Forward Lock and when no DRM is selected. You can disable one or more of these
options or enable OMA DRM 1.0 with the cdsi db command, see the Sun Java
System Content Delivery Server Installation Guide for information on this command.
22
Administrator Guide • 2005Q4
Using OMA DRM 1.0
OMA DRM 1.0 offers three different formats for applying protection, as described in
TABLE 2-3.
TABLE 2-3
OMA DRM 1.0 Formats
DRM Type
Description
Forward Lock
Content is delivered with basic copy protection. Content cannot be
forwarded to another device.
Combined Delivery
Content is delivered together with basic copy protection and
additional usage rights are included. Content cannot be forwarded
to another device.
Separate Delivery
Encrypted content is delivered separately from the digital rights.
Content can be forwarded to another device.
For a thorough discussion of OMA DRM 1.0, go to
http://www.openmobilealliance.org/. The default setting for OMA DRM 1.0
in the Content Delivery Server is Disabled. You can enable this DRM after
deployment (see “Enabling and Disabling a DRM” on page 26 for more information).
If OMA DRM 1.0 is selected as an available DRM type, the system administrator can
set a preference for the type of rights delivery format, as follows:
■
Only combined delivery is used
■
Only separate deliver is used
■
Separate delivery is used whenever possible, otherwise, combined delivery is
used
The last preference option provides flexibility in providing digital rights protection
with content. Work with your system administrator to determine what rights
delivery preference to use, if desired. The preference is set in the configuration
properties file for the Content Delivery Server.
Content with Forward Lock or Combined Delivery is available to compliant devices
that support Combined Delivery. Compliant devices that do not support Separate
Delivery cannot receive content that has Separate Delivery unless the delivery
preferences are set to allow compliant devices to receive content using Separate
Delivery by using Combined Delivery.
The possible associations of DRM types to content types are listed in Appendix B.
See “Adding a Content Type” on page 32 for information on how to assign DRM
types to content types.
Chapter 2
Catalog Manager
23
OMA DRM 1.0 and Non-Compliant Devices
For devices that are not compliant with OMA DRM 1.0, the Catalog Manager
administrator can configure the Content Delivery Server with one of the following
options to deliver content with a free always, first download only, or every
download pricing model:
■
Deliver all content to non-compliant devices as unprotected original content (that
is, content as received from the content provider). The free always, first download
only, and every download pricing models are available to content under this
option.
■
Deliver only free content as unprotected original content to non-compliant
devices. Only the free always pricing model is available to content under this
option.
■
Make the content unavailable to non-compliant devices.
For a discussion of pricing models, see “Pricing Content” on page 26.
MIME Types for OMA DRM 1.0
To support the OMA DRM 1.0 formats, a device must support the MIME types listed
in TABLE 2-4.
TABLE 2-4
Required MIME Types for OMA DRM 1.0
OMA DRM 1.0 Format
Required MIME Type Support
Forward Lock
application/vnd.oma.drm.message
Combined Delivery
application/vnd.oma.drm.message
application/vnd.oma.drm.rights+xml
Separate Delivery
application/vnd.oma.drm.rights+xml
application/vnd.oma.drm.rights+wbxml
application/vnd.oma.drm.content
These MIME types are used to determine the OMA DRM 1.0 format supported on a
device. Support for these MIME types must be added to device profiles for devices
capable of receiving OMA DRM 1.0 protected content.
24
Administrator Guide • 2005Q4
Associating Content Types with DRMs
When assigning a DRM type to a content type, be aware that CDS DRM can only be
used with MIDlets. Be aware also that SMS content types and remotely hosted
copyrighted content cannot be assigned a DRM. Other than these restrictions, the
choice of no DRM, CDS OMA DRM 1.0 Forward Lock, and OMA DRM 1.0 can be
used with any content type.
This release of the Content Delivery Server contains the default associations of DRM
types to content types shown in TABLE 2-5.
TABLE 2-5
DRM Options and Associated DRM Types and Content Types
Default Setting for DRM
Type
DRM Type
Content Type
None (no DRM protection)
group logo
iappli
image
midlet
monophonic ringtone
operator logo
ringtone
sms picture
video
Enabled
CDS DRM
midlet
Enabled
CDS OMA DRM 1.0
Forward Lock
nonea
Enabled
OMA DRM 1.0:
Forward Lock
Combined Delivery
Separate Delivery
none
Disabled
a Although no content type is associated with CDS OMA DRM 1.0 Forward Lock by default, you can assign it to the content type of your choice through the Catalog Manager.
You can assign a DRM through the MIME types page in the Catalog Manager.
During deployment only one DRM can be associated with a particular content type.
That means that even though None, CDS OMA DRM 1.0 Forward Lock, and OMA
DRM 1.0 are all enabled, only one of them can be associated with the picture
content type. The Content Delivery Server provides six CDS DRM Agents. Only one
agent can be used per deployment. See Appendix B for a list of DRMs and content
type associations. See TABLE 2-2 for agent descriptions.
Chapter 2
Catalog Manager
25
You can assign the DRM options to the associated content types given in TABLE 2-5
but you are not restricted to those combinations, for instance, you can apply None to
all content types if you wish. For steps on how to assign a DRM, see “Adding a
Content Type” on page 32.
You can change the DRM option for a content type after deployment if needed. See
“Enabling and Disabling a DRM” on page 26 for more information.
Enabling and Disabling a DRM
You can change the DRM selection for a content type after the Content Delivery
Server is running by switching DRMs. You can also enable or disable DRMs after
deployment. For example, if None is assigned to content type, image, and you later
choose to use OMA DRM 1.0, you can enable that DRM during runtime and assign
that DRM to the image content type.
If you decide you no longer want to support the CDS DRM Agent, you can disable
that agent during runtime and assign another option, such as None to MIDlets
content. Use caution when disabling a DRM. Make sure that the DRM you are
disabling is not currently associated with a content type. Follow this sequence:
1. Change the DRM assigned to the content type.
2. Disable the old DRM.
Even though the DRM is disabled, content protected under that DRM can still exist
in the Content Delivery Server. Content submitted after a new DRM is assigned is
protected under the new DRM. Another factor affected by changing the DRM is the
pricing model associated with the content type. Changing DRMs can change which
pricing models are available. The following section discusses pricing content in more
detail.
Pricing Content
The Catalog Manager administrator must associate one or more pricing models for
each content type. A pricing model is the condition of purchase (per download, per
periods of uses, and per number of uses) associated with content. The pricing
models supported in the Content Delivery Server are defined in TABLE 2-10.
26
Administrator Guide • 2005Q4
TABLE 2-6
Content Delivery Server Pricing Models
Pricing Model
Definition
Free always
No charge for downloading content. Content can be downloaded
any number of times for however long content is available.
Trial
No charge for content on initial download. Subscriber must
purchase content for subsequent downloads.
First download only
Subscriber is charged for initial download of content. Subscriber
is not charged for subsequent downloads.
Every downloada
Subscriber is charged for each download of content.
Per use
Subscriber can download content once after purchase and is
charged for N uses.
Per period
Subscriber can download content once after purchase and is
charged for running content for the specified length of time, for
example, 3 days, 2 weeks, or 1 month.
Charge for N days, weeks, months, or years.
Per subscription
Subscriber can download content an unlimited number of times
during the subscription period and is automatically charged for
the next period of use when the current period expires.
Charge recurring fee daily, weekly, monthly, or yearly.
Per interval
Subscriber can download content an unlimited number of times
during the interval and is charged for running content from the
specified start date to the specified end date.
Charge for use starting mm/dd/yyyy through mm/dd/yyyy.
a A grace period can be applied for this pricing model by the Vending Manager administrator.
The former usage pricing model of X downloads in Y days is no longer available by
default. That pricing model is now used, optionally, as a grace period. A grace
period, if configured at deployment, can be attributed to the Every Download
pricing model (see TABLE 2-10). Upon purchase, a grace period allows additional
numbers of downloads or extends the download period. The system administrator
can set the properties pricing.model.recurringDownload.numberOfDays and
pricing.model.recurringDownload.numberOfTimes to enable a grace period.
See the Sun Java System Content Delivery Server Installation Guide for information on
setting a grace period.
Each DRM supports some set of the pricing models available in the Content Delivery
Server. The pricing models that you can assign to a content type are dependent on
the DRM that is associated with the content type.
Chapter 2
Catalog Manager
27
The Content Delivery Server supports the combinations of DRM options and pricing
models as shown in TABLE 2-7.
TABLE 2-7
DRM Options and Pricing Models
DRM Type
Pricing Model
None (no DRM protection)
Free always
First download only
Every download
CDS DRM Agents
Free always
Trial
First download only
Every download
Per use
Per period
Per subscription
CDS OMA DRM 1.0
Forward Lock
Free always
First download only
Every download
OMA DRM 1.0
Forward Lock, Combined, or
Separate Delivery
Free always
First download only
Every download
Per use
Per period
Per interval
You determine whether to enable all the available pricing models for a content type
or just a subset. For instance, if you associate a CDS DRM Agent with MIDlets, you
can elect to enable all the available pricing models possible with that DRM or a
subset, such as first download only, per use, and per period.
You make the DRM selections and the pricing model selections for a content type on
the MIME Types page in the Catalog Manager. All the pricing models supported by
the Content Delivery Server are listed. Non applicable pricing models are not
selectable. Therefore, if you selected None for the image content type, you cannot
select the Per Use pricing model because it is not available without DRM protection.
Previously, a content item, such as a MIDlet, could have a combination of pricing
models such as charge on first download only and charge per subscription. Such
combinations are not possible with the use of digital rights management. To simplify
management of content, all content items can have only one pricing model. For
preexisting content items that have a pricing model combination, the first download
only and recurring download models are no longer applicable.
28
Administrator Guide • 2005Q4
Pricing Options
At the same time that you select a pricing model, you have the option of creating
pricing options for it. Having predefined pricing options gives you more control
over the pricing of content and can make managing content easier. You can set up
predefined pricing options for content providers to choose from instead of having
them decide content pricing and usage terms.
Another benefit to creating predefined pricing options is that it enables you to apply
the same purchase criteria to all contents with the same content type. For instance,
all image content types can have the pricing option of $0.50 for every download. By
changing the purchase price of a pricing option, you change the purchase price for
all content using that pricing option at once. You always have the ability to edit a
pricing option or create custom prices for specific content items as needed.
A pricing option consists of a unique ID for the pricing option, an option name, and
the purchase characteristics of the content. The pricing option consists of the
following elements:
■
External options ID - A unique designation used by the billing system to identify
this pricing option.
■
Pricing option name - A name that identifies a specific pricing option.
■
Purchase price - A monetary value, which can be 0.
■
Specific pricing model - The condition for purchase. Only one model can be
applied.
A pricing option looks like this, for example:
1222 Ringtones-Jazz $.99 1st Download Only.
Pricing options cannot be deleted, you can only enable or disable them once they are
created. Regardless of whether a pricing option is enabled or disabled, you can still
edit the option through the Catalog Manager.
As the Catalog Manager administrator, you determine whether content providers are
required to use the pricing options you enable for the content type or create a
custom price based on the available pricing model. An option on the MIME types
page allows you to restrict the content type to the pricing options you enabled.
Content providers submitting content of that type must use the assigned pricing
option.
Changing the Pricing of Content
You can change the pricing of content in the following ways:
■
■
Edit the content type
Edit the properties of a submitted, published, or unpublished content item
Chapter 2
Catalog Manager
29
■
■
Edit the pricing option
Create a customized price for a published content item
Changing the pricing of content is dependent on several factors, such as the content
item status, the DRM assigned, and whether the content item is copyrighted.
For a copyrighted content item, the pricing options you can choose from are
dependent on the item’s content type preferences alone because copyrighted content
cannot have a DRM associated with it.
For a submitted content item that has a status of new, pending, or denied and is not
copyrighted, the pricing options you can choose from are dictated by the DRM
associated with the item’s content type.
For a content item with a status of published or testing, the pricing options you can
choose from depend on the following factors:
■
■
■
The content item’s current pricing option
The currently allowed pricing models for the item’s content type
The DRM used by the content item
For example, suppose SpruceDraw, a content item of type midlet is published. At
the time it is published, midlet has no DRM assigned and the pricing model of first
download only. Therefore, SpruceDraw has no DRM assigned to it and uses the first
download only pricing option. If no change occurs to the content type, the Edit
Content page for SpruceDraw allows you to choose either first download only or
every download.
Later, the content type preferences are edited so that midlet now uses OMA DRM
1.0 and the pricing models are changed to first download only and per interval.
Because SpruceDraw is already published, its DRM option does not change, it is still
None. While the available pricing models for midlet are now first download only,
every download, and per interval, the per interval model is not available to content
without DRM protection. So the Edit Content page for SpruceDraw does not list per
interval in the Catalog Price list. When editing SpruceDraw, you can choose from
first download only or every download.
If a content item uses OMA DRM 1.0 and one of the trials, per use, per period, or per
interval pricing models, the pricing model cannot be changed because the content
item would require reprotection, that is, a reapplication of the DRM. You can change
the purchase price of the item, but not whether it has or does not have trial usage or
its pricing model.
Disassociating Content From Pricing Options
Sometimes you or a Vending Manager administrator might want to change the
purchase price of a specific item of content. By doing so, you disassociate a content
item from its pricing option. For example, suppose an item of content named Roses
30
Administrator Guide • 2005Q4
has the content type picture and a pricing option of $0.75 for first download only.
You determine that Roses is priced at $.50 for first download only. When you edit
the content and change its price, Roses becomes disassociated from other content of
type picture with that pricing option. If the purchase price for picture content
changes later, Roses is unaffected by the change because it is no longer associated
with its original pricing option. Roses is considered to have a custom price. Any
future changes to the purchase price for Roses must be made explicitly to that
content item.
▼ Viewing Supported Content Types and MIME Types
1. From the Catalog Manager administration console, click Content on the main
menu bar.
2. Click the MIME Types tab.
The MIME Types page is displayed. This page shows the content types that are
defined and the MIME types that are currently associated with each content type.
The following information is displayed for each MIME type:
Chapter 2
Catalog Manager
31
■
■
■
Content Type - The type of content that the MIME type is associated with.
MIME Type - The string that identifies the MIME type.
File Extensions - The file extensions that are associated with the MIME type.
▼ Viewing Properties for a Supported MIME Type
1. Click the string in the MIME Type column on the MIME Types page.
The properties page for the MIME type is displayed.
In addition to providing the Content type, MIME type, and File Extensions, the
Properties page also provides a brief description of the MIME type.
2. Click OK to close the properties page.
▼ Adding a Content Type
1. From the Catalog Manager administration console, click Content on the main
menu bar.
2. Click the MIME Types tab.
3. Click New Content Type.
The New Content Type definition page is displayed.
32
Administrator Guide • 2005Q4
4. Enter the following information:
■
■
■
Content Type - Enter the name of the content type that you are adding.
Description - Enter a brief description of the content type.
Preview - Choose whether content type of this type can have a preview available
for subscribers.
If you disable the Preview feature, the Preview field is not displayed in the
Content Properties page.
Chapter 2
Catalog Manager
33
5. Select a DRM.
Administrators must know which DRMs are applicable for specific content types.
See Appendix B for a table of DRMs and associated pricing models. If an
inapplicable DRM is assigned, submission of content with that DRM fails.
For instance, if you erroneously assign CDS DRM Agent to the image content type
and a content provider attempts to submit a content item of type image, the content
provider receives an error message that the submission failed.
See “Content Protection” on page 20 for a discussion of DRMs.
6. Select the pricing models you want available for the content type.
All the pricing models appropriate for the selected DRM are available for selection.
See Appendix B for a table of DRMs and associated pricing models to be sure you
are selecting an appropriate pricing model for the DRM selected.
7. Click Done when finished.
8. Click OK to close the confirmation page.
▼ Editing a Content Type
1. From the Catalog Manager administration console, click Content on the main
menu bar.
2. Click the MIME Types tab.
The MIME Types page is displayed.
3. Click the content type that you want to edit.
The Content Type Preferences page is displayed.
Make the necessary changes to the content type and description:
■
Content Type - The name of the content type that you are adding.
■
Description - A brief description of the content type.
■
Preview - The preview options for this content type.
■
DRM Preference - The DRM associated with this content type. Changing the
DRM changes the pricing models that can be applied to content.
Only newly published content items have the new DRM and any new pricing
options. Existing content items still have the previously assigned DRM and
pricing option and are still available to subscribers.
■
Pricing Models - The pricing models available for this content type.
If you unselect a pricing model, existing content retains their pricing options. For
unpublished content items that used that pricing model, you must choose another
pricing model when editing that content item.
34
Administrator Guide • 2005Q4
■
Pricing Options - This section addresses two items:
■
Required Pricing Options - Enables or disables content providers to set their
own pricing options for content. This option is only available when a pricing
option is defined for the content type.
Clicking the option restricts content providers to selecting the predefined
pricing options you have enabled.
If you do not check Require Pricing, content providers can create custom
pricing for the content being submitted. Note that content submitted with
custom pricing must be manually edited.
■
Available Pricing Options - Enables or disables predefined pricing options for
this content type. You can also go to the Edit Pricing page from this section to
edit existing pricing options. Predefined pricing options are listed in the
Available Pricing Options section, which is only displayed when at least one
pricing option is defined for the content type. You can enable or disable one or
more options by checking or clearing the check box next to each Options ID.
If the list of pricing options requires no change or no pricing options exist yet,
you can go directly to Step 4.
To create predefined pricing options, see “Creating a Pricing Option” on
page 35 for instructions. For a discussion of pricing options and why you
would want to create them, see “Pricing Options” on page 29.
4. Click Done when finished.
All changes to the content type are saved.
▼ Creating a Pricing Option
1. From the Catalog Manager administration console, click Content on the main
menu bar.
2. Click the MIME Types tab.
3. Click a content type.
4. Click New Option.
The New Pricing Option page is displayed.
Chapter 2
Catalog Manager
35
The fields displayed are relevant to the selected pricing models on the previous
page. If no existing pricing options exist yet for the content type, the Available
Pricing Options section is not displayed.
5. Enter a unique Option ID.
The Option ID identifies this specific pricing option for this content type.
6. Enter a unique Pricing Option Name.
The Option Name is an identifier that external systems can use to identify the
pricing option for this content type.
36
Administrator Guide • 2005Q4
7. Select free usage or non-free usage or enter the number of free trials.
The fields shown are dependent on the pricing models you made available for this
content type when creating or editing the content type. TABLE 2-6 lists and defines the
supported pricing models.
8. Select the Charge option you want to apply to the content type.
Unless the pricing model is Always Free, enter a monetary value and enter values
for other fields in the option as required.
9. Click Save to add the new option to the list of available pricing options.
You can continue to add more options. Click Save after each option to add it to the
pricing options list. Click Reset to clear all the fields on the page.
Clicking OK before clicking Save cancels the pricing option creation and clears the
fields in the page. You are returned to the Content Type Preferences page.
Clicking Cancel terminates the operation and cancels any saved pricing options
10. Click OK.
You are returned to the Content Type Preferences page.
11. Click Done to complete the operation.
Clicking Cancel terminates the operation being performed on this page and returns
you to the MIME Types page.
▼ Editing a Pricing Option
You can edit attributes of an existing pricing option other than the pricing model. All
content items that use that pricing option are changed immediately both in the
Catalog and Vending Managers and on subscriber devices.
1. From the Catalog Manager administration console, click Content on the main
menu bar.
2. Click the MIME Types tab.
3. Click a content type.
The Content Type Preferences page is displayed.
4. In the Available Pricing Options section, click Edit for the option you want to
change.
The Content Type - Edit Pricing page is displayed.
Chapter 2
Catalog Manager
37
5. Change the following fields as needed:
■
Option ID - Unique identifier for this option. Values can consists of numbers,
characters, or a combination of both.
■
Option Name - Name of option. Values can consists of numbers, characters, or a
combination of both.
■
Purchase Price - Monetary value.
6. Click Save to save your changes.
The Content Type Preferences page is displayed. Changes to the pricing option are
immediate and content using that pricing option are updated in the Catalog
Manager. If auto-updating of prices is selected in the Vending Manager, any change
to the purchase price to both the pricing option itself and to content using the
pricing option is automatically updated in the Vending Manager. Otherwise, the
Vending Manager administrator must manually update the purchase price of the
pricing option and the affected content.
38
Administrator Guide • 2005Q4
7. Click Done.
8. Click OK to close the Confirmation page.
To create a custom price for an individual item of content, see “Editing Content” on
page 52. To create a custom price for multiple content items at once, see “Setting
Custom Prices for Published Content” on page 66.
▼ Deleting a Content Type
Deleting a content type removes that content type and its associated pricing options
from the current deployment of the Content Delivery Server. Use caution when
using this command because it cannot be undone.
Content types with associated MIME types cannot be deleted unless the associated
MIME types are deleted first (see “Deleting a MIME Type” on page 43). The only
supported content types that cannot be deleted at all are midlet and iappli.
Content types with existing pricing options cannot be deleted.
To delete a content type before a MIME type is associated, follow these steps:
1. From the Catalog Manager administration console, click Content on the main
menu bar.
2. Click the MIME Types tab.
The MIME Types page is displayed.
3. Click the content type that you want to delete.
The Content Types Preferences page is displayed.
4. Click Delete Content Type.
You are prompted to confirm the deletion.
5. Click OK.
A page is displayed indicating that the content type is deleted.
6. Click OK to close the Confirmation page.
▼ Disabling a Pricing Option
Pricing options cannot be deleted, but you can disable a content type’s pricing
option. When an option is disabled, content providers do not see that pricing option
in the list of predefined pricing options when submitting content of that content
type. Existing content in the catalog that use that pricing option are not affected.
Subscribers can see the existing content and can purchase the content with the
original price. You can enable the pricing option at a later time if desired.
Chapter 2
Catalog Manager
39
1. From the Catalog Manager administration console, click Content on the main
menu bar.
2. Click the MIME Types tab.
The MIME Types page is displayed.
3. Click the content type with the pricing option you want to disable.
The Content Type Preferences page is displayed.
4. In the Available Pricing Options section, clear the check box under the Enabled
column for the pricing option you want to disable.
You can clear more than one option at a time. If you clear all the available pricing
options, the Require Pricing Options feature is unchecked. Content providers are
forced to create custom prices for content being submitted.
An alternative to disabling a pricing option is to make it unavailable by editing the
content type and clearing one or more of the checked pricing models. Once the
pricing model is made unavailable, content providers do not see any predefined
pricing options that use that model when submitting content.
5. Click Done.
6. Click OK to close the Confirmation page.
▼ Registering a MIME Type
1. From the Catalog Manager administration console, click Content on the main
menu bar.
2. Click the MIME Types tab.
3. Click New MIME Type.
The MIME Type definition page is displayed.
40
Administrator Guide • 2005Q4
4. Enter the following information:
■
Content Type - Select from the list the type of content with which the MIME type
is associated.
■
MIME Type - Enter the string that identifies the MIME type, for example,
image/jpeg.
■
Description - Enter a brief description of the MIME type.
■
File Extensions - Enter the file extensions associated with the MIME type. Each
extension must be preceded by a period (.). To specify more than one extension,
separate each entry with a comma (,), for example, .jpg, .jpeg.
5. Click Save to save the MIME type.
A Confirmation page is displayed.
6. Click OK.
The list of MIME types is displayed.
▼ Editing a MIME Type
When associated with MIDlets, the following MIME types are required by the
Content Delivery Server and cannot be edited or deleted:
■
■
application/java-archive
text/vnd.sun.j2me.app-descriptor
When associated with iAppli applications, the following MIME types are required
by the Content Delivery Server and cannot be edited or deleted:
Chapter 2
Catalog Manager
41
■
■
application/java-archive
application/x-jam
When associated with other content types, the MIME types previously listed are
treated as any other MIME type.
To edit a MIME type, follow these steps:
1. From the Catalog Manager administration console, click Content on the main
menu bar.
2. Click the MIME Types tab.
The MIME Types page is displayed.
3. Click the MIME type that you want to edit.
The properties page for the MIME type is displayed.
4. Click Edit.
The MIME Types Definition page is displayed. An asterisk (*) beside a field indicates
that it is a required field.
5. Make the necessary changes.
6. Click Save.
A Confirmation page is displayed.
42
Administrator Guide • 2005Q4
7. Click OK.
The MIME Type Properties page is displayed.
8. Click OK to close the confirmation message.
▼ Deleting a MIME Type
You cannot delete a MIME type if content with that MIME type is submitted or if a
device references it. You cannot delete the following MIME types under the
conditions listed:
■
When associated with MIDlets, the following MIME types are required by the
Content Delivery Server and cannot be edited or deleted:
■
■
■
application/java-archive
text/vnd.sun.j2me.app-descriptor
When associated with iAppli applications, the following MIME types are required
by the Content Delivery Server and cannot be edited or deleted:
■
■
application/java-archive
application/x-jam
When associated with other content types, the MIME types previously listed are
treated as any other MIME type.
To delete a MIME type, follow these steps:
1. From the Catalog Manager administration console, click Content on the main
menu bar.
2. Click the MIME Types tab.
The MIME Types page is displayed.
3. Click the MIME type that you want to delete.
The MIME Types properties are displayed.
4. Click Delete.
You are prompted to confirm the deletion.
5. Click OK.
A page is displayed indicating that the MIME type is deleted.
6. Click OK.
The list of MIME types is displayed.
Chapter 2
Catalog Manager
43
Managing Submitted Content
Developers submit content in packages that consist of their created content and XML
files with support and description information. Developers submit content through
the Developer portal. When content is submitted to the Catalog Manager, the
Catalog Manager runs an automated validation process on the content to ensure
there is no malicious content and the content matches the Catalog Manager’s
supported devices.
The Submitted Content page displays all content submitted to the Catalog Manager.
This is the default page displayed when you first log in to the Catalog Manager.
Use the Submitted Content page to review content before you publish it to your
Vending Managers. The page provides the total number of submitted contents.
These items can consist of content undergoing review as well content whose status
has changed from Published to Pending, Testing, or Denied. The total number of
items in a particular state are displayed to the left of each state.
Submitted content can have one of the statuses described in TABLE 2-8.
TABLE 2-8
Content Status Types
State
Definition
New
Content that has successfully passed the Catalog Manager’s
automatic validation process, but requires your review and
approval before it is published.
Pending
Content that requires further review before being published.
Testing
Content currently undergoing or requiring testing prior to being
published.
Unpublished
Content that was published but is currently unavailable to the
Vending Manager and subscribers.
Denied
Content that is rejected, but is not deleted from the database yet.
Note – Testing content is available to Vending Managers for distribution to certain
subscribers. Testing content is available only to subscribers with testing roles
(assigned by the Vending Manager) and published content is available to regular
subscribers.
▼ Viewing Submitted Content
The Submitted Content page displays the total number of submitted content, so you
know what the manager’s workload is and what to expect. You can view a list of all
content in any state.
44
Administrator Guide • 2005Q4
To view submitted content by state, follow these steps:
1. From the Catalog Manager administration console, click Content on the main
menu bar.
The Content Database Management page is displayed for submitted content.
2. Click the title of the state that you want to view.
For example, click New to view all new content.
The Browse and Search Results page shows all submitted content for the selected
state.
Chapter 2
Catalog Manager
45
The following information is displayed for each item:
■
Title - The name of the content.
■
Developer - The name of the developer who submitted the content.
■
Categories - The categories in which the content is defined.
■
Catalog Price - The price specified by the Catalog Manager administrator. By
default, this price is the same as the cost until you change it.
If the content was submitted for free, the Catalog Price and Cost shows Charge
Free always.
■
Recommended Price - The price specified by the content provider.
■
Short Description - A short description of the content.
■
Type - The type of content. Select the type from the list of supported types.
3. Click Review Process on the navigation bar or click Content in the main menu bar
to display the list of submitted content.
To view all submitted content, use the search feature. Leave the search field blank
and select All Categories and Any Status. When searching for content, you can enter
a part of a content title or the full title in the Search text field. A list of all content
containing an exact match of the search entry is displayed.
To view the properties for an item, click the title of the item. The View Application
Properties page is displayed. If icons, documentation, or screen shots were
submitted with the content, you can click the View button for the item to see what
was submitted. If the item is a ring tone and a preview was submitted, you can click
the Listen button to hear the preview.
46
Administrator Guide • 2005Q4
▼ Viewing Submitted Editions
The Editions Database Management page displays the total number of submitted
editions, and, of that total, how many editions are in a New, Pending, or Denied
state.
1. From the Catalog Manager administration console, click Content on the main
menu bar.
The Content Database Management page is displayed for submitted content.
2. Click Edition Updates.
The Editions Database Management page is displayed.
3. Click the status that you want to view.
For example, click New Editions to view all new editions. The Browse and Search
Results page shows all submitted editions for the selected status.
Chapter 2
Catalog Manager
47
The following information is displayed for each edition:
■
■
■
■
■
■
Title - The name of the parent item with which the edition is associated.
Edition Name - The name of the edition.
Edition Description - A short description of the edition.
Version - The version of the edition.
Type - The type of content. Select the type from the list of supported types.
Developer - The name of the content provider who submitted the edition.
To view the properties for a specific edition, click the title of the desired edition.
The properties for the edition are displayed in the View Content Edition page.
Clicking OK displays the View Content Properties page for the original content.
Click Back on the View Content Properties page to return to the list of editions.
For content that is defined to have one or more supporting devices, you might need
to add additional supporting devices as they become available. To add devices to
existing content, see “Adding Supported Devices to Existing Content” on page 89.
To return to the main page for Submitted Content, click Review Process in the
navigation bar.
▼ Removing an Edition
You can remove an edition by making it unavailable for use by subscribers by
specifying that no devices are matched to the edition.
To make an edition unavailable to subscribers, follow these steps:
48
Administrator Guide • 2005Q4
1. From the Submitted Content page, select the status of the edition you want to
disable.
2. Click the title of the content.
3. Go to the Editions section of the View Content Properties for the selected content.
4. Click on the instrumented version of the edition.
5. Click Select on the Supported Devices field of the View Content Edition page.
6. Select the option, Force no devices to be selected for this edition (disable edition).
7. Click OK.
No devices are associated with the selected edition. The edition does not appear in
the subscriber’s content list but does appear in the list of submitted content. The
View Content Edition page for the edition shows no devices listed in the Capable
Device Models and Matched Devices fields.
▼ Searching for Content
To find a specific item of content, follow these steps:
1. From the Submitted Content (or the Published Content) tabbed page, enter either
the content name or a part of a content title or the full title in the Search text field.
You can refine your search by selecting the category and status that you want to
search from the drop-down lists. From the Published Content tabbed page, search in
categories for content.
Searching in Submitted Content shows matches for all submitted content, including
content that is published. Searching in Published Content shows matches only for
published content.
Note that you can only search for content and not editions.
2. Click Submit.
A list of all content containing an exact match of the search entry is displayed.
To show all submitted content, leave the search field blank and select All Categories
and Any Status. You can click on a highlighted column title to alphabetically sort the
content for that information type.
Chapter 2
Catalog Manager
49
▼ Changing the Status of Content
You can change that status of submitted content to one of the types described in
TABLE 2-9.
TABLE 2-9
Content Status Types
Status
Definition
Published
Content available for use by subscribers.
Pending
Content requiring further review before being made available.
Denied
Content rejected.
Deleted
Content removed.
Testing
Content available for use by testing subscribers.
When a content’s status is changed, a notification of the change in status is sent to
the content provider. For more information on notifications sent to the provider, see
the Sun Java System Content Delivery Server Content Developer Guide.
To change the status of content, follow these steps:
1. From the Catalog Manager administration console, click Content on the main
menu bar.
The Content Database Management page is displayed for submitted content.
2. Select Full Submissions.
3. Click the title of the status that contains the content with which you want to work.
For example, click New to work with new content.
4. Select the items that you want to change.
To select all the items in the list, select Select All from the Select on Page drop-down
list.
5. From the Change Status To drop-down list, select the status that you want to
assign to the item.
You can select either Published, Pending, Denied, Deleted, or Testing.
50
Administrator Guide • 2005Q4
6. Click GO.
The Confirm: Change Status page is displayed. You can enter a message to the
developer to provide an explanation of the status of the content.
7. Click OK in the Change Status page to confirm the status change.
The status of the content is updated. If there are content items remaining in the
selection list, clicking OK displays the Browse and Search Result with the list of
content items. Repeat Steps 4 through 6 until you have changed the status of all the
remaining content items.
When a status change is made to the last content items, the Browse and Search
Result page displays a confirmation message.
8. Click Done in the Browse and Search Result page to close the confirmation
message.
If the vending server is busy at the time you change the content status, instead of a
confirmation page, you are notified that the server is busy and the Vending Manager
did not receive the change yet.
If an error occurs when communicating with the Vending Manager, an error message
appears instead of the confirmation page.
You can also change the status of content from the Edit Application Properties page.
See “Editing Content” on page 52.
Chapter 2
Catalog Manager
51
▼ Changing the Status of Editions
1. From the Catalog Manager administration console, click Content on the main
menu bar.
The Content Database Management page is displayed for submitted content.
2. Select Edition Updates.
The Editions Database Management page is displayed.
3. Click the title of the status that contains the edition with which you want to work.
For example, click New Editions to work with new editions.
4. Select the editions that you want to change.
To select all the editions in the list, select Select All from the Select on Page dropdown list.
5. From the Change Status To drop-down list, select the status you want to assign to
the edition.
You can select either Published, Pending, Denied, Deleted, or Testing.
6. Click GO.
A confirmation page is displayed. You can enter a message to the developer to
provide an explanation of the edition status.
7. Click OK to confirm the status change.
▼ Editing Content
You can use the Edit Content page to change one or more properties of a content
item. For instance, you can change which categories contain the content item. You
can also use this page to change the pricing option for submitted content on an
individual basis if the pricing option currently set for the content is not desired
1. Locate the content on one of the status lists or perform a content search to locate
the content.
2. Click the title of the content that you want to edit.
The View Content Properties page is displayed. This information is taken from the
content originally submitted by the developer. All editable fields are displayed with
a white background. You can also view and edit the content developer’s profile by
clicking View Profile next to the developer’s name. See “Editing a Developer
Account” on page 103 for more information.
If icons, documentation, or screen shots were submitted with the content, you can
view the items by clicking on the View button for the item. If the item is a ring tone
and a preview was submitted, you can click the Listen button to hear the preview.
52
Administrator Guide • 2005Q4
3. Click Edit from the View Content Properties page.
The Edit Content page is displayed. An asterisk (*) beside a field indicates that it is a
required field.
This page allows you to edit the following fields:
Chapter 2
Catalog Manager
53
■
General Information - Contains content status and any additional messages
displayed to the content provider.
■
Pricing - Shows the price specified by the content provider.
The pricing options designated by the content provider are displayed just above
the Catalog Price section. You can change the purchase price in the Catalog Price
section. TABLE 2-10 describes the pricing options.
TABLE 2-10
Content Delivery Server Pricing Models
Pricing Model
Definition
Free always
No charge for downloading content. Content can be downloaded
any number of times for however long content is available.
Trial
No charge for content on initial download. Subscriber must
purchase content for subsequent downloads.
First download only
Subscriber is charged for initial download of content. Subscriber
is not charged for subsequent downloads.
Every downloada
Subscriber is charged for each download of content.
Per use
Subscriber can download content once after purchase and is
charged for N uses.
Per period
Subscriber can download content once after purchase and is
charged for running content for the specified length of time, for
example, 3 days, 2 weeks, or 1 month:
Charge for N days, weeks, months, or years.
Per subscription
Subscriber can download content an unlimited number of times
during the subscription period and is automatically charged for
the next period of use when the current period expires:
Charge recurring fee daily, weekly, monthly, or yearly.
Per interval
Subscriber can download content an unlimited number of times
during the interval and is charged for running content from the
specified start date to the specified end date.
Charge for use starting mm/dd/yyyy through mm/dd/yyyy.
a A grace period can be applied to this pricing model by the Vending Manager administrator.
■
Catalog Price - Shows the price charged to subscribers. You can change the price
in one of the following ways:
■
Select one of the available pricing options.
Once the content is published, the only attribute that can be changed later
without disassociating the content from its pricing option is the purchase price.
See “Changing the Pricing of Content” on page 29 for more information.
54
Administrator Guide • 2005Q4
■
Create a custom price for this content item.
Be aware that by creating a custom price, you are disassociating this item for
its pricing option. If you need to reapply a pricing option to the content later,
you can do so, however, you must select a pricing model that is compatible
with the pricing model used with the custom price.
For example, if the custom price used a download pricing model (for instance
$0.99 for every download), the pricing option you reapply must also use a
download pricing model (first download only, every download, or free
always).
■
Catalog Description - Provides the following information about the content:
■
■
■
■
■
■
■
■
■
■
■
Product name
Version
Short content description (maximum of 40 characters)
Long content description (maximum of 256 characters)
Device icon (GIF image 40 x 40 pixels)
Small icon (GIF image 40 x 40 pixels)
Large icon (GIF image 80 x 80 pixels)
Primary Screen Shot (JPEG images 200 pixels wide by 190 pixels high)
Secondary Screen shots (JPEG images 200 pixels wide by 190 pixels high)
User Guide (PDF file only)
Preview (must be of a format supported in the Content Delivery Server)
If other descriptive fields are present for the content, edit those fields as necessary.
■
Category Description - Assigns categories to the content.
4. Edit the content as needed, then click OK.
The View Content Properties page displays the updated content.
To set the pricing characteristics for multiple content items at once, see “Setting
Custom Prices for Published Content” on page 66.
Managing Published Content
The Published Content section displays all content that is published to the Vending
Managers. The administration tasks associated with Published Content are the same
as those associated with managing Submitted Content. This section describes
viewing published content and published editions. See “Managing Submitted
Content” on page 44 for information on searching for, changing the status of, and
editing content.
Chapter 2
Catalog Manager
55
Note – If you change a content’s status from Published to another state, the content
is removed from the Published Content list and is not included in the list of
published categories.
▼ Viewing Published Content
1. From the Catalog Manager administration console, click Content on the main
menu bar.
2. Click the Published Content tab.
The Published Content page displays a list of the main categories defined. A number
beside each category indicates the number of published content packages.
3. If a category has subcategories, click the category name to expand the category.
For categories without subcategories, click the name to display the list of content in
that category.
56
Administrator Guide • 2005Q4
To view the properties for an item, click the title of the item. The View Content
Properties page is displayed. If icons, documentation, or screen shots were
submitted with the content, click the View button for the item to see what was
submitted. If the item is a ring tone and a preview was submitted, you can click the
Listen button to hear the preview.
▼ Removing Content
You can either make content temporarily unavailable or remove content from the
catalog by changing its status.
1. From the Catalog Manager administration console, click Content on the main
menu bar.
2. Click the Published Content tab.
3. Navigate to the content you want to unpublish.
4. Select one or more content items.
5. Select Unpublished or Deleted from the Change Status To drop-down list.
■
Unpublished - Keeps the content item in the Catalog Manager database but
makes it unavailable to the Vending Manager and the subscriber. You can
republish the content item when desired. You can keep the pricing option the
same when you republish or change the pricing option of unpublished content if
desired, in effect, making it new content and then you can republish it.
Note that for unpublished content using OMA DRM 1.0, you can change the
purchase price but not the pricing model. You can change the pricing option of
content with any other DRM type, including No DRM.
■
Deleted - Removes the content item. The content item must be resubmitted by the
content provider to make it available to subscribers again. You delete a content
item when you no longer want to offer that content.
You might want to provide an explanation for removing the content item in the
message field.
6. Click OK.
▼ Viewing Published Editions
1. From the Catalog Manager administration console, click Content on the main
menu bar.
2. Click the Published Content tab.
Chapter 2
Catalog Manager
57
3. Navigate to the item that you want to work with.
You can use the search feature or view the list of content for the category that
contains the item.
You can sort the display of the content items by clicking on a highlighted column
title on the Browse and Search Result page.
4. Click the title of the item.
The View Content Properties page is displayed. The list of editions available are
shown in the Editions section at the end of the page.
5. Click the name of the edition that you want to view.
The edition properties are displayed in the View Content Edition page. Click OK to
return to the View Content Properties page of the original content. Click an
instrumented edition version and you can select supported devices for it. See
“Adding Supported Devices to Existing Content” on page 89 for details.
Removing a Published Edition
You can make a published edition unavailable to subscribers by disabling the
edition, that is, by specifying that no devices are matched to the edition. To disable
an edition, click on the instrumented edition you want to disable in the Editions
section of the View Content Properties page and follow steps 5-7 in “Removing an
Edition” on page 48.
▼ Copying or Moving Categories of Content
You can move or copy whole categories of content at a single time in the Catalog
Manager saving you considerable time and effort. By copying or moving one or
more categories, you are copying or moving all the content items within those
categories.
Note – When scheduling a copy or move operation, be aware that if large numbers
of categories and content are being copied or moved, the operation can take some
time to complete.
You can also selectively move or copy individual items of content, see “Copying or
Moving Content Items” on page 62 for more information.
1. From the Catalog Manager administration console, click Content on the main
menu bar.
2. Click the Published Content tab.
58
Administrator Guide • 2005Q4
3. Click Copy/Move Content.
The Copy/Move Content page is displayed. The default selection is
Category/Categories.
Category and content item names change from gray to black as the categories and
content items are loaded. Wait until all items are loaded before making a selection.
4. Select the categories you want to copy or move.
Under the source column on the left, select one or more categories to copy or move.
If you select a higher level category, all of its subcategories, including their content
items, are also copied or moved. You cannot select individual items of content. Also,
Chapter 2
Catalog Manager
59
you cannot copy or move a parent category into one of its child categories. You must
click the check box to select an item in the tree. See “Copying or Moving Content
Items” on page 62 for more information.
Note that an X indicates a selected category. A dot (.) indicates that at least one
category has been selected in the column. A higher level category with a dot
indicates that at least one of its subcategories is selected.
5. Select one or more destination categories.
Under the destination column on the right, select one or more higher level
categories. The destination category you select cannot be a terminal category. A
terminal category is the lowest level category and contains only content items. You
must click the check box to select an item in the tree.
60
Administrator Guide • 2005Q4
6. Click Copy or Move.
The Copy and Move buttons only become active when at least one selection is made
in both the source and destination trees. If one category tree does not have a
selection, for instance, if you clear all selections in a tree, the buttons are inactive.
7. Confirm or cancel the operation.
If copied, categories and their associated content are duplicated under each
destination category. If moved, categories and their content are removed from the
original location and placed in the destination category. If more than one destination
category is selected, categories and content are duplicated under each destination
category.
Chapter 2
Catalog Manager
61
The preceding figure shows the results of moving the Mobile Mail, Investment, and
Accounting categories to the Business and Professional category. All content items in
Mobile Mail, Investment, and Accounting were also moved.
If you copy or move a category to another category and decide you no longer want
that category in its new location, you can take one of the following actions:
62
■
If the category is empty, that is, it contains no content items or subcategories, you
can delete the category from its new location. See “Deleting a Category” on
page 18 for more information.
■
If the category is not empty, you must remove its subcategories and content items
by moving or copying them to another location before you can delete the
category.
Administrator Guide • 2005Q4
▼ Copying or Moving Content Items
By selecting Individual items on the Copy/Move Content page, you can select
specific content items to copy or move to other categories.
Note – When scheduling a copy or move operation, be aware that if large numbers
of categories and content are being copied or moved, the operation can take some
time to complete.
1. From the Catalog Manager administration console, click Content on the main
menu bar.
2. Click the Published Content tab.
3. Click Copy/Move Content.
The Copy/Move Content page is displayed.
Chapter 2
Catalog Manager
63
Category and content item names change from gray to black as the categories and
content items are loaded. Wait until all items are loaded before making a selection.
4. Click Individual Items.
5. Select the content items in one or more categories that you want to copy or move.
Under the source column on the left, you can select one or more content items to
copy or move but you cannot select categories. You can expand a category to see its
content items. You must click the check box to select an item in the tree. See
“Copying or Moving Categories of Content” on page 58 for more information.
Note that an X indicates a selected content item. A dot (.) indicates that at least one
content item has been selected in the column. A category with a dot indicates that at
least one of its content items is selected.
64
Administrator Guide • 2005Q4
6. Select one or more destination categories.
Under the source column on the right, the destination categories you select must be
terminal categories. A terminal category is the lowest level category and contains
only content items. You must click the check box to select an item in the tree.
7. Click Copy or Move.
The Copy and Move buttons only become active when at least one selection is made
in both the source and destination trees. If one category tree does not have a
selection, for instance, if you clear all selections in a tree, the buttons are inactive.
8. Confirm or cancel the operation.
If copied, content is duplicated under each destination category. If moved, content is
removed from the original location and placed in the destination category. If more
than one destination category is selected, content is duplicated under each category.
Chapter 2
Catalog Manager
65
The preceding figure shows the results of copying the content items, N_Ringer and
Splash Screen to the Personal Productivity category. The content items are still
available in the Mobile Mail category.
If you copy a content item to a category and decide that you do not want the item in
that category, you can edit the content to change the category assignment. See
“Editing Content” on page 52 for information.
Setting Custom Prices for Published Content
Another way for you to manage content pricing is to set the price for multiple
content items at once. You can change the purchase price for content in one ore more
categories. Note that while you can change the purchase price, you cannot change
the pricing model.
66
Administrator Guide • 2005Q4
For instance, if you select the Featured and Entertainment categories, you can
change the purchase price for all the content in those categories or specific content
items in those categories. You set a specific purchase price, apply a percentage
increase or decrease, or increase or decrease the price by a set amount.
Note – Setting custom prices has no Undo operation. Before making the change,
carefully review all settings to ensure that the correct changes will be applied only to
the intended contents. Changing the purchase price in this way, disassociates all
affected content items from their pricing options and they are considered to have
custom pricing.
Pricing for content published as Free cannot be changed using the Customize Prices
feature.
Creating Custom Prices for Content per Category
1. Click Content from the Catalog Manager’s main menu.
2. Click the Published Content tab.
3. Click Customize Prices.
The Customize Prices page is displayed. An asterisk (*) beside a field indicates that
it is a required field.
Chapter 2
Catalog Manager
67
4. Select the category or subcategories of content or specific contents.
To change the purchase price of all the contents of a category, simply click the
category itself.
To change the purchase price of specific content items in a category, navigate
through the category to select individual content items.
68
Administrator Guide • 2005Q4
5. Change the purchase price in one of the following ways:
■
■
■
Enter a new purchase price.
Increase or decrease the purchase amount by N per cent.
Increase or decrease the purchase price by a dollar amount.
The price is applied to all selected content regardless of their pricing models. For
example, if SpruceDraw is $5.00 per monthly subscription and Launch Screen is
$0.50 per download, increasing the purchase price by 10% results in SpruceDraw
being offered at $5.50 per monthly subscriptions and Launch Screen at $0.55 per
download.
6. Click Customize Price.
7. Click OK in the confirmation dialog box to establish the change.
This procedure has no Undo operation. Carefully check that your pricing changes
will affect only the desired contents before you click OK. Otherwise, you must
manually reset the pricing for erroneously affected content.
Managing Devices
The Catalog Manager manages the devices supported by the Content Delivery
Server. A device in the Catalog Manager refers to a specific mobile device model.
Device capabilities are the criteria that the Catalog Manager uses to define which
devices can download specific content. When a developer submits content to the
Content Delivery Server, device capabilities are matched to the content submitted.
Note – When capability matching is run for all content for a device and one or more
items of content fail verification, the process completes but the Background Jobs list
shows a failed job. You cannot retry this job. The failed content items must be
corrected. Another capability matching process then starts for those items. You can
check the Background Job Detail page for the failed job to see which content failed
verification. See “Getting Job Status” on page 126 for information on background
jobs.
Device capabilities include the following:
Chapter 2
Catalog Manager
69
■
System capabilities - Capabilities primarily used by the Content Delivery Server.
They define capabilities that a device must have to perform Content Delivery
Server functionality. For instance, system capabilities define whether a device
supports Short Message Service (SMS) or Wireless Application Protocol (WAP)
Push.
■
Mandatory capabilities - Capabilities that must be defined for a device to accept
MIDlet applications.
■
Content Delivery Server-specific capabilities - Non-industry standard
capabilities that are specific to the server’s functionality. For example, the
Supported Libraries capability enables you to set the libraries that the device
supports. Libraries define the API sets that are supported. The Supported
Libraries capability enables the Content Delivery Server to match an application
to a device that supports the libraries used by the MIDlet.
■
User interface and software capabilities - Capabilities that specify the
characteristics of the device. The Content Delivery Server uses these capabilities
to refine the capability matching process.
To determine which devices can access the submitted content, the Content Delivery
Server performs a capability match comparing the capabilities of the devices defined
in the Catalog Manager with the capabilities required by the content submitted by
the developer. Only subscribers with devices capabilities that match the capabilities
required by the content can access the content.
Define the devices that you want to support before you make the Content Delivery
Server available to developers and subscribers.
The following device management tasks are described in this section:
■
■
■
■
Managing
Managing
Managing
Managing
Device Libraries
Content Descriptor Templates
Device Definitions
Server Locales
When an operation is performed (editing, deleting, adding, and so on), the Content
Deliver Server puts a background job notification in the main menu bar. You can
click on the notice to see details of jobs that were or are running in this session. See
“Getting Job Status” on page 126 for more information.
Managing Device Libraries
Device libraries identify the APIs that are supported by a device. Libraries are also
used in Developer Profiles to define the set of APIs that developers can use in the
applications that they submit. See “Managing Developer Plans” on page 114 for
information on plans and profiles.
70
Administrator Guide • 2005Q4
Device libraries are based on the Java class library. When you define a device library
to the Content Delivery Server, you submit the JAR or ZIP file that contains the APIs
that you want to support.
▼ Viewing Device Libraries
1. From the Catalog Manager administration console, click Devices on the main
menu bar.
2. Click the Libraries tab.
The Device Libraries page is displayed, showing the submitted libraries.
The following information is displayed for each library:
■
■
■
Library Name - The name of the library.
Description - A brief description of the library and its contents.
Last Modified Date - The last date that changes were made to the library.
▼ Viewing Properties for a Specific Device Library
To view the properties for a specific device library, follow these steps:
1. Click the library name.
The properties page shows the name, description, date last modified, and the APIs
allowed for devices and profiles that include the library.
Chapter 2
Catalog Manager
71
2. When you are done viewing the properties, click OK to close the properties page.
▼ Adding a Device Library
1. From the Catalog Manager administration console, click Devices on the main
menu bar.
2. Click the Libraries tab.
The list of libraries is displayed.
3. Click New Library.
The Library Definition page is displayed.
72
Administrator Guide • 2005Q4
4. Enter the following information:
■
Name - A name for the new library.
■
Description - A brief description of the library and its contents.
■
Select JAR File - The path of the class library that you want to submit or click
Browse to locate file. The library file can be either a JAR file or a ZIP file.
5. Click Next.
The second page of the library definition process is displayed.
Chapter 2
Catalog Manager
73
6. Select the items in the tree that you want to include in the library.
Clear any items that you do not want to include.
To select individual methods, expand the package by clicking the plus sign (+) next
to the check box for the package.
7. Click OK to save the new library.
A confirmation page is displayed.
8. Click OK to return to the list of libraries.
▼ Editing a Device Library
1. From the Catalog Manager administration console, click Devices on the main
menu bar.
2. Click the Libraries tab.
The Device Libraries page is displayed.
3. Click the name of the library that you want to edit.
The Library Definition page is displayed.
4. Click Edit.
74
Administrator Guide • 2005Q4
5. Make the necessary changes.
You can edit only the name and description of a library that is in use. A library is in
use if it is assigned to a device or a Developer Profile.
6. Click OK.
A confirmation page is displayed.
7. Click OK to display the library properties.
▼ Deleting a Device Library
You cannot delete a library that is in use. A library is in use if it has been assigned to
a device or a Developer Profile.
To delete a device library, follow these steps:
1. From the Catalog Manager administration console, click Devices on the main
menu bar.
2. Click the Libraries tab.
The Device Libraries page is displayed.
3. Click the name of the library that you want to delete.
The Library Definition page is displayed.
4. Click Delete.
You are prompted to confirm the deletion of the library.
5. Click OK.
The library is deleted.
6. Click OK to display the list of libraries.
Managing Content Descriptor Templates
Content descriptor templates are used to describe content other than MIDlets (such
as ring tones, pictures, and Symbian applications) similar to the way Java
Application Descriptor (JAD) files are used to describe MIDlets. The templates are
also used to describe the download mechanism used by a device.
Content descriptor templates are required for two step downloading of content to a
device. You specify one step or two step downloading when you assign capabilities
to a device. See “Specifying Device Capabilities” on page 83 for additional
information.
Chapter 2
Catalog Manager
75
The Content Delivery Server provides descriptor templates for Content Object
Descriptor (COD) and General Content Descriptor (GCD). You can define other
templates as needed.
TABLE 2-11 shows the Content Delivery Server content attributes that you can use to
customize the template for your needs.
TABLE 2-11
Content Attributes for Content Descriptor Templates
Attribute1
Definition
Name
The name of the content.
Version
The version of the content.
Size
The size of the content.
NOTE: This attribute is required.
Vendor
The name of the content developer who submitted the content.
ShortDescription
A brief description of the content.
Description
A detailed description of the content.
DownloadURL
The URL from which the content can be downloaded.
NOTE: This attribute is required.
BillingURL
The URL contacted to verify licenses.
ConfirmURL
The URL to which download confirmation or error messages are
sent.
ID
The ID assigned to the content.
BinaryExtension
The extension of the file that contains the content.
BinaryMimeType
The MIME type associated with the content.
NOTE: This attribute is required.
ContentType
The type of content submitted.
ModifiedDate
The date the content was last changed.
1All property names must be preceded by /ContentItem/. For example, /ContentItem/Name.
The following code shows a sample content descriptor template.
CODE EXAMPLE 2-1
Sample Content Descriptor Template
<?xml version="1.0"?>
<xsl:stylesheet xmlns:xsl="http://www.w3.org/1999/XSL/Transform"
version="1.0">
<xsl:output method="text" indent="yes"/>
<xsl:template match="/">
Content-Type: <xsl:value-of select=
"/ContentItem/BinaryMimeType"/>
76
Administrator Guide • 2005Q4
CODE EXAMPLE 2-1
Sample Content Descriptor Template (Continued)
Content-Name: <xsl:value-of select="/ContentItem/Name"/>
Content-Version: <xsl:value-of select="/ContentItem/Version"/>
Content-Vendor: <xsl:value-of select="/ContentItem/Vendor"/>
Content-URL: <xsl:value-of select="/ContentItem/DownloadURL"/>
Content-Size: <xsl:value-of select="/ContentItem/Size"/>
Confirm-URL: <xsl:value-of select="/ContentItem/ConfirmURL"/>
</xsl:template>
</xsl:stylesheet>
▼ Viewing Content Descriptor Templates
1. From the Catalog Manager administration console, click Devices on the main
menu bar.
2. Click the Templates tab.
The Content Descriptor Templates page is displayed, showing the currently defined
templates.
The following information is displayed for each template:
■
Template Name - The name of the template.
■
MIME Type - The MIME type associated with the template.
■
Extension - The extension of the files that use the template. The extension must be
preceded by a period (.). For example, .cod. This extension is also used as the
name of the template. For example, cod.xsl.
To view the properties for a specific template, click the template name. The
properties page shows the name, MIME type, extension, and XSL description of the
template.
Chapter 2
Catalog Manager
77
▼ Adding a Content Descriptor Template
1. From the Catalog Manager administration console, click Devices on the main
menu bar.
2. Click the Templates tab to display the list of templates.
3. Click New Template.
The Content Descriptor Template Definition page is displayed.
4. Enter the following information:
■
Template Name - A name for the new library.
■
MIME Type - The string to define the MIME type.
■
Extension - The extension that is associated with the MIME type.
■
Descriptor file - The content descriptor template using XSL. You can enter the
statements directly in the edit field or paste an existing template and make
modifications to it. See TABLE 2-11 for information on the attributes that you can
use in the template. Information about XSL is available from the Internet. Click on
one of the default templates to see an example.
5. Click Save to save the new template.
A confirmation page is displayed.
6. Click OK to display the list of templates.
78
Administrator Guide • 2005Q4
▼ Editing a Content Descriptor Template
1. From the Catalog Manager administration console, click Devices on the main
menu bar.
2. Click the Templates tab.
The list of templates is displayed.
3. Click the name of the template that you want to edit.
The template properties are displayed.
4. Click Edit.
5. Make the necessary changes to the template properties.
The fields are the same as those described in “Adding a Content Descriptor
Template” on page 77.
6. Click Save.
A confirmation page is displayed.
7. Click OK to display the template properties.
Managing Device Definitions
Device definitions identify the devices supported by the Content Delivery Server
and describe the capabilities of the device. You can add devices as needed and
remove devices that are not being used.
Viewing Devices
To view the devices defined for your enterprise, click Devices from the main menu
bar. The Device Management page lists the models in the order in which they were
created in the system.
Periodically, the Content Delivery Server might detect that a new device exists. The
new device is added to the list of devices but has a status of new or quarantined.
Auto-detection and provisioning of detected devices is only possible if the property,
autoCreate.newDevice, is set to true in the Subscriber Portal properties file.
Chapter 2
Catalog Manager
79
The following information is displayed for each device.
■
Model Name - The name of the device model.
■
Model Number - The model number of the device.
■
Manufacturer - The name of the company that manufactured the device.
■
User-agent - The unique identifier for the device. The user-agent is a regular
expression that contains information about the device, such as hardware, browser,
and model information. Specifying the user-agent enables the Content Delivery
Server to identify the device without having to ask the subscriber to specify the
device details.
■
Description - A short description of the device.
■
Status - The status of the device, as follows:
■
Active - A device whose capabilities are known and is available for use by
subscribers. Developers can submit content to active devices.
■
New - An auto-provisioned device whose capabilities are not completely
known but is available for subscribers to use. Developers can submit content
for new devices. An example of unknown capabilities might be that at the time
the device was detected, only an incomplete list of its supported libraries was
available. Determine the device’s capabilities before changing its status.
You can change the status of a device from New to Active by clicking the
Activate button on the selected new device’s Device View page.
80
Administrator Guide • 2005Q4
■
Quarantined - An auto-provisioned device whose capabilities are not
completely known and is unavailable to subscribers. Developers cannot submit
content to quarantined devices. Determine the device’s capabilities before
changing its status.
Change the status of a device from Quarantined to Active by clicking the
Activate button on the selected quarantined device’s Device View page.
▼ Adding a Device
Use the New Device command to add a device to the Content Delivery Server
database. An XML file of the device definitions is created for you. If you have an
existing device, you can import it directly into the Content Delivery Server, see
“Importing Devices” on page 91.
1. On the Device Management page, click New Device.
The Device Management page is displayed. An asterisk (*) beside a field indicates
the field is required.
Chapter 2
Catalog Manager
81
2. Specify the following fields:
■
Name - The name of the device.
■
Description - A description of the device.
■
Manufacturer - The name of the manufacturer.
■
Manufacturer Number - The number of the manufacturer.
■
User-agent - The unique identifier for the device. The user-agent is a regular
expression that contains information about the device, such as hardware, browser,
and model information. Specifying the user-agent enables the Content Delivery
Server to identify the device without having to ask the subscriber to specify the
device details.
The regular expression you enter must match the entire user-agent expression
given by the device. You can specify wildcards in the string as .* but be careful
where you place it. For example, if the user-agent from a device is
SAMSUNG-SGH-E700-OLYMPIC2004/1.0 UP.Browser/6.1.0.6 (GUI)
MMP/1.0 (Browser WAP Proxy/1.0), the user-agent regular expression
82
Administrator Guide • 2005Q4
pattern, SAMSUNG-SGH-E700.*, matches it. The expressions, SAMSUNG-SGHE700 and .*SAMSUNG-SGH-E700, do not match as they only partially match the
user-agent coming from the device.
■
Supported Libraries - The libraries that the device supports. Libraries define the
API sets supported by the device. To select multiple libraries, hold the Control
key down and click the libraries with the left mouse button. Selected libraries are
highlighted.
■
Browser Type - The type of browser supported by the device.
If you do not see the browser type you need in the list, update the
browser.config file in $CDS_HOME/deployment/deployment-name/conf
directory. For information on how to add new browser templates, see Chapter 7,
“Device-Specific User Interface Framework” in the Sun Java System Content
Delivery Server Integration Guide.
■
Device Capabilities - The system, browser, user interface, software, mandatory,
and Content Delivery Server-specific capabilities of the device. Specify these
capabilities as needed.
For MicroEdition Configuration and MicroEdition Profile, you must select all
applicable libraries. For example, if you have content that supports CLDC 1.0 and
content that supports CLDC 1.1, you must select both libraries so that content
supporting each library runs on the device.
If the Push Type is SMS, you must also select an SMS delivery type. You can
choose NSM, EMS, or None. See Appendix A for more information on device
capabilities.
3. Click Create New Device.
The Device Management page is displayed that shows the properties of the new
device. A device definitions XML file is created for the device. You can click on the
device name in the list of devices and click Export to see the contents of the file.
4. Click OK.
The Device Management page is displayed that shows the list of devices.
After you add a device, you must specify the device capabilities. See “Specifying
Device Capabilities” on page 83.
Once the new device is added, you also need to configure the device’s MIME type
mappings, see “Mapping MIME Types to a Device” on page 86.
Chapter 2
Catalog Manager
83
▼ Specifying Device Capabilities
1. From the Device Management page, click the device name to select it.
The properties page for the device is displayed.
2. Click Edit.
The Device Management page for editing device capabilities is displayed. An
asterisk (*) beside a field indicates that it is a required field.
84
Administrator Guide • 2005Q4
If the Edit button is not available, wait a few minutes for the previous edit request to
complete before attempting to make more changes. When you change the
capabilities of a device, the capability matching process is run to update the list of
content that matches the device. If there is a lot of content to check, the process can
take a while.
3. Check the capabilities required for the device and edit the properties as needed.
If the Push Type is SMS, you must also select an SMS delivery type. You can choose
NSM, EMS, or None.
See Appendix A for information on device capabilities.
4. Click Modify This Device.
The Device Management page is displayed that shows the properties of the new
device.
Chapter 2
Catalog Manager
85
5. Click OK.
The Device Management page is displayed that shows the list of devices.
▼ Activating New or Quarantined Devices
When you are sure a newly detected device is capable of supporting content, you
can make that device available to developers and subscribers by changing its status
from New or Quarantined to Active.
To activate new or quarantined devices, follow these steps:
1. Click Devices from the Catalog Manager menu bar.
2. Click the new or quarantined device from the list of devices.
3. Click the Activate button in the Device Management page for the selected device.
▼ Mapping MIME Types to a Device
Each device has specific requirements for the content that it can support. You must
specify the MIME types supported for each device that you define. For each MIME
type supported by the device, do the following:
86
Administrator Guide • 2005Q4
■
Identify other MIME types that are accepted as alternatives to the selected MIME
type.
■
Indicate the extension associated with the MIME type.
■
Indicate whether the device supports one step or two step download for that
MIME type, and indicate if the device supports Multimedia Message Service
(MMS).
You can select OTA - One Step, OTA - Two Step, Nokia Smart Messaging (NSM)
or Enhanced Messaging (EMS).
One step download occurs when all information associated with the content is
downloaded in a single step. One step download is valid for any content type other
than MIDlets. If a descriptor file is associated with the content, the download is
performed in two steps: first the descriptor file is downloaded, then the content is
downloaded. MIDlets always use two step downloads.
To map MIME types, follow these steps:
1. From the Device Management page, click the device name.
The properties page for the device is displayed.
2. Click Manage MIME Types.
The Device/MIME Types Mappings page is displayed and shows the list of MIME
types registered with the Content Delivery Server.
Chapter 2
Catalog Manager
87
If the Manage MIME Types button is not available, wait a few minutes for the
previous edit request to complete before attempting to make more changes. When
you change the MIME types supported by a device, the capability matching process
is run to update the list of content that matches the device. If a lot of content must be
checked, the process can take a while.
3. Select the MIME types that this device supports.
If the device can support a MIME type that is not in the list, you can register the
MIME type, then remap MIME types. See “Registering a MIME Type” on page 40.
4. For each MIME type selected, provide the following information:
88
Administrator Guide • 2005Q4
a. Alternative MIME types to be handled as if they were the MIME type
supported for the device.
For example, if the device supports ZIP files with the MIME type
application/zip, you can specify application/x-compressed as an
alternative MIME type. Content that specifies either MIME type is passed to the
device with application/zip specified in the content header.
b. The extension that the device uses for content of that MIME type.
c. The delivery type used for that MIME type.
If you choose a two step download for content other than MIDlets, you must
specify a content descriptor template when you set the capabilities of the device.
See “Managing Content Descriptor Templates” on page 74 for more information.
For SMS content, you must choose either NSM or EMS as the delivery
mechanism.
If a delivery type was previously chosen, that delivery type is displayed in the
Delivery Type field.
d. Whether the MIME type selected supports MMS.
5. Click OK.
A message is displayed that tells you that the MIME type mapping selections are
saved and that capability matching is in process.
6. Click OK.
The Device Management page is displayed that shows the capabilities of the device.
7. Click OK.
The Device Management page is displayed that shows the list of devices.
▼ Setting a Compatible Device
When a device becomes available that can run content supported by an existing
device, you can specify that the device is compatible to the existing device.
Subscribers can see content designated for either device.
To define a device as compatible, follow these steps:
1. From the Device Management page, click the new device name to select it.
2. Click Select Compatible Devices in the Device Descriptions page.
3. Select the devices known to be compatible with the new device.
To select multiple compatible devices, press Control and click on the desired devices.
To deselect a single device, press Control and click on the unwanted selected device.
To deselect all devices, click the Remove All button.
Chapter 2
Catalog Manager
89
4. Click OK to save your changes.
5. Click OK in the confirmation page.
Note – When a new version of an existing device becomes available, you can add it
to the list of devices and designate the previous version of the device as compatible
to it. When content is created that specifies the new version, the content can be seen
on either the previous version of the device or the new version.
Note, however, that content that is created that specifies the earlier device version is
not immediately accessible through the newer device. You must edit the earlier
device’s description to include the new version as a compatible device. You can
modify an edition of the content to include the new version as a supported device.
See the following procedure for instructions.
▼ Adding Supported Devices to Existing Content
When a new device is available that can support existing content, the content can be
edited to include the new device as one of its supported devices.
To add a device as a supported device to existing content, follow these steps:
1. Click Content in the Catalog Manager’s main menu.
2. Select the desired content from the content list.
3. Click on an instrumented edition of the content in View Content Properties page.
4. Click Select for Supported Devices on the View Content Edition page.
5. Select one or more compatible devices and click OK.
Selecting the option, Force no devices to be selected for this edition, results in no
devices being associated with the content edition. The edition is no longer available
to subscribers.
6. Click OK again to confirm your selections.
▼ Editing a Device
1. From the Device Management page, click the device name to select it.
The Device Management page displays the properties of the device.
2. Click Edit.
The properties page for the device is displayed. The fields that you can edit are the
same as those described in “Adding a Device” on page 80. To edit the capabilities of
the device, see “Specifying Device Capabilities” on page 83. To edit the settings for
MIME types, see “Mapping MIME Types to a Device” on page 86.
90
Administrator Guide • 2005Q4
3. Click Modify This Device.
A confirmation dialog box asks you to confirm that you want to update the device.
4. Click OK.
The Device Management page is displayed that shows the capabilities of the device.
5. Click OK.
The Device Management page is displayed that shows the list of devices.
▼ Setting the Default Device
The Catalog Manager automatically assigns the default device to all new Subscriber
Accounts. When you create a Subscriber Account, you can override the default
device by assigning one of the defined devices to it.
To set the default device, follow these steps:
1. On the Device Management page, click Set Default Device.
The Set Default Device page is displayed.
2. Select the device from the list of available devices.
3. Click OK.
4. Click OK to close the confirmation message.
Chapter 2
Catalog Manager
91
The device is now set as the default device in the database. All new Subscriber
Accounts will be assigned this device as a default upon creation.
▼ Deleting a Device
You cannot delete the default device. You also cannot delete a device that a
subscriber account references.
To delete a device, follow these steps:
1. On the Device Management page, click the name of the device model you want to
delete.
The Device Management page for the selected device is displayed.
2. Click Delete.
A delete confirmation dialog box asks you to confirm that you want to delete the
device.
3. Click OK.
The device is deleted from the database.
4. Click OK again to close the confirmation page.
▼ Importing Devices
If you already have a device definition file (in .xml format) for a device you want to
add, you can import the device directly to the Content Delivery Server without
manually adding it. Capability matching, for devices with Active status, is done at
the time of import.
The Content Delivery Server provides some device definitions that you can import if
you choose. Device definition files are located at
$CDS_HOME/dist/cds/handset_definitions, where $CDS_HOME is the
directory where the Content Delivery Server is installed.
To import a device, follow these steps:
1. From the Catalog Manager administration console, click Devices on the main
menu bar.
2. Click Import on the Device Management page.
3. Click Browse on the Import Device page and select the .xml file containing the
data for the device you want to import.
If you want to review the device capabilities before making it available, select the
option, Quarantine this device.
92
Administrator Guide • 2005Q4
4. Click Import.
The device is listed on the Device Management page. Unless the Quarantine option
was selected, the device has a status of Active.
▼
Exporting Devices
To export a device, that is to create a device definition file (in .xml format) for an
existing device:
1. From the Catalog Manager administration console, click Devices on the main
menu bar.
2. Click the desired device from the list on the Device Management page.
3. Click Export.
An XML file that defines the properties for the device is displayed. Use the
window’s File menu to save the file to your preferred location.
Managing Server Locales
A locale is a collection of information necessary to adapt software to a specific
geographical location. Some operations are locale sensitive and require a specified
locale to tailor information for users, such as:
■
■
Messages displayed to the user
Cultural information such as, dates and currency formats
Content and devices can have one or more locales. You can add or edit locales to the
server as needed. See “Deleting a Locale” on page 94 for restrictions on removing
locales from the server.
▼ Adding a New Locale
1. From the Catalog Manager administration console, click Devices on the main
menu bar.
2. Click the Locales tab.
The list of locales is displayed.
Chapter 2
Catalog Manager
93
3. Enter the language code, the country code, and the name of the language in the
empty row for the new locale.
A locale code is comprised of the language code and the country code separated by
a dash (-), for example, en-US is the locale designation for English, United States
while en-AU is the designation for English, Australia. The locale code is created or
updated for you.
You must enter a valid ISO Language Code. These codes are the lower-case twoletter codes as defined by ISO-639. You can find a full list of these codes at
http://www.ics.uci.edu/pub/ietf/http/related/iso639.txt.
You must also enter a valid ISO Country Code. These codes are the upper-case twoletter codes as defined by ISO-3166. You can find a full list of these codes at
http://www.chemie.fu-berlin.de/diverse/doc/ISO_3166.html.
Enter the language in the Description field.
4. Click Create to add the locale.
The new locale is added to the list and the server is updated. The new locale is then
available for selection for use by content and devices.
94
Administrator Guide • 2005Q4
▼ Changing a Locale
To edit or update a locale or locale information, follow these steps:
1. Select the value for the locale you want to change and enter the new value.
For instance, to change the English to Australian English, replace the Country Code
with AU and replace the Description with Australian or Australian English.
2. Click Update.
Deleting a Locale
To remove a locale from the server, click Delete for the locale you want to remove.
Do not delete locales that are being used by content or devices. An error message
appears if an attempt is made.
Managing Accounts
The Catalog Manager is responsible for managing three types of accounts:
■
■
■
Vending Manager
Developer
Administrator
Chapter 2
Catalog Manager
95
The Catalog Manager does not administer subscriber accounts; these are
administered through the Vending Manager. See “Managing Subscriber Accounts”
on page 209 for more information.
TABLE 2-12 describes the purpose each account type serves:
TABLE 2-12
Account Types
Account Type
Description
Vending Manager
A Vending Manager account is for a specifically branded Vending
Manager that stocks content from the Catalog Manager. It is
associated with one or more Vending Plans.
Developer
Developer accounts are for corporations or individuals that submit
content to the Catalog Manager. Developer accounts are associated
with one or more Developer Plans.
Administrator
Administrator accounts are for individuals who administer the
Catalog Manager. The Administrator accounts can be disabled
when you do not want an individual accessing the Catalog
Manager.
The following account management tasks are described in this section:
■
■
■
Managing Vending Manager Accounts
Managing Developer Accounts
Managing Catalog Manager Administrator Accounts
When an operation is performed (editing, deleting, adding, and so on), the Content
Delivery Server puts a background job notification in the main menu bar. Click on
the notice to see details of jobs that were or are running. See “Getting Job Status” on
page 126 for more information.
▼
Viewing Accounts
1. From the Catalog Manager, click Accounts in the main menu.
By default, the Accounts page displays the list of Vending Manager accounts.
96
Administrator Guide • 2005Q4
2. Click Developers or Administrators.
The list of defined Developer or Administrator accounts is displayed.
Each account type has its own page or view. TABLE 2-13 describes the operations you
can perform on any of the three views.
TABLE 2-13
Search and Display Operations
Operation
Implementation
Search for an account
1. Enter the search item in the search box.
2. Select the search criteria in the criteria drop-down list.
3. Click Submit.
Display a list of
accounts alphabetically
Click the letter in the alphabet list in the browse bar.
All accounts sorted by the selected letter are displayed. The
browse bar indicates which column it uses to display.
Display the account list
by a particular column
for example, login ID
Click the column name to sort the account list by the column.
Display all the accounts
for the selected account
type
Click List All.
Chapter 2
Catalog Manager
97
Managing Vending Manager Accounts
Vending Manager accounts define the Vending Managers to which the Catalog
Manager publishes content. Because a single Catalog Manager can serve multiple
Vending Managers, you can have many Vending Manager accounts.
Each Vending Manager account must be assigned to one or more vending plans.
Vending Managers are generally configured to serve separate enterprises, so each
account generally has a specific Vending Plan. Before you begin creating a Vending
Manager account, you might want to create the vending plan that you want to
assign to the account. You can assign accounts to the default vending plan and edit
the account later.
For information on vending plans, see “Managing Vending Plans” on page 107.
▼ Viewing Vending Manager Accounts
1. From the Catalog Manager, click Accounts in the main menu.
By default, the Accounts page displays the list of Vending Manager accounts.
2. Click an account name.
The Vending Manager account page displays the properties of the selected account.
▼ Adding a Vending Manager Account
1. From the Catalog Manager, click Accounts in the main menu bar.
The Vending Managers page is displayed.
2. Click Add New Account.
The Add New Vending Manager page is displayed.
98
Administrator Guide • 2005Q4
3. Enter the required information.
An asterisk (*) beside a field indicates that it is a required field.
■
Account ID - Specify a unique designation for the account. The Account ID is
automatically converted to lowercase. The ID can contain a combination of
characters and numbers.
Note – The Account ID you assign must be also be used for the vs.account.name
property in the deployment configuration file and the vending name in the database
configuration file in your cfg directory.
■
Account Password - Enter a password.
■
Confirm Password - Reenter the password.
■
Company Name - Enter the company that the account represents.
■
Status - Leave the status as Active, unless you want to postpone access to the
Catalog Manager.
■
Network ID - Enter a URI for the Vending Manager used within the Content
Delivery Server. For example, http://ebiz.vending.com:8080/vsadmin/.
Chapter 2
Catalog Manager
99
Select the radio button to specify whether the URI contains a domain name or IP
address. Use the format hostname:port for domain names. Use the format
xxx.xxx.xxx.xxx:port for IP addresses.
To avoid data inconsistency or notification failure, ensure that the Network ID
specified is a valid address.
If the Content Delivery Server is running behind a firewall, set the Network ID to
the internal IP address of the host running the web server. To verify that the
Catalog Manager can access the Vending Manager, open a browser on the host
running the Catalog Manager and point the browser to
http://vending_manager_ip. If the page cannot be displayed, correct the IP
address specified for Network ID.
■
Vending Plans - Select one or more vending plans. Vending plans define which
categories the Vending Manager account can access.
If you do not specify a vending plan, the Vending Manager account is
automatically assigned to the default vending plan. See “Managing Vending
Plans” on page 107 for information.
■
Contact Information - Enter contact information for the company representative.
4. Click OK to add the new Vending Manager account.
A confirmation message is displayed.
5. Click OK to confirm the addition.
6. Click OK to close the confirmation message.
▼ Editing a Vending Manager Account
1. From the Catalog Manager, click Accounts in the main menu bar.
The Vending Manager page is displayed.
2. Click the Vending Manager account you want to modify.
The Vending Manager Account details page is displayed.
100
Administrator Guide • 2005Q4
3. Click Edit.
The Edit Account Details page displays the same fields as those described in
“Adding a Vending Manager Account” on page 97.
4. Modify the fields as required, then click OK.
A confirmation page asks whether you want to save the changes.
5. Click OK to close the Confirmation page.
▼ Deleting a Vending Manager Account
1. From the Catalog Manager, click Accounts in the main menu bar.
The Vending Manager page is displayed.
2. Click the Vending Manager account you want to delete.
The Vending Account Details page is displayed.
You cannot delete the account for a Vending Manager with stocked content. You
must first unstock all content.
3. Click Delete.
A Confirmation page is displayed asking you to confirm that you want to delete the
account.
Chapter 2
Catalog Manager
101
4. Click OK.
The account is deleted and it is removed from any vending plan with which it was
associated.
Managing Developer Accounts
Developer accounts are for corporations or individuals that submit content to the
Catalog Manager. Each developer is associated with one or more Developer plans.
Before you begin creating a Developer account, you might want to ensure an
appropriate Developer plan exists that you can assign to the account.
For information on Developer plans, see “Managing Developer Plans” on page 114.
▼ Viewing Developer Accounts
1. From the Catalog Manager, click Accounts in the main menu, then click
Developers.
The Accounts page displays the list of Developer accounts.
2. Click an account name.
The Developer Account Details page displays the properties of the account.
▼ Adding a Developer Account
1. From the Catalog Manager, click Accounts in the main menu bar, then click
Developers.
The Accounts page displays a list of Developer accounts.
2. Click Add New Account.
The Add New Developer page is displayed.
102
Administrator Guide • 2005Q4
3. Enter the required information.
An asterisk (*) beside a field indicates that it is a required field.
■
Login ID - Specify the Login ID, which must be unique. The Login ID is
automatically converted to lowercase.
■
Password - Enter a password.
■
Confirm Password - Reenter the password.
■
Status - Leave the status as Enabled, unless you want to postpone access to the
Catalog Manager.
■
Developer Plans - Select one or more developer plans that you want to assign to
the developer. To select multiple developer plans, press the Control key and click
the developer plans you want.
If you do not specify a developer plan, the developer account is automatically
assigned to the default developer plan. See “Managing Developer Plans” on
page 114 for more information.
■
Contact Information - Specify the contact information.
4. Click OK to add the Developer account.
A confirmation message asks you to confirm you want to add the account.
5. Click OK to confirm the addition.
Chapter 2
Catalog Manager
103
6. Click OK again to close the confirmation message.
▼ Editing a Developer Account
1. From the Catalog Manager, click Accounts in the main menu bar, then click
Developers.
The Accounts page displays a list of Developer accounts.
2. Click the Developer account you want to modify.
The Developer Account Details page is displayed.
3. Click Edit Profile.
The Edit Account Details page displays the same fields as those described in
“Adding a Developer Account” on page 101.
104
Administrator Guide • 2005Q4
4. Modify the fields as required, then click OK.
A confirmation page is displayed asking whether you want to save the changes.
▼ Deleting a Developer Account
1. From the Catalog Manager, click Accounts in the main menu bar, then click
Developer.
The Accounts page displays a list of Developer accounts.
2. Click the developer account you want to delete.
The Developer Account Details page is displayed.
3. Click Delete.
A Confirmation page is displayed asking you to confirm you want to delete the
account.
4. Click OK.
The developer account is deleted from the database and is removed from any
Developer plans with which it was associated.
5. Click OK to close the information message.
Managing Catalog Manager Administrator
Accounts
Administrator accounts are for administrators who have access to the Catalog
Manager. There are no tiers of access, thus every administrator has full access. If you
do not want an individual to access the Catalog Manager, you can disable the
Administrator account. This keeps the account information in the system but does
not allow the user ID access.
▼ Viewing Catalog Manager Administrator Accounts
1. From the Catalog Manager, click Accounts in the main menu, then click
Administrators.
The Accounts page displays the list of Administrator accounts.
2. Click an account name.
The Administrator Account Details page displays the properties of the account.
Chapter 2
Catalog Manager
105
▼ Adding a Catalog Manager Administrator Account
1. From the Catalog Manager, click Accounts in the main menu bar, then click
Administrators.
The Accounts page displays a list of Administrator accounts.
2. Click Add New Account.
The Add New Administrator page is displayed.
3. Enter the required information.
An asterisk (*) beside a field indicates that it is a required field.
106
■
Login ID - Specify the Login ID, which must be unique. The Login ID is
automatically converted to lowercase.
■
Password - Enter a password.
■
Confirm Password - Reenter the password in the Confirm Password text field.
■
Status - Leave the status as Enabled, unless you want to postpone the
administrator’s access to the Catalog Manager.
■
Contact Information - Specify the contact information.
Administrator Guide • 2005Q4
4. Click OK to add the Administrator account.
A confirmation message asks you to confirm you want to add the account.
5. Click OK to confirm the addition.
6. Click OK to close the confirmation message.
▼ Editing a Catalog Manager Administrator Account
1. From the Catalog Manager, click Accounts in the main menu bar, then click
Administrators.
The Accounts page displays a list of Administrator accounts.
2. Click the Administrator Account you want to modify.
The Administrator Account Details page is displayed.
3. Click Edit in the top, right corner.
The Edit Account page displays the same fields as those described in “Adding a
Catalog Manager Administrator Account” on page 105.
4. Modify the fields as required.
For example, if you want to disable the Administrator account, set the status to
Inactive. Then click OK.
A confirmation page is displayed asking whether you want to save the changes.
5. Click OK to confirm the changes.
▼ Deleting a Catalog Manager Administrator Account
1. From the Catalog Manager, click Accounts in the main menu bar, then click
Administrators.
The Accounts page displays a list of Administrator accounts.
2. Click the Administrator account you want to delete.
The Administrator Account Details page is displayed.
3. Click Delete.
A confirmation page is displayed asking you to confirm you want to delete the
account.
4. Click OK.
The administrator account is deleted from the database and the administrator no
longer has access to the Catalog Manager.
5. Click OK again to close the confirmation message.
Chapter 2
Catalog Manager
107
Managing Plans
Vending Manager and Developer accounts are assigned to plans. The Catalog
Manager uses plans to control content submission for developers and content access
for Vending Managers. TABLE 2-14 describes the two types of plans used by the
Catalog Manager.
TABLE 2-14
Plan Types
Plan Type
Description
Vending
Vending plans define content access rights. For example, if you have
a Vending Manager branded to sell content to teenagers, you don’t
want it stocking adult content. When creating a Vending plan you
can define which categories a Vending Manager can access. Vending
plans can also be nested within other Vending plans. Each Vending
Manager account is associated with one or more Vending plans.
Developer
Developer plans define the set of APIs that developers can use in
applications that they submit. Profiles define the classes in a specific
library that developers can use. A Developer plan contains one or
more profiles.
The following device management tasks are described in this section:
■
■
Managing Vending Plans
Managing Developer Plans
When an operation is performed (editing, deleting, adding, and so on), the Content
Deliver Server puts a background job notification in the main menu bar. You can
click on the notice to see details of jobs that were or are running. See “Getting Job
Status” on page 126 for more information.
Managing Vending Plans
The Vending Manager handles the selling of content. Since a single Catalog Manager
can serve multiple Vending Managers, you can potentially have many Vending
plans. A Vending Manager can be assigned to more than one Vending plan, so
ensure your Vending plans are limited enough to give you the control you need.
▼ Viewing Vending Plans
1. From the Catalog Manager, click Plans in the main menu bar.
The Vending Plan Management page displays a list of the Vending plans.
108
Administrator Guide • 2005Q4
2. Click a Vending plan name to view the properties of the plan.
The Vending Plan Properties page displays the properties of the plan. From this page
you can edit, delete, add, or remove members from the Vending plan.
▼ Adding a Vending Plan
1. From the Catalog Manager, click Plans in the main menu bar.
The Vending Plans page is displayed by default.
2. Click New Vending Plan.
The New Vending Plan page is displayed.
Chapter 2
Catalog Manager
109
3. Enter the name of the plan and a short description of the plan.
4. Select any existing plans that are to be included in this plan.
5. Specify the categories you want to offer to the Vending Managers that are
assigned to this plan.
Note – When you select a category, all subcategories for the category are included.
6. Click OK.
The new Vending plan is updated to the database.
Note – After you create the Vending Plan, you can add Vending Manager accounts
to it. See “Adding a Member to a Vending Plan” on page 111.
▼ Editing a Vending Plan
Before you edit a plan, you might want to review the Vending Manager accounts
that are assigned to the plan. See “Viewing Vending Plan Members” on page 111.
110
Administrator Guide • 2005Q4
To edit a Vending plan, follow these steps:
1. From the Catalog Manager, click Plans in the main menu bar.
The Vending Plans page is displayed by default.
2. Click the plan that you want to modify.
The Vending Plans Management page is displayed.
3. Click Edit.
The Edit Vending Plans page displays the same fields as those described in “Adding
a Vending Plan” on page 108.
Chapter 2
Catalog Manager
111
4. Modify the fields as required, then click OK.
The Properties page appears displaying the changed information.
5. Click OK.
The Vending Plan is updated in the database.
▼ Viewing Vending Plan Members
Members are the Vending Manager accounts assigned to a vending plan. You can
add and remove members from a Vending plan.
To view the members associated with a Vending plan, follow these steps:
1. From the Catalog Manager, click Plans in the main menu bar.
The Vending Plans page is displayed by default.
2. Click the plan you want to view.
The Vending Plans Properties page is displayed.
3. Click the Members tab.
The list of Vending Manager accounts associated with the Vending plan is displayed.
▼ Adding a Member to a Vending Plan
1. From the Catalog Manager, click Plans in the main menu bar.
The Vending Plan Management page is displayed by default.
112
Administrator Guide • 2005Q4
2. Click the plan you want to view.
The Vending Plan Management page is displayed.
3. Click the Members tab.
The list of Vending Manager accounts associated with the Vending plan is displayed.
4. Click Add.
A list of Vending Manager accounts is displayed. Vending Manager accounts that are
already assigned to the account are not displayed.
5. Check one or more Vending Manager accounts that you want to assign the
Vending Plan to, then click OK.
The Vending Manager account is added as a member of the Vending plan.
▼ Removing a Member from a Vending Plan
1. From the Catalog Manager, click Plans in the main menu bar.
The Vending Plans page is displayed by default.
2. Click the plan that you want to view.
The Vending Plans Properties page is displayed.
3. Click the Members tab.
The list of Vending Manager accounts associated with the Vending plan is displayed.
4. Select the members you want to remove from the plan, then click Remove.
A Confirmation page confirms that the members will be removed from the plan.
5. Click OK.
Note – If you remove a member that has no other Vending plan assigned to it, the
default plan is assigned.
▼ Setting the Default Vending Plan
The default Vending plan is automatically assigned to new Vending Manager
accounts until alternative assignments are made.
To set the default vending plan, follow these steps:
1. From the Catalog Manager, click Plans in the main menu bar.
The Vending Plans page is displayed.
2. Click Set Defaults.
The Set Default Vending Plan page displays a list of all Vending plans.
Chapter 2
Catalog Manager
113
3. Select the plan that you want to set as the default.
4. Click OK.
The default plan is assigned to all new Vending Manager accounts until a new
Vending plan is assigned.
▼ Deleting a Vending Plan
1. From the Catalog Manager, click Plans in the main menu bar.
The Vending Plans page is displayed by default.
2. Click the plan that you want to delete.
The Vending Plans Properties page is displayed.
The following plans cannot be deleted:
■
The default plan. If you want to delete the plan currently assigned as the default,
you must first assign a different plan as the default.
■
A plan referenced by another plan.
3. Click Delete.
A Confirmation page confirms that you want to remove the plan from the database.
4. Click OK to confirm the deletion.
The Vending plan is deleted from the database and from any Vending Manager
accounts associated with it. If this is the only Vending plan assigned to a Vending
Manager account, the default vending plan is assigned to the account until a new
Vending plan is assigned.
114
Administrator Guide • 2005Q4
Managing Developer Plans
Developer plans define the set of APIs that developers can use in applications that
they submit. Profiles define the classes in a specific library that developers can use.
A Developer plan contains one or more profiles.
The Content Delivery Server provides a default Developer plan. You can customize
this default Developer plan for your needs, or you can assign a different plan as the
default. New Developer accounts are automatically assigned to the default
Developer plan. You can edit the account at any time to assign a different plan.
Developer plans control developer access to the Catalog Manager. You can assign
more than one Developer plan to a developer account, so you can make the
Developer plans as specific as you need for control within your enterprise.
For example, as an administrator, you can create a set of profiles that include various
API sets. Using these profiles, you can create developer plans that provide varying
levels of access to developers. The Basic Profile could include the basic API set
required to run an application, such as user interface and MIDlet APIs. Other
profiles could include various API sets, such as timer classes and storage
information. From the set of profiles defined, you could then create the following
developer plans:
■
Basic Developer Plan - Includes the Basic Profile.
■
Intermediate Developer Plan - Includes the Basic Profile and two other profiles.
■
Advanced Developer Plan - Contains the profiles contained in the Intermediate
Developer Plan as well as additional profiles.
▼ Viewing Profiles
1. From the Catalog Manager administration console, click Plans in the main menu
bar.
2. Click the Developer Plans tab.
3. Select Profiles from the drop-down list.
The list of profiles is displayed.
Chapter 2
Catalog Manager
115
4. Click a profile name.
The Profile Definition page is displayed.
▼ Adding a Profile
1. From the Catalog Manager administration, click Plans in the main menu bar.
2. Click the Developer Plans tab.
The Developer Plan Management page is displayed.
3. Click New Profile.
The Profile Definition page is displayed. An asterisk (*) beside a field indicates that
it is a required field.
116
Administrator Guide • 2005Q4
4. Provide the information requested.
■
Name - Enter a name for the profile.
■
Description - Enter a description of the profile.
■
Select Library - Select the library that you want to include.
5. Click Next.
The second page for defining a profile is displayed.
Chapter 2
Catalog Manager
117
6. Select the items from the library that you want this profile to support.
To select individual methods, expand the package by clicking the plus sign (+) next
to the check box for the package.
7. Click Finish.
The new profile is added to the database.
8. Click OK to close the Confirmation page.
▼ Editing a Profile
1. From the Catalog Manager administration console, click Plans in the main menu
bar.
2. Click the Developer Plans tab.
The Developer Plan Management page is displayed.
3. Select Profiles from the drop-down list.
4. Click the profile that you want to modify.
The Properties page for the profile is displayed.
118
Administrator Guide • 2005Q4
5. Click Edit.
The edit page displays the same fields as those described in “Adding a Profile” on
page 115.
6. Modify the profile as required and click OK.
7. Click OK to close the Confirmation page.
The Properties page for the profile is displayed.
8. Click OK.
The list of profiles is displayed.
▼ Deleting a Profile
1. From the Catalog Manager administration console, click Plans in the main menu
bar.
2. Click the Developer Plans tab.
The Developer Plan Management page is displayed.
3. Select Profiles from the drop-down list.
4. Click the profile that you want to delete.
The Properties page for the profile is displayed.
5. Click Delete.
A confirmation message asks you to confirm that you want to delete the profile.
Chapter 2
Catalog Manager
119
6. Click OK.
The profile is deleted from the database and from any developer plans in which it
was included.
7. Click OK to close the confirmation message.
▼ Viewing Developer Plans
1. From the Catalog Manager administration console, click Plans in the main menu
bar.
2. Click the Developer Plans tab.
3. Select Developer Plans from the drop-down list.
The list of Developer plans is displayed.
4. Click a plan name.
The Developer Plan Definition page is displayed.
▼ Adding a Developer Plan
1. From the Catalog Manager administration console, click Plans in the main menu
bar.
2. Click the Developer Plans tab.
The Developer Plan Management page is displayed.
3. Click New Developer Plan.
The Developer Plan Definition page is displayed.
120
Administrator Guide • 2005Q4
4. Specify a name and description for the Developer plan and select the profiles to
be included in this plan.
5. Click OK to save the new Developer plan.
A confirmation message is displayed.
6. Click OK to close the confirmation message.
You can now add Developer accounts to the plan. See “Adding a Developer Licensee
to a Developer Plan” on page 122.
▼ Editing a Developer Plan
Before you edit a Developer plan, you might want to view the Developer accounts
associated with the plan. See “Viewing Developer Licensees” on page 121.
To edit a Developer plan, follow these steps:
1. From the Catalog Manager, click Plans in the main menu bar.
2. Click the Developer Plans tab.
The Developer Plan Management page is displayed.
3. Select Developer Plans from the drop-down list.
Chapter 2
Catalog Manager
121
4. Click the Developer plan that you want to modify.
The Developer Plan Definition page is displayed.
5. Click Edit.
The Developer Plan Definition page displays the same fields as those described in
“Adding a Developer Plan” on page 119.
6. Change the information as required, then click OK.
▼ Viewing Developer Licensees
Developer licensees are the developer accounts assigned to a Developer plan. You
can add and remove members from a developer plan.
To view the Developer licensees associated with a Developer plan, follow these
steps:
1. From the Catalog Manager administrator console, click Plans in the main menu
bar.
2. Click the Developer Plans tab.
The Developer Plan Management page is displayed.
3. Select Developer Plans from the drop-down list.
122
Administrator Guide • 2005Q4
4. Click the Developer plan that you want to view.
The Developer Plan Definition page is displayed.
5. Click the Developer Licensees tab.
The list of Developer accounts associated with the Developer plan is displayed.
▼ Adding a Developer Licensee to a Developer Plan
1. From the Catalog Manager administration console, click Plans in the main menu
bar.
2. Click the Developer Plans tab.
The Developer Plan Management page is displayed.
3. Select Developer Plans from the View drop-down list.
4. Click the Developer plan that you want to view.
The Developer Plan Definition page is displayed.
5. Click the Developer Licensees tab.
The list of Developer accounts associated with the Developer plan is displayed.
6. Click Add Licensees.
A list of Developer accounts is displayed. The list contains only accounts that are not
already associated with the selected plan.
7. Check the Developer accounts that you want to assign to the Developer plan.
Chapter 2
Catalog Manager
123
8. Click Add.
The Developer accounts are added as licensees of the Developer plan.
9. Click OK to confirm the addition.
▼ Removing a Developer Licensee from a Developer Plan
1. From the Catalog Manager administration console, click Plans in the main menu
bar.
2. Click the Developer Plans tab.
The Developer Plan Management page is displayed.
3. Select Developer Plans from the View drop-down list.
4. Click the Developer plan that you want to view.
The Developer Plan Definition page is displayed.
5. Click the Developer Licensees tab.
The list of Developer accounts associated with the Developer plan is displayed.
6. Select the Developer accounts that you want to remove.
7. Click Remove.
A confirmation page confirms that the Developer accounts are removed from the
plan. If the Developer account that you remove has no other Developer plan
assigned, the default Developer plan is assigned.
8. Click OK to confirm the deletion.
▼ Setting the Default Developer Plan
The default Developer plan is automatically assigned to new Developer accounts
until alternative assignments are made.
To set the default Developer plan, follow these steps:
1. From the Catalog Manager administration console, click Plans in the main menu
bar.
2. Click the Developer Plans tab.
The Developer Plan Management page is displayed.
3. Click Set Default.
The Default Developer page displays a list of all Developer plans.
124
Administrator Guide • 2005Q4
4. Select the plan that you want to set as the default.
5. Click OK.
The default plan is automatically assigned to new Developer accounts until
alternative assignments are made.
▼ Deleting a Developer Plan
Before you delete a Developer plan, you might want to review the Developer
accounts that are associated with the plan. See S“Viewing Developer Licensees” on
page 121.
To delete a Developer plan, follow these steps:
1. From the Catalog Manager administration console, click Plans in the main menu
bar.
2. Click the Developer Plans tab.
The Developer Plan Management page is displayed.
3. Select Developer Plans from the View drop-down list.
4. Click the Developer plan that you want to delete.
The default plan cannot be deleted. To delete the plan currently assigned as the
default, you must first assign a different plan as the default.
5. Click Delete.
A confirmation message asks you to confirm that you want to delete the Developer
plan.
Chapter 2
Catalog Manager
125
6. Click OK to close the confirmation message.
The Developer plan is deleted from the database, and the plan is deleted from the
Developer accounts to which it was assigned. If a Developer account is not assigned
to any other Developer plan, the default Developer plan is assigned.
Getting Background Job Status
The time it takes for an operation or job such as changing status or editing device
characteristics, to complete can vary greatly. Processing time can be lengthy due to
several factors, for instance:
■
■
■
■
A server might not be responding
A change was made that affects a large number of content, for instance customize
pricing was done
One or more characteristics of a device were changed, thus affecting its
compatibility with one or more pieces of content
One or more properties of content could have been changed, affecting its
associated list of compatible devices
The Content Delivery Server provides you with a means to keep informed of the
status of submitted jobs. TABLE 2-15 describes the job indicators that are displayed at
the end of the Catalog Manager’s main menu when a job is submitted.
TABLE 2-15
126
Background Job Indicators
Job Notification Type
Description
Informational
Appears when a background job is submitted.
Pending
Appears when at least one job is running without failure.
This notice changes when the last job completes
successfully or fails.
Job Failure
Appears when a failed job occurs. This notice changes when
the failed job is retried to complete successfully or is
deleted.
Administrator Guide • 2005Q4
▼
Getting Job Status
● Click on the Background Jobs notice in the main menu bar.
The Background jobs listing pages lists the completed, pending, and failed
background jobs.
The following information for each job is available:
■
The job number, which is a unique ID automatically assigned to the job at the
time of submission
■
Time and date the job was run (note that jobs are run serially, in the order they are
submitted)
■
A brief description of the nature of the job
■
Number of times the job was retried
■
Percentage of job completion
■
Job status
Chapter 2
Catalog Manager
127
To clear the listing of successfully completed jobs, click Clean completed. Only
pending jobs and failed jobs remain in the list. Pending job status changes when the
job successfully completes or fails. Clear the jobs listings regularly to reduce
memory usage and to make it easier to review the most recent jobs.
Clicking OK leaves the job listings as is and displays the list of submitted contents.
You can refresh the browser to see the updated status for a pending job when
viewing the Background jobs listing page or the Background job detail page.
You can set the job listings page to refresh every 1 to 99 seconds by selecting the
Refresh button and entering the number of seconds at which the listing page is to be
refreshed. Click the Refresh now button to immediately refresh the page.
Use the forward and back arrows or specify a page in the Background Jobs listing to
examine jobs when the list is extensive.
Examining Job Details
To examine the details of a specific job, click on the Job Id or the Job Name.
Information for the job includes the information shown in the jobs listing page. Any
additional information relevant to the specific of job is given under the Detailed
Information section at the bottom of the page. Examples of additional information
include:
■
■
128
Number of content items affected by the job
Names of the vending servers that failed during the job
Administrator Guide • 2005Q4
If a job has no additional information, the Detailed Information section states that no
other information is available.
Clearing a Failed Job
Failed jobs remain on the jobs listing page until they are manually cleared. You can
do this in the following ways:
■
Click Delete this job to remove the job from the list.
The intended job is not completed.
■
Click Retry this job.
The job you submitted is run again. If you know what caused the failure and you
can resolve it, fix the problem and then retry the operation.
Chapter 2
Catalog Manager
129
CHAPTER
3
Vending Manager
This chapter describes the tasks for administering the Vending Manager. There are
two administration roles: Administrator and Customer Care agent. The role is
assigned when the Administrator account is created.
Only Vending Manager administrators can perform the following tasks:
■
Managing Categories
Creating, adding, and editing categories
■
Managing Catalog Content
■
■
■
Managing Stocked Content
■
■
■
Viewing content available from the Catalog Manager
Stocking content and updating the catalog
Modifying pricing
Updating content
Creating Customized Marketing Campaigns
Creating messages to send to subscribers
■
Managing Vending Manager Administrator Accounts
Creating and managing Vending Manager Administrator accounts
In addition to the tasks, the administrator also performs all the tasks that Customer
Care Agents perform.
Customer Care Agents perform the following tasks:
■
Viewing Stocked Content
Viewing the content stocked on the Vending Manager
■
Managing Subscriber Accounts
■
■
■
Creating and managing Subscriber accounts
Managing Subscriber licenses
Viewing download history
129
■
■
■
Resetting trials
Issuing refunds
Managing Subscriber Plans
Creating and managing Subscriber plans
■
Viewing Reports
Viewing statistical data
Customer Care Agents can also edit their own accounts. They cannot edit other
Administrator accounts.
Administrator Tasks
As a Vending Manager administrator, you are responsible for administering all
features of the Vending Manager. The tasks include the tasks described in this
section as well as the tasks described in “Customer Care Agent Tasks” on page 205.
Administration tasks are performed through the Vending Manager administration
console. See “Accessing the Administration Consoles” on page 11 for information.
Note – When multiple Vending Manager administrators are performing Vending
Manager tasks simultaneously, some operations can take longer to complete than
expected. Also if the same item (for instance, a device, content, or bundle) is being
acted on concurrently by multiple administrators, problems could occur.
Managing Categories
To properly manage content, you must first create the categories that you want to
use. Categories are the logical containers that hold the content. You use categories on
the Vending Manager to control subscriber access to the content.
A default set of categories is provided with the Vending Manager. You can edit or
delete these categories. You can also add categories and subcategories. Only main
categories can have subcategories.
▼ Adding a Category
1. From the Vending Manager administration console, click Content on the main
menu bar.
The Content Management page is displayed.
130
Administrator Guide • 2005Q4
2. From the Stocked Content tab, click Manage Categories.
The Catalog Management page is displayed showing the Vending Manager
Categories.
3. If you want to create a main category, go to Step 4.
If you want to define a subcategory of an existing category, click the category name
and then proceed to Step 4.
For example, if you want to create a category that is a subcategory of “Business and
Professional,” click Business and Professional. The Business and Professional
category information page is displayed.
4. Click Add New Category.
The Edit Category page is displayed. An asterisk (*) beside a field indicates that it is
a required field.
5. Enter a name and description of the category.
The name must be unique within the category. You cannot have two categories of the
same name under the same level of hierarchy.
6. Click Add Category.
The new category is added to the database.
Chapter 3
Vending Manager
131
Note – The maximum number of category levels that can be added in a session is
set in the CommonConsole.properties file in the
$CDS_HOME/deployment/deployment_name/conf/ directory. The default number
of levels of categories is set to 10. That is, top-level and sublevel categories can be
created but sub-sublevel categories cannot. If you modify the property, you must
restart the server to enact the change.
▼ Editing a Category
1. From the Vending Manager administration console, click Content on the main
menu bar.
The Content Management page is displayed.
2. From the Stocked Content tab, click Manage Categories.
The Catalog Management page is displayed.
3. Click on an Up or Down arrow to change the placement of a category in the
category tree.
132
Administrator Guide • 2005Q4
4. If you want to edit a main category, go to Step 5, otherwise, click the category
name to navigate to the subcategory you want to edit.
For example, if you want to edit the Legal subcategory of the Business and
Professional category, click Business and Professional. The Business and Professional
category information page is displayed.
5. Click the edit symbol
beside the category that you want to modify.
The Edit Category page is displayed. An asterisk (*) beside a field indicates that it is
a required field.
6. Change the category name and description as required.
7. Click Update.
The previous Edit Category page is displayed.
▼ Deleting a Category
You can only delete categories that do not contain content. You must either move or
delete content in an undesired category before you can delete that category.
1. From the Vending Manager administration console, click Content on the main
menu bar.
The Content Management page is displayed.
2. From the Stocked Content tab, click Manage Categories.
The Catalog Management page is displayed.
Chapter 3
Vending Manager
133
3. Click the delete category button
for the category that you want to delete.
The category and all its subcategories are deleted and are removed from all plans
and content with which they are associated.
To delete a subcategory, click the category name to display its list of subcategories.
For example, to delete the Small Business subcategory of the Business and
Professional category, click Business and Professional. The Business and Professional
category information page is displayed.
Note – You cannot delete a category that contains content. You must first assign the
content to a different category.
Managing Catalog Content
As a Vending Manager administrator, you can stock content published by the
Catalog Manager, categorize it, and price it for subscribers to purchase. The Catalog
tab of the Content Management page provides you with access to all content
published to this Vending Manager.
▼ Viewing Published Content
1. From the Vending Manager administration console, click Content on the main
menu bar.
2. Click the Catalog tab if it is not the active tab.
The Content Management page displays a list of the main categories. The
information displayed above the catalog tree shows the current state of the autostocking feature and the auto-update pricing feature. The current values for the
General Pricing Rule are also shown.
A number beside each category indicates the number of published items available to
you from the Catalog Manager. You can decide whether or not to make this content
available to your subscribers.
134
Administrator Guide • 2005Q4
3. See a list of content by following one of these steps:
a. Click a category name that has no subcategories to see the list of content in that
category.
b. Expand a category with subcategories by clicking the category name, then click
the subcategory name to see its content list.
c. Click View By Title to see the list of all published content.
This view allows you to browse all content alphabetically by title. Initially, the
first 20 items are displayed on the first page. Use the alphabet links in the browse
bar to show only content beginning with the selected letter.
Chapter 3
Vending Manager
135
The following information is displayed for each item. Click the Status, the Title, or
the Type column title to sort content by that information type.
■
Status - Provides a graphical indication of whether or not the item is stocked and
whether an update is available for a stocked item. TABLE 3-1 shows the symbols
used.
TABLE 3-1
Content Status Symbols
Symbol
Description
Application is stocked - content is available to subscribers
Application is stocked and an update is available
Application status is unknown
Unstocked applications are listed without an associated icon.
136
Administrator Guide • 2005Q4
■
Title - Displays the title of the content in the catalog.
■
Catalog Price - Displays the amount that the Vending Manager has to pay the
Catalog Manager for every sale they make to a subscriber.
■
Categories - Displays the multiple categories (and their complete paths) that are
assigned to the content in the catalog.
■
Short Description - A short description of the content.
■
Type - Displays the type of content.
To return to the list of categories, click View By Categories in the Browse Catalog
bar.
▼ Searching for Published Content
1. From the Vending Manager administration console, click Content on the main
menu bar.
2. Click the Catalog tab if it is not the active tab.
The Content Management page displays a list of the main categories.
3. Enter the search term in the Search field.
Enter a part of the content title or the entire title or words in the content description
in the Search text field. A list of all content containing one or more of the search
entries is displayed.
4. Select the category from the Category drop-down list.
5. Click Search.
The Catalog page returns a list of available content that meets the search criteria.
▼ Viewing the Properties of Published Content
1. From the Vending Manager administration console, click Content on the main
menu bar.
2. Click the Catalog tab if it is not the active tab.
The Content Management page displays a list of the main categories.
3. Navigate to the item that you want to work with.
You can use the search feature or view the list of content for the category that
contains the item.
4. Click the title of the item.
The Content Properties page is displayed.
Chapter 3
Vending Manager
137
■
General Information - Indicates whether the content is stocked, or if an update to
the property information associated with the item is available.
The following items appear on this page:
■
If the content is not stocked, a Stock Content button is displayed at the top of
the page.
■
If the content is stocked, a View Stocked Content button is at displayed the top
of the page.
■
If an update is available for a stocked item, an additional link to Update
Information is on the Stocked Contents tab.
The General Information field displays the following information:
■
■
■
■
■
138
Content ID
Developer Content ID
Type
Developer Name
Last Modified Date
■
Pricing - Displays the purchase price and the pricing model assigned to the
content.
■
Categories - The categories containing this content item.
Administrator Guide • 2005Q4
■
Catalog Description - A description of the content. If icons, documentation, or
screen shots were submitted with the content, click the View button for the item
to see what was submitted. If the item is a ring tone and a preview was
submitted, click the Listen button to hear the preview.
■
Editions - The list of editions submitted for this item.
5. Click OK.
▼ Viewing Editions of Published Content
1. From the Vending Manager administration console, click Content on the main
menu bar.
2. Click the Catalog tab if it is not the active tab.
The Content Management page displays a list of the main categories.
3. Navigate to the item with which you want to work.
You can use the search feature or view the list of content for the category that
contains the item.
4. Click the title of the item.
The Content Properties page is displayed. The list of editions available is shown in
the Editions section at the bottom of the page.
Chapter 3
Vending Manager
139
The following information is shown for each edition:
■
■
■
■
■
■
Edition ID
Name
Version
Edition Type
Original Edition
Modified Date
The Edition Type, Original, indicates the initally submitted content, while Final
indicates the actual content that is delivered to subscribers. If the content item has
OMA DRM protection, a Trial type indicates a content item that is delivered to
subscribers for trial usage.
If the Catalog Manager administrator enables Preview for a content type, the
Preview field is included in the Catalog Description section.
5. Click the name of the edition that you want to view.
The Properties page for the edition is displayed.
140
Administrator Guide • 2005Q4
6. When you are done viewing the Edition Properties, click OK.
If no devices are listed in both the Supported Devices and Matched Devices fields,
the Catalog Manager administrator made the edition unavailable to subscribers.
Setting Stocking Options
From the Catalog tab, you can specify stocking options. The current status of the
stocking options is displayed after the title of the tab. The following two options for
automatically stocking content are available from the Catalog Manager:
■
■
Auto-stocking Off - Published content must be manually stocked from the
Catalog.
Auto-stocking On - Published content is automatically stocked from the Catalog
and inherit all Catalog Manager category assignments.
Stocking options are particularly important when the same person administers both
the Catalog Manager and the Vending Manager. Automated Stocking enables you to
automatically push all published content from the Catalog Manager, using the
categories specified in the Catalog Manager, directly to the subscriber site without
having to administer content on the Vending Manager.
Chapter 3
Vending Manager
141
To enable auto-stocking, follow these steps:
1. From the Vending Manager administration console, click Content on the main
menu.
2. Click the Catalog tab if it is not the active tab.
3. Click Stocking Options.
The Stocking Options page is displayed.
4. Click Auto-stocking On.
5. Click OK to save your changes.
To set automated price markups, see “Setting Local Pricing” on page 153.
▼ Stocking Content Manually
If a content item is not stocked to your subscriber site, you can stock it manually
using the Stocked Content option on the Content Properties page. This feature
allows you to stock individual content items one by one. To stock multiple content
items at once or whole categories of items, see “Stocking Multiple Content Items” on
page 144.
142
Administrator Guide • 2005Q4
To stock content, follow these steps:
1. From the Vending Manager administration console, click Content on the main
menu bar.
2. Click the Catalog tab if it is not the active tab.
The Content Management page displays a list of the main categories.
3. Click View by Title.
Use the search feature or view the list of content for the category that contains the
item.
4. Click the title of the content that you want to stock.
The Content Properties page is displayed. If the content is not stocked, a Stock
Content button is displayed at the top of the page.
Tip – Unstocked content does not have an symbol in the status column of the
content list.
5. Click Stock Content.
The Stock Content page is displayed. An asterisk (*) beside a field indicates that it is
a required field.
6. In the Stock Content page, specify the following options:
■
Stocking Status - Stock the content and make it available to subscribers or stock
the content but do not make it available to subscribers yet.
■
Catalog Price - This field is informational only. It shows the recommended price
for this content item.
■
Vending Price - Change the purchase price of the content item.
You can only change the purchase price, you cannot change the pricing model,
which is set in the Catalog Manager. For a description of pricing models, see
TABLE 2-6.
If configured at deployment, you can have grace periods applied to the Every
Download pricing model. At purchase time, a grace period allows additional
numbers of downloads or extends the download period.
For example, if a grace period is not configured in the Vending Manager, the
Every Download option appears as:
Charge $N on every download
With grace period turned on, the same pricing option appears as:
Charge $N on every download or every N days.
Chapter 3
Vending Manager
143
■
Keyword - You can create a unique keyword to identify this content item. This
keyword is used by subscribers when ordering content. Keywords are used when
content is requested through mobile originated (MO) push. Keywords can contain
spaces, underscores, and dashes, but cannot contain special characters, such as an
asterisk (*). Also, keywords consisting only of numeric characters are invalid.
Keywords provide an alternative means for systems, such as Mobile Originated
(MO) Push to request content items instead of using content IDs.
■
■
External Content ID - This section is available only if your system uses
something other than the Content Delivery Server content ID to identify the
content. If this section appears, enter the following information:
■
Enter the External Content ID that your billing system uses to identify this
content or select it from the list provided. This field is required if present.
■
Enter the External Group ID that your billing system uses to identify this
content or select it from the list provided. This field can be blank if your system
does not use group IDs.
Categories - You can select from the following options:
■
Inherit Categories. This is the default option. Check this option to inherit
category assignments from the Catalog Manager. Catalog category assignments
are shown alphabetically with the full path.
■
Select from Category Browser. Use this option to select a category from your
Vending Manager categories. You can select an entire category and include its
subcategories or you can select subcategories within a category.
7. Click OK.
8. Click OK to close the Confirmation page.
The content list is shown and the item that you just stocked shows the stocked status
symbol in the status column.
Note – You can alter the purchase price for more than one content item at once, see
“Customizing Prices for Stocked Content” on page 170 for more information.
▼ Stocking Multiple Content Items
You can stock multiple content items at once. Only unstocked content can be
selected and stocked into the desired categories.
You can only stock content into existing categories. Once content is stocked, you
cannot undo the operation. To unstock content, you must manually unstock
individual content items from the content item’s property page.
144
Administrator Guide • 2005Q4
Note – When scheduling a stocking operation, be aware that if large numbers of
content are being stocked, the operation can take some time to complete.
1. From the Vending Manager administration console, click Catalog on the main
menu bar.
2. Click Stock Content.
The Stock Content page is displayed.
Chapter 3
Vending Manager
145
An asterisk (*) beside a field indicates that it is a required field.
Only unstocked content items are selectable. Category and content item names
change from gray to black as the categories and content items are loaded. Wait until
all items are loaded before making a selection.
3. Select the categories that you want to stock.
Under the catalog categories column on the left, you can select one or more
categories of content or individual content items to stock. Selecting a category to
stock, selects all unstocked content in the category and its subcategories. All selected
items must have the same External ID and status.
146
Administrator Guide • 2005Q4
4. Select one or more destination categories under the Vending Categories column.
Under the Vending Manager categories column on the right, you can select one or
more terminal categories in which you want the content to be stocked. A terminal
category is the lowest level category and contains only content items. You cannot
select higher level categories.
5. Specify the content status and the External Content ID.
You can enter the External Group ID that your billing system uses to identify this
content or select it from the list provided, if applicable. This field can be blank if
your system does not use group IDs.
Chapter 3
Vending Manager
147
6. Click Stock.
Click Clear to remove all selections in both trees and reselect categories and content
items. Clicking the Cancel button clears all selections and displays the top-level
Catalog page.
7. Confirm or cancel the operation.
The Stocking Job Status page appears.
TBD
8. Click Done.
TheStock Content page is displayed.
If for some reason, the connection between the Catalog Manager and the Vending
Manager is broken, the stocking process is suspended and resumes automatically at
the point it stopped when the connection is restored.
148
Administrator Guide • 2005Q4
To stop a stocking job from this page, see the next section.
Viewing Stocking Jobs
At the bottom of the Stock Content page, you can see a list of executing, pending,
and failed stocking jobs:
The following information is shown for each job:
■
■
■
■
ID - Content ID
Started - Date and time stocking occurred
Started By - Administrator who performed the operation
Status - Current status of the job:
■
Executing - Stocking operation is in process. Shows the number of items that
are stocked, pending, or failed to stock.
■
Pending - Stocking operation is in process. Shows the number of items that are
pending.
■
Completed with failures - Stocking operation is done but some items were not
stocked. Shows the number of items that failed to stock.
■
Failed - Stocking operation was unsuccessful. Shows the number of items that
failed to stock.
■
Stopped - Number of items that are stocked, failed to stock, or remaining when
the job was stopped.
Executing and pending jobs have a Stop icon
. Clicking the icon stops the
stocking operation. See “Stopping a Stocking Job” on page 150 for more information.
Clearing the Stocking Jobs list
You can clear the Stocking Jobs list of jobs with Completed, Stopped, or Failed status
by clicking on the Trash icon. The dialog box asks for confirmation. Clicking Yes
clears the job item from the list.
Chapter 3
Vending Manager
149
▼ Stopping a Stocking Job
You can stop a stocking job with an Executing or Pending status from the Stocking
Jobs Status page or the Stocking Jobs section of the Stock Content page.
1. From the Stocking Job Status page, click Stop.
2. Confirm or cancel the stocking job.
No undo command is available. Items that are already stocked remain stocked. Any
items in Pending or Failed status are not stocked.
You can also stop a stocking job from the Stock Content page by selecting a stocking
job in the Stocking Jobs list with an Executing or Pending status. Click an item’s Stop
icon
. The Stop icon changes to a Trash icon and the status of the job is changed
to Stopped.
150
Administrator Guide • 2005Q4
Checking the Status of a Stocking Job
You can check on the status of a stocking job in one of the following ways:
■
Click Stock to see the status of the current stocking job.
■
Click on a job ID in the Stocking Jobs list to check the status of a specific stocking
job.
The Stocking Job Status page is displayed showing the status of the selected job:
TBD
The following information is displayed:
■
Job Status - Current status of the job:
■
Executing - Number of items that are stocked, pending, or failed to stock is
displayed in the header bar above the columns.
■
Complete with Failures - Number of items that are stocked and that failed to
stock is displayed in the header bar above the columns.
■
Failed - Number of items that failed to stock is displayed in the header bar
above the columns.
Chapter 3
Vending Manager
151
■
Pending - Number of items that are pending is displayed in the header bar
above the columns.
■
Stopped - Number of items that are stocked, failed to stock, or not stocked
when the job was stopped is displayed in the header bar above the columns.
■
Content Tile - Name of the content item
■
Vending Categories - Categories containing the content item
■
Status - Current status of the content item. A content item can have one of the
following status types:
■
■
■
Stocked
Pending
Failed
The page is refreshed every 30 seconds. To refresh immediately, click Refresh.
To clear job items in this page, click Delete for any job item with a status of
Completed, Failed, or Stopped.
▼ Updating the Catalog for Stocked Content
If the item in a catalog is already stocked but the catalog property information has
been updated, you can update the properties of the stocked item. Even if you choose
not to update property information, the subscriber downloading the content always
receives the latest copy of the JAR.
To update the catalog, follow these steps:
1. From the Vending Manager administration console, click Content on the main
menu bar.
2. Click the Catalog tab if it is not the active tab.
The Content Management page displays a list of the main categories.
3. Click View by Title to find the content item you want to update.
You can also use the search feature to locate the content.
4. From the content list, click the title of the content that you want to update.
Tip – Updated content is identified by the updated status symbol
column of the content list.
The View Content Properties page is displayed.
5. Click Update.
A confirmation page is displayed.
152
Administrator Guide • 2005Q4
in the status
6. Click OK.
The View Content Properties page is displayed showing the updated information.
Pricing for Content for a Locale
Vending Managers can be widely distributed geographically. In such cases, multiple
currencies are involved in pricing content. The system administrator configures the
currencies and initial price equivalents for a Vending Manager’s locale. This is
known as the General Pricing Rule. A General Pricing Rule is established for each
Vending Manager so that a one-to-one correlation exists between one currency unit
in the Catalog Manager and the equivalent amount in the Vending Manager’s
currency.
For example, suppose a Catalog Manager administrator is in Canada and a Vending
Manager administrator is in Italy. The General Pricing Rule calculates what the
Italian currency equivalent of $1.00 Canadian is and applies that calculation to all
content in the Vending Manager. So if a content item is priced at $1.50 Canadian, the
Vending Manager administrator in Italy sees the content priced at 0.95 Euros.
In situations where the Catalog Manager and Vending Manager are running on the
same server, both must use the same locale, therefore, the price for content is the
same in the Catalog Manager and the Vending Manager unless a custom price has
been created.
▼ Setting Local Pricing
If the Automatically Update Catalog Price is checked, all content in the Vending
Manager is automatically updated based on the General Pricing Rule whenever the
pricing option for content is changed in the Catalog Manager. If this feature is not
checked, you can manually update content pricing from the Pricing Option page.
The Pricing Option page lists the content types of all content in the Vending
Manager and their assigned pricing option information. It also shows the last time
content pricing was updated in the Catalog Manager and in the Vending Manager.
For content with custom pricing (content that is disassociated from its original
pricing option), you can manually apply the General Pricing Rule to update those
content items.
1. From the Vending Manager administration console, click Catalog on the main
menu bar.
2. Click Pricing Options.
The Pricing Options page is displayed.
Chapter 3
Vending Manager
153
The page displays the following information:
154
■
General Pricing Rule set by the system administrator at deployment.
■
List of content types. Click the column head to sort the list alphabetically.
■
List of option IDs associated with a content type. Click the column head to sort
the list alphabetically.
■
The current purchase price and usage condition set in the Catalog Manager.
■
The current purchase price equivalent in the Vending Manager’s local currency
under the General Pricing Rule.
■
The current purchase price equivalent in the Vending Manager’s local currency.
■
The date the purchase price was changed in the Catalog Manager. Click the
column head to sort the list by date.
■
The date the purchase price was changed in the Vending Manager. Click the
column head to sort the list by date.
■
Notification that the content’s price was changed in the Catalog Manager and
when automatic price updating is turned off in the Vending Manager. See “Price
Update Notification” on page 155 for more information.
Administrator Guide • 2005Q4
3. Enter the value for your local currency equal to the one currency unit.
If the one currency unit is one Euro and your local currency is Yen, enter the current
equivalent value in Yen.
4. Enter the percentage markup by which you want to increase the purchase price, if
desired.
If you do not want to increase the purchase price of content by a percentage, enter 0
or leave the field empty.
Automatic markup (percentage increase) of content purchase prices is applied to
both manually and automatically stocked content.
5. Click Apply.
A table displays a list of content types and their assigned pricing option information.
It also shows the last time content pricing was updated.
6. Click Done to enact the change.
Price Update Notification
When automatic price updating is turned off in the Vending Manager, an Ignore
Update alert is displayed in the Pricing Options table to alert you that a price change
is in effect for the associated content in the Catalog Manager. You can perform one of
the following actions:
■
Enter a price in the Current VM Price column for the updated content to update
the price in the Vending Manager.
When you click Done to change the price, the Ignore Update alert is removed.
■
Take no action to adjust the content price in the Vending Manager and check the
Ignore Update check box to remove the alert.
■
Take no action to adjust the content price at the current time and leave the alert so
that you can come back at a later time and quickly identify the content you want
to update.
▼ Changing the Price of Individual Content Items
You can change the purchase price for content on an individual basis. Only the
purchase price of published content can be changed, that is, you cannot change the
purchase price for content with Testing status. Also, you cannot change the purchase
price of individual content items within a bundle.
If you change the purchase price of a content item through the content’s property
page, you disassociate that content from its pricing option. See “Disassociating
Content From Pricing Options” on page 30 for more information.
Chapter 3
Vending Manager
155
1. From the Vending Manager administration console, click Content on the main
menu bar.
2. Click the Stocked Content tab.
3. Click View by Title to list all content.
4. Click the content name to go to the content’s property page.
5. Click Edit.
6. Change the vending price.
7. Click OK to save the change.
A confirmation message appears.
8. Click OK to close the confirmation message.
Managing Stocked Content
As a Vending Manager administrator, you can make content unavailable to
subscribers by unstocking the content or changing its status to inactive. The Stocked
Content tab of the Content Management page provides you with access to all
content that has been stocked for this Vending Manager.
Viewing Stocked Content
This task is described in the section on tasks for customer care agents. See “Viewing
Stocked Content” on page 206.
▼ Searching for Stocked Content
1. From the Vending Manager administration console, click Content on the main
menu.
2. Click the Stocked Content tab if it is not the active tab.
156
Administrator Guide • 2005Q4
3. Enter the search term in the Search field.
4. Select the category that you want to search from the Category drop-down list.
5. Select the status of the content from the Status drop-down list.
6. Click Search.
The Stocked Content page shows a list of stocked content that meets the search
criteria that you specified.
▼ Changing the Status of Stocked Content
Stocked content can have the following three states:
■
Active - Active content is available to subscribers.
■
Inactive - Inactive content is not available to subscribers.
■
Unavailable - Stocked content on the Vending Manager that is unpublished by
the Catalog Manager. You cannot change the status of content that is unavailable,
you can only unstock it.
You can change the status of content in either the Active or Inactive state. To change
the status of stocked content, follow these steps:
Chapter 3
Vending Manager
157
1. From the Vending Manager administration console, click Content on the main
menu.
2. Click the Stocked Content tab if it is not the active tab.
3. Navigate to the item with which you want to work.
You can use the search feature or view the list of content for the category that
contains the item.
4. In the first column of the content list, check the content whose status you want to
change.
5. From the Change Status To drop-down list, select the status you want.
6. Click GO.
The Confirmation page is displayed.
7. Click OK to confirm the status change.
The Stocked Content list is displayed and the Status column displays the updated
status information.
▼ Unstocking Content
You can unstock content that you no longer want in your catalog.
To unstock content, follow these steps:
1. From the Vending Manager administration console, click Content on the main
menu.
2. Click the Stocked Content tab if it is not the active tab.
3. Navigate to the item that you want to unstock.
You can use the search feature or view the list of content for the category that
contains the item.
4. From the content list, check the content that you want to unstock.
The View Content Properties page is displayed.
5. Click Unstock.
The Confirmation page is displayed.
6. Click OK to confirm you want to unstock the content listed.
The Stocked Content page is displayed. The content that you unstocked is not listed
and is no longer available to subscribers.
158
Administrator Guide • 2005Q4
▼ Editing Stocked Content
1. From the Vending Manager administration console, click Content on the main
menu.
2. Click the Stocked Content tab if it is not the active tab.
3. Navigate to the stocked item that you want to edit.
You can use the search feature or view the list of content for the category that
contains the item.
4. From the content list, click the title of the content that you want to edit.
The View Content Properties page is displayed.
5. Click Edit.
The Edit Content page shows the properties. An asterisk (*) beside a field indicates
that it is a required field.
Chapter 3
Vending Manager
159
You can edit the following fields:
■
Status - Content can be active (available to subscribers) or inactive (unavailable to
subscribers).
■
Vending Price - Purchase price for the content item charged to the subscriber.
The Catalog Price shows the pricing option for the content item in the Catalog
Manager.
■
External Content ID - Information used by your billing system to identify this
content. This section is available only if your system uses something other than
the Content Delivery Server content ID to identify content.
You can change one or both of the following content ID types:
■
160
Enter the External Content ID that your billing system uses to identify this
content or select it from the list provided.
Administrator Guide • 2005Q4
■
Enter the External Group ID that your billing system uses to identify this
content or select it from the list provided. This field can be blank if your system
does not use group IDs.
■
Categories - The categories to which the content is assigned.
■
Catalog Description - The properties of the content.
■
Product name and version number.
■
Short content description (maximum of 40 characters).
■
Long content description (maximum of 256 characters).
■
Keyword is used as an alternative means by external systems to request
content. A keyword can contain spaces, underscores, and dashes, but cannot
contain special characters, such as an asterisk (*). Also keywords consisting
only of numeric characters are invalid.
■
Device icon (GIF image 40 x 40 pixels).
■
Small icon (GIF image 40 x 40 pixels).
■
Large icon (GIF image 80 x 80 pixels).
■
Screen shots (JPEG images 200 pixels wide by 190 pixels high).
■
User Guide (PDF file).
■
Preview file (a file format supported by the Content Delivery Server).
6. Modify the fields as required.
7. Click OK.
8. Click OK to close the confirmation message.
The content is updated in the database and the properties page is displayed.
▼ Editing External Content IDs
If your billing system requires something other than the Content Delivery Server
content ID to identify the content, you can edit the external content IDs for multiple
items from the list of stocked content.
To edit a single item, you can edit the properties for that item. See “Editing Stocked
Content” on page 159.
To edit multiple items, follow these steps:
1. From the Vending Manager administration console, click Content on the main
menu bar.
2. Click the Stocked Content tab if it is not the active tab.
3. Navigate to the items that you want to edit.
To view all content, click View By Title.
Chapter 3
Vending Manager
161
4. Select the items that you want to edit.
5. Click Edit External ID.
The Edit External Content page is displayed.
6. Select the items that you want to change.
7. Enter or select the external content ID and external group ID in the fields for an
item to change individual items.
To change all selected items to the same external content ID, select Content IDs and
enter a value or select the value to be assigned to all items.
To change all selected items to the same external group ID, select Group IDs and
enter a value or select the value to be assigned to all items.
8. Click Submit to submit your changes.
Updating Stocked Content
If an update is available for stocked content, the Properties page displays the
following options at the top of the page:
162
■
View in Catalog - Click View in Catalog to open the Properties page of the
content.
■
Update - Click Update to update the content.
Administrator Guide • 2005Q4
▼ Copying or Moving Categories of Content
You can move or copy whole categories of content at a single time in the Vending
Manager. By copying or moving one or more categories, you are copying or moving
all the content items within those categories.
Note – When scheduling a copy or move operation, be aware that if large numbers
of categories and content are being copied or moved, the operation can take some
time to complete.
You can also selectively move or copy individual items of content. See “Copying or
Moving Content Items” on page 167 for more information.
1. From the Vending Manager administration console, click Content on the main
menu bar.
2. Click the Stocked Content tab.
3. Click Copy/Move Content.
The Copy/Move Content page is displayed. The default selection is
Category/Categories.
Chapter 3
Vending Manager
163
Category and content item names change from gray to black as the categories and
content items are loaded. Wait until all items are loaded before making a selection.
4. Select the categories you want to copy or move.
Under the source column on the left, select one or more categories to copy or move.
If you select a higher level category, all of its subcategories, including their content
items, are also copied or moved. You cannot select individual items of content. Also,
you cannot copy or move a parent category into one of its child categories. You must
click the check box to select an item in the tree. See “Copying or Moving Content
Items” on page 167 for more information.
Note that an X indicates a selected category. A dot (.) indicates that at least one
category has been selected in the column. A higher level category with a dot
indicates that at least one of its subcategories is selected.
164
Administrator Guide • 2005Q4
5. Select one or more destination categories.
Under the destination column on the right, you can select one or more higher
levelcategories. The destination category you select cannot be a terminal category. A
terminal category is the lowest level category and contains only content items. You
must click the check box to select an item in the tree.
6. Click Copy or Move.
The Copy and Move buttons only become active when at least one selection is made
in both the source and destination trees. If one category tree does not have a
selection, for instance, if you clear all selections in a tree, the buttons are inactive.
Chapter 3
Vending Manager
165
7. Confirm or cancel the operation.
If copied, categories and their associated content are duplicated under each
destination category. If moved, categories and their content are removed from the
original location and placed in the destination category. If more than one destination
category is selected, categories and content are duplicated under each destination
category.
The preceding figure shows the results of moving the Investment and Accounting
categories to the Business and Professional category. All content items in Investment
and Accounting were also moved.
If you copy or move a category to another category and decide you no longer want
that category in its new location, you can take one of the following actions:
166
Administrator Guide • 2005Q4
■
If the category is empty, that is, it contains no content items or subcategories, you
can delete the category from its new location. See “Deleting a Category” on
page 133 for more information.
■
If the category is not empty, you must remove its subcategories and content items
by moving or copying them to another location before you can delete the
category.
▼ Copying or Moving Content Items
By selecting Individual items on the Copy/Move Content page, you can select
specific content items to copy or move to other categories.
Note – When scheduling a copy or move operation, be aware that if large numbers
of categories and content are being copied or moved, the operation can take some
time to complete.
1. From the Vending Manager administration console, click Content on the main
menu bar.
2. Click the Stocked Content tab.
3. Click Copy/Move Content.
The Copy/Move Content page is displayed.
Chapter 3
Vending Manager
167
Category and content item names change from gray to black as the categories and
content items are loaded. Wait until all items are loaded before making a selection.
4. Click Individual Items.
5. Select the content items of content in one or more categories that you want to copy
or move.
Under the source column on the left, you can select one or more items of content to
copy or move but you cannot select categories. You must click the check box to select
an item in the tree. See “Copying or Moving Categories of Content” on page 163 for
more information.
Note that an X indicates a selected content item. A dot (.) indicates that at least one
content item has been selected in the column. A category with a dot indicates that at
least one of its content items is selected.
168
Administrator Guide • 2005Q4
6. Select one or more destination categories.
Under the source column on the right, the destination categories you select must be
terminal categories. A terminal category is the lowest level category and contains
only content items. You must click the check box to select an item in the tree.
7. Click Copy or Move.
The Copy and Move buttons only become active when at least one selection is made
in both the source and destination trees. If one category tree does not have a
selection, for instance, if you clear all selections in a tree, the buttons are inactive.
8. Confirm or cancel the operation.
If copied, content is duplicated under each destination category. If moved, content is
removed from the original location and placed in the destination category. If more
than one destination category is selected, content is duplicated under each category.
Chapter 3
Vending Manager
169
The preceding figure shows the results of copying the content items, SpruceClock
and Technopop to the Mobile Mail and Instant Messages categories. The content
items are still available in the Featured category.
If you copy a content item to a category and decide that you do not want the item in
that category, you can edit the content to change the category assignment. See
“Editing Stocked Content” on page 159 for information.
▼ Customizing Prices for Stocked Content
Another way to manage the purchase price for content is to set the price for
categories of content. You can change the price per category of content to affect a
pricing change over a wide range of content simultaneously. Keep in mind that
170
Administrator Guide • 2005Q4
changing the price in this manner, dissociates the selected content items from their
pricing options. See “Disassociating Content From Pricing Options” on page 30 for
more information.
Note – Customizing content pricing has no Undo operation. Before enacting any
changes, be sure to review the changes to ensure that the correct changes apply only
to the intended contents.
To change the price of content per category, follow these steps:
1. Click Content from the Vending Manager’s main menu.
2. Click the Stocked Content tab.
3. Click Customize Prices.
The Customize Prices page is displayed.
An asterisk (*) beside a field indicates that it is a required field.
Chapter 3
Vending Manager
171
4. Select the category or subcategories of content or specific contents.
To change the purchase price of all the contents of a category, simply click the
category itself.
To change the purchase price of specific content items in a category, navigate
through the category to select individual content items.
5. (Optional) Select the External Content ID filter to apply the pricing change to only
those selected contents that have the given ID.
Click Choose to select the desired content ID or group ID.
Content items in the same category but assigned to a content or a group ID different
than the one chosen are not affected by the price change.
172
Administrator Guide • 2005Q4
6. Change the purchase price in one of the following ways:
■
■
■
Enter a new purchase price.
Increase or decrease the purchase amount by N per cent.
Increase or decrease the purchase price by a dollar amount.
The price is applied to all selected content regardless of their pricing models. For
example, if SpruceDraw is $5.00 per monthly subscription and Launch Screen is
$0.50 per download, increasing the purchase price by 10% results in SpruceDraw
being offered at $5.50 per monthly subscriptions and Launch Screen at $0.55 per
download.
7. Click Customize Price.
8. Click OK in the confirmation dialog box to establish the change.
No Undo operation is available once you click OK. Check that your pricing changes
will affect only the desired contents. Otherwise, manually reset the pricing for
erroneously changed content.
Managing Bundles
Bundles are a collection of related files (for instance, you could have a bundle for a
particular business activity that includes an application and associated audio, video,
or image files), making the information accessible to subscribers in a convenient
form. The Vending Manager administrator creates and manages bundles.
This section covers the following topics:
■
■
■
■
Bundle Pricing
Creating a Bundle
Viewing Bundle Information
Changing the Status of a Bundle
A subscriber can only see the bundles in the list of available content if all the items
within a bundle can run on the subscriber’s device. By examining the details of a
bundle, a subscriber can see the items that the bundle contains.
When the status of a bundled item of content is changed from Published to
Unpublished by a Catalog Manager administrator, it remains in the bundle but is
unavailable to subscribers. In the bundle’s property page, subscribers who already
purchased the bundle see a status of Unavailable for the content item. Subscribers
purchasing the bundle do not see the content in the bundle’s content list.
If the status of the content is changed back to Published, one of the following
situations occurs:
Chapter 3
Vending Manager
173
■
If the Vending Manager’s Auto-stocking option is turned on, the content is
immediately reactivated. The bundle’s property page shows a status of Active for
the content and the content is available to subscribers again.
■
If the Auto-stocking option is turned off, you must restock the content in the
Vending Manager to reactivate the bundle.
See “Editing a Bundle” on page 183, “Stocking Content Manually” on page 142, and
“Setting Stocking Options” on page 141 for more information.
Bundle Pricing
When you create a bundle, you set a purchase price for the bundle, not for each of
the individual content items within the bundle. Bundles can use only a First
Download pricing model. Use of the individual content items, however, are
dependent on their individually assigned pricing models. For example, a subscriber
pays a single purchase price to get a bundle containing an image and a ring tone.
The image has a Per Use pricing model and the ring tone has an Every Download
pricing model. The subscriber’s access to the picture is determined by the allowed
number of uses and access to the ring tone by the allowed number of downloads.
Due to the delivery mechanisms of some DRM types (see “Content Protection” on
page 20), content using a Per Subscription or a Trial pricing model cannot be
included in a bundle. The following list explains the usage conditions for content
items in a bundle with different pricing models:
174
■
Free always - Content item can be downloaded and used for an unlimited
amount of time.
■
Trial (free for N uses) - Free trials are not available through bundles.
■
First download only - Content item can be downloaded and used for an
unlimited amount of time. The subscriber paid for a bundle containing this
content item so does not incur a charge for downloading content item.
■
Every download - The subscriber paid for a bundle containing this content item
so does not incur a charge for initial download of this content item. The
subscriber is charged for every additional download of this content item.
■
Per use - After initial download, subscriber is not charged for N uses of this
content item. When this content item is used for the maximum Nth time,
subscriber is charged for each additional use. If the subscriber attempts to
download this content item again, an offer to purchase this item for another N
uses is made.
■
Per period - After initial download, the subscriber is not charged for using this
content item for the stated number of days, weeks, or months. At the end of the
period, subscriber must repurchase content to continue use.
Administrator Guide • 2005Q4
■
Per interval - After initial download, the subscriber is not is not charged for using
this content item for the stated time interval. Subscriber cannot purchase this item
again as it is only offered for a specific time.
■
Per subscription - No content items with this pricing model are allowed in a
bundle.
Subscribers who purchased bundled content in the previous release of the Content
Delivery Server can still download and run content in those bundles per the pricing
and usage conditions in effect at that time, including those associated with the
subscription pricing model.
Once a bundle is purchased, the following purchase conditions apply:
■
The subscriber cannot repurchase the bundle again, regardless of whether the
licenses are expired for content in the bundle.
■
The subscriber who purchased the bundle cannot purchase individual items
already contained in the bundle until their usage conditions expire.
If a bundle is purchased but not downloaded and the subscriber looks at the details
page for a content item that is in the bundle, the subscriber sees a link to the
bundle’s details page and is informed that the content item was purchased through
the bundle.
▼ Creating a Bundle
1. Click Content in the Vending Manager administration console’s main menu.
2. Click Bundled Content in the Content Management page.
The categories list displays the number of bundles per category.
Chapter 3
Vending Manager
175
3. Click Create Bundle.
The Create Bundle page is displayed.
176
Administrator Guide • 2005Q4
An asterisk (*) beside a field indicates that it is a required field.
4. Specify the following information:
■
General Information
■
Status - Select whether the bundle is active or inactive to subscribers. Items
within a bundle cannot be inactivated. To inactive an item, it must first be
removed from the bundle.
■
Content Included in the Bundle - Select content from the category tree, which
provides access to all content in the system. A minimum of two contents items
are required.
A bundle cannot contain other bundles. A bundle is always comprised of
individual content items.
Chapter 3
Vending Manager
177
■
Bundle Price
■
■
Provide the bundle at no charge to the subscriber for the content.
Set the bundle purchase price.
Bundle price overrides the pricing assigned to individual content items for first
download. The pricing models for individual content items still apply.
■
External Content ID
This section is available only if your system uses something other than the
Content Delivery Server content ID to identify the content. If this section appears,
enter the following information:
■
■
Enter the External Content ID that your billing system uses to identify this
content or select it from the list provided. This information is required.
■
Enter the External Group ID that your billing system uses to identify this
content or select it from the list provided. This field can be blank if your system
does not use group IDs.
Categories
Use the Select from Category Browser option to select a category for the bundle
from your Vending Manager categories. You can select a top-level category or
navigate down to select a subcategory.
■
Catalog Description
■
■
■
■
■
■
■
■
Product name and version number
Short content description (maximum of 40 characters)
Long content description (maximum of 256 characters)
Keyword for bundle (maximum of 40 characters)
Small icon (GIF image 40 x 40 pixels)
Large icon (GIF image 80 x 80 pixels)
Screen shots (JPEG images 200 pixels wide by 190 pixels high)
User Guide (PDF file)
5. Click OK to create the bundle.
If you create a bundle and no device exists that is capable of running all content in
that bundle, an error message is generated. A dialog box opens with the following
message:
The bundle has been created successfully, but no handset capable of running all of
the included content exists.
You can still save the bundle by clicking OK in the dialog box.
6. Click OK to close the Confirmation page.
The top-level Bundled Content page is displayed.
178
Administrator Guide • 2005Q4
▼ Viewing Bundle Information
1. Click Content in the Vending Manager administration console’s main menu.
2. Click Bundled Content in the Content Management page.
3. Click View by Title.
The Browse Vending Content By Title page is displayed.
For each bundle in the list, its status, title, content ID, retail price, and vending
categories are displayed. You can also view bundles specific to a category by clicking
on a category from the Bundled Content categories list.
4. Click on the title of the bundle to see detailed information about it.
The View Content Bundle Properties page lists each item of content in the bundle
including status, content ID, pricing, and content type information.
Chapter 3
Vending Manager
179
Note – If the status of a content item that is part of a bundle is changed to Inactive
or Unpublished by the Catalog Administrator, the content is removed from the
bundle and is not available to subscribers who purchase the bundle after the status
change. Check the status of content in a bundle from the bundle’s properties page by
clicking on the title of a bundle.
180
Administrator Guide • 2005Q4
▼ Deleting a Bundle
1. Click Content in the Vending Manager administration console’s main menu.
2. Click Bundled Content in the Content Management page.
3. Click View By Title.
4. Select the check box for the desired bundle in the list.
5. Click Delete.
You cannot delete individual items within a bundle. You must create a new bundle
containing only those desired items.
6. Click OK to confirm the unbundling of the content for the selected bundle.
Subscribers never see a deleted bundle unless they purchased it prior to it being
deleted by the Vending Manager administrator. Subscribers who purchased the
bundle before it was deleted see the bundle in their list of purchased items and can
download content in that bundle.
▼ Editing External Content IDs
If your billing system requires something other than the Content Delivery Server
content ID to identify the content, you can edit the external content ID for a bundle
from the list of bundled content.
To edit External Content IDs, follow these steps:
1. Click Content in the Vending Manager administration console’s main menu.
2. Click Bundled Content in the Content Management page.
3. Click View By Title.
4. Check the box for the desired bundle or bundles.
5. Click Edit External ID.
The Edit External Content page for bundles is displayed.
Chapter 3
Vending Manager
181
6. Select the items that you want to change.
7. Enter a value or select the External Content ID or the External Group ID in the for
each selected bundle.
To change all selected items to the same external content ID, select Content IDs and
enter a value or select the value to be assigned to all items.
To change all selected items to the same external group ID, select Group IDs and
enter a value or select the value to be assigned to all items.
8. Click Submit to submit your changes.
▼ Changing the Status of a Bundle
1. Click Content in the Vending Manager administration console’s main menu.
2. Click Bundled Content in the Content Management page.
3. Click View By Title.
4. Select the check box for the desired bundle and choose the state you want applied
from the Change Status To drop-down list.
5. Click Go.
6. Click OK to close the Confirmation page.
The list of bundles shows the current state of each bundle.
182
Administrator Guide • 2005Q4
▼ Editing a Bundle
You can modify a bundle by changing its status, contents, retail price, and so on.
To edit a bundle, follow these steps:
1. Click Content in the Vending Manager administration console’s main menu.
2. Click Bundled Content in the Content Management page.
3. Click View by Title.
4. Click on the title of the bundle you want.
The View Content Bundle Properties page opens.
5. Click Edit and make your changes.
6. Click OK.
7. Click OK to close the Confirmation page.
For a description of fields on the Edit page, see “Creating a Bundle” on page 175.
▼
Managing Testing Content
Some content received from the Catalog Manager might be undergoing testing
before being made available to regular subscribers. This type of content has the
status Testing. Only testing subscribers have access to testing content and do not see
regular published content on the Subscriber portal. It is your responsibility to assign
a testing role to a subscriber. To assign a role to a subscriber, see “Adding a
Subscriber Account” on page 210.
To see a list of testing content, follow these steps:
1. Click Content on the Vending Manager administration console’s main menu.
2. Click the Content Testing tab.
A list of all content with Testing status is displayed.
3. Click on the desired content to see its properties.
When the Catalog Administrator changes the status of testing content to Published,
the content is automatically reactivated in the Vending Manager whether the Autostocking option is turned on or off.
Chapter 3
Vending Manager
183
▼
Stocking Testing Content
If the auto-stocking option is set to OFF, you can manually stock content items with
Testing status to make them available to subscribers with testing roles.
1. Click Content on the Vending Manager administration console’s main menu.
2. Click the Content Testing tab.
A list of all content with Testing status is displayed.
3. Click Stock for the testing content item you want to stock.
The Stock Content page is displayed.
4. Make changes as desired.
An asterisk (*) beside a field indicates that it is a required field.
5. Click OK.
6. Click OK to close the Confirmation page.
If you decide to make a stocked testing content item unavailable to subscribers, you
can go to the list of testing content and click Unstock.
Creating Customized Marketing Campaigns
When you initiate advertising campaigns or want to promote content by offering it
at special prices, you can create customized marketing campaigns to send
advertisements to subscribers. You can select one or more items that you want to
promote and specify the criteria by which subscribers are selected to receive the
advertisements. The advertisements can be sent as email or as a message to the
subscriber’s device.
In addition to creating the marketing campaign, you also define the segment of
subscribers that the campaign will target. To keep the format of the campaign
consistent, create a template for the marketing message. This section covers the
following topics:
■
■
■
184
Creating a Campaign
Working with Subscriber Segments
Working with Campaign Templates
Administrator Guide • 2005Q4
▼ Creating a Campaign
The Content Download Server provides a wizard to help you define a marketing
campaign. The wizard leads you through the steps of specifying the campaign type,
the target audience, the marketing message, content and pricing details, and
scheduling and duration.
To start the Campaign Wizard, follow these steps:
1. Click Campaigns on the Vending Manager administration console’s main menu.
2. Click New on the Campaign List header.
The first page of the Campaign wizard is displayed.
▼ Specifying a Campaign Type
1. In the first page of the wizard, click the radio button to select one of these
campaign types:
■
Event-Driven Campaign - An event-driven campaign is initiated when a
subscriber performs an action that triggers an event. The system responds by
sending the promotion to the subscriber. The actions that trigger the event include
subscriber registration, content purchase, content download, and content refund.
■
Outbound Campaign - An outbound campaign is typically proactive and is sent
to a targeted segment of subscribers.
■
Promotional Campaign - A promotion is a passive campaign that can be viewed
by the subscriber on the desktop portal. When the subscriber logs in, the system
compares the subscriber’s profile to the list of promotions and determines
whether there is a match between the subscriber and a promotion.
2. Click Next to specify campaign options and target audience.
Chapter 3
Vending Manager
185
▼ Specifying Campaign Options and Target Audience
The Campaign Options page lets you define the name and description of the
campaign, and the market segment that receives it. You can also assign a coupon to
the campaign. If you are creating an event-driven campaign, you can define the
event that triggers the campaign.
Complete the fields in the Campaign Options page. An asterisk (*) beside a field
indicates the field is required.
1. Enter the name of the campaign and a description.
The name of the campaign must be unique to all other campaigns.
2. Enter the Campaign Coupon.
A coupon is an attribute of a campaign. This field identifies any coupons associated
with the campaign. A subscriber can redeem a coupon by entering it when viewing
content. In most cases, entering a coupon activates the campaign as long as the
subscriber is part of the campaign’s segment.
You can enter a maximum of 32 characters, which can consist of characters and
numbers.
186
Administrator Guide • 2005Q4
3. Choose the Subscriber Segment from the drop-down list.
The Subscriber Segment is the target audience for the campaign. The list contains all
of the subscriber segments that are currently defined. See “Creating a Subscriber
Segment” on page 195 for more information.
Only subscribers who selected the option of “Notify me for update or promotions”
through the subscriber portal are included in a subscriber segment.
4. Select a triggering event and activate a campaign.
a. Choose the event that triggers the sending of the campaign message (for
event-driven campaigns only).
b. Select the Activate Campaign check box to make the campaign available when
it is submitted (for event-driven or promotional campaigns).
5. Click Next to specify the campaign message.
▼ Specifying a Campaign Message
The Specify the Campaign Message page lets you specify the message that is sent to
subscribers and the template that is used for the message.
To specify a campaign message, follow these steps:
Chapter 3
Vending Manager
187
1. Enter the subject of the advertisement.
This string is also used as the subject line for advertisements sent as email.
Note that though you can enter as much text you like in the Subject and Text fields,
a character limit might apply when sending the message depending on the template
that might be applied to it (for example, SMS).
2. Enter any message that you want included in the advertisement in the text field.
You can leave this blank if you do not want to include a message.
When creating the message, note that a content purchased event is generated for free
content as well as purchased content. That is, the notification message is sent
whether the subscriber purchases content or obtains it for free.
3. Choose a template from the drop-down list if you want the message to be inserted
into an existing template.
You must specify how you want the notification sent. Select one or both of the
following means of transmission:
■
■
An email message
A wireless text message
4. Click Next to specify the content items that are offered with this campaign.
▼ Specifying Content for the Campaign
The Campaign Content page lets you choose the content items that is a part of the
campaign. The page uses a tree structure to display a list of all of the available
categories.
188
Administrator Guide • 2005Q4
To specify content for a campaign, follow these steps:
1. Set the content in one of the following ways:
a. Click All Active Content.
This action enables all currently valid content, including newly stocked content,
to be included in existing campaigns.
b. Open the tree and select the check boxes next to the specific items that you
want to include in the campaign.
To include all of the content in a category, select the check box next to a category
name.
2. Click Next to proceed.
▼ Specifying Campaign Pricing Characteristics
Use this page to specify a discount on the price of the content and the duration of
the offer.
Chapter 3
Vending Manager
189
To specify pricing characteristics for a campaign, follow these steps:
1. Select the Discount on Items check box and enter a value by which the price of the
item is to be discounted.
2. Set a duration for the discount offer:
■
Offer valid for - Enter the number of days for which the offer is valid.
■
Never expire - Continue the pricing discount as set until the campaign is
discontinued.
3. Click Done to complete the campaign definition.
If you are defining an outbound campaign, click Next to proceed to the campaign
scheduling page.
▼ Specifying Campaign Scheduling
For outbound campaigns, you can specify when the campaign should occur. You can
have the advertisement executed immediately or schedule the execution for off-peak
hours. Processing the advertisement can be data-intensive and sending the
advertisement can be network-intensive, so consider the load on the system when
scheduling the execution for your distribution.
190
Administrator Guide • 2005Q4
To create a schedule for a campaign, follow these steps:
1. Set up the campaign schedule.
Choose one of the following schedules:
■
Process and send the message immediately.
■
Defer processing, in which case, enter the time and date when the message is to
be processed and sent.
Enter the date and time of processing and sending the campaign in the format
shown next to each field. Enter the time based on a 24-hour clock.
2. Click Done.
Click OK to return to the list of defined campaign.
▼ Viewing Campaign Details
1. Click Campaigns in the Vending Manager main menu.
2. Click the name of a campaign.
The Campaign Details page is displayed.
Chapter 3
Vending Manager
191
This page enables you to review the information for your advertisement.
192
■
To view the items that are included in the campaign, click View List in the
Promotional Content section.
■
To view the subscribers to whom the advertisement is sent, click View List in the
Subscriber Segment section.
Administrator Guide • 2005Q4
■
To see the format of the message that is sent to the subscribers, click Preview in
the Promotional Message section. The format is determined by the notification
template set up by your system administrator. See “Working with Campaign
Templates” on page 197 for more information.
■
To see the campaign schedule for outbound campaigns, look in the Scheduling
section.
3. Click Send Message to queue the advertisement for processing.
A confirmation page is displayed.
4. Click OK.
▼ Editing a Campaign
1. Click Campaigns in the Vending Manager administration console menu bar.
2. Click the name of a campaign.
The Campaign Details page is displayed.
3. Click Edit.
The Campaign Wizard opens with the current values for the selected campaign.
4. Edit the values that you want to change and click Next to continue.
You can edit the campaign message, content items, pricing characteristics, and, if
applicable, the campaign schedule.
5. Click Done on the last page of the wizard.
▼ Testing a Campaign
1. Click Campaigns in the Vending Manager administration console menu bar.
2. Click the name of a campaign.
The Campaign Details page is displayed.
3. Click Test.
4. Send test email or a test wireless message or both.
■
■
To send a test e-mail, enter the recipient’s e-mail address.
To send a test wireless message, enter the recipient’s phone number and select a
device type from the drop-down list.
5. Click OK.
6. Click OK to close the Confirmation page.
The test message is sent.
Chapter 3
Vending Manager
193
Working with Subscriber Segments
A subscriber segment defines the criteria for separating subscribers into groups. The
Subscriber Segment List page displays the current list of subscriber segments, a
short description of each segment, and an estimated number of subscribers. The
number of subscribers is only an estimate because some segments need to know the
content list to determine whether a subscriber matches a criterion. Also, a subscriber
can initiate service after the segment has been created and they might be included in
the segment when a campaign is processed.
Only subscribers who selected the “Notify me for update or promotions” option
through the subscriber portal are included in a subscriber segment.
194
Administrator Guide • 2005Q4
▼ Displaying Subscriber Segments
1. Click Campaigns in the Vending Manager administration console menu bar.
The Campaign List page is displayed.
2. Click the Segments tab in the Campaign List page.
The Subscriber Segments page is displayed.
▼ Creating a Subscriber Segment
1. Open the Subscriber Segments page.
2. Click New.
The Subscriber Details page is displayed.
Chapter 3
Vending Manager
195
3. Specify the following information:
■
Enter a name and description for the subscriber segment.
The name must be unique to other segment names and it must not exceed 255
characters.
■
Select the check box if a subscriber must match all of the specified criteria in this
page to belong to this segment.
If the check box is clear, advertisements are sent to subscribers who meet any of
the criteria specified.
The selection can be based on the following factors:
196
■
Whether the subscriber has previously downloaded one or all of the items
being promoted.
■
The number of items the subscriber has downloaded and how recently.
Administrator Guide • 2005Q4
■
The subscriber plan to which the subscriber belongs.
■
The device a subscriber uses.
▼ Editing a Subscriber Segment
1. Open the Subscriber Segment List page.
See “Displaying Subscriber Segments” on page 195 for more information.
2. Click a subscriber segment name or description.
The Segment Details page is displayed.
3. Edit the fields in the Segment Details page.
See “Creating a Subscriber Segment” on page 195 for a description of the fields.
4. Click OK when you are finished.
Working with Campaign Templates
A template provides a consistent format for a campaign message. This section
explains how to create and use campaign templates.
▼ Displaying Available Campaign Templates
1. Click Campaigns in the Vending Manager administration console menu bar.
The Campaign List page is displayed.
2. Click the Templates tab in the Campaign List page.
The Campaign Templates page is displayed.
▼ Creating a Campaign Template
1. Open the Campaign Templates page.
2. Click New.
3. Edit the Template Details page:
■
Enter a name and a description for the template.
■
Enter blocks of XSL code to define the format of the campaign message in one of
the text boxes:
■
■
■
■
The Email Stylesheet
The Multimedia Message Service (MMS) Stylesheet
The Short Message Service (SMS) Stylesheet
Wireless Application Protocol (WAP) Stylesheet
Chapter 3
Vending Manager
197
You can write code that presents the same general format for the message but
allows for variations suitable for each delivery method.
If you define a style sheet for MMS, specify the name of the MMS message to
which it applies.
4. Click OK.
TABLE 3-2 describes the properties that you can use to customize the template for
your needs.
TABLE 3-2
198
Properties Available for Notification Templates
Property1
Definition
Name
The name assigned to the campaign. This
property is also used as the Subject for
notifications sent as email.
Description
The description of the campaign.
Discount
The discount applied to the original price of
the content offered in the campaign.
ExpirationDate
The date that the campaign expires.
Administrator Guide • 2005Q4
TABLE 3-2
Properties Available for Notification Templates (Continued)
Property1
Definition
ID
Campaign ID
Subject
The email subject line.
Coupon
The defined coupon code.
Message
The message that the administrator wants to
include in the notification.
CampaignURL
The URL the subscriber should use to
purchase from the campaign.
DeviceCampaignURL
The URL that will take a subscriber to the
campaign on the subscriber’s device.
Subscriber/FirstName
The first name of the subscriber that the
message is sent to.
Subscriber/LastName
The last name of the subscriber that the
message is sent to.
Subscriber/MSISDN
The MSISDN for the subscriber’s device.
Subscriber/Device
The type of device that the subscriber uses.
ContentItem/ID
The internal ID of the item offered.
ContentItem/Name
The name of the item offered.
ContentItem/ShortDescription
The brief description of the item.
ContentItem/Description
The full description of the item.
ContentItem/ContentType
The type of content.
ContentItem/ModifiedDate
The date the item was last modified.
ContentItem/Status
The current status of the item.
ContentItem/Size
The size of the item.
ContentItem/Version
The version of the item.
ContentItem/Vendor
The vendor who provided the item.
ContentItem/Price
The original purchase price of the item.
ContentItem/DiscountPrice
The purchase price charged when item is
purchased from the campaign URL.
ContentItem/DetailsURL
The URL used to view details about the item.
ContentItem/DeviceDetailsURL
The URL that will take a subscriber to the
specific piece of content for this campaign.
ContentItem/Midlet-1
The name of the JAD file.
For MIDlets only.
Chapter 3
Vending Manager
199
TABLE 3-2
Properties Available for Notification Templates (Continued)
Property1
Definition
ContentItem/ConfigurationVersion
The version of the item.
For MIDlets and iAppli applications only.
ContentItem/ProfileVersion
The API set used in the application.
For MIDlets and iAppli applications only.
ContentItem/Classname
The name of the iAppli application file.
For iAppli applications only.
1All property names must be preceded by /CDSNotification/. For example, /CDSNotification/Name.
To see examples of campaign notification templates, follow these steps:
1. Open the Campaign Templates page.
2. Click the name or description of the default notification template.
An example of a template is provided for each type of style sheet.
200
Administrator Guide • 2005Q4
▼ Editing a Campaign Template
1. Open the Campaign Templates page.
See “Displaying Available Campaign Templates” on page 197 for more information.
2. Click the name or description of the template you want to edit.
3. Edit the values in the Campaign Template Details page.
4. Click OK.
Managing Vending Manager Administrator
Accounts
Administrators have access to the Vending Manager. There are two administrator
roles:
■
Administrator - Administrators with full privileges for administering the
Vending Manager.
■
Customer Care Agent - Administrators with privileges for viewing content and
managing subscribers.
You can disable any administrator you no longer want to access the Vending
Manager, which keeps the account information in the system but does not allow the
user ID access.
You can perform each of the following functions on any of the account views:
■
Search for an account by entering a string in the search box at the top of the view,
specifying a column, and clicking Submit.
■
Display items beginning with a particular letter at the top of the list by clicking
the letter in the alphabet list in the browse bar. The browse bar displays the name
of the column used for display.
■
Sort the account list by clicking on any column head.
▼ Viewing Vending Manager Administrator Accounts
1. From the Vending Manager administration console, click Accounts on the main
menu bar.
2. Click the Administrators tab.
The list of Administrator Accounts is displayed.
Chapter 3
Vending Manager
201
3. To view an individual Administrator Account, click the administrator name.
If you are a Customer Care Agent, you can view your own account by clicking the
My Account tab on the Account Management page.
The Administrator Account Details page is displayed. From here you can edit or
delete an Administrator Account.
▼ Adding a Vending Manager Administrator Account
1. From the Vending Manager, click Accounts on the Main menu.
2. Click the Administrators tab.
The list of Administrator Accounts is displayed
3. Click Add New Administrator.
The Add New Administrator page is displayed. An asterisk (*) beside a field
indicates the field is required.
202
Administrator Guide • 2005Q4
Complete the following fields:
■
Login ID - Enter the Login ID the administrator uses to access the Vending
Manager. It must be unique and at least three characters.
■
Password - Enter a password of at least four characters.
■
Confirm Password - Reenter the password.
■
Status - Leave the status as Enabled unless you want to suspend access to the
Vending Manager.
■
Role - Select the role that you want to assign to the administrator, either
Administrator or Customer Care Agent.
■
Contact information - Specify administrator contact information.
4. Click OK.
5. Click OK again to close the Confirmation page.
You are informed that the new account is added to the database.
6. Click OK.
Chapter 3
Vending Manager
203
▼ Editing a Vending Manager Administrator Account
To edit all Administrator Accounts, you must be an administrator. Customer Care
Agents can edit only their own account.
To edit an Administrator Account, follow these steps:
1. From the Vending Manager administration console, click Accounts on the main
menu bar.
2. Click Administrators.
The list of Administrator Accounts is displayed.
3. Click an administrator name.
The Administrator Account page is displayed.
4. Click Edit.
The Edit Account Details page displays the same fields as those described in
“Adding a Vending Manager Administrator Account” on page 202.
204
Administrator Guide • 2005Q4
5. Modify the information as required.
6. Click OK.
The Edit Administrator confirmation page is displayed.
7. Click OK again to close the confirmation message.
The Administrator Account is updated in the database.
▼ Deleting a Vending Manager Administrator Account
1. From the Vending Manager administration console, click Accounts on the main
menu bar.
2. Click the Administrators tab.
The list of Administrator Accounts is displayed.
3. Click an administrator name.
The Administrator Account Details page is displayed.
4. Click Delete.
The Delete Administrator confirmation page is displayed.
5. Click OK to close the Confirmation page.
6. Click OK.
The Administrator Account is deleted from the database and the administrator will
no longer have access to the Vending Manager.
Customer Care Agent Tasks
The primary responsibility of customer care agents is to manage subscribers. This
includes managing subscriber plans and subscriber accounts. Customer care agents
can also view stocked content and reports. These tasks are handled through the
Vending Manager administration console.
Customer care agents might also need to work with subscribers to resolve problems
that they are having. See the Sun Java System Content Delivery Server Error Messages
guide for information.
Chapter 3
Vending Manager
205
▼
Viewing Stocked Content
1. From the Vending Manager administration console, click Content on the main
menu bar.
The Stocked Content page displays a list of the main categories defined. A number
beside each category indicates the number of stocked items.
2. Click a content category or subcategory to view a list of the stocked content for the
selected category.
To view all content by title, click View By Title.
This view allows you to browse content alphabetically by title. By default, the view
is set to List All, displaying the first 20 items alphabetically on the first page.
206
Administrator Guide • 2005Q4
Note – The Edit External ID button appears only if your billing system requires
something other than the Content Delivery Server content ID to identify the content.
The following information is displayed for each item:
■
Status - The status of the item. It can have the following values:
■
■
Active - Stocked content is made available to subscribers.
Inactive - Stocked content is not made available to subscribers.
■
Title - The title of the content.
■
ID - The content ID.
■
Retail Price - Trial usage, download, usage, or subscription pricing option,
depending on what was set. You set the retail price when you stock the content.
■
Cost - Download, usage, or subscription pricing, depending on what was set. This
is the cost set by the Catalog Manager administrator. It is the wholesale cost to the
Vending manager to sell content.
■
Vending Categories - The categories (and their complete paths) that are assigned
to the stocked content.
■
Type - The content type.
The list can be sorted by Status, Title, ID, and Type. Click a column title to sort the
list by the selected title. To return to the list of categories, click Vending Categories in
the browse bar.
▼ Setting the Display of Stocked Content for Subscribers
You can determine how stocked content is displayed for subscribers in the
Subscribers Portal through the Vending Manager.
Chapter 3
Vending Manager
207
To set the display of stocked content, follow these steps:
1. From the Vending Manager administration console, click Content on the main
menu bar.
2. Click the Stocked Content tab if it is not the active tab.
The Vending Preferences page is displayed.
3. Click Preferences.
Select one of the following display orders:
■
Alphabetically - Alphabetically lists the content titles
■
Stocking date - Lists the contents chronologically by ordering dates
■
Popularity - Lists the content by number of purchases with the content with the
highest purchase order listed first
4. Set MMS as the preferred content delivery mechanism for the stocked content, if
applicable. For information on using MMS as the preferred content delivery
system, see “Sending MMS Messages” on page 225.
5. Click OK.
To set the featured view of contents in a category, see “Editing a Category” on
page 132.
▼ Viewing the Properties of Stocked Content
To view content properties:
1. From the Vending Manager administration console, click Content on the main
menu bar.
2. Click the Stocked Content tab if it is not the active tab.
The Content Management page displays a list of the main categories defined.
3. Navigate to the item that you want to examine.
You can use the search feature or view the list of content for the category that
contains the item.
4. Click the title of the item.
The View Content Properties page is displayed. If icons, documentation, or screen
shots were submitted with the content, click the View button for the item to see what
was submitted. If the item is a ring tone and a preview was submitted, you can click
the Listen button to hear the preview.
5. Click OK.
208
Administrator Guide • 2005Q4
▼ Viewing Editions of Stocked Content
1. From the Vending Manager administration console, click Content on the main
menu bar.
2. Click the Stocked Content tab if it is not the active tab.
The Content Management page displays a list of the main categories defined.
3. Navigate to the item that you want to examine.
You can use the search feature or view the list of content for the category that
contains the item.
4. Click the title of the item.
The View Content Properties page is displayed. The list of editions available are
shown in the Editions section at the end of the page.
5. Click the name of the edition that you want to view.
The View Content Edition properties page is displayed.
6. Click OK.
The View Content Properties page is displayed. Click OK again to return to the
Stocked Content list.
Managing Subscriber Accounts
Subscriber accounts are for individuals who buy content from the Vending Manager.
Subscriber accounts include the licenses for content that the subscriber downloaded.
The Vending Manager assigns subscriber roles, which determine the type of content
that is available to subscribers.
Each Subscriber account is associated with one or more Subscriber plans. Before you
create a Subscriber account, you might want to ensure that an appropriate
Subscriber plan exists for you to assign to the account. If not, you can assign
accounts to the default Subscriber plan and edit the account later. See “Managing
Subscriber Plans” on page 216 for more information.
You can perform each of the following functions on any of the account views.
■
Search for an account by entering a string in the search box at the top of the view,
specifying a column, and clicking Submit.
■
Display items beginning with a particular letter at the top of the list by clicking
the letter in the alphabet list in the browse bar. The browse bar displays the name
of the column used for display.
■
Sort the account list by clicking on any column title.
Chapter 3
Vending Manager
209
▼ Viewing Subscriber Accounts
1. From the Vending Manager administration console, click Accounts on the main
menu bar.
2. Click the Subscribers tab.
The list of Subscriber accounts is displayed.
If no device is specified to be used, the Device field is blank.
3. Click the login ID for the subscriber account that you want to examine.
The Subscriber Account page is displayed. From this page you can edit or delete a
Subscriber account.
4. Click OK to return to the previous page.
▼ Adding a Subscriber Account
You can add a Subscriber account in the Vending Manager. Subscribers can also sign
up for their own accounts through the subscriber portal. An account is automatically
created using the default Subscriber plan for new subscribers who access the
subscriber portal from their device.
To add a Subscriber account, follow these steps:
1. From the Vending Manager, click Accounts on the Main menu.
2. Click the Subscribers tab.
The list of Subscriber accounts is displayed.
210
Administrator Guide • 2005Q4
3. Click Add New Subscriber.
The Add New Subscriber page is displayed.
4. Enter the required information:
An asterisk (*) beside a field indicates that it is a required field.
■
Login ID - Enter the unique subscriber ID that the subscriber uses to log in to the
subscriber site.
■
Password - Enter a password of at least four characters.
■
Confirm Password - Reenter the password.
■
Status - Leave the Status as Enabled unless you want to suspend access to the
Subscriber Portal for this subscriber.
■
Mobile ID - Enter the ID of the mobile device, either the MSISDN or ESN.
■
Device Model - Select the device model from the drop-down list of supported
devices.
■
Subscriber Plans - Check the plans to assign to the subscriber.
Note that if you do not select a plan, the Subscriber account is assigned to the
default Subscriber plan. See “Managing Subscriber Plans” on page 216 for more
information.
Chapter 3
Vending Manager
211
■
Subscriber’s role - Select Test subscriber for a subscriber who is testing content
only. Select Regular subscriber for a subscriber who is accessing published
content.
■
Contact Information - Specify contact information for the subscriber.
Complete the other fields on the page as desired.
5. Click OK.
6. Click OK again to close the Confirmation page.
The new Subscriber account is added to the database.
7. Click OK to close the Information page.
▼ Editing a Subscriber Account
1. From the Vending Manager administration console, click Accounts on the main
menu bar.
2. Click the Subscribers tab.
The list of Subscriber accounts is displayed.
3. Click the Login ID for the subscriber account with which you want to work.
The Subscriber Account page is displayed.
4. Click Edit.
The Edit Account page displays the same fields as those described in “Adding a
Subscriber Account” on page 210.
212
Administrator Guide • 2005Q4
5. Modify the information as required, then click OK.
The Edit Subscriber confirmation page is displayed.
6. Click OK again to close the Confirmation page.
The Subscriber account Is updated in the database.
▼ Viewing a Subscriber ’s Download History
To view the list of content that a subscriber has downloaded, follow these steps:
1. From the Vending Manager administration console, click Accounts on the main
menu bar.
2. Click the Subscribers tab.
The list of Subscriber accounts is displayed.
3. Click the Login ID of the subscriber whose history you want to view.
If you do not know the ID, search for the subscriber using their MSISDN.
The Subscriber Account page is displayed.
4. Click the Content List tab.
The Subscriber Account page shows the list of content downloaded by the
subscriber. Under the License column, any content sent or received as gift is noted
along with the Login ID of the recipient or the giver of the gift.
▼ Managing Subscriber Licenses
You can change the status of an application license for a subscriber. The change takes
effect the next time the subscriber attempts to access that application. If you cancel a
license, the subscriber must either wait for you to reactivate the license or purchase
another license to continue using the application. If you reactivate a license that you
previously cancelled, the terms of the original license are reinstated and the
subscriber is not billed.
Note – You can change the status of licenses only for content items that use the
subscription pricing option except for content that was given or received as a gift.
To manage subscriber licenses, follow these steps:
1. From the Vending Manager administration console, click Accounts on the main
menu bar.
2. Click the Subscribers tab.
The list of Subscriber accounts is displayed.
Chapter 3
Vending Manager
213
3. Click the Login ID for the subscriber account with which you want to work.
The Subscriber Account page is displayed.
4. Click Content List.
The list of content that the subscriber has downloaded is displayed.
5. Click Edit License for the content with which you want to work.
6. Select the new status from the Status list.
7. Click OK to save the change.
8. Click OK to close the Confirmation page.
▼ Extending Trial Usage
Trials can be extended for content that was downloaded but not yet purchased by
the subscriber.
To extend a trial for a subscriber, follow these steps:
1. From the Vending Manager administration console, click Accounts on the main
menu bar.
2. Click the Subscribers tab.
The list of Subscriber accounts is displayed.
3. Click the Login ID for the subscriber account with which you want to work.
The Subscriber Account page is displayed.
4. Click Content List.
The list of content that the subscriber has downloaded is displayed.
5. Click Edit License for the content with which you want to work.
6. Click Renew Trials.
The subscriber receives one additional free usage.
Note – The subscriber’s device does not show the additional trial until the original
trial runs have completed.
7. Click OK to save your change.
214
Administrator Guide • 2005Q4
▼ Issuing a Refund
1. From the Vending Manager administration console, click Accounts on the main
menu bar.
2. Click the Subscribers tab.
The list of Subscriber accounts is displayed.
3. Click the login ID for the subscriber that you want to work with.
The Subscriber Account Details page is displayed.
4. Click Content List.
The list of content that the subscriber downloaded is displayed.
5. Click Edit License for the content with which you want to work.
6. Select Initiate Refund.
7. Click OK.
The content list is displayed.
▼ Deleting a Subscriber Account
1. From the Vending Manager administration console, click Accounts on the main
menu bar.
2. Click the Subscribers tab.
The list of Subscriber accounts is displayed.
3. Click the Login ID for the subscriber account with which you want to work.
The Subscriber Account Details page is displayed.
4. Click Delete.
The Delete Subscriber confirmation page is displayed.
5. Click OK to close the Confirmation page.
The Subscriber account is deleted and is removed from any Subscriber plan with
which it was associated.
6. Click OK to close the Information page.
Chapter 3
Vending Manager
215
Managing Subscriber Plans
Subscriber accounts are assigned to Subscriber plans. Subscriber plans determine
which content a subscriber can access and download. A Subscriber plan is mapped
to selected categories in the Vending Manager. The content in the selected categories
is made available to plan members. If content is in a category that is not supported
by the Subscriber plan, the subscriber cannot access it for download.
The following features exist for Subscriber plans:
■
A subscriber must be a member of at least one Subscriber plan and can be a
member of multiple plans.
■
Content supported in one Subscriber plan can be included in another Subscriber
plan by nesting plans. This enables you to create a hierarchy of Subscriber plans.
▼ Viewing Subscriber Plans
1. From the Vending Manager administration console, click Plans on the main menu
bar.
The Subscriber Plan Management page displays all the Subscriber plans defined.
2. Click the plan name.
The properties of the Subscriber plan is displayed.
The Properties page displays the following information about the Subscriber plan:
216
■
The name of the plan.
■
A short description of the plan.
■
Subplan information. Subplans are listed alphabetically (includes the name of the
plan, any subplans it contains, and a description of the plan).
Administrator Guide • 2005Q4
■
Parent plan information. Parent plans are listed alphabetically (includes the name
of the plan, any subplans it contains, and a description of the plan).
■
The category paths. All category paths associated with the plan are listed in the
order in which they appear in the Vending Manager Category.
The Members page displays all the Subscriber accounts that are currently members
of the Subscriber plan. From this page you can view a Subscriber account and add
and remove Subscriber accounts from the plan.
▼ Adding a Subscriber Plan
1. From the Vending Manager administrator console, click Plans on the Main menu
bar.
The Subscriber Plan Management page displays all the Subscriber plans defined.
2. Click New Subscriber Plan.
The Add New Subscriber Plan page is displayed.
Chapter 3
Vending Manager
217
3. Enter the following information
■
Specify a name and description of the plan.
■
Check the plans to be included within the plan.
■
Select the categories you want to offer to subscribers that are assigned to this
plan. Content stocked in these categories is made available to the subscribers
assigned to this plan.
4. Click OK.
Note – You can now add the Subscriber account to a Subscriber plan. See “Adding
Members to a Subscriber Plan” on page 220.
▼ Editing a Subscriber Plan
Before you edit a plan, review the Subscriber accounts that are assigned to the plan.
See “Viewing Subscriber Plan Members” on page 219.
To edit a Subscriber plan, follow these steps:
1. From the Vending Manager administration console, click Plans on the main menu
bar.
The Subscriber Plan Management page displays the list of Subscriber plans defined.
2. Click the name of the Subscriber Plan you want to edit.
The Subscriber Plan Management page is displayed.
218
Administrator Guide • 2005Q4
3. Click Edit.
The Subscriber Plan Management page displays the same fields as those described in
“Adding a Subscriber Plan” on page 217.
4. Modify the plan as required, then click OK.
The plan is updated in the database.
5. Click OK.
The list of subscriber plans is displayed.
▼ Viewing Subscriber Plan Members
Members are the Subscriber accounts assigned to a Subscriber plan. After you create
a new plan, you can add members. You can also add and remove members from an
existing plan.
To view members of a Subscriber plan, follow these steps:
Chapter 3
Vending Manager
219
1. From the Vending Manager administration console, click Plans on the main menu
bar.
The Subscriber Plan Management page displays all the Subscriber plans defined.
2. Click the plan whose list of members you want to see.
The Subscriber Plan Management page for the selected plan is displayed.
3. Click Members.
All members subscribing to the selected plan are shown.
▼ Adding Members to a Subscriber Plan
1. From the Vending Manager administration console, click Plans on the main menu
bar.
The Subscriber Plan Management page displays all defined Subscriber plans.
2. Click the Subscriber plan name to view the properties of a Subscriber Plan.
The Subscriber Plan Management page is displayed.
3. Click Members.
The Members tab displays all Subscriber accounts that are currently members of the
plan.
4. Click Add New Member.
The Members tab displays all Subscriber accounts that are not currently members of
the plan.
5. Check the Subscriber accounts that you want to add to the plan, then click OK.
The accounts are added to the plan and the plan is updated in the database.
220
Administrator Guide • 2005Q4
▼ Removing Members from a Subscriber Plan
1. From the Vending Manager administration console, click Plans on the main menu
bar.
The Subscriber Plan Management page displays all defined Subscriber plans.
2. Click the Subscriber Plan name to view the properties of a Subscriber plan.
The Subscriber Plan Properties page is displayed.
3. Click Members.
The Members tab displays all Subscriber Accounts that are currently members of the
plan.
4. Check the Subscriber accounts that you want to remove from the plan, then click
Remove.
The Subscriber Plan Management page is displayed.
5. Click OK.
The accounts are removed from the plan and the plan is updated in the database. If
a removed account is not assigned to any other Subscriber plan, the default plan is
assigned.
▼ Setting a Default Plan for New Subscribers
The Vending Manager allows you to set a default plan that is automatically assigned
to new Subscriber accounts. You can set any of the defined Subscriber plans as the
default plan.
To set a default Subscriber plan, follow these steps:
1. From the Vending Manager administration console, click Plans on the main menu
bar.
The Subscriber Plan Management page is displayed.
2. Click Set Default.
The Set Default page is displayed.
Chapter 3
Vending Manager
221
3. Check the plan you require, then click OK.
The default plan is automatically assigned to new Subscriber accounts until
alternative plan assignments are made.
▼ Deleting a Subscriber Plan
Before you delete a plan, you might want to review the Subscriber accounts that are
assigned to the plan. See “Viewing Subscriber Plan Members” on page 219.
To delete a Subscriber plan, follow these steps:
1. From the Vending Manager administration console, click Plans on the main menu
bar.
The Subscriber Plan Management page displays all defined Subscriber plans.
2. Click the name of the Subscriber Plan that you want to delete.
The Subscriber Plan Management page for the selected plan is displayed.
Note that you cannot delete the default Subscriber plan. If you want to delete the
plan currently assigned as the default, you must first assign a different plan as the
default.
3. Click Delete.
The Delete Subscriber Plan confirmation page is displayed.
4. Click OK to confirm the deletion.
The plan is deleted from the database and the plan is deleted from any Subscriber
accounts associated with it. If this is the only Subscriber plan assigned to a
Subscriber account, the default Subscriber plan is assigned to the account until a
new Subscriber plan is assigned.
222
Administrator Guide • 2005Q4
▼
Editing Your Administrator Account
This function is available only to Customer Care Agents. Vending Manager
administrators edit their account the same way that they edit the account of another
Vending Manager administrator. See “Editing a Vending Manager Administrator
Account” on page 204.
To edit your own Customer Care Agent account, follow these steps:
1. From the Vending Manager administration console, click Accounts on the main
menu bar.
The Accounts Management page is displayed.
2. Click the My Account tab.
3. Click Edit.
The Edit Account Details page displays the same fields as those described in
“Adding a Vending Manager Administrator Account” on page 202.
4. Modify the information as required.
5. Click OK.
6. Click OK again to close the Confirmation page.
The Administrator Account is updated in the database.
▼
Viewing Reports
The Vending Manager provides daily statistical reports so you can view and track
application download information and usage statistics downloads.
To view reports, follow these steps:
1. From the Vending Manager administration console, click Reports on the main
menu bar.
The Sun Java System Content Delivery Server Reporting page displays the Java
Applications Report.
Chapter 3
Vending Manager
223
2. Select a content type from the Select Content Type drop-down list to display
reports for other content types.
Reports display the following information:
■
Application Download Reporting - The number of downloads and applications:
■
Total Downloads - The total number of downloads for the application type.
■
Applications in the Field - The total number of applications for the application
type.
■
Most Popular Downloads - The top five downloaded applications. Click on an
application to view the properties of that application.
■
Downloads by Time - The number of downloads per time period. The time
periods are defined in six hour increments:
■
■
■
■
■
224
6AM - Noon
Noon - 6PM
6PM - Midnight
Midnight - 6AM
Downloads Per Device - The number of downloads for each mobile device
supported.
Administrator Guide • 2005Q4
Sending MMS Messages
The Vending Manager’s MMS feature lets you send messages containing video,
image, and audio files. This section covers the following actions:
■
■
■
■
■
■
▼
Choosing MMS as the Content Delivery System
Displaying MMS Messages
Creating an MMS Message
Editing an MMS Message
Testing an MMS Message
Using the MMS Test Log
Choosing MMS as the Content Delivery System
The Content Delivery Server lets you choose MMS as the preferred delivery
mechanism for message content. By choosing this preference, all subscribers with
MMS-enabled devices are able to download message content using MMS. If you do
not choose this preference, then subscribers cannot download content using MMS.
To enable MMS as the preferred content delivery mechanism, follow these steps:
1. From the Vending Manager administration console, click Content on the main
menu bar.
2. Click Preferences on the Vending Manager administration console page.
3. Select the Prefer MMS as content delivery mechanism check box in the Vending
Preferences page.
4. Click OK.
Displaying MMS Messages
● Click MMS on the main menu of the Vending Manager administration console.
The MMS Messages page displays the current list of MMS messages stored in the
system. The messages can be sorted by name or date. If the list spans more than one
page, navigation controls enables you to display additional rows.
Chapter 3
Vending Manager
225
▼
Creating an MMS Message
1. Click MMS in the main menu of the Vending Manager administration console.
2. Click New MMS Message.
The MMS wizard opens and the Edit MMS page is displayed.
3. Enter a name for the message and the message text.
A maximum of 256 characters are allowed for the message text.
4. Specify whether you want the text to appear on the top or the bottom of the
device’s display area.
Note – The placement of text might differ from the position selected if the
Multimedia Message Service Center (MMSC) you use or the subscriber’s device does
not support the Synchronized Multimedia Integration Language (SMIL) template
specified in mms_smil.template.filename property.
226
Administrator Guide • 2005Q4
5. Select one or more device types in the table.
The device type table lists the MMS-capable devices from your chosen list of
supported devices. The table has navigation buttons that enables you to display
additional device entries.
6. Click Next to proceed.
7. Select the media type you want to include with the message.
This page enables you to select any of the media types that are appropriate for the
selected devices. If you select both image (or video) and audio, the media types are
run serially.
8. Enter the path or browse for the media file.
9. Click Load.
The page refreshes and now Preview and Remove buttons are present.
10. (Ooptional)Click Preview to preview the media file.
In the case of a video or image file, clicking Load previews the image or video. For
an audio file, clicking Load Audio plays the file. If you do not want to use this file,
click Remove to remove the file and return to Step 9.
Chapter 3
Vending Manager
227
11. Click Save to save the MMS message to the server.
Alternatively, you can click Save and Test to save the message and to perform a test
send. See “Testing a New MMS Message” on page 229 for more Information.
12. Click OK to close the Confirmation page.
▼
Editing an MMS Message
1. Click MMS on the main menu of the Vending Manager administration console.
2. Click the title or text of a message.
The MMS Message wizard is displayed.
3. Edit the information that you want to change in the MMS Message wizard.
In the Edit MMS page, you can change the message name and text, placement of the
message on the screen, or the device types.
To change the image, video, or audio file for the message, click Next to proceed to
the Message Name message_name page.
Click Remove to delete the respective image, video, or audio content (Preview or
Play Audio and Remove buttons appear respective to the content type in the existing
MMS message). Click the Browse button to make another file selection.
228
Administrator Guide • 2005Q4
4. Click Save to save the MMS message to the server or Save and Test to save the
message and to perform a test send.
See “Testing an MMS Message” on page 229 for more information.
5. Click OK to close the Confirmation page.
▼
Testing an MMS Message
The Test MMS Message page enables you to send a test message to an email address
and to a wireless device. You can send a test MMS message when you create it or
you can test sending any message in the MMS message list. This section covers the
following topics:
■
■
Testing an Existing MMS Message
Testing a New MMS Message
Testing a New MMS Message
You can perform a test send of an MMS message when you create it:
1. Click Save and Test in the Add Video/Image Content page.
2. Enter the email address or the phone number (you can also enter both) of the
recipient of the test message.
3. Select the device that corresponds to the telephone number from the drop-down
list.
The drop-down list contains the MMS-capable devices from your chosen list of
supported devices.
4. Click Test to send the message.
5. Enter the results of the test in the Test Log table page.
Chapter 3
Vending Manager
229
Test status is either Passed, Failed, or Not Tested. Enter any comments regarding the
test in the Comments field.
6. Click Save.
See “Using the MMS Test Log” on page 231 for more information.
▼ Testing an Existing MMS Message
To perform a test send of an existing MMS message, follow these steps:
1. Open the MMS Messages page.
See “Displaying MMS Messages” on page 225 for instructions on accessing this page.
2. Click the title or text of a message.
The MMS Message wizard is displayed.
3. Click Send Test MMS Message in the Edit MMS menu bar.
4. Continue with Step 2 through 6 of “Testing a New MMS Message” on page 229.
▼
Deleting an MMS Message
1. Open the MMS Messages page.
See “Displaying MMS Messages” on page 225 for instructions on accessing the page.
2. Select the messages you want to delete in one of the following ways:
230
Administrator Guide • 2005Q4
■
■
Select the check box next to the messages you want to delete
Choose All from the drop-down list
3. Click Delete.
4. Click OK to close the confirmation dialog box.
▼
Using the MMS Test Log
The MMS Test Log enables you to record the results of sending a test MMS message
for a particular device. You can also record comments about the test.
1. Click Edit MMS Test Log in the Edit MMS page.
2. Select the appropriate test results from the drop down list and enter any
comments about the test.
3. Click Save.
You can also click Test in the Send Test Message page to open the Test Log page.
Chapter 3
Vending Manager
231
232
Administrator Guide • 2005Q4
APPENDIX
A
Device Capabilities
This appendix describes the device capabilities that you can specify for the devices
that you use with the Sun Java System Content Delivery Server. It also provides a
sample specification for a common device. See “Managing Devices” on page 68 for
information on how to specify device capabilities.
Descriptions of the Capabilities
Device capabilities are defined in the following categories:
■
■
■
■
System Capabilities
Mandatory Capabilities
Content Delivery Server-Specific Capabilities
User Interface and Software Capabilities
See “Specifying a Capability Value” on page 236 for more information.
System Capabilities
System capabilities are primarily used by the Content Delivery Server. They define
capabilities that a device must have to perform Content Delivery Server
functionality. For instance, system capabilities define whether a device supports
Short Message Service (SMS) or WAP Push.
Push Type takes a string value that specifies the device’s delivery mechanisms: mms,
sms, or wap.
233
Mandatory Capabilities
Mandatory capabilities are capabilities that must be specified for a device to accept
MIDlet applications. TABLE A-1 lists the mandatory capabilities for devices used with
the Content Delivery Server.
TABLE A-1
Mandatory Capabilities
Name
Type
Description
Example Value
MicroEditionConfiguration
String
Software Platform specific: Connected
Limited Device (CLDC) Configuration
version.
CLDC-1.0
MicroEditionProfile
String
Software Platform specific: Mobile
Information Device Profile (MIDP)
version
MIDP-1.0
Content Delivery Server-Specific Capabilities
Content Delivery Server-specific capabilities apply to the server’s functionality and
are not industry standard. Devices must have the Content Delivery Server-specific
capabilities listed in TABLE A-2 if they are to be used with the server.
TABLE A-2
234
Content Delivery Server-Specific Capabilities
Name
Type
Description
Example Value
Supported
Libraries
List
System capability for API validation.
Enables you to set the libraries that the
device supports. Libraries define the API
sets supported. This capability enables the
Content Delivery Server to match an
application to a device that supports the
libraries used by the application.
MIDP-1.0
Descriptor
Template
List
System capability for two-step download
of content.
The template specified is used to generate
the descriptor file for content other than
MIDlets, if two-step download is
specified. If this option is not selected,
content is delivered as either OTA
one-step or as an SMS message.
General
Content
Descriptor
Administration Guide • 2005Q4
Browser Capabilities
Browser capability refers to the browser type specified for a device. A string value
specifying the browser that is rendering markup on the device is given. For example,
Browser Type can have one of the following values:
■
■
■
■
WML-1_2
XHTML-NokiaSeries40
XHTML-Symbain
XHTML-UP
User Interface and Software Capabilities
The Content Delivery Server uses the user interface and software capabilities to
refine the capability matching process.
TABLE A-3 lists the user interface and software capabilities.
TABLE A-3
User Interface and Software Capabilities
Name
Type
Description
Example Value
Bits Per Pixel
Integer
Hardware platform-specific: Bits
Per Pixel
Defines the minimum number of
bits per pixel that a device must
have to run the application.
16
Ccpp Accept
String
List
Software platform-specific: List
of MIME types that the device
supports for OTA download.
application/javaarchive
text/plain
image/gif
Ccpp Accept
Language
List
Software platform-specific:
Locale
Defines the locale supported by
the device. Select one or more
entries from the list.
en_US
Color Capable
Boolean
Hardware platform-specific:
Color Capable
Defines whether or not the
device has a color screen.
Yes or No
Appendix A
Device Capabilities
235
TABLE A-3
User Interface and Software Capabilities (Continued)
Name
Type
Description
Example Value
Confirm
Capable
Boolean
Software platform-specific:
Confirm Capable
Defines whether or not the
device sends a confirmation
(MIDlet-Install-Notify) after a
MIDlet is installed.
Yes or No
Delivery Type
List
Software platform-specific:
Delivery Type
Defines the content delivery
mechanism the device supports.
OTA
NSM
EMS
Image Capable
Boolean
Hardware platform-specific:
Image Capable
Defines whether or not the
device supports images.
Yes or No
Input CharSet
List
Hardware platform-specific:
Input CharSet
Defines the list of character sets
that the device can accept.
US-ASCII
ISO-8859-1
Maximum
Application
Size
Integer
The maximum size of an
application, in bytes, that can be
supported by the device.
30000
Number of
softkeys
Integer
Software platform-specific:
Defines the number of soft keys
the device requires.
2
Output CharSet
List
Hardware platform-specific:
Defines the list of character sets
supported by the device for
output to the display.
US-ASCII
ISO-8859-1
Screen Height
Integer
Hardware platform-specific: The
size of the device’s screen height
in units of pixels.
128
Screen Width
Integer
Hardware platform-specific: The
size of the device’s screen width
in units of pixels.
128
Specifying a Capability Value
Depending on the capability, you can specify the value as a List, Integer, or Boolean.
236
Administration Guide • 2005Q4
List
A list value can contain one or more values. To select multiple values from the list
provided, hold the Control key while clicking on each item that you want to include.
Each value is shown on a separate line when the items are displayed as a string. For
example, Supported Libraries takes a list value that can be either DOJA-1.0, MIDP1.0, or MIDP-2.0.
Integer
An integer value is a numeric value. The integer must be a whole number. The value
does not support decimal points. For example, Number of Softkeys takes an integer
value, such as 2.
Boolean
A valid Boolean value for a device capability is either yes or no. For example, Image
Capable can take a Boolean value of Yes.
Device Specifications
This section provides a sample of a device capabilities specification for a device
supported by the Content Delivery Server, the Nokia 6310i default device. The last
section provides blank tables that you can fill out for other devices that you want to
support.
Note – The device information given in the specifications table for the Nokia 6310i
shows only the device capabilities that are supported in the Content Delivery Server.
Any desired MIME types that are supported by a device but are not supported for
the device in the Content Delivery Server must be added manually by the
Administrator.
Appendix A
Device Capabilities
237
Nokia 6310i
TABLE A-4 shows the specifications for the Nokia 6310i device.
TABLE A-4
238
Nokia 6310i Device Specifications
Capability
Value
Browser Type
WML-1_2
Bits Per Pixel
16
Ccpp Accept Language
en_US
Ccpp Accept String
application/java-archive
image/gif
image/vnd.wap.wbmp
text/plain
text/vnd.sun.j2me.app-descriptor
Color Capable
Yes
Confirm Capable
Yes
Delivery Type
OTA
Image Capable
Yes
Input CharSet
US_ASCII
ISO-8859-1
UTF-8
UTF-16
Maximum Application Size
30000
MicroEdition-Configuration
CLDC-1.0
MicroEdition-Profile
MIDP-1.0
Number of softkeys
2
Output CharSet
US_ASCII
ISO-8859-1
UTF-8
UTF-16
Push Type
wap
Screen Height
65
Screen Width
96
Administration Guide • 2005Q4
User-Defined Devices
The following blank tables are provided for you so you can enter information for the
devices that you add to the Content Delivery Server.
TABLE A-5
Device Specifications for a User-Defined Device 1
Capability
Value
Browser Type
Bits Per Pixel
Ccpp Accept String
Ccpp Accept Language
MicroEdition-Configuration
Color Capable
Confirm Capable
Delivery Type
Image Capable
Input CharSet
Maximum Application Size
MicroEdition-Profile
Number of softkeys
Output CharSet
Push Type
Screen Height
Screen Width
TABLE A-6
Device Specifications for a User-Defined Device 2
Capability
Value
Browser Type
Bits Per Pixel
Ccpp Accept String
Ccpp Accept Language
MicroEdition-Configuration
Appendix A
Device Capabilities
239
TABLE A-6
Device Specifications for a User-Defined Device 2 (Continued)
Capability
Color Capable
Confirm Capable
Delivery Type
Image Capable
Input CharSet
Maximum Application Size
MicroEdition-Profile
Number of softkeys
Output CharSet
Push Type
Screen Height
Screen Width
240
Administration Guide • 2005Q4
Value
APPENDIX
B
Content Pricing
Content types are assigned a DRM type in the Catalog Manager along with the
possible pricing models that can be used for that content type. TABLE B-1 lists the
possible pricing models that can be used for content types with the corresponding
DRM types:
TABLE B-1
DRM Type
No DRM
Associated DRMs, Content Types, and Pricing Models
DRM Agent or Format
Content Type
Pricing Model
ringtone
image
midlet
iappli
video
group_logo
operator_logo
monophonic_ringtone
sms_picture
Free always
First download only
Every download
241
TABLE B-1
Associated DRMs, Content Types, and Pricing Models (Continued)
DRM Type
DRM Agent or Format
CDS DRM
Agents
Disconnected Time Sensitive
242
Content Type
midlet
Pricing Model
Free always
First download only
Every download
Per period
Per subscription
Disconnected Use Sensitive
midlet
Free always
Trial
First download only
Every download
Per period
Per use
Disconnected Use and Time
Sensitive
midlet
Free always
Trial
First download only
Every download
Per period
Per use
Per subscription
Small Connected Use and Time
Sensitive
midlet
Free always
Trial
First download only
Every download
Per period
Per use
Per subscription
Midsize Connected Use and
Time Sensitive
midlet
Free always
Trial
First download only
Every download
Per period
Per use
Per subscription
Standard Connected Use and
Time Sensitive
midlet
Free always
Trial
First download only
Every download
Per period
Per use
Per subscription
Administration Guide • 2005Q4
TABLE B-1
DRM Type
Associated DRMs, Content Types, and Pricing Models (Continued)
DRM Agent or Format
Content Type
Pricing Model
ringtone
image
midlet
iappli
video
Free always
First download only
Every download
Forward Lock
ringtone
image
midlet
iappli
video
Free always
First download only
Every download
Combined Delivery
ringtone
image
midlet
iappli
video
Trial
Per use
Per period
Per interval
Separate Delivery
ringtone
image
midlet
iappli
video
Trial
Per use
Per period
Per interval
CDS OMA DRM 1.0
Forward Lock
OMA DRM 1.0
Pricing Scenarios
The pricing scenarios given here show the effect on content in both the Catalog
Manager and the Vending Manager when changes are made to the purchase price of
content.
All scenarios are based on the following existing conditions:
■
Pricing option 1A is defined in the Catalog Manager as $1.00 per Download.
■
Two content items, Item1 and Item2, both are assigned pricing option 1A.
■
Automatic pricing updates is selected in the Vending Manager.
Appendix B
Content Pricing
243
Initial purchase price for Item 1 and Item 2 are shown as they exist in the Catalog
Manager and the Vending Manager. The currency type is the same for both the
Catalog Manager and Vending Manager ($). The General Pricing Rule is $1.00 is
equivalent to $1.00 and no markup is applied.
TABLE B-2
Initial Pricing Set for Items 1 and 2
Catalog Manager
Vending Manager
Item1
$1.00 per Download
PO 1A
$1.00 per Download
PO 1A
Item2
$1.00 per Download
PO 1A
$1.00 per Download
PO 1A
Table notation:
■
■
■
PO - Pricing option
DIS - Content is disassociated from pricing option
RE - Content is reassociated with pricing option
Scenario 1: The Catalog Manager administrator edits pricing option 1A from $1.00
per Download to $1.50 per Download.
TABLE B-3
Resulting Pricing for Items 1 and 2 in Scenario 1
Catalog Manager
Vending Manager
Item1
$1.50 per Download
PO 1A
$1.50 per Download
PO 1A
Item2
$1.50 per Download
PO 1A
$1.50 per Download
PO 1A
Scenario 2: The Catalog Manager administrator edits the properties of Item 1 by
changing its purchase price to $1.50. Item 1 is now disassociated from pricing option
1A in the Catalog Manager. No changes are made to the pricing option itself.
TABLE B-4
Resulting Pricing for Items 1 and 2 in Scenario 2
Catalog Manager
244
Vending Manager
Item1
$1.50 per Download
Custom
PO 1A DIS
$1.50 per Download
Custom
PO 1A DIS
Item2
$1.00 per Download
PO 1A
$1.00 per Download
PO 1A
Administration Guide • 2005Q4
Scenario 3: Two changes to Item1 occur:
■
The Vending Manager administrator edits the property of Item 1 by changing the
purchase price from $1.00 to $0.75. Item 1 is now disassociated from pricing
option 1A in the Vending Manager.
■
Later, the Catalog Manager administrator edits pricing option 1A by changing the
purchase price from $1.00 to $0.80. In the Catalog Manager, Item 1 and Item 2 are
still associated with pricing option 1A.
TABLE B-5
Resulting Pricing for Items 1 and 2 in Scenario 3
Catalog Manager
Vending Manager
Item1
$0.80 per Download
PO 1A
$0.75 per Download
Custom
PO 1A DIS
Item2
$0.80 per Download
PO 1A
$0.80 per Download
PO 1A
Scenario 4: Two changes to Item1 occur:
■
The Vending Manager administrator edits the property of Item 1 by changing the
purchase price from $1.00 to $0.75. Item 1 is now disassociated from pricing
option 1A in the Vending Manager.
■
Later, the Catalog Manager administrator edits the property of Item 1 by
changing the purchase price from $1.00 to $0.80. Item 1 is now disassociated from
pricing option 1A in the Catalog Manager:
TABLE B-6
Resulting Pricing for Items 1 and 2 in Scenario 4
Catalog Manager
Vending Manager
Item1
$0.80 per Download
Custom
PO 1A DIS
$0.80 per Download
Custom
PO 1A DIS
Item2
$1.00 per Download
PO 1A
$1.00 per Download
PO 1A
Scenario 5: The Vending Manager administrator has a custom price of $0.80 for
Item1. The administrator then unstocks Item1 and later restocks Item1 and accepts
pricing option 1A for Item1. Item1 is now associated with its original pricing option
TABLE B-7
Resulting Pricing for Items 1 and 2 in Scenario 5
Catalog Manager
Vending Manager
Item1
$1.00 per Download
PO 1A
$1.00 per Download
PO 1A RE
Item 2
$1.00 per Download
PO 1A
$1.00 per Download
PO 1A
Appendix B
Content Pricing
245
Scenario 6: Item1 is never associated with a pricing option. The Catalog Manager
administrator assigns a price of $2.00 to it. Later the administrator changes the price
to $2.50.
TABLE B-8
Resulting Pricing for Items 1 and 2 in Scenario 6
Catalog Manager
246
Vending Manager
Item1
$2.50 per Download
Custom
$2.50 per Download
Custom
Item 2
$1.00 per Download
PO 1A
$1.00 per Download
PO 1A
Administration Guide • 2005Q4
Glossary
This glossary defines the terms and acronyms used in the context of this guide.
Accounts
The individuals who have access to the Sun Java System Content Delivery
Server. Four types of accounts are available: Developer Accounts, Vending
Manager Accounts, Subscriber Accounts, and Administrator Accounts.
Active Content
Stocked content that is available to the Vending Manager and to subscribers.
The Vending Manager administrator can change the status of content that is
active.
Administrator
Administrator
Accounts
Applications
Billing Model
Person responsible for administration of the Catalog Manager or Vending
Manager component of the Content Delivery Server.
Accounts for individuals who administer the Catalog Manager or the Vending
Manager. Administrator Accounts can be disabled when you no longer want
an individual accessing the Catalog Manager or the Vending Manager.
Executable content submitted to the Content Delivery Server.
A billing type, either prepaid or postpaid, in the billing system supported by
the Content Delivery Server.
In the prepaid billing model, the billing system is contacted for authorization
before a subscriber is permitted to purchase and download content. For
postpaid billing models, the billing system receives purchase information after
the transaction occurs. See Pricing Model.
Bundled Content
Campaign
A collection of related files (for example, an application and any associated
audio, video, or image files). Bundled content is created and managed by
the Vending Manager.
A collection of attributes for promoting or selling content. The Vending
Manager can create marketing campaigns.
247
Campaign Coupon
Capabilities
Catalog Manager
Catalog Price
Category
Connected Limited
Device Configuration
(CLDC)
A sequence of characters and numbers used to identify a campaign. With a
coupon, a subscriber can purchase content that has been promoted or
discounted for a specific campaign.
Criteria that the Catalog Manager uses to define the devices that can download
specific content. Capabilities are defined in the following categories:
Mandatory Capabilities, System Capabilities, Content Delivery Server-Specific
Capabilities, and User Interface and Software Capabilities.
The content aggregator or warehouse. The Catalog Manager manages all the
content submitted by the developer community and publishes the content to
the Vending Managers.
Purchase Price of content set by the Catalog Manager administrator. See
Content Provider Price and Vending Price.
A logical container or bucket that holds individual Applications, Ring Tones or
Pictures. Content categories are central to content management. Categories in
the Catalog Manager control access to the content by Vending Managers.
Categories in the Vending Manager control access to the content by
Subscribers.
A part of the Java 2 Platform, Micro Edition platform. CLDC is the foundation
of the Java runtime environment targeting small, resource-constrained devices,
such as mobile phones, mainstream personal digital assistants, and small retail
payment terminals.
Combined with a device-specific Java class library, such as the Mobile
Information Device Profile (MIDP), CLDC provides a complete runtime
environment for small resource-constrained devices.
Content
Content Delivery
Server
Content Delivery
Server-Specific
Capabilities
248
The applications, ring tones, and pictures that are submitted by developers and
eventually downloaded by subscribers.
A high performance software solution that allows operators to manage the
complexity of delivering wireless Java applications over-the-air (OTA) to their
subscribers. The Sun Java System Content Delivery Server separates content
aggregation, presentation, and delivery into separate Managers—Catalog
Manager, Fulfillment Manager, and Vending Manager. This enables an
operator to centrally manage content, customize multiple subscriber interfaces,
and ensure fast downloads.
The server’s functionalities, which are not industry standard.
Administration Guide • 2005Q4
Content Descriptor
Template
Content Provider
Content Provider
Price
A description of content other than MIDlets (such as Ring Tones, Pictures, and
Symbian applications) similar to the way a JAD File describes a MIDlet.
The individual or corporation who submits content to the Catalog Manager.
Purchase price of content set or selected by the content provider. The content
provider price can be overridden by the Catalog Manager administrator. See
Catalog Price and Vending Price.
Developer Accounts
A definition of corporations or individuals that submit content to the Catalog
Manager. Developer Accounts are associated with one or more Developer
Plans.
Developer Plans
A definition of the set of APIs that developers can use in applications that they
submit. A Profile defines the classes in a specific library that developers can
use. A Developer Plan contains one or more Profiles.
Device
Descriptor Template
Edition
Digital Rights
Management (DRM)
A mobile device model supported by the Catalog Manager.
See Content Descriptor Template.
Alternate versions of an application, picture, or ring tone that run on devices
with different capabilities.
Usage protection of content. Rights protection can be delivered separately from
content or with content.
Fulfillment Manager
The Fulfillment Manager provides a dedicated, high-performance, scalable
solution for delivering OTA content to subscribers.
General Pricing Rule
Initial currency and initial price equivalents as set in the configuration
properties file by the System Administrator. At deployment time, the system
administrator can set the purchase prices (monetary values) in the Vending
Manager. After deployment, the Vending Manager administrator can change
the purchase prices as needed.
Inactive Content
Stocked content that is available to the Vending Manager but not available to
subscribers. The Vending Manager administrator can change the status of
content that is inactive.
JAD File
A Java Application Descriptor (JAD) file describes a MIDlet and its associated
JAR File.
JAR File
A Java ARchive (JAR) file contains the class, image, and sound files for a
MIDlet gathered into a single file and compressed for faster downloading to
your device. By putting the MIDlet components in a single file and
compressing that file, download time is saved.
Library
An API set that a device model supports.
Glossary
249
Locale
Mandatory
Capabilities
MIDlet
Mobile Information
Device Profile
(MIDP)
Obfuscation
Over-The-Air Protocol
(OTA)
Pictures
Plan
Pricing Controls
A geographic or political region or community that shares the same language,
customs, or cultural convention. In software, a locale is a collection of files,
data, and code, which contains the information necessary to adapt software to
a specific geographical location.
Required capabilities for a device to accept MIDlet applications.
A MIDlet is a Java technology-based application written for MIDP. MIDlet
applications are subclasses of the javax.microedition.midlet.MIDlet
class that is defined by the MIDP specification.
A set of Java technology-based APIs that, together with the Connected Limited
Device Configuration (CLDC), provides a complete Java 2 Platform, Micro
Edition (J2METM platform) software application runtime environment targeted
at mobile information devices, such as mobile phones and entry level PDAs.
The MIDP specification addresses issues such as user interface, persistent
storage, networking, and application life cycle.
A technique used to protect source code. Obfuscation makes code more
difficult to understand when it is decompiled, but it has no affect on the
functionality of the code. In addition, obfuscation makes the JAR file as small
as possible, enabling devices with smaller memories to support large JAR files.
A standard for the transmission and reception of application-related
information in a wireless communications system.
Background images against which menus, icons, and other elements are
displayed. Also a type of content supported by the Content Delivery Server.
A plan defines content access rights. Plans can also be nested within other
Plans. Three types of plans are available: Vending Plans, Developer Plans, and
Subscriber Plan.
Controls that enable the Catalog Manager administrator to select the list of
available pricing models that can be applied to the selected content type by
either a content provider or a Catalog Manager.
Pricing Model
Condition of purchase associated with content. Supported pricing models are:
free always, first download only, every download, trial, per use, per period,
per subscription, and per interval.
Pricing Option
Pricing characteristics of content that is presented to the subscriber at purchase
time. The pricing option consists of the following elements: Pricing Option ID,
Pricing Option Name, Pricing Model, and Purchase Price.
The Pricing Option ID is a unique identifier for the pricing option. The Pricing
Option Name is an external pricing option name used by external systems
to identify the content items.
250
Administration Guide • 2005Q4
Profile
Purchase Price
Record Management
System (RMS)
Ring Tones
Short Message Service
(SMS)
Stocked Item
Subscriber
A Profile defines a set of APIs that a developer can use in applications
submitted to the Content Delivery Server. See also Developer Plans.
A monetary value assigned to an item of content. The currency type as seen by
subscribers is determined by individual Vending Managers. The monetary
value is initially assigned by the Catalog Manager administrator in the local
currency of that administrator.
A simple record-oriented database that allows a MIDlet to persistently store
information and retrieve it later. Different MIDlets can also use the RMS to
share data.
A content type that is supported by the Content Delivery Server. Also, the
sound heard by someone receiving a call.
A service for sending messages of up to 160 characters (224 characters if using
a 5-bit mode) to mobile phones that use Global System for Mobile (GSM)
communication.
Content that is stocked on a Vending Manager and is available to subscribers
for download.
An individual who downloads content from the Vending Manager.
Subscriber Accounts
An account that defines an individual who subscribes to a service plan that
provides them with the download service. Subscriber Accounts are associated
with one or more Subscriber Plan.
Subscriber Plan
A plan that determines the content that a subscriber can access and download.
Subscriber Accounts are assigned to Subscriber Plans. A Subscriber Plan is
mapped to selected categories in the Vending Manager. The content in the
selected categories is made available to plan members. If content is in a
category that is not supported by the Subscriber Plan, the subscriber cannot
access it.
Content supported in one Subscriber Plan can be included in another
Subscriber Plan by nesting plans. This allows you to create a hierarchy of
Subscriber Plans.
System Administrator
System Capabilities
Person responsible for installation, configuration, deployment, and
performance of the Content Delivery Server.
System capabilities are primarily used by the Content Delivery Server. They
define capabilities that a device must have in order to perform Content
Delivery Server functionality. For instance, system capabilities define whether
a device supports SMS or WAP Push.
Glossary
251
Testing Content
Unavailable Content
Unstocked Content
Updated Content
User-agent
User Interface and
Software Capabilities
Vending Manager
Content currently undergoing or requiring testing prior to being published.
The status of Testing is assigned by the Catalog Manager administrator. Testing
content is available to Vending Managers for distribution only to subscribers
with testing roles (assigned by the Vending Manager).
Stocked content on the Vending Manager that is unpublished by the Catalog
Manager. Unavailable content is not available to the Vending Manager or to
subscribers. The Vending Manager administrator cannot change the status of
content that is unavailable. The Vending Manager administrator can only
unstock it.
Published content received from the Catalog Manager that is not currently
stocked in the Vending Manager. Unstocked content is available in the Vending
Manager catalog. The Vending Manager administrator can stock published
content received from the Catalog Manager and unstock content with stocked
status in the Vending Manager.
Stocked content whose catalog property information has changed.
A unique identifier for a mobile device model. The user-agent is a regular
expression that usually contains hardware, browser, and model information
about the device.
The Content Delivery Server uses the user interface and software capabilities
to refine the capability matching process.
The Vending Manager manages content published by the Catalog Manager.
The Vending Manager controls subscriber access and purchase pricing and
provides daily statistical reports on the Content Delivery Server.
Vending Managers are generally configured to serve separate enterprises and a
single Catalog Manager can serve multiple Vending Managers.
Vending Manager
Accounts
Vending Plans
Vending Plans define content access rights. When creating a Vending Plan, you
can define the categories that a Vending Manager can access. Vending Plans
can also be nested within other Vending Plans.
Vending Price
Monetary value set in the local currency for content set by a Vending Manager
administrator. Also known as retail price. See Catalog Price and Content
Provider Price.
Wireless Application
Protocol (WAP)
252
A Vending Manager account is for a specifically branded vending manager that
stocks content from the Catalog Manager. It is associated with one or more
Vending Plans.
A specification for a set of communication protocols to standardize the way
that wireless devices, such as cellular telephones and radio transceivers, can be
used for Internet access, including e-mail, the World Wide Web, unscrupulous,
and Internet Relay Chat (IRC).
Administration Guide • 2005Q4
Glossary
253
254
Administration Guide • 2005Q4
Index
A
about this guide, xv
account management
catalog manager, 94 to 106
catalog manager administrator accounts, 104 to
106
developer accounts, 101 to 104
overview
catalog manager, 6
vending manager, 9
subscriber accounts, 209 to 215
vending manager accounts, 97 to ??
vending manager administrator accounts, 201 to
205
accounts
catalog manager administrator
adding, 105
deleting, 106
description, 95
editing, 106
managing, 104
properties, 104
viewing, 104
developer
adding, 101
assigning to a developer plan, 122
deleting, 104
description, 95
editing, 103
managing, 101
properties, 101
removing from a developer plan, 123
viewing, 101
subscriber
managing, 209
searching, 209
vending manager
adding, 97
assigning to a vending plan, 111
deleting, 100
description, 95
editing, 99
managing, 97
properties, 97
removing from a vending plan, 112
viewing, 97
vending manager administrator
adding, 202
deleting, 205
editing, 204
searching, 201
viewing, 201
administration console, 10, 11
administrator account
catalog manager
adding, 105
deleting, 106
description, 95
editing, 106
managing, 104
viewing, 104
default, 11
vending manager
adding, 202
deleting, 205
editing, 204
255
managing, 201
searching, 201
viewing, 201
administrator accounts
editing own, 223
administrator tasks
catalog manager, 3
customer care agent, 8
vending manager, 8
advertisements
see customized marketing campaigns
API filter, 5
architecture, 1
autoCreate.newDevice property, 78
B
background job indicators, 125
background job status, 125
background jobs
clearing failed jobs, 128
examining details, 127
getting status, 126
browser capabilities, 235
browser requirements, 10
browser.config file, 82
bulk stocking operations, 144
C
campaigns
creating, 185
editing templates, 201
types of, 185
capability matching, 69
catalog content
see published content
catalog manager
accounts
administrator, 104
managing, 94
vending manager, 97
administrator tasks, 3
category management, 14
content
categories, 14
searching, 49
submitted, 44
256
Administration Guide • 2005Q4
content descriptor template management, 74
device management, 68
logging in, 11
overview, 3
plans
developer, 114
managing, 107
vending, 107
processes, 4
profiles
adding, 115
deleting, 118
editing, 117
viewing, 114
vending plan management, 107
catalog price, 46
categories
catalog manager
adding, 16
changing display order, 16
deleting, 18
editing, 17
viewing, 14
changing price per category, 66
copying in Catalog Manager, 58
copying in Vending Manager, 163
moving in Catalog Manager, 58
moving in Vending Manager, 163
vending manager
adding, 130
deleting, 133
editing, 132
managing, 130
category management
catalog manager, 14 to 18
vending manager, 130 to 134
changing the status, 157
compatible devices, 88
content
capability matching, 69
changing the pricing model, 29
checking stocking status, 151
content type
adding, 32
associating a DRM, 25
creating a pricing option, 35
deleting, 39
editing, 34
editing a pricing option, 37
managing, 19
setting DRM, 32
setting pricing models, 34
submissions, 19
viewing, 31
copying in Catalog Manager, 62
copying in Vending Manager, 167
customer care agent
viewing stocked content, 206
digital rights protection, 20
disassociating pricing option from, 30
editing submitted, 52
editions
changing the status, 52
properties, 48, 140, 209
viewing, 47, 139, 209
ID, external, 144, 161, 178, 181
managing testing items, 183
MIME type
deleting, 43
editing, 41
managing, 19
properties, 32
registering, 40
viewing, 31
moving in Catalog Manager, 62
moving in Vending Manager, 167
pending, 50
pricing, 26
grace period, 27
published
deleted, 50
denying, 50
searching, 137
setting price per category, 66
testing, 50
updating, 152
viewing, 56, 134
remotely hosted copyrighted content, 21
required pricing options, 29
separate content type submission, 19
single content type submission, 19
status, 136
stocked
active, 207
changing the status, 157
editing, 159
inactive, 207
searching, 156
setting price per category, 170
unstocking, 158
updating, 162
updating the catalog, 152
viewing properties, 208
stocking manually, 142
stocking mulitple content items, 144
stocking options, 141
stocking status, 152
stocking testing items, 184
submitted
changing the status, 50
deleting, 50
denied, 50
pending, 50
publishing, 50
searching, 49
state, 44
testing, 50
viewing all, 46
viewing by state, 45
types, 19
viewing content properties, 137
viewing editions, 57
Content Delivery Server content attributes, 75
Content Delivery Server specific capabilities, 234
content descriptor template
adding, 77
content attributes, 75
editing, 78
managing, 74
properties, 76
sample, 75
viewing, 76
content management
catalog manager, 13 to 58
overview
catalog manager, 5
vending manager, 9
published content, 55 to 58, 134 to 142
stocked content, 156 to 163
submitted content, 44 to 55
testing content, 183
content type
adding, 32
deleting, 39
editing, 34
Index
257
managing, 19
setting DRM, 32
setting pricing model, 34
viewing, 31
content validation, 5
cost, 207
cost price, 46
customer care agent
accounts, 201
tasks
overview, 8
customer care agents
adding subscriber accounts, 210
adding subscriber members, 220
adding subscriber plans, 217
deleting subscriber accounts, 215
deleting subscriber plans, 222
editing administrator account, 223
editing subscriber accounts, 212
editing subscriber plans, 218, 221
issuing a refund, 215
managing subscriber licenses, 213
managing subscriber plans, 216
setting default plan for new subscribers, 221
setting stocked content display, 207
tasks
extending trial usage, 214
managing subscriber accounts, 209
viewing content editions, 209
viewing download history, 213
viewing reports, 223
viewing stocked content, 208
viewing stocked contents, 206
viewing subscriber accounts, 210
viewing subscriber members, 219
viewing subscriber plans, 216
customized marketing campaigns, 184 to 193
D
default
administrator account, 11
developer plan, 102, 114, 123, 124
log in ID and password, 11
subscriber plan, 209, 210, 211, 221, 222
vending plan, 99, 112, 113
denied content, 50
descriptor template
258
Administration Guide • 2005Q4
see content descriptor template
developer account
adding, 101
assigning to a developer plan, 122
deleting, 104
description, 95
editing, 103
managing, 101
properties, 101
removing from a developer plan, 123
viewing, 101
developer plan
adding, 119
default, 102, 114, 123, 124
deleting, 124
editing, 120
licensee
see member
managing, 114
member
adding, 122
removing, 123
viewing, 121
properties, 119
setting the default, 123
viewing, 119
developer plans, description, 107
device library
adding, 71
deleting, 74
editing, 73
properties, 70
viewing, 70
device management, 6, 68 to 78
devices
activating new or quarantined, 85
adding, 80
auto-detection, 78
capabilities
browser, 235
mandatory, 234
system, 233
user interface/software, 235
capability matching, 69
deleting, 91
editing, 89
managing, 68
mapping MIME types, 86
new, 79
properties, 89
provisioning of detected devices, 78
quarantined, 79
setting a default, 90
setting compatible devices, 88
specification tables, 237
specifying capabilities, 83
status types, 79
viewing, 78
devices capabilities
specifying a value, 236
digital rights protection
CDS DRM, 21
CDS DRM agents, descriptions of, 21
CDS OMA DRM 1.0 Forward Lock, 21
Combined Delivery, 23
disabling DRM, 26
enabling DRM, 26
Forward Lock, 23
inapplicable content, 21
non-compliant devices, 24
OMA DRM 1.0, formats of, 23
Separate Delivery, 23
supported MIME types for OMA DRM 1.0, 24
types of, 20
documentation, Content Delivery Server, xvii
E
editions
published
properties, 140
viewing, 139
stocked
properties, 209
viewing, 209
submitted
changing the status, 52
properties, 48
viewing, 47
viewing published, 57
event-driven campaign, 185
external content ID
changing, 161, 181
setting, 144, 178
F
fulfillment manager, 7
G
grace period, 27
I
instrumentation, 5
DRM agents, 21
intended audience, xv
ISO Country Code, 93
ISO Language Code, 93
J
jobs
clearing list, 127
failed, 125
informational, 125
pending, 125
L
licensee
see member
licenses, subscriber, 213
locales
adding, 92
changing, 94
defined, 92
ISO Country Code, 93
ISO Language Code, 93
local code, 93
managing, 92
removing, 94
logging in, 11
M
mandatory capabilities, 234
member
adding developer licensees, 122
developer plan
adding, 122
removing, 123
viewing, 121
vending plan
adding, 111
removing, 112
viewing, 111
MIME type
deleting, 43
editing, 41
Index
259
managing, 19
mapping to device, 86
properties, 32
registering, 40
supported types for OMA DRM 1.0, 24
viewing, 31
multimedia message service
choosing, 225
creating messages, 226
deleting new messages, 230
displaying, 225
editing, 228
test logs, 231
testing new messages, 229, 230
multimedia message service (MMS), 225
N
notification templates
properties, 198
O
obfuscation, 5
organization, xv
outbound campaign, 185
overview
account management
catalog manager, 6
vending manager, 9
catalog manager, 3
content management
catalog manager, 5
vending manager, 9
content validation, 5
customer care tasks, 8
device management, 6
fulfillment manager, 7
plan management
catalog manager, 6
vending manager, 9
Sun Java System Content Delivery Server, 1
vending manager, 7
P
pending content, 50
plan management
catalog manager, 107 to 125
developer plans, 114 to 125
260
Administration Guide • 2005Q4
overview
catalog manager, 6
vending manager, 9
subscriber plans, 216 to 222
vending plans, 107 to 113
plans
developer
adding, 119
adding members, 122
deleting, 124
description, 107
editing, 120
managing, 114
properties, 119
removing members, 123
setting the default, 123
setting the default service plan, 123
viewing, 119
viewing members, 121
managing, 107
subscriber
assigning subscriber accounts, 219
properties, 216
setting the default, 221
vending
adding, 108
adding members, 111
deleting, 112, 113
description, 107
editing, 110
managing, 107
properties, 108
removing members, 112
setting the default, 112
viewing, 107
viewing members, 111
pricing
associated content types, DRM, and pricing
models, 28
catalog, 46
changing the pricing model, 29
content, 26
cost, 207
recommended price, 46
retail, 207
setting
price per category for published content, 66
price per category for stocked content, 170
pricing models
defined, 26
Every Download, 27, 54
First Download, 27, 54
Free, 27, 54
Per Interval, 27, 54
Per Period, 27, 54
Per Subscription, 27, 54
Per Use, 27, 54
setting, 34
Trial, 27, 54
pricing options, 29
creating, 35
disassociating, 30
editing, 37
required, 29
profile
adding, 115
deleting, 118
editing, 117
properties, 115
viewing, 114
promotional campaign, 185
properties
catalog manager administrator account, 104
content descriptor template, 76
developer account, 101
developer plan, 119
device, 89
device library, 70
editions
published, 140
stocked, 209
submitted, 48
MIME type, 32
profiles, 115
published content, 137
stocked content, 208
subscriber plan, 216
vending manager account, 97
vending plan, 108
published content, 50
changing status, 50
deleting, 50
denied, 50
managing, 134
properties, 137
searching, 137
setting price per category, 66
testing, 50
R
refunds, 215
remotely hosted copyrighted content, 21
reports, 10, 223
retail price, 207
S
server locales, see locales, 92
software capabilities, 235
state, submitted content, 44
status
changing, 157
subscriber license, 214
status of content, 136
stocked content, 157
editing, 159
properties, 208
searching, 156
setting price per category, 170
stocking individual content items, 142
stocking multiple content items, 144
unstocking, 158
updating, 162
updating the catalog, 152
stocking jobs
checking status, 151
clearing, 150
status of, 149, 151
status of content items, 152
stopping, 150
viewing, 149
stocking options, 141
submitted content
changing the status, 50
Deleted, 50
Denied, 50
editing, 52
managing, 44
New, 44
Pending, 44, 50
Published, 50
searching, 49
state, 44
Testing, 50
Index
261
submitted content
Denied, 44
viewing all, 46
viewing by state, 45
subscriber account
searching, 209
subscriber accounts
adding, 210
deleting, 215
editing, 212
managing, 209
setting default plan, 221
viewing, 210
viewing download history, 213
subscriber download history, 213
subscriber license
changing the status, 214
subscriber licenses
extending trial, 214
issuing a refund, 215
managing, 213
subscriber plan
default, 209, 210, 211, 222
properties, 216
setting the default, 221
subscriber plan members
adding, 220
viewing, 219
subscriber plans
adding, 217
assigning, 211
deleting, 222
editing, 218, 221
managing, 216
viewing, 216
subscriber role
testing, 212
subscriber roles
assigning, 212
subscriber types
testing, 183
Sun Java System Content Delivery Server, 1
system capabilities, 233
T
testing subscriber, 212
testing subscribers, 183
262
Administration Guide • 2005Q4
trial usage
creating, 207
extending, 214
U
unstock content, 158
unstocking content, 158
user agent, defined, 79
user interface capabilities, 235
V
vending manager
adding administrator accounts, 202
administrator account
adding, 202
deleting, 205
editing, 204
managing, 201
searching, 201
viewing, 201
administrator tasks, 8
catalog content
see published content
categories
adding, 130
deleting, 133
editing, 132
managing, 130
content, 134
customer care agent tasks, 8
logging in, 12
overview, 7
processes, 9
properties
published content, 137
published content
managing, 134
searching, 137
reports, 223
subscriber plans, 216
viewing administrator accounts, 201
vending manager account
adding, 97
assigning to a vending plan, 111
deleting, 100
description, 95
editing, 99
managing, 97
properties, 97
removing from a vending plan, 112
viewing, 97
vending plan
adding, 108
default, 99, 113
deleting, 113
description, 107
editing, 110
managing, 107
members
adding, 111
removing, 112
viewing, 111
properties, 108
setting the default, 112
viewing, 107
Index
263
264
Administration Guide • 2005Q4