Transcript
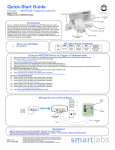
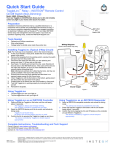
Quick-Start Guide
SwitchLinc Dimmer - INSTEON® Remote Control Dimmer
TM
Model: 2476D (600 Watt), Rev 5.0+
Your new SwitchLinc Dimmer allows you to dim and remotely control any light in your home at the
touch of a button.
Preparation
Paddle
top
Installation should be performed only by a qualified electrician or by a
homeowner who is familiar and comfortable with electrical circuitry. If you
have any questions regarding installation, we suggest consulting an
electrician. Software such as HouseLincTM 2 can make management and
setup of INSTEON devices much easier. If you have any questions
regarding setup, contact Smarthome Tech Support.
LED bar
Paddle
bottom
Tools Needed
•
•
•
Set button
Phillips screwdriver
Wire cutter / stripper
Voltage tester to identify wires inside the junction box
Installation SwitchLinc (Typical, 2-Way Circuit)
Note: For Multi-Way Circuit installation, refer to the Owner’s Manual.
1)
2)
3)
4)
5)
6)
7)
8)
9)
At the circuit breaker or fuse panel, disable the circuit supplying power
to the switch
Remove the faceplate from the existing switch, then unscrew the
switch and pull it out from the junction box
Disconnect the wires from the switch you are replacing and ensure you
have 1/2” of bare wire on the ends
To correctly identify the LINE, LOAD, NEUTRAL, and GROUND wires,
enable power to the switch from the circuit breaker or fuse panel, use a
line voltage meter, then turn the breaker off again. See Figure 1 to
properly connect your wires to SwitchLinc.
Note: Mechanical switches don’t utilize NEUTRAL, but they are usually
available in the back of the switch box.
Ensure that all wire connectors are firmly attached and that there is no
exposed copper except for the GROUND wire
Orient SwitchLinc with the LED bar at the left, gently place it into the
junction box, and then screw it into place
Enable power to the fixture from the circuit breaker or fuse panel
Test that the SwitchLinc is working properly by turning the light on and
off
Reinstall the faceplate
Using SwitchLinc
•
•
•
•
•
•
Tap the paddle top to turn your light on
Tap the paddle bottom to turn your light off
Press & hold the paddle top to brighten your light
Press & hold the paddle bottom to dim your light
Double-tap the paddle top to turn your light to full-on quickly
Double-tap the paddle bottom to turn your light off quickly
Figure 1
Using SwitchLinc as a Controller
Using SwitchLinc as a Responder
1)
1)
2)
3)
Press & hold paddle top until the unit beeps (about 10 seconds)
The top LED will begin blinking and the controlled light will flash
once
You will have 4 minutes to complete the next step.
Select the INSTEON device you would like to control and activate its
Linking Mode
SwitchLinc will double-beep and its LED will stop blinking and
turn on solid and the controlled light will flash once
Confirm the Link by tapping the SwitchLinc paddle on and off
The device SwitchLinc is controlling should respond appropriately
2)
3)
Select your INSTEON-compatible Controller and activate its Linking
Mode. You will have 4 minutes to complete the next step.
Press & hold the paddle top on SwitchLinc until the unit double-beeps
(about 10 seconds)
The SwitchLinc top LED will flash, and then turn on solid and the
controlled light will flash
Confirm the Link by tapping the On/Off buttons on the Controller you just
Linked to SwitchLinc
SwitchLinc should respond appropriately
Complete Instructions, Troubleshooting, and Tech Support
Owner’s Manual: http://wiki.smarthome.com/index.php?title=2476D_Manual
Call: Tech. Support @ 1-800-SMARTHOME (800-762-7846)
Contact Us Online: http://www.smarthome.com/contactus.html
ETL/UL Warning
CAUTION - To reduce the risk of overheating and possible damage to other equipment do not install to control a receptacle, a motor-operated appliance, a fluorescent
lighting fixture, or a transformer-supplied appliance.
Gradateurs commandant une lampe a filament de tungstene – afin de reduire le risque de surchauffe et la possibilite d’endommagement a d’autres materiels, ne pas
installer pour commander une prise, un appareil a moteur, une lampe flourescente ou un appareil alimente par un transformateur.
Page 1 of 1
Rev. 01-06-2010
SmartLabs Limited Warranty – SmartLabs warrants to original consumer of this product for a period of 2 years from date of purchase, this product will be
free from defects in material & workmanship & will perform in substantial conformity with its Owner's Manual. Warranty shall not apply to defects caused by
misuse or neglect.
U.S. Patent No. 7,345,998, International patents pending © Copyright 2010
SmartLabs, 16542 Millikan Ave., Irvine, CA 92606, 1-800-SMARTHOME (800-762-7846)