1
SMARTDISK FOTOCHUTE PORTABLE HARD DRIVE .........1
CONTROLS AND INDICATORS...................................................2
CHARGING THE INTERNAL BATTERY ...................................3
SETTING THE DATE AND TIME.................................................4
WHICH INTERFACE: USB HOST OR DEVICE?.......................4
CONNECTING FOTOCHUTE TO A PC HOST...........................5
STORING AND TRANSFERRING DATA VIA USB ................................6
DISCONNECTING FOTOCHUTE FROM A PC OR MAC HOST ...............6
CONNECTING FOTOCHUTE TO A CAMERA OR OTHER
USB DEVICE.....................................................................................7
MENU SYSTEM .................................................................................8
COPYING ALL FILES FROM AN ATTACHED DEVICE ..........................8
COPYING SELECT FILES FROM AN ATTACHED DEVICE ...................10
DELETING FILES .............................................................................11
VIEWING FILE LIST ........................................................................13
INFORMATION MENU .....................................................................13
Free Disk Space ........................................................................14
Version ......................................................................................14
Set Date and Time .....................................................................14
Language ..................................................................................14
GETTING HELP.............................................................................14
WARRANTY TERMS ....................................................................15
RIGHTS............................................................................................16
FCC COMPLIANCE ......................................................................17
GUIDE DE L'UTILISATEUR ......................................19
DISQUE DUR PORTATIF FOTOCHUTE DE SMARTDISK...19
COMMANDES ET TÉMOINS ......................................................20
CHARGE DE LA PILE INTERNE ...............................................21
RÉGLAGE DE LA DATE ET DE L'HEURE...............................22
INTERFACE À UTILISER : HÔTE OU DISPOSITIF USB? ....23
CONNEXION DU FOTOCHUTE À UN HÔTE PC ....................23
STOCKAGE ET TRANSFERT DES DONNÉES PAR INTERFACE USB......24
DÉCONNEXION DU FOTOCHUTE D'UN HÔTE PC OU MAC ...............25
CONNEXION DU FOTOCHUTE À UN APPAREIL PHOTO OU
À UN AUTRE DISPOSITIF USB ..................................................26
SYSTÈME DE MENUS .......................................................................27
COPIE DE TOUS LES FICHIERS DEPUIS UN DISPOSITIF CONNECTÉ .....27
COPIE D'UNE SÉLECTION DE FICHIERS DEPUIS UN DISPOSITIF
CONNECTÉ ......................................................................................28
SUPPRESSION DE FICHIERS..............................................................31
AFFICHAGE DE LA LISTE DES FICHIERS ...........................................32
AFFICHAGE DU MENU INFORMATION (INFORMATIONS)..................33
Free Disk Space (Espace disque libre) .....................................33
Version ......................................................................................33
Set Date and Time (Régler date et heure) .................................33
Language (Langue)...................................................................34
COMMENT OBTENIR DE L'AIDE .............................................34
TERMES DE LA GARANTIE .......................................................34
DROITS D'AUTEUR ......................................................................36
CONFORMITÉ FCC ......................................................................36
BENUTZERHANDBUCH.............................................39
PORTABLES SMARTDISK FOTOCHUTEFESTPLATTENLAUFWERK .......................................................39
STEUERELEMENTE, ANSCHLÜSSE UND ANZEIGEN.........40
AUFLADEN DER INTERNEN BATTERIE ................................41
EINSTELLEN VON DATUM UND UHRZEIT ...........................42
WELCHE SCHNITTSTELLE: USB-HOST ODER USBGERÄT? ...........................................................................................43
ANSCHLUSS DES FOTOCHUTEFESTPLATTENLAUFWERKS AN EINEN PC-HOST..............43
SPEICHERN UND ÜBERTRAGEN VON DATEN ÜBER USB .................45
ENTFERNEN DES FOTOCHUTE-LAUFWERKS VON EINEM PC- ODER
MAC-HOST.....................................................................................45
ANSCHLUSS DES FOTOCHUTEFESTPLATTENLAUFWERKS AN EINE KAMERA ODER EIN
ANDERES USB-GERÄT ................................................................46
MENÜSYSTEM ................................................................................47
KOPIEREN ALLER DATEIEN VON EINEM ANGESCHLOSSENEN GERÄT
.......................................................................................................48
KOPIEREN BESTIMMTER DATEIEN VON EINEM ANGESCHLOSSENEN
GERÄT............................................................................................49
LÖSCHEN VON DATEIEN .................................................................51
ANZEIGEN DER DATEILISTE ...........................................................52
DAS MENÜ “INFORMATION” ..........................................................53
Free Disk Space (Freier Festplattenspeicher) ..........................54
Version ......................................................................................54
Set Date and Time (Datum/Uhrzeit einstellen) .........................54
Language (Sprache)..................................................................54
SO ERHALTEN SIE HILFE..........................................................54
GARANTIEBEDINGUNGEN........................................................55
URHEBERRECHTE.......................................................................57
FCC-VORSCHRIFTEN..................................................................57
GUIDA PER L'UTENTE ..............................................58
DISCO PORTATILE SMARTDISK FOTOCHUTE...................58
CONTROLLI E INDICATORI .....................................................59
CARICAMENTO DELLA BATTERIA INTERNA.....................60
IMPOSTAZIONE DI DATA E ORA.............................................61
INTERFACCIA HOST USB O DISPOSITIVO USB?.................61
COLLEGAMENTO DI FOTOCHUTE A UN HOST PC............62
MEMORIZZAZIONE E TRASFERIMENTO DEI DATI TRAMITE USB......63
DISCONNESSIONE DI FOTOCHUTE DA UN HOST PC O MAC .............63
COLLEGAMENTO DI FOTOCHUTE A UNA FOTOCAMERA
O A UN ALTRO DISPOSITIVO USB...........................................64
SISTEMA DI MENU ..........................................................................65
COPIA DI TUTTI I FILE DA UN DISPOSITIVO COLLEGATO ..................66
COPIA DEI FILE SELEZIONATI DA UN DISPOSITIVO COLLEGATO .......67
ELIMINAZIONE DI FILE ....................................................................69
VISUALIZZAZIONE DELL'ELENCO DEI FILE ......................................70
MENU INFORMATION (INFORMAZIONI) ..........................................71
Free Disk Space (Spazio libero su disco)..................................71
Version (Versione) ....................................................................71
Impostazione di data e ora........................................................71
Language (Lingua)....................................................................72
ASSISTENZA ..................................................................................72
TERMINI DELLA GARANZIA ....................................................72
DIRITTI ...........................................................................................74
CONFORMITÀ FCC ......................................................................74
MANUAL DEL USUARIO ...........................................76
UNIDAD DE DISCO DURO PORTÁTIL FOTOCHUTE DE
SMARTDISK ...................................................................................76
CONTROLES E INDICADORES .................................................77
CARGA DE LA BATERÍA INTERNA .........................................78
CONFIGURACIÓN DE FECHA Y HORA ..................................79
¿QUÉ INTERFAZ: ORDENADOR ANFITRIÓN O
DISPOSITIVO USB? ......................................................................80
CONEXIÓN DE FOTOCHUTE A UN ORDENADOR
ANFITRIÓN ....................................................................................80
ALMACENAMIENTO Y TRANSFERENCIA DE DATOS MEDIANTE USB 81
DESCONEXIÓN DE LA UNIDAD FOTOCHUTE DE UN ORDENADOR
PERSONAL ANFITRIÓN PC O MAC ...................................................82
CONEXIÓN DE LA UNIDAD FOTOCHUTE A UNA CÁMARA
U OTRO DISPOSITIVO USB........................................................83
SISTEMA DE MENÚ..........................................................................84
COPIA DE TODOS LOS ARCHIVOS DE UN DISPOSITIVO CONECTADO .84
COPIA DE ARCHIVOS SELECCIONADOS DE UN DISPOSITIVO
CONECTADO ...................................................................................85
BORRADO DE ARCHIVOS .................................................................88
VISUALIZACIÓN DE LA LISTA DE ARCHIVOS....................................89
MENÚ DE INFORMACIÓN ................................................................90
Espacio libre en el disco ...........................................................90
Versión ......................................................................................90
Ajuste de fecha y hora...............................................................90
Idioma .......................................................................................90
OBTENCIÓN DE AYUDA .............................................................91
TÉRMINOS DE LA GARANTÍA..................................................91
DERECHOS.....................................................................................93
CUMPLIMIENTO CON LAS NORMAS FCC ............................93
HANDLEIDING.............................................................95
DRAAGBARE SMARTDISK FOTOCHUTE HARDE SCHIJF 95
BEDIENINGSELEMENTEN EN INDICATORS ........................96
DE INTERNE BATTERIJ OPLADEN .........................................97
DE DATUM EN TIJD INSTELLEN .............................................98
WELKE INTERFACE: USB-HOST OF APPARAAT? ..............98
DE FOTOCHUTE AANSLUITEN OP EEN PC-HOST..............99
GEGEVENS OPSLAAN EN VERZENDEN VIA USB ............................100
DE FOTOCHUTE UIT EEN PC OF MAC VERWIJDEREN ....................101
DE FOTOCHUTE AANSLUITEN OP EEN CAMERA OF
ANDER USB-APPARAAT ...........................................................102
MENUSYSTEEM ............................................................................103
ALLE BESTANDEN KOPIËREN VANAF EEN AANGESLOTEN APPARAAT
.....................................................................................................103
GESELECTEERDE BESTANDEN KOPIËREN VANAF EEN AANGESLOTEN
APPARAAT ....................................................................................104
BESTANDEN VERWIJDEREN ..........................................................106
DE BESTANDENLIJST BEKIJKEN ....................................................108
HET MENU INFORMATION.............................................................108
Free Disk Space ......................................................................109
Version ....................................................................................109
Set Date and Time ...................................................................109
Language ................................................................................109
HELP ..............................................................................................109
GARANTIEVOORWAARDEN...................................................110
RECHTEN .....................................................................................112
CONFORMITEIT MET FCC ......................................................112
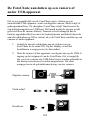
SmartDisk FotoChute Portable Hard Drive
Your SmartDisk FotoChute is a versatile external hard drive featuring
high-performance storage and a USB On-The-Go (OTG) interface.
The flexibility of the USB OTG interface allows you to connect
FotoChute to either a USB Host (like a PC or Mac), or to a USB
Device (like a digital camera, flash disk, or card reader). The display
on FotoChute allows you to confirm the status of your copy
operations, and can be used to browse the list of files you have stored.
Once your drive is connected properly to your computer running a
recent operating system, you will be able to use it as you would any
hard drive for storing your picture data and for performing data backup functions. When your drive is connected properly to a supported
camera (or other supported device), you will be able to copy all of
your camera’s data to FotoChute by pressing a single key.
Furthermore, FotoChute’s menu system allows you the additional
flexibility to select only those specific files that you may want to
copy.
Your FotoChute drive comes pre-formatted from the factory in
FAT32 format.
Note: Capacity dependent on model. Your operating system may
report capacity as fewer gigabytes. 1 GB = 1,000,000,000 bytes.
1
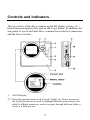
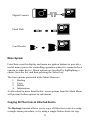
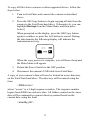
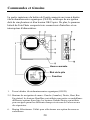
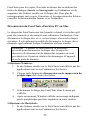
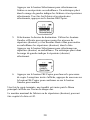
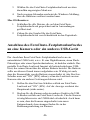
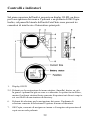
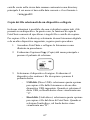
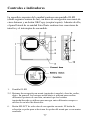
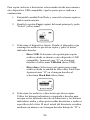
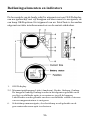
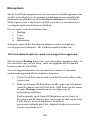
Controls and Indicators
The top surface of the drive contains an OLED display screen, a 5button menu navigation disk, and an OK/Copy button. In addition, the
side panel of your FotoChute drive contains three interface connectors
and the Power Switch.
1.
OLED Display
2-5. Menu Navigation buttons Left (Cancel), Right, Up, Down. In general,
the Up/Down buttons are used to highlight different options from a list,
while Left/Right buttons are used to navigate through different fields or
levels of a directory tree.
2
6.
Menu Navigation Select button. The Select button is pressed to select the
menu option that is highlighted.
7.
OK/Copy, used both for Menu Navigation and for one-button copy
operation.
8.
Main Body
9.
DC Input Jack, for use with the included AC Adapter.
10. Power Switch, enables power from the internal battery. Slide this switch
to the “ON” position to apply battery power to the unit, and to the “OFF”
position to remove battery power from the unit. Leave the unit OFF
while charging the battery, or while connecting the unit to a PC Host
using the attached USB A-Plug.
Note that after the unit has been powered ON for 5 minutes with no
activity, it will power down automatically to conserve battery power.
11. USB A-Jack, to connect to camera or other supported USB Device.
12. USB A-Plug, to connect to a PC or other USB Host.
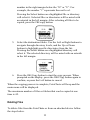
Charging the Internal Battery
FotoChute contains an internal Lithium Ion rechargeable battery that
provides power to the product when it is being used to copy data from
your camera or other supported USB device. After the initial charging
cycle, it normally takes about one and a half hours to recharge fully.
Note: Please charge your new unit for 8 hours prior to connecting
it for the first time to a camera, flash disk, or memory card reader.
To charge the battery, follow these simple steps:
1.
Turn the Power Switch to the OFF position.
2.
Connect the AC Adapter to a wall outlet, and then to the DC
Input Jack on the side panel of FotoChute.
The display will indicate that the unit is charging and will display
current status using the battery icon. When charging is complete the
battery icon will show a full status.
3
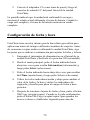
Setting the Date and Time
FotoChute has an internal time of day clock that it uses for applying
time stamps to various folder names. Before you begin to copy files
using FotoChute, use the following steps to set the date and time.
1.
Locate the Power Switch on the side of your FotoChute and
slide it to the ON position.
2.
From the Main Menu, press the Down button three times to
highlight Information, and then press Select.
3.
Press the Down button twice to highlight Set Time, and then
press Select.
4.
Use the Up and Down buttons to change the date or time
value, and use the Left and Right buttons to move to the next
date or time field.
5.
After you finish setting both date and time, press the
OK/Copy button. When prompted to confirm, press the
OK/Copy button to save the new settings, or Left to cancel.
Which Interface: USB Host or Device?
USB OTG provides for two ways to connect to other USB ports.
When you want to connect to a PC or Mac to transfer files between
FotoChute and the computer, you must connect to that computer
through FotoChute’s USB Device port, which uses the attached USB
A-Plug.
When you want to copy data from a supported camera, flash disk or
memory card reader, you must connect to that device through
FotoChute’s USB Host port, which uses the USB A-Jack.
4
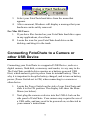
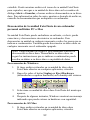
Connecting FotoChute to a PC Host
Connecting your FotoChute to a USB Host device, such as a PC or
Mac, is extremely simple. The FotoChute portable drive is designed to
operate as a bus-powered device, which means it gets its power from
the host PC over the USB cable. This is why it is important to turn off
battery power (Power Switch set to OFF) when connecting to a PC.
Follow the steps below to connect to a PC or Mac.
1.
Locate the Power Switch on the side of your FotoChute and
slide it to the OFF position.
2.
Next connect the attached USB A-Plug to an available USB
port on your PC, Mac, or powered hub.
FotoChute will display the message “Connect to PC”. If there is
adequate power being supplied from your PC, the drive will mount
automatically and a drive letter representing FotoChute will appear in
My Computer (Windows) or a new icon will appear on the desktop
(Macintosh).
If it does not mount automatically, you may need to attach the
included AC Adapter. This can help to supply more power to
FotoChute in those situations where the laptop does not supply
sufficient power by itself.
If your FotoChute still fails to mount, you will need to use a different
computer for transferring your files.
5
Note: If you are using a USB 1.1 port on your Windows computer,
the following cautionary note may appear on your display: HiSpeed USB Device plugged into non-Hi-Speed USB hub. This
does not indicate a problem because FotoChute is compatible with
both USB 1.1 and USB 2.0 ports. Simply close the message and
proceed. However, in this case FotoChute will operate only at USB
1.1 speeds.
Storing and Transferring Data via USB
Once your drive is connected to a computer via USB, it can be
accessed and used like any other removable disk. You can drag files
to your FotoChute’s icon to copy them, navigate to your hard drive in
Open or Save dialog boxes, or delete files stored on your hard drive.
For information on copying, opening, or deleting files, consult your
computer’s documentation.
Disconnecting FotoChute from a PC or Mac Host
Your FotoChute drive is hot-pluggable; it can be connected and
disconnected without restarting your computer. To disconnect your
drive at any time, perform the following steps. You can also
disconnect your hard drive at any time while your computer is
powered off.
Note: Please be careful to follow the correct procedure
when disconnecting your hard drive. Simply unplugging
the hard drive without first following the instructions below
may result in damage to your hard drive and/or loss of data.
For Windows Users:
1. If you have files located on your FotoChute hard drive open
in any applications, close them.
2. Click the Unplug or Eject Hardware button in the System
Tray.
6
3.
4.
Select your FotoChute hard drive from the menu that
appears.
After a moment, Windows will display a message that your
hardware can be safely removed.
For Mac OS Users:
1. If you have files located on your FotoChute hard drive open
in any applications, close them.
2. Locate the icon for your FotoChute hard drive on the
desktop, and drag it to the trash.
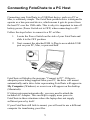
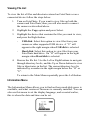
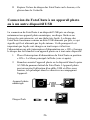
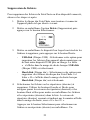
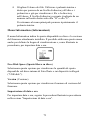
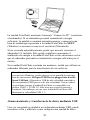
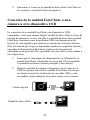
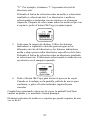
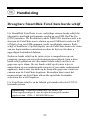
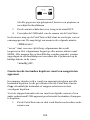
Connecting FotoChute to a Camera or
other USB Device
Connecting your FotoChute to a supported USB Device, such as a
digital camera, flash disk, or memory card reader, is very easy to do.
The FotoChute portable drive operates as a battery-powered USB
Host, which means it gets its power from its internal battery. This is
why it is important to keep the battery charged, and to turn on battery
power (Power Switch set to ON) when connecting to a camera or
other device.
1.
Locate the Power Switch on the side of your FotoChute and
slide it to the ON position. The display will show the Main
Menu (see below).
2.
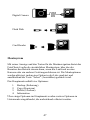
Next plug the camera or device into the USB A-Jack on the
side panel of FotoChute. Your camera may require the use of
a USB cable, and may need to be powered on, as directed in
your camera’s instructions.
7
Digital Camera
Flash Disk
Card Reader
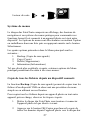
Menu System
FotoChute uses the display and menu navigation buttons to provide a
useful menu system for controlling operation when it is connected to a
camera or other device. Menu options are invoked by highlighting a
choice from the list, and then pressing the Select key.
The four options presented in the Main Menu are
1. Backup
2. Copy
3. Delete
4. Information
As described in more detail below, some options from the Main Menu
will present further options in sub-menus.
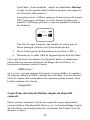
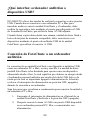
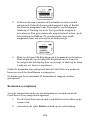
Copying All Files from an Attached Device
The Backup function allows you to copy all files from a device using
a simple menu procedure, or by using a single-button short-cut step.
8
To copy all files from a camera or other supported device, follow the
steps below.
1.
Turn on FotoChute and connect the camera as described
above.
2.
Press the OK/Copy button to begin copying all data from the
camera to the FotoChute hard drive. [Alternatively, you can
highlight Backup from the Main Menu, and then press
Select.]
When prompted on the display, press the OK/Copy button
again to confirm, or press the Left button to cancel. During
the data transfer the following display will indicate the
transmission activity.
When the copy process is complete, you will hear a beep and
the Main Menu will appear.
3.
Return the Power Switch to the OFF position.
4.
Disconnect the camera's USB cable from FotoChute.
A copy of your camera’s data will now be located in a new directory
on the FotoChute hard drive. The directory will be named using the
form
<DSKxxxxx>
where “xxxxx” is a 5-digit sequence number. The sequence number
begins from 00000 on each new date. All folders created on the same
date will be contained in a parent directory named based on the
current date, using the form
<mmddyy00>
9
Copying Select Files from an Attached Device
In some situations you may not want to copy all of the files from a
device. In this case FotoChute’s Copy function allows you the
flexibility to specify individual files or folders to copy.
To copy select files or directories from a digital camera, or other
supported USB device, follow the steps below.
1.
Turn on FotoChute and connect the camera as described
above.
2.
Highlight the Copy option from the Main Menu and press
Select.
3.
Select the Source device. Highlight the device that contains
the files you want to copy, and press the Right button.
4.
-
USB disk: Select this option to copy files from your
camera or other supported USB device. A “U” will
appear in the right margin when USB disk is selected.
-
Hard disk: Select this option to copy files from your
FotoChute hard drive. An “H” will appear in the right
margin when Hard disk is selected.
Select the files or directories you want to copy. Use the Left
or Right buttons to navigate through directory levels, and the
Up or Down buttons to highlight specific files or directories
from the list. The current directory level is indicated by a
10
number in the right margin below the “H” or “U”. For
example, the number “1” represents the root level.
Pressing the Select button on a highlighted file or directory
will select it. Selected files or directories will be noted with
an asterisk in the left margin. After selecting all files to be
copied, press the OK/copy button.
5.
Select the destination folder. Use the Left or Right buttons to
navigate through directory levels, and the Up or Down
buttons to highlight specific directories from the list.
Pressing the Select button on a highlighted directory will
select it. The selected directory will be noted with an asterisk
in the left margin.
6.
Press the OK/Copy button to start the copy process. When
prompted on the display, press the OK/Copy button again to
confirm, or press the Left button to cancel.
When the copying process is complete, FotoChute will beep and the
main menu will be displayed.
The maximum number of files or folders that can be copied at one
time is 42.
Deleting Files
To delete files from the FotoChute or from an attached device follow
the steps below.
11
1.
Turn on FotoChute and connect the camera as described
above.
2.
Highlight the Delete option and press Select.
3.
Highlight the device that contains the files you want to
delete, and press the Right button.
4.
-
USB disk: Select this option to delete files from your
camera or other supported USB device. A “U” will
appear in the right margin when USB disk is selected.
-
Hard disk: Select this option to delete files from your
FotoChute hard drive. An “H” will appear in the right
margin when Hard disk is selected.
Select the files or directories you want to delete. Use the Left
or Right buttons to navigate through directory levels, and the
Up or Down buttons to highlight specific files or directories
from the list. The current directory level is indicated by a
number in the right margin below the “H” or “U”.
Pressing the Select button on a highlighted file or directory
will select it. Selected files or directories will be noted with
an asterisk in the left margin.
5.
After selecting all files to be deleted, Press the OK/Copy
button to start the delete process. When prompted on the
display, press the OK/Copy button again to confirm, or press
the Left button to cancel.
When the file deletion process is complete, FotoChute will beep and
the folder list will be displayed.
12
Viewing File List
To view the list of files and directories stored on FotoChute or on a
connected device follow the steps below.
1.
Turn on FotoChute. If you want to view files on both the
camera and FotoChute, then you will also need to connect
the camera as described above.
2.
Highlight the Copy option and press Select.
3.
Highlight the device that contains the files you want to view,
and press the Right button.
4.
-
USB disk: Select this option to view files from your
camera or other supported USB device. A “U” will
appear in the right margin when USB disk is selected.
-
Hard disk: Select this option to view files from your
FotoChute hard drive. An “H” will appear in the right
margin when Hard disk is selected.
Browse the file list. Use the Left or Right buttons to navigate
through directory levels, and the Up or Down buttons to view
files or directories in the list. The current directory level is
indicated by a number in the right margin below the “H” or
“U”.
To return to the Main Menu repeatedly press the Left button.
Information Menu
The Information Menu allows you to find out how much disk space is
available, and what version of firmware is currently installed. You can
also use this menu to set the display language, and as noted earlier,
this is where the date and time can be set.
13
Free Disk Space
Select this option to display the amount of free space available on
FotoChute’s internal hard drive and on any attached device (“USB
disk”).
Version
Select this option to display the firmware version number.
Set Date and Time
To set the date and time, follow the procedure under “Setting the Date
and Time” presented earlier in this manual.
Language
Select this option to change the display language to English, Japanese,
Dutch, French, German, Spanish, Italian, or Portuguese.
Getting Help
If you are experiencing difficulty installing or using your SmartDisk product,
please visit the main SmartDisk Technical Support website at
www.SmartDisk.com. From this page you can access our library of user
documentation, read answers to frequently asked questions, and download
available software updates. Although most of our customers find this content
sufficient to put them back on the right track, this page also lists ways in
which you can contact the SmartDisk Technical Support Team directly.
Please take this time to enroll to receive future information about your
SmartDisk product at www.SmartDisk.com/Registration.asp. This enrollment
is quick and easy and will assist us in providing the best possible experience
with this and future SmartDisk products.
14
Warranty Terms
SmartDisk Corporation warrants its products to be free of defects in material
and workmanship under normal use and service for a period of 1 year from
the date of purchase or 3 years from the date of manufacture, whichever
occurs first. Products purchased in European Union countries covered by
Directive 1999/44/EC are warranted for a period of 2 years from the date of
purchase. SmartDisk's sole obligation with respect to claims of nonconformance made within the warranty period described above shall be, at its
option, to repair or replace any item of Equipment that SmartDisk, in its sole
discretion, determines to be defective. The Customer shall obtain a Return
Merchandise Authorization (RMA) number from SmartDisk prior to returning
any Equipment to SmartDisk under this warranty by contacting Technical
Support (see www.SmartDisk.com). The Customer shall prepay shipping
charges for Equipment returned to SmartDisk for warranty service, and
SmartDisk shall pay freight charges for the return of the Equipment to the
Customer, excluding customs duties or taxes, if any. All returns require a
dated original proof of purchase and a letter explaining the problem.
SmartDisk Corporation will not be responsible for items returned without an
RMA or improperly packaged. Replacement Equipment shall be new or like
new in performance and shall be warranted for the remaining duration of the
warranty term of the non-conforming Equipment. SmartDisk Corporation will
not be responsible for recovery of customer data from returned products that
incorporate data storage. All replaced Equipment shall become the property of
SmartDisk. Any claims of defects not made within the warranty period shall
be deemed waived by Customer.
SmartDisk's warranty obligations hereunder are expressly conditioned upon
(i.) the Products being properly installed, used and maintained at all times by
Customer; (ii.) the Products not being subject to unusual mechanical stress or
unusual electrical or environmental conditions or other acts of God; (iii.) the
Products not being subjected to misuse, accident or any unauthorized
installation/deinstallation by Customer or other third party; (iv.) the Products
not being altered or modified in an unauthorized manner, unless approved in
writing or otherwise performed by SmartDisk and (v.) Customer promptly
installing all Product revisions that have been released for such Products by
SmartDisk throughout the warranty term. SmartDisk does not warrant that the
Products will operate in any specific combination that may be selected for use
by Customer or that the operation of the Products will be uninterrupted or
error free, or that all non-conformance or defects will be remedied.
Additionally, SmartDisk shall have no warranty obligations for any failure of
15
the Products to conform to the applicable product specifications resulting
from the combination of any Product(s) with hardware and/or software not
supplied by SmartDisk. If it is determined that any Product(s) reported as
defective or non-conforming by Customer during the warranty period is not
defective or non-conforming, SmartDisk may, at its option, charge Customer
for any labor provided and expenses incurred by SmartDisk in connection
with such determination, at SmartDisk's then current rates.
SmartDisk Corporation shall not be responsible for unauthorized sale or
misrepresentation by unauthorized third party resellers. SmartDisk warranties
are not transferable with ownership. Products purchased by auction, yard sale,
flea market or purchased as demo units may not be covered under
SmartDisk’s warranty.
THE WARRANTIES OF SMARTDISK AND REMEDIES OF CUSTOMER
SET FORTH IN THIS SECTION ARE EXCLUSIVE AND ARE GIVEN BY
SMARTDISK AND ACCEPTED BY CUSTOMER IN LIEU OF ANY AND
ALL OTHER WARRANTIES, WHETHER EXPRESSED OR IMPLIED,
INCLUDING WITHOUT LIMITATION, ALL WARRANTIES OF
MERCHANTABILITY AND FITNESS FOR A PARTICULAR PURPOSE,
ALL SUCH OTHER WARRANTIES BEING HEREBY EXPRESSLY AND
UNEQUIVOCALLY DISCLAIMED BY SMARTDISK AND WAIVED BY
CUSTOMER.
Rights
Copyright ©2005 SmartDisk Corporation.
No part of this document may be reproduced in any form or by any means, for
any purpose, without the express written permission of SmartDisk
Corporation. All rights reserved.
All other brands and product names referenced herein are property of their
respective owners.
16
FCC Compliance
This equipment has been tested and found to comply with the limits for a
Class B digital device, pursuant to Part 15 of the FCC Rules. These limits are
designed to provide reasonable protection against harmful interference in a
residential installation. This equipment generates, uses and can radiate radio
frequency energy and, if not installed and used in accordance with the
instructions, may cause harmful interference to radio communications.
However, there is no guarantee that interference will not occur in a particular
installation. If this equipment does cause harmful interference to radio or
television reception, which can be determined by turning the equipment off
and on, the user is encouraged to try to correct the interference by one or more
of the following measures:
•
Reorient or relocate the receiving antenna.
•
Increase the separation between the equipment and receiver.
•
Connect the equipment into an outlet on a circuit different from that
to which the receiver is connected.
•
Consult the dealer or an experienced radio/TV technician for help.
17
18
Guide de l'utilisateur
Disque dur portatif FotoChute de SmartDisk
Le disque dur FotoChute de SmartDisk est une unité de stockage
polyvalente et haute performance dotée d'une interface USB OTG
(On-The-Go). La polyvalence de l'interface USB OTG permet de
connecter le FotoChute à un hôte USB (p. ex., un PC ou un MAC) ou
à un dispositif USB (p. ex., un appareil photo numérique, un disque
flash ou un lecteur de carte). L'affichage du FotoChute indique l'état
des opérations de copie et peut être utilisé pour parcourir la liste des
fichiers et des répertoire (dossiers) stockés sur l'unité.
Une fois le disque dur connecté de façon appropriée à l'ordinateur
tournant sous un système d'exploitation récent, il peut être utilisé
comme tout autre disque dur pour le stockage des images et pour
effectuer des fonctions de copie de sauvegarde. Lorsque l'unité est
connecté de façon appropriée à un appareil photo ou à tout autre
dispositif pris en charge, il est alors possible de copier toutes les
données d'un appareil photo dans le FotoChute à la simple pression
d'un bouton. De plus, le système de menus du FotoChute offre encore
plus de polyvalence en vous permettant de sélectionner uniquement
les fichiers à copier.
L'unité FotoChute est livrée préformatée à l'usine en format FAT32.
Remarque : La capacité est définie selon le modèle. Le système
d'exploitation utilisé peut indiquer une capacité moindre.
1 Go = 1 000 000 000 d'octets.
19
Commandes et témoins
La partie supérieure du boîtier de l'unité comporte un écran à diodes
électroluminescentes organiques (OLED), un disque de navigation
doté de cinq boutons et d'un bouton OK/Copier. De plus, le panneau
latéral du FotoChute comporte trois connecteurs d'interface et un
interrupteur d'alimentation.
Heure courante
État de la pile
Fonction
1.
Écran à diodes électroluminescentes organiques (OLED).
2-5. Boutons de navigation de menu : Gauche (Annuler), Droite, Haut, Bas.
En général, les boutons Haut/Bas sont utilisés pour mettre en surbrillance
différentes options d'une liste; les boutons Gauche/Droite sont utilisés
pour naviguer parmi les différents champs et niveaux de l'arborescence
des répertoires.
6.
Bouton Sélectionner. Utilisé pour sélectionner une option de menu en
surbrillance.
20
7.
Bouton OK/Copier. Utilisé pour la navigation dans les menus ou pour
une opération de copie à l'appui d'un seul bouton.
8.
Boîtier principal.
9.
Prise d'entrée CC, à utiliser avec l'adaptateur CA fourni.
10. Interrupteur d'alimentation, permet d'activer l'alimentation par la pile
interne. Positionner l'interrupteur sur « ON » pour alimenter le disque
dur depuis la pile, et sur « OFF » pour le mettre hors tension.
L'interrupteur doit être positionné sur « OFF » pendant la charge de la
pile ou lorsque le disque dur est connectée à un PC à l'aide de sa fiche
A USB.
Noter que lorsque le disque dur est sous tension depuis 5 minutes et
qu'aucune activité ne se produit, celui-ci est automatiquement mise hors
tension pour conserver l'énergie de la pile.
11. Prise A USB, pour connecter l'unité à un appareil photo ou à tout autre
dispositif USB pris en charge.
12. Fiche A USB, pour connecter l'unité à un PC ou à un autre hôte USB.
Charge de la pile interne
Le disque dur FotoChute est doté d'une pile au lithium-ion
rechargeable assurant l'alimentation de l'appareil lorsqu'il est utilisé
pour copier des données depuis un appareil photo ou tout autre
dispositif USB pris en charge. Une fois le cycle de charge initial
effectué, la pile nécessite environ une heure et demie pour se charger
à bloc.
Remarque : Charger la nouvelle unité pendant huit heures avant
de la connecter pour une première fois à un appareil photo, à un
disque flash ou à un lecteur de carte mémoire.
Pour charger la pile, observer les étapes faciles suivantes :
1.
Placer l'interrupteur d'alimentation en position « OFF ».
2.
Connecter l'adaptateur CA à une prise murale puis à la prise
d'entrée CC sur le panneau latéral du FotoChute.
21
L'affichage comporte une icône de pile utilisée pour indiquer l'état
courant de la pile ainsi que lorsque celle-ci est en mode de charge.
Lorsque la charge de la pile est terminée, l'icône de pile indique une
charge complète.
Réglage de la date et de l'heure
Le disque dur FotoChute est doté d'une horloge interne utilisée pour
attribuer une heure et une date à chaque nom de répertoires (dossiers).
Avant de commencer à copier des fichiers en utilisant le disque dur
FotoChute, observer les étapes faciles suivantes pour régler la date et
l'heure.
1.
Placer l'interrupteur d'alimentation du FotoChute en position
« ON ».
2.
Depuis le Menu principal, appuyer trois fois sur le bouton
BAS pour mettre en surbrillance Information (Informations)
puis appuyer sur le bouton Sélectionner.
3.
Appuyer deux fois sur le bouton Bas pour mettre en
surbrillance Set Time and Date (Régler date et heure) puis
appuyer sur le bouton Sélectionner.
4.
Utiliser les boutons Haut et Bas pour modifier la date et
l'heure, et utiliser les boutons Gauche et Droite pour passer
au champ de date ou d'heure suivant.
5.
Une fois la date et l'heure réglées, appuyer sur le bouton
OK/Copier. Lorsqu'une invite s'affiche pour confirmer la
date et l'heure, appuyer sur le bouton OK/Copier pour
sauvegarder les nouvelles valeurs ou sur le bouton Gauche
pour annuler.
22
Interface à utiliser : hôte ou dispositif USB?
L'interface USB OTG offre deux méthodes pour connecter le disque
dur à d'autres ports USB. Pour connecter le disque dur à un PC ou à
un Macintosh afin de transférer des fichiers du FotoChute vers
l'ordinateur et vice versa, utiliser le port de dispositif USB du
FotoChute doté d'une fiche A USB.
Pour copier des données depuis un appareil photo, un disque flash ou
un lecteur de carte mémoire pris en charge, utiliser le port hôte USB
du FotoChute doté d'une prise A USB.
Connexion du FotoChute à un hôte PC
La connexion du FotoChute à un dispositif hôte USB, notamment un
PC ou un Macintosh, est très simple. Le disque dur portatif FotoChute
est conçu pour fonctionner comme un dispositif alimenté par bus, ce
qui signifie que la tension d'alimentation fournie à celui-ci provient de
l'hôte PC par l'entremise du câble USB. Voilà pourquoi il est
important de désactiver l'alimentation par pile (interrupteur
d'alimentation sur « OFF ») lorsque le disque dur est branché à un PC.
Observer les étapes ci-après pour connecter le FotoChute à un PC ou à
un Macintosh.
1.
Placer l'interrupteur d'alimentation du FotoChute en position
« OFF ».
2.
Connecter la fiche A USB à un port USB libre sur le PC, le
Macintosh ou un concentrateur.
23
Le message « Connect to PC » (Connecté au PC) est ensuite indiqué
sur l'affichage du FotoChute. Lorsqu'une tension adéquate est fournie
par le PC, le disque dur est automatiquement monté et une lettre est
attribuée à l'unité représentant le FotoChute qui s'affiche sous Poste
de travail (Windows) ou une nouvelle icône s'affiche sur le bureau
(Macintosh).
Si le disque dur n'est pas automatiquement monté, utiliser l'adaptateur
CA fourni pour l'alimenter. Cela peut s'avérer utile, par exemple,
lorsqu'un bloc-notes ne possède plus assez de puissance pour
alimenter le FotoChute.
Si le FotoChute n'est toujours pas monté automatiquement, utiliser un
autre ordinateur pour transférer vos fichiers.
Remarque : Lorsqu'un port USB 1.1 d'un ordinateur tournant
Windows est utilisé, la mise en garde suivante peut s'afficher à
l'écran de l'ordinateur : Périphérique USB à haut débit connecté
à un concentrateur USB à débit réduit. Cela n'indique pas un
problème avec le disque dur FotoChute car celui-ci est compatible
avec les ports USB 1.1 et 2.0. Fermer le message et continuer.
Cependant, dans ce cas, le FotoChute fonctionnera aux vitesses de
la version 1.1. d'USB uniquement.
Stockage et transfert des données par interface USB
Une fois le disque dur connecté à l'ordinateur par l'entremise de
l'interface USB, il peut être accédé et utilisé comme tout autre disque
dur amovible. Il est possible de glisser les fichiers sur l'icône du
24
FotoChute pour les copier, d'accéder au disque dur en utilisant les
boîtes de dialogue Ouvrir ou Sauvegarder sur l'ordinateur ou de
supprimer des fichiers stockés sur le disque dur. Pour plus de
renseignements sur la copie, l'ouverture et la suppression des fichiers,
consulter la documentation fournie avec l'ordinateur.
Déconnexion du FotoChute d'un hôte PC ou Mac
Le disque dur FotoChute peut être branché à chaud, c'est-à-dire qu'il
peut être connecté et déconnecté sans redémarrer l'ordinateur. Pour
déconnecter le disque dur, et ce, en tout temps, observer les étapes
suivantes. Il est également possible de déconnecter le disque dur à
n'importe quel moment lorsque l'ordinateur est hors tension.
Remarque : S'assurer de bien observer la procédure
prescrite pour déconnecter le disque dur. Lorsque les
directives de déconnexion du disque dur suivantes ne sont
pas observées, il peut en résulter des dommages à l'appareil
et/ou la perte de données.
Utilisateurs Windows :
1. Si des fichiers stockés sur le FotoChute sont utilisés par des
applications actives sur l'ordinateur, les fermer.
2. Cliquer sur le bouton de déconnexion ou de suppression du
périphérique de la barre des tâches.
3.
4.
Sélectionner le disque dur FotoChute dans le menu qui
s'affiche.
Après un moment, Windows affiche un message indiquant
que le périphérique peut être supprimé en toute sécurité.
Utilisateurs de Macintosh :
1. Si des fichiers stockés sur le FotoChute sont utilisés par des
applications actives sur l'ordinateur, les fermer.
25
2.
Repérer l'icône du disque dur FotoChute sur le bureau, et le
glisser dans la Corbeille.
Connexion du FotoChute à un appareil photo
ou à un autre dispositif USB
La connexion du FotoChute à un dispositif USB pris en charge,
notamment un appareil photo numérique, un disque flash ou un
lecteur de carte mémoire, est une tâche très facile. Le disque dur
FotoChute fonctionne comme un hôte USB alimenté par pile, ce qui
signifie qu'il est alimenté par la pile interne. Voilà pourquoi il est
important que la pile soit chargée en tout temps et d'activer
l'alimentation par pile (interrupteur d'alimentation sur « ON ») lorsque
le disque dur est branché à un appareil photo ou à tout autre dispositif.
1.
Placer l'interrupteur d'alimentation du FotoChute en position
« ON ». Le Menu principal s'affiche (voir ci-après).
2.
Brancher ensuite l'appareil photo ou le dispositif dans la prise
A USB du panneau latéral du FotoChute. L'appareil photo
peut nécessiter l'utilisation d'un câble USB et d'être sous
tension, tel qu'indiqué dans les directives accompagnant
l'appareil.
Appareil photo
numérique
Disque flash
26
Lecteur de carte
Système de menus
Le disque dur FotoChute comporte un affichage, des boutons de
navigation et un système de menus pratique pour commander ses
fonctions lorsqu'il est connecté à un appareil photo ou à tout autre
dispositif. Les options de menu sont sélectionnées en mettant l'option
en surbrillance dans une liste puis en appuyant ensuite sur le bouton
Sélectionner.
Les quatre options présentées dans le Menu principal sont les
suivantes :
1. Backup (Copie de sauvegarde)
2. Copy (Copie)
3. Delete (Suppression)
4. Information (Informations)
Tel que décrit plus en détails ci-après, certaines options du Menu
principal permettent d'accéder à des sous-menus.
Copie de tous les fichiers depuis un dispositif connecté
La fonction Backup (Copie de sauvegarde) permet de copier tous les
fichiers d'un dispositif USB en observant une procédure de menu
simple ou en utilisant un seul bouton.
Pour copier tous les fichiers depuis un appareil photo ou tout autre
appareil pris en charge, observer les étapes ci-après.
1.
Mettre le disque dur FotoChute sous tension et connecter
l'appareil photo tel que décrit ci-avant.
2.
Appuyer sur le bouton OK/Copier pour lancer la copie de
toutes les données depuis l'appareil photo vers le disque dur
27
FotoChute. [Autre méthode : mettre en surbrillance Backup
(Copie de sauvegarde) dans le Menu principal, puis appuyer
sur le bouton Sélectionner.]
Lorsqu'une invite s'affiche, appuyer de nouveau sur le bouton
OK/Copier pour confirmer ou sur le bouton Gauche pour
annuler. L'affichage présente ce qui suit pendant le transfert
des données.
Une fois la copie terminée, une tonalité est émise puis le
Menu principal s'affiche sur l'écran du disque dur.
3.
Placer l'interrupteur d'alimentation en position « OFF ».
4.
Déconnecter le câble USB de l'appareil photo du FotoChute.
Une copie de toutes les données de l'appareil photo est maintenant
placée dans un nouveau répertoire du disque dur FotoChute. Ce
répertoire est nommé selon le format
<DSKxxxxx>
où « xxxxx » est une numéro de séquence à cinq chiffres. Le numéro
de séquence débute à 00000 à chaque nouvelle date. Tous les dossiers
créés à la même date contiendront un répertoire parent nommé selon
la date courante et le format
<mmjjaa00>
Copie d'une sélection de fichiers depuis un dispositif
connecté
Dans certaines situations, il peut être requis de copier uniquement
certains fichiers d'un dispositif. Dans ce cas, la fonction Copy (Copie)
du FotoChute conviviale permet de sélectionner les fichiers et/ou les
dossiers à copier.
28
Pour copier une sélection de fichiers depuis un appareil photo ou tout
autre dispositif USB pris en charge, observer les étapes ci-après.
1.
Mettre le disque dur FotoChute sous tension et connecter
l'appareil photo tel que décrit ci-avant.
2.
Mettre en surbrillance Copy (Copie) dans le Menu principal,
puis appuyer sur le bouton Sélectionner.
3.
Sélectionner le dispositif source. Mettre en surbrillance le
dispositif sur lequel sont stockés les fichiers à copier, puis
appuyer sur le bouton Droite.
4.
-
USB disk (Disque USB) : Sélectionner cette option
pour copier des fichiers depuis un appareil photo
numérique ou tout autre dispositif USB pris en charge.
La lettre « U » s'affiche dans la marge de droite lorsque
USB disk (Disque USB) est sélectionné.
-
Hard disk (Disque dur) : Sélectionner cette option
pour copier des fichiers depuis le disque dur FotoChute.
La lettre « H » s'affiche dans la marge de droite lorsque
Hard disk (Disque dur) est sélectionné.
Sélectionner les fichiers ou les répertoires (dossiers) à copier.
Utiliser les boutons Gauche et Droite pour naviguer parmi les
niveaux de répertoire, et les boutons Haut et Bas pour mettre
en surbrillance les fichiers et les répertoires (dossiers) dans la
liste. Le niveau de répertoire courant est indiqué par le
numéro affiché dans la marge de droite, sous « H » ou « U ».
Par exemple, « 1 » correspond au niveau racine.
29
Appuyer sur le bouton Sélectionner pour sélectionner un
fichier ou un répertoire en surbrillance. Un astérisque placé
dans la marge de gauche indique les fichiers et/ou répertoires
sélectionnés. Une fois les fichiers et/ou répertoires
sélectionnés, appuyer sur le bouton OK/Copier.
5.
Sélectionner le dossier de destination. Utiliser les boutons
Gauche et Droite pour naviguer parmi les niveaux de
répertoire (dossiers), et les boutons Haut et Bas pour mettre
en surbrillance les répertoires (dossiers) dans la liste.
Appuyer sur le bouton Sélectionner pour sélectionner un
répertoire (dossier) en surbrillance. Un astérisque placé dans
la marge de gauche indique le répertoire (dossier)
sélectionné.
6.
Appuyer sur le bouton OK/Copier pour lancer le processus
de copie. Lorsqu'une invite s'affiche, appuyer de nouveau sur
le bouton OK/Copier pour confirmer ou sur le bouton
Gauche pour annuler.
Une fois la copie terminée, une tonalité est émise puis le Menu
principal s'affiche sur l'écran du disque dur.
Le nombre maximal de fichiers ou de répertoires (dossiers) pouvant
être copiés à la fois est 42.
30
Suppression de fichiers
Pour supprimer des fichiers du FotoChute ou d'un dispositif connecté,
observer les étapes ci-après.
1.
Mettre le disque dur FotoChute sous tension et connecter
l'appareil photo tel que décrit ci-avant.
2.
Mettre en surbrillance l'option Delete (Suppression) puis
appuyer sur le bouton Sélectionner.
3.
Mettre en surbrillance le dispositif sur lequel sont stockés les
fichiers à supprimer, puis appuyer sur le bouton Droite.
4.
-
USB disk (Disque USB) : Sélectionner cette option pour
supprimer les fichiers d'un appareil photo numérique ou
de tout autre dispositif USB pris en charge. La lettre
« s'affiche dans la marge de droite lorsque USB disk
(Disque USB) est sélectionné.
-
Hard disk (Disque dur) : Sélectionner cette option pour
supprimer des fichiers du disque dur FotoChute. La
lettre « H » s'affiche dans la marge de droite lorsque
Hard disk (Disque dur) est sélectionné.
Sélectionner les fichiers ou les répertoires (dossiers) à
supprimer. Utiliser les boutons Gauche et Droite pour
naviguer parmi les niveaux de répertoire (dossiers) et les
boutons Haut et Bas pour mettre en surbrillance les fichiers
et les répertoires (dossiers) dans la liste. Le niveau de
répertoire (dossier) courant est indiqué par le numéro affiché
dans la marge de droite, sous « H » ou « U ».
Appuyer sur le bouton Sélectionner pour sélectionner un
fichier ou un répertoire (dossier) en surbrillance. Un
31
astérisque placé dans la marge de gauche indique les fichiers
et/ou répertoires (dossiers) sélectionnés.
5.
Une fois les fichiers et/ou répertoires (dossiers) sélectionnés,
appuyer sur le bouton OK/Copier pour lancer le processus de
suppression. Lorsqu'une invite s'affiche, appuyer de nouveau
sur le bouton OK/Copier pour confirmer ou sur le bouton
Gauche pour annuler.
Une fois la suppression terminée, une tonalité est émise puis la liste
des répertoires (dossiers) s'affiche.
Affichage de la liste des fichiers
Pour consulter la liste des fichiers stockés sur le disque dur FotoChute
ou sur tout autre dispositif connecté, observer les étapes ci-après.
1.
Mettre sous tension le disque dur FotoChute. Pour consulter
la liste des fichiers stockés sur l'appareil photo et sur le
FotoChute, l'appareil photo doit être connectée selon la
méthode décrite ci-avant.
2.
Mettre en surbrillance l'option Copy (Copie) puis appuyer
sur le bouton Sélectionner.
3.
Mettre en surbrillance le dispositif sur lequel sont stockés les
fichiers à consulter, puis appuyer sur le bouton Droite.
4.
-
USB disk (Disque USB) : Sélectionner cette option pour
consulter la liste des fichiers stockés sur un appareil
photo numérique ou tout autre dispositif USB pris en
charge. La lettre « U » s'affiche dans la marge de droite
lorsque USB disk (Disque USB) est sélectionné.
-
Hard disk (Disque dur) : Sélectionner cette option pour
consulter la liste des fichiers stockés sur le disque dur
FotoChute. La lettre « H » s'affiche dans la marge de
droite lorsque Hard disk (Disque dur) est sélectionné.
Parcourir la liste des fichiers. Utiliser les boutons Gauche et
Droite pour naviguer parmi les niveaux de répertoire
32
(dossier), et les boutons Haut et Bas pour afficher les fichiers
et les répertoires (dossiers) de la liste. Le niveau de répertoire
(dossier) courant est indiqué par le numéro affiché dans la
marge de droite, sous « H » ou « U ».
Pour accéder au Menu principal, appuyer plusieurs fois sur le
bouton Gauche.
Affichage du menu Information (Informations)
Le menu Information (Informations) indique l'espace disque
disponible et la version du micrologiciel installé. Utiliser également
ce menu pour sélectionner la langue d'affichage de l'interface et, tel
qu'indiqué antérieurement, pour régler la date et l'heure.
Free Disk Space (Espace disque libre)
Sélectionner cette option pour afficher la quantité d'espace libre sur le
disque dur FotoChute ou de tout autre dispositif connecté (« USB
disk » (Disque USB)).
Version
Sélectionner cette option pour afficher le numéro de version du
micrologiciel.
Set Date and Time (Régler date et heure)
Permet de régler la date et l'heure; observer la procédure sous
« Réglage de la date et de l'heure » présentée antérieurement dans le
présent guide.
33
Language (Langue)
Sélectionner cette option pour modifier la langue d'affichage (anglais,
japonais, hollandais, français, allemand, espagnol, italien ou
portugais).
Comment obtenir de l'aide
En cas de problème ou difficulté pendant l'installation ou l'utilisation du
produit SmartDisk, visiter le site Web d'assistance technique de SmartDisk à
l'adresse www.SmartDisk.com. Cette page vous permet d'accéder à notre
bibliothèque de documentation utilisateur, de lire les réponses aux questions
les plus fréquentes et de télécharger les mises à jour logicielles disponibles. Bien qu'elle propose suffisamment d'informations pour guider la plupart de
nos clients, cette page fournit également les méthodes qui vous permettront de
contacter directement l'équipe d'assistance technique de SmartDisk.
Enregistrer le produit à l'adresse www.SmartDisk.com/Registration.asp afin
de pouvoir recevoir des renseignements sur le produit SmartDisk. Cet
enregistrement facile et rapide nous permettra de vous offrir la meilleure
expérience possible avec les produits courants et à venir de SmartDisk.
Termes de la garantie
SmartDisk Corporation garantit ses produits, sous conditions d'utilisation
normales, contre tout vice de fabrication ou de main-d'œuvre au cours de la
première (1) année à compter de la date d'achat ou pendant trois (3) ans à
partir de la date de fabrication du produit, selon la première occurrence. Les
produits achetés dans les pays de l'Union Européenne couverts par la directive
1999/44/EC sont garantis pour une période de deux (2) ans à compter de la
date d'achat. L'unique obligation de SmartDisk, dans le cadre des
réclamations de non-conformité pendant la période de garantie décrite cidessus est, au choix de SmartDisk, de réparer ou de remplacer tout produit ou
équipement que SmartDisk, à sa discrétion, a déterminé être défectueux. Le
Client doit obtenir un numéro d'autorisation de retour de marchandise (RMA)
auprès de SmartDisk avant de faire parvenir tout équipement à SmartDisk au
34
titre de la présente garantie en contactant l'assistance technique (visiter
www.SmartDisk.com). Le Client prépaiera les frais d'expédition de tout
Matériel retourné à SmartDisk dans le cadre d'un service sous garantie, et
SmartDisk prépaiera les frais d'expédition pour le retour du Matériel au
Client, à l'exclusion des droits de douane ou taxes éventuels. Tout matériel
retourné nécessite une preuve d'achat originale et une lettre présentant le
problème. SmartDisk Corporation ne sera pas responsable des articles
retournés sans RMA ou incorrectement emballés. Le Matériel de
remplacement sera neuf ou équivalent sur le plan des performances et il sera
garanti pour la durée restante de la garantie du Matériel non conforme.
SmartDisk Corporation ne peut être tenue responsable pour la récupération
des données de client sur les produits retournés intégrant un stockage de
données. Le Matériel remplacé deviendra la propriété de SmartDisk. Toute
réclamation concernant des défectuosités non effectuées pendant la période de
garantie est réputée exclue par le client.
Les obligations de SmartDisk au titre de la présente garantie reposent
expressément sur les conditions suivantes : i) les Produits ont été
correctement installés, utilisés et entretenus à tout moment par le Client; ii)
les Produits n'ont pas été soumis à des contraintes mécaniques ou à des
conditions électriques ou ambiantes exceptionnelles, ni à des catastrophes
naturelles; iii) les Produits n'ont pas fait l'objet d'un mauvais usage, d'un
accident ou d'une installation/désinstallation non autorisée de la part du Client
ou d'une tierce partie; iv) les Produits n'ont pas fait l'objet d'altérations ou de
modifications non autorisées, à l'exclusion de celles approuvées par écrit ou
autrement effectuées par SmartDisk; et v) le Client a promptement installé
toutes les révisions du Produit qui ont été publiées pour de tels Produits par
SmartDisk au cours de la période de garantie. SmartDisk ne garantit pas que
les Produits fonctionneront dans le cadre d'une combinaison d'utilisation
spécifique sélectionnée par le Client, que le fonctionnement des Produits sera
ininterrompu ou exempt d'erreurs ni que les non conformités ou les défauts
seront résolus. De plus, SmartDisk n'aura aucune obligation au titre de la
garantie si les Produits ne respectent pas les spécifications applicables lorsque
le ou les Produits sont utilisés en combinaison avec des matériels ou des
logiciels non fournis par SmartDisk. S'il est déterminé que tout Produit
signalé comme défectueux ou non conforme par le Client pendant la période
de garantie est en bon état de marche, SmartDisk peut, à son choix, demander
au Client de payer les frais de main-d'œuvre et autres dépenses encourus par
SmartDisk dans le cadre de cette détermination, selon la grille tarifaire de
SmartDisk alors en vigueur.
SmartDisk Corporation ne peut être tenue responsable pour les ventes non
autorisées ou toute déclaration inexacte de revendeurs de tierce partie non
35
autorisés. Les garanties de SmartDisk ne sont pas transférables. Les produits
achetés dans le cadre d'encans, de ventes de garage, de marchés aux puces ou
achetés comme produits de démonstration ne sont pas couverts par les
garanties de SmartDisk.
LES GARANTIES DE SMARTDISK ET LES RECOURS DU CLIENT
STIPULÉS DANS CETTE SECTION SONT EXCLUSIFS. ILS SONT
DONNÉS PAR SMARTDISK ET ACCEPTÉS PAR LE CLIENT EN LIEU
ET PLACE DE TOUTE AUTRE GARANTIE, EXPRESSE OU IMPLICITE,
Y COMPRIS MAIS SANS S'Y LIMITER, TOUTE GARANTIE DE
QUALITÉ MARCHANDE OU D'ADAPTATION À UN BUT
PARTICULIER. TOUTE AUTRE GARANTIE SIMILAIRE EST, PAR LA
PRÉSENTE, EXPRESSÉMENT ET CATÉGORIQUEMENT REFUSÉE
PAR SMARTDISK ET ABANDONNÉE PAR LE CLIENT.
Droits d'auteur
©2005 SmartDisk Corporation.
Aucune partie de ce document ne peut être reproduite sous quelque forme,
dans quelque but et par quelque moyen que ce soit, sans l'autorisation
expresse écrite de SmartDisk Corporation. Tous droits réservés.
Tous les autres noms de marques ou de produits indiqués dans le présent
document appartiennent à leurs propriétaires respectifs.
Conformité FCC
Cet appareil a été testé et est conforme aux limites conçues pour un appareil
numérique de classe B, selon l'Article 15 des règlements de la FCC. Ces
limites ont pour but de garantir une protection suffisante contre les
interférences nuisibles lorsque l'appareil est utilisé dans un environnement
résidentiel. Cet appareil génère, utilise et peut émettre des ondes
radioélectriques. S'il n'est pas installé et utilisé conformément aux
instructions, il peut provoquer des interférences nuisibles aux
communications radio. Il est cependant impossible de garantir que des
36
interférences ne se produiront pas dans une installation particulière. Si cet
appareil produit des interférences nuisibles à la réception radio ou télévision,
ce qui peut se déterminer en le mettant hors puis sous tension, l'utilisateur
devra essayer de corriger l'interférence en appliquant une ou plusieurs des
mesures suivantes :
•
Réorienter ou déplacer l'antenne réceptrice.
•
Augmenter la distance entre l'appareil et le récepteur.
•
Brancher l'appareil sur un circuit différent de celui auquel le
récepteur est connecté.
•
Demander l'aide du revendeur ou d'un technicien radio/TV
professionnel.
37
38
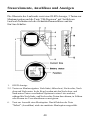
Benutzerhandbuch
Portables SmartDisk FotoChuteFestplattenlaufwerk
Bei Ihrem SmartDisk FotoChute handelt es sich um ein vielseitig
verwendbares externes Festplattenlaufwerk mit extrem hohen
Speicherleistungen, das mit einer USB On-The-Go (OTG)Schnittstelle ausgestattet ist. Dank der Flexibilität dieser Schnittstelle
lässt sich das FotoChute-Festplattenlaufwerk entweder an einen USBHost (PC oder Macintosh) oder an ein USB-Gerät (Digitalkamera,
Flash-Datenträger oder Kartenleser) anschließen. Die Anzeige des
FotoChute-Laufwerks ermöglicht es Ihnen, den Status Ihrer
Kopiervorgänge zu bestätigen und die Liste der auf dem Gerät
gespeicherten Dateien durchzublättern.
Sobald Ihr Laufwerk richtig an einen mit einer neueren
Betriebssystemversion ausgestatteten Computer angeschlossen ist,
können Sie es wie jedes andere Festplattenlaufwerk zum Speichern
Ihrer Bilddaten und Ausführen von Datensicherungsfunktionen
nutzen. Wenn das Laufwerk an eine unterstützte Kamera (oder ein
anderes unterstütztes Gerät) angeschlossen ist, können Sie alle
Kameradaten mit einem einzigen Tastendruck auf das FotoChuteLaufwerk kopieren. Das Menüsystem des FotoChute-Laufwerks bietet
Ihnen außerdem die Flexibilität, nur die Dateien auszuwählen, die Sie
kopieren möchten.
FotoChute-Festplattenlaufwerke werden werkseitig im FAT32-Format
vorformatiert.
Hinweis: Die Speicherkapazität ist modellabhängig. Das von
Ihnen verwendete Betriebssystem gibt unter Umständen eine
geringere Kapazität in Gigabytes an. 1 GB = 1.000.000.000 Bytes.
39
Steuerelemente, Anschlüsse und Anzeigen
Die Oberseite des Laufwerks weist eine OLED-Anzeige, 5 Tasten zur
Menünavigation und die Taste “OK/Kopieren” auf. Seitlich am
Laufwerk befinden sich drei Schnittstellenanschlüsse und der
Ein/Aus-Schalter.
1.
OLED-Anzeige
2-5. Tasten zur Menünavigation: Nach links (Abbrechen), Nach rechts, Nach
oben und Nach unten. In der Regel werden mit den Nach-oben- und
Nach-unten-Tasten verschiedene Optionen in einer Liste markiert,
während die Nach-links- und Nach-rechts-Tasten dazu dienen, in Feldern
oder Ebenen im Verzeichnisbaum zu navigieren.
6.
Taste zur Auswahl einer Menüoption. Durch Drücken der Taste
“Select” (Auswählen) wird eine markierte Menüoption ausgewählt.
40
7.
Taste “OK/Kopieren”, die sowohl zur Menünavigation als auch zum
Kopieren mit einem Tastendruck benutzt wird.
8.
Festplattenlaufwerk
9.
Gleichstrom-Eingangsbuchse für den Anschluss des mitgelieferten
Wechselstromadapters.
10. Ein/Aus-Schalter; regelt die Stromzufuhr von der internen Batterie.
Wenn Sie den Schalter auf “ON” (EIN) stellen, wird das Gerät mit
Batteriestrom versorgt. Steht der Schalter auf “OFF” (AUS), ist die
Stromzufuhr zum Gerät unterbrochen. Stellen Sie den Schalter auf
“OFF” (AUS), während Sie die Batterie aufladen oder das
Festplattenlaufwerk über den USB A-Stecker am Gerät an einen PCHost anschließen.
Beachten Sie, dass sich das Festplattenlaufwerk nach 5 Minuten
Inaktivität automatisch abschaltet, um Batteriestrom zu sparen.
11. USB A-Buchse für den Anschluss an eine Kamera oder ein anderes
unterstütztes USB-Gerät.
12. USB A-Stecker für den Anschluss an einen PC- oder anderen USB-Host.
Aufladen der internen Batterie
Das FotoChute-Laufwerk enthält eine interne aufladbare Lithium IonBatterie, die es mit Strom versorgt, wenn Daten von der Kamera oder
einem anderen unterstützten USB-Gerät kopiert werden. Nach
Abschluss des ersten Ladezyklus dauert es in der Regel ca. 1 ½
Stunden, bis die Batterie voll aufgeladen ist.
Hinweis: Bitte laden Sie Ihr neues Gerät 8 Stunden lang auf, bevor
Sie es zum ersten Mal an eine Kamera, einen Flash-Datenträger
oder einen Speicherkartenleser anschließen.
So laden Sie die Batterie auf:
1.
Stellen Sie den Ein/Aus-Schalter auf OFF (AUS).
2.
Stecken Sie den Wechselstromadapter in eine
Wandsteckdose und dann in die GleichstromEingangsbuchse seitlich am FotoChute-Festplattenlaufwerk.
41
Aus der Anzeige geht nun hervor, dass das Gerät aufgeladen wird.
Das Batteriesymbol zeigt den aktuellen Status an. Wenn die Batterie
voll aufgeladen ist, zeigt das Batteriesymbol dies an.
Einstellen von Datum und Uhrzeit
Das FotoChute-Festplattenlaufwerk ist mit einer internen Uhr für die
Tageszeit ausgestattet, um Ordnernamen Zeitstempel hinzuzufügen.
Bevor Sie Dateien mithilfe Ihres FotoChute-Laufwerks kopieren,
stellen Sie das Datum und die Uhrzeit wie folgt ein:
1.
Stellen Sie den Ein/Aus-Schalter seitlich am FotoChuteLaufwerk auf “ON” (EIN).
2.
Drücken Sie dreimal die Nach-unten-Taste, um Information
im Hauptmenü zu markieren. Drücken Sie dann “Select”
(Auswählen).
3.
Drücken Sie zweimal die Nach-unten-Taste, um Set Time
(Uhrzeit einstellen) zu markieren. Drücken Sie dann “Select”
(Auswählen).
4.
Verwenden Sie die Nach-oben- und Nach-unten-Tasten, um
das Datum oder die Uhrzeit zu ändern, und die Nach-linksund Nach-rechts-Tasten, um zum nächsten Datums- oder
Uhrzeitfeld zu gelangen.
5.
Wenn Sie Datum und Uhrzeit eingestellt haben, drücken Sie
die Taste “OK/Kopieren”. Wenn Sie zur Bestätigung der
Einstellungen aufgefordert werden, drücken Sie erneut die
Taste “OK/Kopieren”, um die neuen Einstellungen zu
speichern, oder die Nach-links-Taste, um den Vorgang
abzubrechen.
42
Welche Schnittstelle: USB-Host oder USBGerät?
USB OTG bietet zwei Anschlussmöglichkeiten: Wenn Sie das
FotoChute-Festplattenlaufwerk an einen PC oder Macintosh
anschließen möchten, um Dateien zwischen den beiden Geräten zu
übertragen, müssen Sie hierzu den USB-Geräteanschluss und USB AStecker am FotoChute-Laufwerk verwenden.
Wenn Sie dagegen Daten von einer unterstützten Kamera, einem
Flash-Datenträger oder einem Speicherkartenleser kopieren möchten,
müssen Sie diese Verbindung über den USB-Hostanschluss und die
USB-Buchse am FotoChute-Laufwerk herstellen.
Anschluss des FotoChute-Festplattenlaufwerks
an einen PC-Host
Der Anschluss Ihres FotoChute-Festplattenlaufwerks an ein USBHostgerät wie einen PC oder Macintosh ist denkbar einfach. Das
Laufwerk ist so ausgelegt, dass es über einen Bus betrieben wird, d.h.
es wird über das USB-Kabel vom Host-PC mit Strom versorgt. Es ist
daher wichtig, die Stromzufuhr von der Batterie auszuschalten
(Position “OFF” des Ein/Aus-Schalters), wenn das Laufwerk an einen
PC angeschlossen wird.
So schließen Sie das Laufwerk an einen PC oder Macintosh an:
1.
Stellen Sie den Ein/Aus-Schalter seitlich am FotoChuteLaufwerk auf “OFF” (AUS).
2.
Stecken Sie den USB A-Stecker am Laufwerk in einen freien
USB-Anschluss Ihres PCs, Macintoshs oder
strombetriebenen Hub.
43
Das FotoChute-Laufwerk zeigt die Meldung “Connect to PC”
(Verbindung zu PC) an. Wenn die Stromzufuhr vom PC ausreicht,
wird das FotoChute-Festplattenlaufwerk automatisch gemountet. In
diesem Fall erscheint ein Buchstabe für das Laufwerk im
Arbeitsplatz (Windows) oder ein neues Symbol auf dem Schreibtisch
(Macintosh).
Wenn das Laufwerk nicht automatisch gemountet wird, müssen Sie
unter Umständen den mitgelieferten Wechselstromadapter
anschließen. Der Adapter speist das FotoChute-Laufwerk zusätzlich
mit Strom, falls die Stromzufuhr vom Laptop nicht ausreicht.
Sollte das FotoChute-Laufwerk trotz Adapter nicht gemountet
werden, müssen Sie einen anderen Computer für die Übertragung
Ihrer Dateien verwenden.
Hinweis: Wenn Ihr Windows-Rechner einen USB 1.1-Anschluss
aufweist, erscheint möglicherweise der folgende Warnhinweis auf
Ihrer Anzeige: Hochgeschwindigkeits-USB-Gerät an NichtHochgeschwindigkeits-USB-Hub angeschlossen. Dies bedeutet
nicht, dass ein Problem besteht, da das FotoChute-Laufwerk
sowohl mit USB 1.1- als auch mit USB 2.0-Anschlüssen
kompatibel ist. Schließen Sie einfach die Meldung und fahren Sie
fort. Beachten Sie jedoch, dass das FotoChute-Laufwerk in diesem
Fall nur USB 1.1-Geschwindigkeiten unterstützt.
44
Speichern und Übertragen von Daten über USB
Sobald Ihr Festplattenlaufwerk mittels USB an einen Computer
angeschlossen ist, kann es wie jeder andere Wechseldatenträger
genutzt werden. Sie können Dateien auf das FotoChute-Symbol
ziehen, um sie zu kopieren, mithilfe der Dialogfelder Öffnen und
Speichern zur Festplatte navigieren oder dort gespeicherte Dateien
löschen. Informationen zum Kopieren, Öffnen und Löschen von
Dateien finden Sie in der Begleitdokumentation für Ihren Computer.
Entfernen des FotoChute-Laufwerks von einem PC- oder
Mac-Host
Das FotoChute-Laufwerk kann bei laufendem Computer
angeschlossen und entfernt werden. Sie brauchen den Computer nicht
neu zu starten. Führen Sie die unten beschriebenen Schritte für Ihr
Betriebssystem aus, um das Laufwerk jederzeit abzuziehen. Natürlich
können Sie das Laufwerk auch jederzeit vom Computer entfernen,
wenn dieser ausgeschaltet ist.
Hinweis: Gehen Sie bitte genau nach Anweisung vor, wenn
Sie das Festplattenlaufwerk vom Computer entfernen.
Wenn Sie das Laufwerk einfach nur abziehen, ohne die
unten stehenden Anweisungen zu beachten, kann dies das
Laufwerk beschädigen und/oder zu Datenverlust führen.
Windows-Benutzer:
1. Schließen Sie alle Dateien, die auf dem FotoChuteFestplattenlaufwerk gespeichert und in Anwendungen
geöffnet sind.
2. Klicken Sie in der Taskleiste auf Hardwarekomponente
entfernen oder auswerfen.
45
3.
4.
Wählen Sie das FotoChute-Festplattenlaufwerk aus dem
daraufhin angezeigten Menü aus.
Nach wenigen Sekunden erscheint die Windows-Meldung,
dass die Hardware entfernt werden kann.
Mac OS-Benutzer:
1. Schließen Sie alle Dateien, die auf dem FotoChuteFestplattenlaufwerk gespeichert und in Anwendungen
geöffnet sind.
2. Ziehen Sie das Symbol für das FotoChuteFestplattenlaufwerk vom Schreibtisch in den Papierkorb.
Anschluss des FotoChute-Festplattenlaufwerks
an eine Kamera oder ein anderes USB-Gerät
Der Anschluss Ihres FotoChute-Festplattenlaufwerks an ein
unterstütztes USB-Gerät, wie z. B. eine Digitalkamera, einen FlashDatenträger oder einen Speicherkartenleser, ist denkbar einfach. Das
portable FotoChute-Laufwerk fungiert als batteriebetriebener USBHost, der seinen Strom über die interne Batterie bezieht. Die Batterie
sollte aus diesem Grund immer aufgeladen sein. Wichtig ist auch,
dass die Stromzufuhr von der Batterie eingeschaltet ist (der Ein/AusSchalter muss auf “ON” [EIN] stehen), wenn das Laufwerk an eine
Kamera oder ein anderes Gerät angeschlossen wird.
1.
Stellen Sie den Ein/Aus-Schalter seitlich am FotoChuteLaufwerk auf “ON” (EIN). Auf der Anzeige erscheint das
Hauptmenü (siehe unten).
2.
Stecken Sie die Kamera oder ein anderes Gerät in die USB
A-Buchse seitlich am FotoChute-Laufwerk. Für die Kamera
ist möglicherweise ein USB-Kabel erforderlich. Auch kann
es sein, dass die Kamera eingeschaltet sein muss.
Entsprechende Anweisungen finden Sie in der
Bedienungsanleitung zur Kamera.
46
Digital Camera
Flash Disk
Card Reader
Menüsystem
Mit seiner Anzeige und den Tasten für die Menünavigation bietet das
FotoChute-Laufwerk ein nützliches Menüsystem, über das der
Benutzer den Betrieb steuern kann, wenn das Laufwerk an eine
Kamera oder ein anderes Gerät angeschlossen ist. Die Menüoptionen
werden aktiviert, indem eine Option in der Liste markiert und
anschließend die Taste “Select” (Auswählen) gedrückt wird.
Das Hauptmenü enthält vier Optionen:
1. Backup (Sicherung)
2. Copy (Kopieren)
3. Delete (Löschen)
4. Information
Über einige Optionen im Hauptmenü werden weitere Optionen in
Untermenüs eingeblendet, die nachstehend erläutert werden.
47
Kopieren aller Dateien von einem angeschlossenen Gerät
Mit der Funktion Backup (Sicherung) können Sie alle Dateien von
einem Gerät kopieren, indem Sie ein paar einfache Schritte ausführen
oder einfach nur eine Taste drücken.
So kopieren Sie alle Dateien von einer Kamera oder einem anderen
unterstützten Gerät:
1.
Schalten Sie das FotoChute-Laufwerk ein und schließen Sie
die Kamera wie oben beschrieben an.
2.
Drücken Sie die Taste “OK/Kopieren”, um alle Daten von
der Kamera auf das FotoChute-Festplattenlaufwerk zu
kopieren. Alternativ dazu können Sie im Hauptmenü die
Option Backup (Sicherung) markieren und dann “Select”
(Auswählen) drücken.
Wenn Sie zur Bestätigung aufgefordert werden, drücken Sie
die Taste “OK/Kopieren” erneut, oder drücken Sie die Nachlinks-Taste, um den Kopiervorgang abzubrechen. Während
die Daten übertragen werden, gibt die folgende Anzeige
Aufschluss über den Übertragungsstatus:
Sobald der Kopiervorgang abgeschlossen ist, wird ein
Signalton ausgegeben und das Hauptmenü angezeigt.
3.
Stellen Sie den Ein/Aus-Schalter wieder auf “OFF” (AUS).
4.
Ziehen Sie das USB-Kabel der Kamera vom FotoChuteFestplattenlaufwerk ab.
Eine Kopie Ihrer Kameradaten befindet sich nun in einem neuen
Verzeichnis auf dem FotoChute-Festplattenlaufwerk. Der
Verzeichnisname hat folgendes Format:
<DSKxxxxx>
48
wobei “xxxxx” einer 5-stelligen Sequenznummer entspricht. Diese
Sequenznummer beginnt für jedes neue Datum mit 00000. Alle
Ordner, die am selben Datum erstellt wurden, werden in einem
übergeordneten Verzeichnis abgelegt, dessen Name dem aktuellen
Datum entspricht und folgendes Format hat:
<mmttjj00>
Kopieren bestimmter Dateien von einem angeschlossenen
Gerät
Es kann mitunter vorkommen, dass Sie nicht alle Dateien von einem
Gerät kopieren möchten. Die Funktion Copy (Kopieren) des
FotoChute-Laufwerks bietet Ihnen die nötige Flexibilität, um
bestimmte Dateien oder Ordner zum Kopieren auszuwählen.
So kopieren Sie bestimmte Dateien oder Verzeichnisse von einer
Digitalkamera oder einem anderen unterstützten USB-Gerät:
1.
Schalten Sie das FotoChute-Laufwerk ein und schließen Sie
die Kamera wie oben beschrieben an.
2.
Markieren Sie im Hauptmenü die Option Copy (Kopieren)
und drücken Sie “Select” (Auswählen).
3.
Wählen Sie die Kopierquelle. Heben Sie das Gerät hervor,
das die zu kopierenden Dateien enthält, und drücken Sie die
Nach-rechts-Taste.
-
USB disk (USB-Datenträger): Wählen Sie diese
Option, um Dateien von Ihrer Kamera oder einem
anderen unterstützten USB-Gerät zu kopieren.
Wenn diese Option gewählt ist, erscheint am
rechten Rand ein “U”.
49
-
4.
Hard disk (Festplatte): Wählen Sie diese Option,
um Dateien von Ihrem FotoChuteFestplattenlaufwerk zu kopieren. Wenn diese
Option gewählt ist, erscheint am rechten Rand ein
“H”.
Wählen Sie die zu kopierenden Dateien oder Verzeichnisse
aus. Navigieren Sie mithilfe der Nach-links- und Nachrechts-Tasten durch die Verzeichnisebenen und markieren
Sie bestimmte Dateien oder Verzeichnisse in der Liste mit
der Nach-oben- oder Nach-unten-Taste. Die Zahl, die unter
dem “H” oder “U” am rechten Rand erscheint, gibt
Aufschluss über die aktuelle Verzeichnisebene. Die Zahl “1”
entspricht beispielsweise dem Stammverzeichnis.
Wenn Sie die Taste “Select” (Auswählen) drücken und eine
Datei bzw. ein Verzeichnis markiert ist, wird die Datei bzw.
das Verzeichnis gewählt. Gewählte Dateien oder
Verzeichnisse sind links mit einem Sternchen
gekennzeichnet. Wenn Sie alle zu kopierenden Dateien
gewählt haben, drücken Sie die Taste “OK/Kopieren”.
5.
Wählen Sie den Zielordner. Navigieren Sie mithilfe der
Nach-links- und Nach-rechts-Tasten durch die
Verzeichnisebenen und markieren Sie bestimmte
Verzeichnisse in der Liste mit der Nach-oben- oder Nachunten-Taste. Wenn Sie die Taste “Select” (Auswählen)
drücken und ein Verzeichnis markiert ist, wird das
Verzeichnis gewählt. Gewählte Verzeichnisse sind links mit
einem Sternchen gekennzeichnet.
50
6.
Drücken Sie die Taste “OK/Kopieren”, um den
Kopiervorgang einzuleiten. Wenn Sie zur Bestätigung
aufgefordert werden, drücken Sie die Taste “OK/Kopieren”
erneut, oder drücken Sie die Nach-links-Taste, um den
Kopiervorgang abzubrechen.
Wenn der Kopiervorgang abgeschlossen ist, gibt das FotoChuteLaufwerk einen Signalton aus und zeigt das Hauptmenü an.
In einem Kopiervorgang können bis zu 42 Dateien oder Ordner
kopiert werden.
Löschen von Dateien
So löschen Sie Dateien vom FotoChute-Festplattenlaufwerk oder von
einem angeschlossenen Gerät:
1.
Schalten Sie das FotoChute-Laufwerk ein und schließen Sie
die Kamera wie oben beschrieben an.
2.
Markieren Sie die Option Delete (Löschen) und drücken Sie
“Select” (Auswählen).
3.
Heben Sie das Gerät hervor, das die zu löschenden Dateien
enthält, und drücken Sie die Nach-rechts-Taste.
-
USB disk (USB-Datenträger): Wählen Sie diese
Option, um Dateien von Ihrer Kamera oder einem
anderen unterstützten USB-Gerät zu löschen. Wenn
51
diese Option gewählt ist, erscheint am rechten Rand
ein “U”.
-
4.
Hard disk (Festplatte): Wählen Sie diese Option,
um Dateien von Ihrem FotoChuteFestplattenlaufwerk zu löschen. Wenn diese Option
gewählt ist, erscheint am rechten Rand ein “H”.
Wählen Sie die zu löschenden Dateien oder Verzeichnisse
aus. Navigieren Sie mithilfe der Nach-links- und Nachrechts-Tasten durch die Verzeichnisebenen und markieren
Sie bestimmte Dateien oder Verzeichnisse in der Liste mit
der Nach-oben- oder Nach-unten-Taste. Die Zahl, die unter
dem “H” oder “U” am rechten Rand erscheint, gibt
Aufschluss über die aktuelle Verzeichnisebene.
Wenn Sie die Taste “Select” (Auswählen) drücken und eine
Datei bzw. ein Verzeichnis markiert ist, wird die Datei bzw.
das Verzeichnis gewählt. Gewählte Dateien oder
Verzeichnisse sind links mit einem Sternchen
gekennzeichnet.
5.
Wenn Sie alle zu löschenden Dateien gewählt haben,
drücken Sie die Taste “OK/Kopieren”, um den
Löschvorgang einzuleiten. Wenn Sie zur Bestätigung
aufgefordert werden, drücken Sie die Taste “OK/Kopieren”
erneut, oder drücken Sie die Nach-links-Taste, um den
Löschvorgang abzubrechen.
Wenn der Löschvorgang abgeschlossen ist, gibt das FotoChuteLaufwerk einen Signalton aus und zeigt die Ordnerliste an.
Anzeigen der Dateiliste
So zeigen Sie die Liste der Dateien und Verzeichnisse an, die auf dem
FotoChute-Festplattenlaufwerk oder einem angeschlossenen Gerät
gespeichert sind:
1.
Schalten Sie das FotoChute-Laufwerk ein. Um sowohl die
Dateien auf der Kamera als auch auf dem FotoChute-
52
Laufwerk anzuzeigen, müssen Sie die Kamera wie oben
beschrieben anschließen.
2.
Markieren Sie die Option Copy (Kopieren) und drücken Sie
“Select” (Auswählen).
3.
Markieren Sie das Gerät, das die anzuzeigenden Dateien
enthält, und drücken Sie die Nach-rechts-Taste.
4.
-
USB disk (USB-Datenträger): Wählen Sie diese
Option, um Dateien von Ihrer Kamera oder einem
anderen unterstützten USB-Gerät anzuzeigen. Wenn
diese Option gewählt ist, erscheint am rechten Rand
ein “U”.
-
Hard disk (Festplatte): Wählen Sie diese Option,
um Dateien von Ihrem FotoChuteFestplattenlaufwerk anzuzeigen. Wenn diese Option
gewählt ist, erscheint am rechten Rand ein “H”.
Führen Sie einen Bildlauf durch die Dateiliste durch.
Navigieren Sie mithilfe der Nach-links- und Nach-rechtsTasten durch die Verzeichnisebenen und zeigen Sie Dateien
oder Verzeichnisse in der Liste mit der Nach-oben- oder
Nach-unten-Taste an. Die Zahl, die unter dem “H” oder “U”
am rechten Rand erscheint, gibt Aufschluss über die aktuelle
Verzeichnisebene.
Um zum Hauptmenü zurückzukehren, drücken Sie mehrmals
die Nach-links-Taste.
Das Menü “Information”
Das Menü “Information” gibt Auskunft über den freien
Festplattenspeicher und die derzeit installierte Firmware-Version.
Verwenden Sie dieses Menü, um die Sprache für die Anzeige und
Datum/Uhrzeit einzustellen.
53
Free Disk Space (Freier Festplattenspeicher)
Wählen Sie diese Option, um den freien Speicher anzuzeigen, der auf
dem internen Festplattenlaufwerk des FotoChute-Geräts und auf allen
angeschlossenen Geräten (“USB-Datenträgern”) verfügbar ist.
Version
Wählen Sie diese Option, um die Firmware-Version anzuzeigen.
Set Date and Time (Datum/Uhrzeit einstellen)
Führen Sie die Schritte im vorangegangenen Abschnitt “Einstellen
von Datum und Uhrzeit” aus, um Datum und Uhrzeit einzustellen.
Language (Sprache)
Wählen Sie diese Option, um die Sprache für die Anzeige auf
Englisch, Japanisch, Holländisch, Französisch, Deutsch, Spanisch,
Italienisch oder Portugiesisch einzustellen.
So erhalten Sie Hilfe
Sollten bei der Installation oder Verwendung Ihres SmartDisk-Produkts
Probleme auftreten, besuchen Sie die Website unseres technischen
Kundendienstes www.SmartDisk.com. Von dort aus haben Sie Zugriff auf
unsere Handbuchbibliothek. Außerdem finden Sie hier Antworten auf alle
häufig gestellten Fragen und können verfügbare Updates unserer
Softwareprogramme herunterladen. Obwohl den meisten Kunden mit dem
Webseiten-Inhalt geholfen werden kann, finden Sie hier auch Angaben zur
direkten Kontaktaufnahme mit unserem SmartDisk Support-Team.
54
Bitte nehmen Sie sich die Zeit, Ihr SmartDisk-Produkt unter
www.SmartDisk.com/Registration.asp zu registrieren, um künftige
Produktinformationen zu erhalten. Die Registrierung ist schnell und einfach
und ermöglicht uns, Sie mit dem besten Service und den neuesten
Informationen zu diesem und zukünftigen SmartDisk-Produkten zu versorgen.
Garantiebedingungen
Die SmartDisk Corporation gewährleistet, dass ihre Produkte unter normalen
Gebrauchs- und Servicebedingungen für einen Zeitraum von einem (1) Jahr
ab Kaufdatum bzw. drei (3) Jahren ab Herstellungsdatum, je nachdem,
welches zuerst zutrifft, frei von Material- und Verarbeitungsmängeln sind.
Produkte, die in einem EU-Land gekauft wurden, in dem die Richtlinie
1999/44/EC Anwendung findet, erhalten eine Garantie von zwei (2) Jahren ab
Kaufdatum. SmartDisks einzige Verpflichtung in Bezug auf Reklamationen,
die innerhalb der oben beschriebenen Garantiezeit gemacht werden, ist, das
Produkt nach eigenem Ermessen zu reparieren oder zu ersetzen, falls es von
SmartDisk für defekt erklärt wurde. Bevor der Kunde ein Gerät, das unter
diese Garantie fällt, an SmartDisk zurückschickt, muss er beim Technical
Support (siehe www.SmartDisk.com) eine RMA-Nummer (Return
Merchandise Authorization) anfordern. Der Kunde muss die Versandkosten
bei Einsenden des Geräts an SmartDisk im Voraus zahlen. SmartDisk
übernimmt die Versandkosten für die Rücksendung des reparierten Geräts,
ausschließlich eventuell anfallender Zollgebühren oder Steuern. Dem
eingesandten defekten Gerät müssen der datierte Originalkaufbeleg sowie
eine Problembeschreibung beigefügt werden. SmartDisk Corporation
übernimmt keinerlei Verantwortung für Geräte, die ohne RMA-Nummer oder
unzulänglich verpackt eingesendet werden. Ersatzgeräte sind neu oder wie
neu in ihrer Leistung. Ihre Garantiezeit entspricht der noch verbleibenden
Laufzeit der Originalgarantie auf das Erstgerät. SmartDisk Corporation
übernimmt keine Verantwortung für die Wiederherstellung von Kundendaten,
die sich auf zurückgesandten Produkten mit Datenspeicher befinden. Das
ursprünglich eingesendete Gerät verbleibt im Besitz von SmartDisk. Der
Kunde hat kein Anrecht auf kostenlose Beseitigung von Mängeln, die nicht
innerhalb der Garantiefrist beanstandet werden.
Die hier ausgeführten Garantieverpflichtungen von SmartDisk unterliegen
ausdrücklich der Bedingung, dass (i) der Kunde die Produkte zu allen Zeiten
ordnungsgemäß installiert, angewendet und gepflegt hat; (ii) die Produkte
55
nicht ungewöhnlicher mechanischer Belastung, ungewöhnlichen elektrischen
oder Umweltbedingungen oder anderen Einflüssen höherer Gewalt ausgesetzt
wurden; (iii) die Produkte nicht Missbrauch, Unfällen oder unautorisierter
Installation/Deinstallation durch den Kunden oder Dritte ausgesetzt wurden;
(iv) die Produkte nicht unautorisiert verändert oder modifiziert wurden, es sei
denn nach schriftlicher Genehmigung oder anderweitig durch SmartDisk
ausgeführt, und (v) der Kunde alle Produktrevisionen, die während der
Garantiezeit von SmartDisk für solche Produkte veröffentlicht wurden,
umgehend installiert hat. SmartDisk garantiert weder, dass die Produkte in
jeder beliebigen, durch den Kunden zur Anwendung gewählten Kombination
funktionieren oder dass der Betrieb der Produkte ununterbrochen und
fehlerfrei sein wird, noch dass alle Fehler und Defekte behoben werden.
Außerdem ist SmartDisk nicht zu Garantieleistungen verpflichtet, sollten die
Produkte aufgrund der Kombination mit Hardware und/oder Software anderer
Hersteller nicht mit den entsprechenden Produktspezifikationen
übereinstimmen. Sollte sich herausstellen, dass die während der Garantiezeit
durch den Kunden als fehlerhaft oder defekt eingesendeten Produkte weder
fehlerhaft noch defekt sind, kann SmartDisk nach eigenem Ermessen dem
Kunden die entstandenen Arbeits- und sonstigen Kosten gemäß der dann
geltenden Preise berechnen.
Die SmartDisk Corporation übernimmt keine Verantwortung für den
unberechtigten Verkauf oder falsche Darstellungen seitens nicht autorisierter
Drittanbieter. Die SmartDisk-Garantieleistungen lassen sich bei einem
Besitzwechsel nicht übertragen. Die SmartDisk-Garantie gilt möglicherweise
nicht für Produkte, die bei einer Versteigerung, einem Verkauf gebrauchter
Artikel oder auf einem Flohmarkt erworben bzw. als Demoversionen gekauft
wurden.
DIE IN DIESEM ABSCHNITT AUSGEFÜHRTEN VON SMARTDISK
ZUGESTANDENEN GARANTIEN UND RECHTE DES KUNDEN SIND
AUSSCHLIESSLICH UND WERDEN ANSTELLE JEGLICHER
ANDERER GARANTIEN - SEIEN SIE AUSDRÜCKLICH ODER
STILLSCHWEIGEND, EINSCHLIESSLICH UND OHNE
BESCHRÄNKUNG AUF ALLE GARANTIEN IN BEZUG AUF
HANDELSFÄHIGKEIT UND EIGNUNG FÜR EINEN BESTIMMTEN
ZWECK - VON SMARTDISK GEWÄHRT UND VOM KUNDEN
AKZEPTIERT. ALL SOLCHE ANDEREN GARANTIEN WERDEN
HIERMIT VON SMARTDISK AUSDRÜCKLICH UND
UNWIDERRUFLICH NICHT GEGEBEN UND VOM KUNDEN NICHT
VERLANGT.
56
Urheberrechte
Copyright ©2005 SmartDisk Corporation.
Ohne die ausdrückliche schriftliche Genehmigung von SmartDisk
Corporation darf kein Teil dieses Dokuments reproduziert werden, in welcher
Form und zu welchem Zweck auch immer. Alle Rechte vorbehalten.
Alle anderen in diesem Dokument erwähnten Marken und Produktnamen sind
Eigentum ihrer jeweiligen Besitzer.
FCC-Vorschriften
Dieses Gerät wurde überprüft und entspricht den Grenzwerten eines digitalen
Geräts der Klasse B gemäß Teil 15 der FCC-Bestimmungen. Diese
Grenzwerte dienen dem angemessenen Schutz gegen schädliche Störungen
bei Betrieb in Wohnräumen. Dieses Gerät erzeugt, benutzt und kann
Hochfrequenzenergie abstrahlen und kann, wenn unsachgemäß installiert und
benutzt, schädliche Störungen im Funkverkehr verursachen. Es besteht jedoch
keine Garantie, dass es in einer bestimmten Umgebung nicht zu Störungen
kommen kann. Falls dieses Gerät beim Radio- oder Fernsehempfang
schädliche Störungen verursachen sollte, was durch Aus- und
Wiedereinschalten des Geräts festgestellt werden kann, wird dem Benutzer
dringend empfohlen, eine Behebung der Störungen durch eine oder mehrere
der folgenden Maßnahmen zu versuchen:
•
Neuausrichten oder Neuverlegen der Empfangsantenne.
•
Vergrößern des Abstands zwischen Gerät und Empfänger.
•
Anschließen des Geräts an einen anderen Stromkreis als den, an den
der Empfänger angeschlossen ist.
•
Zurateziehen eines Händlers oder erfahrenen
Radio/Fernsehtechnikers.
57
Guida per l'utente
Disco portatile SmartDisk FotoChute
SmartDisk FotoChute è un disco esterno versatile dotato di funzione
di memorizzazione ad alte prestazioni e di un'interfaccia USB OTG
(On-The-Go). La flessibilità di tale interfaccia consente di collegare
FotoChute sia a un host USB, quale un PC o un Mac, che a un
dispositivo USB, quale una fotocamera digitale, un disco flash o un
lettore di memory card. Il display di FotoChute consente di controllare
lo stato delle operazioni di copia e può essere utilizzato per
visualizzare l'elenco dei file memorizzati.
Dopo aver collegato correttamente l'unità a un computer su cui è in
esecuzione un sistema operativo recente, sarà possibile utilizzarla
come un qualsiasi disco per memorizzare dati fotografici o per
eseguire il backup dei dati. Quando l'unità è collegata correttamente a
una fotocamera o a un altro dispositivo supportato, sarà possibile
copiare tutti i dati sulla fotocamera in FotoChute con la semplice
pressione di un pulsante. Inoltre, il sistema dei menu di FotoChute
offre la possibilità di selezionare solo i file che si desidera copiare.
L'unità FotoChute è preformattata in fabbrica con il file system
FAT32.
Nota: la capacità dipende dal modello. È possibile che il sistema
operativo riporti una capacità in gigabyte inferiore. 1 GB =
1.000.000.000 byte.
58
Controlli e indicatori
Sul piano superiore dell'unità è presente un display OLED, un disco
per la navigazione dei menu a 5 pulsanti e un pulsante di OK/Copia.
Inoltre, sul pannello laterale dell'unità FotoChute sono presenti tre
connettori di interfaccia e l'interruttore principale.
1.
Display OLED
2-5. Pulsanti per la navigazione dei menu sinistro (Annulla), destro, su, giù.
In genere i pulsanti su/giù servono a evidenziare le opzioni in un elenco,
mentre il pulsante sinistra/destra consente di spostarsi sui diversi campi o
sui vari livelli di una struttura di directory.
6.
Pulsante di selezione per la navigazione dei menu. Il pulsante di
selezione consente di selezionare l'opzione di menu evidenziata.
7.
OK/Copia, consente di navigare nei menu e di eseguire un'operazione di
copia con un solo pulsante.
59
8.
Unità principale
9.
Presa di ingresso CC, da utilizzare con l'adattatore CA fornito.
10. Interruttore principale, attiva l'alimentazione dalla batteria interna.
Spostare l'interruttore nella posizione "ON" per attivare l'alimentazione
dalla batteria, su "OFF" per disattivarla. Lasciare l'interruttore su OFF
durante il caricamento della batteria o mentre l'unità è collegata a un host
PC mediante il connettore USB.
Tenere presente che quando l'unità accesa rimane inattiva per cinque
minuti, si spegne automaticamente per ridurre il consumo della batteria.
11. Presa USB, consente di eseguire il collegamento a una fotocamera o a un
altro dispositivo USB supportato.
12. Connettore USB, consente di eseguire il collegamento a un PC o a un
altro host USB.
Caricamento della batteria interna
FotoChute contiene una batteria interna agli ioni di litio ricaricabile
che alimenta il prodotto durante le operazioni di copia dei dati dalla
fotocamera o da altri dispositivi USB supportati. Dopo il ciclo di
caricamento iniziale, normalmente richiede un'ora e mezza circa per la
ricarica completa.
Nota: la prima volta, caricare l'unità per otto ore prima di
collegarla a una fotocamera, un disco flash o a un lettore di
memory card.
Per caricare la batteria, seguire questa procedura:
1.
Spostare l'interruttore principale su OFF.
2.
Collegare l'adattatore CA a una presa a muro e alla presa di
ingresso CC sul pannello laterale di FotoChute.
Sul display viene indicato che l'unità si sta caricando e lo stato
corrente mediante l'icona della batteria. Quando il caricamento è stato
completato, l'icona della batteria indica lo stato di carica completa.
60
Impostazione di data e ora
FotoChute dispone di un orologio interno che gli consente di applicare
data e ora a vari nomi di cartelle. Prima di iniziare a copiare i file con
FotoChute, seguire questa procedura per impostare data e ora.
1.
Spostare l'interruttore principale sulla posizione ON.
2.
Dal menu principale, premere tre volte il pulsante giù per
evidenziare Information (Informazioni), quindi premere il
pulsante di selezione.
3.
Premere due volte il pulsante giù per evidenziare Set Time
(Imposta ora), quindi premere il pulsante di selezione.
4.
Utilizzare i pulsanti su e giù per modificare i valori di data e
ora e i pulsanti sinistra e destra per passare al campo di ora o
data successivo.
5.
Terminata l'impostazione di data e ora, premere il pulsante
OK/Copia. Quando viene richiesto di confermare, premere il
pulsante OK/Copia per salvare le nuove impostazioni o il
pulsante sinistra per annullale.
Interfaccia host USB o dispositivo USB?
L'interfaccia USB OTG offre due modi per collegarsi ad altre porte
USB. Quando si desidera collegarsi a un PC o a un Mac per trasferire
i file da FotoChute al computer o viceversa, è necessario collegarsi a
tale computer mediante la porta per dispositivo USB di FotoChute,
che utilizza il connettore USB.
Quando si desidera copiare i dati da una fotocamera, un disco flash o
un lettore di memory card, è necessario collegarsi a tale dispositivo
mediante la porta host USB di FotoChute, che utilizza la presa USB.
61
Collegamento di FotoChute a un host PC
Il collegamento di FotoChute a un dispositivo host USB, sia esso PC o
Mac, è molto semplice. L'unità portatile FotoChute è stata progettata
come dispositivo alimentato con bus, il che significa che viene
alimentata dal PC host mediante il cavo USB. È per questo che è
importante spegnere la batteria (interruttore principale su OFF)
durante il collegamento a un PC.
Per effettuare il collegamento a un PC o Mac, seguire questa
procedura.
1.
Spostare l'interruttore principale sulla posizione OFF.
2.
Collegare il connettore USB a una porta USB disponibile sul
PC o Mac o a un hub alimentato.
FotoChute visualizza il messaggio "Connect to PC" (Collegamento a
PC). Se il PC fornisce un'alimentazione adeguata, l'unità viene
rilevata automaticamente e in Risorse del computer (Windows)
viene inserita una lettera di unità che rappresenta FotoChute oppure
viene visualizzata una nuova icona sulla scrivania (Macintosh).
Se il rilevamento automatico non avviene, è possibile che occorra
collegare l'adattatore CA accluso. In tal modo si fornisce più energia a
FotoChute nelle situazioni in cui quella fornita dal computer portatile
non è sufficiente.
Se neppure in questo modo FotoChute viene rilevato, è necessario
utilizzare un altro computer per trasferire i file.
62
Nota: se si utilizza una porta USB 1.1 sul computer Windows, è
possibile che sul display venga visualizzata l'avvertenza seguente:
Hi-Speed USB Device plugged into non-Hi-Speed USB hub
(Dispositivo USB ad alta velocità collegato a un hub USB non ad
alta velocità). Questo non è un problema perché FotoChute è
compatibile sia con le porte USB 1.1 che con quelle USB 2.0. È
sufficiente chiudere il messaggio e continuare. Tuttavia, in questo
caso FotoChute funziona a velocità USB 1.1.
Memorizzazione e trasferimento dei dati tramite USB
Dopo aver collegato l'unità a un computer tramite USB, è possibile
accedervi e utilizzarla come un qualsiasi altro disco rimovibile. È
possibile trascinare i file sull'icona di FotoChute per copiarli,
selezionare le finestre di dialogo di apertura e salvataggio oppure
eliminare i file memorizzati sul disco. Per informazioni su copia,
apertura o eliminazione di file, consultare la documentazione del
computer.
Disconnessione di FotoChute da un host PC o Mac
L'unità FotoChute è collegabile a macchina accesa, ossia può essere
collegata e disconnessa senza dover riavviare il computer. Per
disconnettere l'unità in qualsiasi momento, seguire questa procedura.
È inoltre possibile disconnettere l'unità disco in qualsiasi momento
mentre il computer è spento.
Nota: fare attenzione a seguire la procedura corretta per
disconnettere l'unità disco. Disconnetterla senza seguire le
istruzioni riportate di seguito, potrebbe danneggiarla e/o
provocare una perdita di dati.
Per gli utenti Windows:
1. Se vi sono file di FotoChute aperti in qualsiasi applicazione,
chiuderli.
2. Fare clic sul pulsante Scollegamento o rimozione di una
periferica hardware sulla barra delle applicazioni.
63
3.
4.
Selezionare il disco di FotoChute dal menu visualizzato.
Dopo un po', Windows visualizza un messaggio che
comunica che il dispositivo hardware può essere rimosso.
Per gli utenti di Mac OS:
1. Se vi sono file di FotoChute aperti in qualsiasi applicazione,
chiuderli.
2. Individuare l'icona di FotoChute sulla scrivania e trascinarla
sul cestino.
Collegamento di FotoChute a una fotocamera
o a un altro dispositivo USB
Il collegamento di FotoChute a un dispositivo USB supportato, quale
una fotocamera digitale, un disco flash o un lettore di memory card è
un'operazione molto semplice. L'unità portatile FotoChute funziona
come host USB alimentato a batteria, ciò vuol dire che l'energia gli
viene fornita dalla batteria interna. È per questo che è importante
tenere la batteria carica e attivarla (interruttore principale su ON)
durante il collegamento a una fotocamera o a un altro dispositivo.
1.
Spostare l'interruttore principale sulla posizione ON. Nel
display viene visualizzato il menu principale (vedere la
figura in basso).
2.
Collegare la fotocamera o il dispositivo alla presa USB sul
pannello laterale di FotoChute. È possibile che sia necessario
accendere la fotocamera e utilizzare un cavo USB, secondo
le istruzioni fornite con la fotocamera.
64
Fotocamera digitale
Disco flash
Lettore card
Sistema di menu
FotoChute utilizza il display e i pulsanti di navigazione dei menu per
fornire un utile sistema di menu che consente di controllare le
operazioni durante i collegamenti con le fotocamere o gli altri
dispositivi. Per richiamare le opzioni di menu, è necessario
evidenziarle e poi premere il pulsante di selezione.
Le quattro opzioni del menu principale sono
1. Backup
2. Copy (Copia)
3. Delete (Elimina)
4. Information (Informazioni)
Come descritto più dettagliatamente in seguito, alcune opzioni del
menu principale offrono altre opzioni all'interno di sottomenu.
65
Copia di tutti i file da un dispositivo collegato
La funzione Backup consente di copiare tutti i file di un dispositivo
mediante una procedura molto semplice oppure mediante
un'operazione rapida con un unico pulsante.
Per copiare tutti i file da una fotocamere o da un altro dispositivo
supportato, seguire questa procedura.
1.
Accendere FotoChute e collegare la fotocamera come
illustrato in precedenza.
2.
Premere il pulsante OK/Copia per avviare la copia di tutti i
dati dalla fotocamera all'unità FotoChute. In alternativa, è
possibile evidenziare Backup dal menu principale e premere
il pulsante di selezione.
Quando viene richiesto, premere nuovamente il pulsante
OK/Copia per confermare o il pulsante sinistra per annullare.
Durante il trasferimento dei dati, sul display vengono
visualizzate le icone seguenti che indicano l'attività di
trasmissione.
Una volta completato il processo di copia, viene emesso un
segnale acustico e viene visualizzato il menu principale.
3.
Spostare l'interruttore principale su OFF.
4.
Disconnettere il cavo USB della fotocamera da FotoChute.
Una copia dei dati della fotocamera viene inserita in una nuova
directory sul disco di FotoChute. Alla directory verrà assegnato un
nome con il formato
<DSKxxxxx>
dove "xxxxx" rappresenta una sequenza numerica di 5 cifre. La
sequenza numerica inizia da 00000 ad ogni nuova data. Tutte le
66
cartelle create nella stessa data saranno contenute in una directory
principale il cui nome si basa sulla data corrente e il cui formato è
<mmggaa00>
Copia dei file selezionati da un dispositivo collegato
In alcune situazioni è possibile che non si desideri copiare tutti i file
presenti su un dispositivo. In questo caso, la funzione di copia di
FotoChute consente di specificare i singoli file o cartelle da copiare.
Per copiare i file o le directory selezionate da una fotocamera digitale
o da un altro dispositivo supportato, seguire questa procedura.
1.
Accendere FotoChute e collegare la fotocamera come
illustrato in precedenza.
2.
Evidenziare l'opzione Copy (Copia) dal menu principale e
premere il pulsante di selezione.
3.
Selezionare il dispositivo di origine. Evidenziare il
dispositivo che contiene i file da copiare e premere il
pulsante destra.
-
USB disk (Disco USB): selezionare questa opzione
per copiare i file dalla fotocamera o da un altro
dispositivo USB supportato. Quando si seleziona il
disco USB, sul bordo destro viene visualizzata una
"U".
-
Hard disk (Unità disco): selezionare questa opzione
per copiare i file dal disco di FotoChute. Quando si
seleziona l'unità disco, sul bordo destro viene
visualizzata una "H".
67
4.
Selezionare i file o le directory che si desidera copiare.
Utilizzare i pulsanti sinistra e destra per passare da un livello
di directory all'altro e i pulsanti su e giù per evidenziare i file
o le directory. Il livello di directory corrente è indicato da un
numero sul bordo destro sotto alla "H" o alla "U". Ad
esempio, il numero "1" rappresenta il primo livello.
Se si preme il pulsante di selezione su un file o una directory
evidenziata viene effettuata la selezione. I file o le directory
selezionati sono contrassegnati da un asterisco sul bordo
sinistro. Terminata la selezione di tutti i file da copiare,
premere il pulsante OK/Copia.
5.
Selezionare la cartella di destinazione. Utilizzare i pulsanti
sinistra e destra per passare da un livello di directory all'altro
e i pulsanti su e giù per evidenziare le directory. Se si preme
il pulsante di selezione su una directory evidenziata viene
effettuata la selezione. La directory selezionata è
contrassegnata da un asterisco sul bordo sinistro.
6.
Premere il pulsante OK/Copia per avviare il processo di
copia. Quando viene richiesto, premere nuovamente il
pulsante OK/Copia per confermare o il pulsante sinistra per
annullare.
68
Una volta completato il processo di copia, viene emesso un segnale
acustico e viene visualizzato il menu principale.
In una sola volta è possibile copiare al massimo 42 file o cartelle.
Eliminazione di file
Per eliminare i file da FotoChute o da un dispositivo collegato,
seguire questa procedura.
1.
Accendere FotoChute e collegare la fotocamera come
illustrato in precedenza.
2.
Evidenziare l'opzione Delete (Elimina) e premere il pulsante
di selezione.
3.
Evidenziare il dispositivo che contiene i file da eliminare e
premere il pulsante destra.
4.
-
USB disk (Disco USB): selezionare questa opzione
per eliminare i file dalla fotocamera o da un altro
dispositivo USB supportato. Quando si seleziona il
disco USB, sul bordo destro viene visualizzata una
"U".
-
Hard disk (Unità disco): selezionare questa opzione
per eliminare i file dal disco di FotoChute. Quando
si seleziona l'unità disco, sul bordo destro viene
visualizzata una "H".
Selezionare i file o le directory che si desidera eliminare.
Utilizzare i pulsanti sinistra e destra per passare da un livello
di directory all'altro e i pulsanti su e giù per evidenziare i file
o le directory. Il livello di directory corrente è indicato da un
numero sul bordo destro sotto alla "H" o alla "U".
69
Se si preme il pulsante di selezione su un file o una directory
evidenziata viene effettuata la selezione. I file o le directory
selezionati sono contrassegnati da un asterisco sul bordo
sinistro.
5.
Terminata la selezione di tutti i file da eliminare, premere il
pulsante OK/Copia per avviare il processo di eliminazione.
Quando viene richiesto, premere nuovamente il pulsante
OK/Copia per confermare o il pulsante sinistra per annullare.
Una volta completato il processo di eliminazione, viene emesso un
segnale acustico e viene visualizzato l'elenco delle cartelle.
Visualizzazione dell'elenco dei file
Per visualizzare l'elenco dei file e delle directory in FotoChute o su un
dispositivo collegato, seguire questa procedura.
1.
Accendere FotoChute. Se si desidera visualizzare sia i file
sulla fotocamera che quelli su FotoChute, è necessario
collegare la fotocamera secondo le istruzioni fornite in
precedenza.
2.
Evidenziare l'opzione Copy (Copia) e premere il pulsante di
selezione.
3.
Evidenziare il dispositivo che contiene i file da visualizzare e
premere il pulsante destra.
-
USB disk (Disco USB): selezionare questa opzione
per visualizzare i file della fotocamera o di un altro
dispositivo USB supportato. Quando si seleziona il
disco USB, sul bordo destro viene visualizzata una
"U".
-
Hard disk (Unità disco): selezionare questa opzione
per visualizzare i file sul disco di FotoChute.
Quando si seleziona l'unità disco, sul bordo destro
viene visualizzata una "H".
70
4.
Sfogliare l'elenco dei file. Utilizzare i pulsanti sinistra e
destra per passare da un livello di directory all'altro e i
pulsanti su e giù per visualizzare i file o le directory
nell'elenco. Il livello di directory corrente è indicato da un
numero sul bordo destro sotto alla "H" o alla "U".
Per ritornare al menu principale premere ripetutamente il
pulsante sinistra.
Menu Information (Informazioni)
Il menu Information indica lo spazio disponibile su disco e la versione
del firmware attualmente installata. È possibile utilizzare questo menu
anche per definire la lingua di visualizzazione e, come illustrato in
precedenza, per impostare data e ora.
Free Disk Space (Spazio libero su disco)
Selezionare questa opzione per visualizzare la quantità di spazio
disponibile sul disco interno di FotoChute o sui dispositivi collegati
("USB disk").
Version (Versione)
Selezionare questa opzione per visualizzare il numero di versione del
firmware.
Impostazione di data e ora
Per impostare data e ora, seguire la procedura illustrata in precedenza
nella sezione "Impostazione di data e ora".
71
Language (Lingua)
Selezionare questa opzione per modificare la lingua di visualizzazione
in inglese, giapponese, olandese, francese, tedesco, spagnolo, italiano
o portoghese.
Assistenza
Se si riscontrano difficoltà nell'installazione o nell'utilizzo di un prodotto
SmartDisk, visitare il sito Web dell'assistenza tecnica SmartDisk all'indirizzo
www.SmartDisk.com. Da questa pagina è possibile accedere alla nostra
biblioteca di documentazione per l'utente, leggere le risposte alle domande
frequenti e scaricare gli aggiornamenti software disponibili. Benché molti
nostri clienti trovino queste risorse sufficienti a risolvere i loro problemi, in
questa pagina sono fornite anche informazioni su come contattare
direttamente lo staff di assistenza tecnica SmartDisk.
Iscriversi per ricevere in futuro informazioni sul prodotto SmartDisk in uso
all'indirizzo www.SmartDisk.com/Registration.asp. L'iscrizione è rapida e
facile e ci aiuterà a fornire la migliore assistenza su questo e altri prodotti
SmartDisk.
Termini della garanzia
SmartDisk Corporation garantisce che i suoi prodotti sono esenti da difetti nei
materiali e nella manodopera in condizioni di uso e servizio normali per un
periodo di un anno dalla data dell'acquisto o di tre anni dalla data di
produzione, a seconda di quale condizione sia precedente. I prodotti acquistati
nei paesi dell'Unione Europea tutelati dalla Direttiva 1999/44/EC sono
garantiti per un periodo di due anni dalla data di acquisto. L'unico obbligo di
SmartDisk nei confronti di reclami per mancata conformità presentati entro il
suddetto periodo di garanzia sarà di riparare o sostituire, a sua scelta, il pezzo
dell'apparecchiatura che SmartDisk, a sua sola discrezione, ritenga sia
difettoso. Il cliente dovrà ottenere da SmartDisk un numero di autorizzazione
per restituire la merce prima di poter restituire a SmartDisk qualsiasi
apparecchio coperto da questa garanzia, contattando l'assistenza tecnica
72
(vedere il sito www.SmartDisk.com). Il cliente dovrà pagare in anticipo le
spese di spedizione dell'apparecchio restituito a SmartDisk per il servizio di
garanzia e SmartDisk pagherà le spese di trasporto per la restituzione
dell'apparecchio al cliente, ad eccezione delle eventuali imposte o diritti
doganali. Per tutte le restituzioni è necessaria la prova di acquisto originale
provvista di data e una lettera in cui è spiegato il problema. SmartDisk
Corporation non sarà responsabile dei prodotti restituiti senza numero di
autorizzazione alla restituzione o confezionato in modo improprio.
L'apparecchio fornito in sostituzione sarà nuovo o come nuovo nelle
prestazioni e sarà coperto da garanzia per il periodo restante della garanzia
dell'apparecchio sostituito. SmartDisk Corporation non sarà responsabile del
recupero dei dati dai prodotti restituiti che contengono dati in memoria. Tutti
gli apparecchi restituiti diventeranno di proprietà di SmartDisk. Qualsiasi
reclamo non effettuato entro il periodo di garanzia sarà ritenuto come rinuncia
da parte del cliente.
Gli obblighi di garanzia di SmartDisk in virtù del presente atto sono
espressamente subordinati al fatto che (i.) il prodotto sia stato installato,
utilizzato e tenuto sempre in modo corretto dal cliente; (ii.) il prodotto non sia
stato sottoposto a sollecitazioni meccaniche anomale o a condizioni elettriche
o ambientali fuori della norma o ad altre cause di forza maggiore; (iii.) il
prodotto non abbia subito un uso improprio, incidenti o
installazioni/disinstallazioni non autorizzate da parte del cliente o di terzi;
(iv.) il prodotto non sia stato alterato o modificato senza autorizzazione o
senza previa approvazione scritta o altro tipo di approvazione da parte di
SmartDisk e (v.) il cliente abbia installato prontamente tutte le revisioni del
prodotto rilasciate per esso da SmartDisk nel corso del periodo di garanzia.
SmartDisk non garantisce il funzionamento del prodotto in una qualsiasi
combinazione scelta dal cliente né che il prodotto funzioni ininterrottamente o
senza errori o che sarà posto rimedio a tutti i difetti o aspetti non conformi.
Inoltre, la garanzia non implica alcun obbligo di SmartDisk nel caso in cui il
prodotto non risulti conforme alle specifiche tecniche applicabili derivanti
dall'associazione del prodotto con componenti hardware e/o software non
forniti da SmartDisk. Se viene stabilito che il prodotto che il cliente indica
come difettoso o non conforme nel periodo di garanzia non è difettoso o non
conforme, SmartDisk può, a sua scelta, far pagare al cliente i costi di
manodopera e le spese contratte da SmartDisk in connessione a tale decisione,
al tasso in vigore al momento dell'esborso da parte di SmartDisk.
SmartDisk Corporation non è responsabile della vendita non autorizzata o di
una rappresentazione errata da parte di rivenditori terzi non autorizzati. Le
garanzie di SmartDisk non sono trasferibili con la proprietà. I prodotti
73
acquistati ad aste, mercatini rionali o dell'usato o come unità dimostrative non
sono coperti dalla garanzia di SmartDisk.
LE GARANZIE DI SMARTDISK E LE RIPARAZIONI DEL CLIENTE
ESPOSTE IN QUESTO DOCUMENTO SONO ESCLUSIVE E SONO
CONCESSE DA SMARTDISK E ACCETTATEDAL CLIENTE AL POSTO
DI QUALSIASI ALTRA GARANZIA, ESPRESSA O IMPLICITA,
INCLUSE, MA NON SOLO, TUTTE LE GARANZIE DI
COMMERCIABILITÀ E IDONEITÀ AD UNO SCOPO PARTICOLARE,
MENTRE, IN VIRTÙ DI QUESTO DOCUMENTO, SMARTDISK
RESPINGE ESPRESSAMENTE E INEQUIVOCABILMENTE TUTTE LE
ALTRE GARANZIE A CUI IL CLIENTE ESPRESSAMENTE E
INEQUIVOCABILMENTE RINUNCIA.
Diritti
Copyright ©2005 SmartDisk Corporation.
È vietata la riproduzione, in qualsiasi forma, con qualsiasi mezzo e per
qualsiasi scopo, di qualunque parte di questo documento senza l'espressa
autorizzazione scritta di SmartDisk Corporation. Tutti i diritti riservati.
Tutte le altre marche o nomi di prodotto a cui si fa riferimento nel presente
documento appartengono ai rispettivi proprietari.
Conformità FCC
Questo apparecchio è stato collaudato ed è risultato conforme ai limiti previsti
per un dispositivo digitale di classe B, ai sensi delle norme FCC, Articolo 15.
Questi limiti consentono di fornire una protezione sufficiente contro
interferenze dannose in installazioni residenziali. Questo apparecchio genera,
utilizza e può irradiare energia a radiofrequenza e, se non installato ed
utilizzato secondo le istruzioni, potrebbe provocare interferenze dannose alle
comunicazioni radio. In ogni caso, non esiste garanzia che non si verifichino
interferenze in particolari installazioni. Se questa apparecchiatura provoca
interferenze alla ricezione radio o televisiva, fatto che può essere stabilito
74
accendendo e spegnendo l'apparecchiatura, si raccomanda di correggere
l'interferenza in uno dei seguenti modi:
•
Riorientare o riposizionare l'antenna di ricezione.
•
Aumentare la separazione tra l'apparecchiatura e il ricevitore.
•
Collegare l'apparecchiatura in una presa che si trova su un circuito
diverso da quello in cui è connesso il ricevitore.
•
Per ricevere assistenza, consultare il rivenditore dell'apparecchiatura
o un tecnico radio/TV specializzato.
75
Manual del usuario
Unidad de disco duro portátil FotoChute de
SmartDisk
Su unidad FotoChute de SmartDisk es un versátil disco duro externo
que ofrece almacenamiento de alto rendimiento e interfaz mediante
USB OTG (On-The-Go). La flexibilidad de una interfaz USB OTG le
permite conectar su FotoChute bien a un ordenador anfitrión con USB
(como un ordenador PC o Mac) o a un dispositivo USB (como una
cámara digital, un lector de tarjetas o una unidad de disco flash). La
pantalla de su unidad FotoChute le permite confirmar el estado de sus
operaciones de copia y puede utilizarse para ver la lista de archivos
que ha almacenado.
Una vez su unidad se ha conectado correctamente a su ordenador con
un sistema operativo reciente, podrá utilizarla como cualquier otro
disco duro, para el almacenamiento de sus datos de fotografías y para
funciones de copia de seguridad. Cuando su unidad se haya conectado
adecuadamente a una cámara compatible (u otro dispositivo
compatible), podrá copiar todos los datos de su cámara a la unidad
FotoChute apretando una única tecla. Además de ello, el sistema de
menú de la unidad FotoChute le permite la flexibilidad adicional de
seleccionar sólo aquellos archivos específicos que puede desear
copiar.
Su unidad FotoChute viene preformateada de fábrica en formato
FAT32.
Nota: Capacidad variable según modelo. Su sistema operativo
puede mostrar su capacidad como menos gigabytes.
1 GB = 1.000.000.000 bytes.
76
Controles e indicadores
La superficie superior de la unidad contiene una pantalla OLED
(díodo orgánico emisor de luz), un disco de navegación con menú de
cinco botones y un botón OK/Copy (aceptar/copiar). Además de ello,
el panel lateral de su unidad FotoChute contiene tres conectores de
interfaz y el interruptor de encendido.
1.
Pantalla OLED
2-5. Botones de navegación en menú: izquierda (cancelar), derecha, arriba,
abajo. En general, los botones arriba/abajo se utilizan para resaltar
diferentes opciones de una lista, mientras que los botones
izquierda/derecha se utilizan para navegar entre diferentes campos o
niveles de un árbol de directorio.
6.
Botón SELECT de selección de navegación en menú. El botón de
selección se pulsa para seleccionar la opción del menú que se encuentra
resaltada.
77
7.
OK/Copy, Aceptar/copiar, se utiliza tanto para la navegación en el menú
como para la operación de copia con un solo botón.
8.
Cuerpo principal
9.
Conector de entrada CC, para su utilización con el adaptador CA
incluido.
10. Interruptor de encendido, activa la alimentación desde la batería interna.
Deslice este interruptor a la posición "On" (encendido) para aplicar
alimentación de la batería a la unidad y a la posición "OFF" (apagado)
para eliminar dicha alimentación. Deje la unidad apagada (OFF)
mientras carga la batería o durante su conexión a un ordenador anfitrión
utilizando la toma A USB adjunta.
Recuerde que después de cinco minutos encendida sin actividad, la
unidad se apagará automáticamente para conservar la carga de la batería.
11. Conector A USB, para la conexión a una cámara u otro dispositivo USB
compatible.
12. Toma A USB, para la conexión a un ordenador u otro anfitrión USB.
Carga de la batería interna
La unidad FotoChute contiene una batería de ión de litio recargable
interna que suministra la alimentación para el producto cuando se
utiliza para copiar datos de su cámara u otro dispositivo USB
compatible. Después del ciclo inicial de carga, normalmente se tarda
aproximadamente una hora y media para una recarga completa.
Nota: Cargue su nueva unidad durante 8 horas antes de su primera
conexión a una cámara, unidad de disco flash o lector de tarjetas de
memoria.
Para cargar la batería, sólo tiene que seguir los pasos que se indican a
continuación:
1.
Coloque el interruptor de encendido en la posición OFF
(apagado).
78
2.
Conecte el adaptador CA a una toma de pared y luego al
conector de entrada CC del panel lateral de la unidad
FotoChute.
La pantalla indicará que la unidad está realizando la recarga y
mostrará el estado actual utilizando el icono de batería. Cuando la
carga esté completa, el icono de la batería mostrará un estado
completo.
Configuración de fecha y hora
FotoChute tiene un reloj interno para la hora diaria que utiliza para
aplicar una marca de tiempo a diferentes nombres de carpetas. Antes
de comenzar a copiar archivos utilizando la unidad FotoChute, siga
los pasos que se indican a continuación para ajustar la fecha y la hora.
1.
Encuentre el interruptor de alimentación en el lateral de su
unidad FotoChute y deslícelo a la posición ON (encendido).
2.
Desde el menú principal, pulse el botón indicador hacia
abajo tres veces para resaltar Information (información) y
luego pulse Select (seleccionar).
3.
Pulse el botón indicador hacia abajo dos veces para resaltar
Set Time (ajustar hora) y luego pulse Select (seleccionar).
4.
Utilice las teclas indicadoras arriba y abajo para cambiar el
valor de la fecha y la hora y utilice los indicadores de
izquierda y derecha para pasar al campo de fecha u hora
posterior.
5.
Después de terminar el ajuste de fecha y hora, pulse el botón
OK/Copy (aceptar/copiar). Cuando se le pida confirmación,
pulse el botón OK/Copy (aceptar/copiar) para guardar los
nuevos valores o el indicador izquierdo para cancelar.
79
¿Qué interfaz: ordenador anfitrión o
dispositivo USB?
El USB OTG ofrece dos modos de realizar la conexión a otros puertos
USB. Cuando desea conectarse a un ordenador PC o Mac para
transferir archivos entre la unidad FotoChute y el ordenador, debe
realizar la conexión a éste mediante el puerto para dispositivos USB
de la unidad FotoChute, que utiliza la toma A USB adjunta.
Cuando desea copiar datos desde una cámara, unidad de disco flash o
lector de tarjetas de memoria compatible, debe conectarse a ese
dispositivo mediante el puerto de anfitrión USB de la unidad
FotoChute, que utiliza el conector A USB.
Conexión de FotoChute a un ordenador
anfitrión
La conexión de su unidad FotoChute a un dispositivo anfitrión USB,
como un ordenador PC o Mac, es muy sencilla. La unidad de disco
portátil FotoChute se ha diseñado para operar como un dispositivo
alimentado desde el bus, lo cual significa que obtiene su energía desde
el ordenador personal anfitrión por medio del cable USB. Esta es la
razón por la cual es importante apagar la alimentación de la batería
(colocar el interruptor de alimentación en posición OFF, apagado),
durante la conexión a un ordenador.
Siga los pasos que se indican a continuación para conectar la unidad a
un ordenador PC o Mac.
1.
Encuentre el interruptor de alimentación en el lateral de su
unidad FotoChute y deslícelo a la posición OFF (apagado).
2.
Después conecte la toma A USB a un puerto USB disponible
en su ordenador personal PC, Mac o concentrador con
alimentación.
80
La unidad FotoChute mostrará el mensaje “Connect to PC” (conéctese
al ordenador). Si su ordenador personal suministra la energía
suficiente, la unidad se montará automáticamente y aparecerá una
letra de unidad que representa a la unidad FotoChute en Mi PC
(Windows) o un nuevo icono en el escritorio (Macintosh).
Si no se monta automáticamente, puede que necesite conectar el
adaptador CA incluido. Éste puede contribuir a aumentar el
suministro de energía a la unidad FotoChute en las situaciones en las
que el ordenador personal no suministra la energía suficiente por sí
mismo.
Si su unidad FotoChute continúa sin montarse, tendrá que utilizar un
ordenador diferente para la transferencia de sus archivos.
Nota: Si está utilizando un puerto USB 1.1 en su ordenador
personal con Windows, puede aparecer en su pantalla la siguiente
nota de advertencia: Hi-Speed USB Device plugged into non-HiSpeed USB hub. (Dispositivo USB de alta velocidad conectado a
un concentrador USB que no es de alta velocidad). Esto no indica
un problema, porque la unidad FotoChute es compatible con
puertos USB 1.1 y USB 2.0. Sólo tiene que cerrar el mensaje y
continuar. Sin embargo, en este caso la unidad FotoChute sólo
funcionará a velocidades USB 1.1.
Almacenamiento y transferencia de datos mediante USB
Una vez conectada su unidad a un ordenador mediante USB, puede
accederse a ella y utilizarse como cualquier otra unidad de disco
81
extraíble. Puede arrastrar archivos al icono de su unidad FotoChute
para copiarlos, navegar a su unidad de disco duro en los cuadros de
diálogo Abrir o Guardar, o borrar archivos almacenados en su disco
duro. Para información sobre la copia, apertura o borrado de archivos,
consulte la documentación que acompaña a su ordenador.
Desconexión de la unidad FotoChute de un ordenador
personal anfitrión PC o Mac
Su unidad FotoChute puede enchufarse en caliente, es decir, puede
conectarse y desconectarse sin reiniciar su ordenador. Para
desconectar su unidad en cualquier momento, realice los pasos que se
indican a continuación. También puede desconectar su disco duro en
cualquier momento con el ordenador apagado.
Nota: Tenga cuidado de seguir el procedimiento correcto al
desconectar su disco duro. Desenchufar su disco duro sin
seguir las instrucciones que se indican a continuación puede
resultar en daños a su disco duro o en pérdida de datos.
Para usuarios de Windows:
1. Si tiene archivos situados en su unidad de disco duro
FotoChute abiertos en cualquier aplicación, ciérrelos.
2. Haga clic sobre el botón Unplug or Eject Hardware
(desenchufar o expulsar hardware) en la bandeja del sistema.
3.
4.
Seleccione su unidad de disco duro FotoChute del menú que
aparece.
Después de algunos instantes, Windows mostrará un mensaje
indicando que puede extraer su hardware con seguridad.
Para usuarios de SO Mac:
1. Si tiene archivos situados en su unidad de disco duro
FotoChute abiertos en cualquier aplicación, ciérrelos.
82
2.
Encuentre el icono de su unidad de disco duro FotoChute en
el escritorio y arrástrelo hasta la papelera.
Conexión de la unidad FotoChute a una
cámara u otro dispositivo USB
La conexión de su unidad FotoChute a un dispositivo USB
compatible, como una cámara digital, unidad de disco flash o lector de
tarjetas de memoria, es muy sencilla. La unidad de disco duro portátil
FotoChute funciona como un anfitrión USB con alimentación de
batería, lo cual significa que obtiene su energía de su batería interna.
Esta es la razón por la que es importante mantener cargada la batería y
encender la alimentación de batería (colocar el interruptor de
encendido en la posición ON, encendido) al conectarlo a una cámara u
otro dispositivo.
1.
Encuentre el interruptor de alimentación en el lateral de su
unidad FotoChute y deslícelo a la posición ON (encendido).
La pantalla mostrará el menú principal (véase abajo).
2.
Después enchufe la cámara o dispositivo en el conector A
USB en el panel lateral de la unidad FotoChute. Puede que
su cámara necesite la utilización de un cable USB y estar
encendida, según indiquen las instrucciones en su cámara.
Cámara digital
Unidad de disco flash
83
Lector de
tarjetas
Sistema de menú
La unidad FotoChute utiliza la pantalla y los botones de navegación
del menú para ofrecer un sistema de menú útil para el control del
funcionamiento cuando se encuentra conectada a una cámara u otro
dispositivo. Las opciones de menú se hacen aparecer resaltando una
opción desde la lista y luego pulsando la tecla de selección.
Las cuatro opciones que se presentan en el menú principal son:
1. Backup (copia de seguridad)
2. Copy (copiar)
3. Delete (borrar)
4. Information (información)
Según se describe en detalle a continuación, algunas opciones del
menú principal presentarán más opciones en menús secundarios.
Copia de todos los archivos de un dispositivo conectado
La función Backup (copia de seguridad) le permite copiar todos los
archivos de un dispositivo utilizando un sencillo procedimiento de
menú o un atajo mediante un solo botón.
Para copiar todos los archivos desde una cámara u otro dispositivo
compatible, siga los pasos que se indican a continuación.
1.
Encienda la unidad FotoChute y conecte la cámara según se
indicó anteriormente.
2.
Pulse el botón OK/Copy (aceptar/copiar) para comenzar a
copiar todos los datos de la cámara a la unidad de disco duro
FotoChute. [O puede resaltar Backup (copia de seguridad)
del menú principal y pulsar "Select" (seleccionar)].
84
Cuando se le indique en la pantalla, pulse de nuevo el botón
OK/Copy para confirmar, o pulse el botón indicador
izquierdo para cancelar. Durante la transferencia de datos
aparecerá en pantalla la imagen que se muestra a
continuación, indicando la actividad de transmisión.
Cuando haya terminado el proceso de copia se oirá un pitido
y aparecerá el menú principal.
3.
Devuelva el interruptor de encendido a la posición OFF
(apagado).
4.
Desconecte el cable USB de la cámara de la unidad
FotoChute.
Habrá una copia de los datos de su cámara en un nuevo directorio en
la unidad de disco duro FotoChute. El directorio tendrá un nombre
con la forma que aparece abajo:
<DSKxxxxx>
donde “xxxxx” es una secuencia numérica de 5 dígitos. La secuencia
numérica comienza por 00000 cada fecha nueva. Todas las carpetas
creadas en la misma fecha quedarán incluidas en un directorio
principal nombrado basándose en la fecha actual, utilizando la forma:
<mmddaa00>
Copia de archivos seleccionados de un dispositivo conectado
Puede que, en algunos casos, no desee copiar todos los archivos de un
dispositivo. En este caso, la función Copy (copiar) de la unidad
FotoChute le ofrece la flexibilidad de especificar los archivos o
carpetas individuales que desea copiar.
85
Para copiar archivos o directorios seleccionados desde una cámara u
otro dispositivo USB compatible, siga los pasos que se indican a
continuación.
1.
Encienda la unidad FotoChute y conecte la cámara según se
indicó anteriormente.
2.
Resalte la opción Copy (copiar) del menú principal y pulse
"Select" (seleccionar).
3.
Seleccione el dispositivo fuente. Resalte el dispositivo que
contenga los archivos que desea copiar y pulse el botón
indicador derecho.
4.
-
Disco USB: Seleccione esta opción para copiar
archivos desde su cámara u otro dispositivo USB
compatible. Aparecerá una “U” en el margen
derecho al seleccionar USB disk (disco USB).
-
Disco duro: Seleccione esta opción para copiar
archivos desde su unidad de disco duro FotoChute
Aparecerá una “H” en el margen derecho al
seleccionar Hard disk (disco duro).
Seleccione los archivos o directorios que desea copiar.
Utilice los botones indicadores a izquierda o derecha para
navegar en los diferentes niveles del directorio y los botones
indicadores arriba y abajo para resaltar directorios o archivos
específicos de la lista. El nivel actual del directorio se indica
mediante un número en el margen derecho debajo de “H” o
86
“U”. Por ejemplo, el número “1” representa el nivel de
directorio raíz.
Pulsando el botón de selección sobre un archivo o directorio
resaltado se selecciona éste. Los directorios o archivos
seleccionados se indicarán con un asterisco en el margen
izquierdo. Después de seleccionar todos los archivos que van
a copiarse, pulse el botón OK/Copy (aceptar/copiar).
5.
Seleccione la carpeta de destino. Utilice los botones
indicadores a izquierda o derecha para navegar en los
diferentes niveles del directorio y los botones indicadores
arriba y abajo para resaltar directorios específicos de la lista.
Pulsando el botón de selección sobre un directorio resaltado
se selecciona éste. El directorio seleccionado se indicará con
un asterisco en el margen izquierdo.
6.
Pulse el botón OK/Copy para iniciar el proceso de copia.
Cuando se le indique en la pantalla, púlselo de nuevo para
confirmar, o pulse el botón indicador izquierdo para
cancelar.
Cuando haya terminado el proceso de copia, la unidad FotoChute
emitirá un pitido y se mostrará el menú principal.
El número máximo de archivos o carpetas que puede copiarse de una
vez es de 42.
87
Borrado de archivos
Para borrar archivos de la unidad FotoChute o de un dispositivo
conectado a ella, siga los pasos que se indican a continuación.
1.
Encienda la unidad FotoChute y conecte la cámara según se
indicó anteriormente.
2.
Resalte la opción Delete (borrar) y pulse Select (seleccionar).
3.
Resalte el dispositivo que contenga los archivos que desea
borrar y pulse el botón indicador derecho.
4.
-
Disco USB: Seleccione esta opción para borrar
archivos desde su cámara u otro dispositivo USB
compatible. Aparecerá una “U” en el margen
derecho al seleccionar USB disk (disco USB).
-
Disco duro: Seleccione esta opción para borrar
archivos desde su unidad de disco duro FotoChute
Aparecerá una “H” en el margen derecho al
seleccionar Hard disk (disco duro).
Seleccione los archivos o directorios que desea eliminar.
Utilice los botones indicadores a izquierda o derecha para
navegar en los diferentes niveles del directorio y los botones
indicadores arriba y abajo para resaltar directorios o archivos
específicos de la lista. El nivel actual del directorio se indica
mediante un número en el margen derecho debajo de “H” o
“U”.
Pulsando el botón de selección sobre un archivo o directorio
resaltado se selecciona éste. Los directorios o archivos
seleccionados se indicarán con un asterisco en el margen
izquierdo.
88
5.
Después de seleccionar todos los archivos que desea
eliminar, pulse el botón OK/Copy para iniciar el proceso de
borrado. Cuando se le indique en la pantalla, púlselo de
nuevo para confirmar o pulse el botón indicador izquierdo
para cancelar.
Cuando haya terminado el proceso de borrado, la unidad FotoChute
emitirá un pitido y se mostrará el menú principal.
Visualización de la lista de archivos
Para ver la lista de archivos y directorios almacenados en su unidad
FotoChute o en un dispositivo conectado a ella, siga los pasos que se
indican a continuación.
1.
Encienda la unidad FotoChute. Si desea ver archivos tanto de
la cámara como de la unidad FotoChute, tendrá que conectar
la cámara según se describió anteriormente.
2.
Resalte la opción Copy (copiar) y pulse Select (seleccionar).
3.
Resalte el dispositivo que contenga los archivos que desea
ver y pulse el botón indicador derecho.
4.
-
Disco USB: Seleccione esta opción para ver
archivos desde su cámara u otro dispositivo USB
compatible. Aparecerá una “U” en el margen
derecho al seleccionar USB disk (disco USB).
-
Disco duro: Seleccione esta opción para ver
archivos desde su unidad de disco duro FotoChute.
Aparecerá una “H” en el margen derecho al
seleccionar Hard disk (disco duro).
Vea la lista de archivos. Utilice los botones indicadores a
izquierda o derecha para navegar en los diferentes niveles del
directorio y los botones indicadores arriba y abajo para ver
directorios o archivos específicos de la lista. El nivel del
directorio actual se indica mediante un número en el margen
derecho debajo de “H” o “U”.
89
Para volver al menú principal, pulse el botón indicador
izquierdo varias veces.
Menú de información
El menú de información le permite averiguar cuánto espacio hay
disponible en el disco y qué versión del microprograma está instalada
actualmente. También puede utilizar este menú para escoger el
lenguaje de la pantalla y, según se indicó anteriormente, es aquí donde
pueden ajustarse la fecha y la hora.
Espacio libre en el disco
Seleccione esta opción para mostrar la cantidad de espacio libre
disponible en el disco duro interno de la unidad FotoChute y en
cualquier dispositivo conectado (“USB disk”, disco USB).
Versión
Seleccione esta opción para mostrar el número de la versión del
microprograma.
Ajuste de fecha y hora
Para ajustar la fecha y la hora, siga el procedimiento que se indica
bajo “Configuración de fecha y hora”, que aparece anteriormente en
este manual.
Idioma
Seleccione esta opción para cambiar el idioma de la pantalla a inglés,
japonés, holandés, francés, alemán, español, italiano o portugués.
90
Obtención de ayuda
Si experimenta alguna dificultad en la instalación o utilización de su producto
SmartDisk, visite el sitio web principal de atención técnica de SmartDisk en
www.SmartDisk.com. En esta página puede acceder a nuestra biblioteca de
documentación para el usuario, leer las respuestas a las preguntas más
frecuentes y descargar las actualizaciones de programas disponibles. A pesar
de que este contenido resulta suficiente para guiar a la mayoría de nuestros
clientes, esta página también lista los modos en los que puede ponerse en
contacto directo con el equipo de ayuda técnica de SmartDisk.
Aproveche ese momento para registrarse para recibir más información sobre
su producto SmartDisk en www.SmartDisk.com/Registration.asp. El proceso
de registro es rápido y sencillo y nos ayudará a ofrecerle la mejor experiencia
posible con este y otros productos SmartDisk.
Términos de la garantía
SmartDisk Corporation garantiza que sus productos no tienen defectos de
mano de obra ni material en condiciones normales de utilización y servicio
durante el periodo que ocurra primero: 1 año a partir de la fecha de compra o
3 años a partir de la fecha de fabricación. Los productos adquiridos en países
de la Unión Europea en los que se aplica la Directiva 1999/44/EC tienen una
garantía de 2 años a partir de la fecha de compra. La única obligación de
SmartDisk respecto a las reclamaciones por no conformidad realizadas
durante el periodo de garantía descrito anteriormente serán, a su elección, la
reparación o sustitución de cualquier dispositivo que SmartDisk, a su
exclusiva discreción, determine defectuoso. El cliente obtendrá un número de
autorización de devolución de mercancía (RMA, por sus siglas en inglés) de
SmartDisk antes de devolver cualquier equipo a SmartDisk según esta
garantía, poniéndose en contacto con el servicio de atención técnica (véase
www.SmartDisk.com). El cliente abonará por adelantado los costes de envío
del equipo devuelto a SmartDisk para su atención técnica bajo esa garantía, y
SmartDisk pagará los gastos de transporte de la devolución del equipo al
cliente, excluyendo gastos de aduana o impuestos, si los hubiere. Todas las
devoluciones exigen una prueba de compra con la fecha original y una carta
explicando el problema. SmartDisk Corporation no será responsable de
91
aquellos artículos devueltos sin un número de RMA o empaquetados de modo
incorrecto. El equipo de repuesto será nuevo o equivalente en su rendimiento
y tendrá garantía durante la duración restante del plazo de garantía del equipo
defectuoso. SmartDisk Corporation no será responsable de la recuperación de
los datos del cliente de los productos devueltos que incluyan almacenamiento
de datos. Todo equipo devuelto será propiedad de SmartDisk. Se considerará
que el cliente ha renunciado a cualquier reclamación por defectos que no se
efectúe durante el periodo de garantía.
Las obligaciones de la garantía de SmartDisk por el presente documento
incluyen las condiciones expresas de que (i.) el cliente haya instalado,
utilizado y mantenido correctamente el producto en todo momento; (ii.) los
productos no se hayan sometido a tensión mecánica ni eléctrica inusual, ni a
condiciones medioambientales u otros actos de fuerza mayor inusuales; (iii.)
el cliente o cualquier tercera parte no haya sometido los productos a mal uso,
accidente, ni instalación o desinstalación alguna no autorizadas; (iv.) los
productos no se hayan alterado ni modificado de modo no autorizado, a no ser
que SmartDisk lo haya aprobado, por escrito o de otro modo y (v.) que el
cliente instale con prontitud todas las revisiones del producto que SmartDisk
haya hecho públicas para dichos productos durante el plazo de la garantía.
SmartDisk no garantiza que los productos funcionarán en combinación
específica alguna que pueda haber seleccionado el cliente ni que el
funcionamiento de los productos será continuado y sin errores, ni que se
solucionarán todos los defectos y faltas de conformidad. Además de ello,
SmartDisk no tendrá obligación alguna según la garantía, por ningún fallo de
los productos en cumplir las especificaciones aplicables del producto
resultantes de su combinación con hardware o software no suministrado por
SmartDisk. Si se determina que algún producto que el cliente ha comunicado
defectuoso o que no está conforme durante el periodo de garantía no es
defectuoso ni disconforme, SmartDisk podrá, a su elección, cobrar al cliente
cualquier mano de obra y gastos en los que SmartDisk haya incurrido en
relación con dicha determinación, a las tarifas de SmartDisk vigentes en ese
momento.
SmartDisk Corporation no será responsable de la venta o representación no
autorizadas por terceras partes revendedoras no autorizadas. Las garantías de
SmartDisk no se transfieren con la propiedad. Los productos adquiridos
mediante subasta, mercadillo particular, mercado callejero o como unidades
de demostración pueden no estar cubiertos por la garantía de SmartDisk.
LAS GARANTÍAS DE SMARTDISK Y LOS REMEDIOS PARA EL
CLIENTE QUE SE INDICAN EN ESTA SECCIÓN SON EXCLUSIVOS Y
SMARTDISK LAS OFRECE Y EL CLIENTE LAS ACEPTA EN LUGAR
92
DE TODAS Y CUALESQUIERA OTRAS GARANTÍAS, EXPRESAS O
IMPLÍCITAS, INCLUYENDO, PERO SIN LIMITARSE A ELLAS, TODA
GARANTÍA DE COMERCIALIZACIÓN Y ADECUACIÓN PARA UN
PROPÓSITO ESPECÍFICO, Y POR EL PRESENTE SMARTDISK SE
DESCARGA EXPRESA E INEQUÍVOCAMENTE, DE TODAS ESTAS
GARANTÍAS Y EL CLIENTE RENUNCIA A ELLAS DEL MISMO
MODO.
Derechos
Copyright ©2005 SmartDisk Corporation.
Queda prohibida la reproducción de cualquier parte de este documento, en
cualquier forma y de cualquier manera, para cualquier propósito, sin el
expreso consentimiento por escrito de SmartDisk Corporation. Reservados
todos los derechos.
Todas las marcas y nombres de productos a los que se hace referencia en el
presente documento son propiedad de sus dueños respectivos.
Cumplimiento con las normas FCC
Este equipo se ha probado y se ha hallado que cumple los límites para un
dispositivo digital de clase B, de acuerdo con la parte 15 de las normas FCC.
Estos límites tienen como objetivo proporcionar una protección razonable
contra interferencias dañinas en una instalación residencial. Este equipo
genera, utiliza y puede irradiar energía de radiofrecuencia y, si no se instala y
utiliza de acuerdo con las instrucciones, puede causar interferencias dañinas a
las comunicaciones por radio. Sin embargo, no hay garantía alguna de que no
ocurran interferencias en una instalación específica. Si este equipo produce
interferencias dañinas a la recepción de radio o televisión, lo cual puede
determinarse apagando y encendiendo el equipo, se anima al usuario a que
intente corregir la interferencia aplicando una o más de las medidas que se
indican a continuación:
•
Cambie la orientación o ubicación de la antena receptora.
93
•
Aumente la separación entre el equipo y el receptor.
•
Conecte el equipo a una toma en un circuito diferente de aquel al
que se encuentra conectado el receptor.
•
Consulte con su distribuidor o un técnico de radio / TV
experimentado para obtener ayuda.
94
Handleiding
Draagbare SmartDisk FotoChute harde schijf
Uw SmartDisk FotoChute is een veelzijdige externe harde schijf die
uitgerust is met high-performance opslag en een USB On-The-Go
(OTG) interface. De flexibiliteit van de USB OTG interface stelt u in
staat om de FotoChute aan te sluiten op een USB-host (zoals een PC
of Mac) of op een USB-apparaat (zoals een digitale camera, flashschijf of kaartlezer). Op het display van de FotoChute kunt u de status
van uw kopieertaken controleren en door de lijst met de door u
opgeslagen bestanden bladeren.
Zodra uw harde schijf op de juiste wijze is aangesloten op een
computer waarop een recent besturingssysteem draait, kunt u deze
harde schijf gebruiken als elke andere harde schijf om foto's en
gegevens op te slaan. Als uw harde schijf op de juiste wijze is
aangesloten op een ondersteunde camera (of een ander ondersteund
apparaat), kunt u met één druk op de knop alle gegevens vanuit uw
camera naar de FotoChute kopiëren. Bovendien kunt u met het
menusysteem van FotoChute alleen díe specifieke bestanden
selecteren die u wilt kopiëren.
Uw FotoChute-schijf is in de fabriek geformatteerd in het FAT32bestandssysteem.
Opmerking: Capaciteit afhankelijk van model. Uw
besturingssysteem geeft voor de capaciteit mogelijk minder
gigabytes aan. 1 GB = 1.000.000.000 bytes.
95
Bedieningselementen en indicators
De bovenzijde van de harde schijf is uitgerust met een OLED-display,
een navigatieschijf met vijf knoppen om door menu's te navigeren, en
een knop OK/Kopiëren. Het zijpaneel van uw FotoChute is bovendien
uitgerust met drie interfaceconnectors en de aan/uit-schakelaar.
1.
OLED-display.
2-5. Menunavigatieknoppen Links (Annuleren), Rechts, Omhoog, Omlaag.
De knoppen Omhoog/Omlaag worden in het algemeen gebruikt om in
een lijst verschillende opties te accentueren, terwijl de knoppen
Links/Rechts worden gebruikt om door verschillende velden of niveaus
van een mappenstructuur te navigeren.
6.
Selectieknop menunavigatie; de selectieknop wordt gebruikt om de
geaccentueerde menu-optie te selecteren.
96
7.
OK/Kopiëren; wordt gebruikt voor zowel menunavigatie en om met één
druk op de knop gegevens te kopiëren.
8.
Behuizing.
9.
DC-ingangsaansluiting; voor gebruik met de bijgeleverde netadapter.
10. Aan/uit-schakelaar; levert stroom vanaf de interne batterij. Schuif deze
schakelaar naar de stand “ON” om het apparaat te voeden met
batterijstroom, en naar de stand “OFF” om de stroom vanaf de batterij te
onderbreken. Laat het apparaat in de stand OFF wanneer de batterij
wordt opgeladen of wanneer het apparaat via de USB A-plug op een PChost is aangesloten.
Onthoud dat als het apparaat 5 minuten lang in de stand ON heeft
gestaan zonder dat er activiteiten plaats hebben gevonden, het apparaat
automatisch wordt uitgeschakeld om batterijstroom te besparen.
11. USB A-ingang; om een verbinding te maken met een camera of een
ander ondersteund USB-apparaat.
12. USB A-plug; om een verbinding te maken met een PC of een andere
USB-host.
De interne batterij opladen
De FotoChute bevat een interne oplaadbare Lithium Ion batterij die
aan het apparaat stroom levert als gegevens worden gekopieerd vanaf
uw camera of een ander ondersteund USB-apparaat. Na de allereerste
laadcyclus duurt het gewoonlijk ongeveer anderhalf uur om de batterij
volledig op te laden.
Opmerking: Laad het apparaat gedurende 8 uur op voordat u het
apparaat voor de eerste keer op een camera, flash-schijf of
geheugenkaartlezer aansluit.
De batterij laadt u als volgt op:
1.
Zet de aan/uit-schakelaar in de stand OFF.
2.
Sluit de netadapter aan op een stopcontact en vervolgens op
de DC-ingangsaansluiting op het zijpaneel van de FotoChute.
97
Op het display wordt aangegeven dat het apparaat wordt opgeladen en
met het batterijsymbool wordt weergegeven in hoeverre dat is
gebeurd. Als de batterij volledig opgeladen is, ziet u dat aan het
batterijsymbool.
De datum en tijd instellen
De FotoChute is uitgerust met een interne klok die wordt gebruikt om
aan mapnamen tijdstempels toe te wijzen. Stel de datum en tijd in
voordat u met de FotoChute bestanden gaat kopiëren. Dit doet u als
volgt:
1.
Schuif de aan/uit-schakelaar aan de zijkant van uw
FotoChute in de stand ON.
2.
Druk vanuit het hoofdmenu de knop Omlaag driemaal in om
Information te accentueren, en druk vervolgens op de
selectieknop.
3.
Druk de knop Omlaag tweemaal in om Set Time te
accentueren, en druk vervolgens op de selectieknop.
4.
Gebruik de knoppen Omhoog en Omlaag om de datum of
tijd te wijzigen, en gebruik de knoppen Links en Rechts om
naar het volgende datum- of tijdveld te gaan.
5.
Druk op de knop OK/Kopiëren nadat u zowel de datum als
tijd heeft ingesteld. U wordt gevraagd uw keuze te
bevestigen. Druk nogmaals op de knop OK/Kopiëren om de
nieuwe instellingen op te slaan, of druk op de knop Links als
u dit niet wilt doen.
Welke interface: USB-host of apparaat?
Met USB OTG kunt u op twee manieren een verbinding maken met
andere USB-poorten. Als u de FotoChute wilt aansluiten op een PC of
98
Mac om tussen de FotoChute en de computer bestanden over te
zetten, dan moet u via de geïntegreerde USB A-plug van de
FotoChute een verbinding maken met de betreffende computer.
Als u gegevens wilt kopiëren vanaf een ondersteunde camera, flashschijf of geheugenkaartlezer, dan moet u via de USB A-ingang van de
FotoChute een verbinding maken met het betreffende apparaat.
De FotoChute aansluiten op een PC-host
Het is heel eenvoudig om de FotoChute aan te sluiten op een USBhostapparaat, zoals een PC of Mac. De draagbare FotoChute is een
busaangedreven apparaat. Dit houdt in dat de stroom via de USBkabel afkomstig is van de host-PC. Dit is de reden waarom het
belangrijk is om de batterijstroom uit te schakelen (door de aan/uitschakelaar in de stand OFF te zetten) als u een verbinding maakt met
een PC.
Voer de stappen hieronder uit om een verbinding te maken met een
PC of Mac.
1.
Schuif de aan/uit-schakelaar aan de zijkant van de FotoChute
in de stand OFF.
2.
Sluit vervolgens de geïntegreerde USB A-plug aan op een
beschikbare USB-poort op uw PC, Mac, of op een hub
waarop stroom is aangesloten.
99
Op het display van de FotoChute verschijnt de melding “Connect to
PC”. Als de PC voldoende stroom levert, wordt de FotoChute-schijf
automatisch opgestart en verschijnt er bij gebruik van Windows in
Deze computer een schijfletter die de FotoChute vertegenwoordigt of
verschijnt er bij gebruik van Macintosh een nieuw pictogram op het
bureaublad.
Als de FotoChute-schijf niet automatisch opstart, kan het nodig zijn
de bijgeleverde netadapter op een stopcontact aan te sluiten. Hiermee
zorgt u voor extra stroom naar de FotoChute als een laptop zelf niet
voldoende stroom levert.
Als de FotoChute dan nog steeds niet wil opstarten, dan heeft u voor
het overzetten van uw bestanden een andere computer nodig.
Opmerking: Als u op uw Windows-computer een USB 1.1 poort
gebruikt, dan is het mogelijk dat op het display de volgende
waarschuwing verschijnt: Hi-Speed USB Device plugged into
non-Hi-Speed USB hub. Dit betekent niet dat er een probleem is,
omdat FotoChute compatibel is met zowel USB 1.1 als USB 2.0
poorten. U hoeft dan alleen maar het bericht te sluiten en verder te
gaan. Maar FotoChute zal in dit geval alleen functioneren op de
snelheid van USB 1.1.
Gegevens opslaan en verzenden via USB
Zodra de FotoChute via USB op een computer is aangesloten, heeft u
toegang tot de FotoChute en kunt u deze gebruiken als elke andere
verwisselbare schijf. U kunt bestanden verslepen naar het FotoChutepictogram om deze te kopiëren, naar uw harde schijf navigeren in de
dialoogschermen Open of Save, of bestanden verwijderen die op uw
harde schijf zijn opgeslagen. Wilt u meer weten over het kopiëren,
openen of verwijderen van bestanden, raadpleeg dan de documentatie
van uw computer.
100
De FotoChute uit een PC of Mac verwijderen
De FotoChute is hot-pluggable. Dit wil zeggen dat de FotoChute kan
worden aangesloten en verwijderd zonder dat de computer opnieuw
hoeft te worden opgestart. De FotoChute verwijdert u zoals hieronder
is beschreven. U kunt de FotoChute ook verwijderen als uw computer
uit staat.
Opmerking: Let erop dat u de juiste procedure uitvoert als u
de FotoChute uit de computer verwijdert. Door de
FotoChute meteen los te koppelen zonder eerst de
instructies hieronder uit te voeren, kan tot gevolg hebben dat
uw harde schijf beschadigd raakt en/of dat gegevens
verloren gaan.
Voor gebruikers van Windows:
1. Als er op de FotoChute-schijf bestanden zijn geopend, sluit
deze dan.
2. Klik op de knop Hardware ontkoppelen of uitwerpen of
Hardware veilig verwijderen in het systeemvak.
3.
4.
Selecteer de FotoChute-schijf in het menu dat verschijnt.
Windows toont kort daarna een bericht dat uw hardware
veilig kan worden verwijderd.
Voor gebruikers van Mac:
1. Als er op de FotoChute-schijf bestanden zijn geopend, sluit
deze dan.
2. Lokaliseer het pictogram van uw FotoChute-schijf op het
bureaublad en sleep dit naar de prullenbak (trash).
101
De FotoChute aansluiten op een camera of
ander USB-apparaat
Het is erg gemakkelijk om de FotoChute aan te sluiten op een
ondersteund USB-apparaat, zoals een digitale camera, flash-schijf of
geheugenkaartlezer. De draagbare FotoChute-schijf functioneert als
een batterijaangedreven USB-host. Dit houdt in dat de stroom wordt
geleverd door de interne batterij. Daarom is het belangrijk dat de
batterij opgeladen blijft en dat u de batterijstroom inschakelt (door de
aan/uit-schakelaar op ON te zetten) als u de FotoChute aansluit op een
camera of ander apparaat.
1.
Schuif de aan/uit-schakelaar aan de zijkant van uw
FotoChute in de stand ON. Op het display wordt het
hoofdmenu weergegeven (zie hieronder).
2.
Sluit de camera of het apparaat vervolgens aan op de USB Aingang op het zijpaneel van de FotoChute. Het is mogelijk
dat voor uw camera een USB-kabel moet worden gebruikt en
dat hierop stroom moet worden aangesloten. Dit staat
aangegeven in de gebruiksaanwijzing van uw camera.
Digitale camera
Flash-schijf
Kaartlezer
102
Menusysteem
Als de FotoChute aangesloten is op een camera of ander apparaat, dan
wordt via het display en de menunavigatieknoppen een gemakkelijk
menusysteem geboden om de bedieningshandelingen te verrichten.
Menu-opties roept u aan door in de lijst een keuze te accentueren en
vervolgens op de selectieknop te drukken.
De vier opties in het hoofdmenu zijn:
1. Backup
2. Copy
3. Delete
4. Information
Sommige opties in het hoofdmenu kunnen worden verfijnd met
vervolgopties in submenu's. Dit wordt hieronder beschreven.
Alle bestanden kopiëren vanaf een aangesloten apparaat
Met de functie Backup kunt u met een eenvoudige menuprocedure, of
met een korte stap via één knop, vanaf een apparaat alle bestanden
kopiëren naar de FotoChute.
Voer de stappen hieronder uit om vanaf een camera of een ander
ondersteund apparaat alle bestanden te kopiëren.
1.
Zet de FotoChute aan en sluit zoals hierboven beschreven de
camera aan.
2.
Druk op de knop OK/Kopiëren om alle gegevens te kopiëren
vanaf de camera naar de FotoChute. [Ook kunt u in het menu
de optie Backup accentueren en vervolgens op de
selectieknop drukken.]
Druk nogmaals op de knop OK/Kopiëren om uw keuze te
bevestigen als het display daar om vraagt, of druk op de knop
Links om uw keuze te annuleren. Tijdens de
gegevensoverdracht geeft het volgende display de activiteit
van de overdracht weer.
103
Als alle gegevens zijn gekopieerd, hoort u een pieptoon en
verschijnt het hoofdmenu.
3.
Zet de aan/uit-schakelaar weer terug in de stand OFF.
4.
Verwijder de USB-kabel van de camera uit de FotoChute.
In de nieuwe map op de FotoChute-schijf staat nu een kopie van uw
cameragegevens. De map krijgt een naam in de volgende notatie:
<DSKxxxxx>
“xxxxx” staat voor een vijfcijferig volgnummer dat wordt
toegewezen. Het volgnummer begint op elke nieuwe datum vanaf
00000. Alle mappen die op dezelfde dag worden gemaakt, worden
opgeslagen in een hoofdmap met een naam die is gebaseerd op de
huidige datum, in de vorm
<mmddyy00>
Geselecteerde bestanden kopiëren vanaf een aangesloten
apparaat
In sommige situaties wilt u vanaf een apparaat misschien niet alle
bestanden kopiëren. In dit geval kunt u met de FotoChute-functie
Copy afzonderlijke bestanden of mappen selecteren en deze
vervolgens kopiëren.
Voer de stappen hieronder uit om vanaf een digitale camera of een
ander ondersteund USB-apparaat geselecteerde bestanden of mappen
te kopiëren.
1.
Zet de FotoChute aan en sluit zoals hierboven beschreven de
camera aan.
104
2.
Accentueer de optie Copy in het hoofdmenu en druk op de
selectieknop.
3.
Selecteer het bronapparaat. Accentueer het apparaat dat de
bestanden bevat die u wilt kopiëren en druk op de knop
Rechts.
4.
-
USB disk: Selecteer deze optie om bestanden te
kopiëren vanaf uw camera of een ander ondersteund
USB-apparaat. Er verschijnt een “U” in de
rechtermarge als u USB disk selecteert.
-
Hard disk: Selecteer deze optie om bestanden te
kopiëren vanaf de FotoChute-schijf. Er verschijnt
een “H” in de rechtermarge als u Hard disk
selecteert.
Selecteer de bestanden of mappen die u wilt kopiëren.
Gebruik de navigatieknoppen Links of Rechts om door de
mappenniveaus te navigeren, en de knoppen Omhoog of
Omlaag om in de lijst specifieke bestanden of mappen te
accentueren. Het huidige mapniveau wordt aangegeven door
een getal in de rechtermarge onder de “H” of “U”. Het getal
“1” vertegenwoordigt bijvoorbeeld het hoogste niveau.
Een geaccentueerd bestand of geaccentueerde map selecteert
u door op de selectieknop te drukken. Geselecteerde
bestanden of mappen worden aangemerkt met een sterretje in
de linkermarge. Druk op de knop OK/Kopiëren nadat u alle
bestanden heeft geselecteerd die u wilt kopiëren.
105
5.
Selecteer de map waarnaar de bestanden moeten worden
gekopieerd. Gebruik de navigatieknoppen Links of Rechts
om door de mappenniveaus te navigeren, en de knoppen
Omhoog of Omlaag om in de lijst specifieke mappen te
accentueren. Een geaccentueerde map selecteert u door op de
selectieknop te drukken. De geselecteerde map wordt
aangemerkt met een sterretje in de linkermarge.
6.
Druk op de knop OK/Kopiëren om te beginnen met kopiëren.
Druk nogmaals op de knop OK/Kopiëren om uw keuze te
bevestigen als het display daar om vraagt, of druk op de knop
Links om uw keuze te annuleren.
Nadat de bestanden zijn gekopieerd laat de FotoChute een pieptoon
horen en wordt het hoofdmenu weergegeven.
Er kunnen per keer maximaal 42 bestanden of mappen worden
gekopieerd.
Bestanden verwijderen
Voer de stappen hieronder uit om bestanden te verwijderen uit de
FotoChute of een aangesloten apparaat.
1.
Zet de FotoChute aan en sluit zoals hierboven beschreven de
camera aan.
2.
Accentueer de optie Delete en druk op de selectieknop.
106
3.
4.
Accentueer het apparaat dat de bestanden bevat die u wilt
verwijderen en druk op de knop Rechts.
-
USB disk: Selecteer deze optie om bestanden te
verwijderen uit uw camera of een ander ondersteund
USB-apparaat. Er verschijnt een “U” in de
rechtermarge als u USB disk selecteert.
-
Hard disk: Selecteer deze optie om bestanden op de
FotoChute-schijf te verwijderen. Er verschijnt een
“H” in de rechtermarge als u Hard disk selecteert.
Selecteer de bestanden of mappen die u wilt verwijderen.
Gebruik de navigatieknoppen Links of Rechts om door de
mappenniveaus te navigeren, en de knoppen Omhoog of
Omlaag om in de lijst specifieke bestanden of mappen te
accentueren. Het huidige mapniveau wordt aangegeven door
een getal in de rechtermarge onder de “H” of “U”.
Een geaccentueerd bestand of geaccentueerde map selecteert
u door op de selectieknop te drukken. Geselecteerde
bestanden of mappen worden aangemerkt met een sterretje in
de linkermarge.
5.
Druk op de knop OK/Kopiëren om de bestanden te
verwijderen nadat u alle bestanden heeft geselecteerd. Druk
nogmaals op de knop OK/Kopiëren om uw keuze te
bevestigen als het display daar om vraagt, of druk op de knop
Links om uw keuze te annuleren.
Nadat de bestanden zijn verwijderd laat de FotoChute een pieptoon
horen en wordt de mappenlijst weergegeven.
107
De bestandenlijst bekijken
Voer de stappen hieronder uit om de lijst met bestanden en mappen te
bekijken die is opgeslagen op de FotoChute of een aangesloten
apparaat.
1.
Zet de FotoChute aan. Als u bestanden op zowel de camera
als de FotoChute wilt bekijken, dan moet u ook - zoals eerder
beschreven - de camera aansluiten.
2.
Accentueer de optie Copy en druk op de selectieknop.
3.
Accentueer het apparaat dat de bestanden bevat die u wilt
bekijken en druk op de knop Rechts.
4.
-
USB disk: Selecteer deze optie om bestanden te
bekijken die zijn opgeslagen in uw camera of een
ander ondersteund USB-apparaat. Er verschijnt een
“U” in de rechtermarge als u USB disk selecteert.
-
Hard disk: Selecteer deze optie om bestanden te
bekijken die zijn opgeslagen op de FotoChuteschijf. Er verschijnt een “H” in de rechtermarge als
u Hard disk selecteert.
Navigeer door de bestandenlijst. Gebruik de
navigatieknoppen Links of Rechts om door de
mappenniveaus te navigeren, en de knoppen Omhoog of
Omlaag om in de lijst bestanden of mappen te bekijken. Het
huidige mapniveau wordt aangegeven door een getal in de
rechtermarge onder de “H” of “U”.
U kunt teruggaan naar het hoofdmenu door herhaaldelijk op
de knop Links te drukken.
Het menu Information
In het menu Information kunt u zien hoeveel ruimte er nog op de
schijf aanwezig is, en welke firmware-versie momenteel is
geïnstalleerd. U kunt in dit menu ook de displaytaal en, zoals eerder
uiteengezet, de datum en tijd instellen.
108
Free Disk Space
Selecteer deze optie om te controleren hoeveel vrije ruimte er nog
aanwezig is op de interne harde schijf van de FotoChute of van een
aangesloten apparaat (“USB disk”).
Version
Selecteer deze optie om het nummer van de firmware-versie op te
roepen.
Set Date and Time
Voer de procedure uit onder “De datum en tijd instellen” om de datum
en tijd in te stellen, zoals eerder in deze handleiding is beschreven.
Language
Selecteer deze optie om de displaytaal te wijzigen. U heeft de keus uit
English, Japanese, Dutch, French, German, Spanish, Italian, of
Portuguese.
Help
Mocht u moeilijkheden ondervinden bij het installeren of gebruik van uw
SmartDisk-product, ga dan voor technische ondersteuning naar de website
van SmartDisk: www.SmartDisk.com. Vanaf deze pagina heeft u toegang tot
onze bibliotheek met gebruikershandleidingen, kunt u de antwoorden lezen op
vaak gestelde vragen en de beschikbare software-updates downloaden. Ook al
is de informatie op deze pagina meestal voldoende om onze klanten weer op
het goede spoor te helpen, wordt op deze pagina ook aangegeven hoe u het
SmartDisk Technical Support team direct kunt benaderen.
109
Als u in de toekomst meer informatie wilt ontvangen over uw SmartDiskproduct, neem nu dan even de tijd om dit product te registreren op
www.SmartDisk.com/Registration.asp. Registratie gaat snel en is heel
eenvoudig, en geeft ons de gelegenheid u optimaal te informeren over dit
product en toekomstige SmartDisk-producten.
Garantievoorwaarden
SmartDisk Corporation garandeert dat zijn producten vrij zijn van materiaalen fabrieksfouten, mits deze producten normaal worden gebruikt en
onderhouden. Deze garantie is geldig gedurende 1 jaar vanaf de datum van
aankoop of gedurende 3 jaar vanaf de datum van fabricage, afhankelijk van
welke situatie zich het eerst voordoet. Op producten die zijn gekocht in
landen van de Europese Unie en die vallen onder Richtlijn 1999/44/EG, rust
een garantie van 2 jaar vanaf de datum van aankoop. Als binnen de boven
beschreven garantieperiode een claim wordt ingediend omdat SmartDisk
Corporation niet aan zijn verplichtingen heeft voldaan, dan is SmartDisk
Corporation alleen verplicht apparatuur naar keuze te repareren of vervangen
nadat naar eigen inzicht is bepaald of apparatuur al dan niet defect is. De klant
moet bij SmartDisk Corporation een Return Merchandise Authorization
(RMA) nummer opvragen voordat apparatuur naar SmartDisk kan worden
geretourneerd. Hiervoor dient contact te worden opgenomen met de dienst
Technische Ondersteuning (Technical Support) (zie www.SmartDisk.com).
De klant betaalt vooraf de verzendkosten van de aan SmartDisk
geretourneerde apparatuur die bestemd is voor service krachtens de garantie,
en SmartDisk betaalt de verzendkosten van de apparatuur die terug wordt
gezonden naar de klant, exclusief eventuele douaneverplichtingen of
belastingen. Alle retouren moeten vergezeld gaan van een origineel
aankoopbewijs en een brief met een beschrijving van het probleem.
SmartDisk Corporation is niet verantwoordelijk voor artikelen die zonder
RMA-nummer of niet goed verpakt worden geretourneerd. Vervangende
apparatuur is nieuw of qua prestatie zo goed als nieuw. De garantietermijn
voor deze apparatuur loopt tot het einde van de oorspronkelijke
garantietermijn van de defecte apparatuur. SmartDisk Corporation is niet
verantwoordelijk voor herstel van klantgegevens die aanwezig zijn in de
geretourneerde apparatuur. De vervangen apparatuur wordt eigendom van
SmartDisk. De klant stemt ermee in dat claims voor defecten buiten de
garantieperiode niet in behandeling worden genomen.
110
De hieronder uiteengezette garantieverplichtingen van SmartDisk zijn
expliciet onderhevig aan het volgende: (i.) de Producten moeten te allen tijde
op de juiste manier door de klant geïnstalleerd, gebruikt en onderhouden
worden; (ii.) de Producten mogen niet worden blootgesteld aan
ongebruikelijke mechanische stress, een ongebruikelijke elektrische
omgeving, bijzondere weersomstandigheden of andere situaties van force
majeure; (iii.) de Producten zijn niet blootgesteld aan oneigenlijk gebruik,
ongevallen of ongeautoriseerde installatie/de-installatie van welke aard dan
ook door de klant of een derde; (iv.) de Producten mogen niet zonder
toestemming worden gewijzigd, tenzij schriftelijk goedgekeurd of op andere
wijze uitgevoerd door SmartDisk en (v.) de klant installeert tijdig alle
productrevisies die tijdens de garantietermijn voor de betreffende producten
door SmartDisk worden uitgebracht. SmartDisk garandeert niet dat de
Producten functioneren in welke specifieke combinatie dan ook die de klant
kiest voor eigen gebruik of dat de Producten ononderbroken en foutloos
functioneren of dat alle afwijkingen of defecten zullen worden gerepareerd.
Bovendien heeft SmartDisk geen garantieverplichtingen indien de Producten
niet overeenkomen met de van toepassing zijnde productspecificaties als dit
het gevolg is van het combineren van welk(e) Product(en) dan ook met
hardware en/of software die niet afkomstig is van SmartDisk. Indien door de
klant tijdens de garantieperiode aan SmartDisk wordt bericht dat een Product
defect is of niet voldoet, maar door SmartDisk wordt vastgesteld dat het
Product niet defect is of wel voldoet, heeft SmartDisk het recht om, indien
SmartDisk dit verkiest, de klant uren en kosten in rekening brengen die door
SmartDisk zijn besteed om tot een dergelijke vaststelling te komen, tegen de
prijzen die op dat moment door SmartDisk worden gehanteerd.
SmartDisk Corporation is niet verantwoordelijk voor onbevoegde verkoop of
een misleidende voorstelling van zaken door onbevoegde derde
wederverkopers. De garantie van SmartDisk is niet overdraagbaar. Producten
die zijn gekocht op een veiling, straatverkoop, vlooienmarkt of die zijn
gekocht als demonstratie-apparaat, vallen mogelijk niet onder de garantie van
SmartDisk.
DE GARANTIES VAN SMARTDISK EN DE RECHTSMIDDELEN VAN
DE KLANT DIE HIER WORDEN UITEENGEZET ZIJN EXCLUSIEF EN
WORDEN DOOR SMARTDISK GEGEVEN EN DOOR DE KLANT
AANVAARD IN PLAATS VAN ALLE ANDERE GARANTIES, HETZIJ
EXPLICIET OF IMPLICIET, MET INBEGRIP VAN, MAAR NIET
BEPERKT TOT, ALLE GARANTIES MET BETREKKING TOT DE
VERKOOPBAARHEID EN GESCHIKTHEID VOOR EEN BEPAALD
DOEL, WAARBIJ EXPLICIET EN ONMISKENBAAR DUIDELIJK IS
111
DAT SMARTDISK GEVRIJWAARD WORDT VAN AL DEZE ANDERE
GARANTIES EN DE KLANT HIERVAN AFSTAND DOET.
Rechten
Copyright ©2005 SmartDisk Corporation.
Niets uit dit document mag verveelvoudigd worden, in enige vorm of op
enige wijze, voor welk doel dan ook, zonder de expliciete schriftelijke
toestemming van SmartDisk Corporation. Alle rechten voorbehouden.
Alle andere merknamen en productnamen die hierin worden genoemd, zijn
het eigendom van de betreffende ondernemingen.
Conformiteit met FCC
Dit apparaat is getest en voldoet aan de beperkingen die overeenkomstig Deel
15 van de FCC-voorschriften gesteld worden aan een digitaal apparaat uit
klasse B. Deze beperkingen zijn bedoeld om een redelijke bescherming te
bieden tegen schadelijke storingen in een installatie die in een woonomgeving
staat. Dit apparaat produceert en gebruikt radiogolven en kan deze uitstralen.
Als de apparatuur niet volgens de aanwijzingen is geïnstalleerd of wordt
gebruikt, kan dit schadelijke storingen in radioverbindingen tot gevolg
hebben. Het goed opvolgen van de aanwijzingen biedt echter geen garantie
dat er in een bepaalde installatie geen storingen zullen voorkomen. Als dit
apparaat inderdaad schadelijke storingen veroorzaakt in de ontvangst van
radio- of televisiesignalen (dit kan worden vastgesteld door de apparatuur aan
en uit te zetten), verdient het aanbeveling een of meer van de volgende
maatregelen te nemen om de storing te verhelpen:
•
Verander de ontvangstantenne van richting of van plaats.
•
Zet het apparaat en de ontvanger verder uit elkaar.
•
Sluit het apparaat aan op een stopcontact van een andere
stroomkring dan dat waarop de ontvanger is aangesloten.
•
Raadpleeg de leverancier of een ervaren radio/tv-technicus voor
hulp.
112
113