1
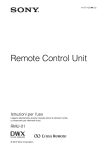
SFT-202
Digital Satellite Receiver
Instruction manual
Table of Contents
1. Safety and precautions
2. Accessories
3. System Connection
4. Front Panel
5. Rear Panel
6. Remote Control Unit
7. Quick Start
8. Downloading Channels
9. Viewing your channels
10. Multi-satellite
11. Favourite Channels
12. Electronic Programme Guide(EPG)
13. Selecting different audio channels
14. Additional Information
15. Parental Control
16. Parental Lock
17. Advanced users guide
18. Tuning Modes
19. Setup Satellite
20. Editing Channels
21. Arrange
22. Sort Free to Air Channel s
23. Deleting Channels
24. Installation
LNB
TV/VCR settings
Preferences
Set local time
System Information
25. Reset to factory defaults
26. Trouble shooting
27. Technical Specifications
`
2
3
4
5
6
7
8
9
10
10
11
11
12
13
14
14
16
17
28
19
19
20
21
22
25
26
27
1
Safety and Precautions:
Thank you for purchasing the new SAMSUNG digital satellite receiver. For your safety and proper
operation of your receiver, please take time reading this manual fully before installing and operating
the receiver.
Safety notice:
DANGER! HIGH VOLTAGE! RISK OF ELECTRIC SHOCK!
Lethal voltages are present inside the unit. Always unplug the receiver completely from mains outlet
before connecting or disconnecting anything.
No user-serviceable parts inside. Please refer all servicing to qualified service agents.
Never expose the unit to water, moisture, extreme cold or direct sunlight.
Slots are provided for proper ventilation for the unit, do not obstruct them.
Do not insert or drop small objects into the unit.
Install the unit in a well-ventilated location
Never cover the unit or operate the unit near any heat source.
It is advisable to unplug the unit from the mains, TV, and the satellite dish when a thunderstorm is
expected.
Cleaning your receiver
Always unplug the unit from mains before cleaning the unit.
Do not use solvents of any kind to clean the unit, only use a soft-dry cloth.
SAMSUNG reserves the right to change specifications without prior notice.
This manual only covers the version of software supplied with the receiver.
2
Accessories:
User Manual: 1
Batteries: 2
UHF TV cable: 1
Remote Control Unit: 1
RADIO TVISAT LANG
TV
INFO
MUTE
CH
VOL
OK
VOL
CH
MENU
ESC
1
2
3
4
5
6
7
8
9
0
SIGNAL
F1
HELP
3
F2
System Connection:
Please unplug all unites from mains outlet before installation. Once all connections are made please
check again before connecting the equipment to the mains outlet.
The following shows a typical installation of a satellite receiver. If you require further assistance for the
installation of your satellite receiver, please contact your local distributor.
4
Front Panel:
A
B C
D
A
F
E
A. Standby:
B. Menu:
C. Volume +/-:
D. Exit:
E. Display:
F. Channel +/-:
To switch the receiver on / off.
To enter the main menu.
To increase or decrease volume level.
To back step or exit from menu.
Displays channel mode and channel number (see below*).
To change channels or move cursor in menu.
* Display modes:
The current viewing mode is displayed by your receiver:
Mode:
TV
Radio
Favourites
Menu info bar:
TV icon + Channel. No.
Radio icon + Channel No.
Heart icon + Channel No.
Front panel LED display:
Channel Number
r + Channel No.
F + Channel No.
5
Rear Panel :
Please refer to the diagram above for all the connection possibilities of your receiver. Do not connect
the unit to the mains socket until all other connections have been made and checked.
IF Input:
Connect the cable from your dish to this connector.
Loop Out:
If you have a second satellite receiver, connect the second satellite receiver’s
LNB input to this connector.
TV:
Connect your TV UHF input to this connector.
ANT:
Connect your TV antenna to this connector-only in
conjunction with TV UHF output.
TV SCART:
Use this connector to connect you TV to the receiver via a SCART cable.
VCR SCART:
Use this connector to connect you VCR to the receiver via a SCART cable.
Video:
Composite video output for connecting to a monitor etc.
0/12V:
0 or 12V output for external control switch.
Audio L/R:
Audio outputs for connecting to an external stereo amplifier.
S-Video Out:
Additional output for recording with a VCR / camcorder with S-ideo capability.
RS232:
You can connect the receiver to a PC via this connector (advanced users only).
IEEE 1284:
High-speed data port for connecting with a PC (advance users only).
Once ALL the connections are made and CHECKED, you may connect the unit to the main
supply.
6
Remote Control Unit:
To switch to the second
Soundtrack/ language
By-Pass SCART priority
VCR loop through
Display radio channel list
To display channel status or
current or next channel
information in EPG mode
RADIO TVI SAT LANG
TV
INFO
Display TV channel list
MUTE
To switch your receiver on from
stand by or off to stand by
To mute the sound
CH
VOL
OK
VOL
CH
MENU
To change volume, or to move
cursor left, right in menu
To select menu option, or to
updated on entry
ESC
1
2
3
4
5
6
7
8
9
0
SIGNAL F 1 HELP F 2
Programme Guide :
To display the current and next
programme information
(if available)
To change channels in view
mode, or to move cursor up or
down in menu mode
To about setting or to back out or
of menu
Numeric Keys : Used to select
channels or enter programming
parameters
To edit or display the Favourite
channels list
Toggle signal meter
Function keys :
In normal viewing mode, F1 may
be used to recall the last viewed
channel
To Display the on-line help
messages when available
Additional functions will be
indicated in menus where
applicable
7
Quick Start:
After initialisation, the Language selection screen will be displayed.
By using the LEFT/RIGHT keys, you may select the
different menu languages available. Once you have
selected the desired menu language, press OK to
continue with set-up.
English
Select Menu Language
After selecting the menu language, the receiver will display the Channel Tuning Menu:
(Menu, Channel Setup, OK)
LNB
Preset
Satellite
Preset Entry:
A1
Setup Satellite
Hotbird – 13.0E
Move the cursor to highlight the “Satellite” box and
use the LEFT/RIGHT keys to scroll through the prestored satellites. For example, if your dish is aimed
at the Astra satellite, when Astra is selected, you
should see both signal meters reading a good signal
level. The receiver will then prompt you to press OK
to start tuning to all the channels on Astra.
Frequency
Sym. Rate
Polarity
FEC
Snaigl Found
FTA
(See next page)
Network
Use
Note:
11720
27500
Hor 18v
3/4
F1 – Preset
Signal
Data
Off
Bouquet
PIDs
to change Satellite
F2 Mode
1. If you wish to only tune to a specific Network or Bouquet of channels, move the cursor to highlight
the “Bouquet” box and use the LEFT/RIGHT keys to scroll through the pre-stored Bouquets. You
should now see both signal meters reading a good signal level and the receiver will prompt you to
press OK to start tuning all the channels from the selected Network or Bouquet.
2. If you only wish to download Free-to-Air channels, high-light the FTA box and turn the option to “on”.
Provided your dish is installed correctly and aligned to the relevant satellite, both the Signal and Data
bars should display a GREEN bar which denotes the following:
The first bar shows the actual satellite SIGNAL strength
You should see a GREEN bar showing your satellite signal is medium to good. If it is RED, this
normally indicates that either your dish/LNB set-up is not adequate for this satellite, or your dish is
not correctly aligned.
The second bar shows the quality of the DATA received
This GREEN bar indicates the DATA INTEGRITY of the signal received. If the bar is RED, this
indicates that the DATA received is unreliable. This could cause the picture to break up, or
disappear completely.
Note: If “No signal found” is displayed, check that the values entered are correct and are valid for
the satellite your dish is installed for. (Please also refer to the “Advanced Users” and “Trouble
Shooting” section to check that your LNB settings are correct).
Manual Entry (see also “Advanced User Guide” ):
(See the “Advanced User Guide” section for more information on manual entry and other tuning
options other than Auto set-up.)
8
Downloading Channels:
With a “Signal Found” message displayed the signal meters in the Channel Tuning Menu,and
depending on whether you have selected a Satellite or Bouquet search.
Press the OK key to begin auto search (Satellite, Network or Bouquet).
A uto C hannel Search
Astra 19.2E
TV channels
89
Radio channels
Sky 1
CNN
NBC
Movies 1
Sky news
17
BBC1
Virgin Radio
ITN
Searching 11.381 GHz …
The AUTO CHANNEL SEARCH screen will now be displayed:
Please wait for the receiver to process all the channels - this may take a few minutes. The time
required to tune in all the channels on the selected satellite depends on the number of channels
available. You may press the ESC key to stop auto tuning anytime.
All the channels found (TV and Radio) will be displayed in the two separate boxes provided in the
“Auto Channel Search” menu. Once all the channels are found, the “Finished” message will be
displayed at the bottom of the menu indicating that the process has finished.
Now press the OK key to store the new channels.
You should now be able to view the first channel found by your receiver. The channel number, channel
information and the clock will be displayed at the top of the screen for a few seconds. You may recall
this information banner by pressing the INFO key on your handset.
Note: Some channels are scrambled - only channel information will be displayed.
You may now either go and view your downloaded channels or continue to download channels from
another bouquet or satellite.
A
uto
C
hannel
S
earch
TV channels
Radio channels
Searching 11.381 GHz
9
Viewing your channels:
There are several ways to access the stored channels:
Using the UP/DOWN keys on the remote handset to access the channels sequentially.
Using the numeric keys (0-9) by typing the channel number to access the channels directly.
Using the TV key on your handset to display the TV channel list. Use the UP/DOWN keys to
move the cursor to highlight the desired channel, then press OK to view that channel. You may
also use the LEFT/RIGHT keys to skip to the next or previous page of the channel list for quicker
scrolling.
¶ Using the “Favourite Channels List” - You may add all your favourite TV and Radio channels
into the “Favourite Channels List”. Please see next section on instructions for using and editing
favourite channels.
Multi-satellite:
As you download channels from different satellites, your digital satellite receiver will store in dedicated
satellite groups. For more details please refer to the Advanced User Guide.
List by satellite:
To access your channels, press the TV (or Radio) key:
To access the list of channels on a different satellite,
press F1 or F2 keys. Within each list you may use
the Up/Down, Left/Right keys to highlight the required
channel and press OK to select it.
1 CNN
Astra
2 Sky
3 Cartoon
4 TNT
5 CNBC
6 STAR TV1
7 MTV
8 VH-1
Use
page
19.2E
to change
Use
cursor
to move
Use OK to select
Press ESC to exit
List in Alphabetical order:
Alternatively, from View mode you can list all the stored
channels in alphabetical order by pressing TV (or Radio)
twice in succession.
Use the Up/Down, Left/Right keys to highlight the
channels and press OK to select it. In alpha mode,
you can also use the F1/F2 keys to skip to the next
letter to save time.
Canal +11
Canal +2
CNBC
CNN
Fashion
K1
K2
K3
Astra
TV14
TV17
TV22
TV18
TV35
TV57
TV60
TV54
19.2E
Note: At any time if you wish to return to your original cursor position, simply press the HELP
key on your remote.
10
Favourite Channels:
Before you can use the “Favourite Channels List”, you must first add your favourite channels into the
favourites list. Please refer to the instructions below:
1 Discovery
1. In view mode press the TV button to display the TV channel list.
2. You will now see the TV listing with your current channel highlighted.
3. Press the FAVOURITES key (heart shape) to add a favourite icon next to the channel name. This
channel will be added to the “Favourites List”. To add more channels to your “Favourites List” move
the cursor to highlight another channel and press
the FAVOURITES key. (if you press the FAVOURITES
Canal +11
TV14
Canal +2
TV17
key again it will remove the favourite icon).
CNBC
TV22
4. Press the OK key to store the favourite settings.
CNN
TV18
Fashion
K1
K2
K3
In view mode press the FAVOURITES key to display
the “Favourite Channel List”.
TV35
TV57
TV60
TV54
To view your favourite channel, highlight it and press OK.
Astra
Electronic programme guide (EPG):
19.2E
This receiver is equipped with a unique dual EPG system which gives you two easy ways to view the
programme information (what’s on now and what’s on next)! When transmitted by the broadcaster, the
EPG system can display a variety of programme information ranging from start and end times of a
programme to additional information about the programme itself. You can easily select and view a
programme on the EPG by highlighting it and pressing OK.
Select Menu Language
EPG Type
Default Audio Language
You can also choose between a FULL or
CONDENSED version of the EPG, using
the “Preferences” section under
the Installation Menu:
TV Guide (Current Prog. Info.)
Channel
1 of 124
Time :
CNN International
12:30 – 13:00
Eurosport
12:00 – 14:00
Sci-fi Channel
12:30 – 13:00
NBC Europe
12:30 – 12:45
English
Full
eng
Menu Transparency
TV Guide (Current Prog. Info.)
12:35
Channel
Regional financial report
CART Indy Car series
8th Round Detroit GP
Wonder Woman
Time:
123:35
Scheduled
1.
CNN International
12:30 – 13:00
2.
3.
4.
5.
Eurosport
Sci-fi Channel
NBC Europe
Canal+ Swe
12:00 –
12:30 –
12:30 –
12:30 –
14:00
13:00
12:45
13:45
Regional financial report
No Info.
Press EPG key for current/next prog. Info.
Use INFO key for more information
Press EPG key for current/next prog. Info.
Use INFO key for more information
Full EPG
Condensed EPG
11
Selecting different audio channels:
In digital satellite broadcasts, multiple audio languages can be simultaneously transmitted by the
programme provider.
Default audio setting:
The user can first select a default audio language via the “Preferences” menu for the receiver. Once
the default audio language has been stored, all newly found TV/Radio channels will then be stored
with the selected default audio language.
Multi-Channel Audio:
The broadcasters may transmit more than one language for any channel. By pressing the “LANG” key
on the handset, the user can quickly find out what other languages are available for that channel. If the
left side column of the Audio Control menu shows a selection of different languages, the user can
select and store a new default language for that channel only - for that channel the receiver will always
return to the newly stored default language.
Sometimes two different languages are broadcasted with one language on the Left Audio Channel
(L) and a different language on the Right Audio Channel (R). When this is available, the “Audio
Channel” column of the “Audio Control” menu will display the available audio channels and the user
can then select either channel L or R for the desired language. Otherwise the default L+R setting
would have the two languages“mixed” together and they will be heard at the same time.
From this menu, the left column indicates the
default languages available and the right column
indicates the available audio sub-channels. The
User may then move the cursor to the L or R subchannel and listen to decide whether the required
language is available.
Language
eng
fra
dan
Audio Channel
L
R
L+R
Notes:
The left column is the default language setting and this option is storable. If the user changes the
default language to another language, any new programmes which do not support the new default
language may become silent. When this happens, the receiver will display the Missing Audio icon on
the Information Banner, you can press the LANG key to select a different default language.
Missing Audio icon
Many broadcasters transmit multiple languages and programmes on a number of audio sub-channels.
With this menu the user can listen to any of the sub-channels by moving the cursor to highlight them
when available. The L and R audio sub-channels can vary from programme to programme so this is
not stored and will revert to L+R (Stereo) when you change channel.
A
udio C
R
12
Additional Information:
When viewing a programme, pressing the info key will display the information banner.
SAMSUNG
Note:
If the receiver was previously working on a channel and the “No Signal” icon appears, you may have
one of the following problems:
Signal
Signal degraded heavily by poor weather
Channel no longer broadcasting and no carrier
was detected.
Dish not aligned to the correct satellite
LNB power switched off in the menu
Faulty cable or LNB.
Data
Use INFO key for diagnostic info.
The Signal and Data level meter:
Press the Signal key during view mode to display the signal
and data level for the current channel. Use this feature to
assist dish alignment or fault finding should there be a
reception problem.
Signal
Pic. Size:
Frames/Sec:
Asp. Ratio:
Bits/Sec:
Diagnostic Information:
For more information on the receiving signal,
press the INFO key to display the diagnostic
Screen:
Data
Video
544x576
25.00
4:3
15000000
Audio
Channel:
Emphasis:
Sample Rate:
The diagnostic screen displays detailed broadcast
information in real time. Press INFO key again to
return to the signal meters or ESC to return to the
Picture.
Memory Status:
At any time you can check the memory status on you receiver.
The indicator shows the amount of receiver memory used by the stored channels.
Press:
Menu, Channel Setup, Memory Status :
All channels are stored in memory
Memory Used
Memory Used
13
Stereo
Off
48.00kHz
Parental Control:
To restrict unauthorised access to your receiver, two types of parental lock are provided:
Channel Lock:
This provides channel “lock out” facility to restrict the access of adult programme material.
Menu Lock:
This will lock out the access of both the Channel Tuning and Installation menus from unauthorised
users. This will reinforce the Channel Lock as it also prevents other users from re-tuning channels that
are known to contain adult material.
To access the Parental Control menu:
Press Menu, Parental Lock, OK.
P. Lock
Enter Parental Lock PIN :
After the correct PIN (Personal Identification Number)
has been entered, the following menu will be displayed:
The default PIN is 0000. If you change your PIN, please
remember to keep it in a safe place.
Channel Lock:
This allows all channel locks to be either enabled or
disabled all at once. First use the Lock/Unlock option
to tag the individual channels to be locked, then
switch the Channel Lock option ON or OFF.
Menu Lock:
This option toggles the menu lock ON or OFF.
When menu lock is ON, you cannot access either
Channel Set-up or Installation menus without
entering a PIN.
Channel Lock
OFF
Menu Lock
OFF
Lock/Unlock Channels
Change PIN
Note: Channel Lock is only effective if
Installation/Channel Setup menus are also
locked with Menu Lock
Note:
Once the correct PIN has been entered to temporarily
disable a lock, this will remain “unlocked” until the receiver has been switched to standby mode.
Lock/Unlock Channels:
Highlight this option and press OK to display the
Channel Lock menu:Use UP/DOWN, LEFT/RIGHT to select the channels you
wish to lock. press F2 to turn the LOCK tag ON and OFF.
Once you have tagged all the channels to be locked,
press ESC to return to the Parental Control menu and
make sure both Channel Lock and Menu Lock are
switched to ON.
Canal +11 TV14
Canal+2
TV17
CNBC
TV22
CNN
TV18
Fashion
TV35
K1
TV57
K2
TV60
K3
TV54
Astra
F2 toF2
Lock/Unlock
to Lock/Unlock
TV 124
Press ESC twice to return to viewing mode and switch the
receiver to Stand-by and back to ON again.
Now go to any Locked Channel (e.g. TNT) and
you will see that this is locked.
To Unlock, press F2 and enter the PIN number and press OK.
14
19.2E
19.2E
19.2E
19.2E
19.2E
19.2E
19.2E
19.2E
Canal +
19.2E
CHANNEL LOCKED, F2 TO DISABLE LOCK
SAMSUNG
Signa l
Changing the PIN:
The factory default PIN is set to: 0000. At any time the user may change this PIN code by accessing
the “Change PIN” menu:
Channel Lock
OFF
Menu Lock
OFF
Enter new PIN:
Confirm:
Lock/Unlock Channels
Change PIN
Note: Channel Lock is only effective if
Installation/Channel Setup menus are also
locked with Menu Lock
To change the PIN code, enter in the new PIN into the New PIN box and re-enter the same PIN again
in the Verify Box to confirm.
If the two PINs are not identical, the change will be aborted and the user will be asked to either reenter the new PIN or press ESC to abort the PIN change. If the PIN is accepted this will now be your
new PIN.
Don’t forget your PIN number!
Please write down your PIN code below and keep in a safe place.
If you have forgotten your PIN code, please call an Authorised Service Agent.
Factory PIN Code:
0000
New PIN Code:
Please keep this section or this manual in a safe place.
15
Advanced users guide:
Tuning to different channel frequencies:
If the satellite you desire is not in the Preset listing, or you want to tune the receiver to a different set of
channels, please follow the instructions below:
To access the tuning menu, press the Menu key:
Move the cursor to Channel Setup and press OK.
Press OK on Tuning to access the Tuning Menu
Press F1 to enter the Manual Tuning Menu.
A1
Setup Satellite
LNB
Preset
Satellite
Astra-19.2E
Frequence
Sym. Rate
Polarity
FEC
By referring to your channel listings, enter the
Frequency,Symbol Rate (use 0-9 keys), Polarity
and FEC (Use LEFT/RIGHT keys) in the appropriate boxes for the channels you wish to tune to.
11720
27500
Hor 18v
3/4
Signal
Signal Found
FTA
Auto
Note: If you are using more than one LNB, be
sure to select the correct LNB (A, B,C or D)
for your tuning parameters.You can change
your LNB settings by highlighting the LNB
settings button and pressing OK (see page 22).
Data
Off
Network
Use
Bouquet
F1 – Manual
You need to press OK to update the entered
parameters and thereceiver will try to tune to
the new settings.
F2 - Mode
A1
Setup Satellite
LNB
Preset
Satellite
Hotbird – 13.0E
Frequence
Sym. Rate
Polarity
FEC
If the message “Signal Found” is displayed and
both the Signal and Data bar graphs are GREEN,
you may now select a tuning method.
11720
27500
Hor 18v
3/4
Signal
Signal Found
If the message “No Signal” is shown, please
check that your tuning parameters are correct
and amend if necessary.
FTA
Auto
Use
PIDs
to change Satellite
Data
Off
Network
Bouquet
PIDs
to change satellite
Check you LNB settings are correct (you can
F1 – Manual
F2 - Mode
access the LNB set-up menu by highlighting
the LNB Settings button and press OK; see
page 22 for LNB set-up information). If your
Manual Tuning Menu
tuning and LNB settings are correct, your dish
may not be adequate to receive the signal or
out of alignment with the satellite.
Provided you are receiving a good Signal and Data, you may now proceed with one of the three
download methods: Network, Bouquet, or Manual. You may highlight the FTA box and change the
option to “on” to download Free-to-Air channels.
16
Tuning Modes:
Auto Tuning
From the select frequencies, the receiver will automatically search for all other frequencies within the
tuning range and downloads them automatically into the receiver. Once the channels have been
downloaded, all the TV and Radio channels will be displayed separately allowing the user to inspect
them and decide whether they are to be stored or aborted. This option is not available in Manual tuning
mode (F1).
Network and Bouquet Tuning
Within a digital broadcast transmission, many other network frequencies are provided to guide the
receiver to tune to other Networks. Network tuning enables the receiver to download other channels
from the same network. Use Bouquet tuning you only want to download channels from one channel
frequency group. Bouquet Tuning is used when only the channels from the desired frequency are to be
downloaded.
PID tuning
Apart from the usual channel parameters (Frequency,
Symbol Rate, Polarity and FEC value), the broadcaster
must include additional information (known as Packet
Identifiers or PIDs) in their transmission to allow autotuning to work properly.
Hot Bird
13.0E
Name
Ch type
TV
PIDs in
Hex/Dec
Hex
Audio
Video
Text
PCR
PID 0000
PID 0000
PID 0000
PID 0000
In “PID Tuning” you are required to enter the channel
name and three other parameters: Video PID, Audio
PID, PCR PID and Text PID (optional). These values
can either be in Decimal (ranging from 0 to 9) or Hexadecimal (ranging from 0 to 9 and A to F for each
digit).
After selecting from the Preset List, or Manually entering the basic channel parameters (Frequency,
Symbol Rate, Polarity and FEC value), move the cursor to highlight the Manual button and press OK to
start tuning.
Edit the Channel details by following the steps below:1.
2.
3.
4.
5.
6.
Use the UP, DOWN, LEFT/RIGHT keys, to move the cursor from one field to another.
Use the LEFT/RIGHT, F1 and F2 keys to enter the channel name.
Select the channel type whether it is a TV channel or a Radio channel.
Decide whether you would like to enter the PIDs in decimal or hexadecimal form.
Use the F1/ F2 and 0-9 keys to enter the PID values.
When you have finished and are ready to store and display that channel, press OK.
Note:
In order for manual tuning to be successful, the PCR PID must be entered. In many cases the PCR
PID is not published. Fortunately, in nearly all cases the PCR is the same as the Video PID or the
Audio PID or 8190 in decimal or 1FFE in hexadecimal.
The Teletext PID is optional and can be ignored when the value is unknown.
17
Setup Satellite:
If your desired satellite position is not on the Preset List, you can manually edit an existing satellite or
add a new satellite name to the preset list.
To add a new satellite to your list, you must first enter the channel tuning mode:
Press Menu, Channel Setup, OK:
A1
Setup Satellite
LNB
Preset
Satellite
From the Channel tuning menu press F1
to enter manual tuner mode.
Astra – 19.2E
Frequence
Sym. Rate
Polarity
FEC
You will now see a Setup Satellite button on
the right hand side.
11720
27500
Hor 18v
3/4
Signal
Signal
FTA
Réseau
Highlight the Setup Satellite button, press OK.
FTA
Bouquet
Data
Off
You will now see the Setup Satellite menu:
Auto
In the Setup Satellite menu you may either
press F1 to edit the highlighted satellite details,
or you may press F2 to add your own satellite
to the listing.
Network
Bouquet
Use
F1 – Manual
In either case you will then be required to enter
the new parameters in the boxes provided:
Satellite: Enter the satellite name
Position: Enter the satellite position in degrees,
then the decimal place and either E or W (East
or West).
PIDs
to change satellite
2 - Mode
A1
Setup Satellite
LNB
Preset
Satellite
Hotbird-13.0E
Frequence
Sym. Rate
Polarity
FEC
11720
27500
Hor 18v
3/4
Signal
Press OK when finished. Your new satellite will
be added to the Manual list on the screen.
FTA
Data
Off
Auto
Network
Bouquet
Use
Highlight the new satellite in the list and press
OK to return to the Channel tuning menu. You
will find your new satellite displayed in the
Satellite box.
F1 – Manual
Enter the transponder parameters and check
for signal availability.
PIDs
to change satellite
F2 - Mode
ABC
Satellite
Position
Commence downloading your new channels.
Now any manual channels downloaded under
these parameters will be listed under the satellite
name you have entered.
123
5
E .
TV
Radio
Number of services
Astra
Sirius 1 / 2
Note:
In the Manual Tuning Menu, you can use the F2
key to toggle between the receiver”s preset satellite
list and the manually added satellite list.
18
F1 –Edit’deeails
19.2 E
50.E
F2 - Add
Data
Editing channels:
Should you wish to modify or view details of a particular channel, you may do so by using the Edit
Channel Details menu.
Please note that apart from editing the channel name, editing any of the channel parameters will cause
the channel to either be lost or changed (different audio/video). This menu is best used for checking
channel parameters downloaded from the broadcaster.
Name
To access the Edit Channel Details menu:
LNB
Press the MENU key, select Channel Setup,
then select Edit Channel Details and press OK.
A1
Frequency
Sym Rate
Polarity
FEC
By using the UP/DOWN, LEFT/RIGHT, F1/F2
and the OK/ESC keys, you may move to any
field to edit the associated parameters (the
operation is similar to using the manual tuning
menu). Once all changes have been made,
Press OK to retune to these new parameters.
Ch type
11278
27500
Ver
7/8
PIDs in
Hex/Dec
Hex
Audio PID
Video PID
Text PID
PCR PID
0000
0000
0000
0000
TV
Note: It is important to identify whether the channel is TV or Radio so that the channel is stored
under the appropriate channel list (TV or Radio List).
Arrange:
The channel sort facility allows you to “drag and drop” channels to your preferred location. Within the
“Channel Setup” menu, you will find the Sort Channels option:
Move the cursor to highlight “Arrange” in the Channel Setup menu and press OK.
Use the TV or Radio keys to select the
listing you wish to sort.
TV Channels
1
2
3
4
5
6
7
Use the UP/DOWN/LEFT/RIGHT keys
to move the cursor, highlight the channel
you wish to move and press OK to select
It.The selected channel now will move
with the cursor.
Sky 1
CNN
NBC
Movies 1
Sky News
Radio
OK
select channel
ESC
exit
Discovery
Kiosk 2
list radio
channels
8 NRK 1
Use the UP/DOWN/LEFT/RIGHT keys
to move the channel to the new location.
TV Channels
Press OK to “drop” the selected channel
into the new position or ESC to cancel
the change.
1 Sky 1
2 CNN
3 NRK 1
Repeat for all other channels or press
ESC again to store the new settings and
Return to the previous menu.
4
5
6
7
8
19
Radio
list radio
channels
OK
select channel
NBC
Movies 1
Skynews
Discovery
Kiosk 2
ESC
OK
exit
Sort Free to Air Channels:
This function automatically separates the scrambled channels from the free-to-air channels by actually
checking each channel for video and audio. The user first decides whether to sort TV or Radio
channels (or both at the same time), and then selects whether to delete the scrambled channels or
simply move them to the end of the channel list.
Depending on the number of channels to be sorted, the time taken to complete the process will vary
and the progress bar will indicate progress in percentage.
To change the mode of operation, use the Left/Right or OK key.
Use F1 key to start the sorting progress and ESC to abort.
The Sort Unscrambled Channels Menu:
Mode
Mode:
Select either to delete all scrambled channels
or move all scrambled channels to the end of
the channel list.
Move to end of list
Scope
TV Channels
Channel
PPV Movie
Progress
Scope:
Select sort TV channels only, Radio channels
only, or sort both at the same time.
Available
Unavailable
Press F1 to proceed, ESC to abort.
Channel:
Displays the current channel being checked.
Progress:
Displays the sorting progress in percentage.
Available/Unavailable:
Displays a visual ratio between free channels to scrambled channels.
N.B.: Please note that channels with no signal lock will not be moved or deleted.
Mod
20
Deleting Channels:
You can choose one of the two following methods:Delete Channels Clear All Channel Info -
you may select individual channels for deletion.
you may delete all channels in one operation.
1. Deleting Channels:
Move the cursor to highlight “Delete Channels” in the Channel Setup menu and press OK.
By default TV channels are listed, press the RADIO
key to access the Radio list.
TV Channels
Radio
Use the UP/DOWN/LEFT/RIGHT keys to move
the cursor, highlight the channels you wish to
delete and press F1 to tag the channels to be
deleted. Notice that the tagged channels now
have an “X” tag next to them (Pressing F1 will
remove the tag).
1
2
3
4
5
6
7
Sky 1
X
CNN
NBC
X
Movies 1
Sky news
Discovery
Kiosk 2
8 NRK 1
If you wish to tag all the channels, press F2.
(Pressing F2 again will remove all the tags)
Info
F1
F2
OK
List radio
channels
Play Channel
Toggle tag
All tags on
Delete tagged
channels
cancel
ESC
Hotbird 13.0E
If you wish to preview the channel before tagging,
press Info. You can tag channels while in preview mode - changing channels with UP/DOWN
keys, and tagging them with F1. Press the Info
key to return to the “Delete Channels” menu.
Once you have tagged all the unwanted
channels press OK to confirm.
TV 124
Canal +
F1 – toggle delete ESC – exit
Press F2 key to confirm deletion or
press any Other key to return to
the Delete Channels menu.
SAMSUNG
19.2E
Delete
Signal
2. Clear All Channel Info:
Only use this option if you would like to DELETE ALL CHANNELS stored in your receiver. All stored
channels in the receiver will be erased at the end of the following procedure:
From the Main Menu select Channel Setup and Delete.
You will be prompted with a warning screen:
Warning
Follow the on-screen messages to proceed
in deleting all your channels or to abort.
Are you sure you want to continue?
You will lose ALL channel information
Press OK to continue
any other key to exit
Finally, press OK to confirm deletion of all
channel information.
Note:
The above procedure will delete all stored channels in the receiver’s memory. Any modifications made
to the receiver’s set-up (LNB settings, Parental Lock etc.) will NOT be affected. For instructions on
how to reset the receiver to factory condition please refer to the Reset to factory defaults section in this
manual.
21
Installation:
LNB:
The installation menu provides access to LNB settings and features. These can expand the receivers
capabilities as well as customising the receiver to your preference.
Press Menu and select Installation to access the Installation menu:
LNB
LNB
Low
High
DiSEqC
Tone
22k
12v
LNB Power
<
A1
Univ
09750
10600
A
A
Off
Off
>
Help
Messages
Save
On
DiSEqC 1.0
DiSEqC 1.0
OFF
Repeats
Tone
0
OFF
The default LNB setting is as per the diagram above.
LNB Power:
This toggles the LNB power supply on and off. This option should be set to ON. With the LNB power
switched off, all control signals for LNB, switches and DiSEqC will also be disabled.
LNB A1 to D4:
Up to sixteen universal LNBs can be conntected to your digital receiver. For each LNB (A1 to D4) you
may specify the type and control method of the LNB.
L.O. Freq:
Enter the Local Oscillator Frequency in MHz of your LNB here. For LNBs with two L.O. frequencies,
enter the Low Band L.O. frequency in the Low column and the High Band L.O. frequency in the High
Column. (e.g. For a Universal LNB, the Low Band L.O. frequency is 9750 MHz and the High Band L.O.
Frequency is 10600 MHz).
Tone:
Your digital receiver is equipped with switch controls 12V, 22kHz tone, as well as DiSEqC 1.0
DiSEqC:
With the DiSEqC options switched on you can select between LNBs from A to D.
Note:
You may use these controls independently to select different LNBs, and in addition you can use either
in conjunction with DiSEqC switchs to increase the number of LNBs used. Up to maximum of sixteen
LNBs can be used.
Note: Universal LNBs uses 22kHz to switch between Low Band and High Band and therefore the
22kHz control column is automatically disabled when Univ is selected in the LNB column.
Save:
Highlight this button and press OK to store any changes made to this menu. If you exit by pressig
ESC your changes will not be saved.
22
TV/VCR settings:
The TV/VCR menu contains various options that allow you to configure the receiver to suit your
system:
Press Menu, select Installation to access the TV/VCR Menu:
TV Type
Standard (4:3)
UHF Channel
Enable TV SCART RGB
Enable TV SCART S-Video
Enable VCR SCART S-Video
38
OFF
OFF
OFF
The following options are available:
TV Type:
Select between a standard aspect ratio TV (4:3) or Wide-screen (16:9) TV.
16:9 mode is only active when a programme is transmitted in 16:9 format.
With a modern 16:9 TV, the switch to 16:9 mode is automatic if connected via a full SCART.
With a modern 4:3 TV, 16:9 mode will produce a “Letter Box” format if connected via a full SCART.
UHF Channel:
Use this option to change the TV UHF modulator output channel. The default channel is CH38. If this
is already occupied by a local TV channel, VCR or you are experiencing picture interference, use this
option to re-tune your satellite receiver to a different UHF channel. Remember to re-tune your TV and
VCR to the new channel.
Enable TV SCART RGB:
When OFF, the TV SCART outputs composite video signal. If you have a RGB compatible TV,
switch this option to ON to enjoy better picture quality.
Enable TV SCART S-Video:
Select this option only if your TV is S-Video compatible.
Note: 1. If your TV is not compatible, a Black and White picture will result.
2. This option is NOT available if TV SCART is set to RGB.
Enable VCR SCART S-Video:
Select this option only if your VCR is S-Video compatible.
Note: 1. If your VCR is not compatible, a Black and White picture will result.
2. This option is NOT available if TV SCART is set to RGB.
23
Preferences:
This menu allows you to customise the receiver to suit your individual needs.
To access the Preferences menu: Press Menu, select system.
Select Menu Language:
You may change the default menu language.
The number of languages available depends
on the receiver’s software version.
Select Menu Language
EPG Type
Default Audio Language
English
Full
eng
Menu Transparency
EPG Type:
You can change the Electronic Programme
Guide format between FULL EPG or
CONDENSED EPG.
(See EPG section under Accessing Channels).
Default Audio Language:
You can select or change the default language for your programmes with this menu. When tuning for
new channels, the receiver will automatically search for the default language if available (See the
“Selecting Different Audio Channels” section).
Menu Transparency:
Use this feature to adjust the transparency of the receiver’s menus.
Set local time:
The Digital Satellite receiver is equipped with an internal clock. The time is displayed on the channel
information banner and on the EPG so that you will never miss your favourite programme, wherever
the programmes are transmitted from!
Offset from GMT:
Enter the time difference between your local
time and GMT in this box.
+1
Offset from GMT
Local Time:
Some broadcasters may not transmit the time
together with their programme content. In this
case you may need to enter the local time of
your country here (Note: This is a 24hr clock).
Local time
:
13
45
System Information:
The system information option on the Installation menu above displays software version numbers.
This can be used to identify whether there is a newer version of software available.
As digital receiver technology is constantly
improving, newer and better versions of
software will become available in future to
further enhance your receiver. New software
updates will be available to your dealer and
On the Internet.
Application
dd/mm/ yyyy
Boot
F P
24
SID x.x
x.xx.xx
2.0
1.x
Reset to factory defaults:
The Reset To Factory Defaults option is provided to enable the user to completely reset the receiver.
Unlike the Clear All Channel Information option which allows the user to clear only the channel list, the
Reset To Factory Defaults option will clear all changes made by the user, including Installation,
Channel Setup and Parental Control changes.
Reset To Factory Defaults menu:
Warning
This will Reset All settings to default values
After pressing OK the following menu
will be displayed:
Press F2 to continue, any other key to exit
Stored settings, including LNB and TV/VCR configurations,
parental/installation access control and preferences
This process has been designed to be
lengthy to minimise accidental resetting
of the receiver to it”s the default condition.
Press F2 to proceed to the next step,
any other key will return you back to
the installation menu.
Warning
Are you sure you want to continue?
All stored settings will be reset to default values
You are asked to confirm this once more.
Pressing OK at this point will enable the
“Reset to Factory Default” function.
Press OK to continue
any other key to exit
Stored settings, including LNB and TV/VCR configurations,
parental/installation access control and preferences
Pressing any other key will return you
back to the installation menu.
Beyond this point, all stored settings
(including LNB, TV/VCR configurations,
parental/installation access control, and
preferences) will be lost.
Warning
Stored settings reset to default values
This final screen confirms the receiver
has been reset to factory defaults.
Press any key to exit
25
Trouble shooting:
If you suspect there is a fault with your receiver, please check the following trouble shooting guide
before calling an authorised service agent.
Warning! Under no circumstances attempt to repair the receiver yourself. Tampering with the
receiver may result in fatal electric shock and will invalidate your warranty.
Symptom:
Possible cause:
No receiver display
Check that the receiver is plugged in and
there is power at the mains socket.
Receiver is ON, but no picture or sound
Check that your TV is switched on
Receiver is on, no picture or sound except
menus
Channel scrambled.
Check tuning and set-up
Check Signal and Data levels.
Dish moved or LNB is faulty.
Interference on picture, sound OK
Local TV interference, tune the
output to another channel, or connect to
TV via SCART or phonos.
Interference on picture, noisy audio
Press Signal key and check if Signal and
Data levels are good enough.
Receiver not responding to remote
Check remote batteries and that the
receiver IR sensor is not covered
(marked IR on the front panel).
26
Technical Specifications:
Electrical Specification
Video Inputs:
Input impedance 75Ω
0.7V pk-pk on R/G/B,
1V pk-pk on CVBS/Y
Output impedance 75Ω
0.7V pk-pk on R/G/B,
0.1V pk-pk on CVBS/Y into 75Ω load.
Input impedance >50kΩAC coupled
Output impedance 600ΩAC coupled
Minimum load impedance 20kΩ
90-250VAC 50-60Hz
Video Outputs:
Audio Inputs:
Audio Outputs:
Mains power:
Connectors
4 x Phono/RCA:
Composite video out
0/12V out
Audio left
Audio right
9 Way D RS232 DCE serial port
UHF in/out IEC male/female or:
VHF in/out F-type (country dependent)
F-type
F-type
RS232:
Modulator/Bypass:
Satellite IF input:
Satellite IF loop out:
Tuner
Loop though Digital tuner with LNB input, and loop output
Full power loop through supported
Frequency Range at LNB input:
Input connector:
Impedance:
Input sensitivity:
920-2150MHz
F-type female
75Ω
-30 to -65dBm
LNB supply voltages
Supply voltage software switchable:
13V/18V
Current limit:
0 to 400mA
Software controlled LNB power on/off
LNB 22kHz Tone switching:
Amplitude:
0.6Vpp (±0.2V)
Frequency:
22KHz ± 2KHz
Duty Cycle:
50% (±20%)
Full DiSEqC specification V1.0 supported
Universal LNB supported
Software controlled on/off
0/12V accessory switch:
Software controlled on/off
Demodulator and FEC
Demodulator:
Type:
Filtering:
Input symbol rate:
Fully DVB compliant
QPSK
0.2 or 0.35 Square root raised cosine
2 Msps to 45 Msps fully variable
Forward Error Correction:
Code rates supported:
1/2, 2/3, 3/4, 5/6, 7/8 (Auto Sensed)
27
Transport, A/V Decoding
Demultiplexor:
PID Filters:
PCR recovery:
Video Decoder:
Bitstreams Supported:
Video Resolution:
Video Memory:
Audio Decoder:
Type:
Layers:
Audio Modes:
Output Sample Rates Supported:
Data rates supported
PAL/NTSC Encoder:
Supported Outputs:
UHF/VHF Modulator:
Tuning Range:
(UHF):
or
(VHF):
Processor and memory
System CPU:
RAM:
ROM:
EEPROM:
Power consumption
Operational
1 Video, 1 Audio, 30 general purpose (SI capable)
internal 27MHz PLL locked to PCR
MPEG2 MP@ML to ISO/IEC 13818-2
MPEG1 to ISO/IEC 11172-2
Up to 720 x 576 pixels at 25 fps for PAL
Up to 720 x 480 pixels at 30 fps for NTSC
16Mbit
MPEG1
I and II
Mono, Dual, Stereo, Joint Stereo
16kHz, 22.05kHz, 24kHz, 32kHz 44.1kHz, 48kHz
8 to 448 Kbps
Composite, RGB, S-Video NTSC-M,
PAL B,D,G,H,I,M,N,Nc
(country dependent)
CH21 to CH69
CH3, 4
(country dependent)
40 MIPS, Cached
512k standard
1MB standard
256kBit
30W max.
28