1
ESPAÑOL: PÁGINA 21
FRANÇAISE : PAGE 41
Instruction
Manual
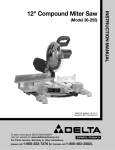
12" Compound
Miter Saw
MODEL 3802
To learn more about Porter-Cable
visit our website at:
http://www.porter-cable.com
IMPORTANT
Please make certain that the person who is to
use this equipment carefully reads and
understands these instructions before starting
operations.
The Model and Serial No. plate is located on the main
housing of the tool. Record these numbers in the
spaces below and retain for future reference.
Model No. _____________________________________
Type __________________________________________
Serial No.______________________________________
Copyright © 2000 PORTER-CABLE Corporation
Part No. 900988 - 11-30-00
IMPORTANT SAFETY INSTRUCTIONS
SAVE THESE INSTRUCTIONS
READ AND FOLLOW ALL INSTRUCTIONS.
This tool was designed for certain applications.DO NOT modify or use it for any application other than for which
it was designed. If you have any questions relative to its application do not use the tool until you have written
Porter-Cable and we have advised you.
Technical Service Manager
Porter-Cable Corporation
4825 Highway 45 North
Jackson, TN 38305
WARNING: FAILURE TO FOLLOW THESE RULES
MAY RESULT IN SERIOUS PERSONAL INJURY.
1. FOR YOUR OWN SAFETY, READ INSTRUCTION MANUAL BEFORE OPERATING THE TOOL. Learn the
tool’s application and limitations as well as the specific hazards peculiar to it.
2. KEEP GUARDS IN PLACE and in working order.
3. GROUND ALL TOOLS. If tool is equipped with three-prong plug, it should be plugged into a three-hole
electrical receptacle. If an adapter is used to accommodate a two-prong receptacle, the adapter lug must be
attached to a known ground. Never remove the third prong.
4. REMOVE ADJUSTING KEYS AND WRENCHES. Form habit of checking to see that keys and adjusting
wrenches are removed from the tool before turning it on.
5. KEEP WORK AREA CLEAN. Cluttered areas and benches invite accidents.
6. DON’T USE IN DANGEROUS ENVIRONMENT. Don’t use power tools in damp or wet locations, or expose
them to rain. Keep work area well-lighted.
7. KEEP CHILDREN AND VISITORS AWAY. All children and visitors should be kept a safe distance from work
area.
8. MAKE WORKSHOP CHILDPROOF – with padlocks, master switches, or by removing starter keys.
9. DON’T FORCE TOOL. It will do the job better and be safer at the rate for which it was designed.
10. USE RIGHT TOOL. Don’t force tool or attachment to do a job for which it was not designed.
11. WEAR PROPER APPAREL. No loose clothing, gloves, neckties, rings, bracelets, or other jewelry to get caught
in moving parts. Nonslip footwear is recommended. Wear protective hair covering to contain long hair.
12. ALWAYS USE SAFETY GLASSES. Wear safety glasses (must comply with ANSI Z87.1). Everyday eyeglasses
only have impact resistant lenses; they are not safety glasses. Also use face or dust mask if cutting operation is dusty.
13. SECURE WORK. Use clamps or a vise to hold work when practical.
14. DON’T OVERREACH. Keep proper footing and balance at all times.
15. MAINTAIN TOOLS IN TOP CONDITION. Keep tools sharp and clean for best and safest performance. Follow
instructions for lubricating and changing accessories.
16. DISCONNECT TOOLS before servicing and when changing accessories such as blades, bits, cutters, etc.
17. USE RECOMMENDED ACCESSORIES. The use of improper accessories may cause hazards or risk of injury to
persons.
18. REDUCE THE RISK OF UNINTENTIONAL STARTING. Make sure switch is in “OFF” position before plugging
in power cord.
19. NEVER STAND ON TOOL. Serious injury could occur if the tool is tipped or if the cutting tool is accidentally
contacted.
20. CHECK DAMAGED PARTS. Before further use of the tool, a guard or other part that is damaged should be
carefully checked to determine that it will operate properly and perform its intended function. Check for alignment
of moving parts, binding of moving parts, breakage of parts, mounting, and any other conditions that may affect its
operation. A guard or other part that is damaged should be properly repaired or replaced by an authorized service
center unless otherwise indicated elsewhere in this instruction manual. Have defective switches replaced by
authorized service center. Do not use tool if switch does not turn it on and off.
21. DIRECTION OF FEED. Feed work into a blade or cutter against the direction of rotation of the blade or cutter
only.
22. NEVER LEAVE TOOL RUNNING UNATTENDED. TURN POWER OFF. Don’t leave tool until it comes to a
complete stop.
23. DRUGS, ALCOHOL, MEDICATION. Do not operate tool while under the influence of drugs, alcohol or any
medication.
24. MAKE SURE TOOL IS DISCONNECTED FROM POWER SUPPLY while motor is being mounted, connected
or reconnected.
2
25. WARNING: SOME DUST CREATED BY POWER SANDING, SAWING, GRINDING, DRILLING, AND OTHER
CONSTRUCTION ACTIVITIES contains chemicals known to cause cancer, birth defects or other reproductive
harm. Some examples of these chemicals are:
• lead from lead-based paints,
• crystalline silica from bricks and cement and other masonry products, and
• arsenic and chromium from chemically-treated lumber.
Your risk from these exposures varies, depending on how often you do this type of work. To reduce your exposure
to these chemicals: work in a well ventilated area, and work with approved safety equipment, such as those dust
masks that are specially designed to filter out microscopic particles.
SAVE THESE INSTRUCTIONS. Refer to them often and use them to instruct others.
ADDITIONAL SAFETY RULES FOR COMPOUND MITER SAWS
1. WARNING: USE ONLY CROSS-CUTTING SAW BLADES. DO NOT USE BLADES WITH DEEP GULLETS AS
THEY CAN DEFLECT AND CONTACT THE GUARD.
2. WARNING: Do not operate the miter saw until it is completely assembled and installed according to the instructions.
3. IF YOU ARE NOT thoroughly familiar with the operation of compound miter saws, obtain advice from your
supervisor, instructor or other qualified person.
4. BE SURE blade is sharp, runs freely and is free of vibration.
5. ALLOW the motor to come up to full speed before starting cut.
6. KEEP motor air slots clean and free of chips.
7. ALWAYS MAKE SURE rotating table is tight before cutting, even if the table is positioned in one of the positive
stops.
8. BE SURE blade and flanges are clean and that arbor screw is tightened securely.
9. USE ONLY blade flanges specified for your saw.
10. NEVER apply lubricants to the blade when it is running.
11. ALWAYS CHECK the blade for cracks or damage before operation. Replace cracked or damaged blade
immediately.
12. ALWAYS KEEP the lower blade guard in place and operating properly.
13. MAKE SURE blade is not contacting workpiece before switch is turned on.
14. NEVER LOCK the switch in the “ON” position.
15. IMPORTANT: After completing cut, release power switch and wait for coasting blade to stop before returning
saw to raised position.
16. DO NOT remove jammed or cut-off pieces until blade has stopped.
17. NEVER cut ferrous metals or masonry.
18. NEVER recut small pieces.
19. PROVIDE ADEQUATE SUPPORT to the sides of the saw table for long workpieces.
20. NEVER use the miter saw in an area with flammable liquids or gases.
21. NEVER USE SOLVENTS TO CLEAN PLASTIC PARTS. Solvents could possibly dissolve or otherwise damage
the material. Only a soft, damp cloth should be used to clean plastic parts.
22. DISCONNECT SAW from power source and clean the machine before leaving it.
23. MAKE SURE the work area is cleaned before leaving the machine.
24. ADDITIONAL INFORMATION regarding the safe and proper operation of this product is available from the
National Safety Council, 1121 Spring Lake Drive, Itasca, IL 60143-3201, in the Accident Prevention Manual for
Industrial Operation and also in the Safety Data Sheets provided by the NSC. Please also refer to the American
National Standard Institute ANSI 01.1 Safety Requirements for the Woodworking Machinery and the U.S.
Department of Labor OSHA 1910.213 Regulations.
25. SOME WOOD CONTAINS PRESERVATIVES WHICH CAN BE TOXIC. Take extra care to prevent inhalation
and skin contact when working with these materials. Request, and follow, any safety information available from your
material supplier.
26. DON’T ABUSE CORD. Never carry tool by cord or yank it to disconnect from receptacle. Keep cord from heat,
oil, and sharp edges. Have damaged or worn power cord and strain reliever replaced immediately. DO NOT
ATTEMPT TO REPAIR POWER CORD.
27. WEAR EAR PROTECTION to safeguard against possible hearing loss.
28. AVOID CUTTING NAILS AND KNOTS. Inspect for and remove all nails from lumber before cutting. Try to do
layout cuts between knots.
29. NEVER USE LIQUID COOLANT. To do so could present electrical shock hazard.
30. KEEP CLEAR OF SAWDUST EJECTION CHUTE. Sawdust and chips are expelled out the ejection chute at
rear of saw. Do not allow anyone in this area while saw is in operation.
31. WHEN THE MITER SAW IS NOT IN USE, the switch should be locked in the OFF position to prevent
unauthorized use of the saw.
3
REPLACEMENT PARTS
When servicing, use only identical replacement parts.
POLARIZED PLUGS: To reduce the risk of electric shock, this equipment has a polarized plug (one blade is wider than
the other). This plug will fit in a polarized outlet only one way. If the plug does not fit fully in the outlet, reverse the plug.
If it still does not fit, contact a qualified electrician to install the proper outlet. Do not change the plug in any way.
MOTOR
Many Porter-Cable tools will operate on either D.C., or single phase 25 to 60 cycle A.C. current and voltage
within plus or minus 5 percent of that shown on the specification plate of the tool. Several models, however,
are designed for A.C. current only. Refer to the specification plate on your tool for proper voltage and current
rating.
CAUTION: Do not operate your tool on a current where the voltage is not within correct limits. Do not operate
tools rated A.C. on a D.C. current. To do so may seriously damage the tool.
RECOMMENDED EXTENSION CORD SIZES FOR
USE WITH STATIONARY ELECTRIC TOOLS
MINIMUM GAUGE EXTENSION CORD
EXTENSION CORD SELECTION
Use proper extension cords. Make sure your
extension cord is in good condition. When
using an extension cord, be sure to use one
heavy enough to carry the current of the saw.
An undersized cord will cause a drop in line
voltage, resulting in loss of power and
overheating. Fig. 1, shows the correct gauge to
use depending on the cord length. If in doubt,
use the next heavier gauge. The smaller the
gauge number, the heavier the cord.
RECOMMENDED SIZES FOR USE WITH STATIONARY ELECTRIC TOOLS
Ampere
Rating
0-6
0-6
0-6
0-6
6-10
6-10
6-10
6-10
10-12
10-12
10-12
10-12
12-16
12-16
12-16
Volts
120
120
120
120
120
120
120
120
120
120
120
120
120
120
120
Total Length of
Cord in Feet
up to 25
25-50
50-100
100-150
up to 25
25-50
50-100
100-150
up to 25
25-50
50-100
100-150
up to 25
25-50
Gauge of
Extension Cord
18 AWG
16 AWG
16 AWG
14 AWG
18 AWG
16 AWG
14 AWG
12 AWG
16 AWG
16 AWG
14 AWG
12 AWG
14 AWG
12 AWG
GREATER THAN 50 FEET NOT RECOMMENDED
Fig. 1
OPERATING INSTRUCTIONS
FOREWORD
Porter-Cable Model 3802 Type 2 is a high capacity 12" compound miter saw designed to cut wood and nonferrous metals. It can crosscut 8" x 2¼" and 7" x 3¼", miter at 45 both left and right 5¼" x 2¼", bevel at 45 left
6¼" x 2¼" and 8" x 1¼", and compound 45 x 45, 5¼" x 2 1/2" and 4¼" x 2¼". It has positive miter stops at 0,
15, 22.5, 31.62, and 45 degrees both left and right, and bevel stops at 0 and 45 degrees left.
POWER CONNECTIONS
A separate electrical circuit should be used for your tools. If an extension cord is used, make sure the conductor
size is large enough to prevent excessive voltage drop which will cause loss of power and possible motor
damage. For distances up to 100 feet, use #12 wire. For distances up to 150 feet, use #10 wire. If an extension
cord is to be used outdoors, it must be marked with the suffix W-A following the cord type designation. For
example – SJTW-A indicates that it is acceptable for outdoor use. Replace damaged or worn cords
immediately. Before connecting the motor to the power line, make sure the switch is in the “OFF” position and
be sure that the electric current is of the same characteristics as stamped on motor nameplate.
4
UNPACKING
1. Carefully remove the machine from the carton.
Retain all packing materials until you have inspected
and satisfactorily operated the machine.
WARNING: Do not connect the machine to the
power source until you have read and understood
this entire instruction manual.
2. Place the machine on a firm, level surface with extra
room for handling and proper support of the workpiece.
3. Familiarize yourself with all features and controls as
explained in this manual.
Fig. 2
4
3
2
1
4. The machine is shipped with the cuttinghead locked
in the down position and the table rotated to 45 degrees
left, Fig. 2. To release the head and move it to the
operating position, see “MOVING CUTTINGHEAD TO
THE UP POSITION” and “MOVING THE TABLE TO
THE 90 DEGREE CUT-OFF POSITION” in this section.
8
7
5
6
11
10
12
9
Fig. 3
5. Unassembled items are shown in Fig. 3 for
identification and use in assembling the saw.
1 Extension table
2 Fence slide
3 Fence slide support
4 Dust bag
5 Arbor and fence wrench
6 ¼" wrench
7 Open end wrench
8 Lock handle for slide fence
9 ¼" flat washer
10 ¼" lock washer
11 ¼ - 18 x 1 1/4" long hex head screw (2)
12 ¼ - 18 x 3/4" long hex head screws (2)
B
A
Fig. 4
ASSEMBLY
B
WARNING: FOR YOUR OWN SAFETY, DO NOT
CONNECT THE MITER SAW TO THE POWER
SOURCE UNTIL THE MACHINE IS COMPLETELY
ASSEMBLED AND YOU HAVE READ AND
UNDERSTOOD THE ENTIRE OWNER’S MANUAL.
MOVING CUTTINGHEAD TO THE UP
POSITION
1. Pull out cuttinghead lockpin (A) Fig. 4, and move the
cuttinghead (B) to the up position.
2. Fig. 5, illustrates the lockpin (A) pulled out and the
cuttinghead (B) in the up position.
A
Fig. 5
5
MOVING TABLE TO THE 0 DEGREE CUT-OFF POSITION
1. Rotate locking knob (A) Fig. 6, counter-clockwise as far as it will go to unlock. Depress lever (B) and rotate
table (C) to the 0 degree straight cut-off position, release lever (B) and tighten locking knob (A).
2. Fig. 7, illustrates the table (C) in the 0 degree straight cut-off position.
3. For proper operation and adjustment of the table, refer to sections, “ROTATING TABLE FOR MITER
CUTTING”, “ADJUSTING CLAMPING ACTION OF TABLE LOCKING MECHANISM” and “ADJUSTING
SLIDING FIT BETWEEN MOVABLE TABLE AND BASE.”
ATTACHING EXTENSION TABLE AND FENCE SLIDE
C
B
C
A
Fig. 7
Fig. 6
B
B
C
A
Fig. 7B
Fig. 7A
1. Attach flat washers to the two 3/4” screw assemblies (A) Fig. 7A, and thread into the threaded holes on left
side of the saw.
NOTE: Turn the screws only a few threads into the holes at this time.
2. Attach the table extension (B) Figs. 7A and 7B, to left side of saw table, making sure groove of table
extension (B) is inside flat washers (C) as shown in Fig. 7B.
6
E
H
D
C
G
F
B
B
Fig. 7C
Fig. 7D
3. Use a straight edge (C) Fig. 7C, to make the extension table (B) even with saw table (D), and tighten the two
screws (A) Fig. 7B.
4. Attach the fence slide support (E) Fig. 7D, to the extension table (B) by using the two 1 1/4” long hex head
screws, 5/16” lockwashers and 5/16” flat washers (F). Bring screws up through the two holes (G) in table
extension and thread them into the two threaded holes (H) on bottom of fence slide support.
NOTE: Do not completely tighten screws at this time.
J
E
J
C
K
E
Fig. 7F
Fig. 7E
5. Use a straight edge (C) Fig. 7E, to level the fence slide support (E) with saw fence (J), and tighten the two
6. Position the fence slide (K) Fig. 7F, in position on top of saw fence (J) and fence slide support (E). Slide fence
slide (K) back and forth several times to check alignment of fence slide support (E). Make any necessary final
adjustments to fence slide support.
M
L
N
N
O
E
Fig. 7H
Fig. 7G
7. Remove screw and spring (L) Fig. 7G, and lock handle (M) from locking stud (N).
8. PLace 1/4" flat washer (O) Fig. 7G, onto locking stud (N) and insert locking stud (N) Fig. 7H, through slot in
fence slide. Thread locking stud into threaded hole in fence slide support (E).
7
L
9. Position lock handle (M) Fig. 7J, on stud
and replace screw and spring (L) that were
removed in STEP 7. NOTE: Lock handle (M) is
spring-loaded and can be repositioned by lifting
up on handle.
M
Fig. 7J
B
A
ATTACHING DUST BAG
Depress spring clips (A) Fig. 8, of dust bag (B)
and clip dust bag (B) onto end of dust chute.
FASTENING MACHINE TO
SUPPORTING SURFACE
Fig. 8
Before operating your compound miter saw,
firmly mount it to a workbench or other
supporting surface. Four holes, (A) Fig. 9, are
provided for fastening the saw to a supporting
surface.
When frequently moving the saw from place to
place, mount the saw to a 3/4” piece of
plywood. The saw can then be easily moved
from place to place and the plywood can be
clamped to the supporting surface using “C”
clamps.
STARTING
MACHINE
AND
A
A
A
A
Fig. 9
STOPPING
To start the machine, depress switch trigger (A)
Fig. 10. To stop the machine, release the switch
trigger.
This saw is equipped with an automatic electric
blade brake. As soon as the switch trigger (A)
Fig. 10, is released, the electric brake is
activated and stops the blade in seconds.
8
A
Fig. 10
DANGER: A TURNING SAW BLADE CAN BE DANGEROUS. AFTER COMPLETING CUT, RELEASE SWITCH
TRIGGER (A) FIG. 12, TO ACTIVATE BLADE BRAKE. KEEP CUTTINGHEAD DOWN UNTIL BLADE HAS
COME TO A COMPLETE STOP.
WARNING: THE TORQUE DEVELOPED DURING BRAKING MAY LOOSEN THE ARBOR SCREW. THE
ARBOR SCREW SHOULD BE CHECKED PERIODICALLY AND
TIGHTENED IF NECESSARY.
B
LOCKING SWITCH IN THE “OFF” POSITION
IMPORTANT: When the miter saw is not in use, the switch
should be locked in the OFF position using a padlock (B) Fig.
11, with a 3/16" diameter shackle to prevent unauthorized
use of the saw.
Fig. 11
A
ROTATING TABLE FOR MITER CUTTING
1. Your compound miter saw will cut any angle from a straight 0
degree cut to 47 degrees right and left. Rotate locking knob (A)
Fig. 12, depress lock lever (B), and rotate table to desired
position.
2. The compound miter saw is equipped with positive stops at
the 0 degree cut-off position and at the 15, 22.5, 31.62, and 45
degree left and right positions.
3. The center line, (C) Fig. 13, on the cursor indicates the actual
angle of cut. Each scale line (B) represents one degree. In effect,
when the center line (C) is moved from one line to the next on the
scale, the angle of the cut is changed by one degree.
4. The pointer is provided with two additional lines (D) and
(E), Fig. 15. This allows movement of the control arm
exactly1/2degree. For example, assume the center line (C) is
pointing to the 10 degree mark on the scale, as indicated, and
and the angle of cut is 1/2 degree to the right. Move the control
arm until the right line (E) lines up with the next line on the scale.
The angle of cut will then be changed 1/2 degree to the right. If
you change the angle of cut 1/2 degree to the left, use the left line
(D) in the same manner.
B
Fig. 12
C
D
E
B
Fig. 13
ADJUSTING SLIDING FIT BETWEEN MOVABLE TABLE AND BASE
CAUTION: DISCONNECT THE MACHINE FROM THE POWER SOURCE.
9
A
To adjust the sliding fit between the movable table and the base,
turn nut (A) Fig. 14, clockwise to increase the sliding fit
(opposite to decrease the fit). This adjustment should not be so
tight that it restricts the rotating movement of the table, or so
loose that it affects the accuracy of the saw.
Fig. 14
ADJUSTING FENCE 90 DEGREES TO BLADE
IMPORTANT: BEFORE MAKING THIS ADJUSTMENT, SET THE BLADE AT 0 DEGREES TO THE TABLE.
SEE SECTION “ADJUSTING 0 AND 45 DEGREE BEVEL POSITIVE STOPS.”
1. CAUTION: DISCONNECT THE MACHINE FROM THE
POWER SOURCE.
2. Rotate the movable table so that the blade is 90 degrees to
the fence and the positive stop is set for 0 degrees.
3. Place one end of a framing square (A) against the front of
the fence (B) and the other end against the blade (C), with the
blade locked in the down position. The fence should be 90
degrees to the blade.
4. If an adjustment is necessary, the fence, (B) Fig. 15, can be
adjusted by loosening four screws, two of which are shown at
(D), that attach the fence to the base. Use the wrench supplied.
Adjust the fence (B), and tighten the four screws (D).
5. When the fence is 90 degrees to the blade, adjust the
cursor (F) Fig. 16, so the pointer is aligned with the 0 degree
mark on the scale by loosening two screws, (G), adjusting
cursor (F) and tightening screws (G).
C
D
A
B
Fig. 15
A
A
F
G
Fig. 17
Fig. 16
TABLE HAZARD AREA
WARNING: THE AREA INSIDE THE TWO RED LINES (A) FIG. 17 ON THE TABLE IS DESIGNATED
AS A HAZARD ZONE. NEVER PLACE YOUR HANDS INSIDE THIS AREA WHILE THE TOOL IS
BEING OPERATED.
10
A
C
B
A
Fig. 18
Fig. 19
ATTACHING OPTIONAL WORK CLAMP
The work clamp is an important accessory. After
purchase, the work clamp can be attached to any one
of the four holes (A) Fig. 18, provided on the base of the
machine, (three of which are shown).
1. Thread lock knob (B) Fig. 19, into threaded hole
where the clamp will be inserted. Place post (C) of work
clamp down through hole as far as possible. Tighten
lock knob (B). An additional lock knob (B) is supplied
and can be threaded into one of the other three holes.
(TIP: Thread the two lock knobs into the two holes
where the work clamp will be used most frequently.)
E
D
C
A
B
Fig. 20
USING THE OPTIONAL WORK
CLAMP
G
1. The height of the work clamp (A) Fig. 20, can be
adjusted by loosening lock knob (B) and moving post
(C) up or down, or depressing lock lever (D) and sliding
clamp body (E) up or down. After height of clamp (A) is
adjusted, tighten lock knob (B) and/or release lock lever
(D).
2.
During operation, lower clamp (A) Fig. 21, by
depressing lock lever (D), until the bottom of the clamp
(A) lightly contacts the top of the workpiece (F).
IMPORTANT: Cam lever (G) should be in “UP”
position when the clamp is lowered on the
workpiece.
3. To clamp the workpiece (F), Fig. 22, tightly against
the table, lower cam lever (G). After cut is complete, lift
lever (G) to release the clamp.
D
A
F
Fig. 21
G
TILTING CUTTINGHEAD FOR
BEVEL CUTTING
F
CAUTION: DISCONNECT THE MACHINE FROM THE
POWER SOURCE.
IMPORTANT: MOVE THE SLIDING FENCE TO THE
LEFT TO PROVIDE CLEARANCE FOR THE BLADE
AND GUARD. THE DEGREE OF TILT DETERMINES
HOW FAR TO MOVE THE SLIDING FENCE. REFER
TO THE SECTION “ADJUSTING SLIDING FENCE.”
11
Fig. 22
1. The cuttinghead of your compound miter saw can be tilted to cut any bevel angle from a 90 degree straight
cut-off to a 45 degree left bevel angle by loosening bevel lock handle (A) Fig. 23, tilting cuttinghead (B) to
the desired angle, and tightening lock handle (A).
2. Positive stops are provided to rapidly position the saw blade at 90 and 45 degrees to the table. Refer to the
section of this manual titled “Adjusting 90 and 45 degree bevel positive stops.” The bevel angle of the
cutting arm is determined by the position of the pointer (C) Fig. 24, on scale (D).
3. In addition, a marked indicator is provided on the bevel scale (33.9 degrees) for cutting crown moulding.
Refer to the “CUTTING CROWN MOULDING” section of this manual.
B
A
D
C
Fig. 23
Fig. 24
ADJUSTING SLIDING FENCE
The high sliding fence (A) Fig. 25A, provides support for extra large workpieces used with your saw and should
always be set as close as possible to the saw blade. When miter cutting (blade set 90 degrees to the table and
at an angle to the right or left), the fence should be set all the way toward the blade, (Fig. 25A). When bevel cutting,
however (blade tilted at an angle to the table), the fence (A) Fig. 25B, should be moved away from the blade to
allow for proper clearance for the saw blade and guard, (Fig. 25B). To accomplish this movement, loosen the lock
handle (B), and slide the fence (A) to the desired location. Tighten the lock handle (B).
NOTE: Lock handle (B) is spring-loaded and can be repositioned. Pull up on handle to reposition it on the
serrated nut located underneath handle.
A
B
Fig. 25A
Fig. 25B
B
ADJUSTING CHIP DEFLECTOR
1. DISCONNECT THE SAW FROM THE POWER
SOURCE.
A
2. A chip deflector (A) Fig. 26, is supplied to help prevent
scrap or cut-off pieces from entering the upper blade guard.
The chip deflector (A) should be adjusted so that it is almost
touching the side of the blade by loosening screw (B),
adjusting chip deflector (A) and tightening screw (B).
Fig. 26
12
H
A
B
C
Fig. 28
Fig. 27
ADJUSTING 0 AND 45 DEGREE BEVEL
POSITIVE STOPS
1. DISCONNECT THE SAW FROM THE POWER
SOURCE.
2. Adjust saw so that both bevel and miter pointers are
set at 0 degrees. Tighten bevel lock handle and lock
cuttinghead in down position.
A
3. Place one end of a square (A) Fig. 27 on the table
and the other end against the blade. The blade should
be set at 90 degrees to the table.
4. If an adjustment is necessary, loosen bevel lock
handle (H) Fig. 28. Loosen locknut (B) and turn adjusting
screw (C), with wrenches provided, until blade is 90
degrees to the table. Tighten locknut (B) and bevel lock
handle (H).
Fig. 29
5. When the blade is 90 degrees to the table, adjust
the pointer to line up with the 0 degree mark on the
bevel scale.
6. Loosen bevel lock handle (H) Fig. 28, and move
cuttinghead all the way to the left bevel position and
tighten bevel lock handle.
F
E
B
A
7. Use a square (A) Fig. 29, to see if the blade is at 45
degrees to the table.
8. If an adjustment is necessary, loosen the bevel lock
handle. Loosen the locknut (E) Fig. 30, and turn the
adjusting screw (F), with wrenches provided, until the
blade is 45 degrees to the table. Tighten locknut (E) and
bevel lock handle.
Fig. 30
9. These positive stops enable you to rapidly position
the blade at the most common bevel angles to the table,
90 and 45 degrees.
C
ADJUSTING SLIDING FIT BETWEEN
TRUNNION AND BEVEL BRACKET
B
After a long period of time, it may become necessary to
adjust the sliding fit between the trunnion (A) Fig. 30,
and the bevel bracket (B) by tightening adjusting nut (C),
Fig. 31, located underneath the bevel lock (A), Fig. 31,
and collar (B) Fig. 31.
13
A
Fig. 31
Correct adjustment provides for a good snug sliding fit between these two parts. This adjustment should not be
so tight that it restricts the tilting movement of the trunnion (A) when bevel cutting, or so loose that it affects the
accuracy of the saw cut.
ADJUSTING THE TENSION OF CUTTINGHEAD RETURN SPRING
The tension of the cuttinghead return spring has been adjusted at the factory in order that the cuttinghead returns
to the up position after a cut has been made. To re-adjust the spring tension, turn adjusting screw (A) Fig. 32,
clockwise to increase or counterclockwise to decrease the spring tension.
ADJUSTING SLIDING FIT BETWEEN CUTTINGHEAD ARM AND TRUNNION
After a long period of time it may become necessary to adjust the sliding fit between the cuttinghead arm (B) Fig.
32, and the trunnion (C) by tightening nut (D). Correct adjustment is a good snug sliding fit between these two
parts. This adjustment should not be so tight that it restricts the sliding movement of the cuttinghead arm (B) or
so loose that it affects the accuracy of the saw cut.
A
C
C
B
D
B
A
Fig. 33
Fig. 32
ADJUSTING DOWNWARD TRAVEL OF SAW BLADE
1. DISCONNECT THE SAW FROM THE POWER SOURCE.
2. The downward travel of the saw blade can be limited to prevent the saw blade from contacting any metal
surfaces of the machine. This adjustment is made by loosening locknut (A) Fig. 33, and turning adjusting screw
(B) in or out until other end of screw (B) contacts stop (C) at the full downward travel of the saw blade.
3. When making this adjustment, MAKE SURE THE MACHINE IS DISCONNECTED FROM THE POWER
SOURCE and lower the blade as far as possible. Rotate the blade by hand to make certain the teeth do not
contact any metal surfaces and adjust if necessary. After adjustment is completed, tighten locknut (A) Fig. 33.
A
B
ADJUSTING BLADE GUARD
After an extended period of time the movable blade
guard (A) Fig. 34, might become sloppy and move
erratically when the cuttinghead is lowered. This can be
easily corrected by slightly tightening nut (B) until the
lower blade guard (A) moves smoothly.
Fig. 34
14
TYPICAL OPERATIONS AND HELPFUL HINTS
1. Before cutting, make certain the cutting arm and
table area are at their correct settings and firmly
locked in place.
2. Before cutting, determine that the workpiece is the
right size for the saw.
3. Place the workpiece on the table and hold or clamp
it firmly against the fence. Fig. 35 illustrates the
optional work clamp (A) being used to clamp a
workpiece to the fence and table.
4. WARNING: If the workpiece causes your hand to be
inside the table hazard area (see section “TABLE
HAZARD AREA”), clamp the workpiece in place
before making the cut, as shown in Fig. 35.
5. For best results cut at a slow, even cutting rate.
6. Never attempt any freehand cutting (wood that is
not held firmly against the fence and table).
A
Fig. 35
AUXILIARY WOOD FENCE
When performing multiple or repetitive cut-off
operations that result in small cut-off pieces (one inch or
less), the saw blade can catch the cut-off pieces and
project them out of the machine or into the blade guard
and housing, possibly causing damage and/or injury. In
order to limit the possibility of personal injury or blade
guard damage, an auxiliary wood fence can be mounted
to your saw as follows:
Holes are provided in the fence to attach an auxiliary
fence (A) and (B) Fig. 36. This auxiliary fence is
constructed of straight wood approximately 1/4” thick
by 3/4” high by 16 inches long as shown at (B); and 1/2”
thick by 5” high by 17” long (A) Fig. 36.
A
B
Fig. 36
NOTE: The auxiliary fence (A) is used only with the saw
blade in the 0 degree bevel position (90 degrees) to the
table. The auxiliary fence must be removed for all bevel
cuts (blade tilted).
FENCE
CUTTING ALUMINUM
BLADE
Aluminum extrusions (aluminum screens and storm
windows) can easily be cut with your miter saw. When
cutting aluminum extrusions, or other sections that can
be cut with a saw blade and are within the capacity of
the machine, position the material so the blade is cutting
through the smallest cross-section, as shown in Fig. 37.
The wrong way to cut aluminum angles is illustrated in
Fig. 38. Be sure to apply a stick wax (similar to
Johnson’s stick wax #140) to the blade before cutting
any aluminum stock. This stick wax is available at most
industrial mill supply houses. The stick wax provides
proper lubrication and keeps chips from adhering to the
blade. NEVER APPLY LUBRICANT TO THE BLADE
WHILE THE MACHINE IS RUNNING.
Fig. 37
FENCE
BLADE
Fig. 38
15
CUTTING BOWED MATERIAL
RIGHT
WRONG
Fig. 39
Fig. 40
1. When cutting flat pieces, first check to see if the material is bowed. If it is, make sure the material is positioned
on the table as shown in Fig. 39.
2. If the material is positioned the wrong way, as shown in Fig. 40, the workpiece will pinch the blade near the
completion of the cut.
CONSTRUCTING WORK SUPPORT EXTENSIONS
C
C
A
B
Fig. 41
One of the unique features of the miter saw is the ease of constructing work supports. Fig. 41 illustrates the miter
saw mounted to two standard 2 x 4’s (A). Fasten the grooves in the two mounting legs (B), to the 2 x 4’s, using
four screws through the four holes in the mounting legs. The length of the 2 x 4’s (A) can vary, depending on
preference. The distance from the top of the 2 x 4’s (A) to the compound miter saw table 3 1/4”. Standard 2 x 4’s
(C) can then be fastened to the top of the 2 x 4’s (A). The top of the 2 x 4’s (C) will then be the same height as
the miter saw table, or minor adjustments can easily be made depending on the height of the 2 x 4’s. This method
will provide support for long workpieces using standard 2 x 4’s instead of constructing an expensive, complicated
work support.
16
CUTTING CROWN MOULDING
One of the many features of the saw is the ease of
cutting crown moulding. The following is an example of
E
cutting both inside and outside corners on 52/38 degree
B
A
wall angle crown moulding.
NOTE: The following procedure for inside or outside
crown molding corners is the same with the exception
that the bevel position will always be at 30 degrees and
the miter position will be 35-1/4 degrees to the right or
left.
1. Move the table to the 31-5/8th degree right miter
position and lock the table in position.
NOTE: A positive stop is provided to find this angle
quickly.
Fig. 42
2. Tilt the saw blade to the 33-7/833-7/8 degree left
bevel
position and tighten bevel lock handle.
NOTE: A triangle indicator is provided on the bevel
C
E
scale to find this angle quickly.
3. Place the crown moulding on the table with the
D
CEILING EDGE of the moulding against the fence, and
make the cut, as shown in Fig. 42.
NOTE: The piece of crown moulding used for the
outside corner will always be on the right hand side of
the blade, as shown at (A) Fig. 42. The piece of crown
moulding used for the inside corner will always be on the
left hand side of the blade, as shown at (B) Fig. 42. Note
that the accessory work clamp (E) is being used to hold
the workpiece in position.
Fig. 43
4. To make the matching halves of the inside and
outside corners, simply rotate the table to the 31-5/8
degree left miter position.
NOTE: A positive stop is provided to find this angle quickly. The saw blade is already tilted to the 33-7/8 degree
bevel position from the previous cut.
5. Place the crown moulding on the table with the WALL EDGE of the crown moulding against the fence and
make the cut. Again, the piece of crown moulding used for the outside corner will always be on the right side of
the blade, as shown at (C) Fig. 43. The piece of crown moulding used for the inside corner will always be on the
left side of the blade, as shown at (D) Fig. 43. Again, the accessory work clamp (E) is being used to hold the
workpiece in position.
6. Fig. 44 illustrates the two outside corner pieces; (1) being the piece cut at (D) Fig. 43 and (2) being the piece
cut at (C) Fig. 43.
7. Fig. 45 illustrates the two inside corner pieces; (1) being the piece cut at (B) Fig. 42, and (2) being the piece
cut at (A) Fig. 42.
B
A
C
Fig. 44
Fig. 45
17
D
MAINTENANCE
CHANGING THE BLADE
C
H
A
D
B
G
E
Fig. 46
Fig. 47
WARNING: USE ONLY CROSS-CUTTING SAW BLADES. DO NOT USE BLADES WITH DEEP GULLETS AS
THEY CAN DEFLECT AND CONTACT GUARD
1. Use only 12" diameter blades with 1" arbor holes that are rated for 4200 RPM or higher.
2. DISCONNECT MACHINE FROM THE POWER SOURCE.
3. Loosen screw (A) Fig. 46, with wrench (B) (provided).
4. Rotate arbor cover (C) Fig. 47, and lower guard (D) Fig. 47, to the rear, exposing arbor screw (E).
5. Remove arbor screw (E) Fig. 47, by turning screw clockwise with wrench (supplied), while at the same time,
pressing in on arbor lock (F) Fig. 48, to keep the arbor from turning. Remove outside blade flange (G) Fig. 47,
and saw blade (H) Fig. 46. DO NOT REMOVE INSIDE BLADE FLANGE.
6. Attach the new saw blade MAKING CERTAIN TEETH OF SAW BLADE ARE POINTING DOWN AT THE
FRONT, and attach outside blade flange (G) Fig. 47. Check to see that the flats on outside blade flange are
engaged with flats on arbor shaft.
7. Thread arbor screw (E) Fig. 47, into saw arbor by turning screw (E) counterclockwise as far as possible by
hand. Then tighten arbor screw (E) with wrench supplied while at the same time pressing in on arbor lock (F) Fig.
48, to keep arbor from turning.
8. Rotate arbor cover (C) Fig. 47, and lower guard (D) to the front and tighten screw (A) that was loosened in
STEP 3.
F
Fig. 48
18
BRUSH INSPECTION AND REPLACEMENT
C
A
B
Fig. 50
Fig. 49
CAUTION: BEFORE INSPECTING BRUSHES, DISCONNECT THE MACHINE FROM THE POWER SOURCE.
Brush life varies, depends on the load on the motor. Check the brushes after the first 50 hours of use of a new
machine, or after a new set of brushes has been installed.
After the first check, examine them after about 10 hours of use, until replacement is necessary.
The brush holders (A) Fig. 49, are located on the motor housing opposite each other. Fig. 50, illustrates one of
the brushes removed for inspection. When the carbon on either brush (B) is worn to 3/16" in length, or if either
spring or shunt wire (C) is burned or damaged in any way, replace both brushes. If the brushes are found
serviceable after removing, reinstall them in the same position.
KEEP TOOL CLEAN
Periodically blow out all air passages with dry compressed air. Clean all plastic parts with a soft damp cloth.
NEVER use solvents to clean plastic parts. They could possibly dissolve or otherwise damage the material.
CAUTION: WEAR SAFETY GLASSES WHILE USING COMPRESSED AIR.
FAILURE TO START
Should your tool fail to start, check to make sure the prongs on the cord plug are making good contact with the
outlet. Also, check for blown fuses or open circuit breakers in the line.
SERVICE AND REPAIRS
All quality tools will eventually require servicing or replacement of parts due to wear from normal use. These
operations should ONLY be performed by either an AUTHORIZED PORTER-CABLE SERVICE STATION or a
PORTER-CABLE SERVICE CENTER. All repairs made by these agencies are fully guaranteed against defective
material and workmanship. We cannot guarantee repairs made or attempted by anyone other than these
agencies.
Should you have any questions about your tool, feel free to write us at any time. In any communication, please
give all information shown on the nameplate of your tool (model number, type, serial number, etc.).
PORTER-CABLE LIMITED ONE YEAR WARRANTY
Porter-Cable warrants its Professional Power Tools for a period of one year from the date of original purchase. We will repair or replace, at our option,
any part or parts of the product and accessories covered under this warranty which, after examination, proves to be defective in workmanship or material
during the warranty period. For repair or replacement, return the complete tool or accessory, transportation prepaid, to your nearest Porter-Cable Service
Center or Authorized Service Station. Proof of purchase may be required. This warranty does not apply to repair or replacement required due to misuse,
abuse, normal wear and tear or repairs attempted or made by other than our Service Centers or Authorized Service Stations.
ANY IMPLIED WARRANTY, INCLUDING THE IMPLIED WARRANTIES OF MERCHANTABILITY AND FITNESS FOR A PARTICULAR PURPOSE, WILL
LAST ONLY FOR ONE (1) YEAR FROM THE DATE OF PURCHASE.
To obtain information on warranty performance please write to: PORTER-CABLE CORPORATION, 4825 Highway 45 North, P.O. Box 2468, Jackson,
Tennessee 38302-2468; Attention: Product Service. THE FOREGOING OBLIGATION IS PORTER-CABLE’S SOLE LIABILITY UNDER THIS OR ANY
IMPLIED WARRANTY AND UNDER NO CIRCUMSTANCES SHALL PORTER-CABLE BE LIABLE FOR ANY INCIDENTAL OR CONSEQUENTIAL
DAMAGES. Some states do not allow limitations on how long an implied warranty lasts or the exclusion or limitation of incidental or consequential
damages, so the above limitation or exclusion may not apply to you.
This warranty gives you specific legal rights and you may also have other legal rights which vary from state to state.
19
NOTES
20
PORTER-CABLE SERVICE CENTERS
(CENTROS DE SERVICIO DE PORTER-CABLE)
(CENTRE DE SERVICE PORTER-CABLE)
Parts and Repair Service for Porter-Cable Power Tools are Available at These Locations
(Obtenga Refaccion de Partes o Servicio para su Herramienta en los Siguientes Centros de Porter-Cable)
(Locations où vous trouverez les pièces de rechange nécessaires ainsi qu’un service d’entretien)
ARIZONA
Tempe 85282 (Phoenix)
2400 West Southern Avenue
Suite 105
Phone: (602) 437-1200
Fax: (602) 437-2200
CALIFORNIA
Ontario 91761 (Los Angeles)
3949A East Guasti Road
Phone: (909) 390-5555
Fax: (909) 390-5554
San Leandro 94577 (Oakland)
3039 Teagarden Street
Phone: (510) 357-9762
Fax: (510) 357-7939
COLORADO
Denver 80216
5855 Stapleton Drive North
Suite A-140
Phone: (303) 370-6909
Fax: (303) 370-6969
FLORIDA
Davie 33314 (Miami)
4343 South State Rd. 7 (441)
Unit #107
Phone: (954) 321-6635
Fax: (954) 321-6638
Tampa 33609
4538 W. Kennedy Boulevard
Phone: (813) 877-9585
Fax: (813) 289-7948
GEORGIA
Forest Park 30297 (Atlanta)
5442 Frontage Road, Suite 112
Phone: (404) 608-0006
Fax: (404) 608-1123
ILLINOIS
Addison 60101 (Chicago)
311 Laura Drive
Phone: (630) 628-6100
Fax: (630) 628-0023
Woodridge 60517 (Chicago)
2033 West 75th Street
Phone: (630) 910-9200
Fax: (630) 910-0360
MARYLAND
Elkridge 21075 (Baltimore)
7397-102 Washington Blvd.
Phone: (410) 799-9394
Fax: (410) 799-9398
MASSACHUSETTS
Braintree 02185 (Boston)
719 Granite Street
Phone: (781) 848-9810
Fax: (781) 848-6759
Franklin 02038 (Boston)
Franklin Industrial Park
101E Constitution Blvd.
Phone: (508) 520-8802
Fax: (508) 528-8089
MICHIGAN
Madison Heights 48071 (Detroit)
30475 Stephenson Highway
Phone: (248) 597-5000
Fax: (248) 597-5004
MINNESOTA
Minneapolis 55429
4315 68th Avenue North
Phone: (612) 561-9080
Fax: (612) 561-0653
Cleveland 44125
8001 Sweet Valley Drive
Unit #19
Phone: (216) 447-9030
Fax: (216) 447-3097
MISSOURI
North Kansas City 64116
1141 Swift Avenue
P.O. Box 12393
Phone: (816) 221-2070
Fax: (816) 221-2897
PENNSYLVANIA
Willow Grove 19090
520 North York Road
Phone: (215) 658-1430
Fax: (215) 658-1433
St. Louis 63119
7574 Watson Road
Phone: (314) 968-8950
Fax: (314) 968-2790
TENNESSEE
Nashville 37214
2262 Lebanon Pike
Phone: (615) 882-0320
Fax: (615) 882-0051
NEW YORK
Flushing 11365-1595 (N.Y.C.)
175-25 Horace Harding Expwy.
Phone: (718) 225-2040
Fax: (718) 423-9619
TEXAS
Carroliton 75006 (Dallas)
1300 Interstate 35 N. Suite 112
Phone: (972) 446-2996
Fax: (972) 446-8157
NORTH CAROLINA
Charlotte 28270
9129 Monroe Road, Suite 110
Phone: (704) 841-1176
Fax: (704) 708-4625
Houston 77055
West 10 Business Center
1008 Wirt Road, Suite 120
Phone: (713) 682-0334
Fax: (713) 682-4867
OHIO
Columbus 43214
4560 Indianola Avenue
Phone: (614) 263-0929
Fax: (614) 263-1238
WASHINGTON
Renton 98055 (Seattle)
268 Southwest 43rd Street
Phone: (425) 251-6680
Fax: (425) 251-9337
Authorized Service Stations are located in many large cities. Telephone 800-487-8665 or 901-541-6042 for assistance locating one. Parts and accessories for
Porter-Cable products should be obtained by contacting any Porter-Cable Distributor, Authorized Service Center, or Porter-Cable Factory Service Center. If you
do not have access to any of these, call 888-848-5175 and you will be directed to the nearest Porter-Cable Factory Service Center. Las Estaciones de Servicio
Autorizadas están ubicadas en muchas grandes ciudades. Llame al 800-487-8665 ó al 901-541-6042 para obtener asistencia a fin de localizar una. Las piezas
y los accesorios para los productos Porter-Cable deben obtenerse poniéndose en contacto con cualquier distribuidor Porter-Cable, Centro de Servicio
Autorizado o Centro de Servicio de Fábrica Porter-Cable. Si no tiene acceso a ninguna de estas opciones, llame al 888-848-5175 y le dirigirán al Centro de
Servicio de Fábrica Porter-Cable más cercano. Des centres de service agréés sont situés dans beaucoup de grandes villes. Appelez au 800-487-8665 ou au
901-541-6042 pour obtenir de l’aide pour en repérer un. Pour obtenir des pièces et accessoires pour les produits Porter-Cable, s’adresser à tout distributeur
Porter-Cable, centre de service agréé ou centre de service d’usine Porter-Cable. Si vous n’avez accès à aucun de ces centres, appeler le 888-848-5175 et on
vous dirigera vers le centre de service d’usine Porter-Cable le plus proche.
DELTA SERVICE CENTERS
ALBERTA
Bay 6, 2520-23rd St. N.E.
Calgary, Alberta
T2E 8L2
Phone: (403) 735-6166
Fax: (403) 735-6144
MANITOBA
1699 Dublin Avenue
Winnipeg, Manitoba
R3H 0H2
Phone: (204) 633-9259
Fax: (204) 632-1976
BRITISH COLUMBIA
8520 Baxter Place
Burnaby, B.C.
V5A 4T8
Phone: (604) 420-0102
Fax: (604) 420-3522
ONTARIO
505 Southgate Drive
Guelph, Ontario
N1H 6M7
Phone: (519) 836-2840
Fax: (519) 767-4131
QUÉBEC
1515 Ave.
St-Jean Baptiste,
Québec, Québec
G2E 5E2
Phone: (418) 877-7112
Fax: (418) 877-7123
1447, Begin
St-Laurent, (Montréal), Québec
H4R 1V8
Phone: (514) 336-8772
Fax: (514) 336-3505
The following are trademarks of PORTER-CABLE Corporation (Las siguientes son marcas registradas de PORTER-CABLE S.A.) (Les marques suivantes sont des
marques de fabriquant de la PORTER-CABLE Corporation): BAMMER®, LASERLOC®, OMNIJIG®, POCKET CUTTER®, PORTA-BAND®, PORTA-PLANE®, PORTERCABLE®, QUICKSAND®, SANDTRAP®, SAW BOSS®, SPEED-BLOC®, SPEEDMATIC®, SPEEDTRONIC®, STAIR-EASE®, THE PROFESSIONAL EDGE®, THE
PROFESSIONAL SELECT®, TIGER CUB®, TIGER SAW®, TORQ-BUSTER®, VERSA-PLANE®, WHISPER SERIES®, DURATRONIC™, FRAME SAW™, INNOVATION
THAT WORKS™, JETSTREAM™, MICRO-SET™, MORTEN™, NETWORK™, RIPTIDE™, TRU-MATCH™, WOODWORKER’S CHOICE™.
Trademarks noted with ® are registered in the United States Patent and Trademark Office and may also be registered in other countries. Las Marcas Registradas
con el signo de ® son registradas por la Oficina de Registros y Patentes de los Estados Unidos y también pueden estar registradas en otros países. Marques
déposées, indiquées par la lettre ®, sont déposées au Bureau des brevets d’invention et marques déposées aux Etats-Unis et pourraient être déposées aux
autres pays.